Tutorial: Upload, access, and explore your data in Azure Machine Learning
APPLIES TO:  Python SDK azure-ai-ml v2 (current)
In this tutorial you learn how to:
- Upload your data to cloud storage
- Create an Azure Machine Learning data asset
- Access your data in a notebook for interactive development
- Create new versions of data assets
A machine learning project typically starts with exploratory data analysis (EDA), data-preprocessing (cleaning, feature engineering), and building Machine Learning model prototypes to validate hypotheses. This prototyping project phase is highly interactive. It lends itself to development in an IDE or a Jupyter notebook, with a Python interactive console. This tutorial describes these ideas.
This video shows how to get started in Azure Machine Learning studio, so that you can follow the steps in the tutorial. The video shows how to create a notebook, clone the notebook, create a compute instance, and download the data needed for the tutorial. The steps are also described in the following sections.
Prerequisites
-
To use Azure Machine Learning, you need a workspace. If you don't have one, complete Create resources you need to get started to create a workspace and learn more about using it.
Important
If your Azure Machine Learning workspace is configured with a managed virtual network, you might need to add outbound rules to allow access to the public Python package repositories. For more information, see Scenario: Access public machine learning packages.
-
Sign in to the studio and select your workspace if it's not already open.
-
Open or create a notebook in your workspace:
- If you want to copy and paste code into cells, create a new notebook.
- Or, open tutorials/get-started-notebooks/explore-data.ipynb from the Samples section of studio. Then select Clone to add the notebook to your Files. To find sample notebooks, see Learn from sample notebooks.
Set your kernel and open in Visual Studio Code (VS Code)
On the top bar above your opened notebook, create a compute instance if you don't already have one.
If the compute instance is stopped, select Start compute and wait until it's running.
Wait until the compute instance is running. Then make sure that the kernel, found on the top right, is
Python 3.10 - SDK v2. If not, use the dropdown list to select this kernel.If you don't see this kernel, verify that your compute instance is running. If it is, select the Refresh button on the top right of the notebook.
If you see a banner that says you need to be authenticated, select Authenticate.
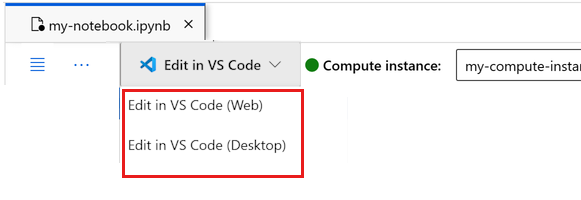
You can run the notebook here, or open it in VS Code for a full integrated development environment (IDE) with the power of Azure Machine Learning resources. Select Open in VS Code, then select either the web or desktop option. When launched this way, VS Code is attached to your compute instance, the kernel, and the workspace file system.
Important
The rest of this tutorial contains cells of the tutorial notebook. Copy and paste them into your new notebook, or switch to the notebook now if you cloned it.
Download the data used in this tutorial
For data ingestion, the Azure Data Explorer handles raw data in these formats. This tutorial uses this CSV-format credit card client data sample. The steps proceed in an Azure Machine Learning resource. In that resource, we'll create a local folder, with the suggested name of data, directly under the folder where this notebook is located.
Note
This tutorial depends on data placed in an Azure Machine Learning resource folder location. For this tutorial, 'local' means a folder location in that Azure Machine Learning resource.
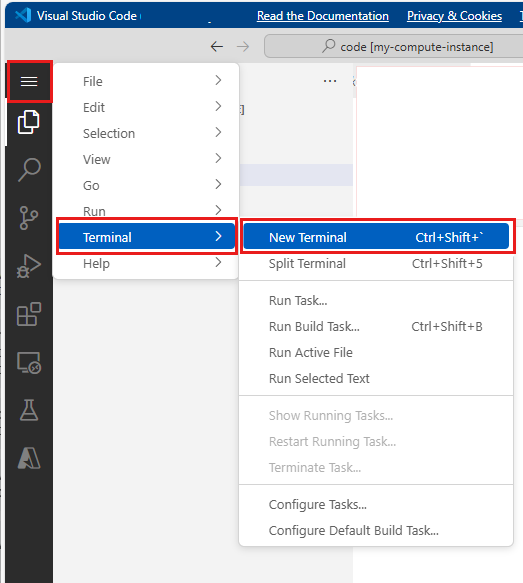
Select Open terminal below the three dots, as shown in this image:

The terminal window opens in a new tab.
Make sure you
cd(Change Directory) to the same folder where this notebook is located. For example, if the notebook is in a folder named get-started-notebooks:cd get-started-notebooks # modify this to the path where your notebook is locatedEnter these commands in the terminal window to copy the data to your compute instance:
mkdir data
cd data                     # the sub-folder where you'll store the data
wget https://azuremlexamples.blob.core.windows.net/datasets/credit_card/default_of_credit_card_clients.csv
You can now close the terminal window.
For more information about the data in the UC Irvine Machine Learning Repository, visit this resource.
Create a handle to the workspace
Before we explore the code, you need a way to reference your workspace. You'll create ml_client for a handle to the workspace. You then use ml_client to manage resources and jobs.
In the next cell, enter your Subscription ID, Resource Group name and Workspace name. To find these values:
- At the upper right Azure Machine Learning studio toolbar, select your workspace name.
- Copy the value for workspace, resource group, and subscription ID into the code.
- You must individually copy the values one at a time, close the area and paste, then continue to the next one.
from azure.ai.ml import MLClient
from azure.identity import DefaultAzureCredential
from azure.ai.ml.entities import Data
from azure.ai.ml.constants import AssetTypes

# authenticate
credential = DefaultAzureCredential()

# Get a handle to the workspace
ml_client = MLClient(
    credential=credential,
    subscription_id="<SUBSCRIPTION_ID>",
    resource_group_name="<RESOURCE_GROUP>",
    workspace_name="<AML_WORKSPACE_NAME>",
)
Note
Creation of MLClient will not connect to the workspace. The client initialization is lazy. It waits for the first time it needs to make a call. This happenS in the next code cell.
Upload data to cloud storage
Azure Machine Learning uses Uniform Resource Identifiers (URIs), which point to storage locations in the cloud. A URI makes it easy to access data in notebooks and jobs. Data URI formats have a format similar to the web URLs that you use in your web browser to access web pages. For example:
- Access data from public https server:
https://<account_name>.blob.core.windows.net/<container_name>/<folder>/<file> - Access data from Azure Data Lake Gen 2:
abfss://<file_system>@<account_name>.dfs.core.windows.net/<folder>/<file>
An Azure Machine Learning data asset is similar to web browser bookmarks (favorites). Instead of remembering long storage paths (URIs) that point to your most frequently used data, you can create a data asset, and then access that asset with a friendly name.
Data asset creation also creates a reference to the data source location, along with a copy of its metadata. Because the data remains in its existing location, you incur no extra storage cost, and you don't risk data source integrity. You can create Data assets from Azure Machine Learning datastores, Azure Storage, public URLs, and local files.
Tip
For smaller-size data uploads, Azure Machine Learning data asset creation works well for data uploads from local machine resources to cloud storage. This approach avoids the need for extra tools or utilities. However, a larger-size data upload might require a dedicated tool or utility - for example, azcopy. The azcopy command-line tool moves data to and from Azure Storage. For more information about azcopy, visit this resource.
The next notebook cell creates the data asset. The code sample uploads the raw data file to the designated cloud storage resource.
Each time you create a data asset, you need a unique version for it. If the version already exists, you'll get an error. In this code, we use the "initial" for the first read of the data. If that version already exists, we don't recreate it.
You can also omit the version parameter. In this case, a version number is generated for you, starting with 1 and then incrementing from there.
This tutorial uses the name "initial" as the first version. The Create production machine learning pipelines tutorial also uses this version of the data, so here we use a value that you'll see again in that tutorial.
from azure.ai.ml.entities import Data
from azure.ai.ml.constants import AssetTypes

# update the 'my_path' variable to match the location of where you downloaded the data on your
# local filesystem

my_path = "./data/default_of_credit_card_clients.csv"
# set the version number of the data asset
v1 = "initial"

my_data = Data(
    name="credit-card",
    version=v1,
    description="Credit card data",
    path=my_path,
    type=AssetTypes.URI_FILE,
)

## create data asset if it doesn't already exist:
try:
    data_asset = ml_client.data.get(name="credit-card", version=v1)
    print(
        f"Data asset already exists. Name: {my_data.name}, version: {my_data.version}"
    )
except:
    ml_client.data.create_or_update(my_data)
    print(f"Data asset created. Name: {my_data.name}, version: {my_data.version}")
To examine the uploaded data, select Data on the left. The data is uploaded and a data asset is created:

This data is named credit-card, and in the Data assets tab, we can see it in the Name column.
An Azure Machine Learning datastore is a reference to an existing storage account on Azure. A datastore offers these benefits:
A common and easy-to-use API, to interact with different storage types
- Azure Data Lake Storage
- Blob
- Files
and authentication methods.
An easier way to discover useful datastores, when working as a team.
In your scripts, a way to hide connection information for credential-based data access (service principal/SAS/key).
Access your data in a notebook
Pandas directly support URIs - this example shows how to read a CSV file from an Azure Machine Learning Datastore:
import pandas as pd

df = pd.read_csv("azureml://subscriptions/<subid>/resourcegroups/<rgname>/workspaces/<workspace_name>/datastores/<datastore_name>/paths/<folder>/<filename>.csv")
However, as mentioned previously, it can become hard to remember these URIs. Additionally, you must manually substitute all <substring> values in the pd.read_csv command with the real values for your resources.
You'll want to create data assets for frequently accessed data. Here's an easier way to access the CSV file in Pandas:
Important
In a notebook cell, execute this code to install the azureml-fsspec Python library in your Jupyter kernel:
%pip install -U azureml-fsspec
import pandas as pd

# get a handle of the data asset and print the URI
data_asset = ml_client.data.get(name="credit-card", version=v1)
print(f"Data asset URI: {data_asset.path}")

# read into pandas - note that you will see 2 headers in your data frame - that is ok, for now

df = pd.read_csv(data_asset.path)
df.head()
For more information about data access in a notebook, visit Access data from Azure cloud storage during interactive development.
Create a new version of the data asset
The data needs some light cleaning, to make it fit to train a machine learning model. It has:
- two headers
- a client ID column; we wouldn't use this feature in Machine Learning
- spaces in the response variable name
Also, compared to the CSV format, the Parquet file format becomes a better way to store this data. Parquet offers compression, and it maintains schema. To clean the data and store it in Parquet, use:
# read in data again, this time using the 2nd row as the header
df = pd.read_csv(data_asset.path, header=1)
# rename column
df.rename(columns={"default payment next month": "default"}, inplace=True)
# remove ID column
df.drop("ID", axis=1, inplace=True)

# write file to filesystem
df.to_parquet("./data/cleaned-credit-card.parquet")
This table shows the structure of the data in the original default_of_credit_card_clients.csv file .CSV file downloaded in an earlier step. The uploaded data contains 23 explanatory variables and 1 response variable, as shown here:
| Column Name(s) | Variable Type | Description |
|---|---|---|
| X1 | Explanatory | Amount of the given credit (NT dollar): it includes both the individual consumer credit and their family (supplementary) credit. |
| X2 | Explanatory | Gender (1 = male; 2 = female). |
| X3 | Explanatory | Education (1 = graduate school; 2 = university; 3 = high school; 4 = others). |
| X4 | Explanatory | Marital status (1 = married; 2 = single; 3 = others). |
| X5 | Explanatory | Age (years). |
| X6-X11 | Explanatory | History of past payment. We tracked the past monthly payment records (from April to September 2005). -1 = pay duly; 1 = payment delay for one month; 2 = payment delay for two months; . . .; 8 = payment delay for eight months; 9 = payment delay for nine months and above. |
| X12-17 | Explanatory | Amount of bill statement (NT dollar) from April to September 2005. |
| X18-23 | Explanatory | Amount of previous payment (NT dollar) from April to September 2005. |
| Y | Response | Default payment (Yes = 1, No = 0) |
Next, create a new version of the data asset (the data automatically uploads to cloud storage). For this version, add a time value, so that each time this code runs, a different version number is created.
from azure.ai.ml.entities import Data
from azure.ai.ml.constants import AssetTypes
import time

# Next, create a new *version* of the data asset (the data is automatically uploaded to cloud storage):
v2 = "cleaned" + time.strftime("%Y.%m.%d.%H%M%S", time.gmtime())
my_path = "./data/cleaned-credit-card.parquet"

# Define the data asset, and use tags to make it clear the asset can be used in training

my_data = Data(
    name="credit-card",
    version=v2,
    description="Default of credit card clients data.",
    tags={"training_data": "true", "format": "parquet"},
    path=my_path,
    type=AssetTypes.URI_FILE,
)

## create the data asset

my_data = ml_client.data.create_or_update(my_data)

print(f"Data asset created. Name: {my_data.name}, version: {my_data.version}")
The cleaned parquet file is the latest version data source. This code shows the CSV version result set first, then the Parquet version:
import pandas as pd

# get a handle of the data asset and print the URI
data_asset_v1 = ml_client.data.get(name="credit-card", version=v1)
data_asset_v2 = ml_client.data.get(name="credit-card", version=v2)

# print the v1 data
print(f"V1 Data asset URI: {data_asset_v1.path}")
v1df = pd.read_csv(data_asset_v1.path)
print(v1df.head(5))

# print the v2 data
print(
    "_____________________________________________________________________________________________________________\n"
)
print(f"V2 Data asset URI: {data_asset_v2.path}")
v2df = pd.read_parquet(data_asset_v2.path)
print(v2df.head(5))
Clean up resources
If you plan to continue now to other tutorials, skip to Next steps.
Stop compute instance
If you don't plan to use it now, stop the compute instance:
- In the studio, in the left navigation area, select Compute.
- In the top tabs, select Compute instances
- Select the compute instance in the list.
- On the top toolbar, select Stop.
Delete all resources
Important
The resources that you created can be used as prerequisites to other Azure Machine Learning tutorials and how-to articles.
If you don't plan to use any of the resources that you created, delete them so you don't incur any charges:
In the Azure portal, in the search box, enter Resource groups and select it from the results.
From the list, select the resource group that you created.
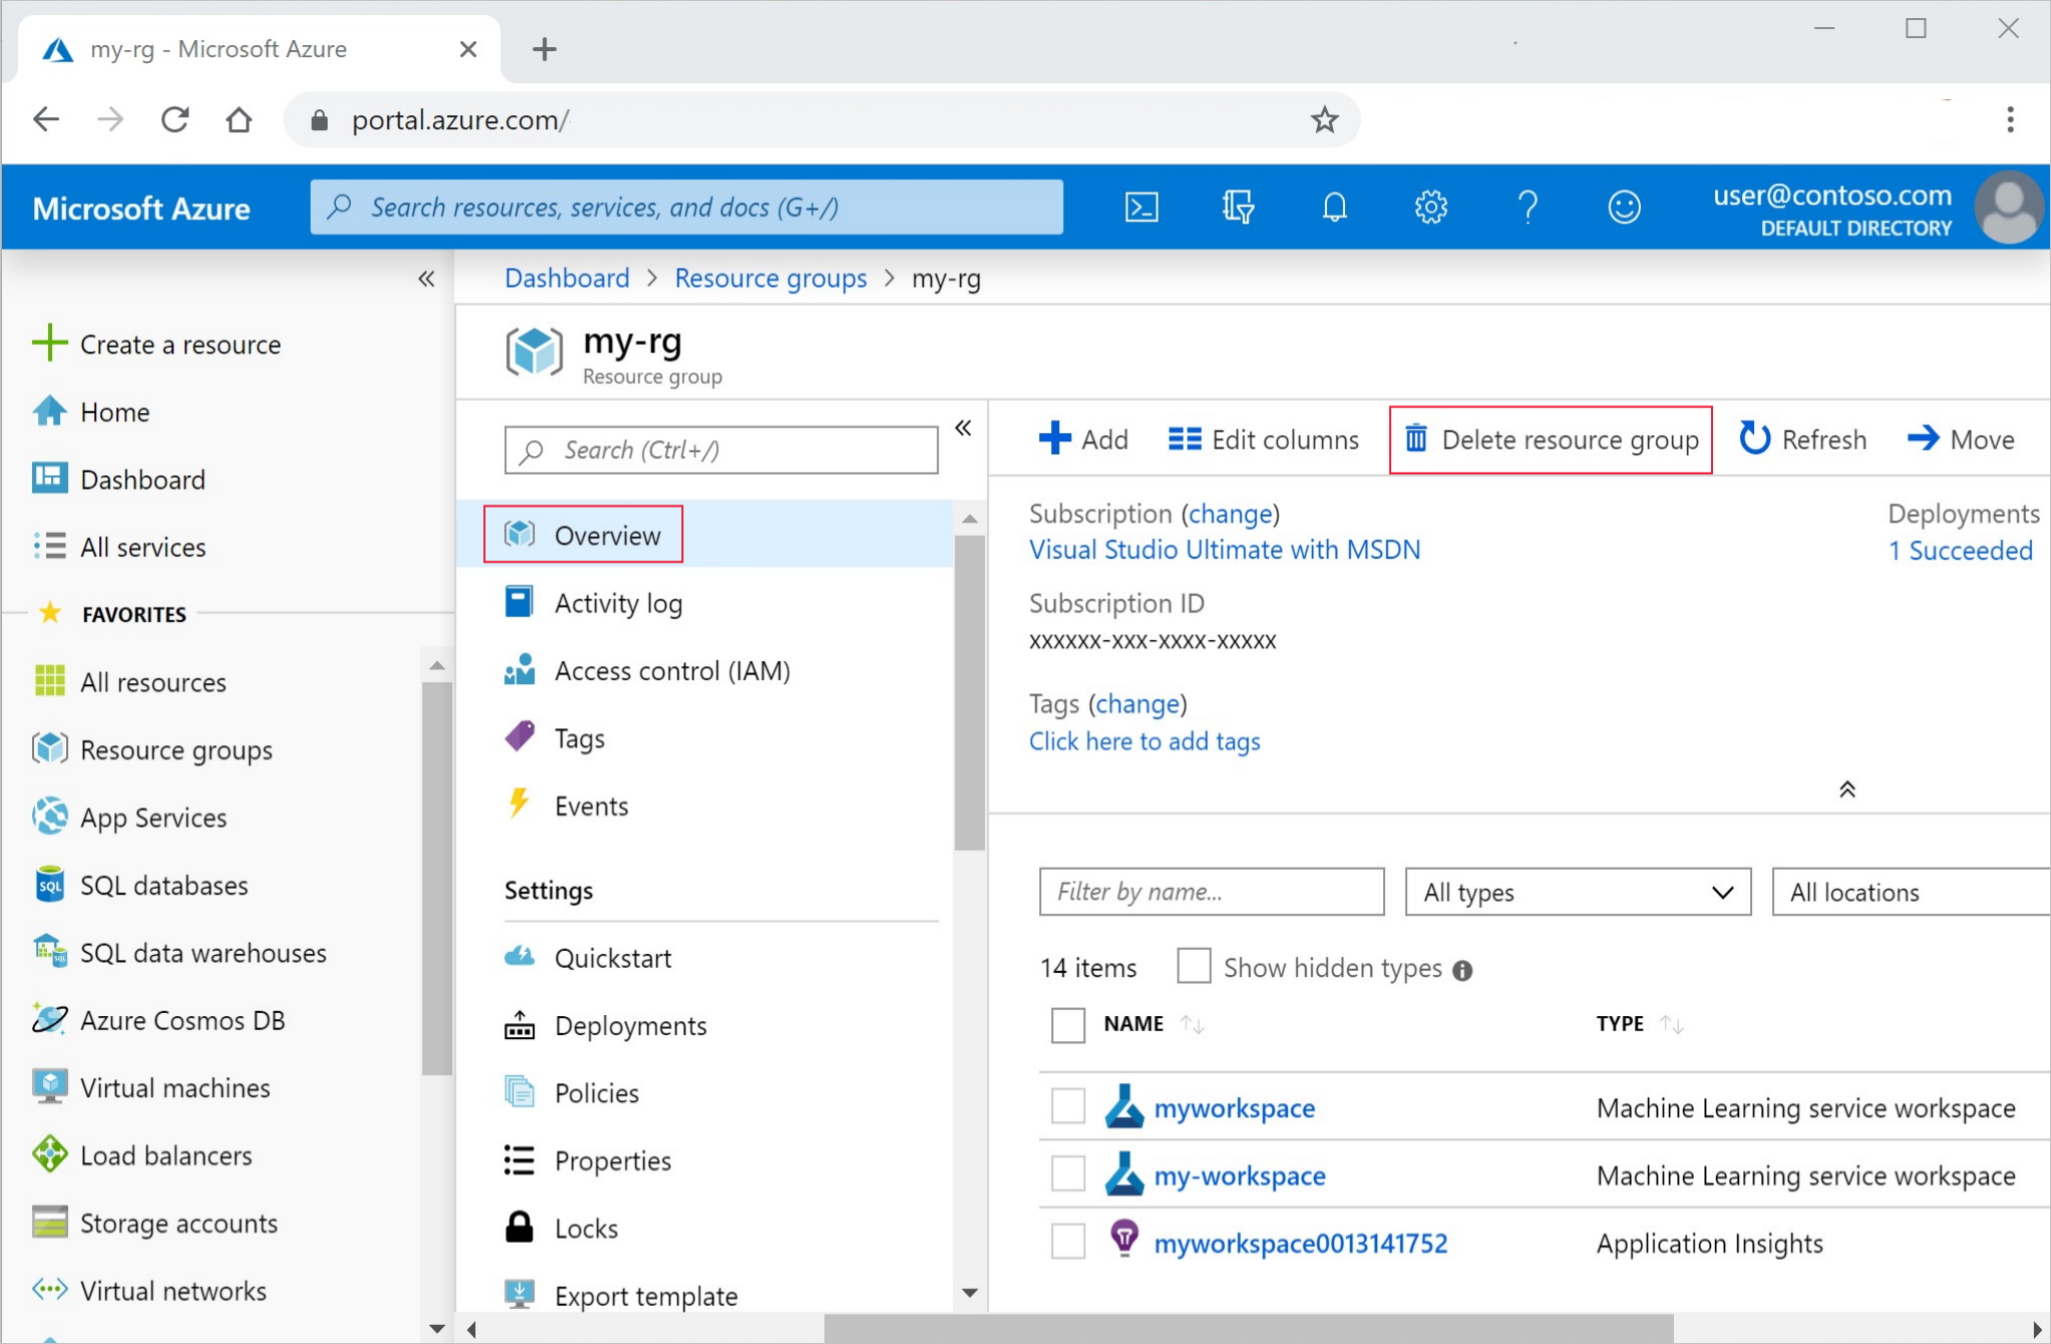
In the Overview page, select Delete resource group.

Enter the resource group name. Then select Delete.
Next steps
For more information about data assets, visit Create data assets.
For more information about datastores, visit Create datastores.
Continue with the next tutorial to learn how to develop a training script:


