Note
Access to this page requires authorization. You can try signing in or changing directories.
Access to this page requires authorization. You can try changing directories.
This article shows you how to add a Mirrored Database (Change Feed) source to an eventstream.
The Mirrored Database (Change Feed) source connector for Microsoft Fabric event streams allows you to ingest real-time change events from a Fabric Mirrored Database. Mirrored databases in Fabric provide a near real-time, read-only replica of your external database data. With this connector, you can capture inserts, updates, and deletes as they happen in the mirrored database and stream them into an eventstream for real-time processing, analytics, and routing to various Fabric destinations.
This connector supports all mirrored database types available in Fabric Mirroring, including:
- Azure SQL Database
- Azure Cosmos DB
- Snowflake
- Open Mirroring
Note
This connector is currently in Preview. The connector ingests raw change feed events from the mirrored database. DeltaFlow (analytics-ready event transformation) isn't currently supported with this connector.
Prerequisites
- Access to a workspace in the Fabric capacity license mode or the Trial license mode with Contributor or higher permissions.
- An existing Mirrored Database in your Fabric workspace that is actively syncing data from the source database.
- The mirrored database must have change feed enabled.
- If you don't have an eventstream, create an eventstream.
Launch the Connect data sources wizard
If you haven't added any source to your eventstream yet, select the Connect data sources tile. You can also select Add source > Connect data sources on the ribbon.

If you're adding the source to an already published eventstream, switch to Edit mode. On the ribbon, select Add source > Connect data sources.

On the Select a data source page, search for Mirrored database and select Connect on the Mirrored database (Change Feed) tile.

Configure and connect to Mirrored Database Change Feed
Ingest change feed events into an Eventstream from a Fabric Mirrored Database of your choice
On the Connect page, select a mirrored database to connect to.
For Workspace, browse to and select the Fabric workspace that contains the mirrored database.
For Mirrored database, select the mirrored database from the list of available databases in the selected workspace.
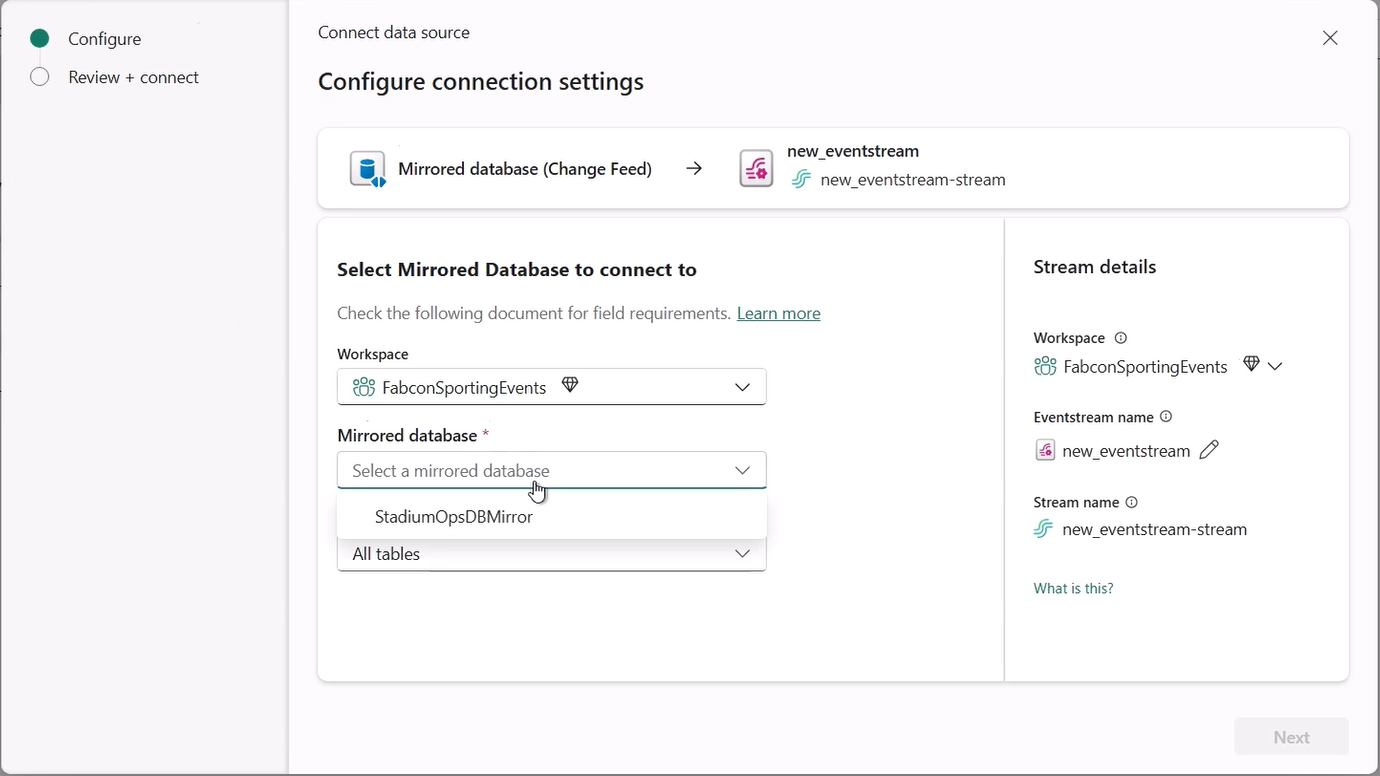
Select All tables, or Enter table name(s) to specify which tables to monitor for changes. If you select the latter, specify tables using a comma-separated list of full table identifiers (
schemaName.tableName) or valid regular expressions. For example:- Use
dbo.Orders.*to select all tables whose names start withdbo.Orders. - Use
dbo\.(Orders|Customers)to selectdbo.Ordersanddbo.Customers.
You can mix both formats using commas. The total character limit for the entire entry is 102,400 characters.
Note
In the current Preview release, only the All tables option is available.
- Use
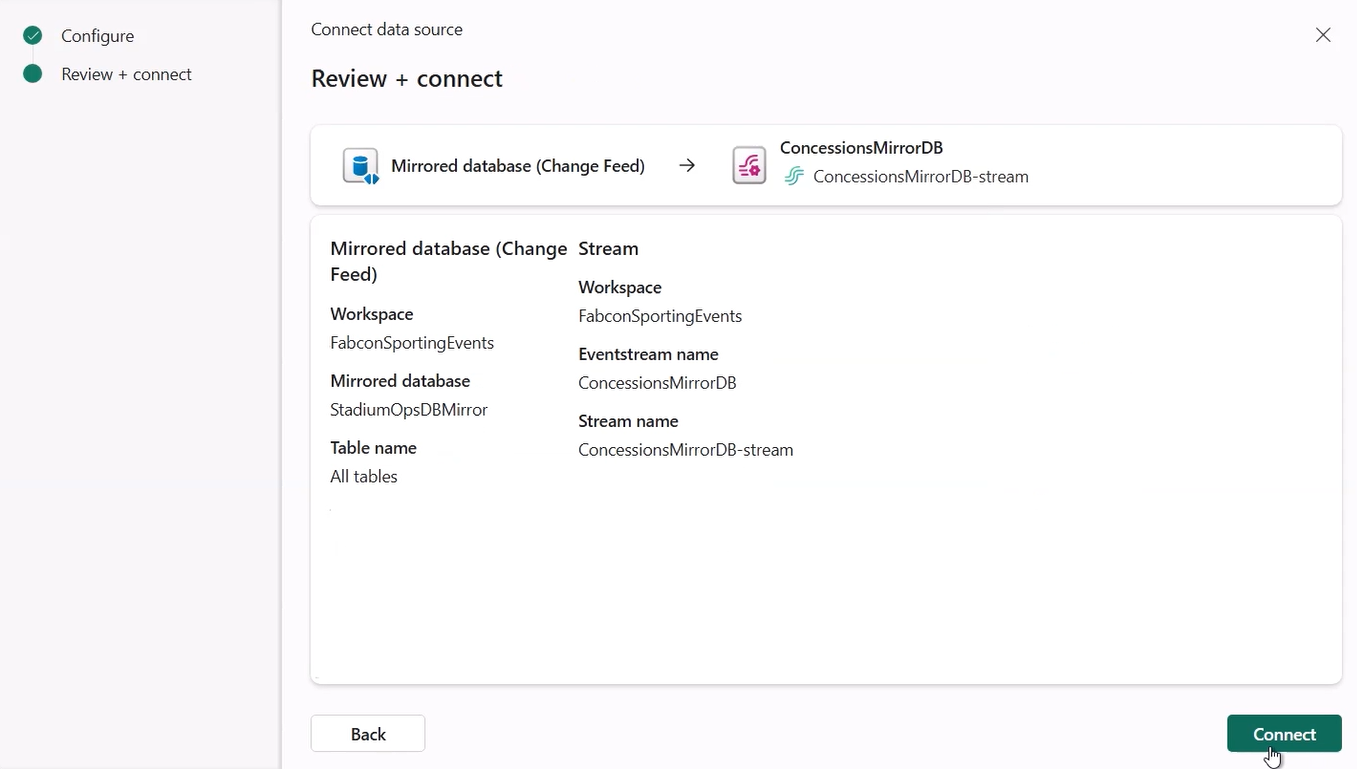
On the Review + connect page, review the summary of settings, and then select Add.
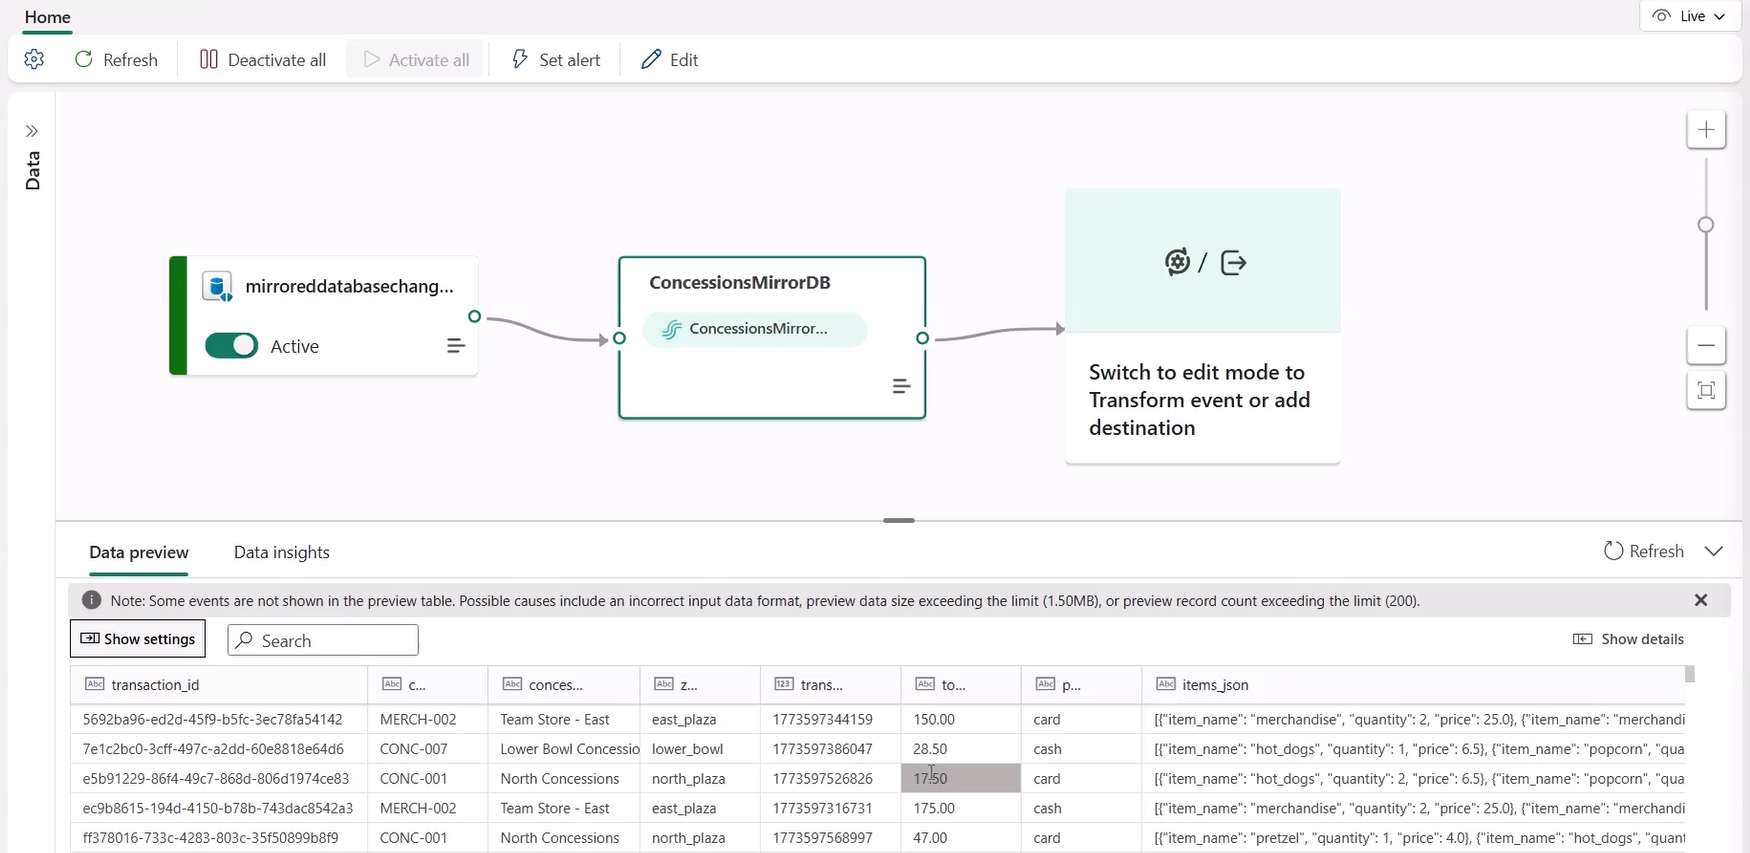
You can see the Mirrored Database (Change Feed) source added to your eventstream while still in Edit mode.


View updated eventstream
To implement this newly added Mirrored Database (Change Feed) source, select Publish. After you complete these steps, your Mirrored Database (Change Feed) source is available for visualization in the Live view.

Configure Eventstream destinations to use schemas
Currently, only the Eventhouse, custom endpoint, and derived stream destinations are supported for Eventstreams with associated schemas. This section shows you how to add and configure an Eventhouse destination when extended features (like schema support) are enabled for the eventstream.
Note
When you use DeltaFlow (Preview) with a supported Change Data Capture (CDC) source, destination tables in the Eventhouse are automatically created and managed to match the source table structure. You don't need to manually configure the destination table schema. DeltaFlow also handles schema evolution automatically when source tables change.
Configure a schema for a custom endpoint destination
Select Transform events or add destination, and then select CustomEndpoint.
On the Custom endpoint pane, specify a name for the destination.
For Input schema, select the schema for events. You make a selection in this box when you enable schema support for an eventstream.

For detailed steps on configuring a custom endpoint destination, see Add a custom endpoint or custom app destination to an eventstream.
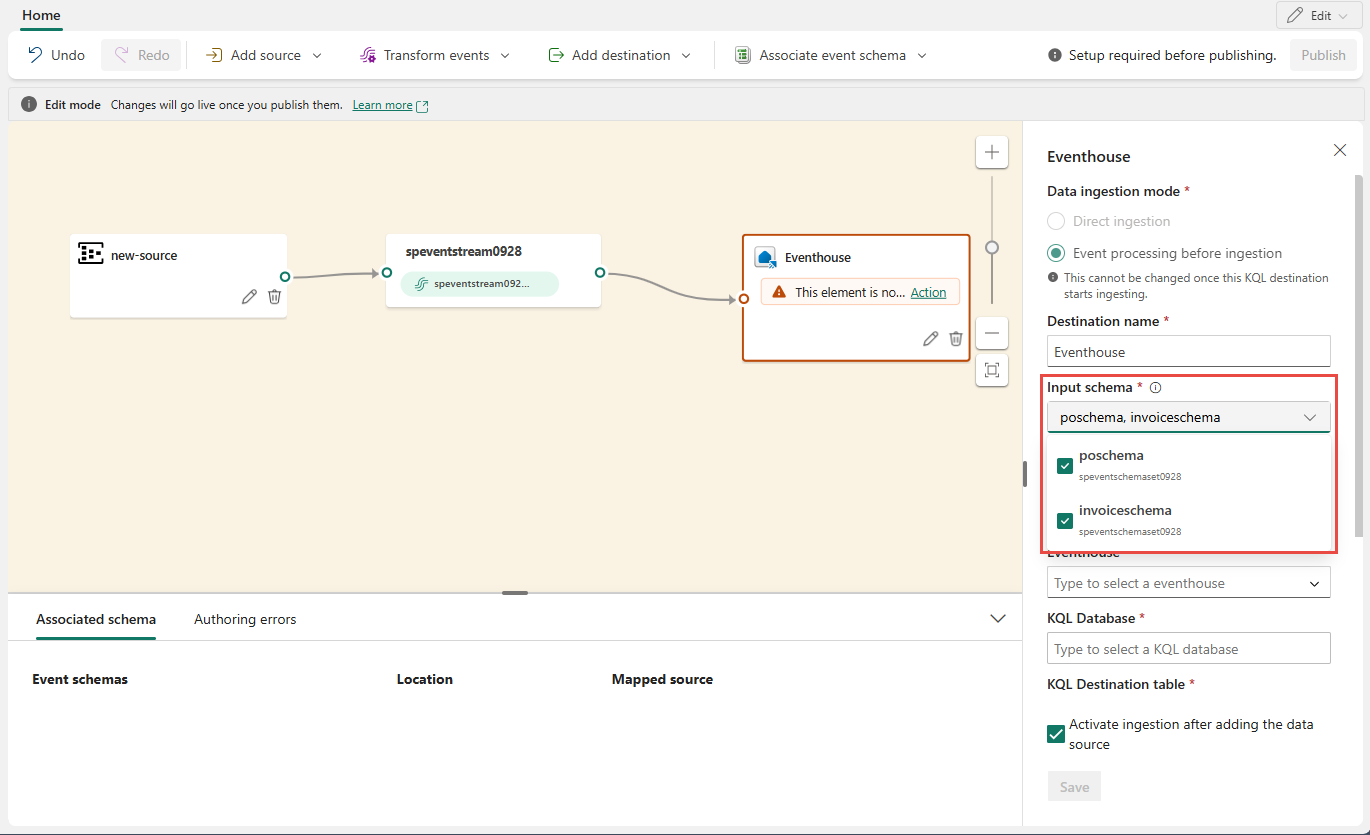
Configure schemas for an eventhouse destination
Select Transform events or add destination, and then select Eventhouse.
On the Eventhouse pane, configure the following schema-related settings:
For Input schema, select one or more schemas from the dropdown list.
Note
If you selected the Dynamic schema via headers option when configuring an Event Hubs source, you might have configured multiple schemas for the source and mapped them to various properties and their values.
For Table creation method, select A single table with all schemas combined or Separate tables for each schema, depending on your requirements.

For Write data with, select one of the following options:
- Payload only: Write extracted payload data to the table. If there are multiple input schemas, data is sent to multiple tables.
- Metadata and payload: Write metadata and payload data to a single table. Example columns include
source,subject,type, anddata.


For detailed steps on configuring an eventhouse destination, see Add an eventhouse destination to an eventstream.
Related content
Other connectors: