Add a report from outside Power Apps
If you’ve created a custom report outside of the system, you can easily add it to Power Apps.
For information about how to create a custom report, see Reporting and Analytics Guide.
From the left navigation pane, select the reports area.
On the command bar, select New.
Add a file created in another application
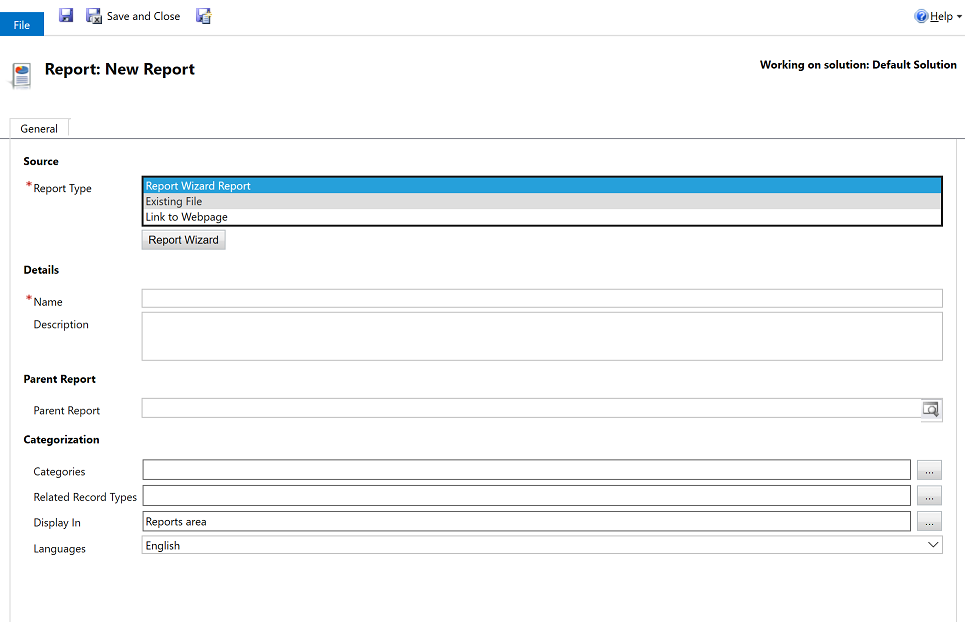
- In the Source section, in the Report Type box, select Existing File.

In the File Location box, enter the path and file name of the file to add, or choose Browse to locate the file.
You can upload many other file types such as an Excel file but for this to run like a SQL Server Reporting Services report or Report Wizard created report, the file needs to be an .RDL file. For more information, see Report writing environment using SQL Server Data Tools.
Note
The maximum size of the report file is determined by the Maximum file size for attachments setting in the Email settings environment setting. However, a report definition file (.RDL) can’t be more than 4 MB in size, even if the maximum file size for attachments setting is larger than 4 MB.
-OR
Add a link to a webpage
In the Source section, in the Report Type box, select Link to Webpage.
In the Webpage URL box, enter the URL of the webpage.
Specify the properties for the report.
In the Details section, specify a meaningful name and description for the report.
The Parent Report text box displays the parent report of the current report, if one exists.
Categories. Choose the Select or change the values for this column
 button, and then specify the categories to include in this report.
Related Row Types. To have the report appear in the Reports list on a page for specific row types, choose the Select or change the values for this column
 button, and then select row types.
Display In. To specify where reports should be visible, choose the Select or change the values for this column
 button, and then select one or more of the options.
If no values are selected, the report won’t be visible to end users.
Choose Save or Save and Close.