Note
Access to this page requires authorization. You can try signing in or changing directories.
Access to this page requires authorization. You can try changing directories.
Some Teams apps require purchasing a service subscription to use app functionality. These service subscriptions are called Software as a Service (SaaS) offers. A license is available for purchase from AppSource and in the Microsoft Teams admin center.
Paid apps require users to authenticate to prevent unwarranted access. Also, user sign-in is required to check for entitlement and to make the corresponding app functionality available for the logged-in user. For authentication, app developers can use single sign-on (SSO) using Microsoft Entra ID or use third-party OAuth Identity Provider. The authentication mechanism is similar for Teams or web apps. For more information, see How apps authenticate users.
You can purchase licenses for services offered by third-party apps from the Manage apps page in the Teams admin center. The Licenses column in the table indicates if an app offers a SaaS subscription for purchase. You can purchase apps using a credit card, debit card, or with invoice billing.

Purchase apps in the Teams admin center
To purchase an app in Teams admin center, follow these steps:
Sign in to the Teams admin center and access Teams apps > Manage apps. You must be a Teams Administrator to access the page.
You can search for an app by its name. To check if an app offers a paid SaaS subscription, see the Licenses column. Each app has one of the following values:
- Purchase: The app offers a SaaS subscription and is available to purchase.
- Purchased: The app offers a paid SaaS subscription and you have the licenses for the app.
- - -: The app doesn't offer a SaaS subscription.
Select Purchase on the Manage apps page to open the Plans and pricing tab on the app details page. You can review the plans and pricing information available in admin center. You can select Learn more link to go to the app's page on AppSource.
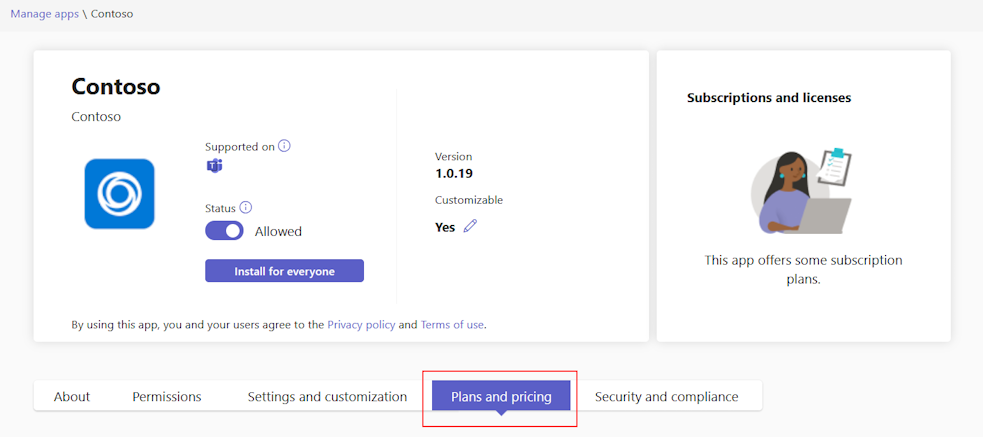
To subscribe to an app, choose the plan you want, and select Buy. The checkout dialog opens.
Note
Some apps may have a Private plan. Private plans are special pricing that your organization can separately negotiate with an app developer.
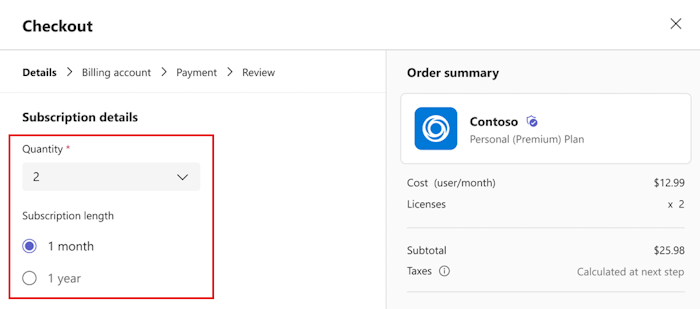
On the checkout screen, select the number of user licenses that you want to buy.
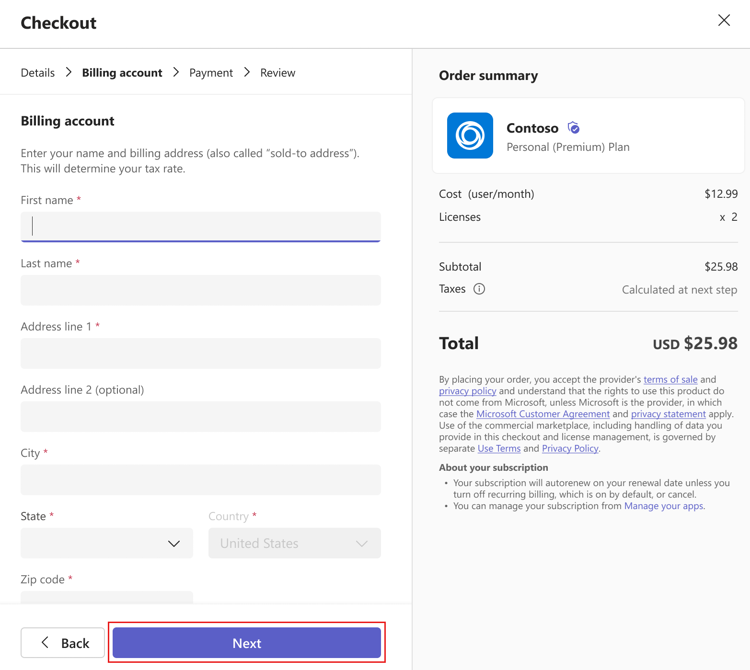
Under Billing account, provide the name and billing details and select Next.
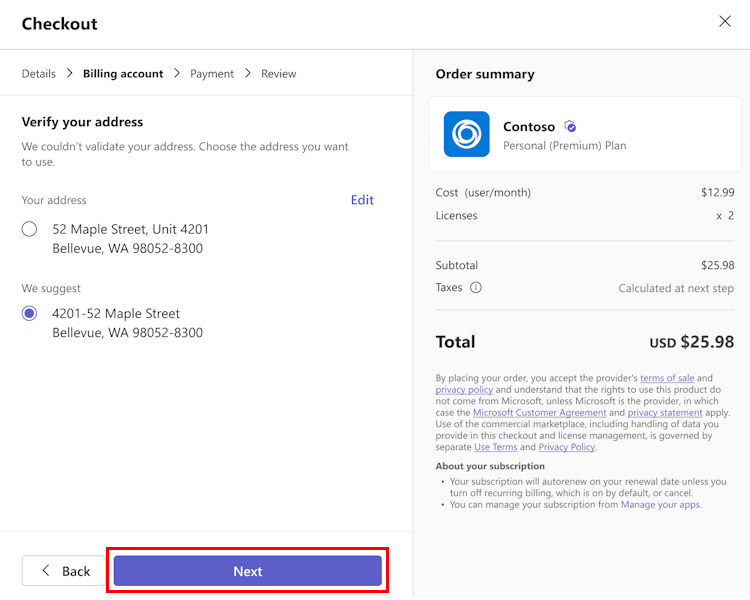
Under Verify your address, select the address and select Next.
Under Add a credit or debit card, add the required details and select Next. By default, the Same as billing address checkbox is selected to use the billing account’s address for the card. To add a new address, clear the checkbox and enter the address.

Under Review, verify the details and select Place order.
Select Set up subscription to activate your subscription on the app developer's website. If you don't set up your subscription after your purchase, you can do it later.
After you purchase the SaaS offer associated with a Teams app, you can view the following purchase details on the Plans and subscriptions tab of the app details page.
- License activation date: Date on which your license was activated.
- Licenses: Number of licenses you have.
Select Manage subscriptions to view and manage the licenses you already have.
Global Administrators can view the subscriptions purchased by anyone in the organization. They can add more licenses, remove licenses, and cancel subscriptions for purchases made by anyone in their billing account. Teams Administrators can perform the same actions for purchases made by them but not for the purchases made by other admins.
Note
If a Global Administrator wants to manage a subscription purchased by another Global Administrator, they need to be in the same billing account. You can give another Global Administrator access to a subscription you purchased by selecting the app in the Microsoft 365 admin center. In admin center, access View billing profile > Select billing account > Assign roles > Add other Global admins.
Important
When you enable app purchasing, it also turns on in-app purchasing. Users may see in-app purchase offers that app developer control. To prevent users from making in-app purchases, you can block the app.
Invoice billing
- Invoice billing is available as a payment option for some transactions.
- A credit review is required the first time you use invoice billing, which can take up to 24 to 48 hours for approval. Invoice billing isn't available until the credit check is complete. You can place your order with a credit card or try again later after your credit review is approved.
- Invoice billing is only available for an admin account that has Teams Administrator and Billing Administrator role.
- Invoice billing isn't available when purchasing a plan with a 30-day free trial.
Manage subscriptions in Teams admin center
In Teams admins center, you can manage the app subscriptions and licenses you purchased. You can view the list of app subscriptions and their details and perform the following actions:
- Change a plan
- Buy or remove license
- Update a payment method
- Cancel a subscription
- View your invoice

To manage subscriptions, follow these steps:
Sign in to Teams admin center and access Teams apps > Manage apps.
Select the Subscriptions tab to view the subscriptions you purchased.


Note
In Teams admin center, you can manage the app subscriptions purchased by you or other admins who are part of the same billing account. To view all the app subscriptions purchased for the same tenant by other admins or purchased using different billing accounts, visit the Microsoft 365 admin center.
List and sell a SaaS offer for a Teams app
Developers can create SaaS offers associated with their Teams apps. These offers are published through Partner Center and are available for organizations to purchase through AppSource and the Microsoft Teams admin center.
For more information for third-party app developers, see Create a SaaS offer.
Manage app licenses in Teams admin center
Microsoft Teams lets admins manage licenses for SaaS app offers. It enables admins to easily buy, assign, track, and remove SaaS app licenses purchased in Teams. It helps utilizing the available resources effectively.
As an administrator, it's important to understand how licenses work and how to manage them effectively. For apps that are purchased with a set number of subscription licenses, you have to ensure that these licenses are being utilized properly.
You can perform the following tasks to manage the licenses:
- Assign license to users to assign an app subscription license to an individual or multiple users.
- Assign license to a team when you need to assign an app subscription license to a team.
Assign a license to a user
You can assign a license to one or more users in your tenant. To view and assign the licenses for an app:
Sign in to the Teams admin center and go to Teams apps > Manage apps.
To view the licenses, select an app. The app details page shows the number of licenses available for the app on the Licenses tab.
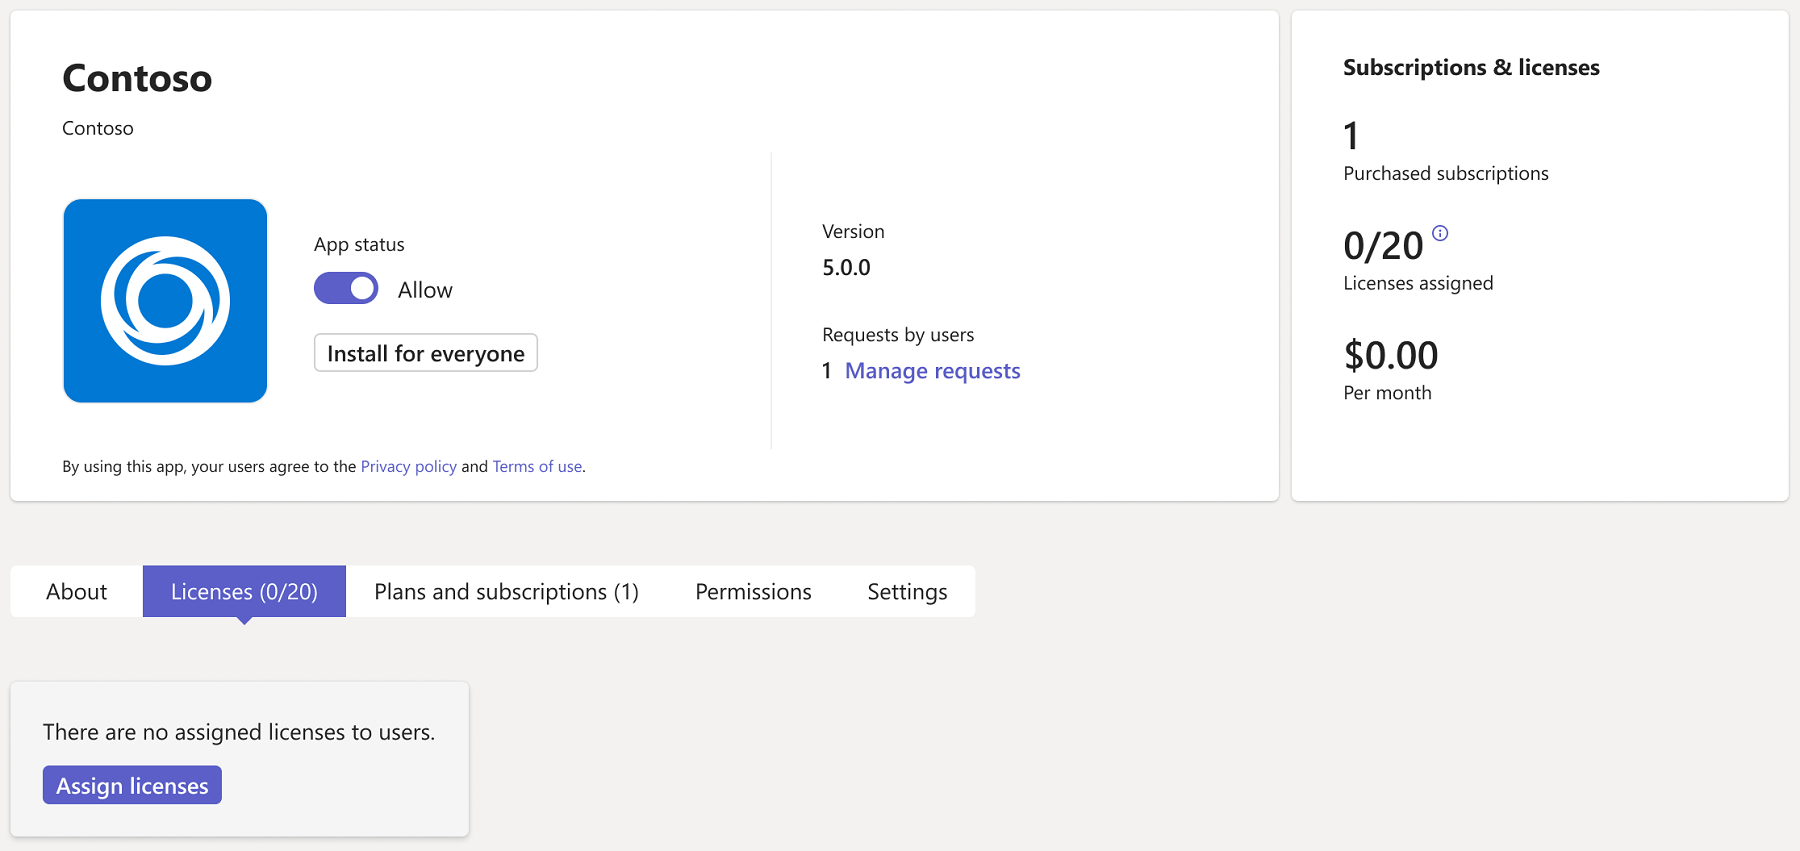
To view the license utilization and assign licenses, select Assign licenses. The assign licenses window appears.
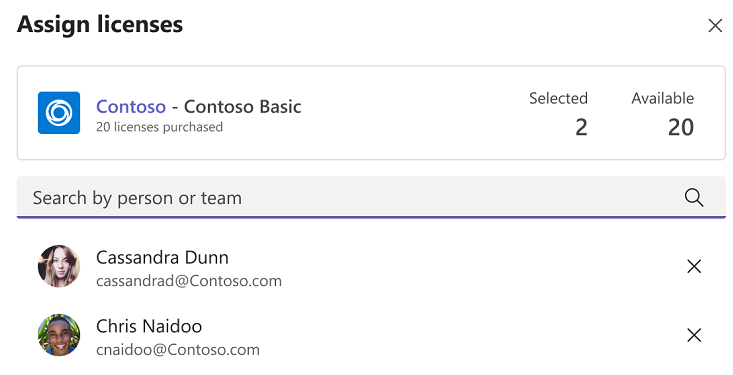
Search and select the users and select Assign.

Assign a license to a team
To manage licenses across multiple users who are part of the same team, you can select a team from the list of available options. The number of members in the team must be smaller than the number of licenses available for the app. To assign a license to a team, follow these steps:
Sign in to the Teams admin center and go to Teams apps > Manage apps.
Under All apps, select the app to assign its licenses to a team.
In the Licenses tab, select Assign licenses.
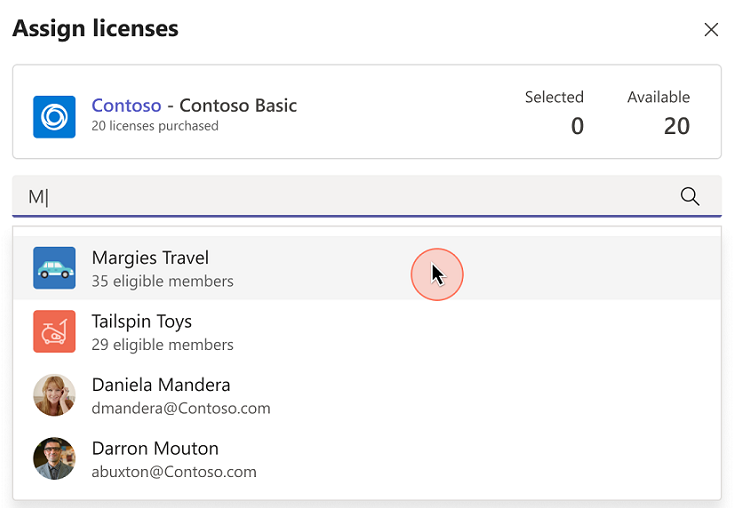
Search and select the team, and select Assign.
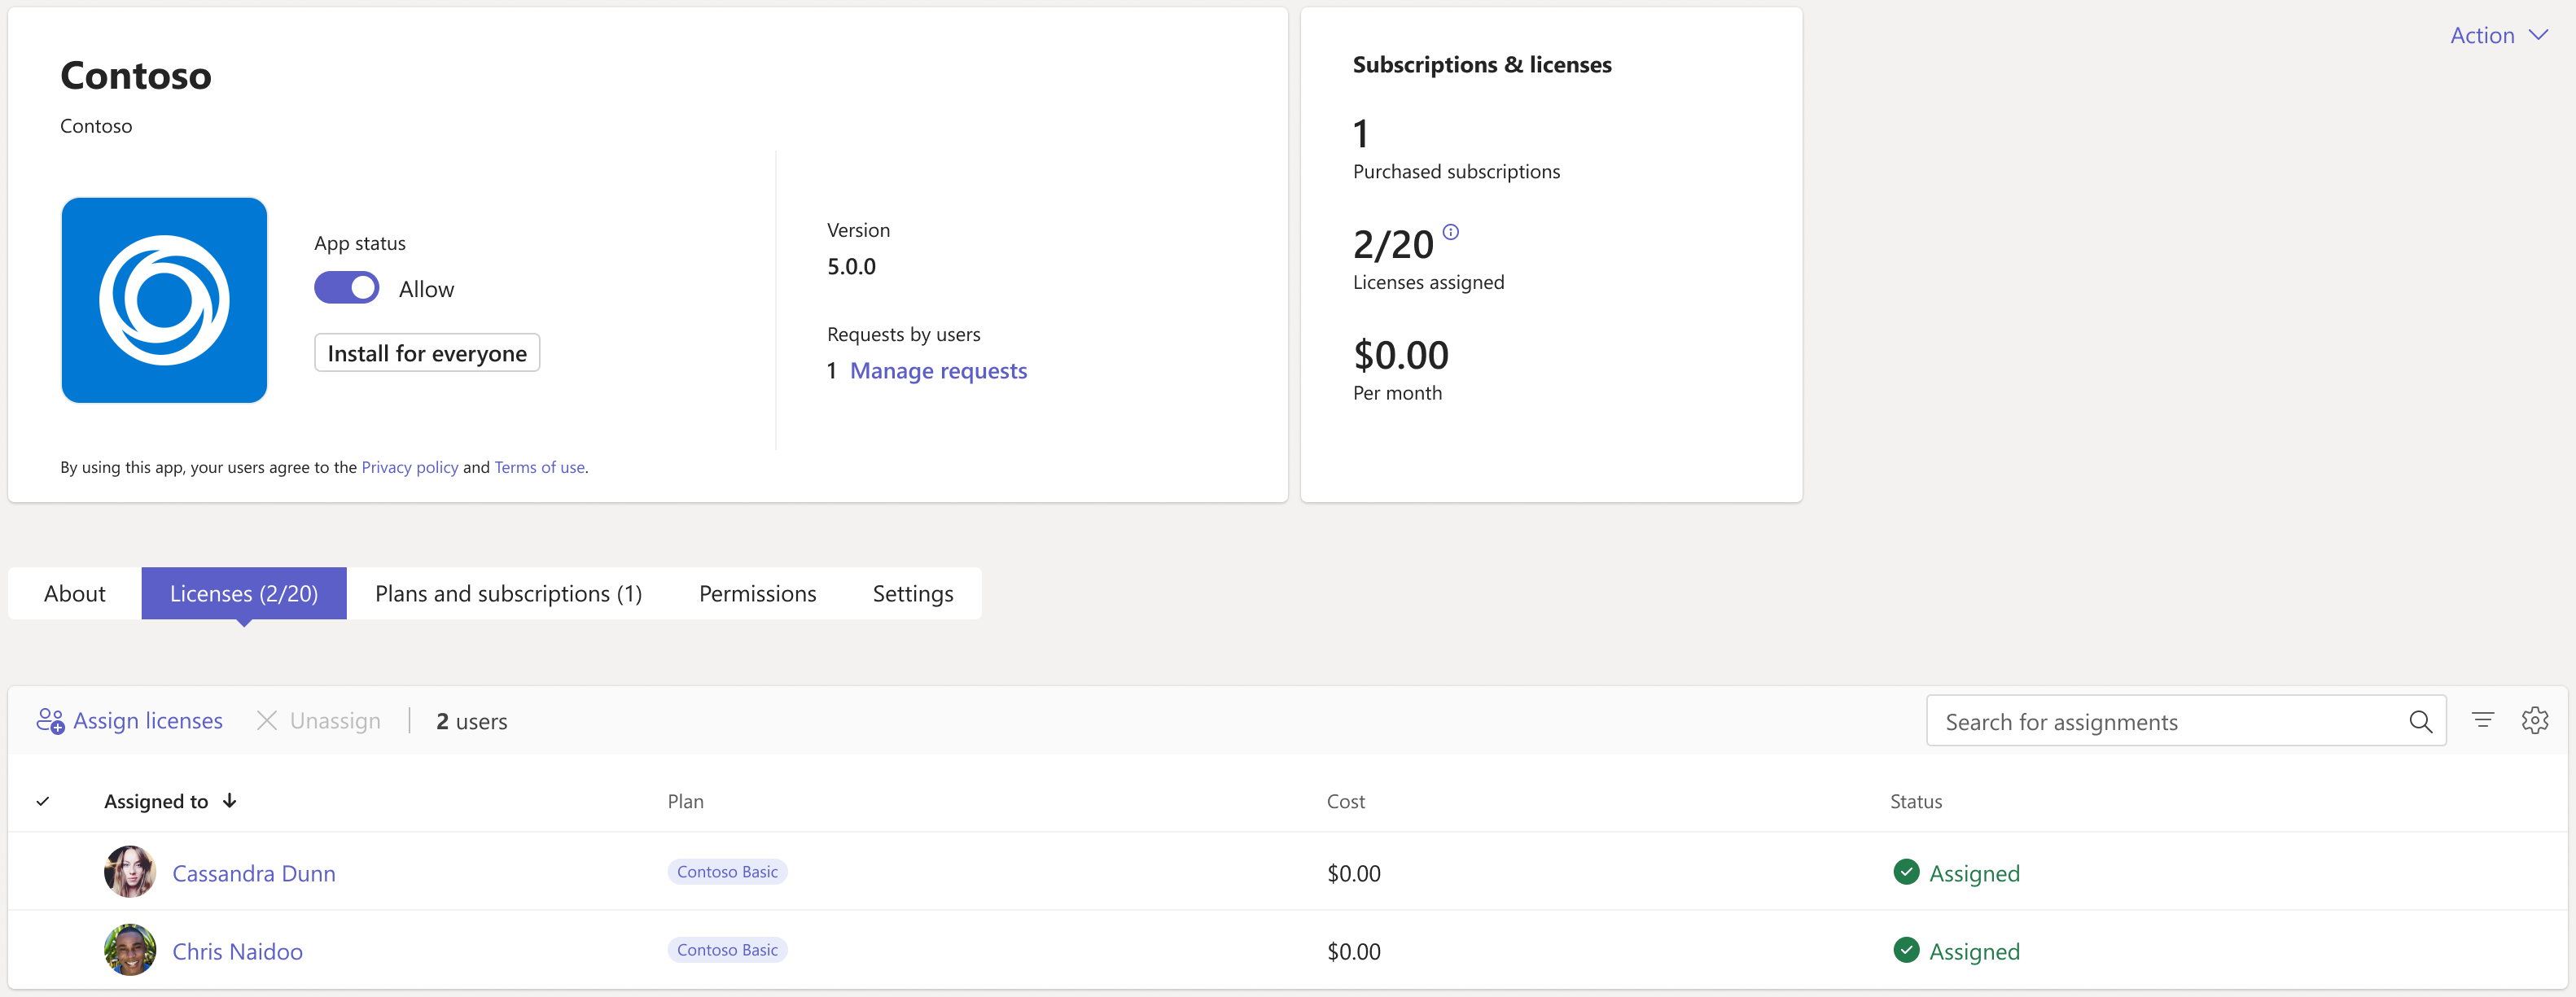
After you assign licenses to the users or team, you can view the list of assigned users. This list allows you to view a mapping of licenses and assigned users.


Disable app purchases in Teams admin center
To prevent users from purchasing third-party apps, you can disable purchases using the MSCommerce PowerShell module. You can view a list of applicable apps and whether self-service purchase is enabled or disabled, using AllowSelfServicePurchase parameter. For more information, see Use AllowSelfServicePurchase to disable Teams app purchases. The change applies to all users in your organization.