Manage data with Microsoft 365
Set up SDS for Microsoft 365 Education
- Microsoft 365 Education subscription
- Need Global Administrator Permissions
- Connect your data to SDS
Enable Manage data with Microsoft 365
Tip
You can set up your manage data configuration immediately after defining your connect data configuration, during the active first run, or later after the first run has finished.
On the Home page, select Manage data to define how to share data with Microsoft 365.

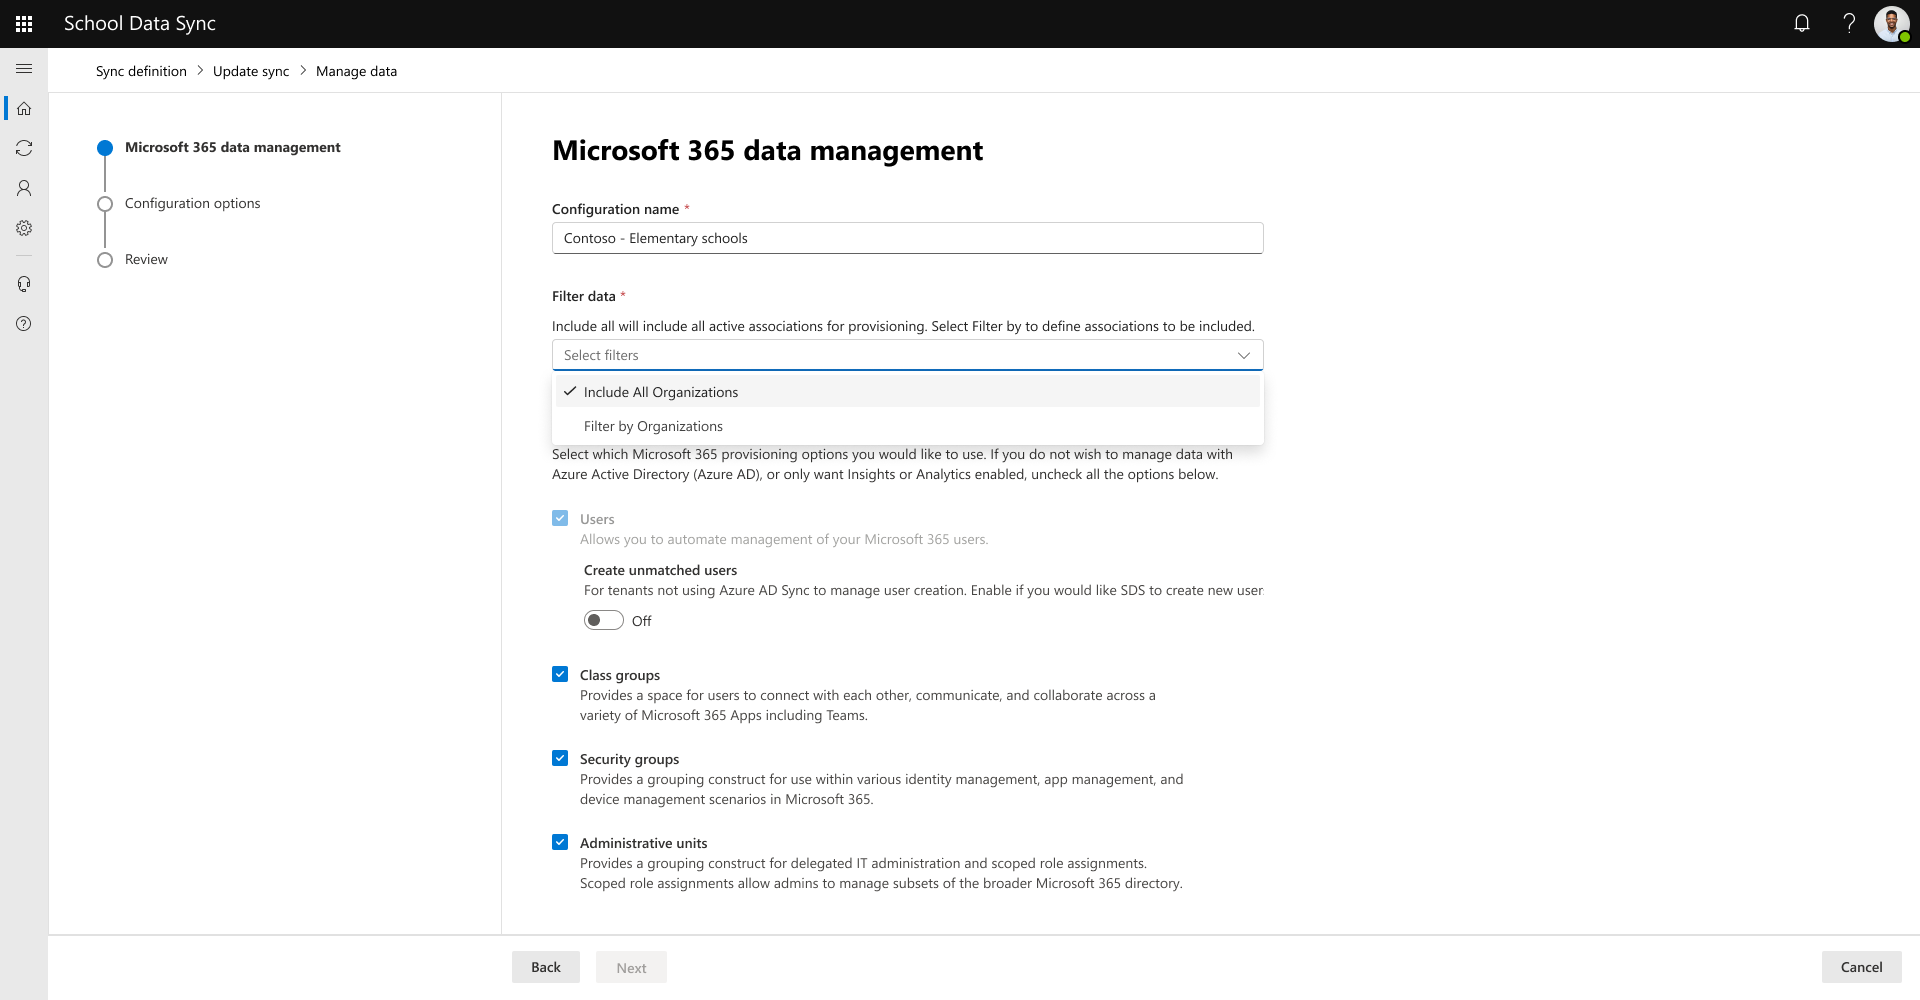
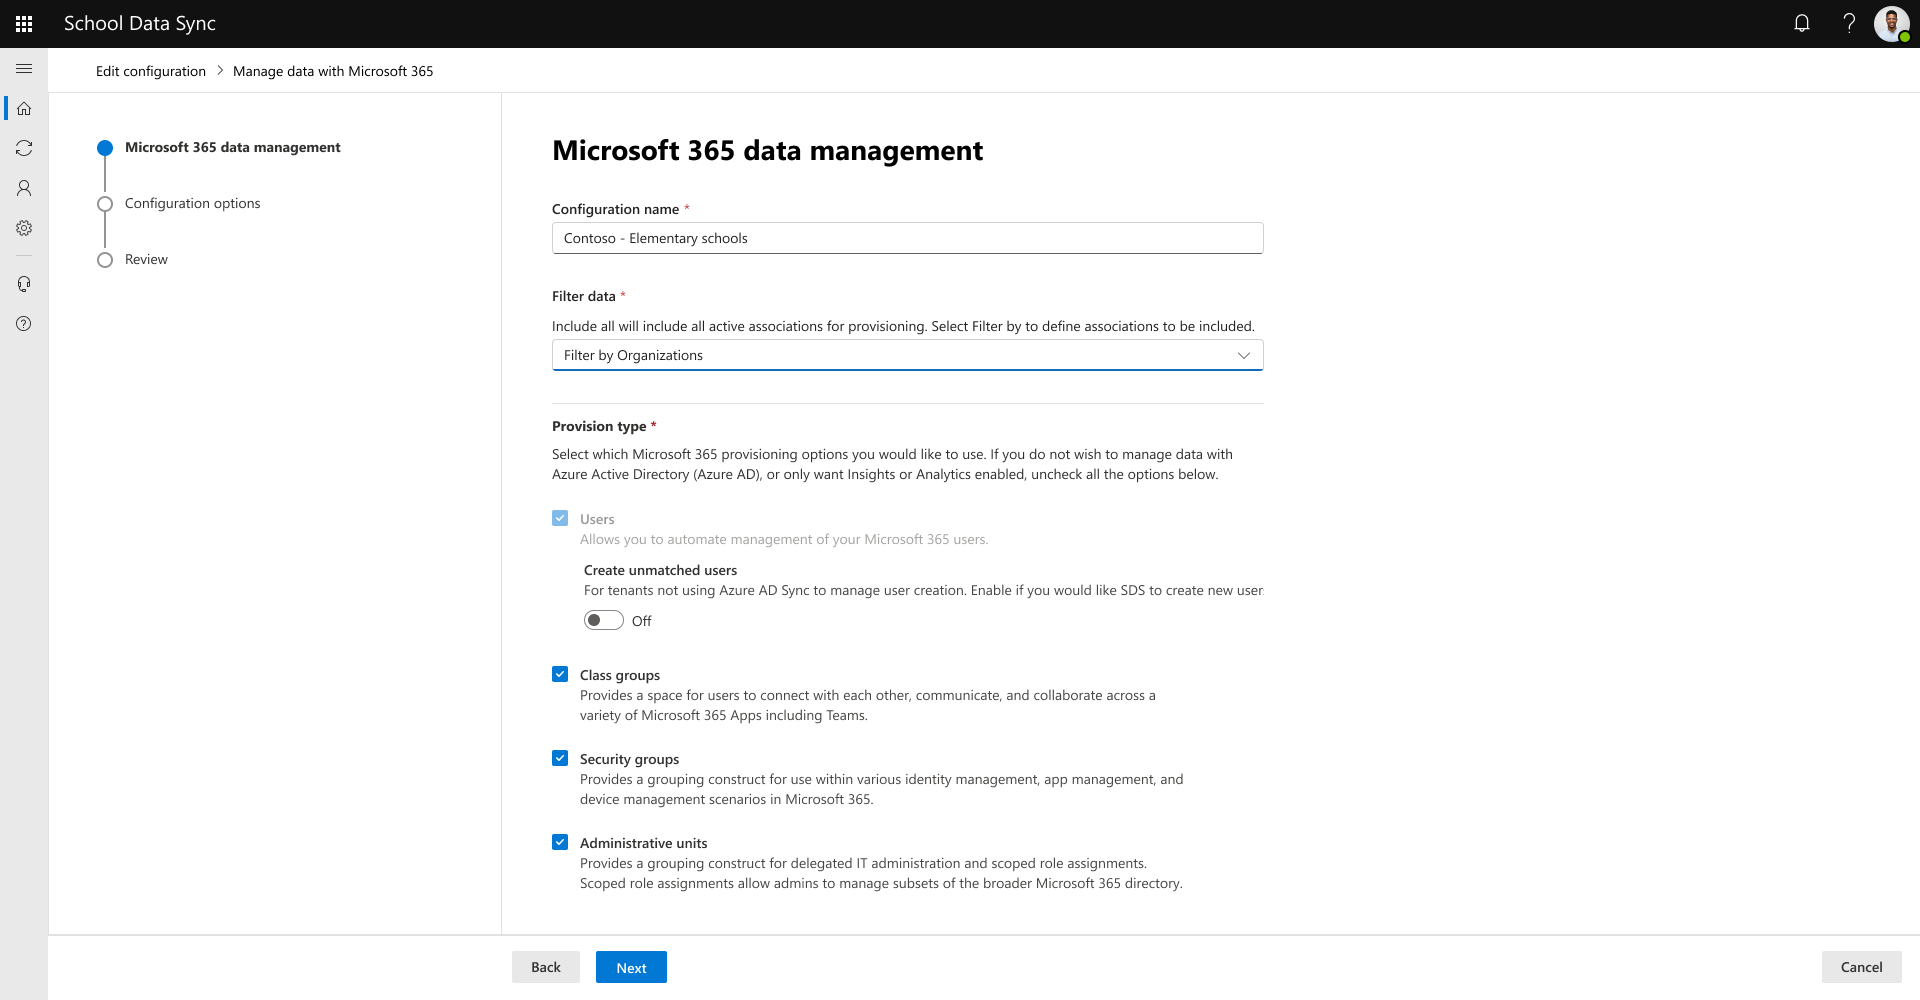
Next, select which Microsoft 365 provisioning configuration you would like to set up. After reviewing and defining your configuration, select Next to continue.
Configuration name: Allows you to define a unique configuration name.
Filter data: Include all will encompass all active organization associations for provisioning. Select filter by to define organization associations to be included.
Note
You can keep the default to Include all organizations or you may select Filter by organizations to only provision a subset of the users or classes ingested from the connected data based on the selected organizations.
Warning
Organization filters should not be used as an attempt to split data to improve performance as the feature increases sync run timing to manage additional configurations.
Users: Allows you to automate management of your Microsoft 365 users.
Determine if you need to Create unmatched users. If so, enable toggle to Yes. The default selection is No.
Warning
You should not set the toggle to 'Yes' for Create unmatched users if you have other active methods of creating users in your Microsoft Entra ID through Azure AD Sync or custom integrations.
Class groups: Provides a space for users to connect with each other, communicate, and collaborate across various Microsoft 365 applications including Teams.
Security groups: Provides a grouping construct for use within various identity management, application management, and device management scenarios in Microsoft 365.
Administrative units: Provides a grouping construct for delegated IT administration and scoped role assignments. Scoped role assignments allow admins to manage a subset of the broader Microsoft 365 directory.
Tip
You can configure School Data Sync (SDS) to only manage users to Microsoft Entra ID without needing to also manage Microsoft 365 Groups and Teams, to do so deselect Class groups.
Important
If you do not want SDS to create and manage Security groups and/or Administrative units you will need to deselect the option(s), otherwise you will need to select at least one of the split types when prompted to complete the set up.
Next, if you selected the option for Filter data Filter by Organizations, you need to define the configuration for Filter: organizations. You select which organizations are included for the filter and provisioning configuration (acts as an opt-in). After reviewing and defining your configuration, select Next to continue.
Important
If you choose to filter your organizations here, any new organizations and their associations will be filtered out by default.
Caution
If you set up multiple managed data configurations, with the same provisioning types but different settings, and Filter by Organizations is applied with the same organizations selected, the configuraiton with the oldest Configuration creation date-time will be applied for the corresponding records. The Configuration creation date-time can be seen in the Sync | Configuration | Managed data screen.

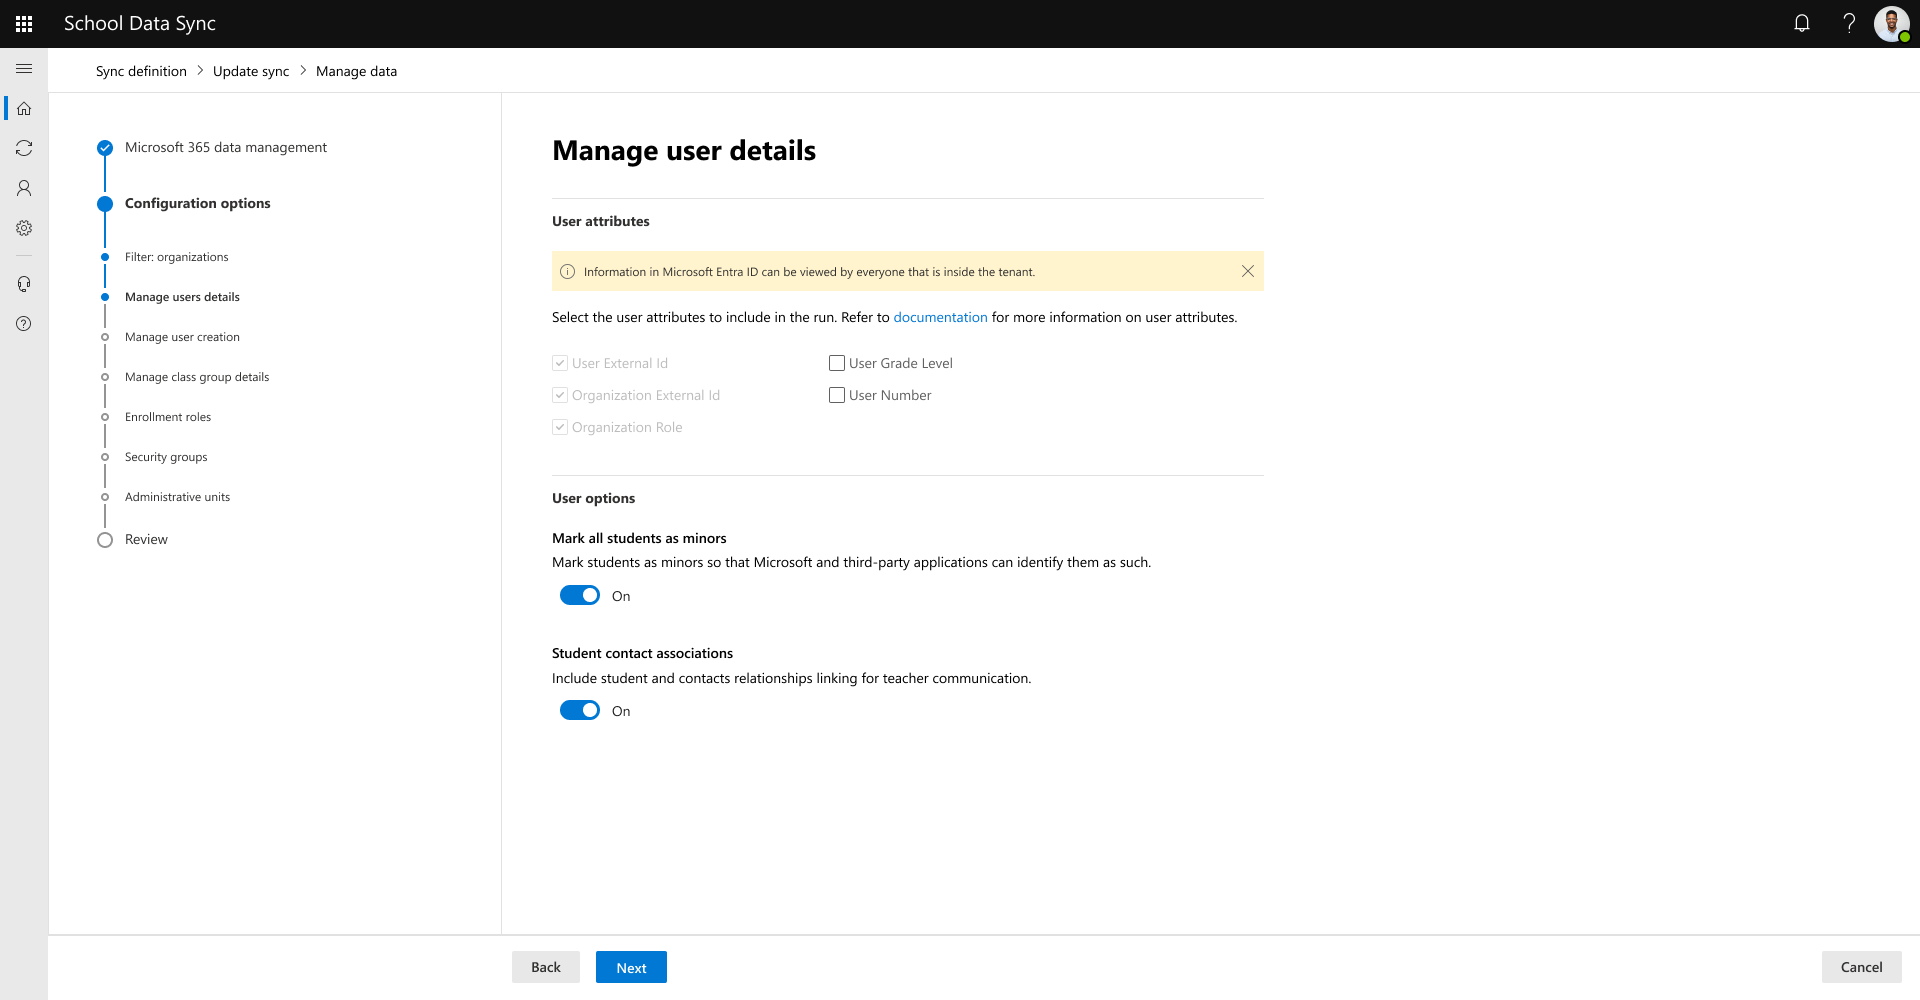
Next you define the configuration for Manage user details. After reviewing and defining your configuration, select Next to continue.
Note
Information in Microsoft Entra ID can be viewed by everyone that is inside the tenant.
You're presented with the ability to select optional properties and options when creating the Microsoft Entra user objects. Review and set your selections.
User attributes: Attributes to be shown on the Microsoft Entra group object. The attributes are written based on the data associated from the connected data when processing data from your SIS/SMS.
Default attributes:
- User External ID: Data found in the sourcedId field for the user.
- Organization External ID: Data found in the sourcedId field for the associated organization and role.
- Organization Role: Data found in the role field for the user and the associated organization.
Optional attributes:
- User Grade Level: If provided the grade field for the user for the associated organization and role.
- User Number: If provided the userNumber field for the user.
User options: What extra settings should be considered when managing the Microsoft Entra user objects?
- Mark all students as minors: Identified from the rules to determine what Role is written to the Microsoft Entra user object if the role is Student. Identifies the user as a minor so that Microsoft and third-party applications identify them as such. The outcome sets the ageGroup and consentProvidedForMinor user properties. We update the attribute ageGroup as "Minor" and consentProvidedForMinor as "Granted" for all student users. The net result of setting the two properties is the attribute of LegalAgeGroupClassification set to MinorWithParentalConsent.
- Student contacts associations: Identified from the rules to determine what Role is written to the Microsoft Entra user object and if the connected data for the SIS / SMS is bringing in Contact Relationships (also known as Guardians / Parents). If the option is On when processing data, this will includes the contact information with the Microsoft Entra user object for educator communication. For more information, see Default List of Values: Contact Relationship Roles on the supported Student Contact Relationship roles supported by SDS.
Important
In the instance that a User has multiple roles, the following rules are used to determine the value when writing Role to Microsoft Entra user object.
- If isPrimary is set for all student roles, even if association to a staff role exists, the role attribute value is made based on the Student Role.
- If isPrimary is set for any Staff role, even if association to a student role exists, the role attribute value is made based on the Staff Role.
- If isPrimary is set for both Staff and Student role, the role attribute value is made based on the Staff role.
- If isPrimary isn't set for any roles, especially with a mix for both Staff and Student roles, the role attribute value is based on the Staff Role.
If the user is also associated with multiple organizations, SDS uses this rule to determine the value when writing the Role to the Microsoft Entra user object.
- Utilize the Organization Role Sort Order value for the highest organization role to set to the Microsoft Entra user object.
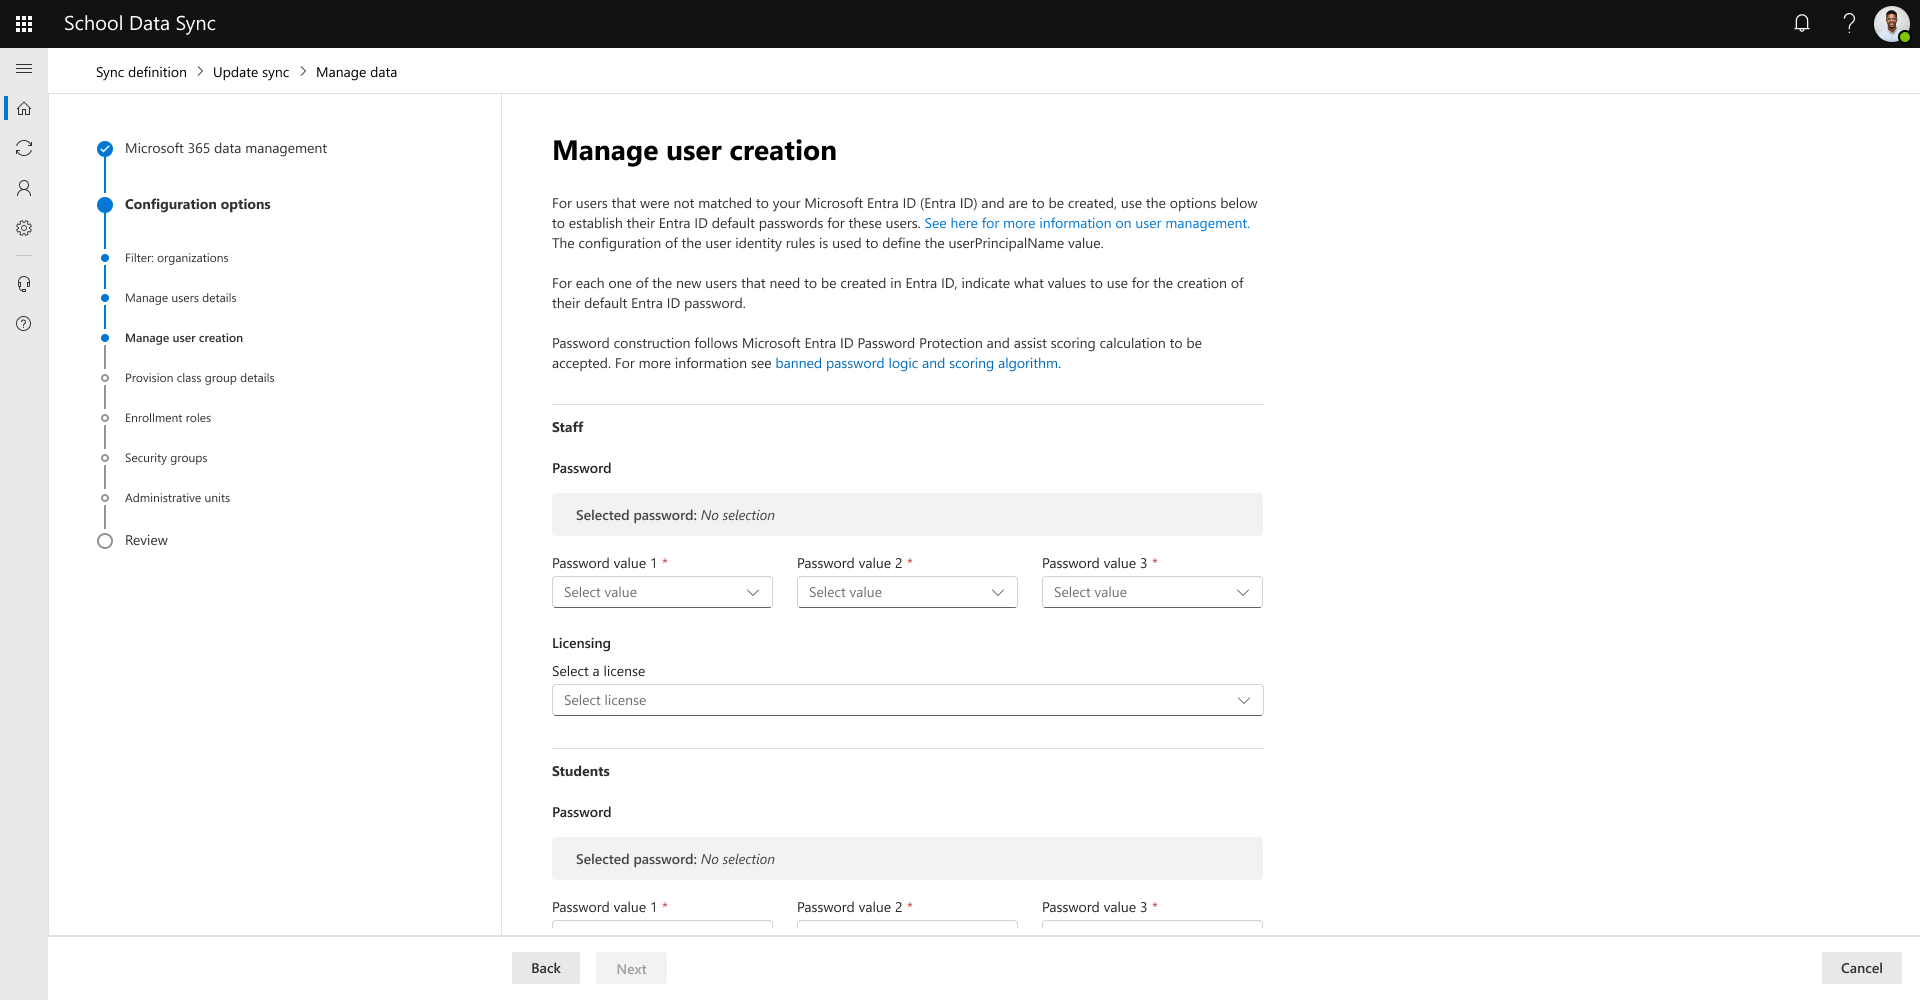
Next, if you turned on the option to Create unmatched users, you define the configuration for Manage user creation. After reviewing and defining your configuration, select Next to continue.
Important
Microsoft Entra UserPrincipalName property (username) values are constructed from the selections of the User identity rules established when the connect data configuration for the source was created. For more information, see User identity rules.
Tip
Password construction follows Microsoft Entra Password Protection guidance and assists with scoring calculation in order for default value to be accepted to successfully create the user. For more information, see banned password logic and scoring algorithm. We recommend setting up the configuration for users to change their password on their first login.
- For Staff users that weren't matched to Microsoft Entra ID and are to be created, you must select values for their default password from the password value options displayed.
- Optional For Staff users that weren't matched and are to be created, optionally select a default license option to be associated to the user during creation. The default selection is No license.
- For Student users that weren't matched to Microsoft Entra ID and are to be created, you must select values for their default password from the password value options displayed.
- Optional For Student users that weren't matched and are to be created, optionally select a default license option to be associated to the user during creation. The default selection is No license.
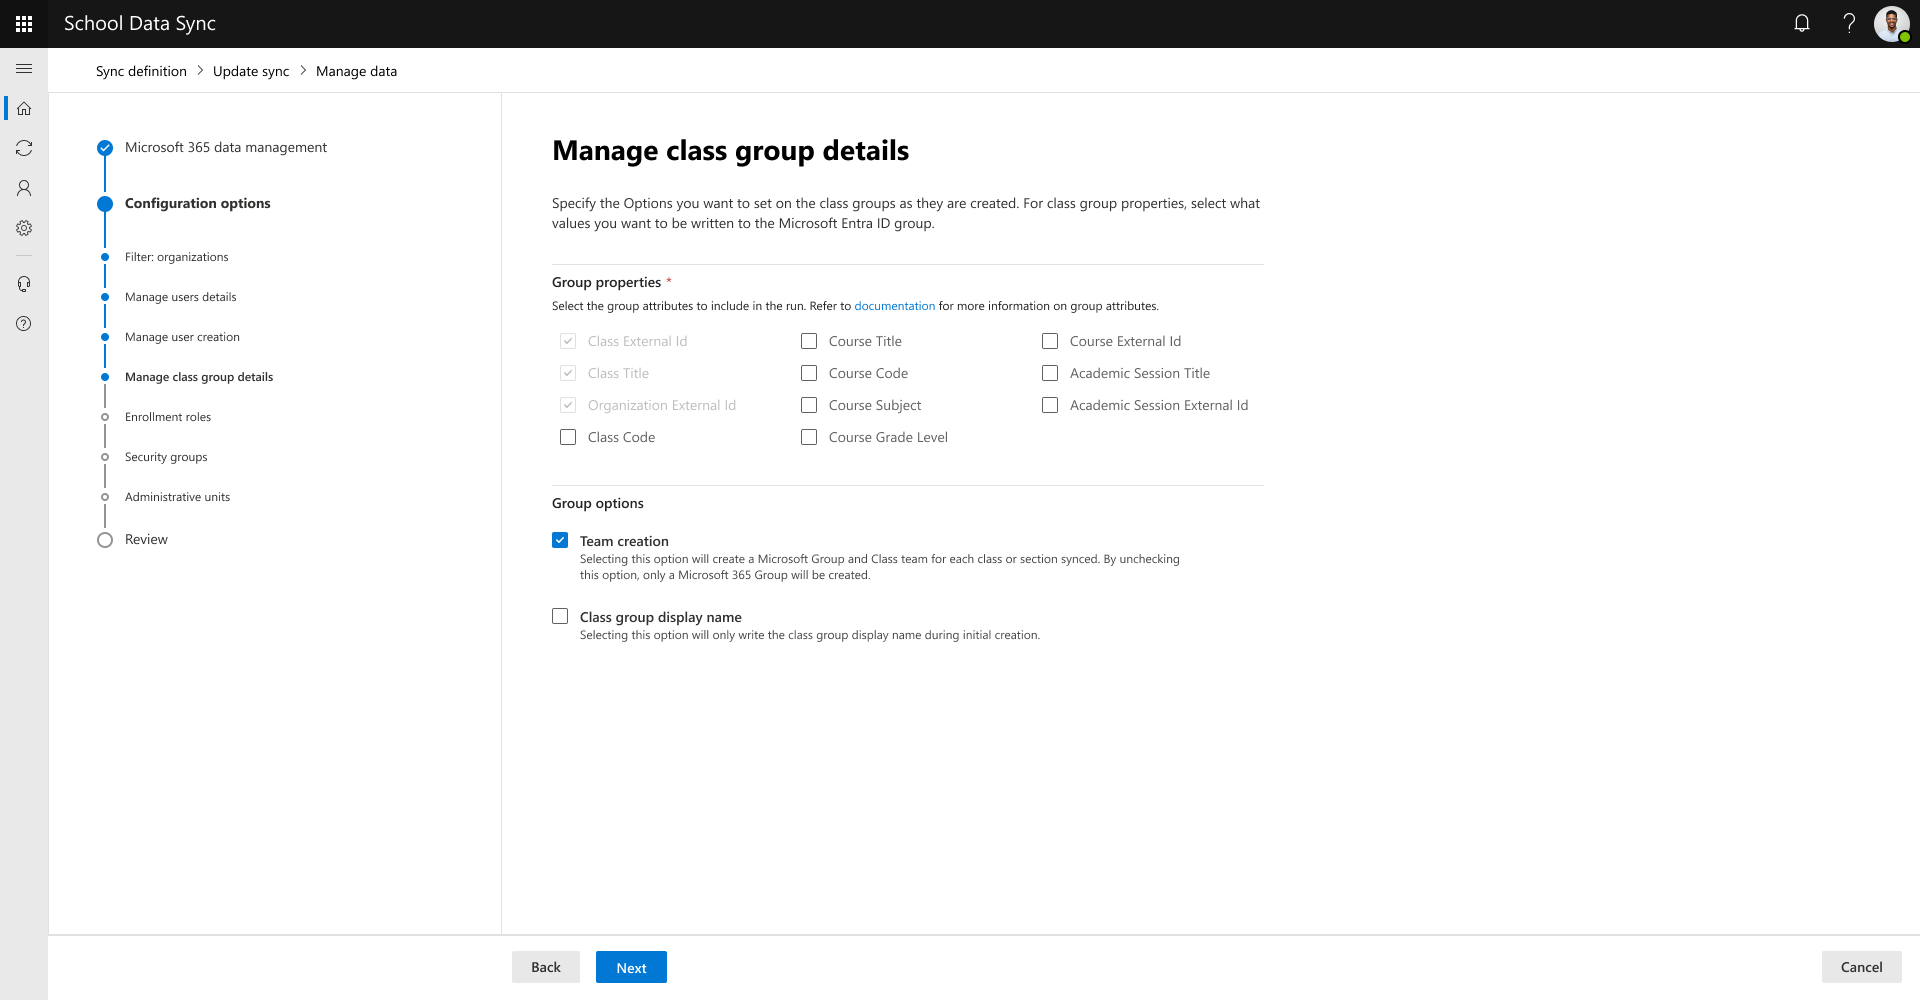
Next, if you selected the option for Class groups, you define the configuration for Provision class group details. After reviewing and defining your configuration, select Next to continue.
Tip
In SDS (Classic) some administrators choose to delay student membership access to Class Teams when first setting up to a future date. School Data Sync and Microsoft Teams for Education has improved this process to empower educators to control the timing when students have access to Class Teams. When using SDS to automate the creation of the Class Team, educators will have early access to the Class Teams. When the educator is ready, they can select Activate to allow students and other group members access.
You're presented with the ability to select optional properties and options when creating the Microsoft Entra group objects. Review and set your selections.
Group properties: Attributes to be shown on the Microsoft Entra group object. The attributes are written based on the data associated from the connected data when processing data from your SIS/SMS.
Default properties
- Organization external ID: Data found in the orgSourcedId field of the section or class.
- Class external ID: Data found in the sourcedId field of the section or class.
- Class title: Data found in the title field of the section or class.
Optional properties
- _Class code: Data found in the code field of the section or class.
- Course title: Data found in the title field of the course associated to the section or class.
- Course code: Data found in the code or course code field of the course associated to the section or class.
- Course subject: Data found in the subject or subjectCodes field of the course associated to the section or class.
- Course grade level: Data found in the grade or grades code field of the course associated to the section or class.
- Course external ID: Data found in the sourcedId field of the course associated to the section or class.
- Academic session external ID: Data found in the sourcedId code field of the academic session associated to the section or class. If academic sessions aren't being included from the SIS/SMS, and this option is selected, the active academic year externalId value is used.
- Academic session title: Data found in the title field of the academic session associated to the section/class. If academic sessions aren't being included from the SIS/SMS, and this option is selected, the active academic year name value is used.
Group options: What extra settings should be considered when managing the Microsoft Entra group object?
- Team creation: If Checked, when the Class group is created a request is sent for Teams to create a Class Team based on the Class group.
- If option is Checked:
- For Educators, or group owners that are using the created Class Teams from SDS they have early access before the students and other group members. When the educator is ready, they can select Activate to allow students and other group members access.
- If option is Not Checked:
- For Educators, or group owners, where SDS isn't creating Class Teams, they can create Class Teams from SDS Groups. When the educator is ready, they can select Activate to allow students and other group members access.
- If option is Checked:
- Class group display name: Only write the group display name during initial creation. This option will allow IT and the group owner to update the group and class team display name and preserve the change in future runs.
- Team creation: If Checked, when the Class group is created a request is sent for Teams to create a Class Team based on the Class group.
Next, if you selected the option for Class groups, you define the configuration for Enrollment roles. After reviewing and defining your configuration, select Next to continue.
- For each group, we need to know who you want to be associated with the Owners and Members.
- A user's association with Group is based on the enrollment role associated to sections or classes.
- Selecting a role means that for any user with that role for the associated group means, the user is included to that section or class.
- Privileges for a group are based on the associated role and if that role is selected in the Owners or Members list.
- For any roles that aren't selected, they won't have access to the corresponding group, section, or class--even if there are users that have roles in a Group.
- Owners have editing privileges to manage their groups, change group names, and add or remove group members.
- The owner is also a member of the group, which enables them to see the section or class in Microsoft applications.
- Members have read only permissions to their groups.

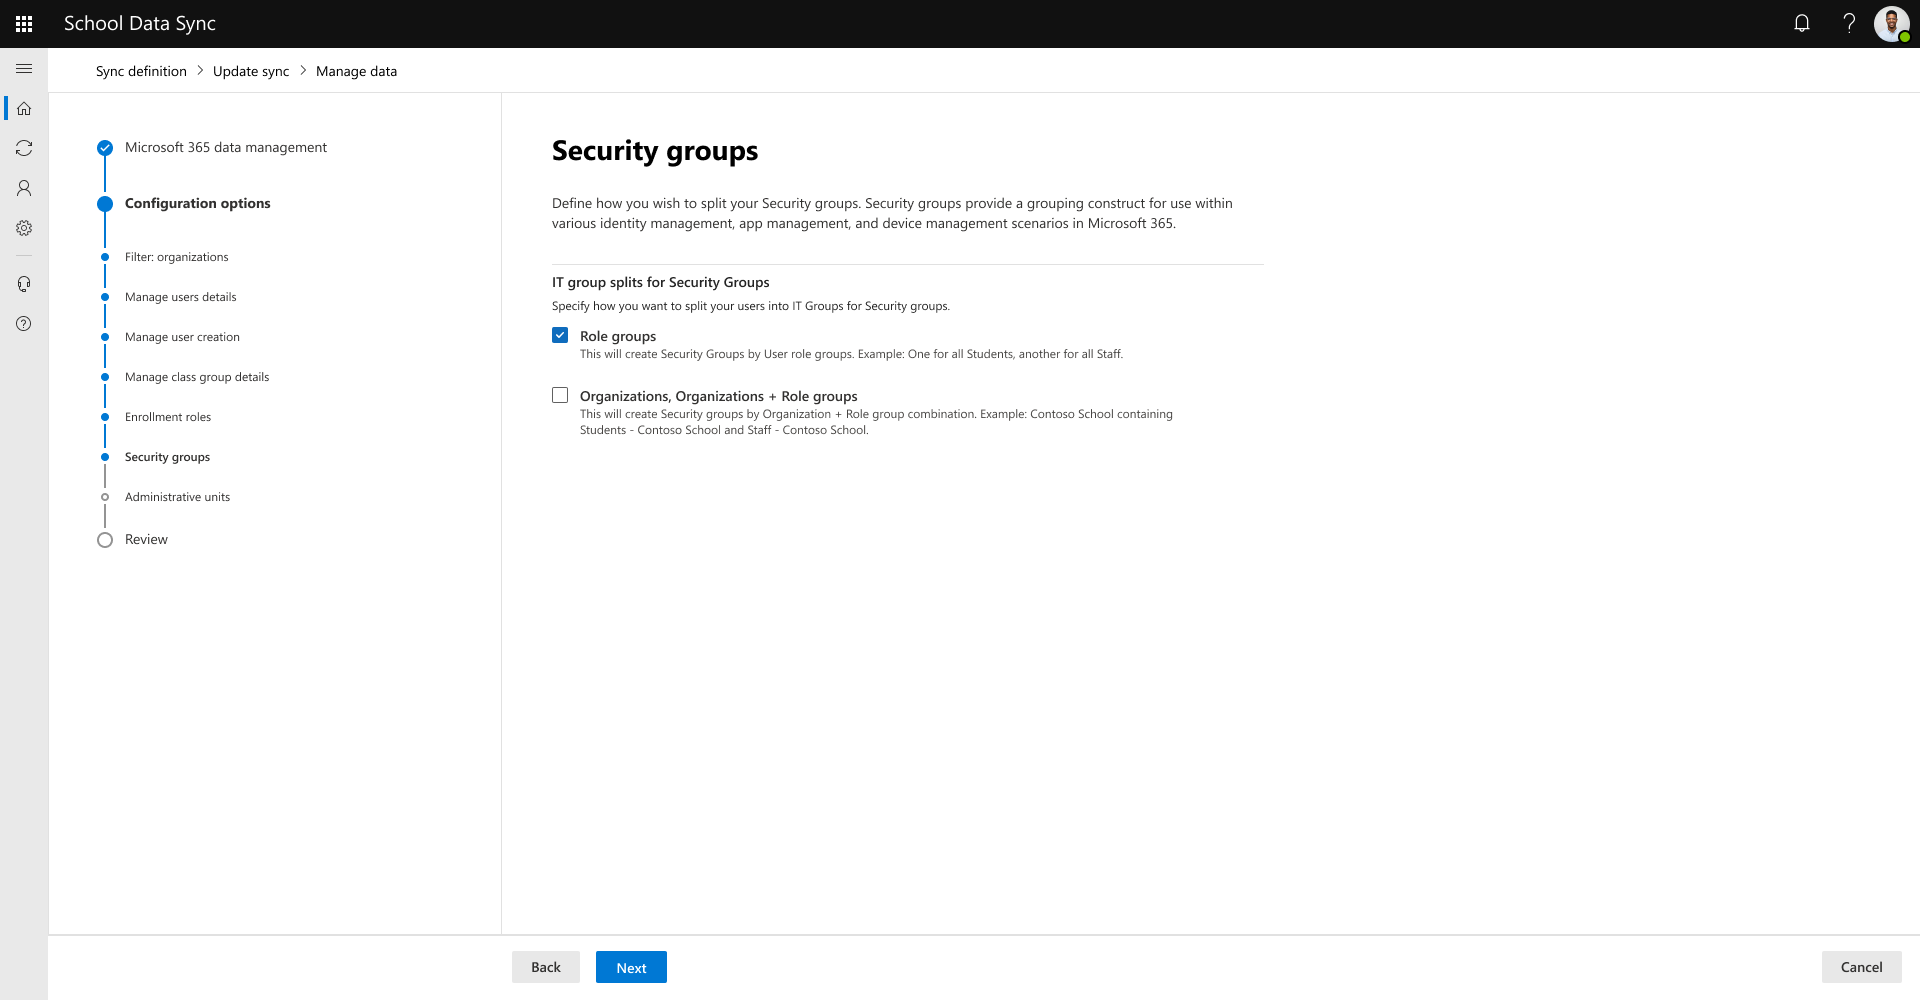
Next, if you selected the option for Security groups, you define the configuration for Security groups. After reviewing and defining your configuration, select Next to continue.
Important
SDS (Classic) TRANSITION CUSTOMERS: Based on the group splits selected, SDS may not bind to (Classic) Security Groups and associate memberships. You may need to review and apply any configuration settings based on your previous (Classic) Security Groups to the new ones created by SDS. The check and updates will need to happen after the first run has completed for the Security Groups flow as part of your transition steps.
Define how you wish to split your Security Groups. You can select to split groups by:
Role Groups: Creates Security Groups by User role groups. Example: One for all Students, another for all Staff
- Creates all Students Security Group and manages users with roles in the Students role group
- Creates all Staff Security Group and manages users with roles in the Staff role group
Organizations, Organizations + Role Groups: Creates Security Groups by Organization + Role Groups combinations. Example: Contoso School containing Students - Contoso School and Staff - Contoso School
- Creates a Security Group for each Organization present with active users
- Nests corresponding Role group + Organization Security Groups to the Organization Security Group
- Creates a Security Group for each combination of users with roles in the Students role group + Organization present
- Creates a Security Group for each combination of users with roles in the Staff role group + Organization present
SDS Security Groups can be used in various administrative functions within Microsoft Entra ID and Microsoft 365. Here are some of the most common uses of the SDS Security Groups:
Intune for Education Device Policy - What is Intune for Education?
Mobile Device Management - Create and deploy device security policies
Group Based Licensing - Assign licenses to users by group membership in Microsoft Entra ID
Conditional Access - What is conditional access?
Group and Team Creation Policy - Manage creation of Groups
Self Service Password Reset - Let users reset passwords
- To target Security groups for Password Reset, choose "Selected" instead of "All" on step 5.
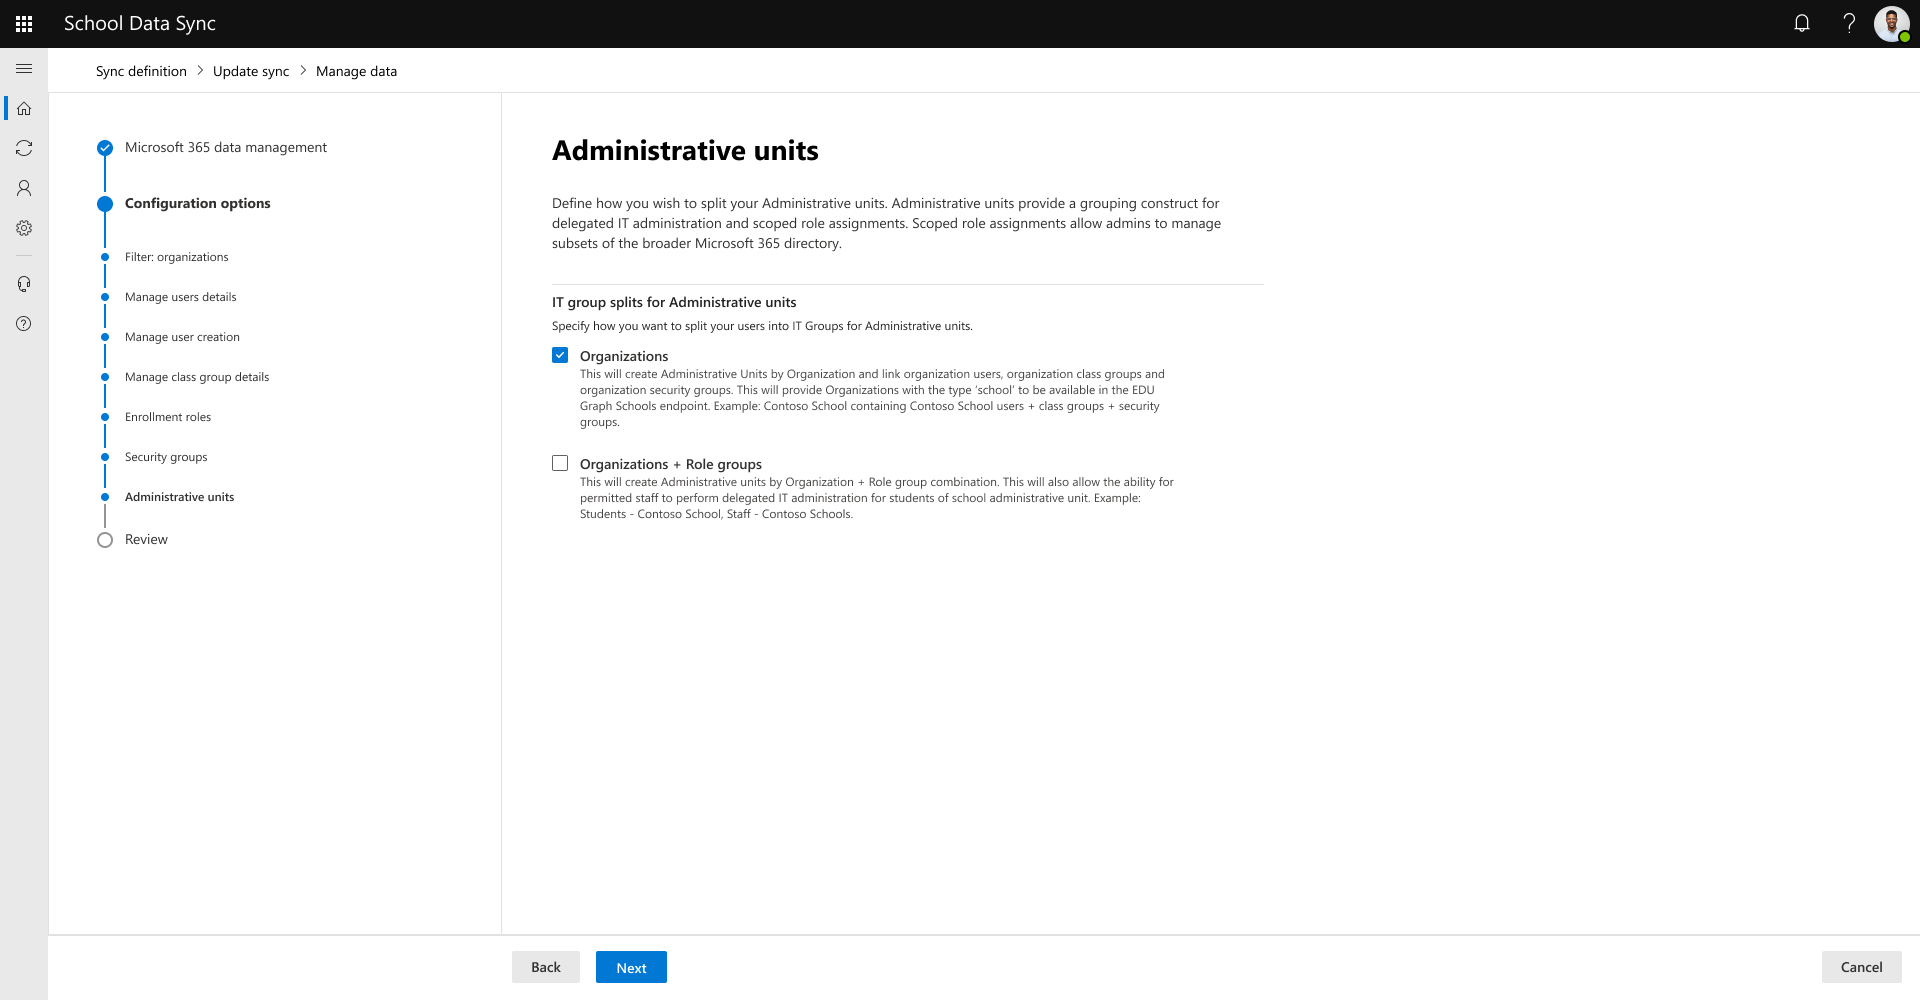
Next, if you selected the option for Administrative units, you define the configuration for Administrative units. After reviewing and defining your configuration, select Next to continue.
Important
SDS (Classic) TRANSITION CUSTOMERS: Based on the group splits selected, SDS may not bind to (Classic) Administrative Units and associate memberships. You may need to review and apply any configuration settings based on your previous (Classic) Administrative Units to the new ones created by SDS. The check and updates will need to happen after the first run has completed for the Administrative Units flow as part of your transition steps.
Define how you wish to split your Administrative Units. You can select to split groups by:
Organizations: Creates Administrative Units by Organization and link organization users, organization class groups and organization security groups. The selection provides Organizations with the type ‘school’ to be available in the EDU Graph Schools endpoint. Example: Contoso School containing Contoso School users + class groups + security groups
- Creates an Administrative Unit for each Organization present with active users
- Links all Students with an active association to the Organization with roles in the Students role group
- Links all Staff with an active association to the Organization with roles in the Staff role group
- If also provisioning Class groups, links all Classes with an active association to the Organization
Organizations + Role Groups: Creates Administrative Units by Organization + Role Group combination. SDS allows the ability for permitted staff to perform delegated IT administration for students of school administrative unit. Example: Students - Contoso School, Staff - Contoso Schools
- Creates Students - Organization Administrative Unit for each Organization present with active users for each combination for users with roles in the Students role group
- Creates Staff - Organization Administrative Unit for each Organization present with active users for each combination for users with roles in the Staff role group
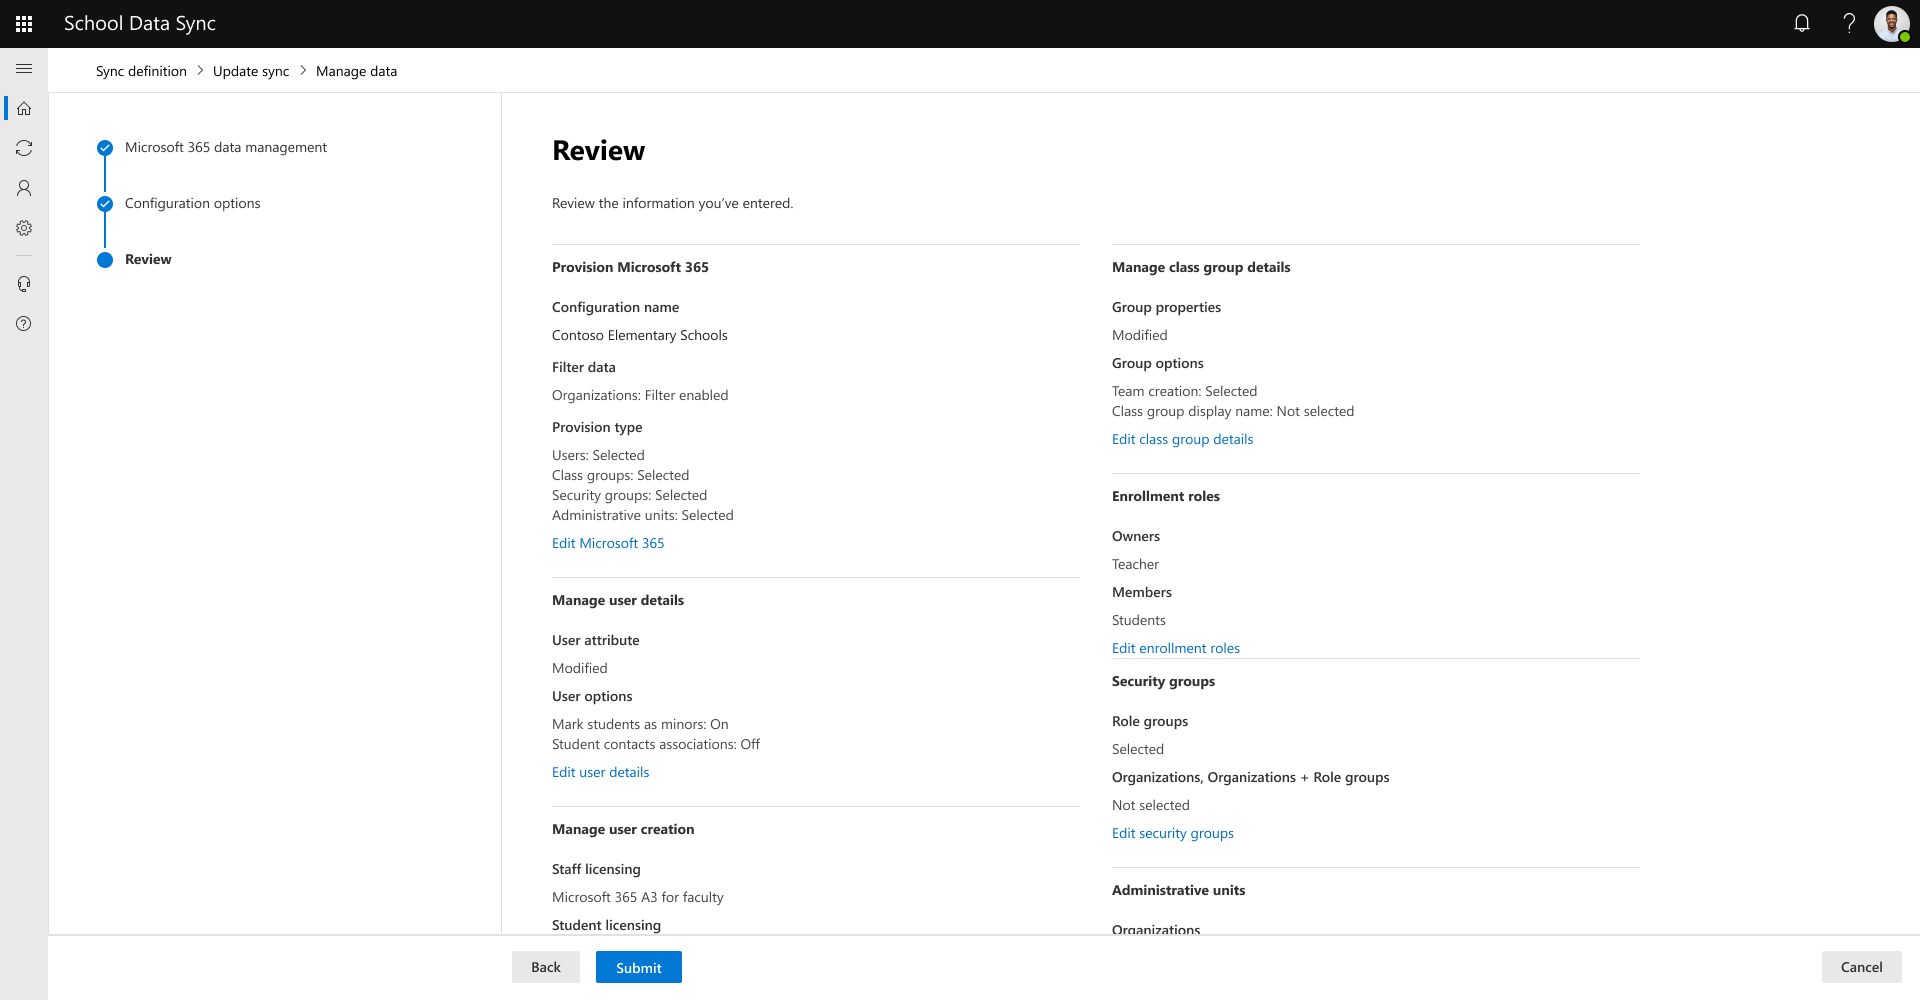
Look over the information presented on Review. If everything looks correct, select Submit. If not, navigate back to update your configuration selections.
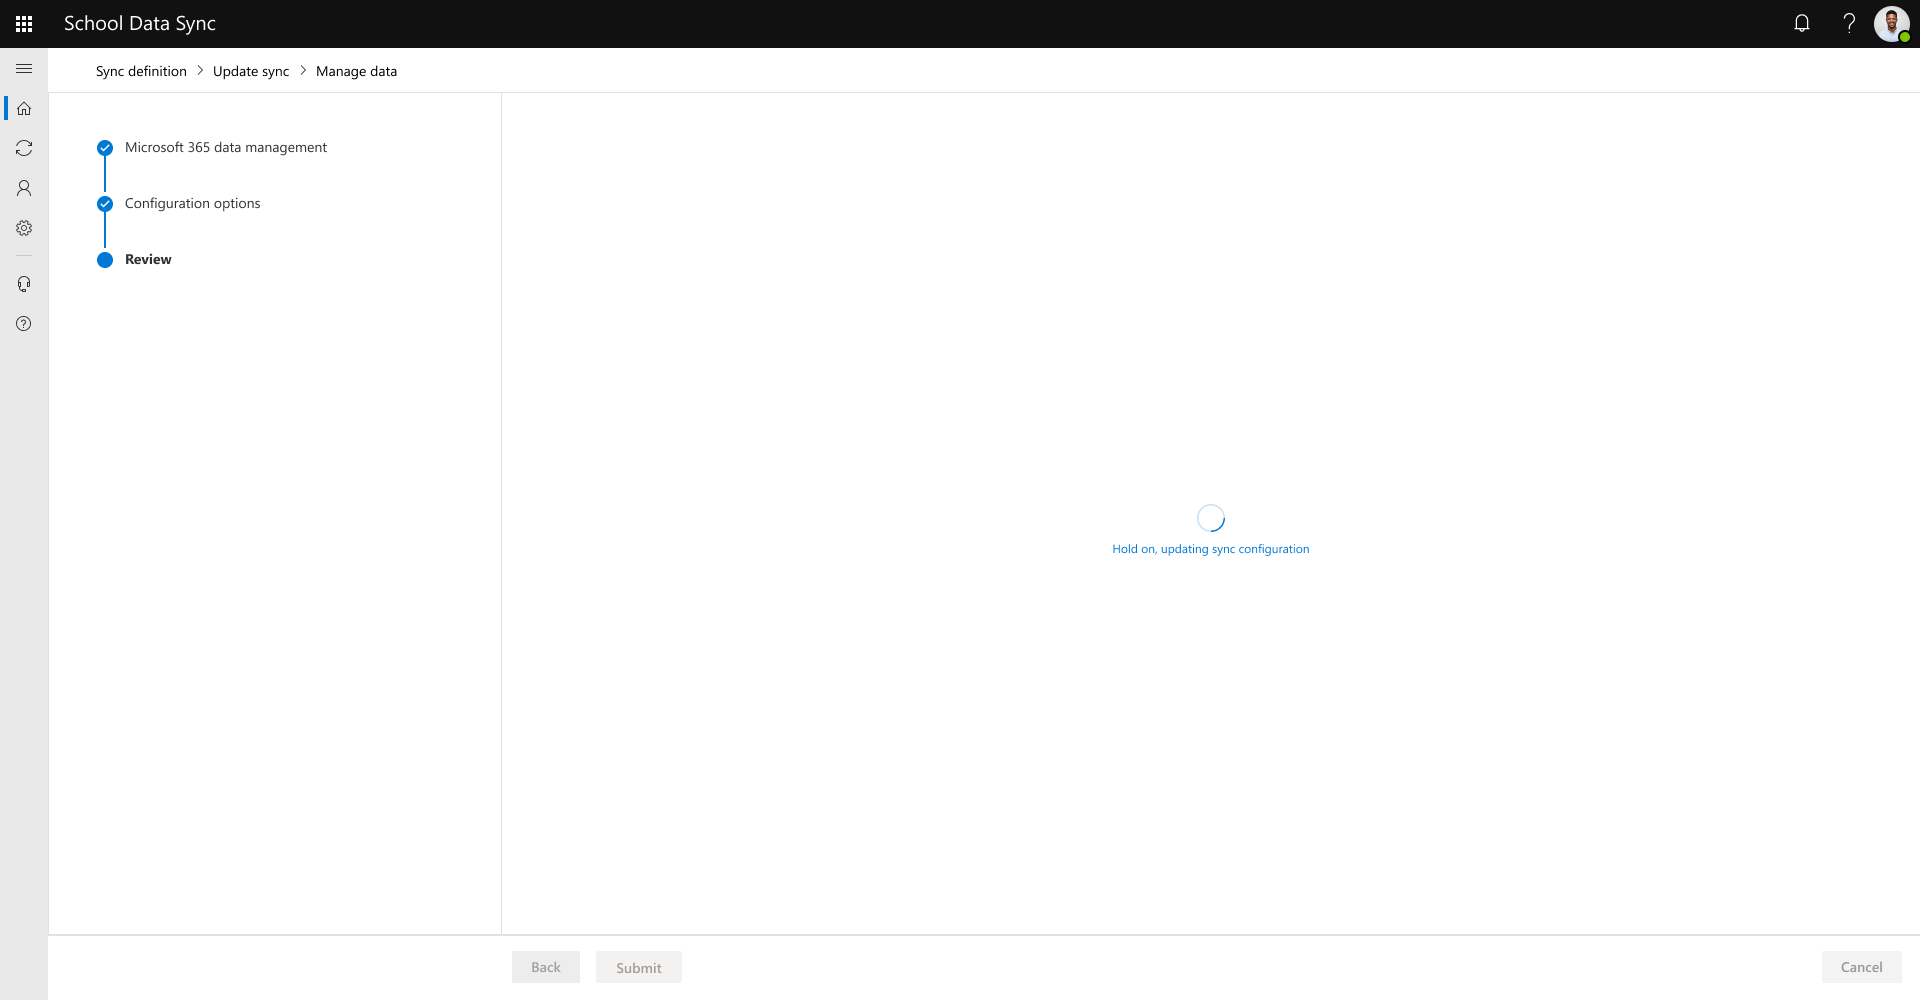
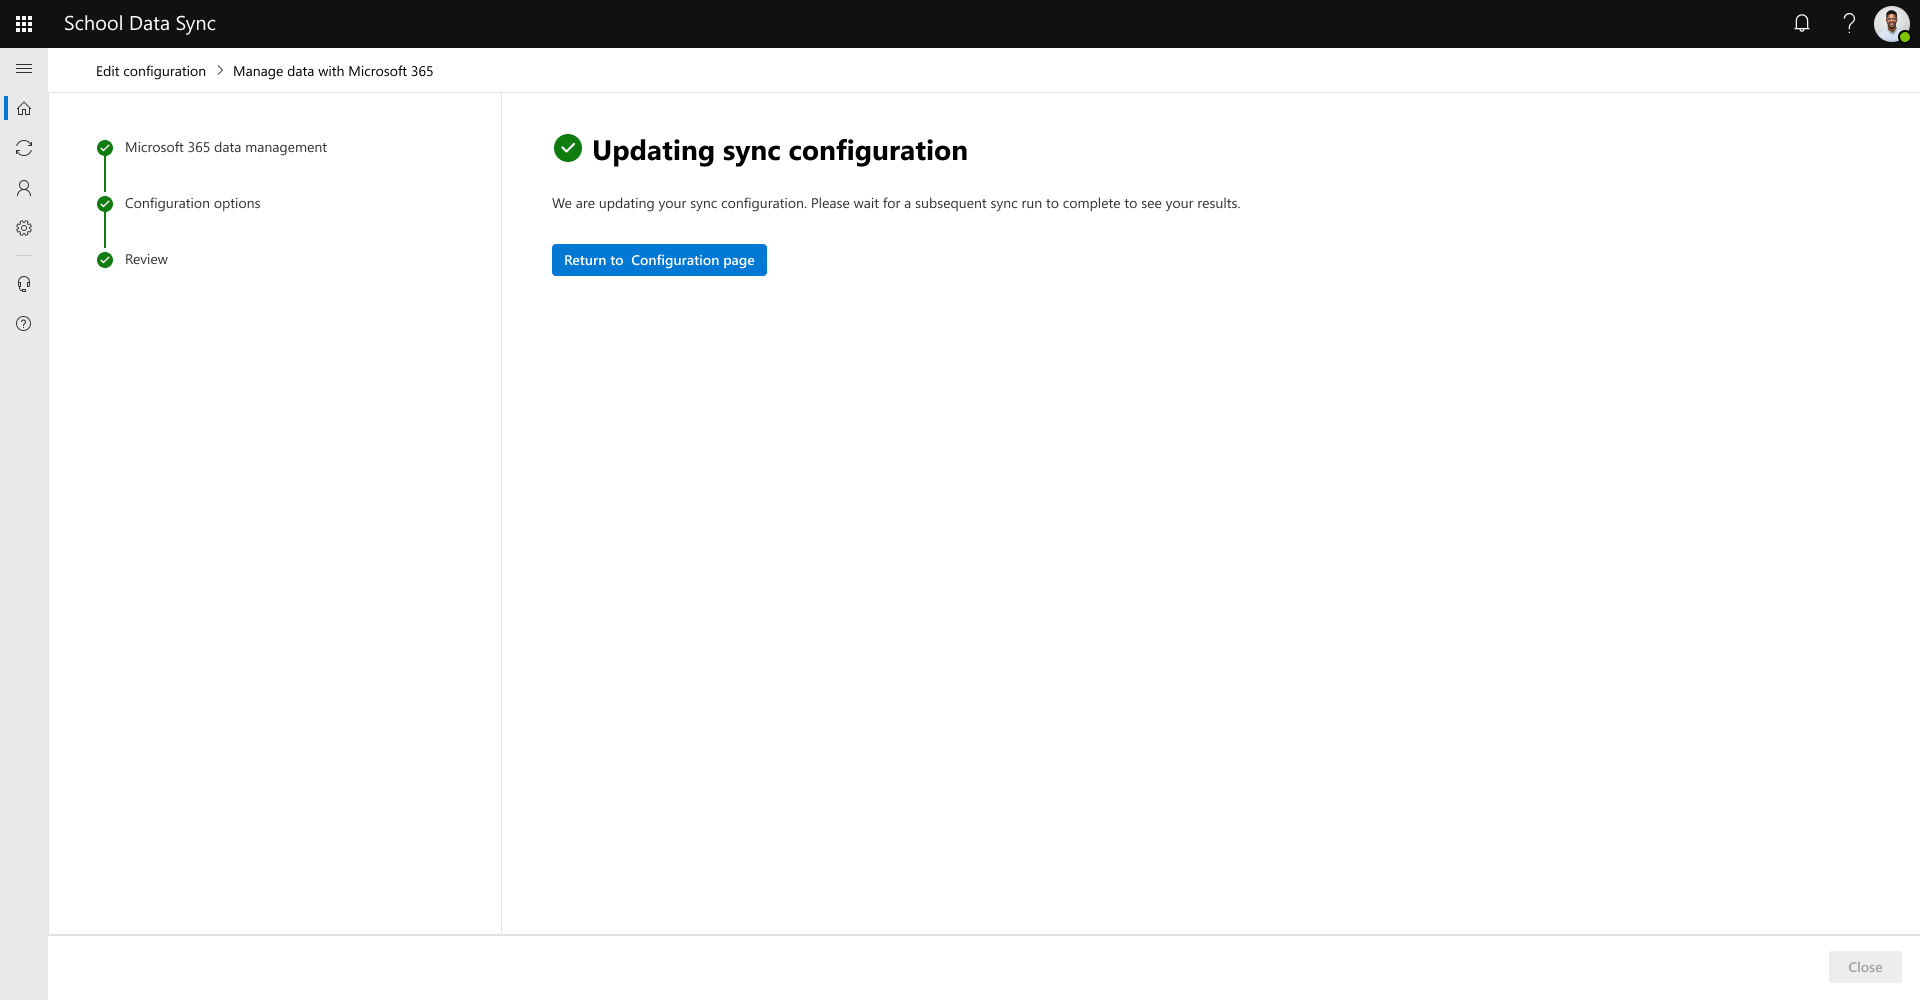
The request to update your sync configuration has been sent. Wait for a subsequent sync run to complete to see your results. Select Return to Dashboard.

After allowing time for the next run to complete, navigate back to the home page dashboard.


If there are no issues with your data, you see ‘No Data Errors or Warnings Found. We didn't encounter any data errors or warnings during your last sync. Keep up the great work!’
If there are issues found with your data, you see ‘We found some issues with your data. We recommend reviewing your sync health.' For more information, see Investigate sync health.
Edit Manage data configuration
Important
Unless called out, the interaction is the same experience encountered during the initial setup described previously when defining the configuration for the provision types on their corresponding screens.
Navigate to Sync | Configuration. By default, you are on Connected data. Select Managed data then select Edit provisioning settings.
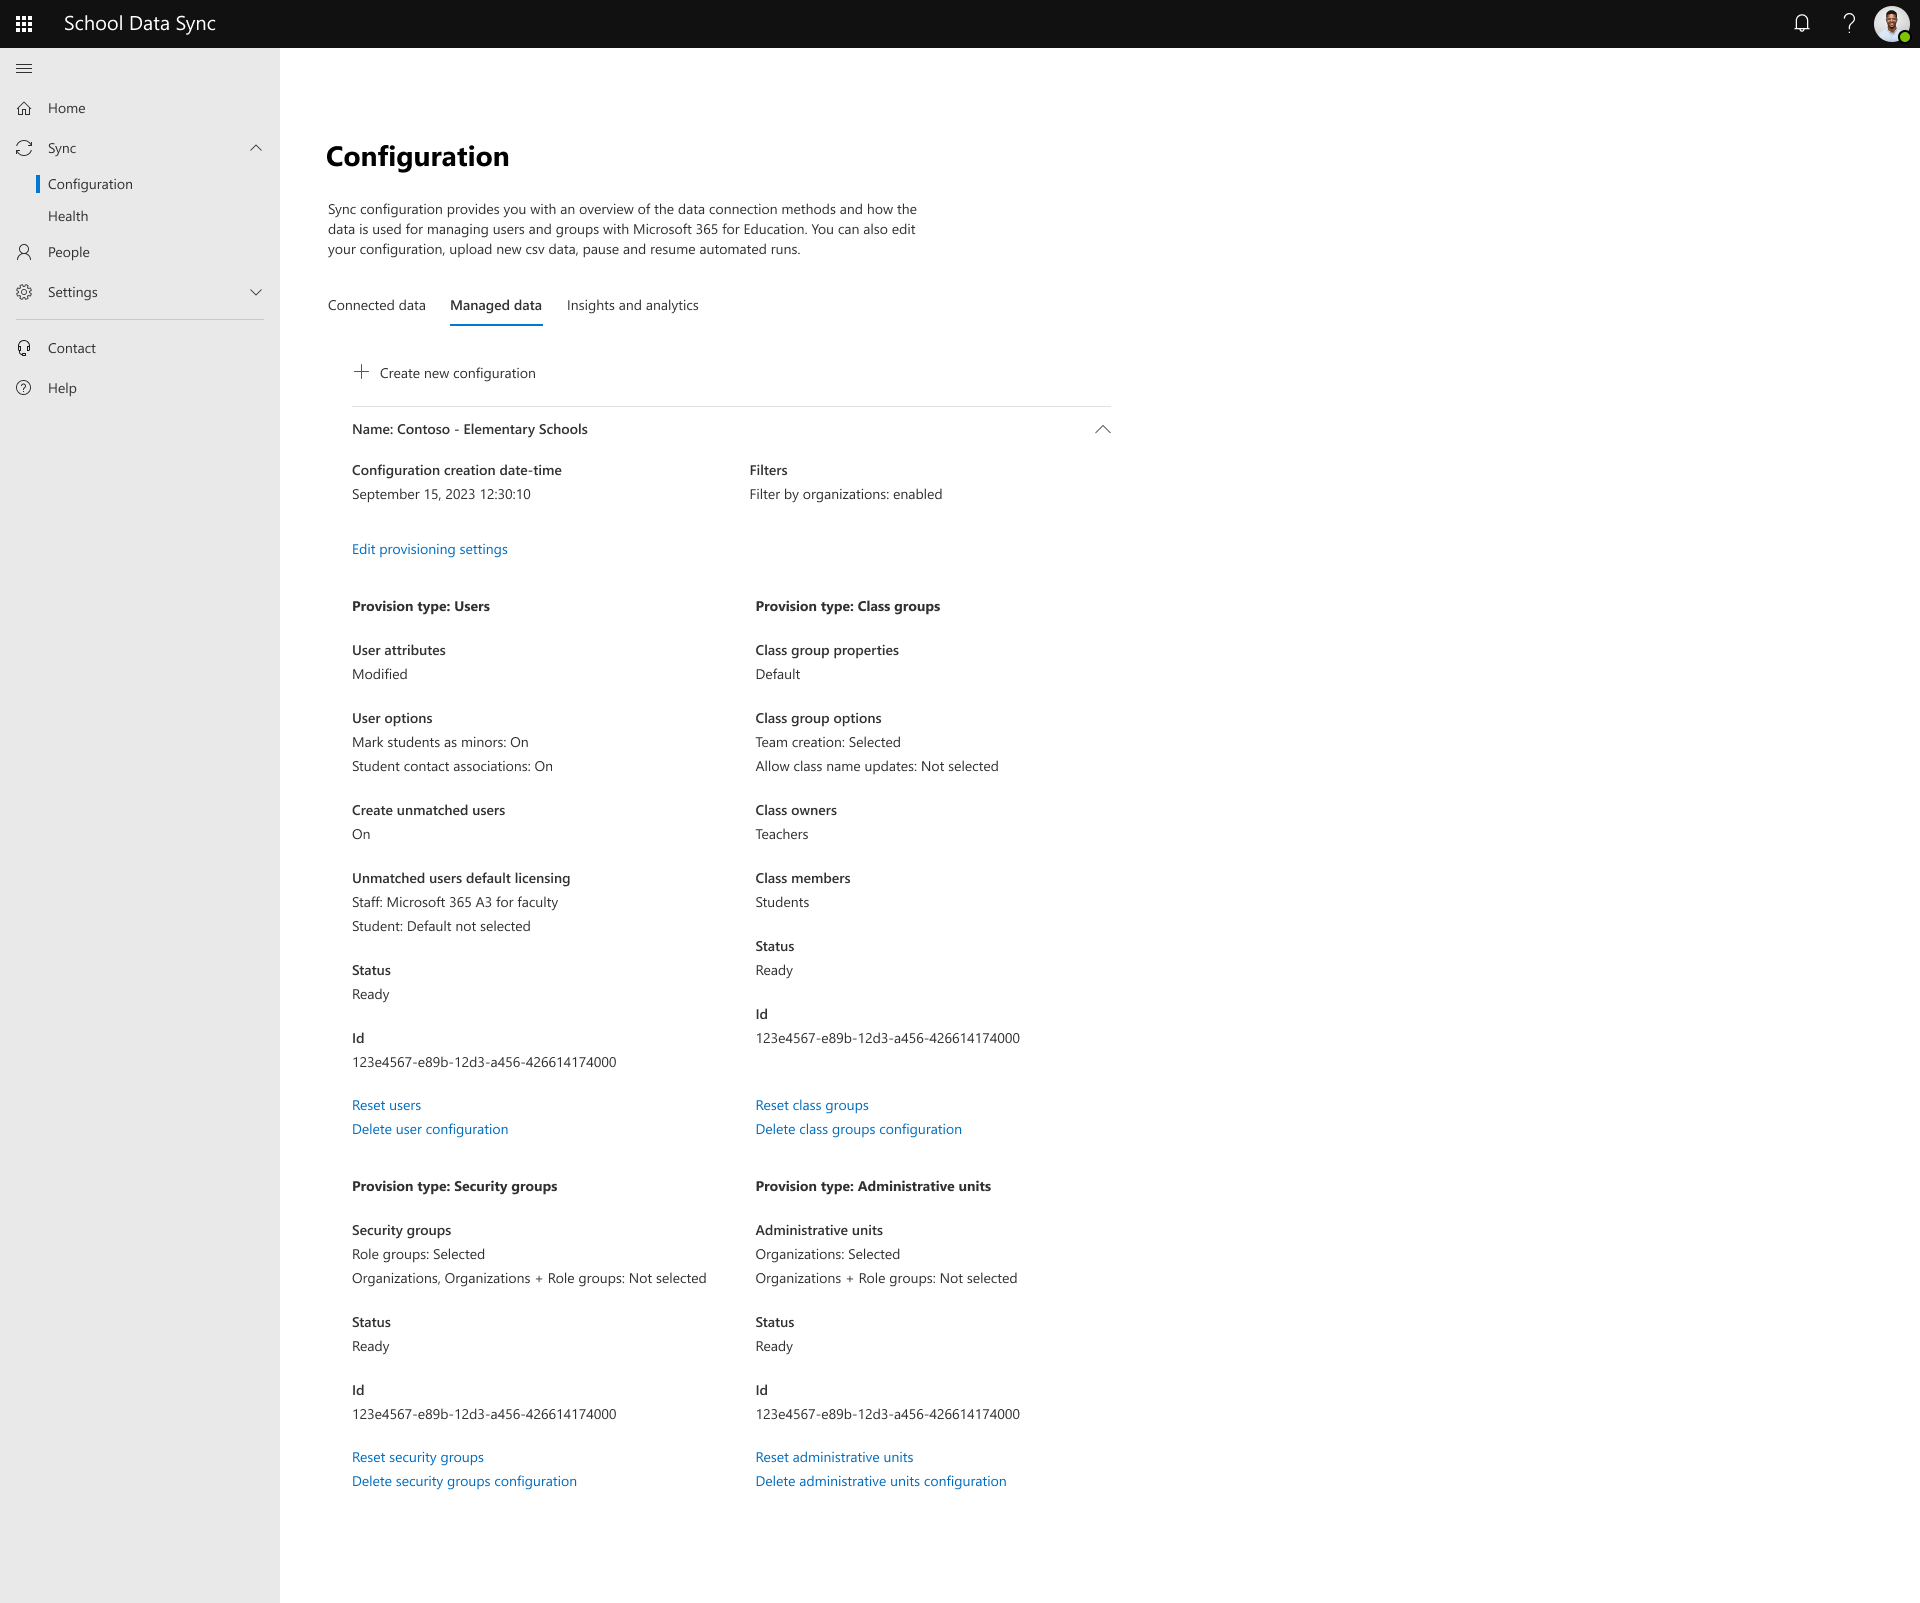
Next, review the Microsoft 365 provisioning options. After reviewing or updating your options, select Next to continue.
- Provision types that are active with the current configuration are shown as selected but disabled. If you wish to remove the provision type from the configuration, follow the steps under Delete a Managed data configuration.
- While you're progressing through the subsequent screens, the existing selections for the provision types are reflected for review and updates.
- Provision types that aren't active with the current configuration are shown as deselected and are enabled for selection.
- While you're progressing through the subsequent screens, the newly selected provision types corresponding screens are added with initial defaults selected for review and updates.
- Provision types that are active with the current configuration are shown as selected but disabled. If you wish to remove the provision type from the configuration, follow the steps under Delete a Managed data configuration.
Next, if your configuration was to Filter by organizations you review the configuration for Filter: organizations. After reviewing or updating your configuration, select Next to continue.
Warning
If you deselect an organization after a previous run, it will remove user's Admin Units, Security Groups, and Class Groups membership data in Entra ID, which was previously managed before updating this filter criteria. It's not advisable to do this during active academic sessions if this data is currently in use. Any changes made will take effect after the next run.

Next you review the configuration for Manage user details. After reviewing or updating your configuration, select Next to continue.
Next, if you turned on the option to Create unmatched users, review the configuration for Manage user creation. After reviewing or updating your configuration, select Next to continue.
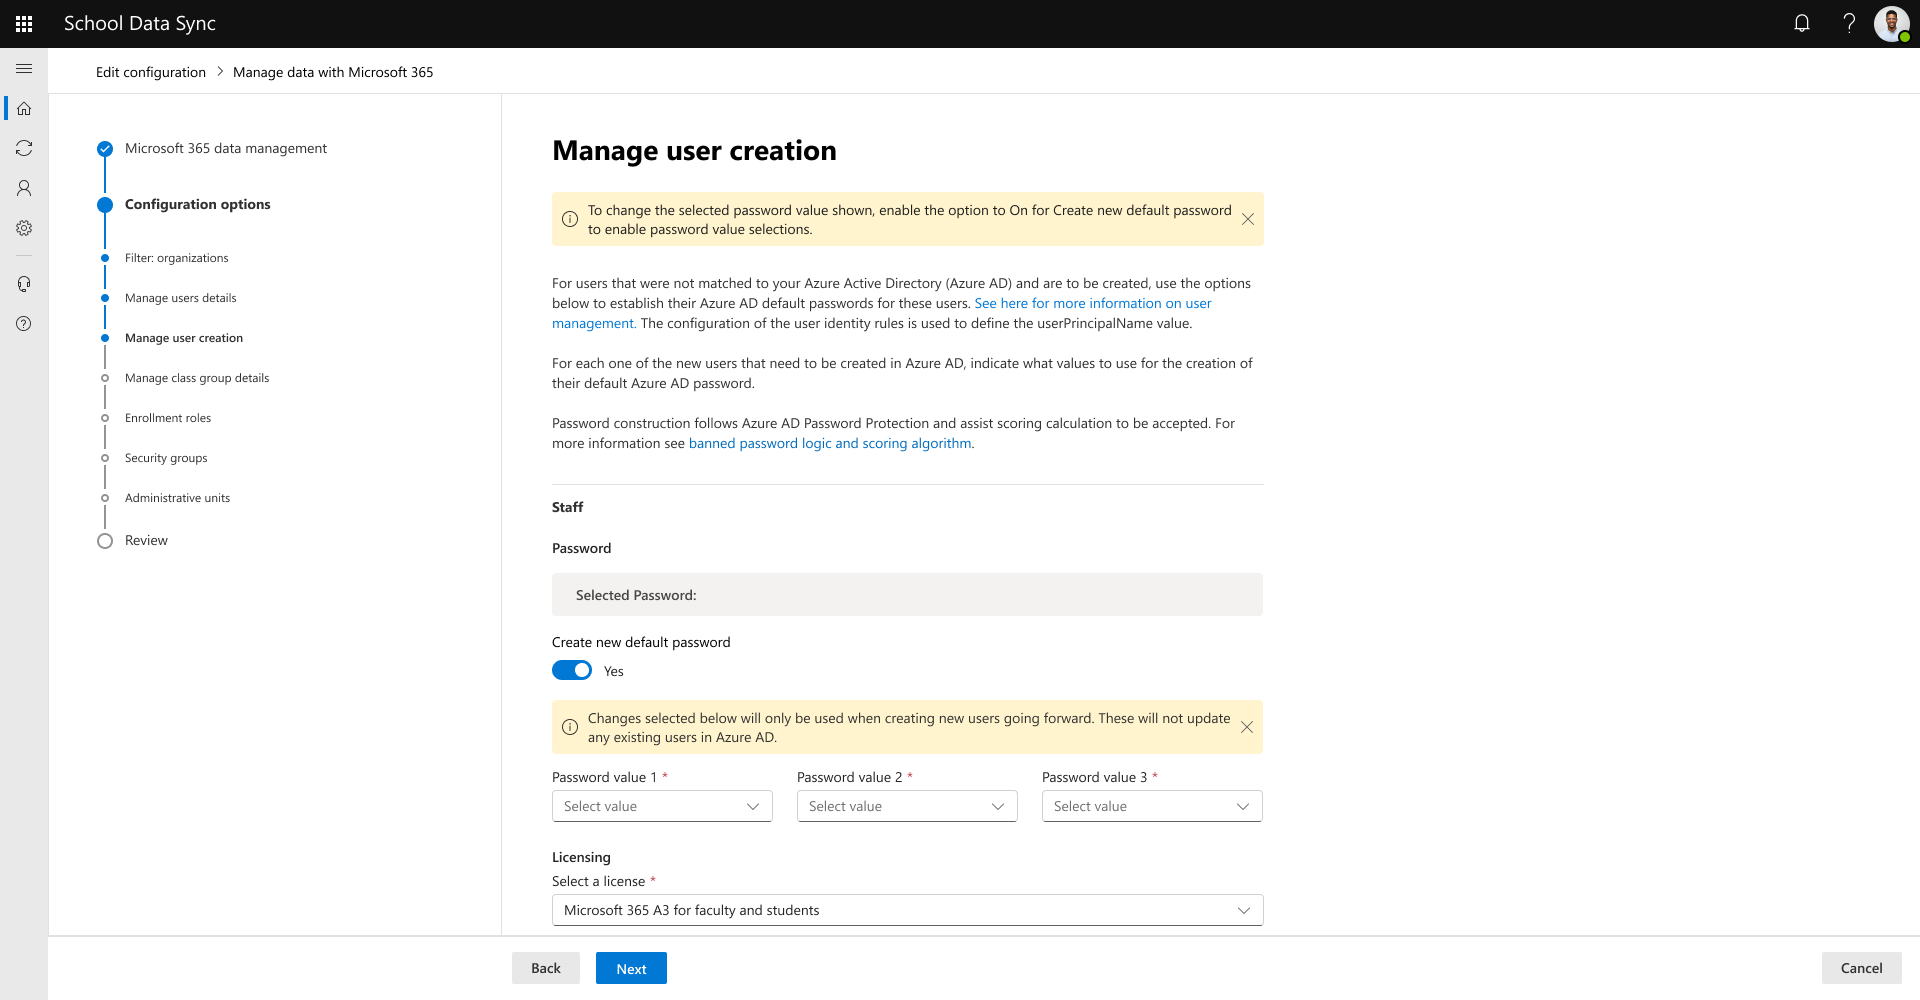
Previously set values are preserved unless setting the option to Create new default password is toggled to 'On'.
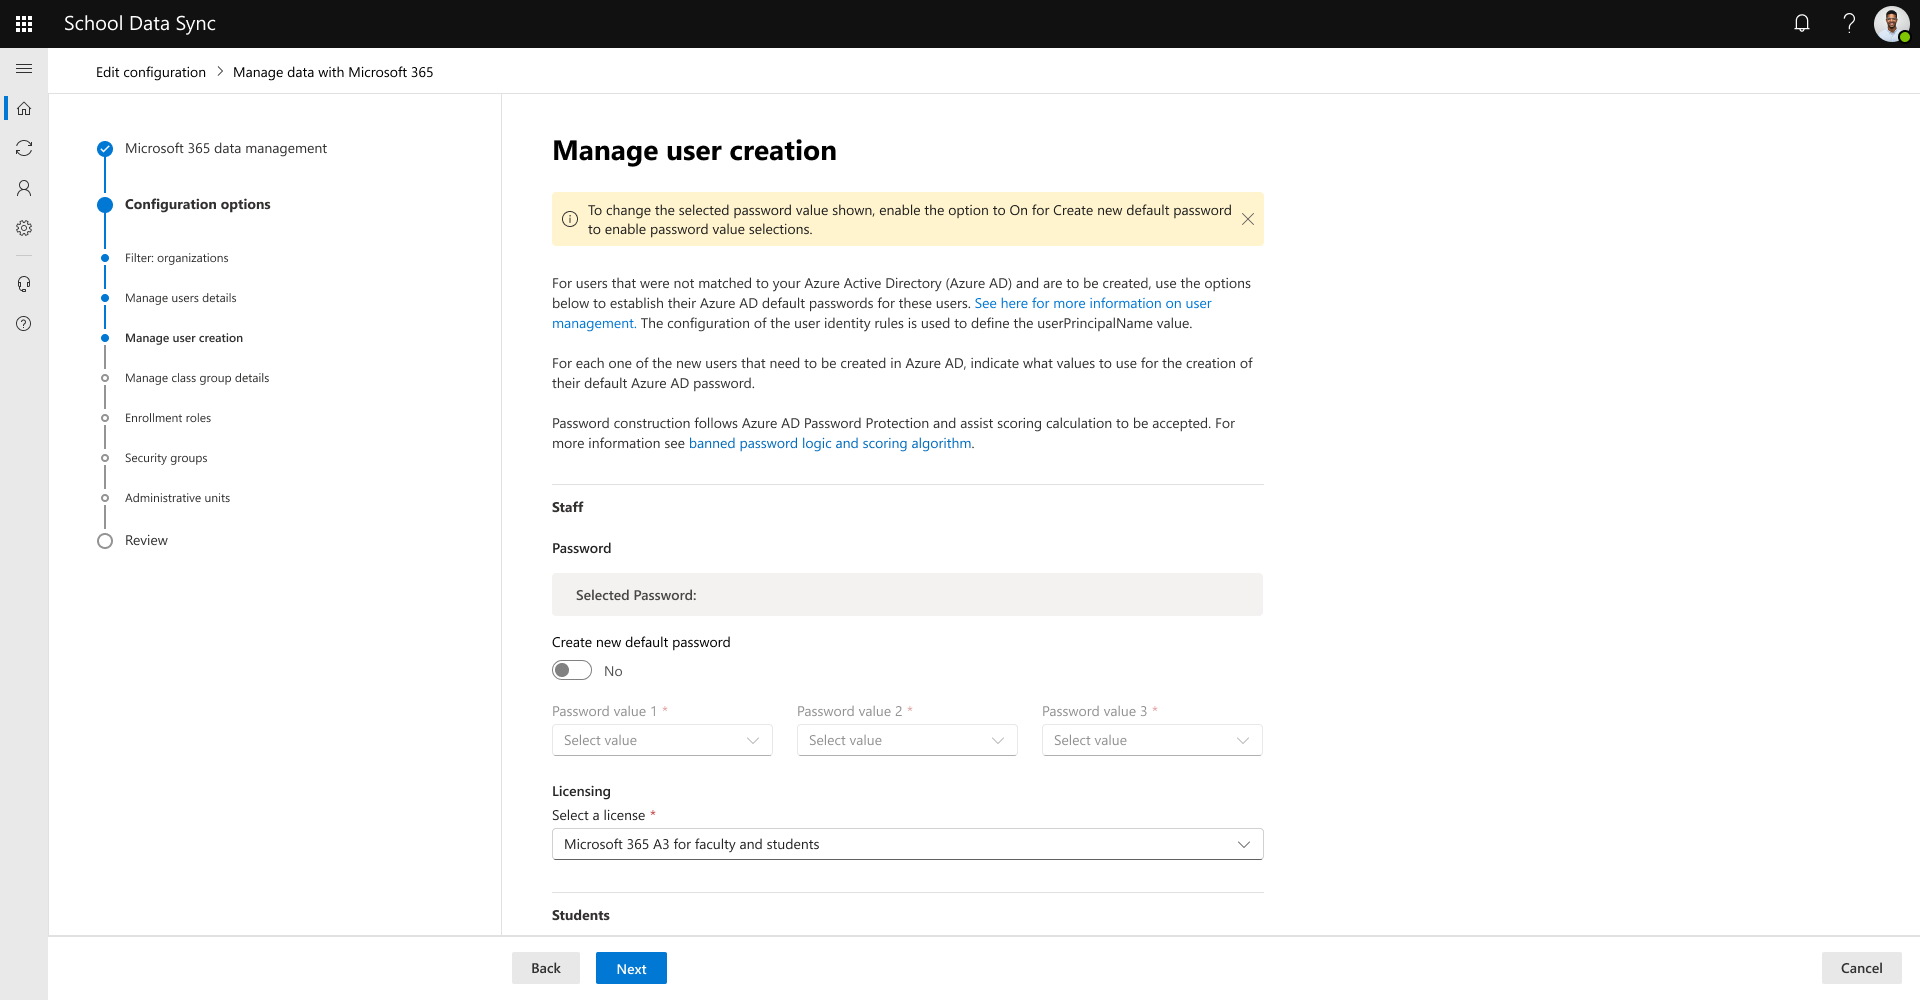
To construct a new Staff or Student default password, change option to Create new default password to On.
Important
Password and license changes selections will only be used when creating new users going forward and won't update any existing users in Microsoft Entra ID.
Next, if you selected the option for Class groups, review the configuration for Provision class group details. After reviewing or updating your configuration, select Next to continue.
Important
When editing, the changes for Provision class group details only impact new records. Existing records aren't affected.
Next, if you selected the option for Class groups, review the configuration for Enrollment roles. After reviewing or updating your configuration, select Next to continue.
Next, if you selected the option for Security groups, review the configuration for Security groups. After reviewing or updating your configuration, select Next to continue.
Caution
If deselecting a split group type, the next run will remove the users memberships but the Security Groups will remain.
Next, if you selected the option for Administrative units, review the configuration for Administrative units. After reviewing or updating your configuration, select Next to continue.
Caution
If deselecting a split group type, the next run will remove the users memberships but the Administrative Units will remain.
Look over the information presented on Review. If everything looks correct, select Submit. If not, navigate back to update your configuration selections.
The request to update your sync configuration has been sent. Wait for a subsequent sync run to complete to see your results. Select Return to Configuration.


Delete a Managed data provision type configuration
Important
Deleting an provision type configuration will stop any new writing and updating of the data into Microsoft Entra ID based on the configurations defined for the selected provision type. This won't remove the data that was previously managed by the provision type.
Navigate to Sync | Configuration. By default, you are on Connected data. Select Managed data.

Navigate to the section for the provision type configuration you wish to delete. Select Delete configuration.
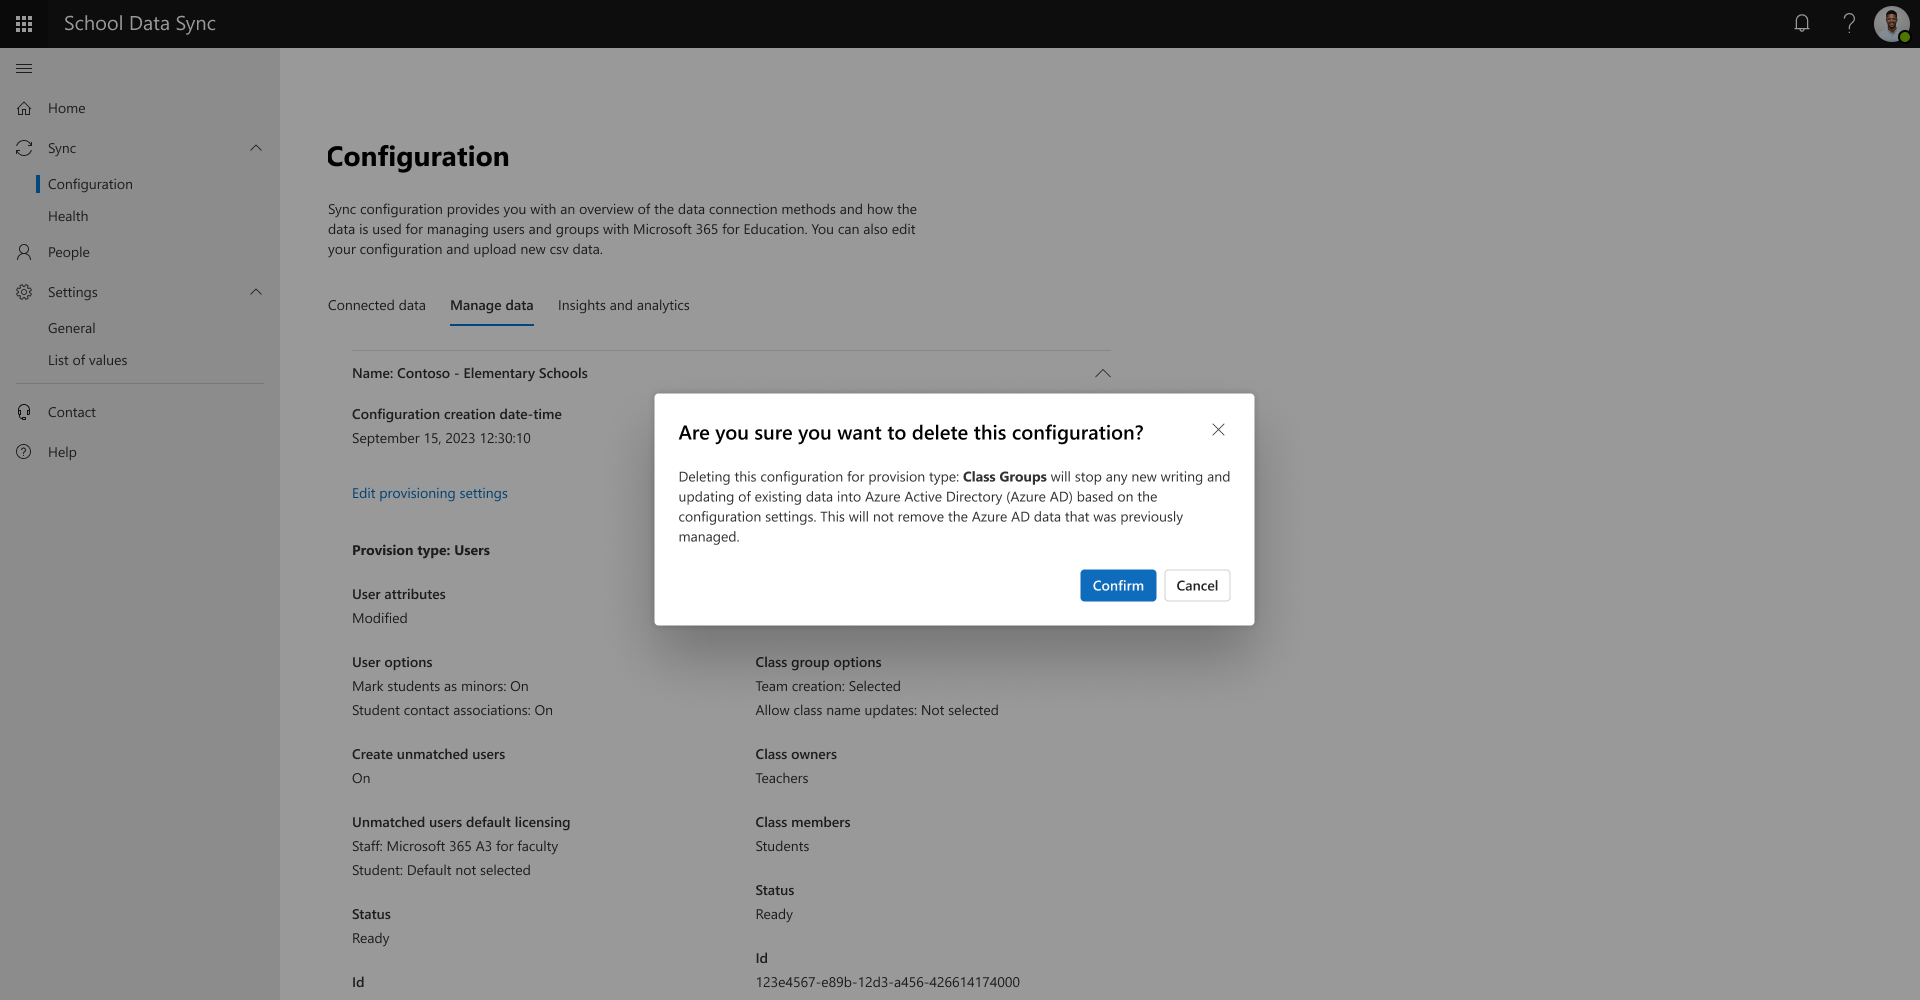
A dialog message appears to confirm that you're sure you want to delete the selected provision type configuration. Select Confirm to continue with deleting the selected provision type configuration. Select Cancel if you don't want to delete the selected provision type configuration.
Caution
Once Confirm is selected the request can not be stopped. Additionally the action can not be reversed. You will need to select Edit provisioning settings to redefine the configuration for the deleted provision type.


Reset a Managed data provision type configuration
Caution
Don't press Reset without thinking about it carefully as there are instances where it may cause more issues than it will fix.
What is Reset
Reset is a request to make a change on the back end to clear out delta file used when processing data between the Education Data Lake and Microsoft Entra ID. Reset doesn't remove any information that already exists or what was previously provisioned through SDS to Microsoft Entra ID. SDS appends to existing objects or creates new objects in Microsoft Entra ID.
After Reset is pressed, it will reprocess all the active source information for the active academic year in the subsequent sync run. The reset takes longer than a traditional sync run as it attempts to process everything line by line instead of looking at changes based on the prior delta file.
Note
The following scenarios are general and may not apply to all issues. Pressing Reset in an improper scenario may cause more issues than it can solve. If you're unsure about pressing Reset, please reach out to your Deployment Manager or submit a ticket to SDS Support.
What issues does Reset help with?
In general, there are two types of issues that Reset should normally resolve.
- Microsoft 365 provisioning errors that have previously been resolved but are still showing in the customer download report.
- Sections / Classes that have been manually deleted, or students that have been manually removed from classes.
Example Scenario: Previously resolved errors still in error log
It's not uncommon when syncing information from a SIS/SMS to have several sections / classes synced that may never be used, possibly a class for Lunch or Study Hall. You decide to remove those sections / classes to limit the information brought across and you're getting errors for those sections / classes not having a teacher referenced to it. After this change is done, you either upload the revised CSV files, or wait for the changes to take place if using an API.
When the following run occurs, you now get errors saying that the section/class can’t be removed, which may not make sense as you've removed it. The error is in response to the run attempting to use the last synced information, from the delta file, and compare it against the most recent run.
After pressing Reset class groups and the information is reprocessed, these errors should be removed from being raised from the Class groups provision type.
Example Scenario: Section / Class was unintentionally deleted
After you have transitioned from one academic year to another, some sections / classes may have an identical name. The identical names tend to confuse some teachers into thinking their new sections / classes were old ones, so they decided to delete them.
These sections / classes now need to be recreated and populated with students. SDS won't identify any changes as they're compared against the last synced information, between the Education Data Lake and the delta file used when processing data for the Class groups provision type to Microsoft Entra ID.
To recreate these sections / classes so are managed by SDS, you should press Reset Class groups, which reprocess all the active information that is provided by the connected data from your SIS/SMS.
The reset recreates the sections / classes and readds students to classes.
If a teacher has manually removed student prior to the reset but the SIS/SMS doesn't reflect the student is no longer part of that section/class when the connected data retrieves the latest information, the reset adds the student back.
Note
This will create a new section/class with the same properties and roster as the course that was deleted, based on the latest information provided and processed by the inbound flow from the SIS/SMS. It will NOT restore the section/class from the deleted state. To restore a deleted section/class (Microsoft Entra group), please follow the documentation on how to Restore a deleted Office 365 group in Microsoft Entra ID.
Rest a provision type
Navigate to Sync | Configuration. By default, you are on Connected data. Select Managed data.

Navigate to the section for the provision type configuration you wish to reset. Select Reset.
A dialog message appears to confirm that you're sure you want to reset the selected provision type. Select Confirm to continue with reset the selected provision type. Select Cancel if you don't want to reset the selected provision type.
Caution
Once Confirm is selected the request can not be stopped. Additionally the action can not be reversed.


Delete configuration section
To remove an entire provisioning configuration section, you need to delete all the provisioning configurations independently first. After you have deleted them, you can delete the remaining configuration section.
Navigate to Sync | Configuration. By default, you are on Connected data. Select Managed data.
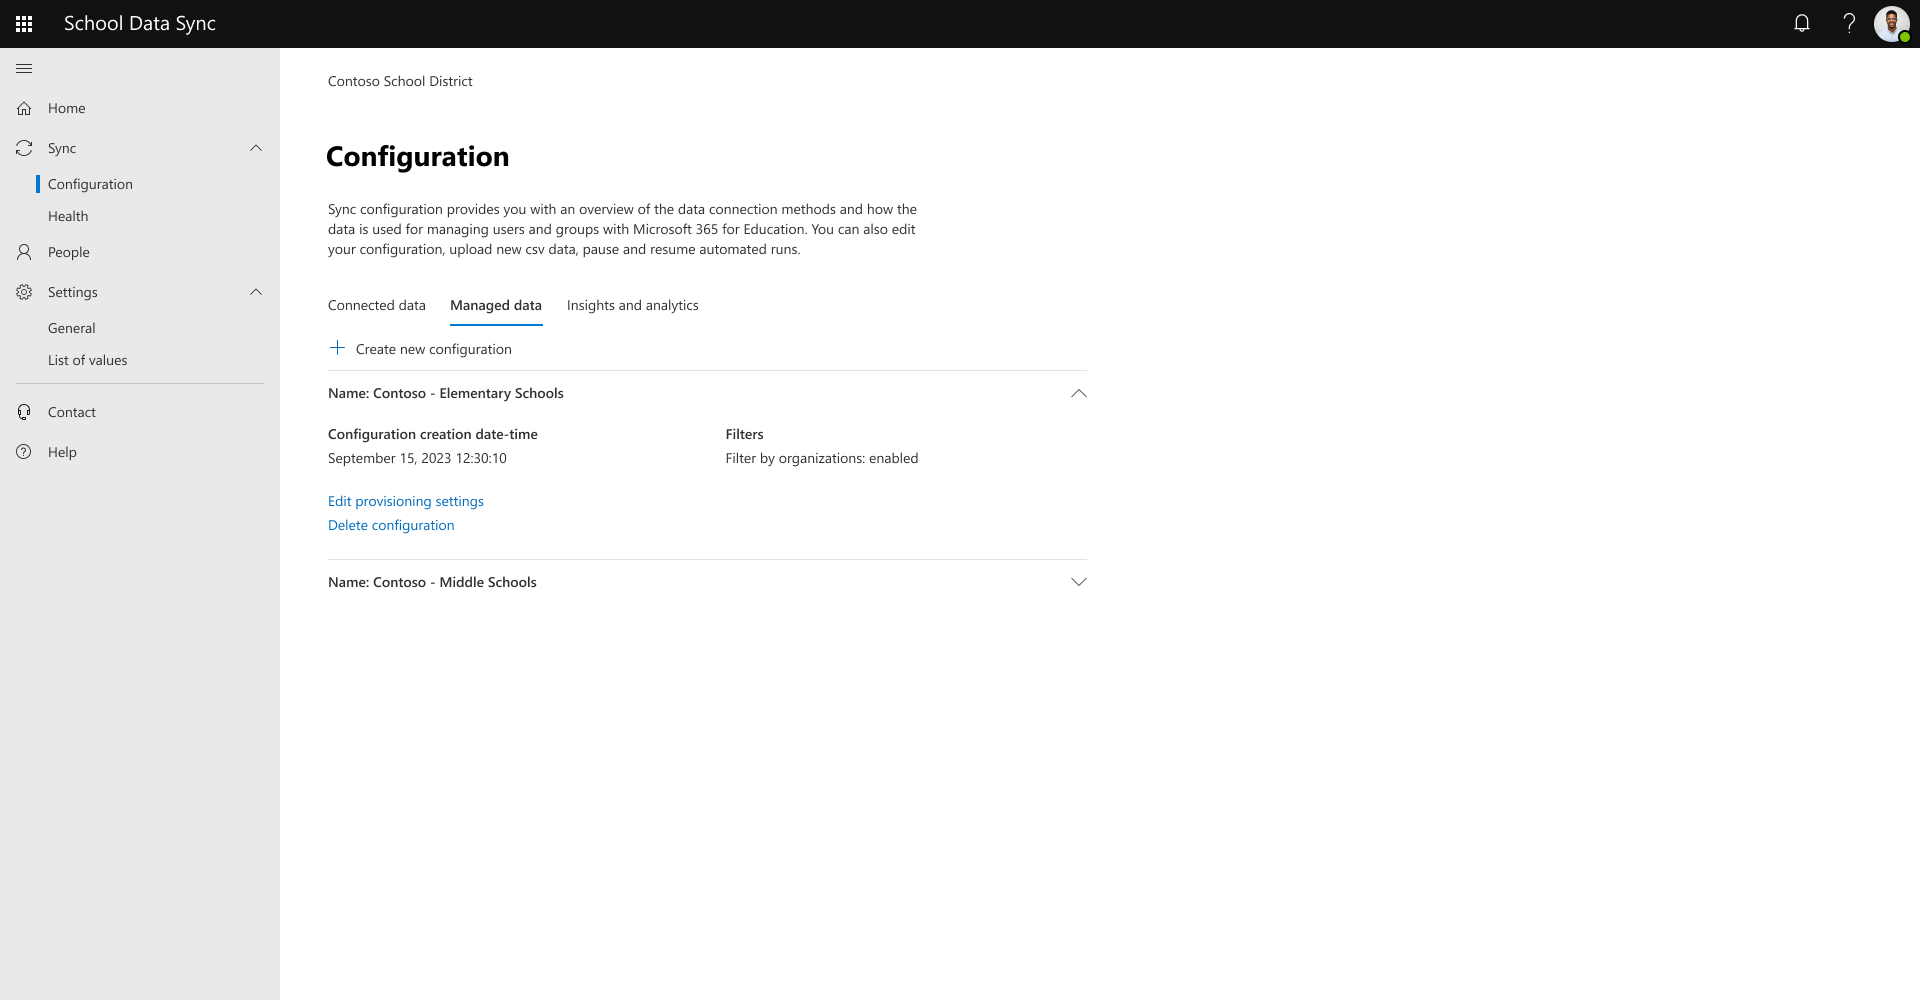
Navigate to the section for the provision type configuration you wish to delete. Select Delete configuration.
A dialog message appears to confirm that you're sure you want to delete the selected configuration. Select Confirm to continue with deleting the selected configuration. Select Cancel if you don't want to delete the selected configuration.
Caution
Once Confirm is selected the request can not be stopped. Additionally the action can not be reversed.


