Note
Access to this page requires authorization. You can try signing in or changing directories.
Access to this page requires authorization. You can try changing directories.
Note
- Display ads are available in all Microsoft Advertising markets, with the exception of Bahamas, China, Egypt, Paraguay, and Venezuela.
- See Create Display ads using HTML5 to learn more about creating Display ads with HTML5.
- See Update your Display ad size for information about updating your Display ad size.
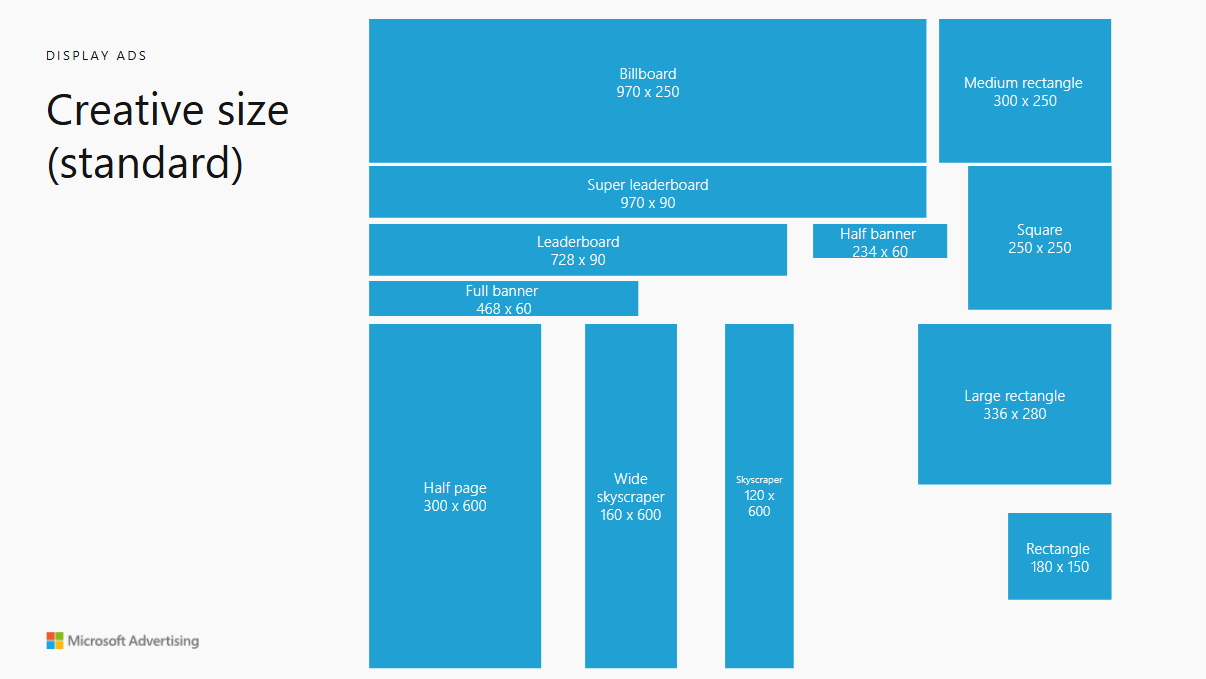
Display ads are designed to showcase your brand with eye-catching, customized image ads. These ads offer a variety of cross-device display placements for you to choose from, including banner, billboard, and half-page. You determine exactly how you want your images to appear in these placements, which allows you greater creative control over your brand's presentation and messaging. You may also choose to add our AI-generated creatives to your Display ads to save time during ad creation. Our AI pulls text and images from your Final URL to generate relevant, eye-catching creatives.
Display ads serve in Audience campaigns, helping you engage your ideal audience by leveraging Microsoft AI's unique data about potential customers. Microsoft Advertising uses search and consumer intent signals to show highly relevant Display ads to potential customers who have demonstrated interest in your product or service, including those who are ready to buy.
You can also connect your Display ads to third-party measurement partners to collect performance metrics. This data can help you optimize your ads with high-performing images and improve low-performing images.
Here are examples of what your Display ads could look like:
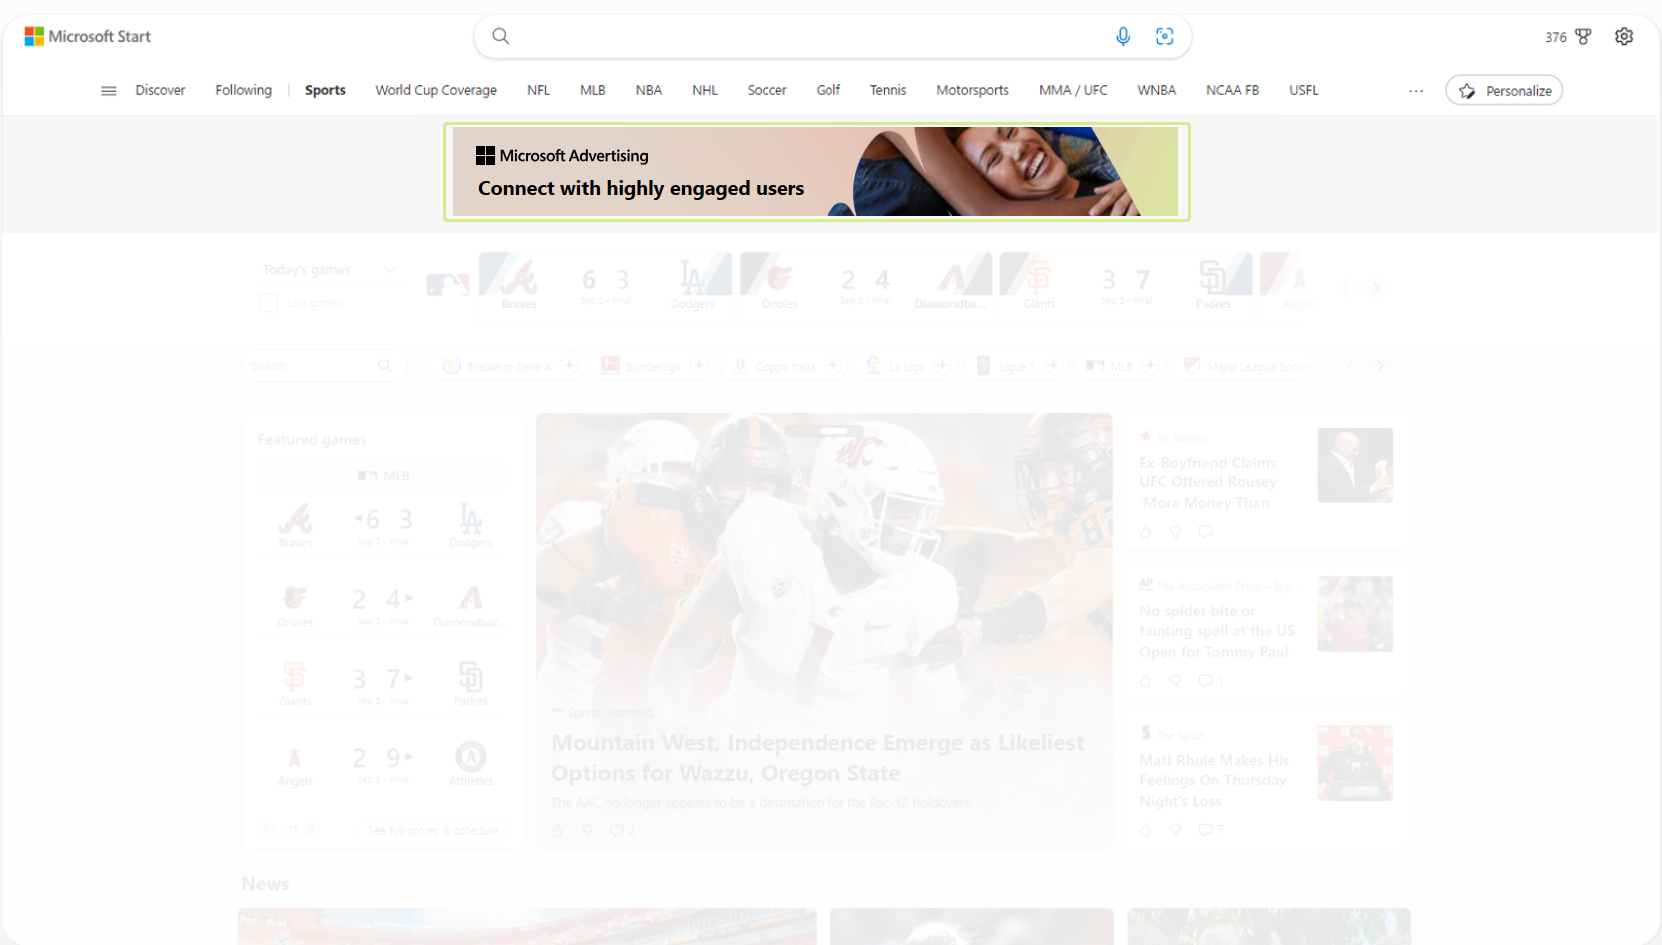
Leaderboard display placement
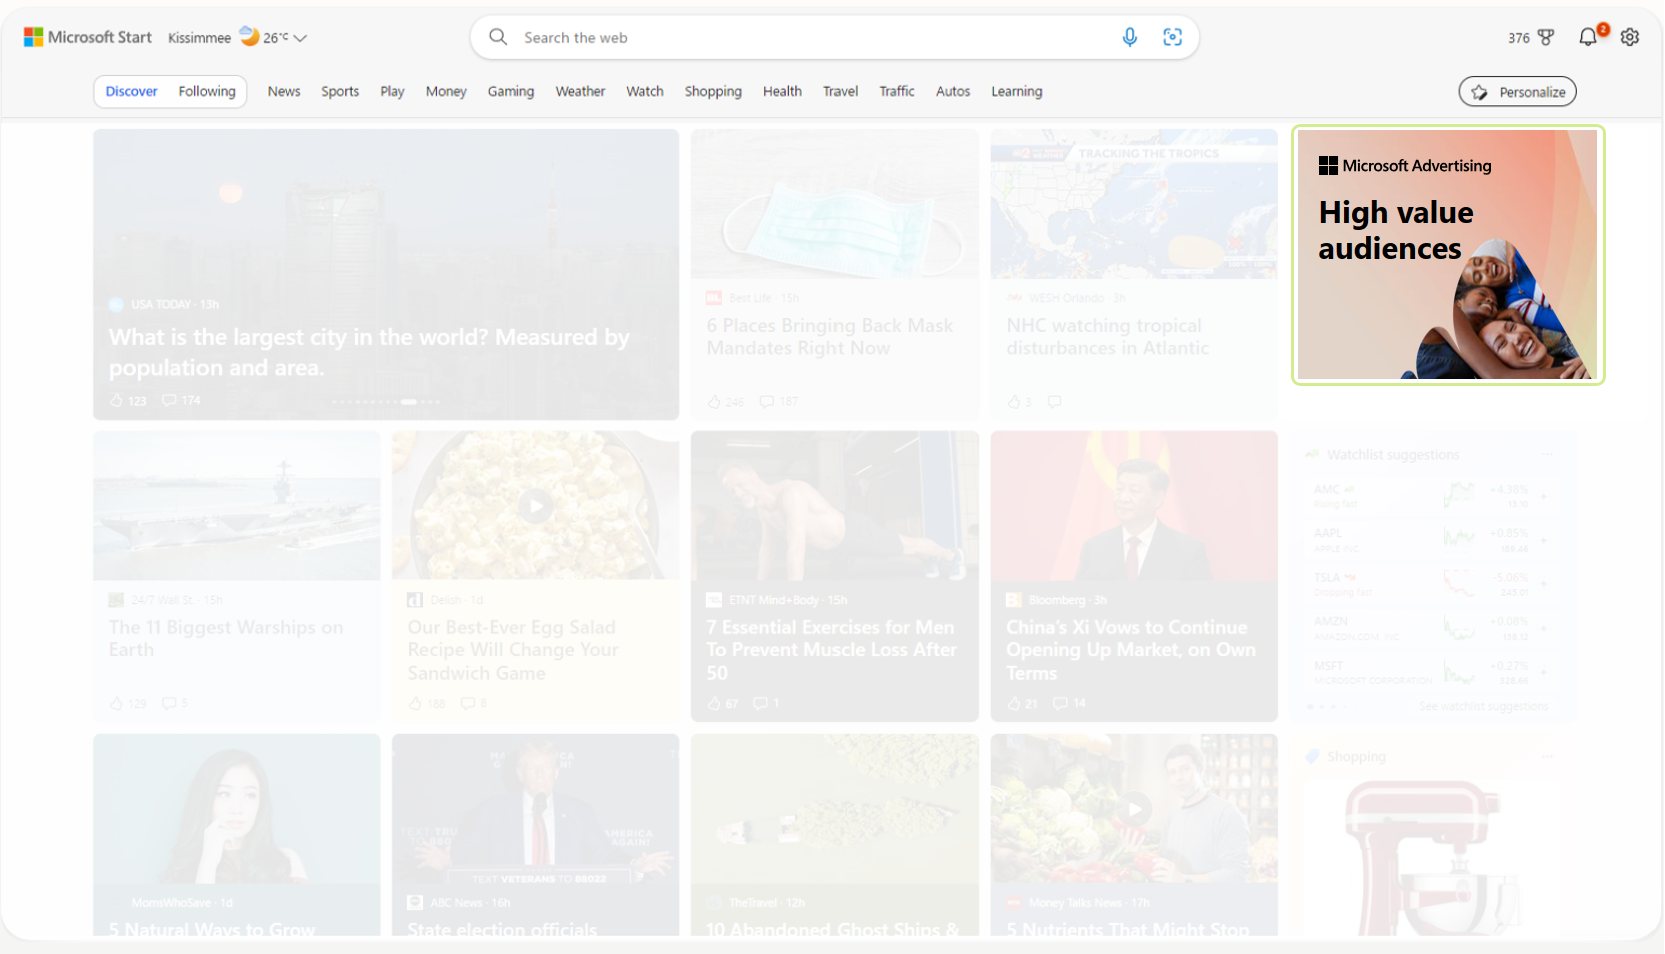
Medium rectangle display placement
The benefits of using Display ads
- Build brand awareness. Captivate your audience and grow your brand with compelling image-based ads on sites such as MSN, Microsoft Start, Microsoft Edge, Outlook.com, and more.
- Control your brand's message. You can upload and fine-tune exactly how you want your images to appear in your ads. This offers you more creative control over how your brand is presented.
- Reach your target audience to deliver results. Engage potential customers in the right place at the right time using Microsoft AI's audience intelligence and targeting capabilities.
Create a Display ad in an existing campaign
To create Display ads in an existing Audience campaign, follow the instructions below. To create a new Audience campaign with Display ads, see How do I create an Audience campaign?
From the navigation menu on the left, hover over Campaigns and select Ads & extensions > Ads.
Select Create, and then select an ad group.
For your ad type, select Display.
Enter the Final URL.
Below Creative, add images and choose one or more images for your ad.
(Optional) You can also choose to add our autogenerated Recommended creatives to your Display ads.
If you chose to add Recommended creatives:
- Once you select a creative, you can choose the display placements where you want it to serve. Select the arrows on either side of the Ad preview area to scroll through the different possible placements.
- Select the pencil icon to edit your creatives. When editing your creatives, you can adjust the Text, Call to action, and Image. You can also change the Background color of the ad's banner and the color of your text. You can replace the image by choosing from the Recommended images or adding an image from the Ads Studio.
- Select Apply when you're finished editing the creative.
Below Size, choose which display placement you'd like your ad to serve in.
Note
We recommend you choose sizes that are eligible to serve on Microsoft sites. This helps guarantee volume and coverage for all placements on Microsoft sites.
Optionally, under Advanced settings, you can apply Advanced URL options to set up the tracking and redirect information for your ads. Learn more about including tracking templates or URL parameters in your final URL.
Optionally, set up your Impression tracking URLs.
Optionally, enter your Tag URL under Third-party measurement and select Save.
Optionally, select Create another ad and choose either Create with AI or Use existing image.
Select Save.
Create Display ads using HTML5
Note
To access this feature, please reach out to your account manager if you meet our requirements.
Uploading an HTML5 ZIP file allows your Display ads to become animated with interactive elements. Review our HTML5 guidelines and best practices before uploading your ZIP file to ensure that it's validated.
Account requirements to access HTML5
Your account manager can request access to this feature if your account:
- Has been open more than 90 days.
- Has spent more than $1000 (or local equivalent) in Microsoft Advertising and has had a consistent spend of $100 or more per month in the last three months.
Create ad in an existing campaign
To create Display ads with HTML5 in an existing Audience campaign, follow the instructions below. To create a new Audience campaign with Display ads that use HTML5, see How do I create an Audience campaign?
From the navigation menu on the left, hover over Campaigns and select Ads & extensions > Ads.
Select Create, and then select an ad group.
For your ad type, select Display.
Enter the Final URL.
Below HTML5, add an HTML5 ZIP file.
Note
If you upload a new HTML5 ZIP file, check to see whether we validated and accepted the file. If not, review the error messages to fix any issues.
Optionally, under Advanced settings, you can apply Advanced URL options to set up the tracking and redirect information for your ads. Learn more about including tracking templates or URL parameters in your final URL.
Optionally, set up your Impression tracking URLs.
Optionally, enter your Tag URL under Third-party measurement and select Save.
Optionally, select Create another ad.
Select Save.
HTML5 guidelines and best practices
Quick checklist
- Upload a single ZIP file.
- Your ZIP file should contain one HTML5 file and assets needed for your ad (up to 40 files total).
- Your ZIP file must contain an index.html file that resides at its root and not in a subfolder.
- The maximum size for your ZIP file is 600 KB.
- We support these file types: HTML, CSS, JS, GIF, PNG, JPG, JPEG, and SVG.
- The maximum folder nesting within your ZIP file is five levels.
- Use only relative paths to local files inside the ZIP file.
- Include the Microsoft Advertising SDK and wire click tracking.
- Code elements in your HTML5 file cannot make requests to external libraries or ad servers.
- No popups, auto-clicking, or auto-redirects.
Packaging your ZIP file
- Compress all assets into a single ZIP file.
- Include exactly one HTML file (recommended name: index.html).
- Optimize images (use supported file extensions and compress images).
- Minimize use of CSS and JS.
- Do not include source maps, design files, or unused assets.
- Avoid deeply nested directories.
- Use system fonts, convert text to SVG, or rasterize text in images if needed.
HTML requirements
If your HTML5 ad does not need any special click area, simply uploading the HTML5 will work and the customer can select the entire ad.
If you want a specific part of the ad to be clickable, your HTML must load the Microsoft Advertising SDK and send click events through it. See the example below which shows you how to load the SDK and send click events.
Example:
<!doctype html>
<html lang="en">
<head>
<meta name="ad.size" content="width=300,height=250" />
<script src="https://adsdk.microsoft.com/h5-kit/client.js"></script>
</head>
<body>
<div id="ad-root">
<h1>Buy Contoso products and services</h1>
<div id="cta" class="btn">Shop now</div>
</div>
<script>
document.getElementById('cta').addEventListener('click', (e) => { e.stopPropagation(); MS_H5_KIT_CLIENT.sendClick(); });
</script>
</body>
</html>
Include the SDK
<script src="https://adsdk.microsoft.com/h5-kit/client.js"></script>Specify the size of your ad
<meta name="ad.size" content="width=300,height=250" />Specify the desired ad click area
<div id="cta" class="btn">Shop now</div>Call the SDK and send click events through it
<script><br>document.getElementById('cta').addEventListener('click', (e) => { e.stopPropagation(); MS_H5_KIT_CLIENT.sendClick(); });<br> </script>
Note
Do not open new windows/tabs or change location directly from click handlers. The SDK handles navigation.
Not allowed
- Code elements in your HTML5 file cannot make requests to external libraries or ad servers.
- Auto-redirects, auto-clicking, or other navigation without the customer selecting the ad.
- Popups, alert/confirm/prompt dialogs, or new windows without the customer selecting the ad.
- Unsupported file extensions or control characters in file names.
Best practices
- Keep animations smooth (limit loops and duration).
- Include accessible text where possible and add alt text for images.
- Test click tracking locally.
- Validate HTML and CSS and check browser for errors.
Update your Display ad size
- From the navigation menu on the left, hover over Campaigns and select Ads & extensions > Ads.
- Select the pencil
 next to your ad.
 - Below Size, update your ad to one of the appropriate sizes listed below.
- Select Save.
| Placements | Size (pixels) |
|---|---|
| Microsoft Edge browsers (included in targeted placements) |
- 300 x 250 (Medium rectangle) - 728 x 90 (Leaderboard) - 970 x 250 (Billboard) |
| Outlook (included in the Productivity targeted placement) |
- 160 x 600 (Wide skyscraper) - 300 x 600 (Half page) - 300 x 250 (Medium rectangle) - 728 x 90 (Leaderboard) |
| Microsoft Casual Games and MSN Games (included in the Gaming targeted placement) |
- 300 x 250 (Medium rectangle) - 300 x 600 (Half page) - 728 x 90 (Leaderboard) - 300 x 250 (Medium rectangle) |
| MSN (included in targeted placements) | - 300 x 250 (Medium rectangle) - 300 x 600 (Half page) - 728 x 90 (Leaderboard) - 970 x 250 (Billboard) |