Note
Access to this page requires authorization. You can try signing in or changing directories.
Access to this page requires authorization. You can try changing directories.
After you review the requirements, you can get started creating your document processing model.
Create your model with the wizard
You can create a document processing model by using the Create custom model wizard. The wizard guides you through the process of creating a model to extract information from documents.
Sign in to Power Apps or Power Automate.
On the left pane, select ... More > AI hub.
(Optional) To keep AI models permanently on the menu for easy access, select the pin icon next to AI hub.
Under Discover an AI capability, select AI models.
Select Extract custom information from documents.
Select Create custom model.
A step-by-step wizard walks you through the process by asking you to list all data you want to extract from your document.
Learn more in the Select the type of document section in this article.
If you want to create your model by using your own documents, make sure you have at least five examples that use the same layout. Otherwise, you can use sample data to create the model.
Select Train.
Test the model by selecting Quick test.
Select the type of document
On the Choose document type step, select the type of document you want to build an AI model to automate data extraction. There are three options: Fixed template documents, General documents, and Invoices.
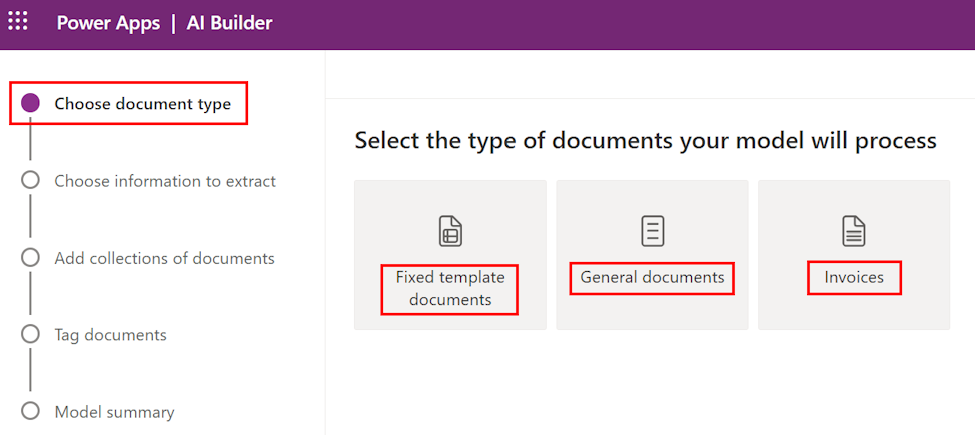
- Fixed template documents: Previously known as structured, this option is ideal when, for a given layout, the fields, tables, checkboxes, signatures, and other items can be found in similar places. You can teach this model to extract data from structured documents that have different layouts. This model has a quick training time.
- General documents: Previously known as unstructured, this option is ideal for any kind of documents, especially when there's no set structure, or when the format is complex. You can teach this model to extract data from structured or unstructured documents that have different layouts. This model is powerful, but has long training time.
- Invoices: Augment the behaviors of the prebuilt invoice processing model by adding new fields to be extracted in addition to the ones by default, or samples of documents not properly extracted.
Understand document intelligence versions
The document intelligence model is available in two versions: v4.0 and v3.1. The version of your model depends on when you last edited the model.
Document Intelligence v4.0 - General Availability (GA)
In addition to the features listed in this article, v4.0 retains all the capabilities of v3.1.
- Overlapping fields: v4.0 supports overlapping fields in custom models, which let you extract information more effectively from documents with complex layouts.
- Signature detection: v4.0 detects signatures in documents, which is especially useful for contracts, agreements, and other signed forms.
- Confidence scores for tables: v4.0 provides confidence scores for table and their cells.
- OCR engine improvements: v4.0 improves the optical character recognition (OCR) engine, enhancing text recognition accuracy and supporting more document types and formats.
Document Intelligence v3.1 General Availability (GA)
- v3.1 supports custom models trained to recognize specific data patterns, such as unique text fields or structures.
- v3.1 includes custom template models that let users create templates based on their document layout and structure.
Check the model version
You can verify the version used to train and publish your model. To do this, select Settings > Published model version > Last trained model version.
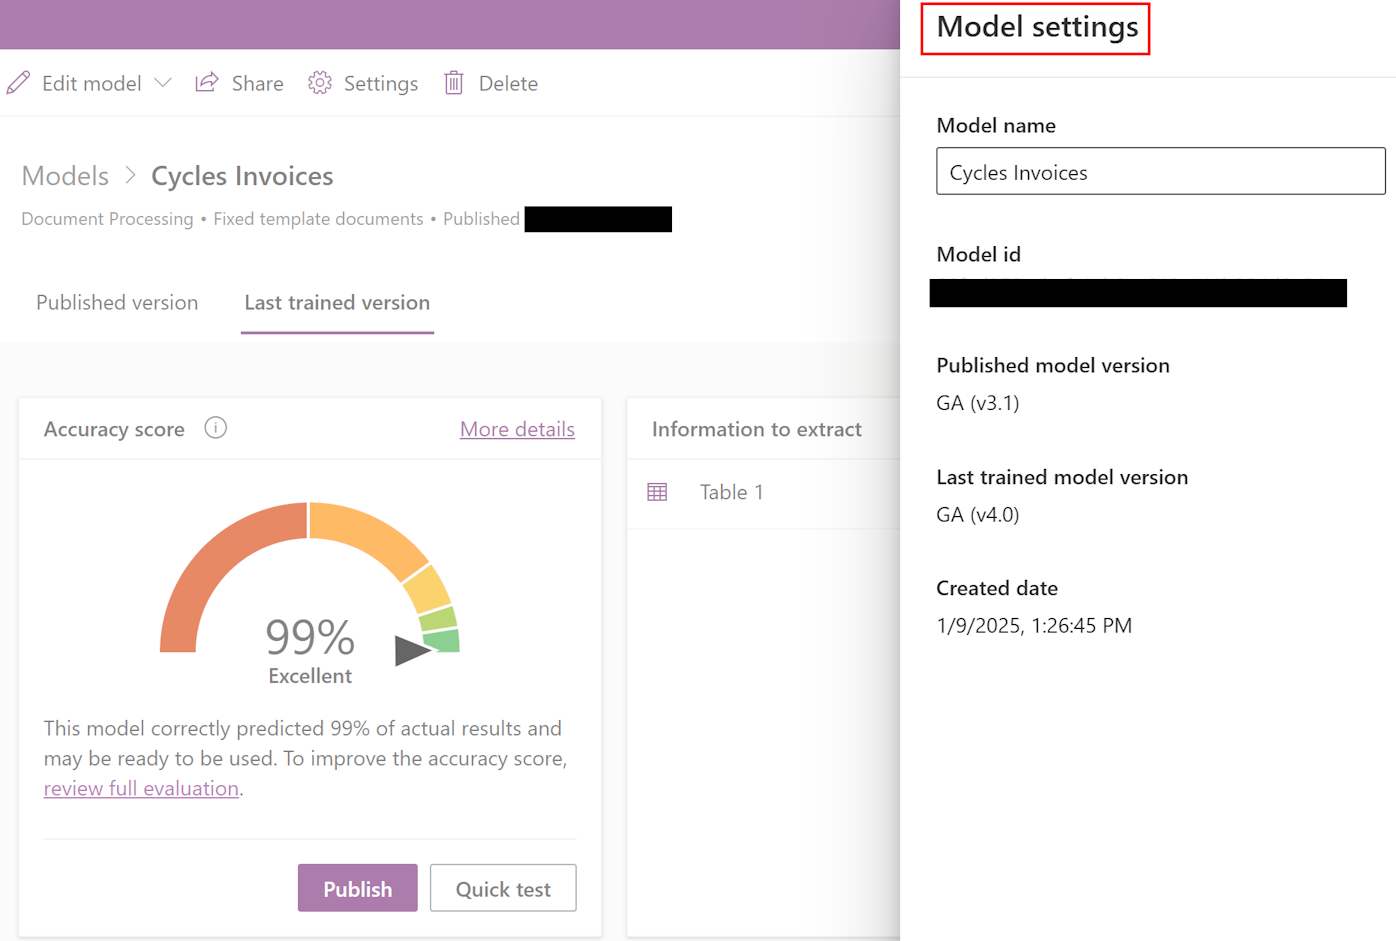
You can move a model from v3.1 to v4.0 by editing, retraining, and publishing it. Re-tagging and other specific modification aren't necessary. Learn more in FAQ for document processing.
Define information to extract
On the Choose information to extract screen, define the fields, tables, and checkboxes you want to teach your model to extract. To start defining these, select +Add.
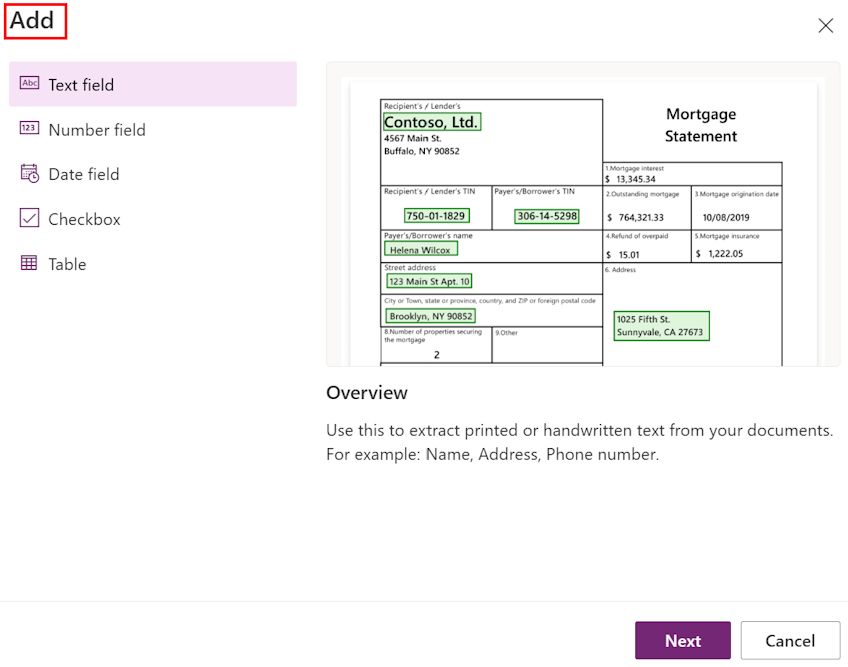
For each text field, provide a name for the field to use in the model.
For each number field, provide a name for the field to use in the model.
Define the format dot (.) or comma (,) as a decimal separator.
For each Date field, provide a name for the field to use in the model.
Also, define the format (Year, Month, Day), or (Monthly, Day, Year), or (Day, Month, Year).
For each checkbox, provide a name for the checkbox to use in the model.
Define separate checkboxes for each item that can be checked in a document.
For each table, provide the name for the table.
Define the different columns that the model should extract.
Note
The custom invoices model comes with default fields that can't be edited.
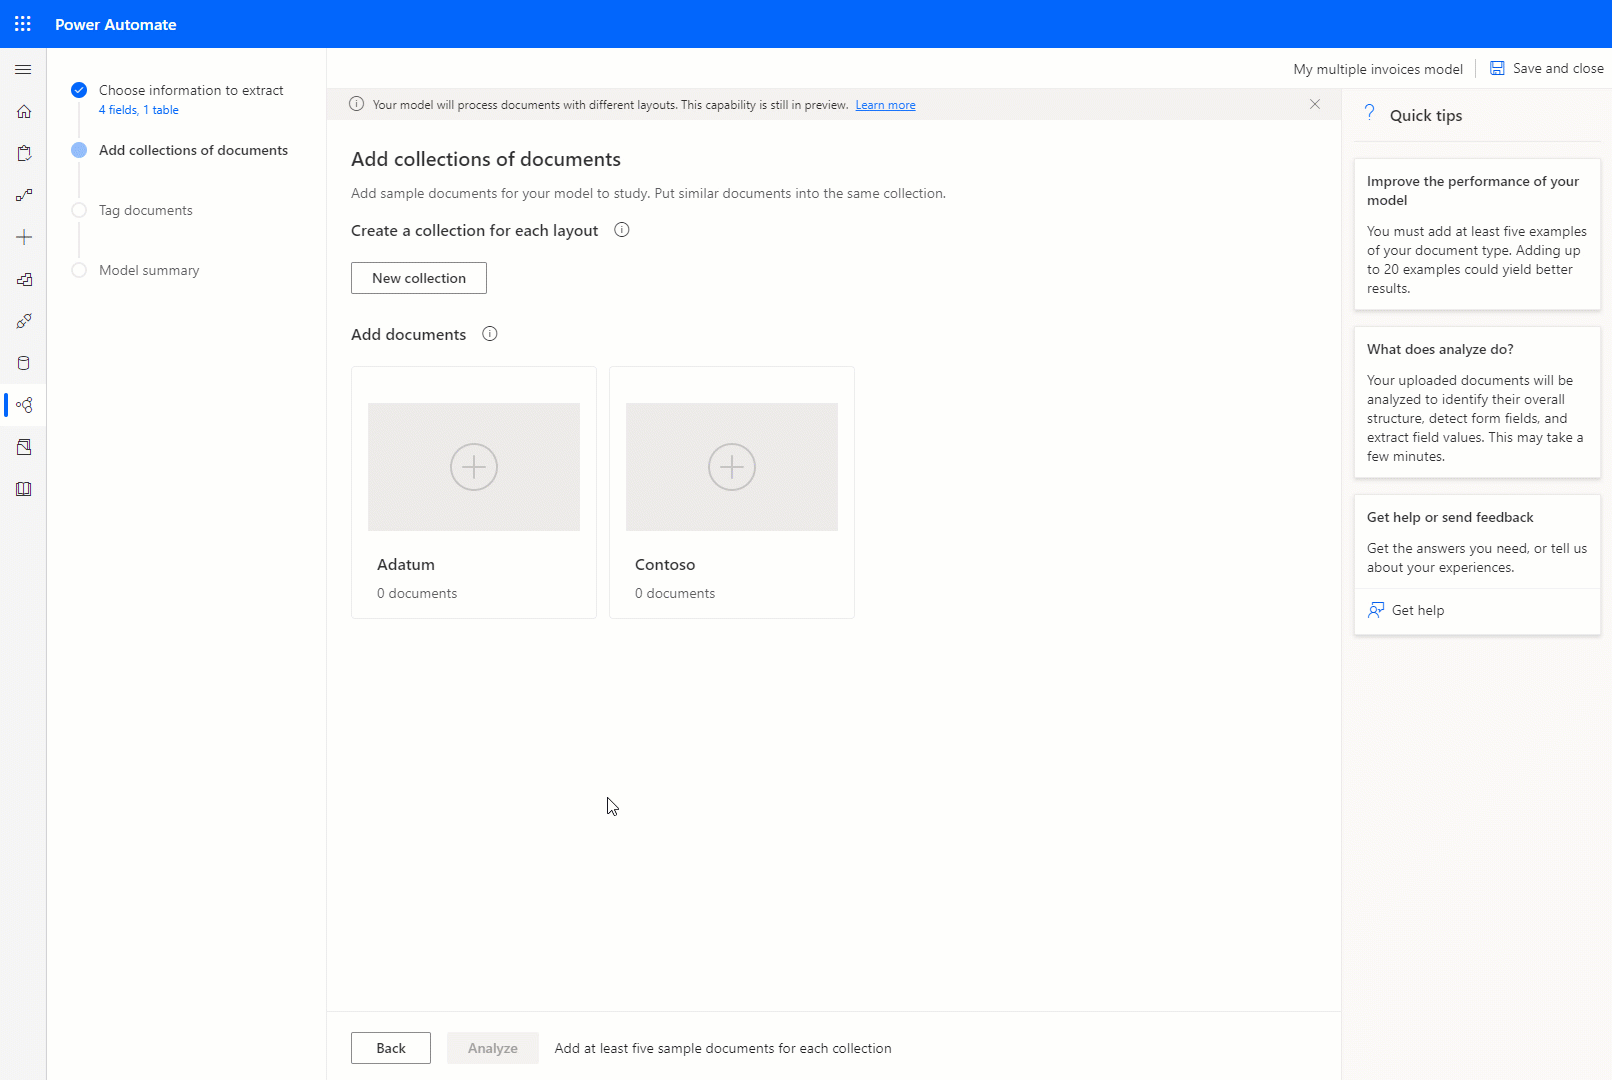
Group documents by collections
A collection is a group of documents that share the same layout. Create as many collections as document layouts that you want your model to process. For example, if you're building an AI model to process invoices from two different vendors, each having their own invoice template, create two collections.
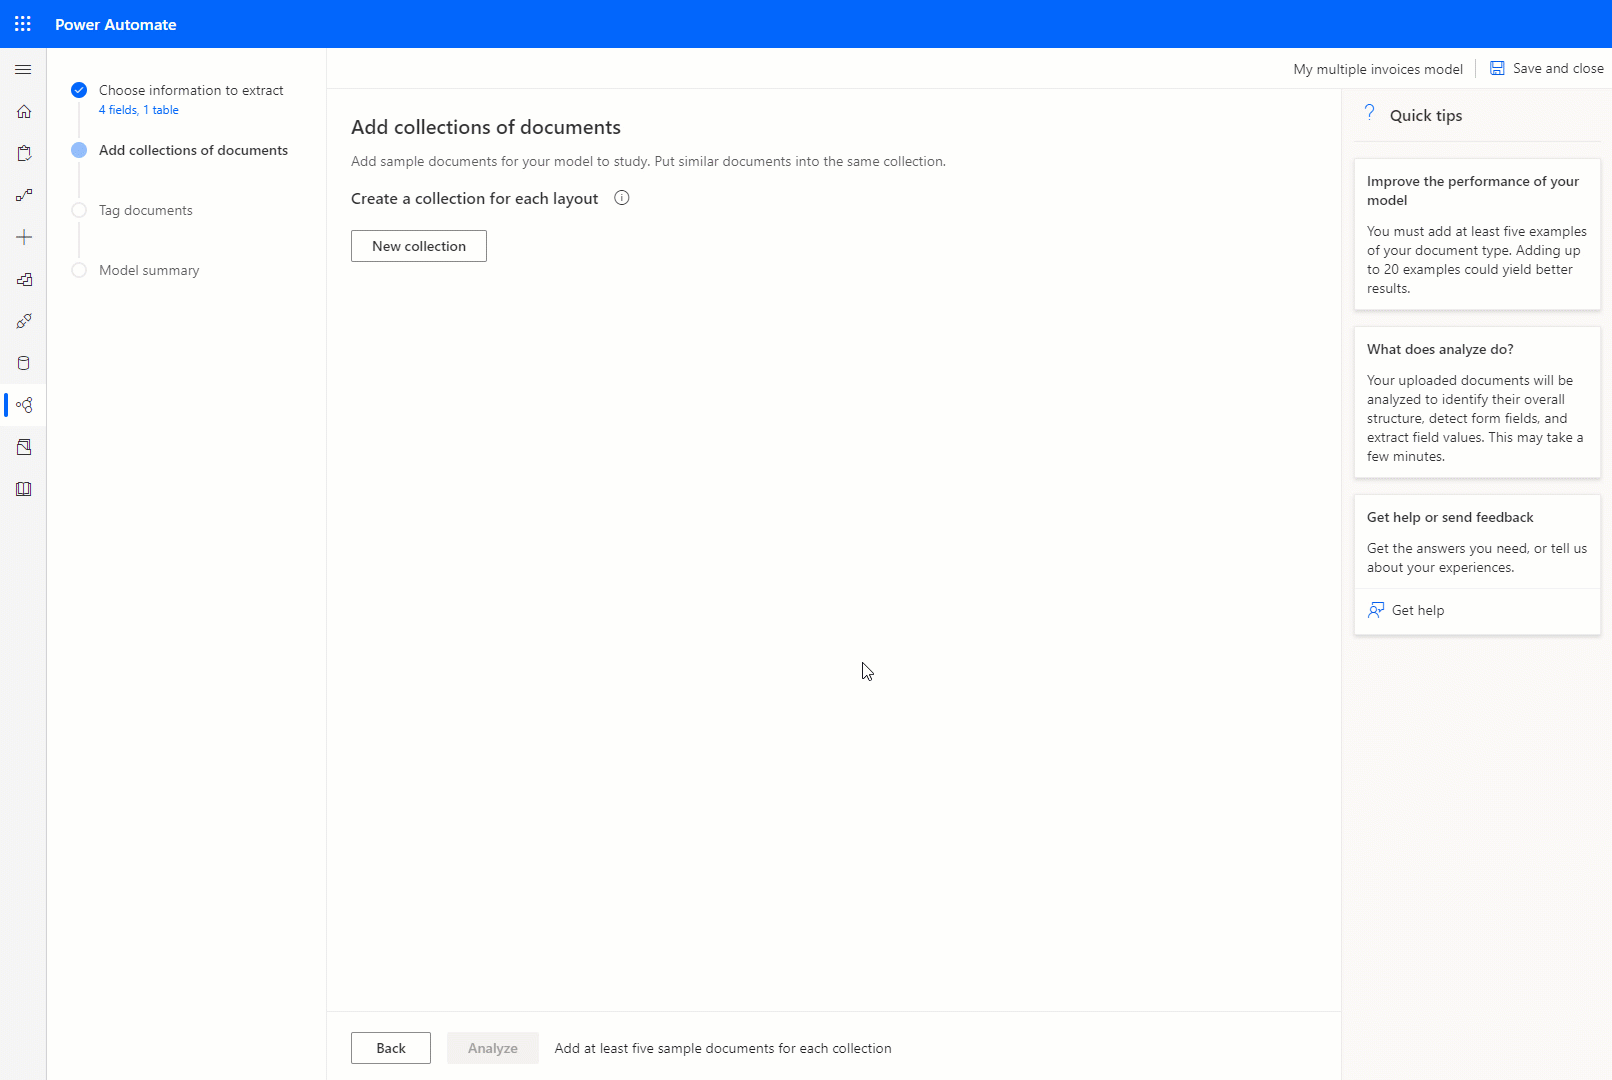
For each collection that you create, you need to upload at least five sample documents per collection. Files with formats JPG, PNG, and PDF files are accepted.
Note
You can create up to 200 collections per model.
Next step
Tag documents in a document processing model