Note
Access to this page requires authorization. You can try signing in or changing directories.
Access to this page requires authorization. You can try changing directories.
AI Builder invoice processing combined with Power Fx lets you extract key details from invoices like invoice ID, vendor names, and dates, quickly and accurately. This low-code solution simplifies data handling and streamlines financial processes.
Supported document types: Invoices
Requirements
For best results, provide one clear photo or high-quality scan per document.
Learn more about requirements in the Supported languages and files section in Invoice processing prebuilt AI model.
Available fields
| Available fields | Type |
|---|---|
| AmountDue | Text |
| BillingAddress | Text |
| BillingAddressRecipient | Text |
| CustomerAddress | Text |
| CustomerAddressRecipient | Text |
| CustomerId | Text |
| CustomerName | Text |
| Customer TaxId | Text |
| DueDate | Text |
| InvoiceDate | Text |
| InvoiceId | Text |
| InvoiceTotal | Text |
| paymentTerms | Text |
| PreviousUnpaidBalance | Text |
| PurchaseOrder | Text |
| RemittanceAddress | Text |
| RemittanceAddressRecipient | Text |
| ServiceAddress | Text |
| ServiceAddressRecipient | Text |
| ServiceEndDate | Text |
| ServiceStartDate | Text |
| ShippingAddress | Text |
| ShippingAddressRecipient | Text |
| SubTotal | Text |
| TotalTax | Text |
| VendorAddress | Text |
| VendorAddressRecipient | Text |
| VendorName | Text |
| VendorTaxId | Text |
Available table items
| Available items | Type |
|---|---|
| Amount | Text |
| Date | Text |
| Description | Text |
| ProductCode | Text |
| Quantity | Text |
| Tax | Text |
| Unit | Text |
| UnitPrice | Text |
Build your canvas app
Sign in to Power Apps.
On the left-side navigation pane, select +Create.
Select the Canvas app from blank tile.
Name your app, select either Tablet or Phone format, and then select Create.
In the app editor, from the left navigation pane, select Data > Add data, and then search Invoice processing.
Select +Insert > Add picture.
Select +Insert > Text label.
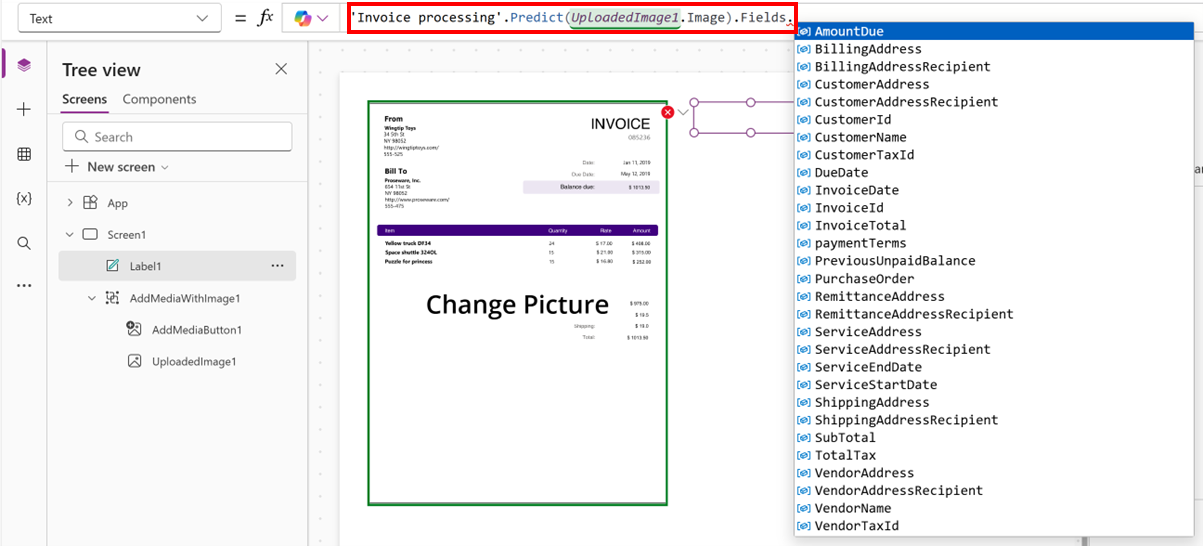
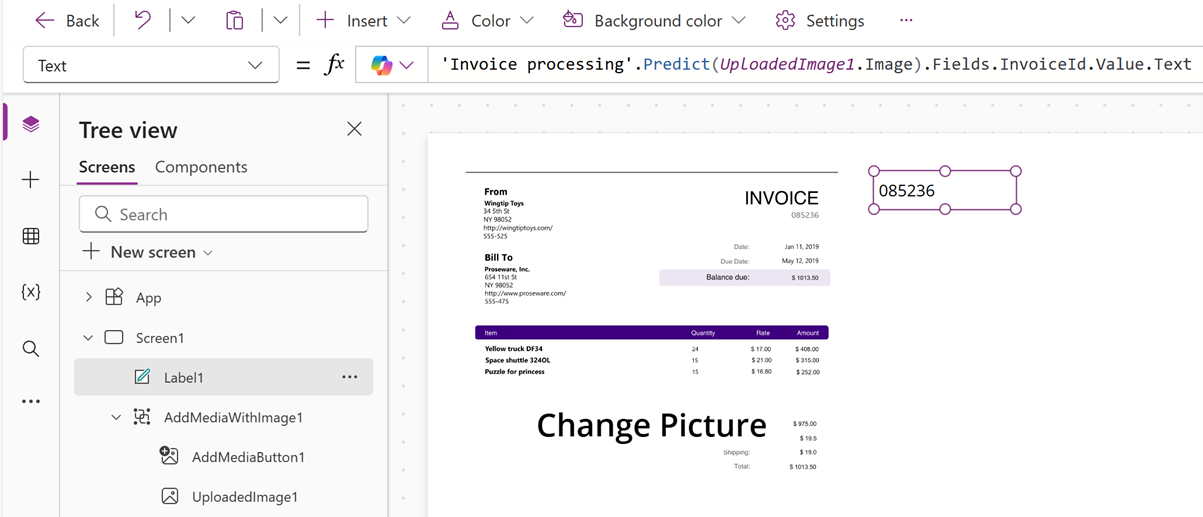
Select Label1 and enter a formula like the following example, where
UploadedImage1is the image container:'Invoice processing'.Predict(UploadedImage1.Image).Fields.InvoiceId.Value.TextYou can select your desired field from the available field.
Select Save, and then select the play button.
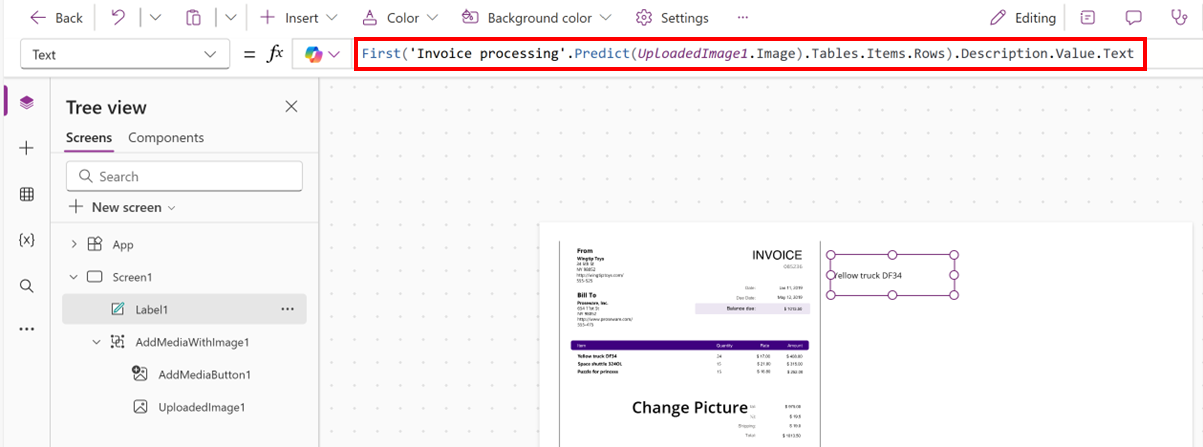
You can also use this formula to retrieve the first item from the result and extract the description of that item as a text string.
First('Invoice processing'.Predict(UploadedImage1.Image).Tables.Items.Rows).Description.Value.Text
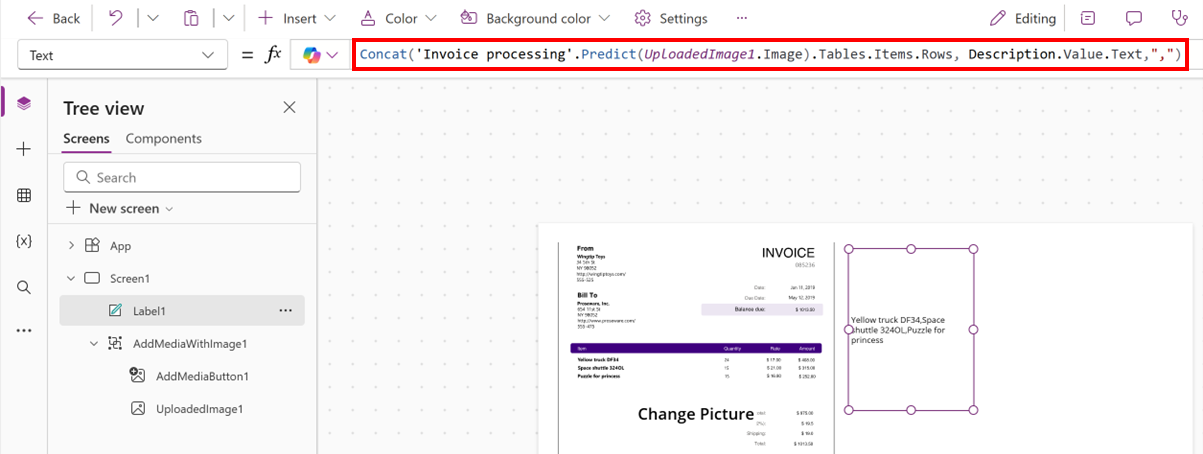
This expression concatenates the text values from the Description field of each row in the prediction results of an image related to invoice, and separates each value with a comma and a space.
Concat('Invoice processing'.Predict(UploadedImage1.Image).Tables.Items.Rows, Description.Value.Text, Char(10))