Please complete both steps.
Prerequisites
- Ensure that you are signed in to both Teams and Outlook
Step 1: Make someone my delegate
A delegate automatically receives Send on Behalf permissions. By default, the delegate can read only your meeting requests and responses. The delegate isn’t granted permission to read other messages in your Inbox.
Open Outlook
Click the File tab.
Click Account Settings, and then click Delegate Access.
Click Add.
If Add doesn’t appear, an active connection might not exist between Outlook and Exchange. The Outlook status bar displays the connection status.
Type the name of the person whom you want to designate as your delegate, or search for and then click the name in the search results list.
Note: The delegate must be a person in your organization's Exchange Global Address List (GAL).
Click Add, and then click OK.
In the Delegate Permissions dialog box, accept the default permission settings or select custom access levels for Exchange folders.
If a delegate needs permission to work only with meeting requests and responses, the default permission settings, such as Delegate receives copies of meeting-related messages sent to me, are sufficient. You can leave the Inbox permission setting at None. Meeting requests and responses will go directly to the delegate's Inbox.
Note: By default, the delegate is granted Editor (can read, create, and modify items) permission to your Calendar folder. When the delegate responds to a meeting on your behalf, it is automatically added to your Calendar folder.
To send a message to notify the delegate of the changed permissions, select the Automatically send a message to delegate summarizing these permissions check box.
If you want, select the Delegate can see my private items check box.
Important: This setting affects all Exchange folders. This includes all Mail, Contacts, Calendar, Tasks, Notes, and Journal folders. There is no way to grant access to private items in only specified folders.
- Click OK.
Step 2: Assign Mailbox folder permissions
-Open Outlook
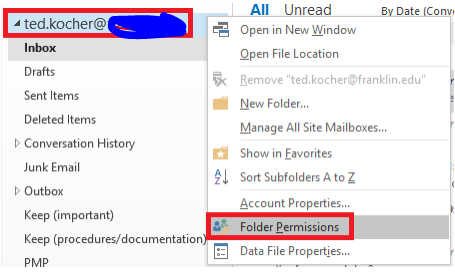
- Right click on your email folder (******@companyname.com) and go to folder permissions.
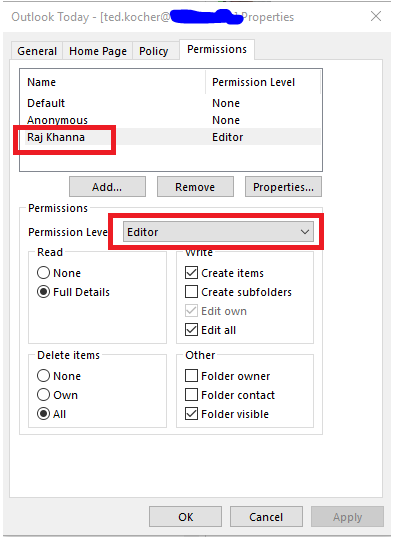
- Highlight the person in question and reassign their permissions here. There is a drop down of different permission levels to choose from
Once delegate access is granted, the user receiving this access can setup the inbox and calendar on their end using the following instructions.
Procedure
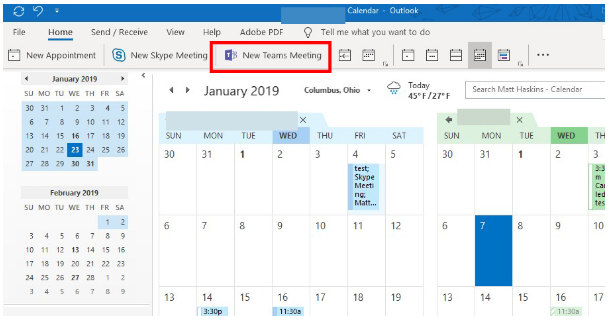
Open the person's calendar that you manage. Click the day you wish to schedule the message for and click the “New Teams Meeting” button on the Outlook toolbar
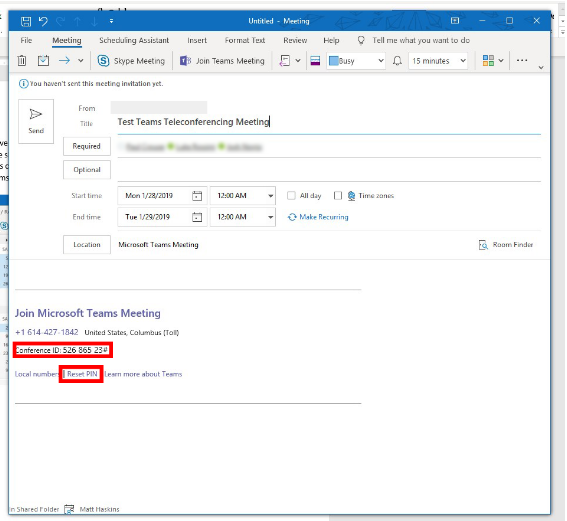
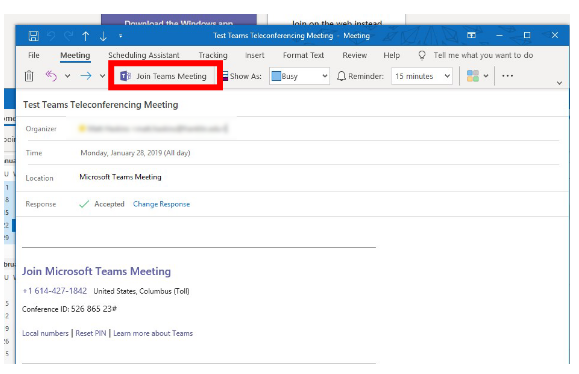
Fill out all the relevant information for the meeting, including the meeting title and the attendees. You should see the “Join Microsoft Teams Meeting” information in the meeting body, along with the call in number and the conference ID.
NOTE: When the recipients of the invitation view the invitation, it will appear to be from "<your name> on behalf of <other person>." The attendees will be notified that you have scheduled this meeting on behalf of the other person.
Click Send. This will create the meeting and will notify the attendees.
NOTE: By default, the person whose calendar you manage will NOT receive an email invitation for this meeting; it will just be placed on his or her calendar.
Teams meetings no longer require a PIN to start the meeting via phone. All Teams meetings are set to allow all anonymous users to join the meeting, and the meeting can start without the host. Even if you are scheduling a meeting on someone else's behalf, a PIN is no longer needed.
Attendees can then join the meeting via the dial in number, or through the Teams desktop or web clients. They can also join by opening the event from Outlook and clicking the “Join Teams Meeting” button.
I hope this helps.
Brendan.
' cx='32' cy='32' r='32' /%3E%3Ctext x='50%25' y='55%25' dominant-baseline='middle' text-anchor='middle' fill='%23FFF' %3EM%3C/text%3E%3C/svg%3E)
' cx='32' cy='32' r='32' /%3E%3Ctext x='50%25' y='55%25' dominant-baseline='middle' text-anchor='middle' fill='%23FFF' %3EKY%3C/text%3E%3C/svg%3E)
' cx='32' cy='32' r='32' /%3E%3Ctext x='50%25' y='55%25' dominant-baseline='middle' text-anchor='middle' fill='%23FFF' %3ECB%3C/text%3E%3C/svg%3E)
' cx='32' cy='32' r='32' /%3E%3Ctext x='50%25' y='55%25' dominant-baseline='middle' text-anchor='middle' fill='%23FFF' %3EDB%3C/text%3E%3C/svg%3E)