Azure Virtual Machines
An Azure service that is used to provision Windows and Linux virtual machines.
9,013 questions
This browser is no longer supported.
Upgrade to Microsoft Edge to take advantage of the latest features, security updates, and technical support.

I've tried many different ways to generate a key to access my SSH and none seem to work. I get 2 or 3 different error messages all different from different places. I'll do my best to explain and hopefully we can figure something out!
Ok to to start I used
and thought it was all ok. I did what this page told me to
https://learn.microsoft.com/en-us/azure/virtual-machines/ssh-keys-portal
ssh -i C:/.ssh/myKey.pem USERNAME@10.0.0.1
and still got this error
USERNAME@10.0.0.1: Permission denied (publickey).
I've taken my info out but you get the point. Than I try PuTTyGen and with the same code above I get this error
publickey: The term 'publickey' is not recognized as a name of a cmdlet, function, script file, or executable program.
Check the spelling of the name, or if a path was included, verify that the path is correct and try again.
Now I know my key is located where I say it is and still tells me its not there. So now I try this option
az vm create \
--resource-group GROUP \
--name Server \
--image UbuntuLTS \
--admin-username USERNAME \
--ssh-key-value C:/.ssh/myKeyPriv.ppk \
--generate-ssh-keys
Seemed to work after adding --generate-ssh-keys to it not found on this page
But than I get this error
SSH key files 'C:/.ssh/myKeyPriv.ppk.private' and 'C:/.ssh/myKeyPriv.ppk' have been generated under ~/.ssh to allow SSH access to the VM. If using machines without permanent storage, back up your keys to a safe location.
Deployment failed. Correlation ID: 5069b9ce-c5c5-4267-ae23-eff333a6e5e5. {
"error": {
"code": "PropertyChangeNotAllowed",
"message": "Changing property 'linuxConfiguration.ssh.publicKeys' is not allowed.",
"target": "linuxConfiguration.ssh.publicKeys"
}
}
So I have no idea where to go from here. I've tried Powershell as Admin on my computer to generate keys before and its worked to connect to Google Cloud and Raspberry Pi's no problem. This I don't know. Any advice would be great.
I will update this post if anything changes.
Thanks!
EDIT--------------------
Well made it a little further but now I get this message
ssh-copy-id -i ssh-keygen.pub USERNAME@Tablet .southcentralus.cloudapp.azure.com
/usr/bin/ssh-copy-id: INFO: Source of key(s) to be installed: "ssh-keygen.pub"
/usr/bin/ssh-copy-id: INFO: attempting to log in with the new key(s), to filter out any that are already installed
/usr/bin/ssh-copy-id: INFO: 1 key(s) remain to be installed -- if you are prompted now it is to install the new keys
USERNAME@Tablet .southcentralus.cloudapp.azure.com: Permission denied (publickey).
Still telling me I have a public key? I used this command to get here
eval "$(ssh-agent -s)"
ssh-copy-id -i ssh-keygen.pub USERNAME@Tablet .southcentralus.cloudapp.azure.com
So still working at it. Only been 4 hours now....

@Felbdogg Any update on issue?
Please "Accept as Answer" if it helped so it can help others in community looking for help on similar topics.
Thanks
@Felbdogg Apologies for the delay in response and all the inconvenience caused because of the issue.
Can you check the below method and let me know if you are able to SSH to your VM or not?
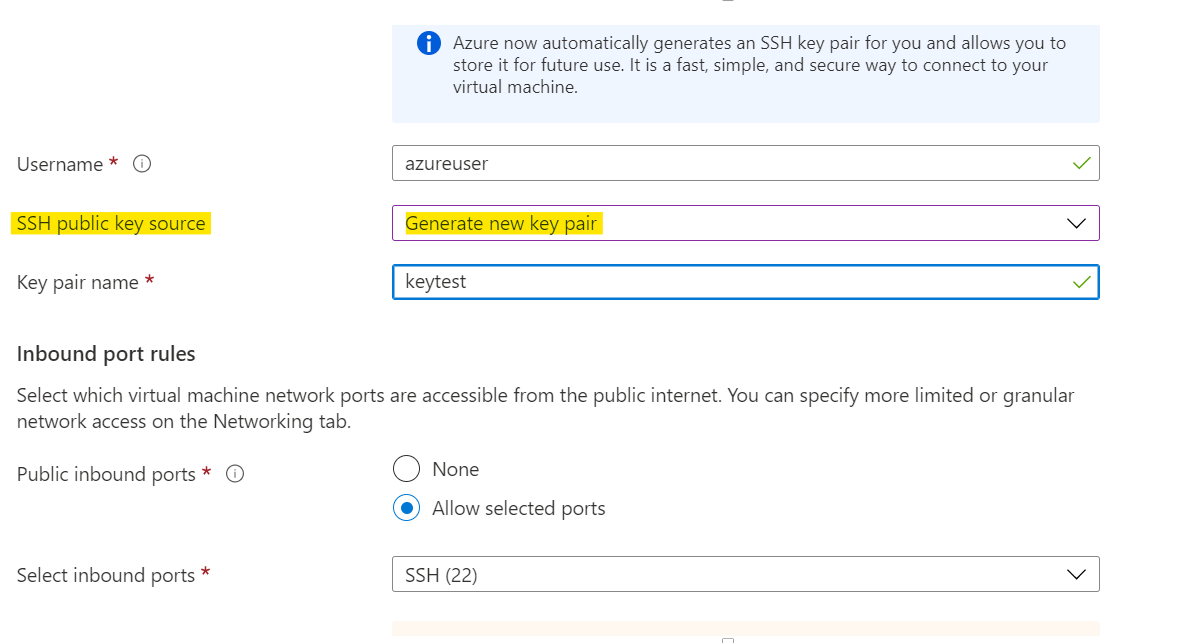
1) Create Azure VM using the steps mentioned here
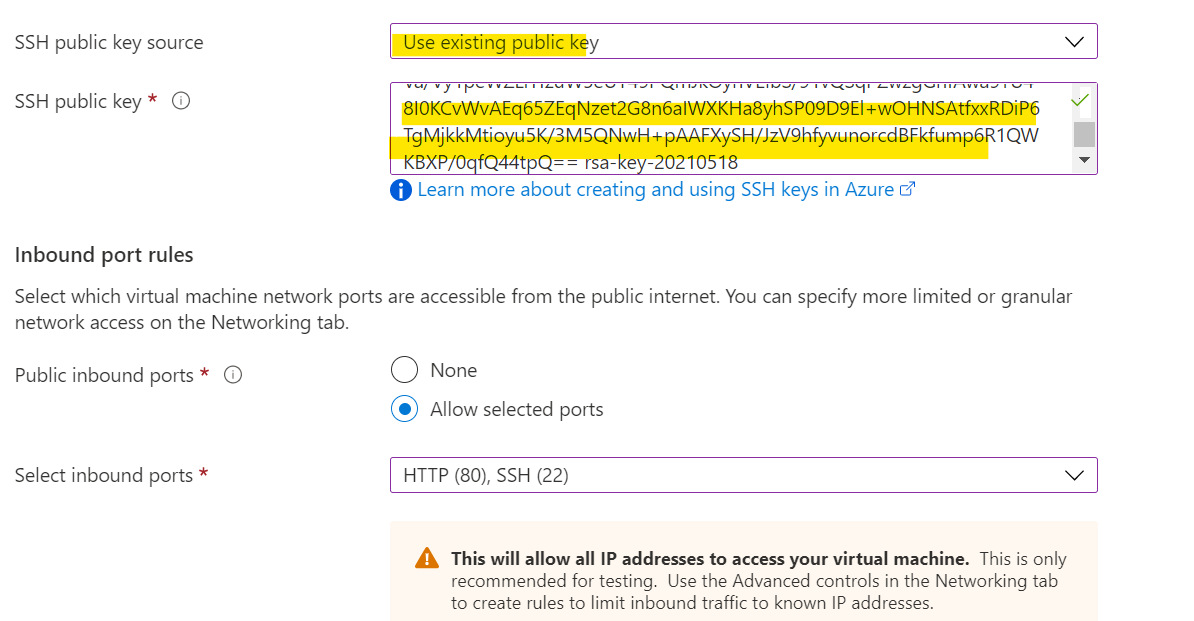
2)Now keep the key setting to Generate new Key Pair as below:
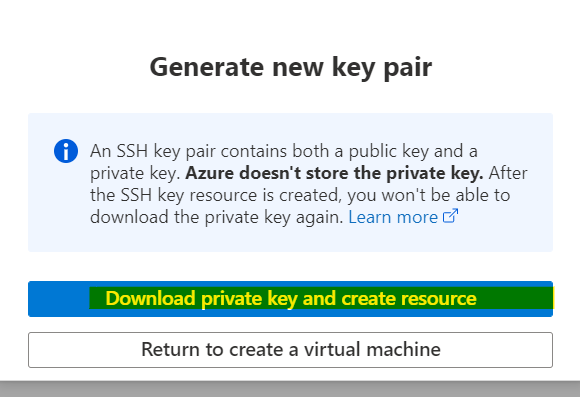
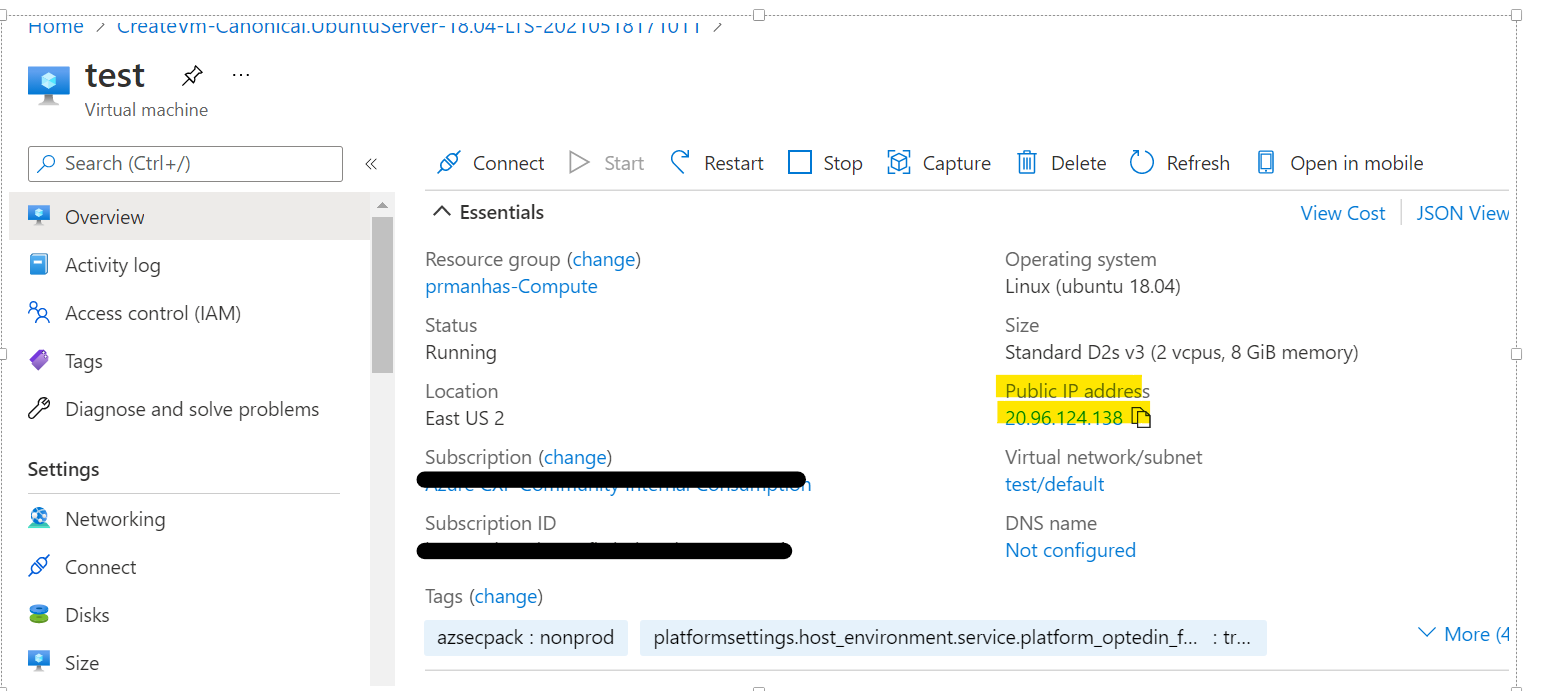
3)Click on Next you will get option to save public and private key and proceed for VM creation:
4)Now once VM is created go to Connect option and copy below data:
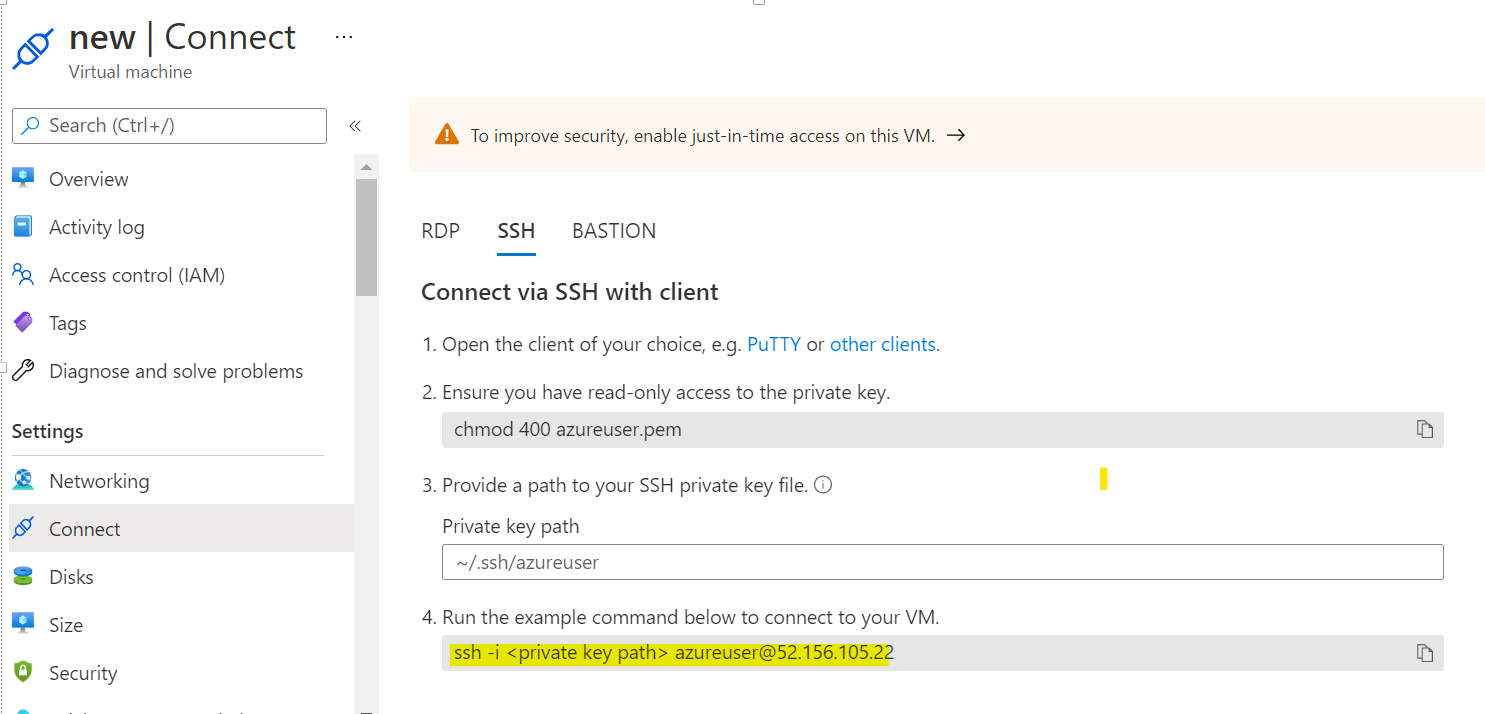
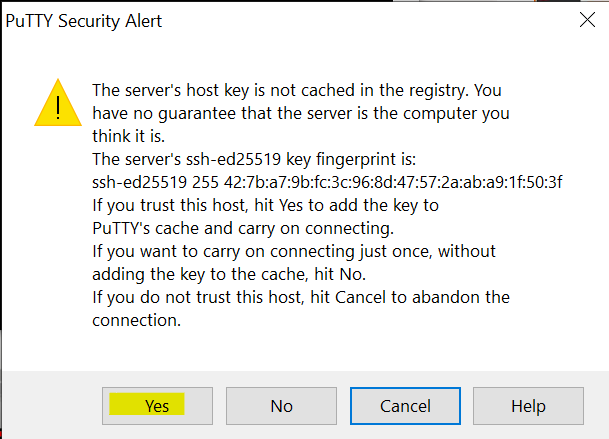
5) Now if you have a Windows machine open Powershell and paste the above and change the private key path with the path of file you downloaded in Step 2 and Click Enter :
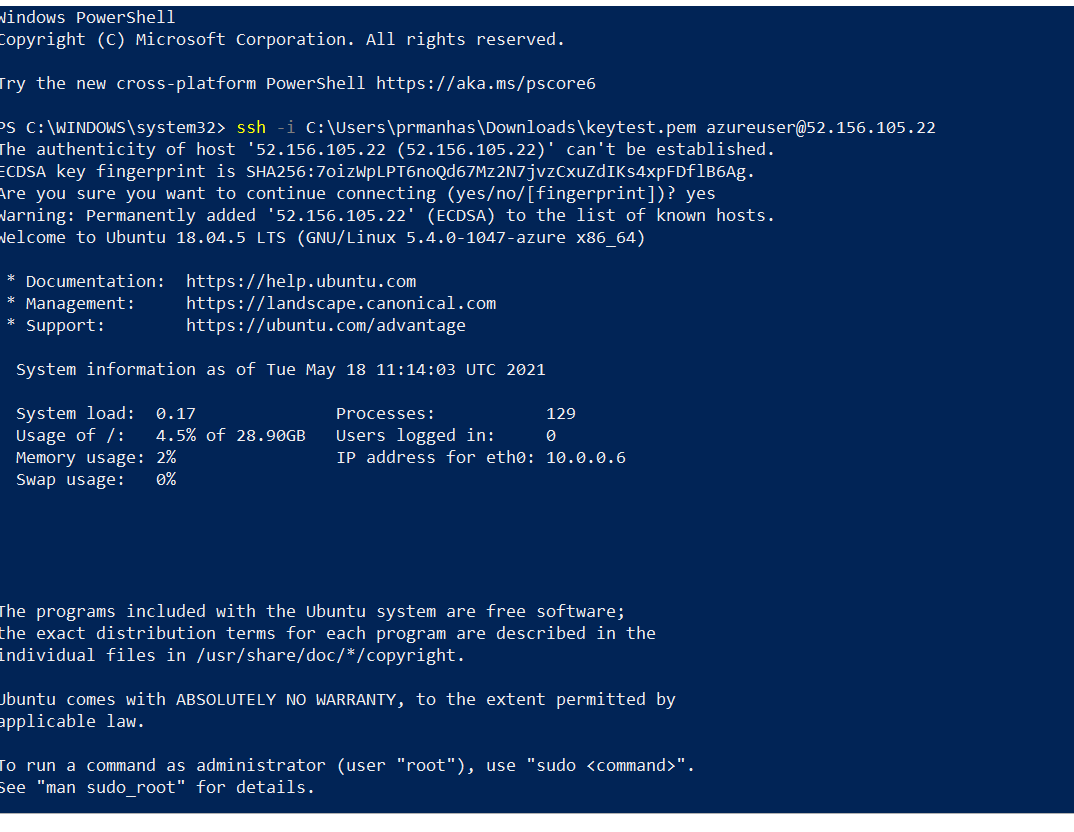
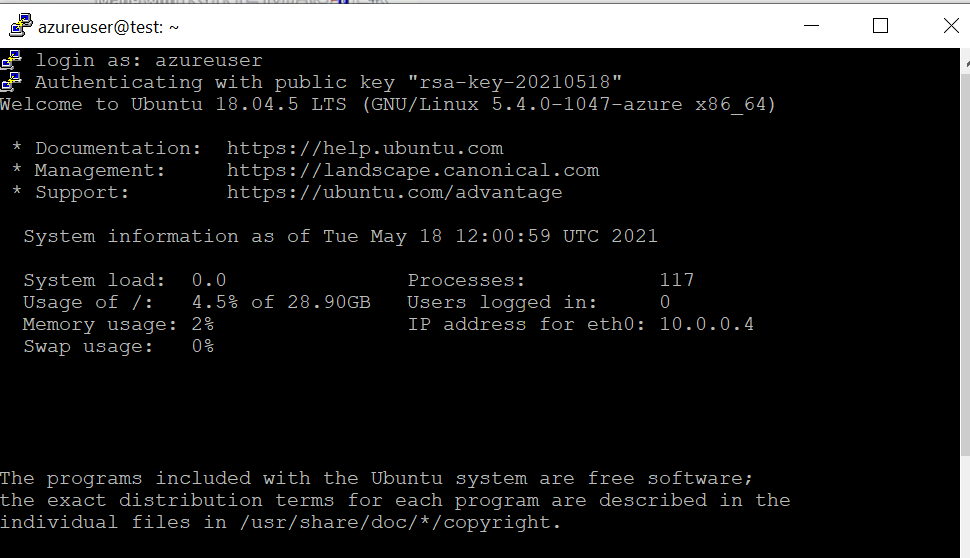
You are now connected to VM and you can check same as below:

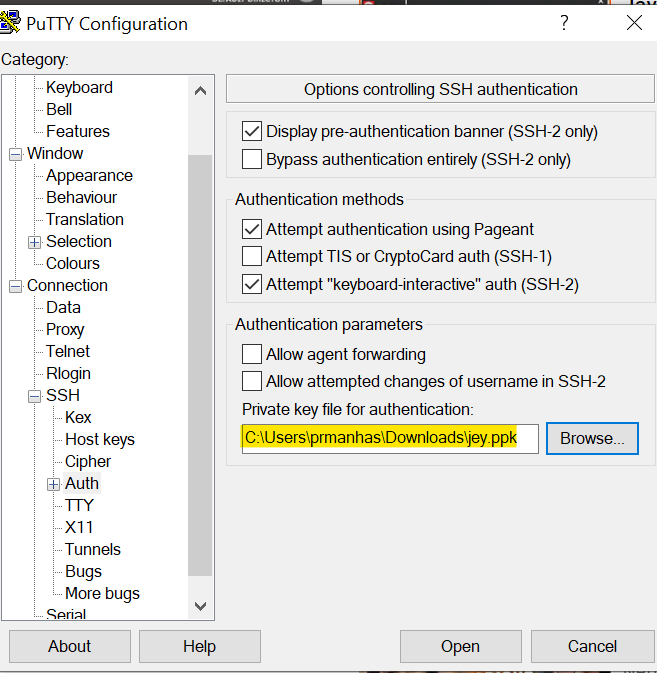
 -Open Putty on your system and paste the copied IP value to Session > Hostname:
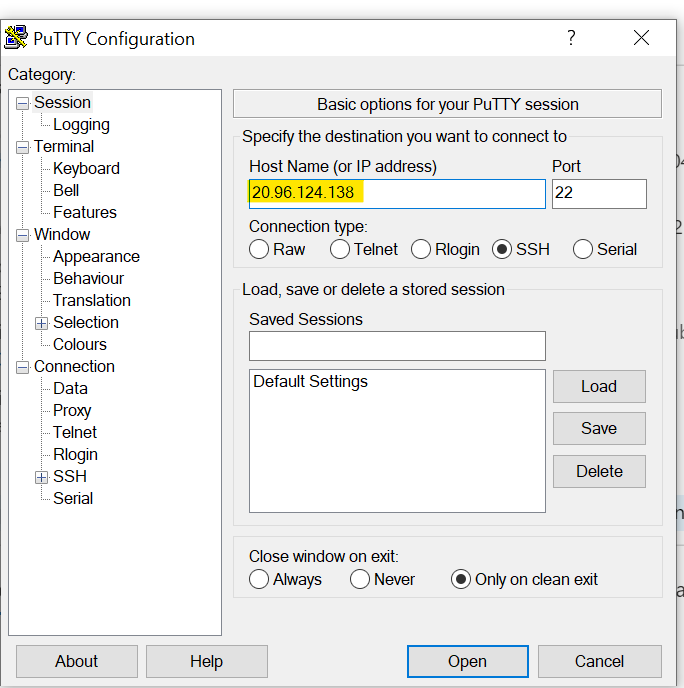
Same will hold for any method.
Hope it helps!!!
Please "Accept as Answer" if it helped so it can help others in community looking for help on similar topics.