Hello @Ryan P ,
Thanks for reaching out.
Yes, you are referring to the right article.
Here are detailed steps for creating AzureAD policy and then assigning them to service principal objects (application) which emits custom "upn" as "prn" claim.
• You must have AzureAD module installed because this can be only done through PowerShell way. If not installed already refer this article to install AzureAD Module.
• Use this cmdlet to create New Azure AD Policy, this would define Basic Claims "userprincipalname" as "prn" .
New-AzureADPolicy -Definition @('{"ClaimsMappingPolicy": {"Version": 1,"IncludeBasicClaimSet": "true","ClaimsSchema":[{"Source": "user","ID": "userprincipalname","JwtClaimType": "prn"}]}}') -DisplayName "BasicClaimupnPrn-title" -Type "ClaimsMappingPolicy"
• Run the following command to see your newly created policy and copy the policy ObjectId,
Get-AzureADPolicy
• Assign the policy to your service principal. You can get the ObjectId of your service principal from Enterprise applications blade as shown below screenshot.
Add-AzureADServicePrincipalPolicy -Id <ObjectId of the ServicePrincipal> -RefObjectId <ObjectId of the Policy>

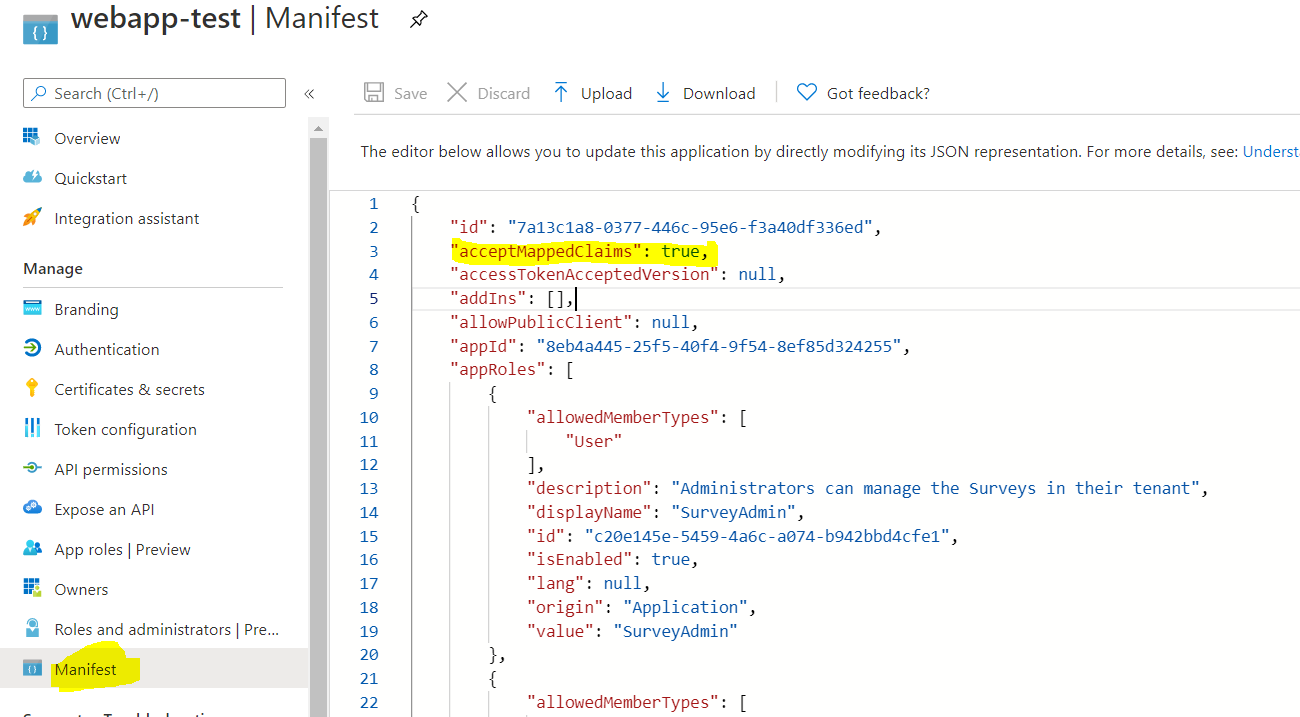
• Once policy has successfully assigned, then enable the AcceptMappedClaims to true in the App as shown in the following image:

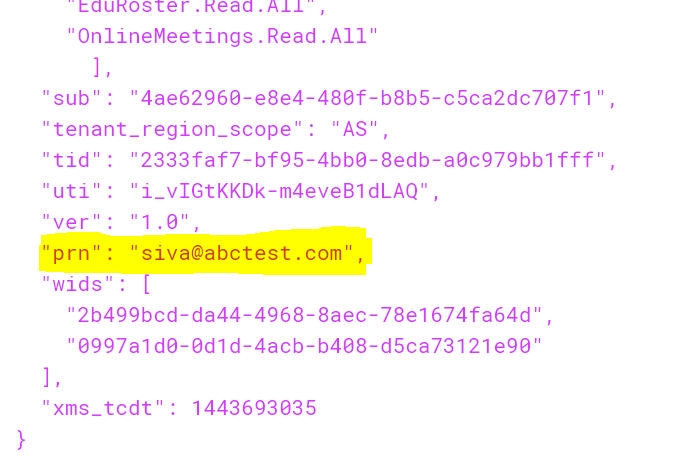
Now you should see Basic Claims "department" and "jobTitle" appears in ID_Token (JWT token). Please find below screenshot from my lab for your reference:
id_token (JWT):

Hope this helps.
------------------------------------------------------------------------------------------------------------------------------
Please "Accept the answer" if the information helped you. This will help us and others in the community as well.
