I Love Orchard CMS, And You Should Too
This post will show some of the features of Orchard that I have recently fallen in love with.
Background
I have been playing with several CMS solutions in Azure Websites. For instance, I recently built a site for my son’s high school football team using DNN. Lately I have been tinkering around with Orchard CMS.
Simply put, I am in love.
The ramp-up for Orchard has been a little steeper than it was for DNN, but once I got over the initial learning curve and discovered a few gems, I instantly saw why this is such a powerful platform. As a developer fluent in Microsoft technologies, this suits my needs perfectly. Even better, I can be proficient with Orchard without doing much development at all!
Creating an Azure Website with WebMatrix
If you didn’t know already, you can just go to the Azure portal and create a new Website from the gallery, pick the CMS of choice (WordPress, Drupal, Joomla, DNN, Umbraco, Orchard, etc), and the site is automatically provisioned for you.
There’s a free tool called WebMatrix that many Visual Studio developers are unlikely to have used because many of its features are baked into VS. I am going to use WebMatrix because getting started is ridiculously easy and it will help introduce a new tool to Visual Studio devs at the same time. It will also show that you can get started with only cursory developer skills.
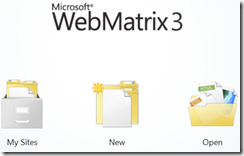
Open WebMatrix.
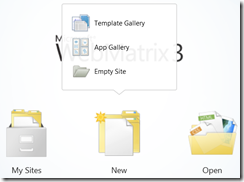
Click the New button and choose App Gallery.
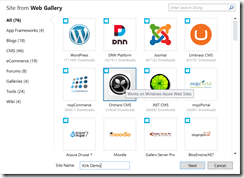
Stand in awe for just a second.
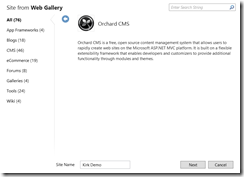
See all those choices? WordPress, Joomla, Umbraco, there are a ton others available in the gallery as well. We will pick Orchard. Give the site a name and click Next.
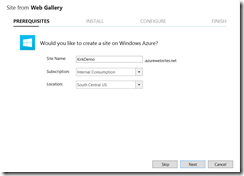
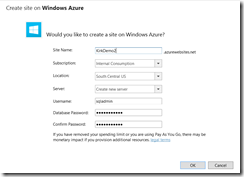
Blah blah. Next. You then get the screen to create your Azure Website directly from WebMatrix. Fill out the values and click Next.
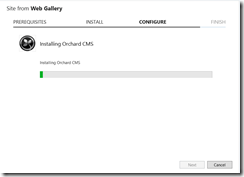
Accept the EULA and magic starts.
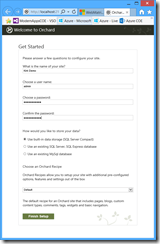
Once the installation is complete, it will launch a browser window. Give your site a name, admin username, and password, and choose where you want to store data. I am going to use SQL Compact for now.
For a brief time you will see that it is cooking a recipe..
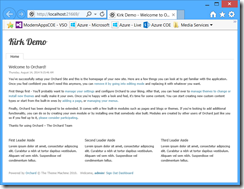
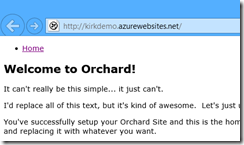
And then your new site is created.
No MCM required ![]()
Changing Themes
When I work with a new CMS for the first time, I immediately want to see how to make the web page my own. Click on the dashboard link (or just append “/admin” to your site’s URL) and you are in the administration dashboard.
Click the Themes link.
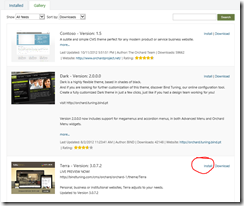
Like other CMS products, there are a bunch of different themes to choose from. Go to the Gallery tab and choose a theme to start from. I’ll choose Terra.
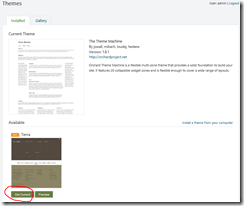
After you click Install, go back to the Installed tab. The new Terra theme is installed but not yet the current theme. Click the Set Current button to make it the current theme.
We can now look at our site and see it looks radically different than before.
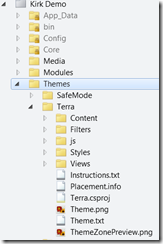
Now go refresh the Themes folder in WebMatrix. Notice the new folder “Terra” with all the CSS, script, and stuff to start customizing the look and feel of your site.
Modifying Content
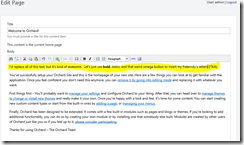
Go to the Orchard administrative dashboard and click the Content link. Find the default page, and click Edit.
You are now editing the content of the page with a nice rich text editor control. Sweet!
Adding Some Modules
While it can boost productivity to start customizing an existing theme, I prefer to start from basic HTML and build the look and feel of my website up. Before we start creating a custom theme, we need a few modules. Go to the administrative dashboard and click on the Modules link in the left navigation.
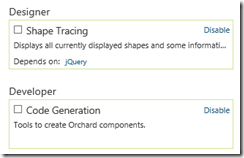
On that page, look for the Designer category and enable the Shape Tracing module. Under the Developer category enable the Code Generation module.
We are going to use the Code Generation module to create a new theme, and use the Shape Tracing module to provide specific Razor views for portions of the page within our new theme.
Creating a Theme
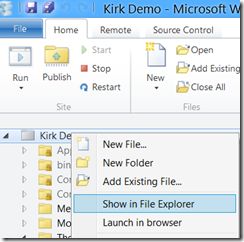
Now that you have added the two modules as described in the previous section (seriously, don’t skip this step, go back and do it… I’ll wait), we will go back to WebMatrix. Right-click the top node and choose “Show in File Explorer”.
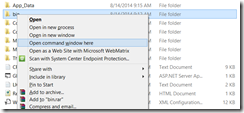
File Explorer opens with our new project. Now Shift+Right Click the “bin” folder and choose “Open Command Window Here”.
A new command prompt opens where the path is the bin folder. Now type “orchard” to run “orchard.exe”, a program in the bin folder.
The command prompt changes to “orchard>”. Now type:
codegen theme KirkDemo
Obviously, I want the world to name their theme “KirkDemo”, but you will more than likely replace that with the name of your theme. After you run it, the new theme is created using the name you provided.
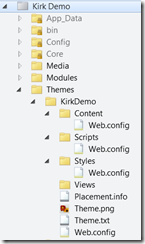
Now go back to WebMatrix and refresh the themes folder.
Pretty empty in here. Let’s see what it looks like. Go to the administration dashboard, click on Themes, and set your new theme as the current theme.
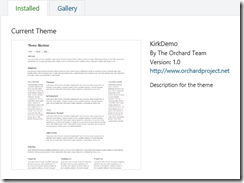
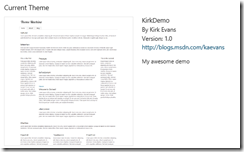
Notice it has a screen shot that looks like the out of box ThemeMachine theme and says it is by The Orchard Team. You can change that stuff by providing a new Theme.png file and editing Theme.txt.
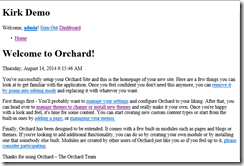
OK, we’ve modified our theme and set it as the current theme. Stand back in amazement at my design skillz.
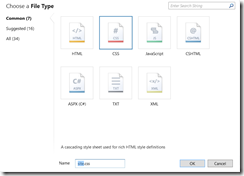
Oh yeah, Times New Roman. That’s how I roll. Ya know what, I can do better. Go into WebMatrix and add a new CSS file named “site.css” in the Styles folder for your theme.
I’ll just change the font to Verdana.
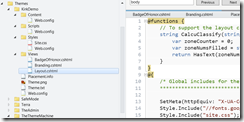
To use our new CSS file, we can create a new view, Layout.cshtml, that will define all the editable regions of our page. I simply copy from the out of box ThemeMachine theme, copying Layout.cshtml, BadgeOfHonor.cshtml, and Branding.cshtml to my theme folder.
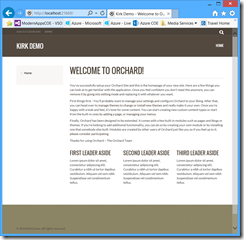
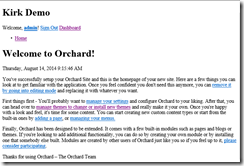
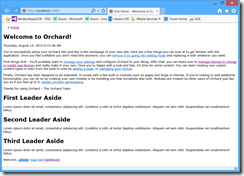
Now click the Run button in the ribbon in WebMatrix. Here are the before and after pictures.
The page has changed quite a bit. The site’s title, “KirkDemo”, is no longer at the top of the page. The welcome, username, sign out, and dashboard links have moved to the bottom of the page, and we now have 3 sections showing up that weren’t there before… First Leader Aside, Second Leader Aside, and Third Leader Aside.
Widgets
The Layout page change that we just made told Orchard where to render widgets if they were defined. For instance, in the Layout.cshtml Razor view, it has this bit of code:
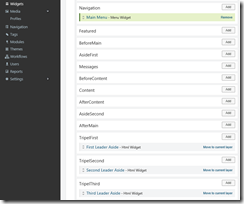
That tells Orchard where to render the TripelFirst content if it is defined. Now go to the Widgets link in the Orchard administrative dashboard. Notice that there is a HomePage layer (applies to just the home page), and in the TripelFirst zone there is an HTML widget named “First leader aside”.
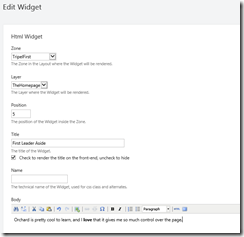
Click the HTML widget to edit it.
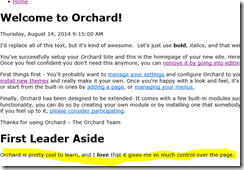
Save, and go back to the site. Our change is shown in the site.
OK, maybe you’re not stunned yet. Just wait… I’ve been saving the best for last.
Shape Tracing
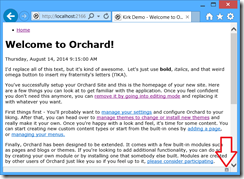
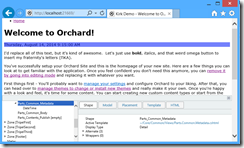
This was the ZOMG moment for me. Remember way back when, in the beginning of this post, we added the Shape Tracing module? We’re going to use that now. In the bottom right corner of the page, there is a small box. Click it.
You will see something that looks like the F12 debugger tools in IE. Hover over a widget on the page to see some properties of it, such as the Title.
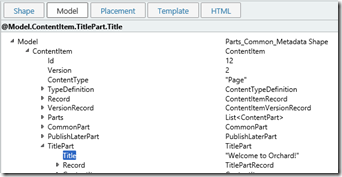
In the shape tracing window, click the Model tab. Then expand into Model / ContentItem / TitlePart / Title.
If you’re familiar with MVC, you will recognize instantly that this is the model that is provided to your view! You can inspect all the parts of the model to see what data is available in context for you to use, and at the top left you can see it writes out the path for you as @Model.ContentItem.TitlePart.Title.
Go to HTML to see the HTML that is rendered by the title widget.
Now go to the Template to see the template code that generates the HTML.
I bet you want to customize that, huh? Probably want to make that an H2 instead of an H1? Let’s do that.
Go back to the Shape tab and expand the Alternate node.
There are 3 alternate Razor views: one that controls how the Title is rendered anywhere in the site, one that controls how it is rendered for just this page, and one that controls how it is rendered for all pages derived from the content type “Page”. Let’s keep it simple and change it for all pages. Click the “Create” link next to the first URL.
A new CSHTML file is added to your Views folder in your theme.
Now edit it.
Save, and hit the Run button.
That date and time is a little annoying here, it doesn’t fit what I’m trying to do. Go back to the shape tracing window and then click on it to discover what is rendering it.
We could do the same trick, just providing an empty view. However, there’s another file to become familiar with… Placement.info. In the previous screenshot, I circled “Parts_Common_Metadata” to highlight the name. Now go to Placement.info to control placement of widgets using rules. Our rule will be simple, suppress the “Parts_Common_Metadata” widget on the home page.
Save, and hit Run.
It’s OK, I understand… I stared in amazement for a few minutes, myself. Take your time, soak it in.
So What? It’s a CMS… that SCALES!
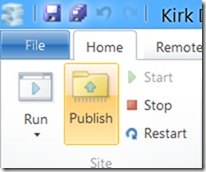
Yes, it’s a CMS, and maybe you aren’t as blown away by the shape tracing feature as I was (I don’t understand how you wouldn’t be, but whatever). The next part should blow you back a bit. In WebMatrix, just click Publish.
This works because you’ve already wired up the Azure publishing profile.
Click Continue.
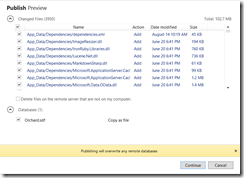
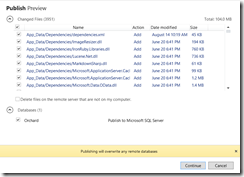
Click Continue. You now see the list of files and the action for each. Notice that our database is using SQL Compact, so it also uploads the .SDF file.
Click Continue, the content is published to your Azure Website.
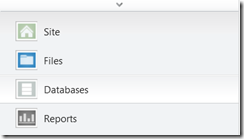
You can now scale the Azure Website! But wait, Kirk… you said it’s using SQL Compact, how does that scale? Hmm… yeah, let’s change that to use Azure SQL databases. In the bottom left of WebMatrix, click on the Databases navigation tab.
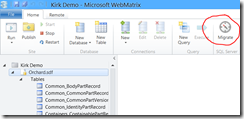
You will be able to see the tables in your database, but you also get a button “Migrate” in the ribbon.
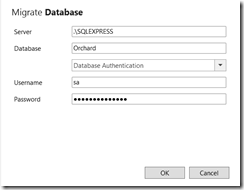
Click Migrate, and you provide settings for SQL Express.
Now that we’re migrated, let’s publish again. You are prompted that you need an Azure SQL database.
We are going to cheat and just create a new Website, this time with a database linked to it.
Now go back to WebMatrix and click Publish just as before. This time, instead of the database being a .SDF file, the database is being published to Azure SQL.
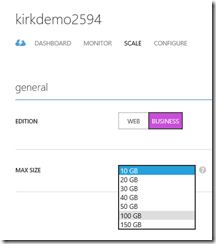
OK, that’s cool, I scaled up from SQL Compact. Well, that’s kind of the point… Orchard let’s you have a very small footprint on cheap, shared hosting and then scale up very easily. You can then scale the database up to meet your needs.
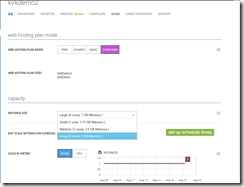
While we are talking about scale, we can also scale the web site. In WebMatrix, go to the “Remote” tab at the top of the page. Since we’ve set up an Azure Website, we also have the option to scale the site.
Click that and you are taken to the Azure management portal, where you can provide settings to scale the Website.
We are running in Azure, and we can have a highly scalable site for not that much money. As proof, weblogs.asp.net was recently migrated to Orchard and Azure Websites. As a reminder, Scott Guthrie’s blog is on that site, and the entire site receives a fair amount of traffic.
- Bandwidth out – 17 terrabytes
- Page Views – 1.3 million
- Unique Visitors – 750,000
- Visits – 1.1 million
The cost? $523.47 per month estimated. That’s unbelievable. You should read more on Jon Galloway’s post, weblogs.asp.net Now Running On Orchard and Azure Web Sites. It includes more details about changes made to Orchard for that scenario.
Global Scale Matters
OK, that’s cool, I can scale up… but how does that help me meet global scale needs? There was a fantastic session at the //Build conference, Azure Web Sites: Architecting Massive-Scale Ready-For-Business Web Apps, that shows how you can use Azure Websites to achieve 20,000 requests per second by architecting your solution in a manner that it can be geo-replicated. The same content was recently published in an MSDN article, Scaling Your Web Application with Azure Web Sites. Since you can replicate your SQL database to different regions, you now have the building blocks for a massively scalable solution.
This is hugely important. In the past, you would have set up a set of servers in a single data center and then tried to figure out how to reduce latency to visitors around the world. Now, you simply copy to an Azure datacenter near them. Use Azure Traffic Manager to direct the user to the closest data center, and you now have a low-latency solution by leveraging the scale of the cloud.
Summary
I’ve been doing this a long time, and this post covered a few of the things that floored me about Orchard. It’s just so incredibly easy to control the page rendering, layout and content. The shape tracing feature blows me away and is just so simple to use. Most importantly, it is so simple to get started with a small site and scale it as your site grows, and doing so ridiculously cheaply using Microsoft Azure Websites that provide a global footprint.
For More Information
OrchardProject.net Documentation
https://www.sarasota.me/blog/migrate-orchard-database-sql-server-ce-to-sql-server-webmatrix
Azure Web Sites: Architecting Massive-Scale Ready-For-Business Web Apps (//Build video)
Scaling Your Web Application with Azure Web Sites (MSDN article)
