Deploying Virtual Machines in Azure using Service Manager and SMA Part I
Earlier this year I worked with Brad Watts on some automation: Deploying Virtual Machines in Azure using the Service Manager Self-Service Portal. Our primary VM deployment mechanism was System Center Orchestrator. I decided to do something similar using Service Management Automation (SMA). This series of posts will take you through uploading a custom VM to Azure, configuring Azure so this VM can be deployed through PowerShell, deploying the VM in PowerShell, deploying the VM in SMA, and finally deploying the VM using the Service Manager Self-Service Portal. This might be a useful scenario if you’re using the Windows Azure Pack (WAP) to deploy on-premise VMs and also want the ability to utilize a single portal to deploy VMs in the cloud.
Part I: Preparing your VM for upload, uploading it to Azure, and configuring Azure
Part II: Deploying your VM in PowerShell and SMA
Part III: Deploying your VM using the Service Manager Self-Service Portal
Summary
The following steps will take you through uploading a custom image to Azure with the necessary settings for scripted deployments. The steps might not be completely necessary as your Azure subscription might already have the following configured.
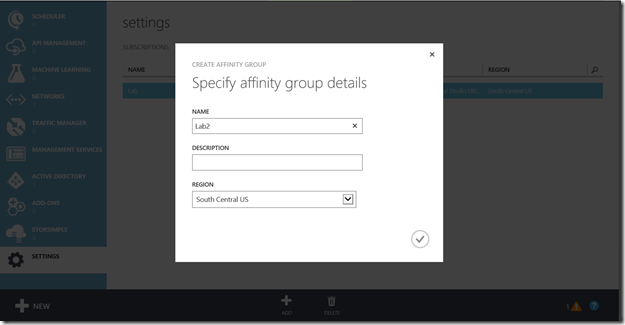
Create a new Affinity Group in Azure
- In the Azure portal go to Settings, click on Affinity Groups, click Add, enter a Name/Region, and click the Check Mark
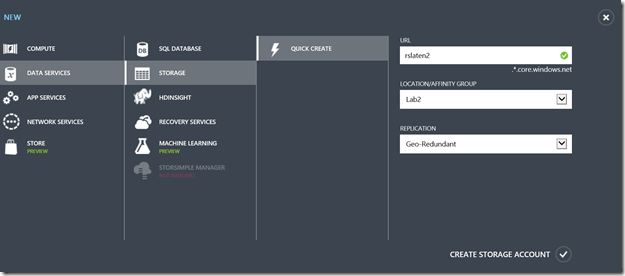
Create a new Storage Account in Azure
- In the Azure portal go to Storage, click the Plus Sign, click Quick Create, select the affinity group created earlier, enter a URL, and click the Check Mark
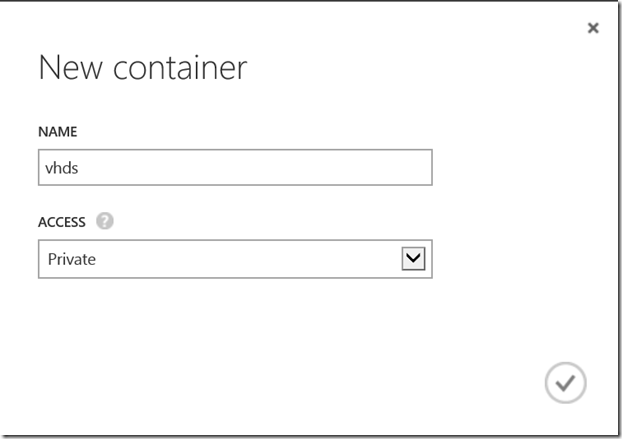
- In the new Storage Account we just created click Containers, enter a Name, and click the Check Mark
- Take note of the container URL, we will need this later
Prepare your Virtual Machine
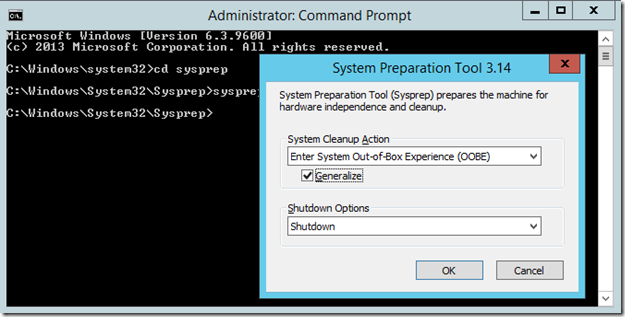
In my example I will use a Windows virtual machine that will later join a domain in Azure. I specifically used Windows Server 2012 R2 and when I was done installing updates and making other configurations I ran sysprep (as an administrator) and chose the options to Enter System Out-of-Box Experience (OOBE), Generalize, and Shutdown. The one thing to remember is to create the VM as a VHD and/or use the Convert-VHD cmdlet to convert from a VHDX.
Upload your Virtual Machine to Azure
- Install Windows PowerShell for Azure (under Command-line tools)
- Open Windows Azure PowerShell
- Type Add-AzureAccount and logon to Azure
- Type Add-AzureVhd –Destination “<yourcontainerURL>/<vhdname>.vhd” –LocalFilePath “<yourlocalVHDPath>”
- Example: Add-AzureVhd –Destination “https://rslaten2.blog.core.windows.net/vhds/w2012Base.vhd” –LocalFilePath “\\myserver\vhd\w2012Base.vhd”
- Type Add-AzureImage –ImageName <YourImageName> –MediaLocation <pathtovhd> –OS Windows
- Example: Add-AzureImage –ImageName w2012Base –MediaLocation “https://rslaten2.blog.core.windows.net/vhds/w2012Base.vhd” –OS Windows
Create a new Network and Domain Controller in Azure
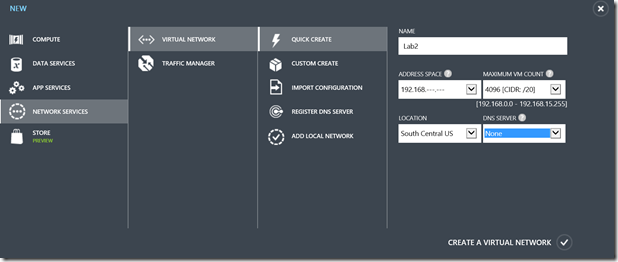
- In the Azure Portal go to Networks and click the Plus sign
- Click Quick Create, name the Network, choose the appropriate Address Space/Location, and click the Check Mark
- Create a new VM in Azure that is a domain controller and DNS Server on this network (we’ll join our custom VM instances to this domain)
- Set this VM to use a static IP Address
- Register that machine as a DNS Server in the Networks section of the Azure Portal
Continue on to Part II…
