Note
Access to this page requires authorization. You can try signing in or changing directories.
Access to this page requires authorization. You can try changing directories.

 By Stephen Armory, Cloud Solution Architect at Microsoft
Introduction
Azure is a vast and varied service, so there are often a plethora of possible ways to tackle simple tasks. One example of this is “How to automatically process an Azure Analysis Services Model”. Numerous options exist, from writing your own Azure Function to PowerShell Scripting.
The “Processing” of Analysis Services Models is a typical admin task that falls to DBAs and Support Technicians to configure and monitor. As such, any approach to handling this shouldn’t include significant software development. In the on-premise world you could use SQL Server Agent to handle this.
The purpose of this article is to provide a simple methodology. This does not mean that it will necessarily be the best approach for you or your organisation, merely that we have considered a number of typical requirements when defining the process.
Summary of Approach
This approach leverages the following concepts, objects and services:
- Use of a Service Principal Name (SPN) within Active Directory.
- The Azure Automation service.
- Use of the “Azure.AnalysisServices” and “SqlServer” Automation Modules.
- Use of a Credential for the SPN.
- Some simple PowerShell script run by the Azure Automation service.
- SQL Server Management Studio (SSMS), to allow the management of the AS Model and Instance.
Benefits of Approach
We are proposing this approach for the following reasons:
- Simplicity of design: We have tried to keep the approach as simple as possible.
- Ease of implementation: By avoiding the use of software development.
- Re-usability: Once implemented, it should be possible to replicate the “Run Books” for each Processing Task.
- Maintainability and centralisation of control: By placing all the “Run Books” into a single “Azure Automation Account”.
- Logging and Reporting: Azure Automation provides excellent logging and reporting capabilities.
- Security: It is proposed that SPNs (Service Principal Names) are used in preference to standard user id’s and passwords. For improved security and manageability.
- Scheduling: Azure Automation provides excellent Scheduling capabilities.
Instructions
Step 1: Create your Service Principal Name (SPN). Step 2: Give your SPN authority to administer Analysis Services. Step 3: Get your AD Directory ID (AKA Tenant ID). Step 4: Use SQL Server Management Studio (SSMS) to provide the Service Principal Name (SPN) with Admin access to the Analysis Services Model. Step 5: Create the Azure Automation Service. Step 6: Setup Azure Automation with the required Modules. Step 7: Provide Automation with the credentials required to run the Analysis Services Refresh. Step 8: Create your Azure Automation “Runbook”. Step 9: Run your “Runbook” and next steps.
Step 1: Create your Service Principal Name (SPN)
| Open the Azure Portal ( https://portal.azure.com ) and sign into your account.Open “Azure Active Directory” and click on “App Registration” then click on “New application registration”.Give the App-registration a name, select Application type of Web app/APII’ve used a sign-on URL of “https://login.windows.net”, feel free to use your own if required.Click "Create". | 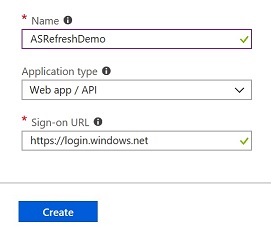 |
|
|
|
| You should now see the following dialog. Copy the “Application ID” onto notepad or equivalent, you will need this later. | 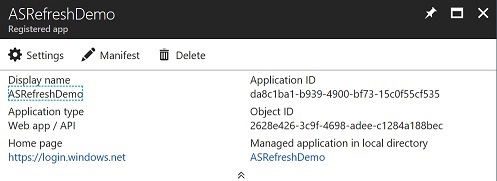 |
Step 2: Give your SPN authority to administer Analysis Services.
| Click on “Settings for your “Registered app” then click on “Required Permissions” you should see something like this. |  |
|
|
|
| Now click on “+Add”. |  |
|
|
|
| Click on “1. Select an API”. |  |
|
|
|
| Type in “Azure Analysis Services”. | 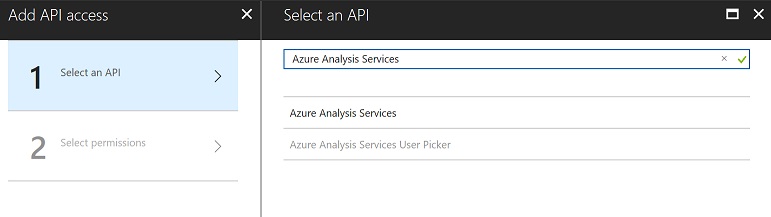 |
|
|
|
| Select “Azure Analysis Services” from the list.Then click “Select” (At the bottom). | 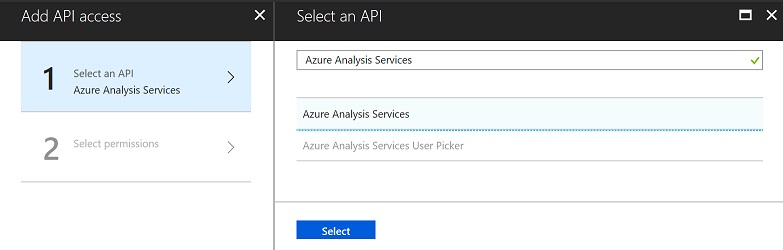 |
|
|
|
| You should now see the following dialog. As shown, click on “Read and Write all models” and click “Select”. | 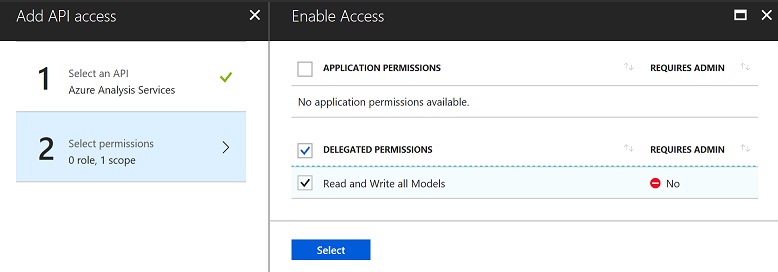 |
|
|
|
| You should now see the following dialog. Click on “Done”. | 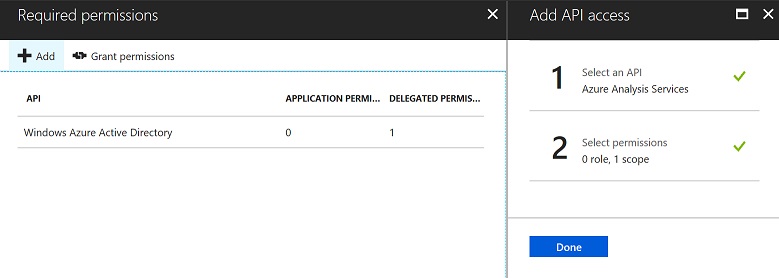 |
|
|
|
| Return to the “Settings” dialog for the “Web app/API” and click on “Keys”. | 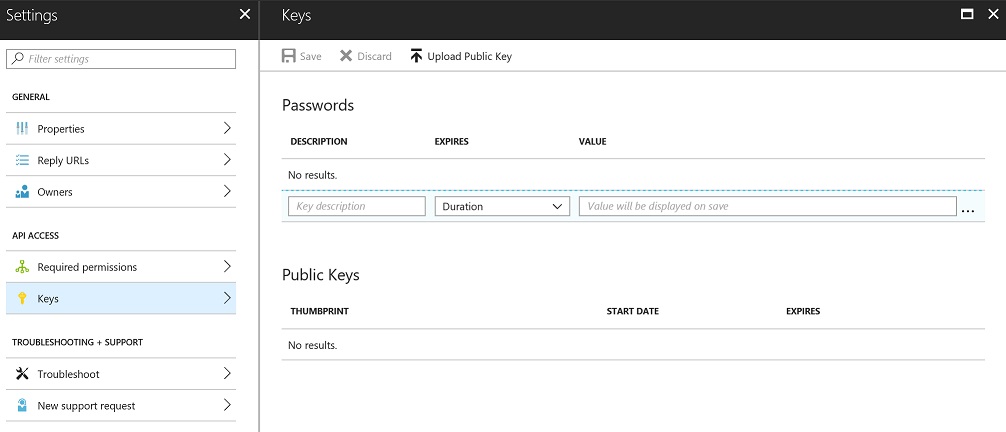 |
|
|
|
| Type a name for a new key into the “Key Description” area and select how long you want the key to last. Then click “Save”. |  |
|
|
|
| Copy the Key Value into Notepad as you will need this later.Note: You should now have an “App Id” and a “Key” value in your notepad. | 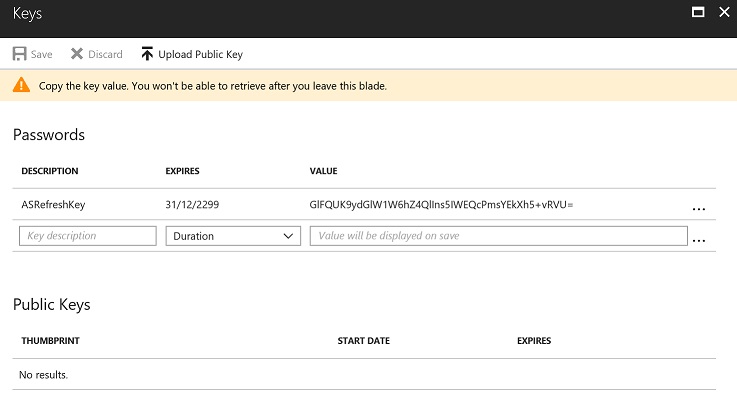 |
|
|
|
Step 3: Get your AD Directory ID (AKA Tenant ID).
| Navigate to “Azure Active Directory” dialog. Scroll down and click on “Properties”.Copy the “Directory ID” into your Notepad.You should now have an “App ID”, “Key” and “Directory ID”.Note: This is also known as the “Tenant ID”. | 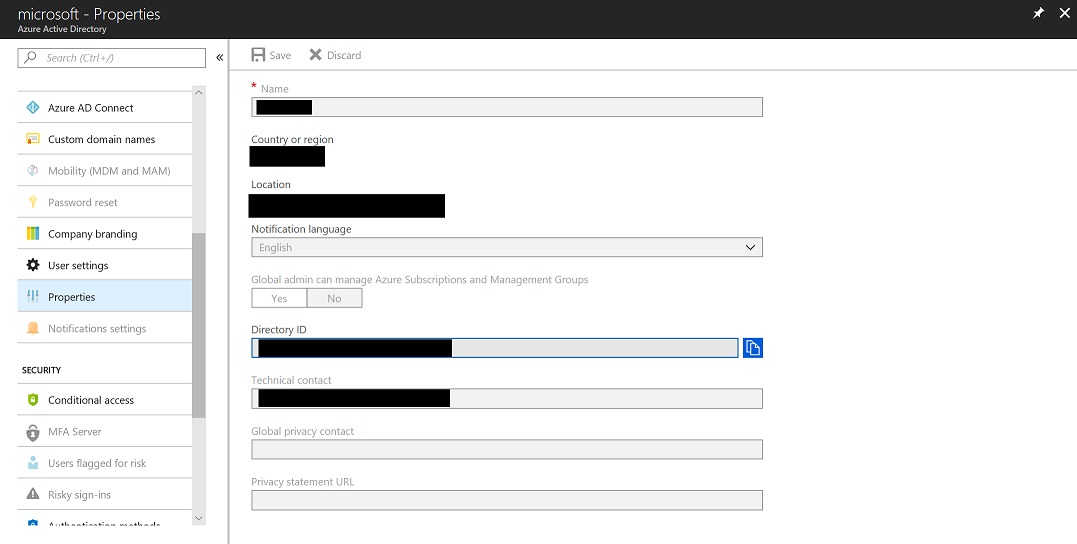 |
|
|
|
Step 4: Use SQL Server Management Studio (SSMS) to provide the Service Principal Name (SPN) with Admin access to the Analysis Services Model.
| Open SSMS and connect to your Azure Analysis Service Instance.Right click on the server name to get the properties dialog. | 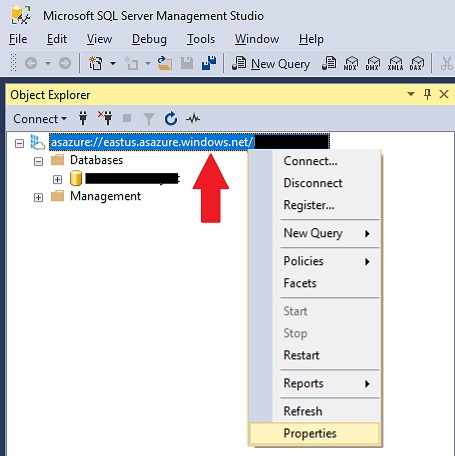 |
|
|
|
| Click on the “Security” option and you should see the following.Click on the “Add” button”. | 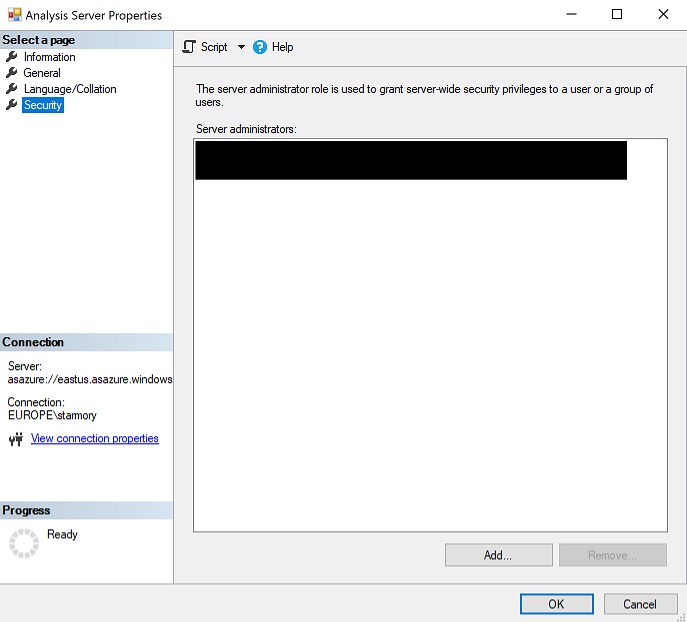 |
|
|
|
| We are now going to provide Azure Analysis Service with the details of the SPN. |  |
|
|
|
In the “Manual Entry” area construct the following string with values from your Notepad.
app:AppId@TenantId (AKA Directory Id)
e.g.
app:da5c1ba1-b922-4900-bf63-15c0f44cf535@72f988bf-52f1-41af-95ab-2d7cd011db77
Click “Add”.
Note: Don't use the "Search" function, it breaks the AD connection.
Step 5: Create the Azure Automation Service.
| It is recommended that you use a “Resource Group” to keep your components in a suitable location. Once in your resource group, click on “Add”. | 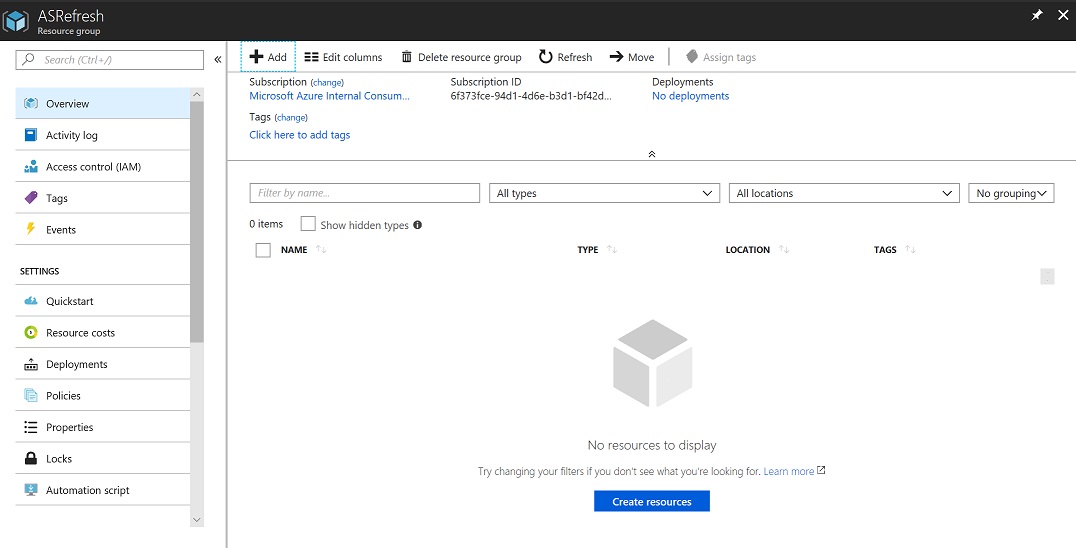 |
|
|
|
| You should now see the following dialog. Type in “Automation”, then click on the “Automation” service. | 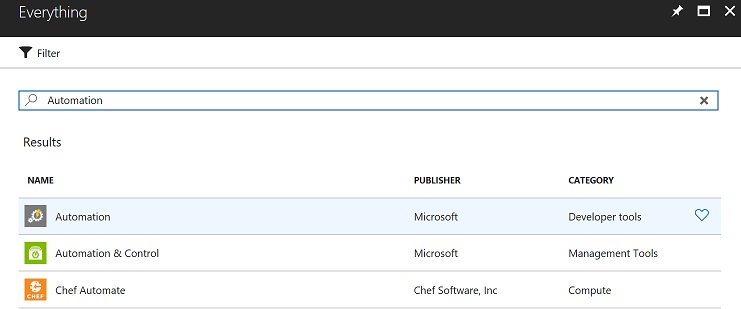 |
|
|
|
| You should now see the following dialog. Click on “Create” at the bottom. |  |
|
|
|
| You should now see the following dialog. Complete it as follows:Name: Choose a suitable name.Subscription: Choose the subscription you want to use.Resource Group: Use the one you chose.Location: Choose a suitable location.Leave the rest of the defaults and click on “Create” at the bottom. This will take a couple of minutes to complete.Go to the next step once completed. | 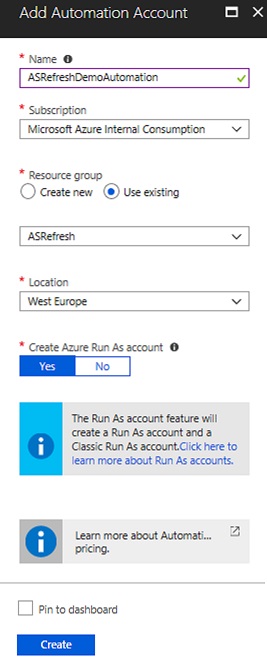 |
|
|
|
Step 6: Setup Azure Automation with the required Modules.
| A number of resources will have been created along with the Automation Account. Click on the Automation Account. |  |
|
|
|
| You should see the following dialog, click on “Modules” on the left at the bottom. |  |
|
|
|
| You should see the following dialog. Click on “Browse Gallery”. | 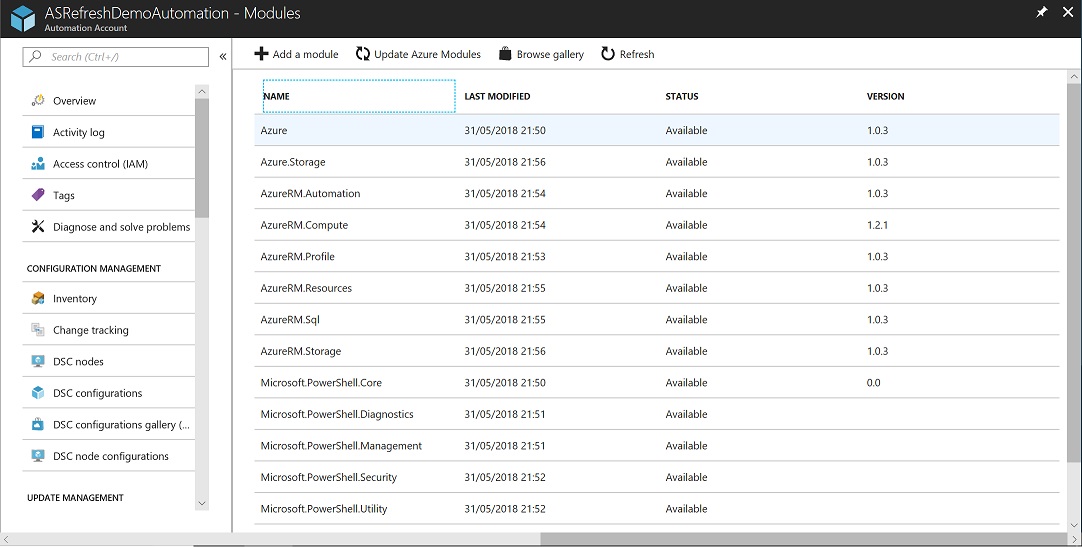 |
|
|
|
| Type in “SQLServer” into the Search area and hit “Enter”.Click on the “SqlServer” module. |  |
|
|
|
| You should see the following dialog. Click “Import”. | 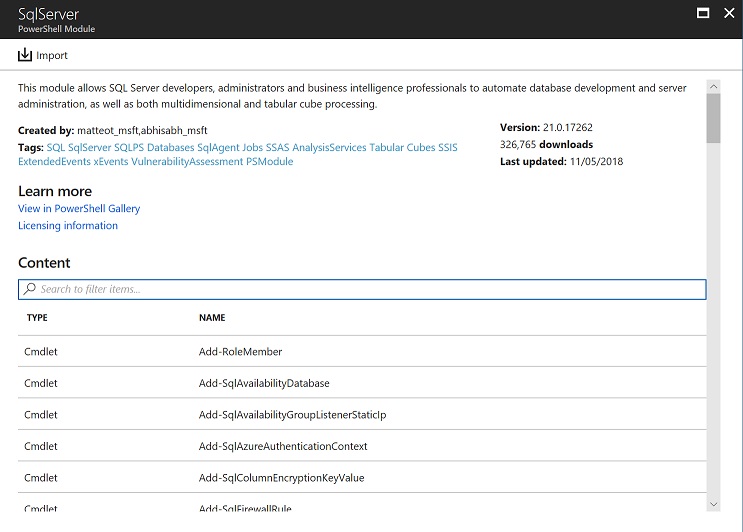 |
|
|
|
| You should see the following “Confirmation” dialog. Click “Ok”. |  |
|
|
|
| Next, we are going to repeat the above process for the “AzureRM.Profile” module.Return to the “Browse Gallery” dialog and type “AzureRM.Profile” into the search area, then hit “Enter”. |  |
|
|
|
| Click on “AzureRM.Profile”, you should see the following. Click on “Import”. | 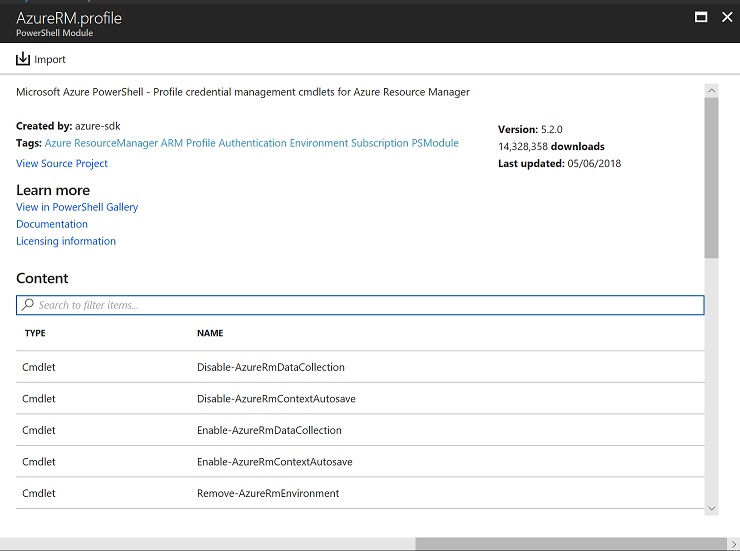 |
|
|
|
| You should see the following “Confirmation” dialog. Check the “I agree to updates” box then click “OK”.Once the module has completed importing, move to the next step. |  |
|
|
|
| Again, we are going to repeat the above process for the “Azure.AnalysisServices” module.Return to the “Browse Gallery” dialog and type “Azure.AnalysisServices” into the search area, then hit “Enter”. |  |
|
|
|
| Click on “Azure.AnalysisServices”, then click on “Import”. | 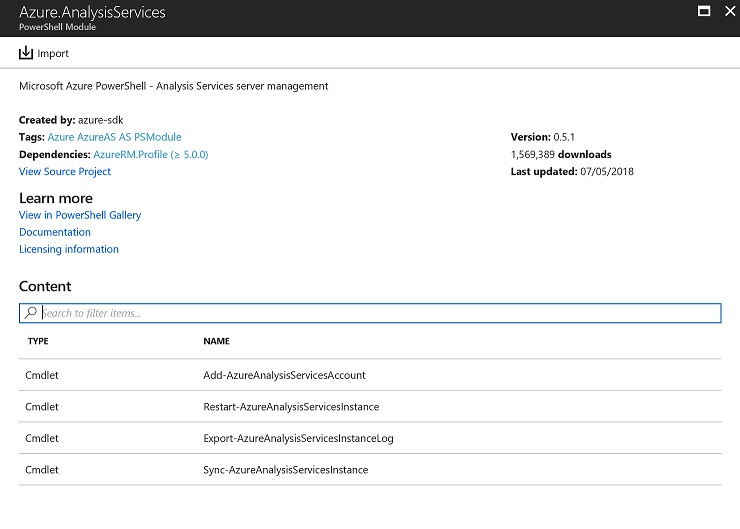 |
|
|
|
| You should see the following “Confirmation” dialog. Check the “I agree to updates” box (if required) then click “OK”.Once the module has completed importing, move to the next step.You should now have “Azure.AnalysisServices” and “SqlServer” modules installed. | 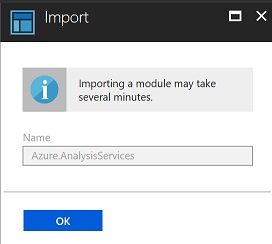 |
|
|
|
Step 7: Provide Automation with the credentials required to run the Analysis Services Refresh.
| Return to the “Azure Automation Account” dialog.Click on “Credentials” at the bottom left. | 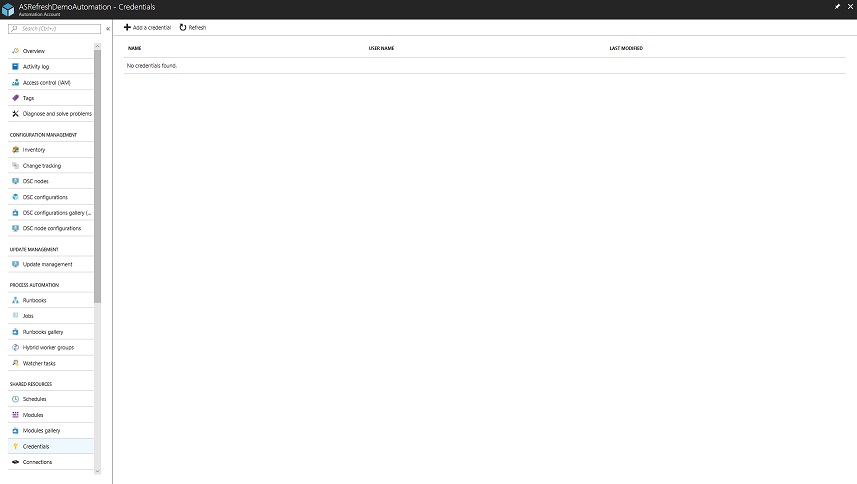 |
|
|
|
| You should now see the following dialog.Click on “+ Add a credential” | 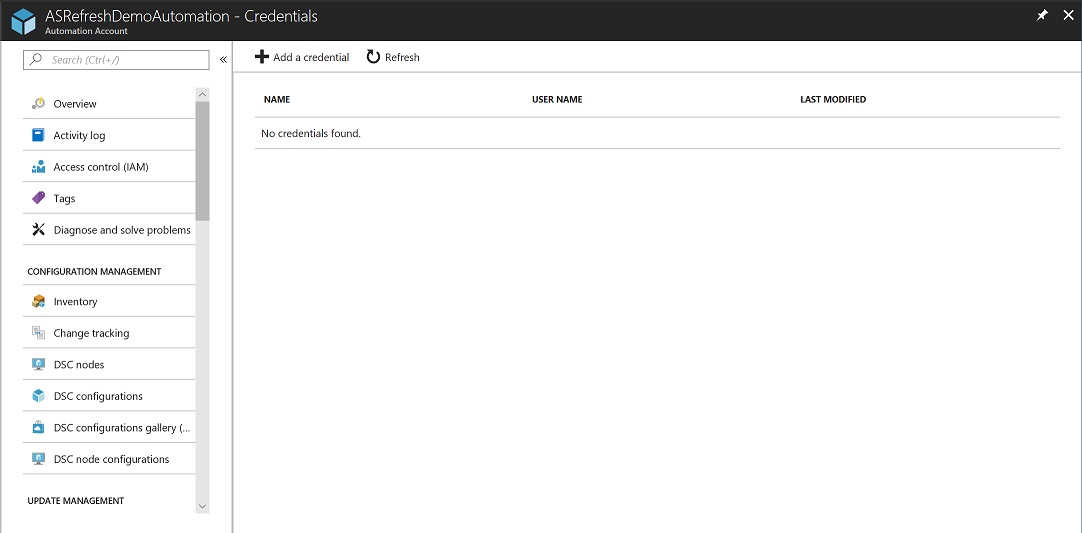 |
|
|
|
| Now create your credential as follows:Name: Give the credential a sensible name.Description: We recommend you fill this in.User name: This is the App Id you should have in your Notepad.Password: This is the Key you should have in your Notepad.Confirm Password: This is the Key you should have in your notepad.Take a copy of the Name you chose and put it into your notebook, this will be used later.Click “Create” | 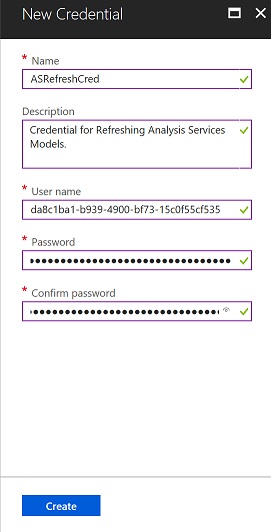 |
|
|
|
Step 8: Create your Azure Automation “Runbook”.
| Navigate to your new Azure Automation Account.Click on “Runbooks”.Click on “+ Add a runbook”.Click on “Create a new runbook”.Fill in the “Runbook” form as follows:Name: Meaningful name.Runbook type: PowerShell.Description: It is recommended you describe the purpose of the runbook here.Click “Create”. | 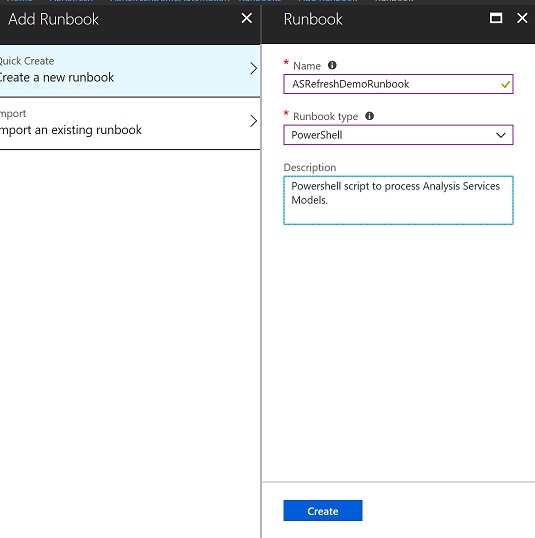 |
|
|
|
| You should now see the “Edit Runbook” dialog. If not, you may have to scroll to the right. | 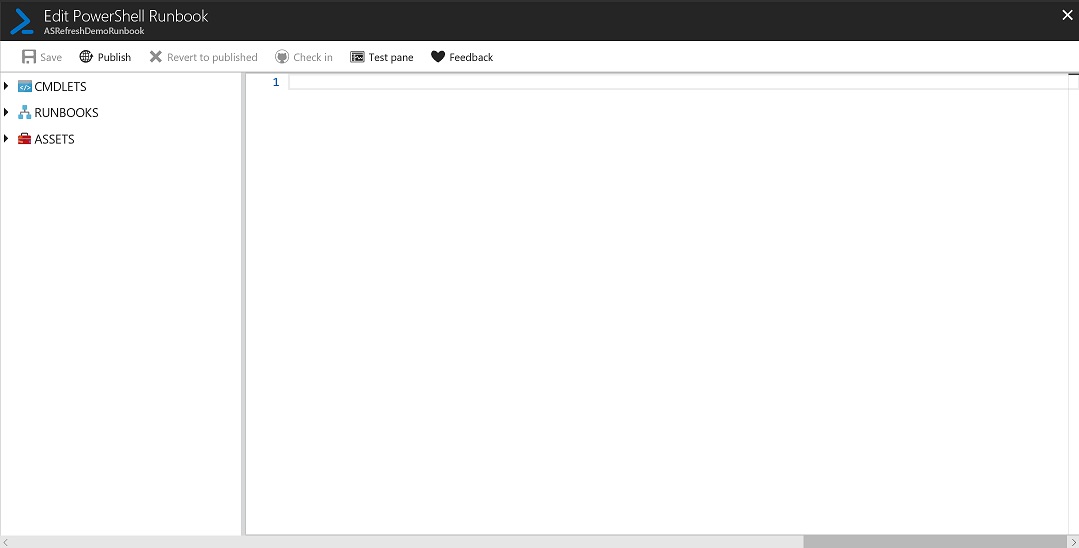 |
|
|
|
Place the following text into the code panel of the runbook.
Click “Save”.
Click “Publish” and confirm.
 $AzureCred = Get-AutomationPSCredential -Name "{Your Credential Name}"
Add-AzureAnalysisServicesAccount -RolloutEnvironment '{AAS Instance Region}' -ServicePrincipal -Credential $AzureCred -TenantId "{Your Tenant ID}"
Invoke-ProcessASDatabase -server "{AAS Instance URL}" -DatabaseName "{Your AAS DB Name}" -RefreshType Full
e.g.
 $AzureCred = Get-AutomationPSCredential -Name "ASRefreshCred"
Add-AzureAnalysisServicesAccount -RolloutEnvironment 'eastus.asazure.windows.net' -ServicePrincipal -Credential $AzureCred -TenantId "74f977bf-8631-41gf-91ab-4d7cd041db47"
Invoke-ProcessASDatabase -server "asazure://eastus.asazure.windows.net/demoas" -DatabaseName "MyASDatabase" -RefreshType Full
Step 9: Run your “Runbook” and next steps.
| Navigate back to the “Runbook” dialog. You should see the following.Run your “Runbook” (Click on “Start”) and confirm. | 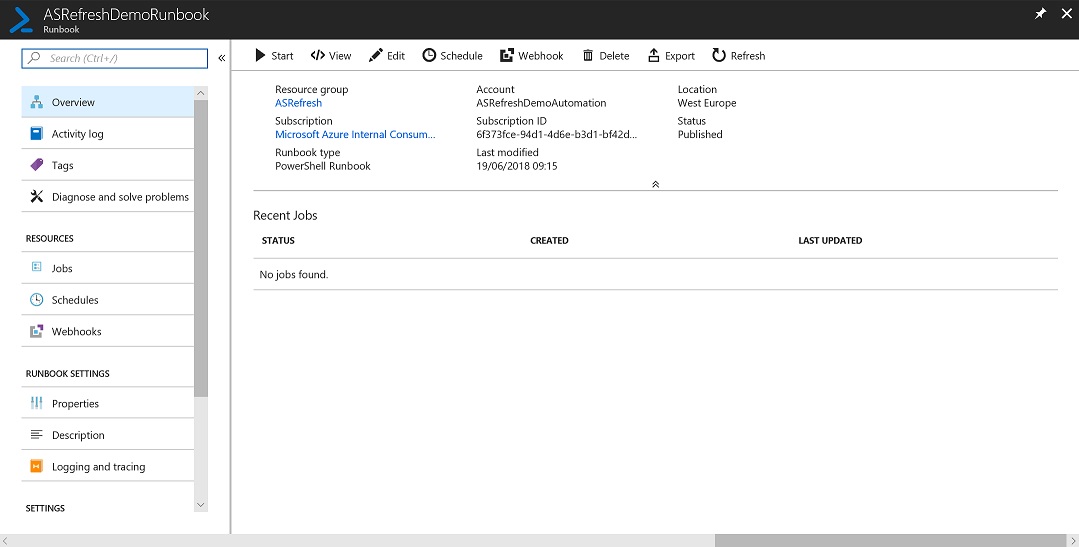 |
|
|
|
| A new “Job” will be created and you should now see the following.Navigate back to the “Runbook” dialog. | 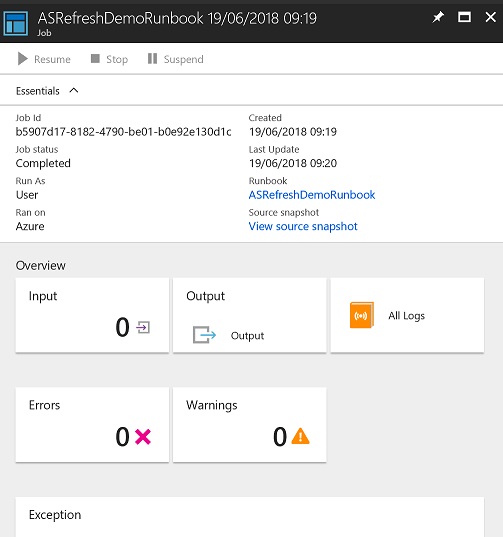 |
|
|
|
| You should now see a “Queued” job.Click refresh every few seconds to see the “Job” progress.Once you see “Completed” click on the “Job”. | 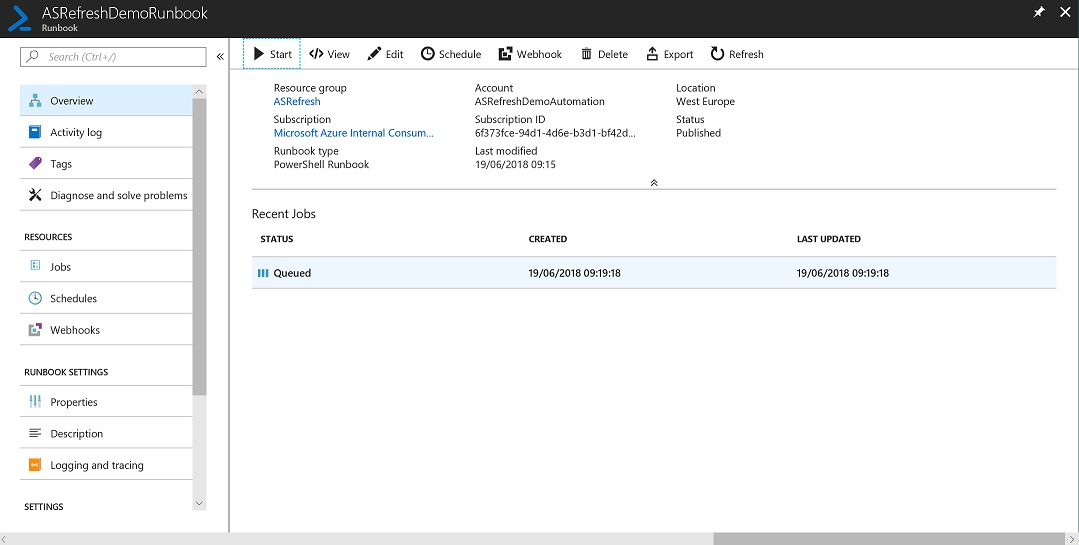 |
|
|
|
| With any luck you will see the following “Completed Job” with no “Errors”. | 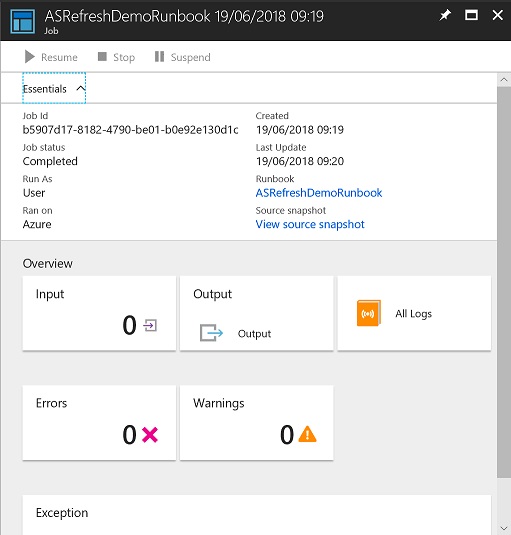 |
Comments
- Anonymous
July 12, 2018
Thank you so much. This was a great help! - Anonymous
September 24, 2018
Great article, easy to follow and understand. Thank you it was very helpful! - Anonymous
October 16, 2018
Hi,We had similar error at two places:Authentication failed: User ID and Password are required when user interface is not available.First at Azure cube processing, which was fixed by SPN creation.Second when we are connecting from on Prem SSRS data source to Azure Analysis Service. The problem still persist here.Are we missing something here?Regards,Vishal - Anonymous
November 01, 2018
Thanks for the great article. We are currently using this approach to process our models. We are using Alerts to monitor the jobs (runbooks) for failures, but I was wondering if you could suggest a better way. Currently, Alerts send an email indicating that the alert is resolved after a configurable duration. This is confusing for users as the issue may not be resolved. Thanks! - Anonymous
November 05, 2018
Hi, Thanks for the awesome information!I managed to get everything running/working for a long while but all of a sudden my runbook hangs on status 'running.'I don't receive any errors or anything. Do you perhaps know what could be the issue or how to trouble shoot this ? Regards, Andrew - Anonymous
January 16, 2019
How should we set up authentication to the datasource within the tabular model for proper processing? For example, I'm using Azure Analysis Service connecting to Azure SQL Server. I'm using OAUTH when developing in VS2017, but after deploying and processing, this doesn't seem to be working. - Anonymous
February 11, 2019
Great article - could such a runbook be invoked from an Azure Data Factory V2 pipeline?