Azure: Working with the new Portal
Introduction
The new portal has been around for a while now, but there seems to be a lack of articles explaining where to find what and what you can do with it. Even while this might sound basic, the portal keeps improving and even experienced users might not always be up to date. So time to bring up a wiki article where we discuss the need to know's and also share major updates to this article when they arrive.
Click on picture to enlarge
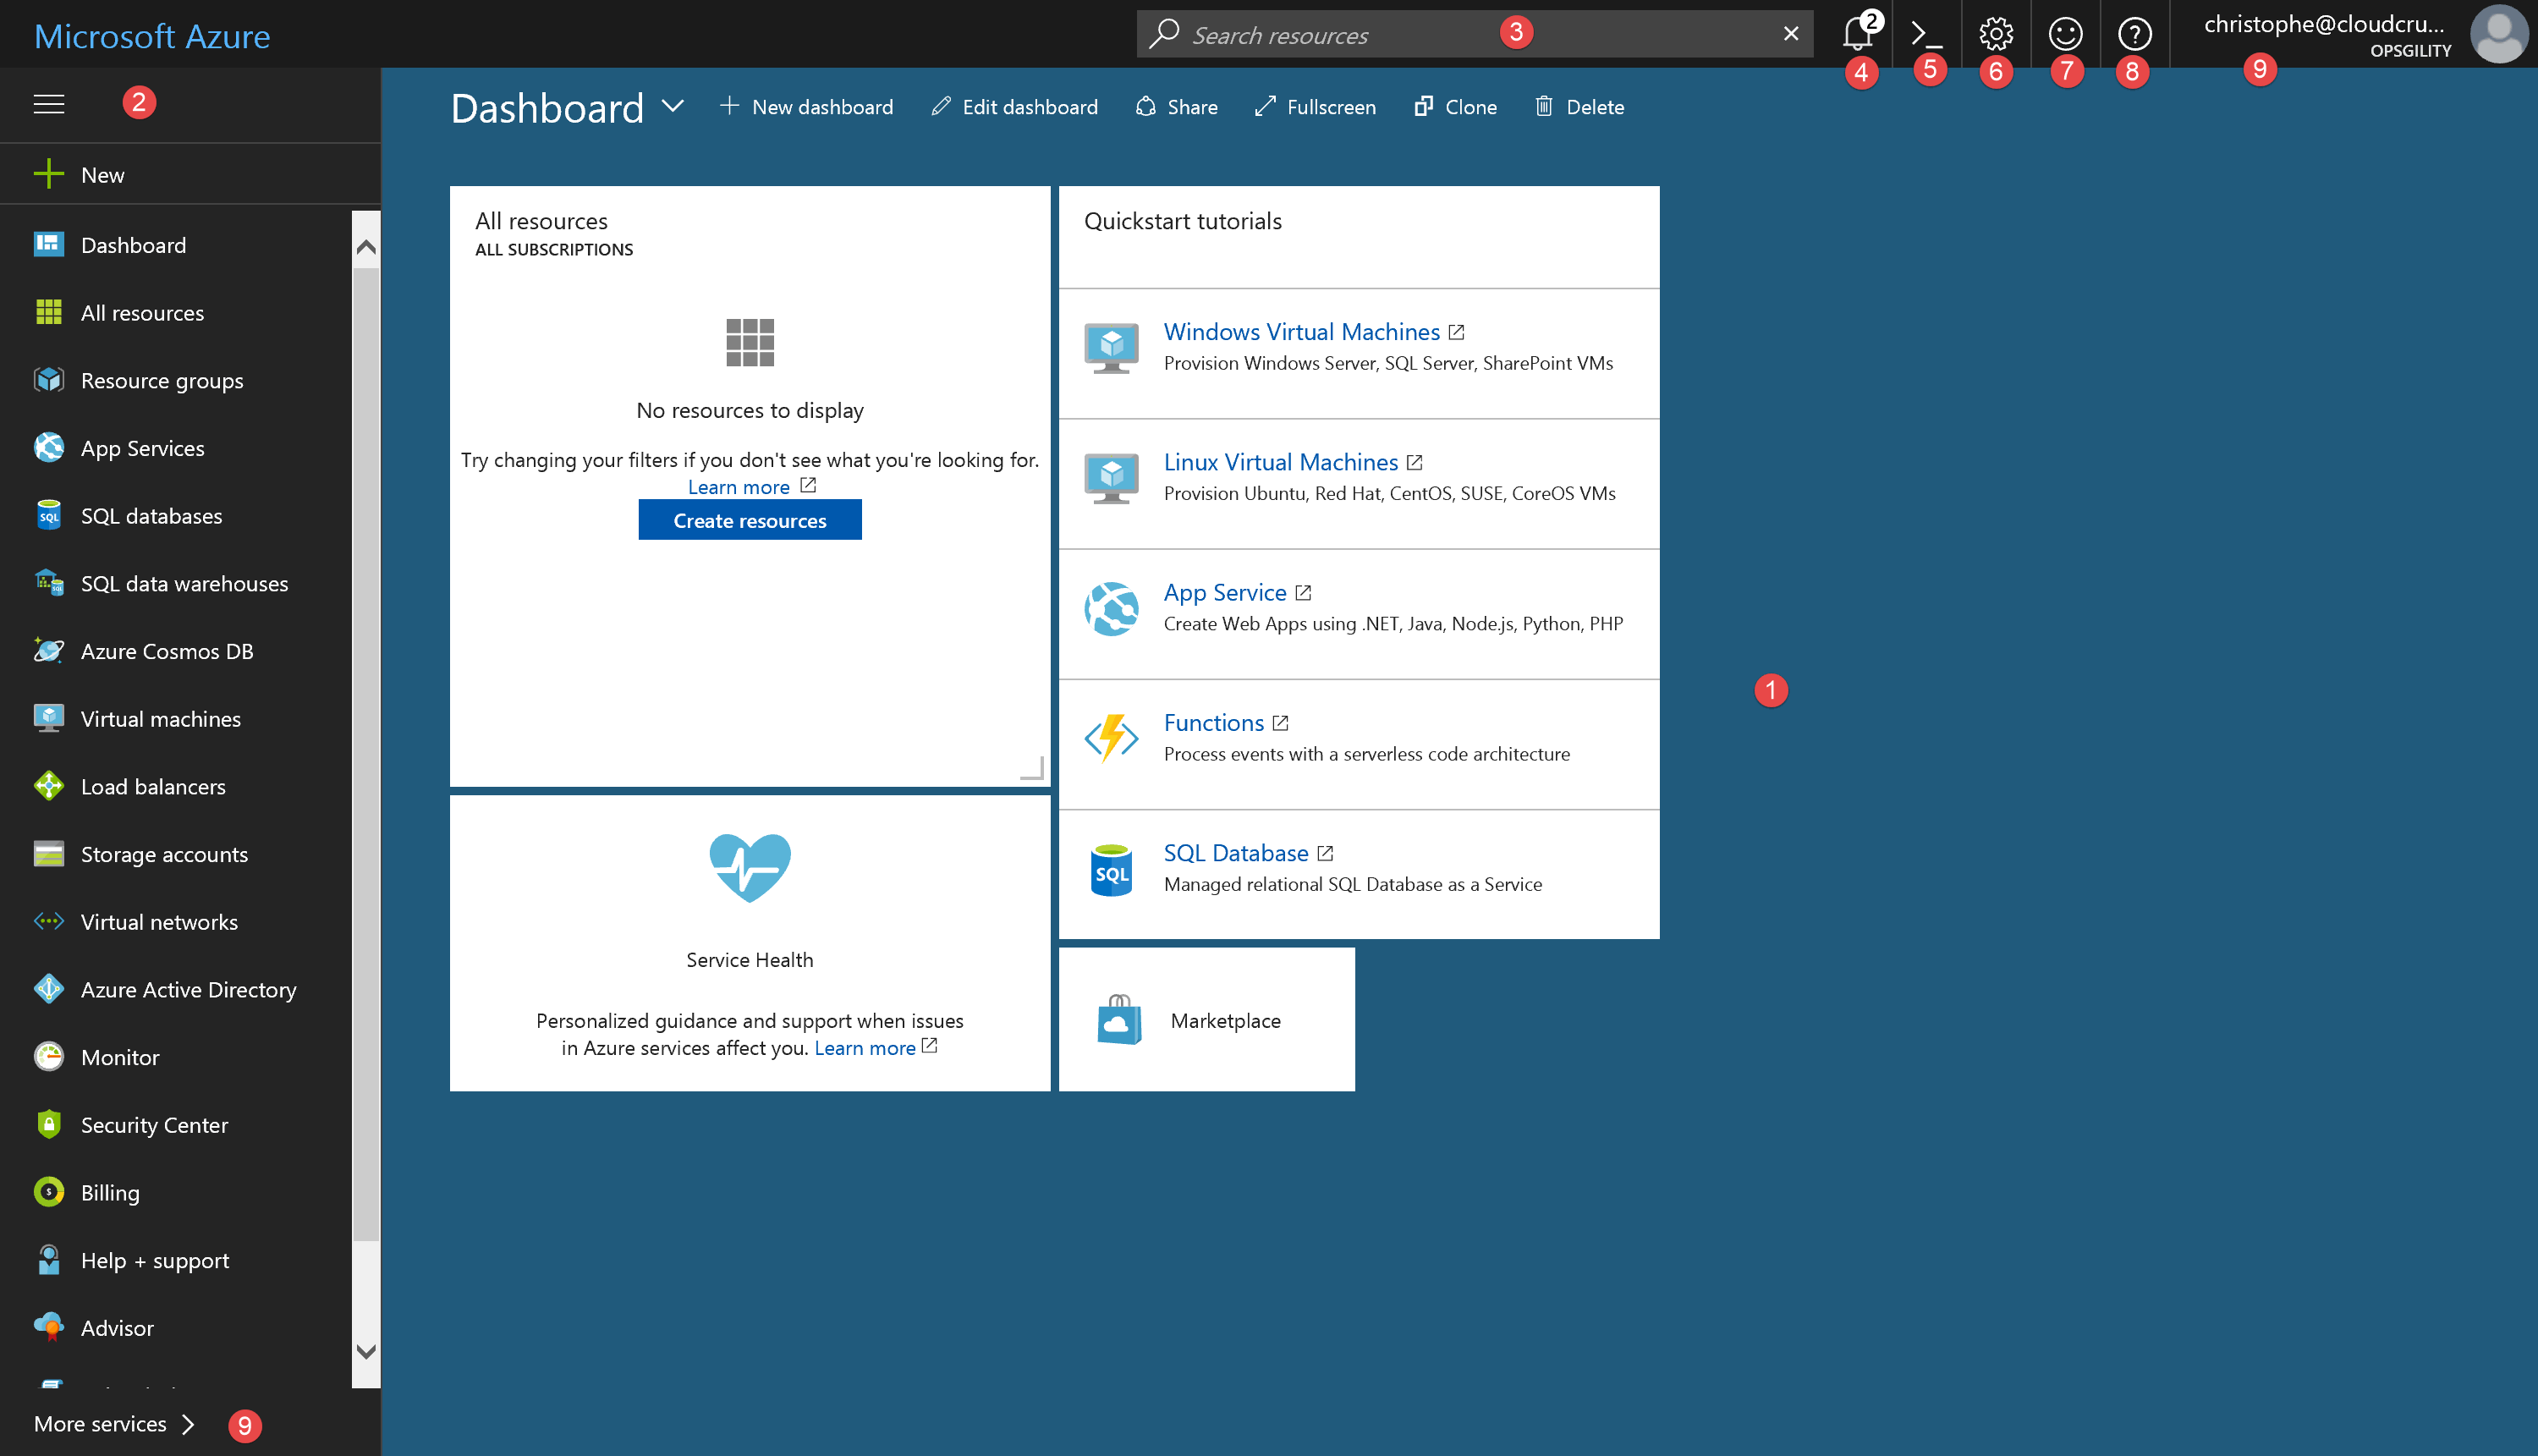
This is the a default page that we will see after we have created a new subscription
Changing colors
Let's start with a small trick, did you know that if you click twice in the free space (next to the tiles) you can change the appearance of the portal? We can change colors depending on our mood, or maybe we're working late (can happen working in IT) and we want a darker theme that's more friendly to the eye.
1. Dashboards
The dashboard is the space on the right side from the menu and below the top bar, it is fully flexible to our needs, we can add and remove Tiles (resource items) to it, resize the tiles and even create multiple dashboard pages for different teams. Lets go over the options.
Options
- With the "+ New dashboard" button we can create as many dashboards as we want, this can come in handy if we have multiple teams working on the Azure platform, maybe our finance dept. will also want one for them?
- the "Edit dashboard" button gives us the option to edit the current displayed dashboard.
- The "Share" button creates an Azure Resource from the dashboard that then can be shared among different subscriptions. Once it is an Azure resource, we can apply role based access on it, so we can also give rights to external users that might normally not be part of our subscription.
- "Full screen" will enlarge the dashboard to full screen, not the whole portal (if we want that just press F11 in IE)
- The "Clone" button will duplicate our dashboard. Maybe we created a dashboard with shared resources that we want to publish in all (team) dashboards. Cloning will save us time doing so
Adding Resources to the dashboard
We can add resources to the dashboard in 2 ways, the first way is to click the 'edit dashboard' button and select the items from the left menu and drag them into the dashboard area.
The second way is to find the resource that we previously created and click the following button to stick it to the dashboard:
2. Side Menu
Following sign  will expand or collapse the menu items, when collapsed we will only see the icons:
The  will let us create new items/resources that are available from the Azure Market Place.
Just type what we are looking for (or browse through the logically structured service menu) and a list with all possible items will be generated.
3. Service Icons
The items we see in the menu is also customizable, to add or remove items (favorites as I call them), click on the  button.
When the service menu is expanded we will be able to let the stars shine or extinguish, when the stars shine they will be added to the menu (2) bar.
Good advise here is to deselect what we don't need and select the services that we have already deployed, this is a quick way to get to our resources.
We can also drag the icons up and down, so we can also arrange them in a way that's most logic to ourselves.
Note: these adjustments are linked to the selected Azure AD Tenant, when we change tenant/subscriptions this will take over the current selection of that new tenant (see 10.Account for more info).
4. Search bar
The search bar located at the top bar of the portal will give us results on resource names, non empty resource groups and Azure services
5. Notifications
The notifications icon ![]() will give our success/failed results on every action we take on the portal.
will give our success/failed results on every action we take on the portal.
note: action made through Power Shell, Azure CLI, Visual Studio,.. and any external tool will not be shown.
6. Cloud Shell
The Cloud Shell ![]() is one of the latest and greatest additions to the portal, once activated it will give us the option to run Azure CLI 2.0 on:
is one of the latest and greatest additions to the portal, once activated it will give us the option to run Azure CLI 2.0 on:
- Azure tools
- Linux Shell Interpreters
- text editors
- source control
- build tools
- container tools
- database tools
- and more through every update release (like Power Shell, where are thou?)
The Cloud shell makes it possible to be used by virtually any location, without the need for locally installed tools. The first time we will be asked to create a Storage Account, this will then create an Azure File storage location for us to persist our storage needed for scripting or other actions. The storage account will be automatically available the next time we login to the portal as it is connected to the user account who created it.
7. Settings
We can apply following setting through the gear icon ![]()
8. Feedback
Happy or dissatisfied on our Azure Portal experience? Share it with the product team, and YES, they listen!!
9. Help and Support
Probably the fastest way to create a support ticket:
10. Account
One of the most important ones (imho), as I see many people not really understanding this part while it is crusial to verify we are working in the correct tenant and it's subscription(s). Our user account can be member of a single subscription, but if we need to manage multiple subscriptions with the same user account, this is where it can get tricky. When we click on our account it is important to select the correct Azure AD Tenant, otherwise the subscriptions linked to that tenant will not be visible (frequently posted 'issue' in Technet Azure forum where a user is invited to the subscription but they can't see the resources they have been granted through RBAC.)
Example:
Being member of the synergics.onmicrosoft.com tenant, the default tenant will be just that. In other words, this is the one that will show up automatically when logged on with my Synergics account. However, my account has membership (through invitation) in other subscriptions that we manage. When we have access to resources on other subscriptions they will be displayed when we click on the account:
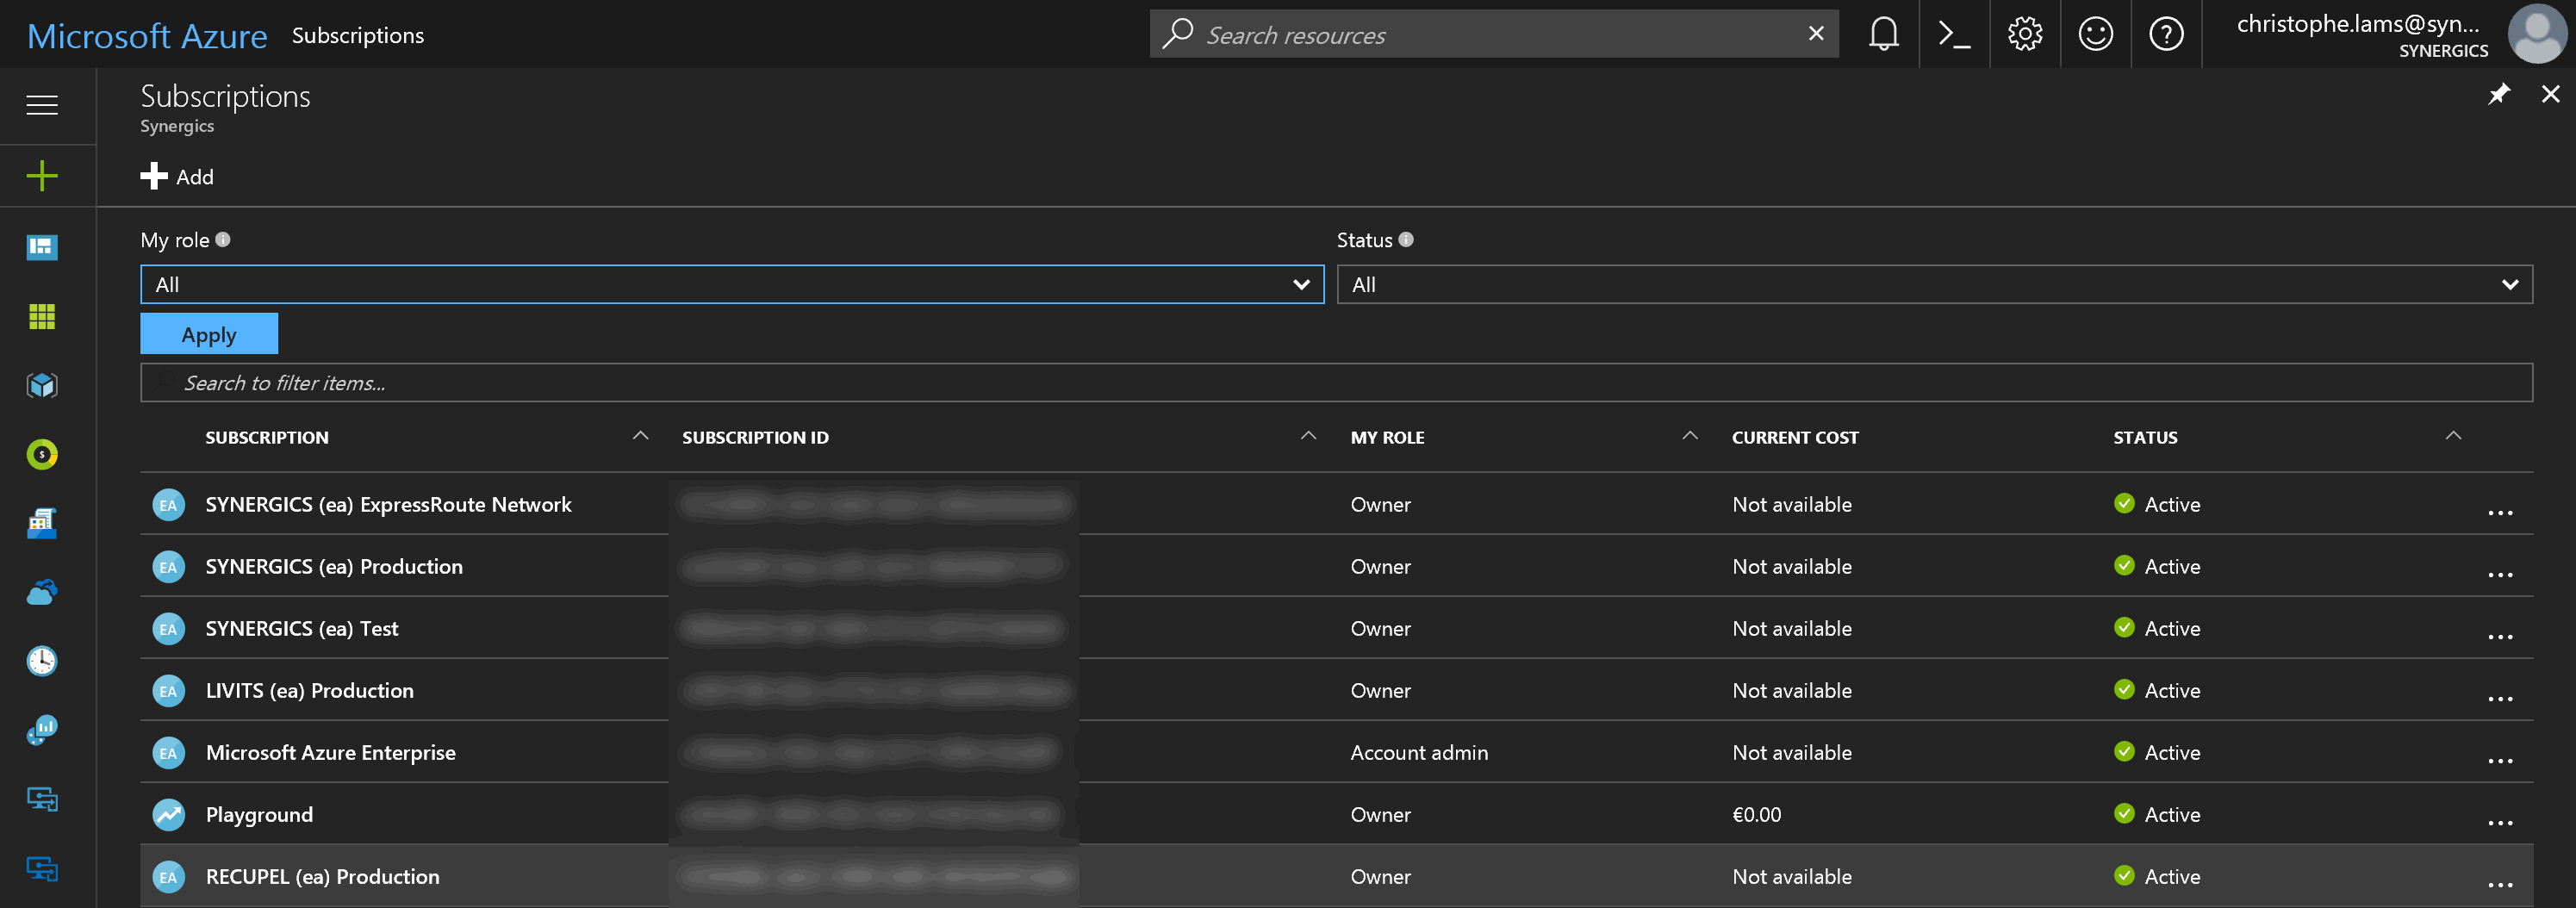
and remember that 1 tenant can have multiple subscriptions linked:
Furthermore, in the account selection you can also:
- log out
- change your password
- view your permissions
- submit ideas
- view your bill
Glossary
| Item | Description |
| CLI | Domain Name System |
| AD | Active Directory |


