Azure VM: Merge Multiple Domain Controllers Into Azure Nested Virtualized VMs (Part 1)
Note
The recommended method to implement this scenario requires an S2S VPN connection in order to ensure resilient connectivity. The following scenario was tested with both deployment methods (S2S, P2S) and P2S VPN connection wasn't as stable as the S2S VPN connection. More details about setting up an S2S VPN can be found in this link.
Series
This article is a part of a series. (Part 2), (Part 3)
Introduction
In previous posts, we read what the MS Azure computing service has to offer for Domain Controller cases. In this post, we are going to talk about a specific scenario, how can we deploy more than one Domain Controllers in a nested virtualized environment hosted by only one Azure Virtual Machine. For this post purposes, we see how to accomplish that with one Domain Controller, but we follow the same steps for the others too. In this part (Part 1) we will read how to create the deployment main resources VM, VNet, Storage.
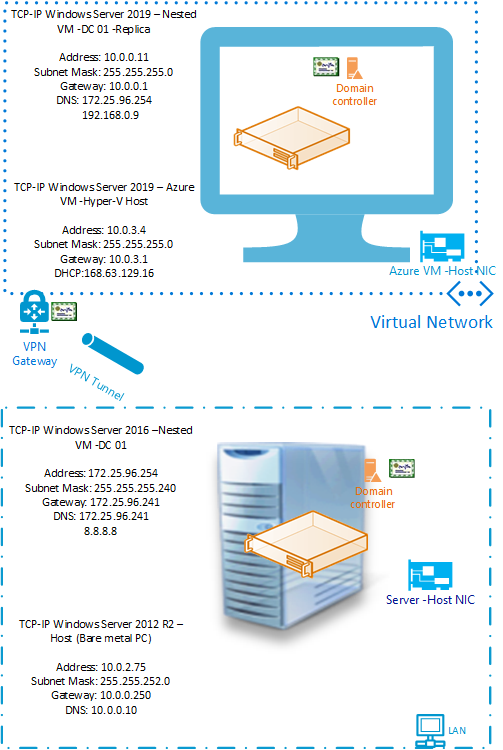
Architecture Diagram
This diagram describes the architecture of the scenario.
A Bare metal PC hosted a Hyper-V VM which was promoted to be a Primary Domain Controller.
An Azure VM hosted a Hyper-V VM with the ADDS role installed. The scenario was to replicate the domain to the nested Azure Domain Controller.
This scenario was implemented by using two P2S VPN connections to complete the replication. The PDC was connected to the Azure Hyper-V host, and the nested DC was connected to the Azure Hyper-V host too.
Prerequisites
To begin the deployment we make sure that we have all the following:
- Microsoft Account
- Active Azure Subscription
- A Virtual Machine with the Hyper-V feature enabled
- A Virtual Network
- An Azure Virtual Network Gateway, for the P2S VPN
Note
In a production environment the VPN type MUST be Site-To-Site
Prepare The Infrastructure in Azure
First, we have to deploy the Azure Virtual Machine. After Microsoft released Dv3 and Ev3 VM size, we are in position to deploy Virtual Machines on Azure to host Hyper-V virtual machines.
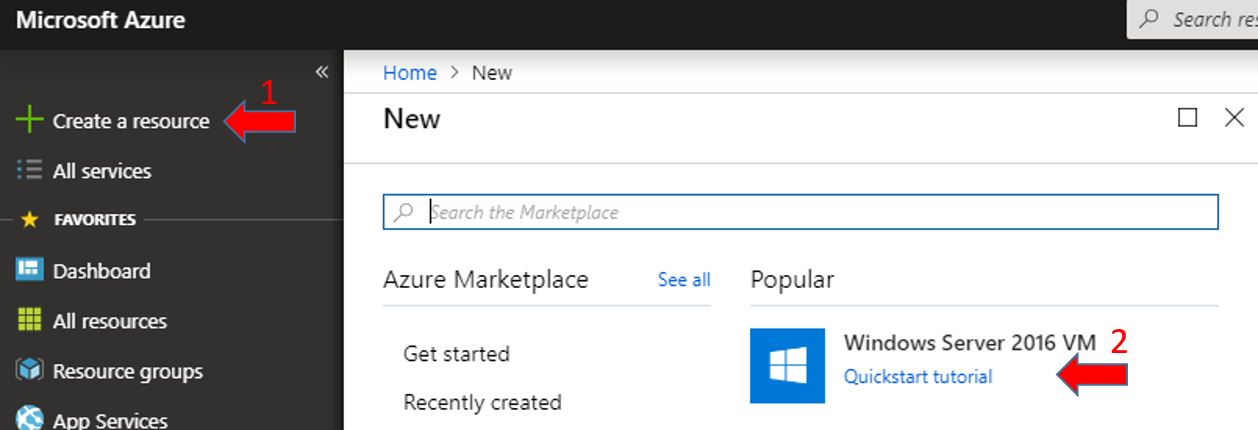
Create The Virtual Machine
From the left Main blade, click Create a resource and select Windows Server 2016 VM, as the image below shows.
The Basics Tab
In this tab, we are able to enter the data for the Instance details, Administrator account, and Inbound port rules, as image below shows.
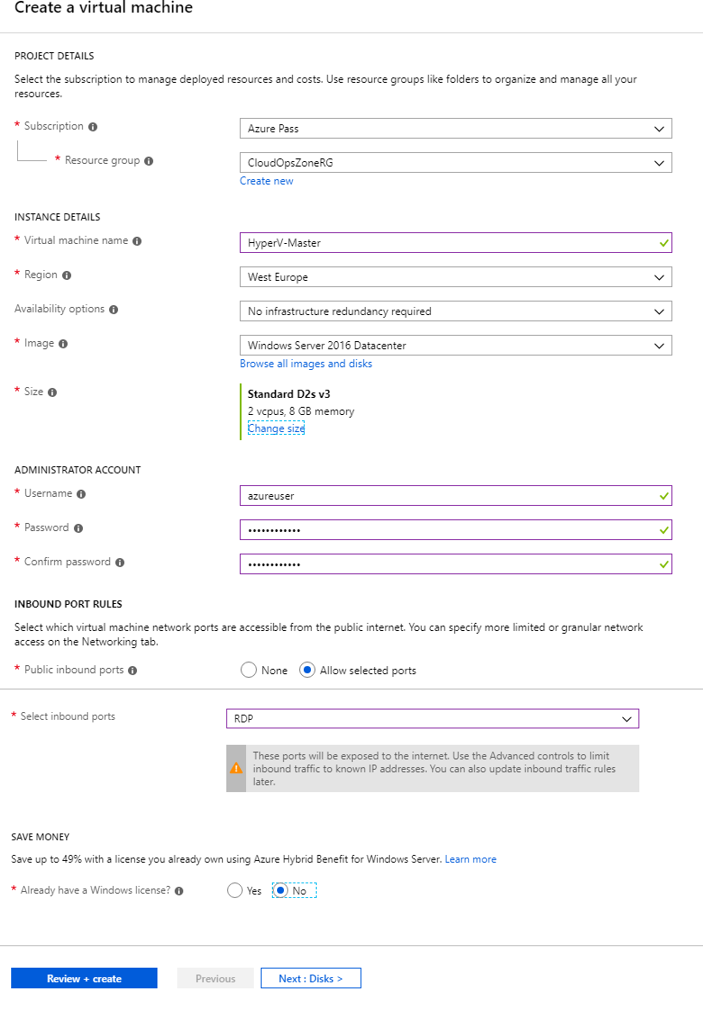
| Setting | Value |
| Subscription | Select an existing Subscription |
| Resource Group | Create a new or Select an existing Resources Group |
| Virtual Machine Name | Type the Virtual Machine Name |
| Region | Select the Region where the resources will deploy |
| Image | Select the Image, e.g Windows Server 2016 Datacenter |
| Size | Select the Virtual Machine size, e.g Standard D2s v3 |
| Username | Type the admin account Username |
| Password | Type the admin account Password |
| Confirm password | Re-type the admin account Password |
| Select inbound ports | Select the port(s), that the Virtual machine will be accessible from that. |
The Disks Tab
In the second tab we can configure the disk system in the Virtual Machine.
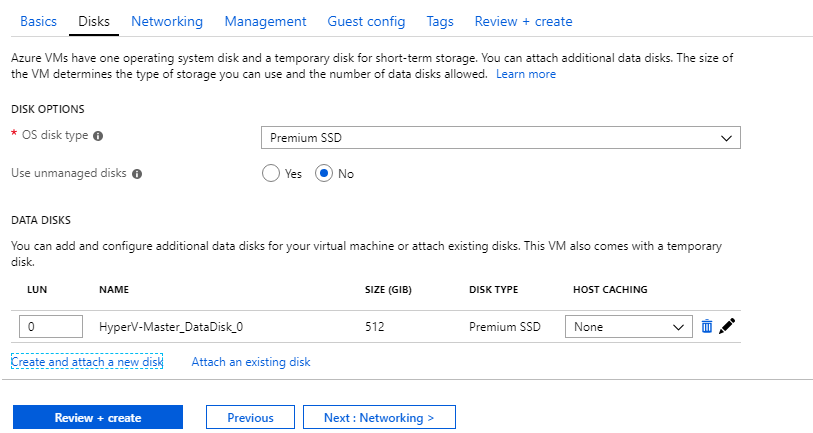
| Setting | Value |
| OS disk type | Select the disk type for the OS, e.g Premium SSD |
| Data Disks | In this section we able to attach extra Data disks to the Virtual Machine. |
The Networking tab
In this tab, we can configure a new or select an existing virtual network for the Virtual Machine.

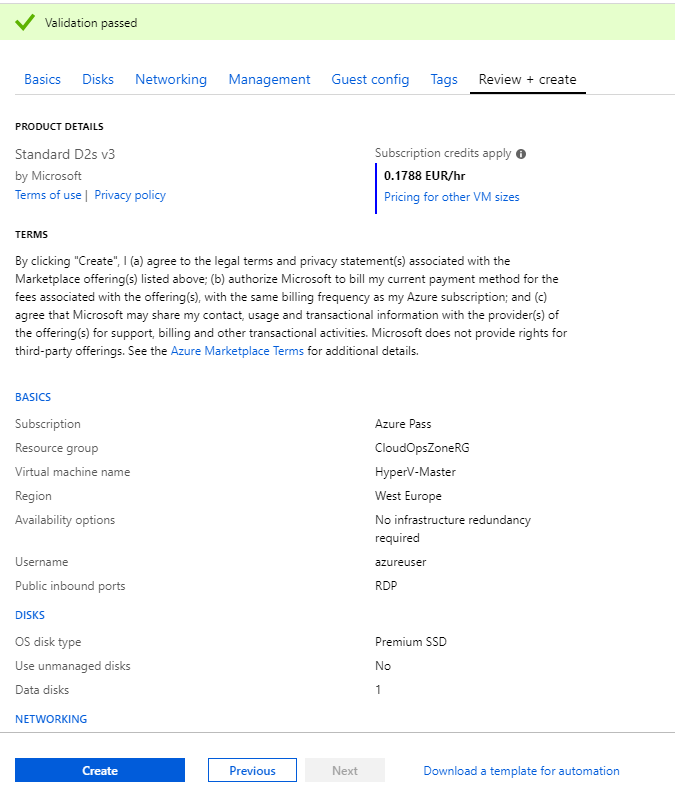
The Review + Create tab
In this tab we just make a review of the deployment, check if these are the product details that we want, click the button Create.
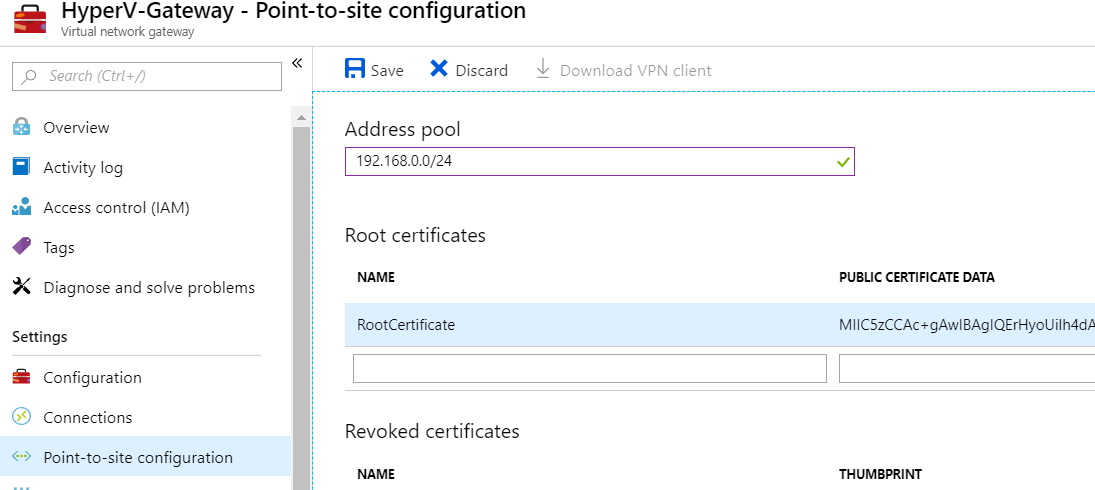
Create Point-To-Site VPN (P2S)
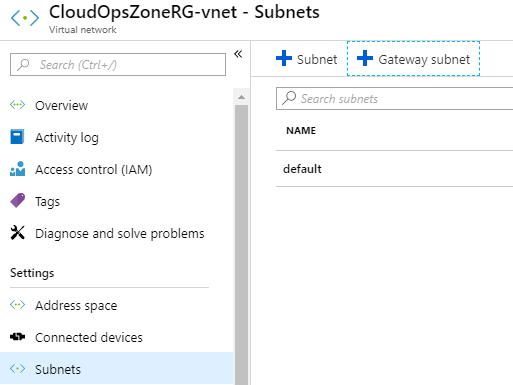
Create a Gateway Subnet
The Gateway Subnet encrypts the traffic between an Azure VNet and On-premises network.
 Caution Caution |
|---|
| The name of this Subnet MUST be "GatewaySubnet" to work properly |
From the Virtual Network main blade, select -Subnets-click "+Gateway subnet"****
** **
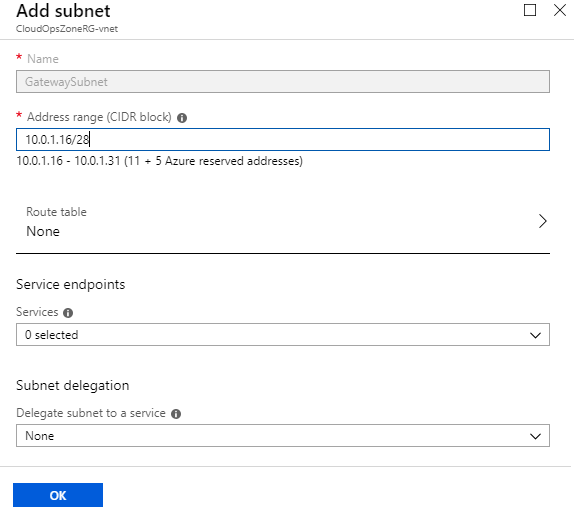
Define the Address range e.g [10.0.1.16/28], and click OK
Search for the service "Virtual network gateway", click the first result like the image below shows and at the next blade click** Create. **

At the {Create virtual network gateway} blade fill all the information and click Create to start the deployment.

| Setting | Value |
| Name | Type the Virtual Network Gateway Name |
| Gateway Type | Select VPN gateway type |
| VPN Type | Select Route-based VPN type |
| SKU | For the post needs, we select the Basic SKU |
| Virtual Network | Select the Vnet, which contains the Virtual Network Gateway Subnet |
| Public IP Address | Type a Name for the Virtual Network Gateway Public IP |
| Subscription | Select the Azure Subscription |
Note
The Virtual Network Gateway deployment can take up to 50 minutes.
Summary
In Part 1 of this post, we talk for the architecture diagram of this scenario and the first basic steps for Azure Virtual Machine, VNet provisioning, and the Azure Point-To-Site configuration. In Part 2 we will talk about the Hyper-V Role/Feature and the nested Virtual Machine deployment.
See Also
- Create Azure Windows Virtual Machine
- Create Azure Virtual Network
- Create Azure VPN