ASP.NET Core Application with Docker Support
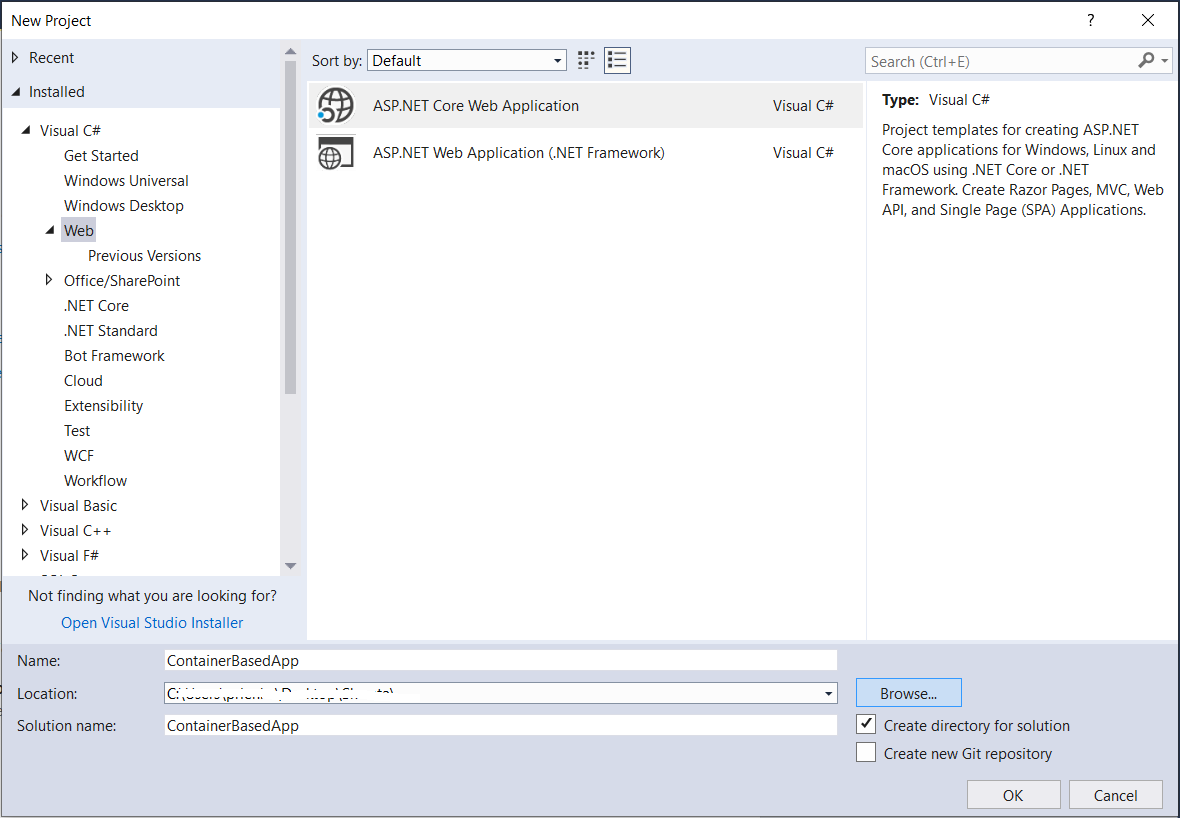
Open Visual Studio, go to New Project and Select ASP.NET Core Web Application as shown below:
https://www.codeproject.com/KB/aspnet/5164456/Image4.png
Once you click on Ok, you will get the below screen where you have to select the checkbox ‘Enable Docker Support (Requires Docker for Windows)’ and OS as ‘Windows’.
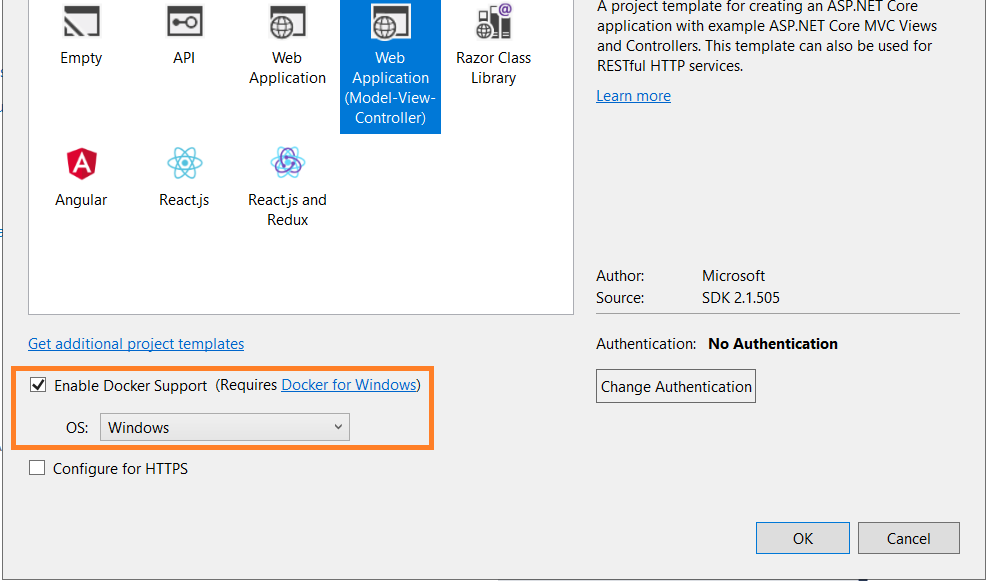
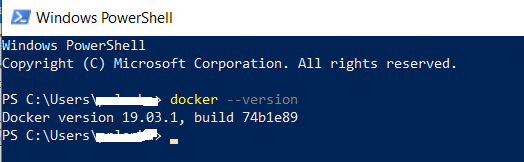
There is also a hyperlink given ‘Requires Docker for Windows’, which can be used to install docker for Windows. In case you didn’t install docker before starting this exercise, it can be done now by clicking on this hyperlink. You can also verify the docker installation by typing the below command on Windows PowerShell:
https://www.codeproject.com/KB/aspnet/5164456/Image7.png
Once the application is created, you will see a file named Dockerfile is added to the application. At this point, if you want, you can change the views for your application.
What is Dockerfile?
On navigating to Solution Explorer, you will see Dockerfile having content similar to the below one:
FROM microsoft/dotnet:2.1-aspnetcore-runtime-nanoserver-1803 AS base
WORKDIR /app
EXPOSE 80

FROM microsoft/dotnet:2.1-sdk-nanoserver-1803 AS build
WORKDIR /src
COPY ["ContainerBasedApp/ContainerBasedApp.csproj", "ContainerBasedApp/"]
RUN dotnet restore "ContainerBasedApp/ContainerBasedApp.csproj"
COPY . .
WORKDIR "/src/ContainerBasedApp"
RUN dotnet build "ContainerBasedApp.csproj" -c Release -o /app

FROM build AS publish
RUN dotnet publish "ContainerBasedApp.csproj" -c Release -o /app

FROM base AS final
WORKDIR /app
COPY --from=publish /app .
ENTRYPOINT ["dotnet", "ContainerBasedApp.dll"]
Dockerfile is a text file which contains some commands. These commands are used to create docker image. Let’s take a brief of these commands:
FROM – This sets the base image for the following instructions and our base image is dotnet:2.1-aspnetcore
WORKDIR – This sets the working directory for storing the outputs, which are generated using the given command
EXPOSE – This informs docker that container listens on a given port
COPY – This copies files/folders from source to destination path
RUN – Executes given command on given image
ENTRYPOINT – This sets the container to be run as an executable
More information about Dockerfile can be found here.
Generating Docker Image From Dockerfile
Dockerfile is used to create a docker image as this file contains all the necessary information which is required to build an image. Build is the command which is used to create an image from the docker file. Now generating an image can be done either by using the Visual Studio UI or by using CLI. Let’s have a look at the Visual Studio path here.
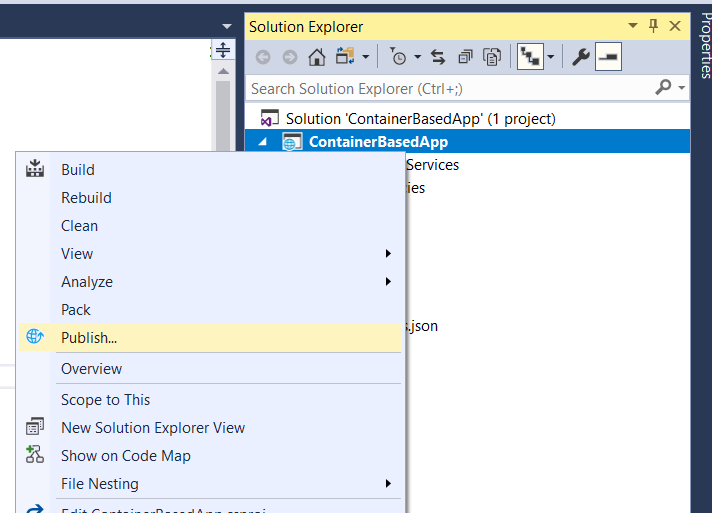
Right click on the project and click on Publish…
https://www.codeproject.com/KB/aspnet/5164456/Image10.png
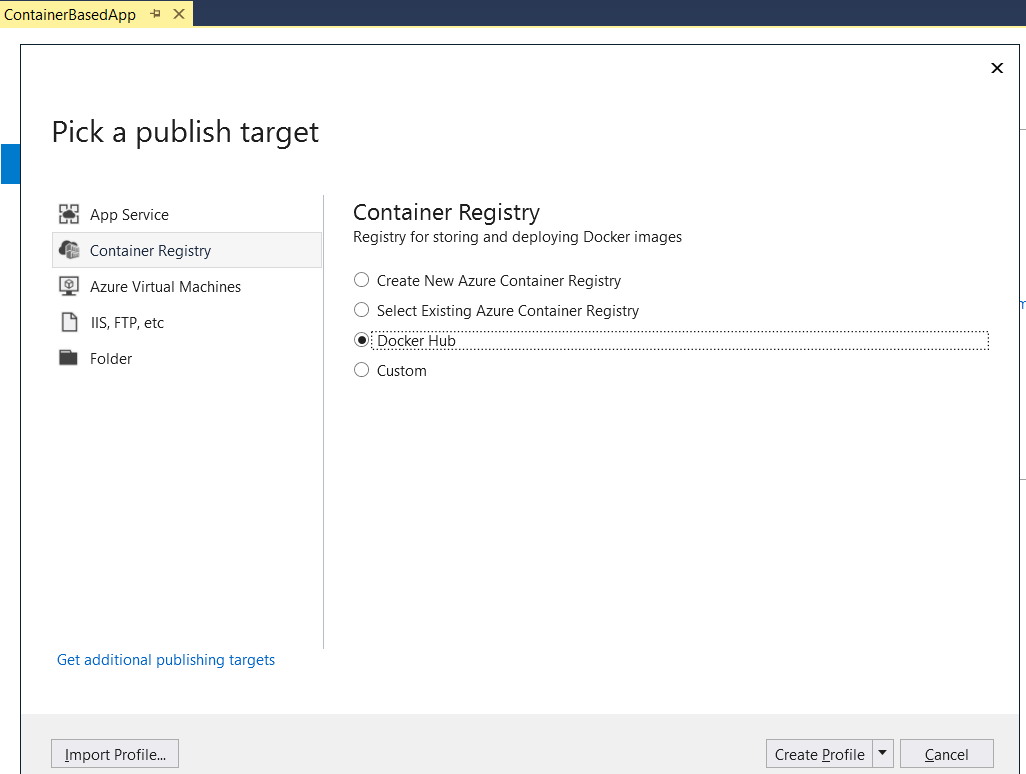
Next is to create container registry, which will deploy and store docker images and here, we will select Docker Hub as shown below:
https://www.codeproject.com/KB/aspnet/5164456/Image11.png
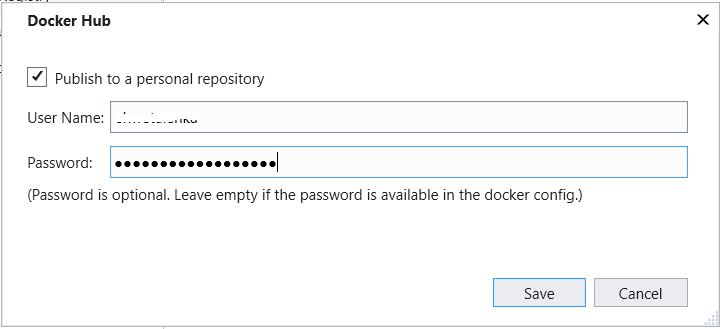
On clicking of Create Profile button, the below dialog will appear, in which you need to supply credentials to connect to Docker Hub.
https://www.codeproject.com/KB/aspnet/5164456/Image12.png
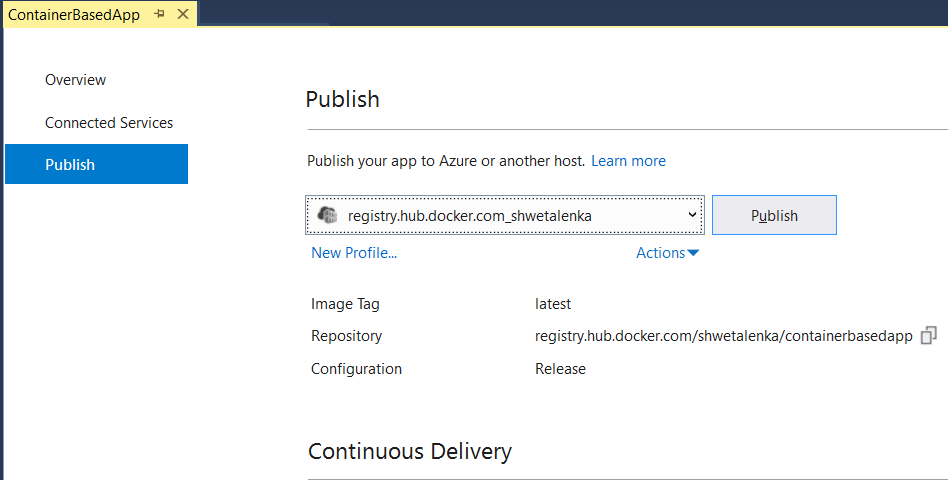
If everything is done correctly, the below screen would appear:
https://www.codeproject.com/KB/aspnet/5164456/Image13.png
Now click on Publish button. It will launch Docker executable and execute each and every line written in Dockerfile.
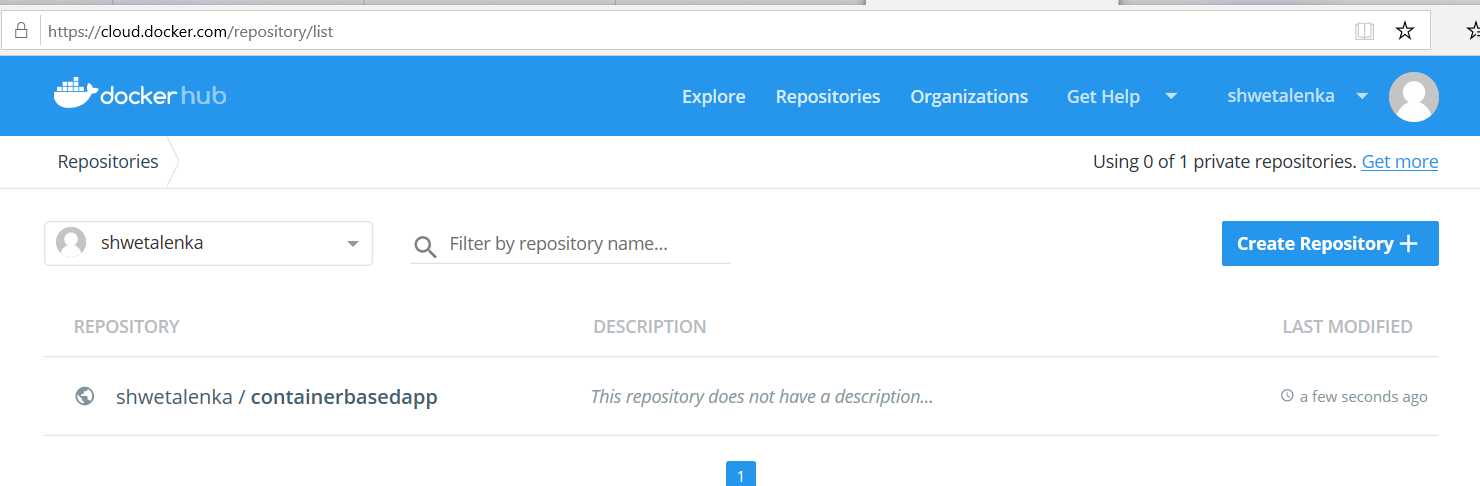
On successful publish, you will get a message ‘Successfully tagged containerbasedapp:latest‘ logged in Output window. But the same can also be verified in docker web site as shown below:
https://www.codeproject.com/KB/aspnet/5164456/Image14.png
It can also be verified by command prompt:
https://www.codeproject.com/KB/aspnet/5164456/Image16.png
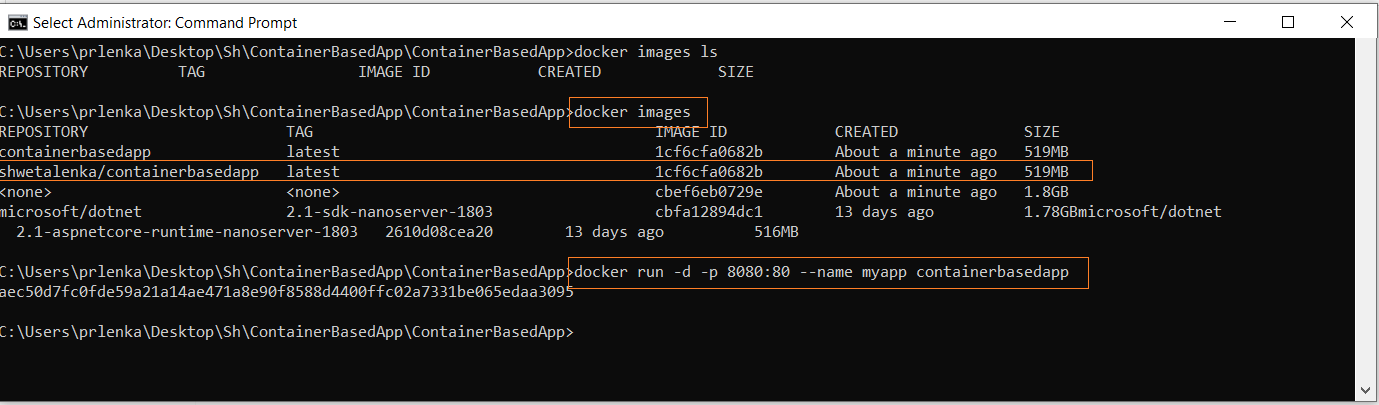
Now it’s time to run the application and verify whether we can view our web page or not. For that, simply run the application from Visual Studio and you would be able to see your view. Here is what I can see from my sample application:
https://www.codeproject.com/KB/aspnet/5164456/Image15.png
Here, you can see that your application is running inside a docker.
Containerizing Existing Multi-Tier Application
Based on the application structure, whether it is a single standalone application, or it has many services, containerization can be introduced. Based on the application, sometimes single container suffices and sometimes one container per service or component is required. To enable the docker deployment in an existing application, go to Solution Explorer, right click on the project, select Add and then select Docker Support as shown below:
https://www.codeproject.com/KB/aspnet/5164456/Image17.png
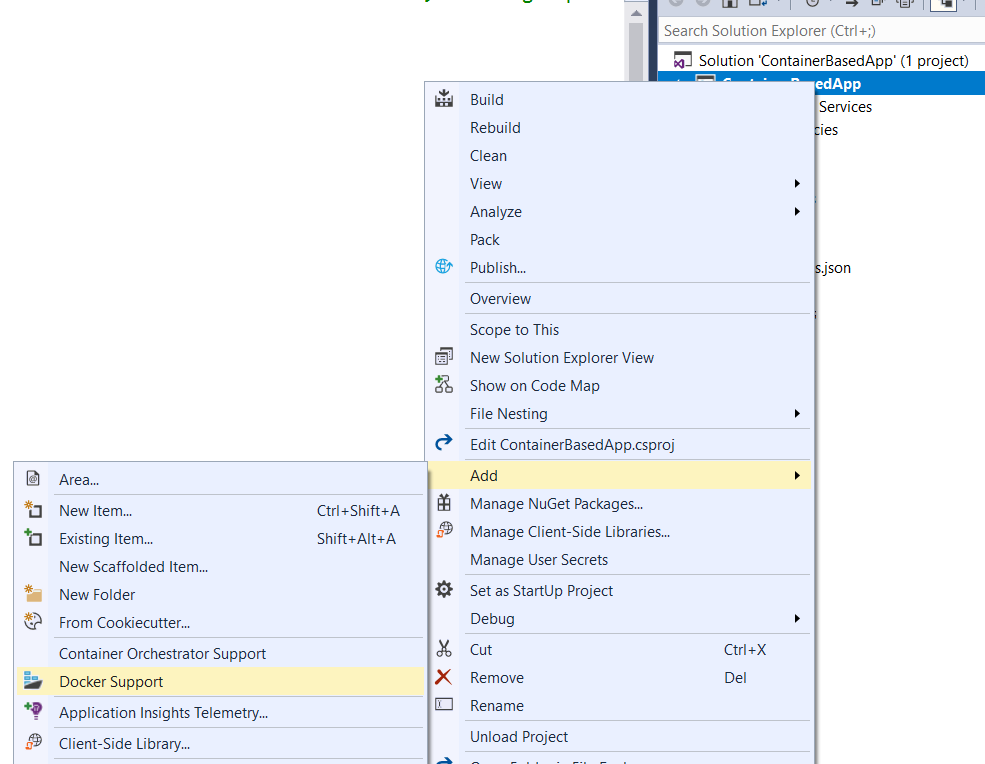
Performing the above action will add the files required for Docker. Now let's understand a bit about docker-compose.
Docker-Compose
Docker Compose is a tool to define and run multi-container applications. The best part about this tool is that it utilizes the same command as Docker, which means we need not remember any special commands in order to use this tool.There are various ways to use this tool but as part of this article, I'll be taking up yml file route. Below are the steps to create a yml file:
Step 1: Installing Docker Compose Tool
This tool is automatically installed on Mac and Windows while installing Docker. But for Linux, it has to be installed explicitly and this can be done using the commands mentioned here. Once tool is installed, it can be verified using the below command:
https://www.codeproject.com/KB/aspnet/5164456/20.png
Step 2: Deciding Storage Location for yml File
We can store the yml file anywhere on disk. So, let's create a folder on your machine and create an empty yml file inside that.
Step 3: Adding Contents to yml File
Now before adding the contents to this file, we have to decide about our major components or say parts of the applications. For example, let's say we need to create a Web Application. So for this, the bare minimum requirement is a Web Server and a Database Server. On going through this link, webserver and database server images can be selected. Here, I'm selecting Windows IIS as the web server and MYSQL for my database. Below is the screenshot of pulling IIS image using command mentioned here:
https://www.codeproject.com/KB/aspnet/5164456/22.png
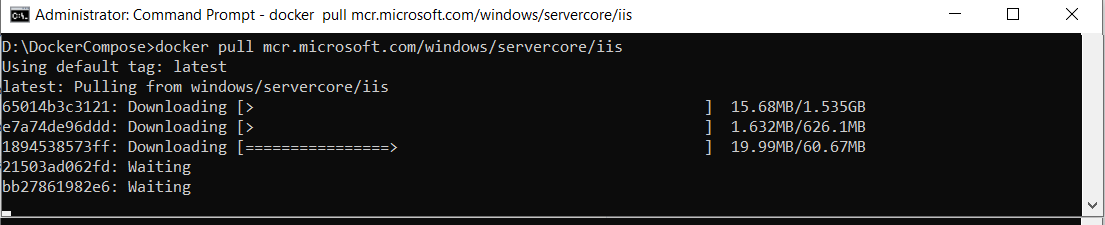
Similarly you can pull the image of database server, if it is not already available on your machine. Accordingly, I've updated my yml file as shown below:
https://www.codeproject.com/KB/aspnet/5164456/24.png
Step 4: Validating yml File
Once file is created, next is to validate our yml file. Go to the directory where yml file is saved and run below command using CLI:
https://www.codeproject.com/KB/aspnet/5164456/25.png
If you can see the contents of the file, it means everything is fine.
Few Useful Commands
Command to run the yml file and creating the containers in the application:
docker-compose up
Command to stop all the running containers:
docker-compose down
Please note that, the yml file created in this article is holding minimum information and is not sufficient for real production projects. In real-time projects, we may have to provide a little more information like ports, volume, etc. The complete information can be found here.
Key Takeaways
Containers provide an ability to package up and complete an application with all the required dependencies, which means the application will run on any other machine regardless of any settings. In one statement, we can summarize everything as - Dockerfile is a deployment script, Image is a packaged application, Registry is an image store and Container is a virtual environment for running the application.