Create a Dynamics 365 Online Connector to Azure Data Factory Pipeline (AAD Service Principal)
Introduction
In this post, we will read how to authenticate D365 Online with AAD Service Principal.
Prerequisites
Before proceed, please make sure you meet the following prerequisites.
- A Dynamics 365 online instance
- An active MS account
- A valid Azure Subscription
The Steps
By following the steps below, we will be able to create Dynamics 365 Online for your Azure Data Factory Pipeline.
Step 1: Register AAD App
Register a new App in the AAD (Azure Active Directory) Sign in to Azure Portal (portal.azure.com).
From the left-hand side blade, navigate to the Azure Active Directory - App registrations, and select + New registration
**
**
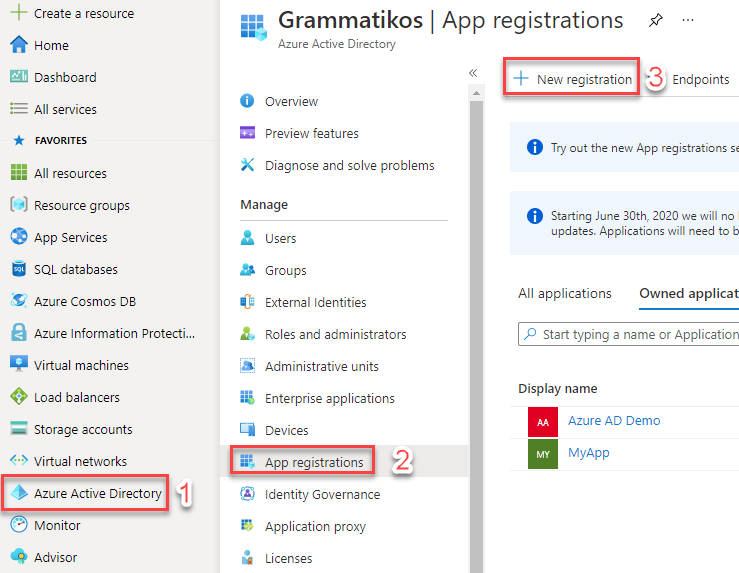
Type a name for the new registered App, select "Accounts in this organizational directory only", and click the Register button.

Step 2: API Permissions
The next step is to give the appropriate API permissions to the registered App.
From the left-hand side menu select Manage - API permissions - + Add a permission

On the Request API permissions, find and select Dynamics CRM

mark the checkbox user_impersonation, and click Add permissions

Select Grant admin consent for {Your Tenant name}
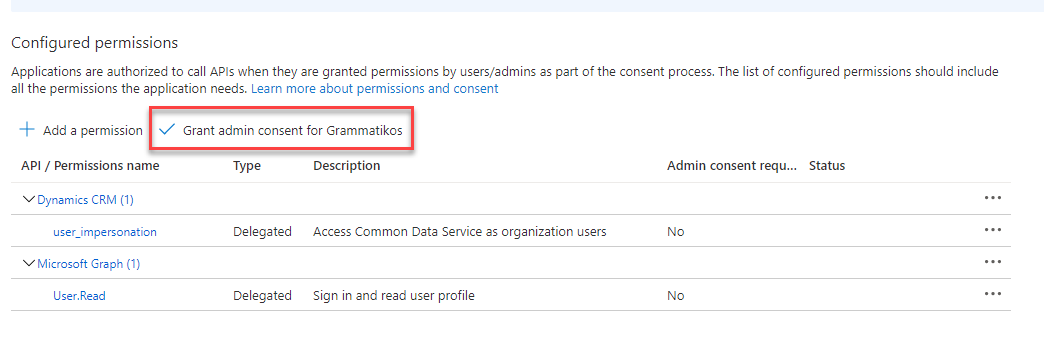
Click Yes, to confirm the permission admin consent

Step 3: Create Secret Key
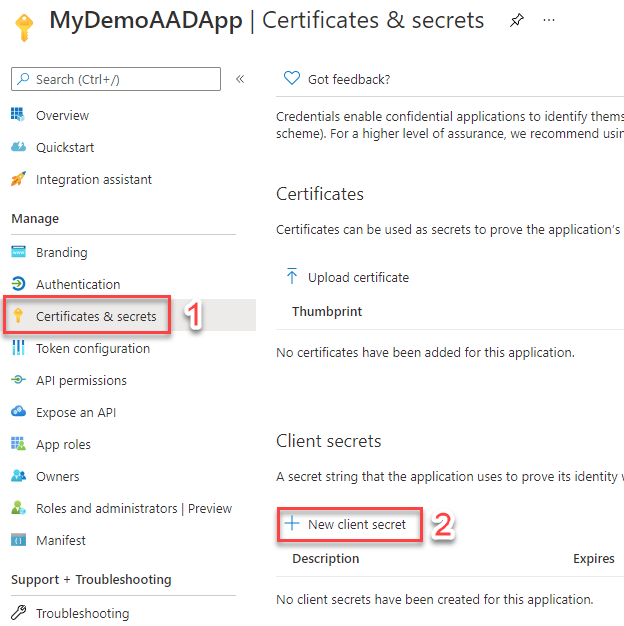
In the 3rd step, we have to create a new secret key for the registered app.
Navigate to Manage - Certificates & Secrets and select to create a New client secret
Type a Description and select when the secret will expires
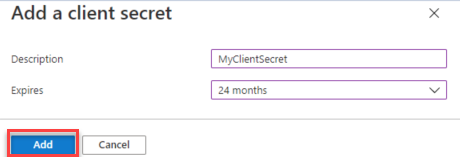
After the Client secret creation, immediately copy the Client Secret value to keep it because it will disappear after some time.

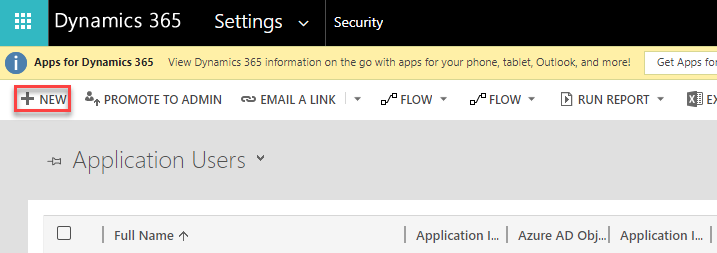
Step 4: Create a new Dynamics 365 application user
Sign-in to the Dyn365 online instance and navigate to Settings - Security - Users.

Change the view to Application Users and select + New
**
**
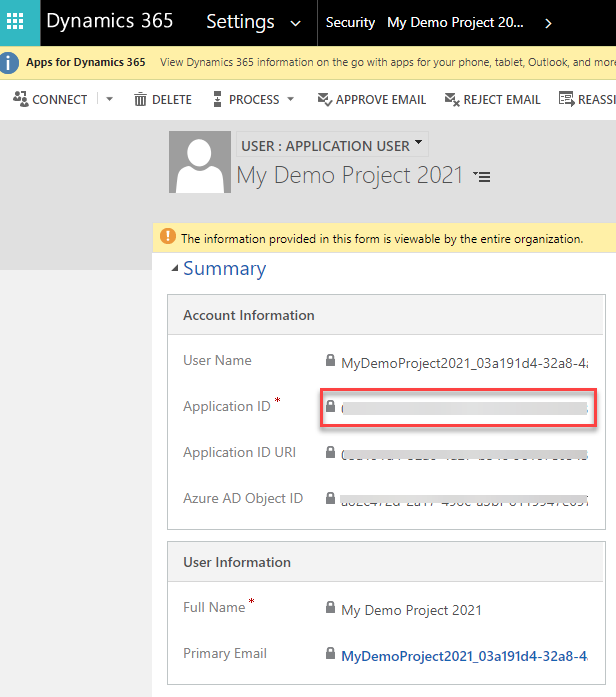
In the new Application User form, paste in the Application ID field the Azure AD registered App **Application (client) ID ** and click Save.
**
**
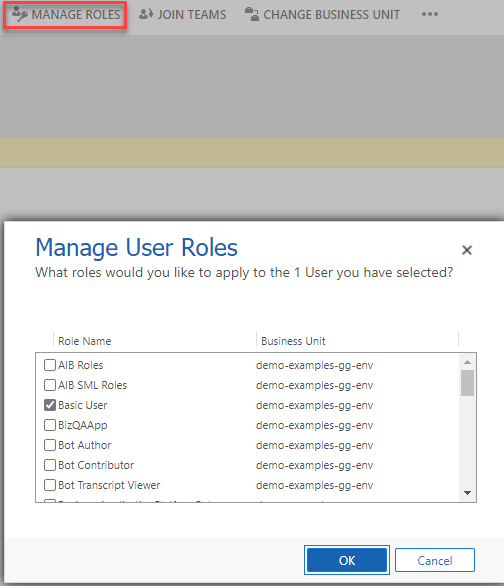
Navigate to MANAGE ROLES, select the appropriate role for the Application user and click OK.
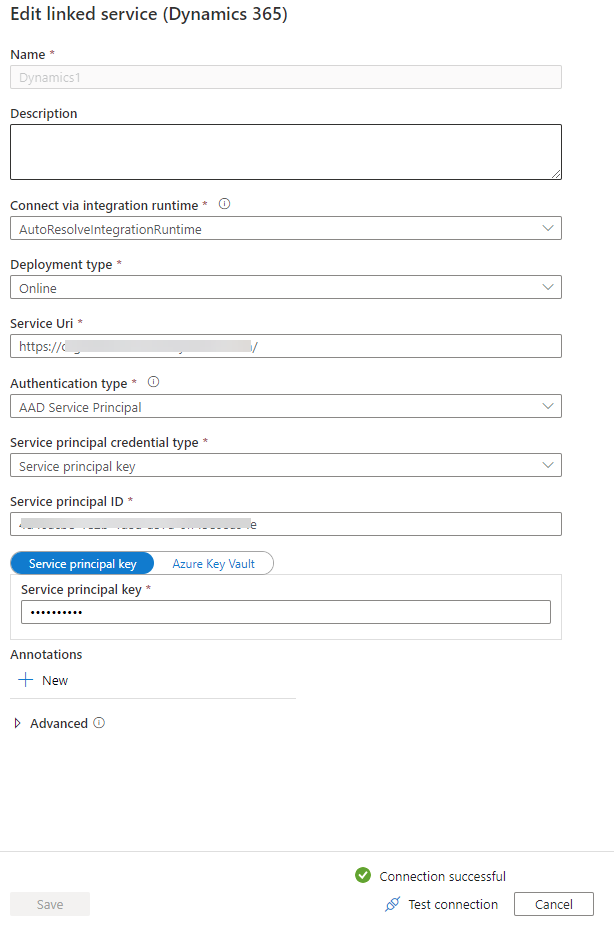
Step 5: Configure the Dynamics 365 connector
And now, the 5th and final step, where we will create the Dynamics 365 linked service to the Azure Data Factory.
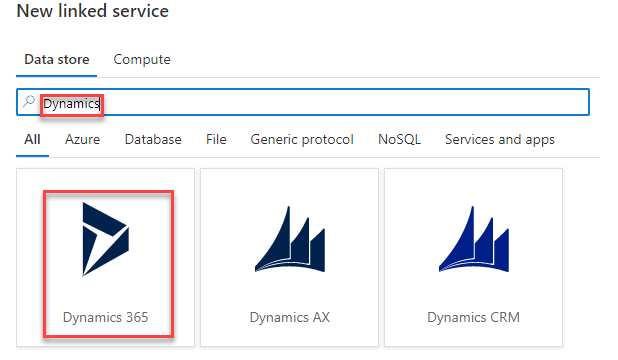
From the left panel select Manage - Linked services - + New

In the search field type "Dynamics", and select Dynamics 365
In the next step, we have to type into the mandatory fields all the necessary pieces of information, as the image below shows.
See Also
- Azure Data Factory and Azure Synapse Analytics connector overview
- Copy data from and to Dynamics 365 (Microsoft Dataverse) or Dynamics CRM
- Create a data factory by using the Azure Data Factory UI