Note
Access to this page requires authorization. You can try signing in or changing directories.
Access to this page requires authorization. You can try changing directories.
Microsoft.AspNetCore.Authentication.Certificate contains an implementation similar to Certificate Authentication for ASP.NET Core. Certificate authentication happens at the TLS level, long before it ever gets to ASP.NET Core. More accurately, this is an authentication handler that validates the certificate and then gives you an event where you can resolve that certificate to a ClaimsPrincipal.
You must configure your server for certificate authentication, be it IIS, Kestrel, Azure Web Apps, or whatever else you're using.
Proxy and load balancer scenarios
Certificate authentication is a stateful scenario primarily used where a proxy or load balancer doesn't handle traffic between clients and servers. If a proxy or load balancer is used, certificate authentication only works if the proxy or load balancer:
- Handles the authentication.
- Passes the user authentication information to the app (for example, in a request header), which acts on the authentication information.
An alternative to certificate authentication in environments where proxies and load balancers are used is Active Directory Federated Services (ADFS) with OpenID Connect (OIDC).
Get started
Acquire an HTTPS certificate, apply it, and configure your server to require certificates.
In the web app:
- Add a reference to the Microsoft.AspNetCore.Authentication.Certificate NuGet package.
- In
Program.cs, callbuilder.Services.AddAuthentication(CertificateAuthenticationDefaults.AuthenticationScheme).AddCertificate(...);. Provide a delegate forOnCertificateValidatedto do any supplementary validation on the client certificate sent with requests. Turn that information into aClaimsPrincipaland set it on thecontext.Principalproperty.
If authentication fails, this handler returns a 403 (Forbidden) response rather a 401 (Unauthorized), as you might expect. The reasoning is that the authentication should happen during the initial TLS connection. By the time it reaches the handler, it's too late. There's no way to upgrade the connection from an anonymous connection to one with a certificate.
UseAuthentication is required to set HttpContext.User to a ClaimsPrincipal created from the certificate. For example:
var builder = WebApplication.CreateBuilder(args);

builder.Services.AddAuthentication(
        CertificateAuthenticationDefaults.AuthenticationScheme)
    .AddCertificate();

var app = builder.Build();

app.UseAuthentication();

app.MapGet("/", () => "Hello World!");

app.Run();
The preceding example demonstrates the default way to add certificate authentication. The handler constructs a user principal using the common certificate properties.
Configure certificate validation
The CertificateAuthenticationOptions handler has some built-in validations that are the minimum validations you should perform on a certificate. Each of these settings is enabled by default.
AllowedCertificateTypes = Chained, SelfSigned, or All (Chained | SelfSigned)
Default value: CertificateTypes.Chained
This check validates that only the appropriate certificate type is allowed. If the app is using self-signed certificates, this option needs to be set to CertificateTypes.All or CertificateTypes.SelfSigned.
ChainTrustValidationMode
Default value: X509ChainTrustMode.System
The certificate presented by the client must chain to a trusted root certificate. This check controls which trust store contains these root certificates.
By default, the handler uses the system trust store. If the presented client certificate needs to chain to a root certificate which doesn't appear in the system trust store, this option can be set to X509ChainTrustMode.CustomRootTrust to make the handler use the CustomTrustStore.
CustomTrustStore
Default value: Empty X509Certificate2Collection
If the handler's ChainTrustValidationMode property is set to X509ChainTrustMode.CustomRootTrust, this X509Certificate2Collection contains every certificate which will be used to validate the client certificate up to a trusted root, including the trusted root.
When the client presents a certificate which is part of a multi-level certificate chain, CustomTrustStore must contain every issuing certificate in the chain.
ValidateCertificateUse
Default value: true
This check validates that the certificate presented by the client has the Client Authentication extended key use (EKU), or no EKUs at all. As the specifications say, if no EKU is specified, then all EKUs are deemed valid.
ValidateValidityPeriod
Default value: true
This check validates that the certificate is within its validity period. On each request, the handler ensures that a certificate that was valid when it was presented hasn't expired during its current session.
RevocationFlag
Default value: X509RevocationFlag.ExcludeRoot
A flag that specifies which certificates in the chain are checked for revocation.
Revocation checks are only performed when the certificate is chained to a root certificate.
RevocationMode
Default value: X509RevocationMode.Online
A flag that specifies how revocation checks are performed.
Specifying an online check can result in a long delay while the certificate authority is contacted.
Revocation checks are only performed when the certificate is chained to a root certificate.
Can I configure my app to require a certificate only on certain paths?
This isn't possible. Remember the certificate exchange is done at the start of the HTTPS conversation, it's done by the server before the first request is received on that connection so it's not possible to scope based on any request fields.
Handler events
The handler has two events:
OnAuthenticationFailed: Called if an exception happens during authentication and allows you to react.OnCertificateValidated: Called after the certificate has been validated, passed validation and a default principal has been created. This event allows you to perform your own validation and augment or replace the principal. For examples include:Determining if the certificate is known to your services.
Constructing your own principal. Consider the following example:
builder.Services.AddAuthentication(
        CertificateAuthenticationDefaults.AuthenticationScheme)
    .AddCertificate(options =>
    {
        options.Events = new CertificateAuthenticationEvents
        {
            OnCertificateValidated = context =>
            {
                var claims = new[]
                {
                    new Claim(
                        ClaimTypes.NameIdentifier,
                        context.ClientCertificate.Subject,
                        ClaimValueTypes.String, context.Options.ClaimsIssuer),
                    new Claim(
                        ClaimTypes.Name,
                        context.ClientCertificate.Subject,
                        ClaimValueTypes.String, context.Options.ClaimsIssuer)
                };

                context.Principal = new ClaimsPrincipal(
                    new ClaimsIdentity(claims, context.Scheme.Name));
                context.Success();

                return Task.CompletedTask;
            }
        };
    });
If you find the inbound certificate doesn't meet your extra validation, call context.Fail("failure reason") with a failure reason.
For better functionality, call a service registered in dependency injection that connects to a database or other type of user store. Access the service by using the context passed into the delegate. Consider the following example:
builder.Services.AddAuthentication(
        CertificateAuthenticationDefaults.AuthenticationScheme)
    .AddCertificate(options =>
    {
        options.Events = new CertificateAuthenticationEvents
        {
            OnCertificateValidated = context =>
            {
                var validationService = context.HttpContext.RequestServices
                    .GetRequiredService<ICertificateValidationService>();

                if (validationService.ValidateCertificate(context.ClientCertificate))
                {
                    var claims = new[]
                    {
                        new Claim(
                            ClaimTypes.NameIdentifier,
                            context.ClientCertificate.Subject,
                            ClaimValueTypes.String, context.Options.ClaimsIssuer),
                        new Claim(
                            ClaimTypes.Name,
                            context.ClientCertificate.Subject,
                            ClaimValueTypes.String, context.Options.ClaimsIssuer)
                    };

                    context.Principal = new ClaimsPrincipal(
                        new ClaimsIdentity(claims, context.Scheme.Name));
                    context.Success();
                }

                return Task.CompletedTask;
            }
        };
    });
Conceptually, the validation of the certificate is an authorization concern. Adding a check on, for example, an issuer or thumbprint in an authorization policy, rather than inside OnCertificateValidated, is perfectly acceptable.
Configure your server to require certificates
Kestrel
In Program.cs, configure Kestrel as follows:
var builder = WebApplication.CreateBuilder(args);

builder.Services.Configure<KestrelServerOptions>(options =>
{
    options.ConfigureHttpsDefaults(options =>
        options.ClientCertificateMode = ClientCertificateMode.RequireCertificate);
});
Note
Endpoints created by calling Listen before calling ConfigureHttpsDefaults won't have the defaults applied.
IIS
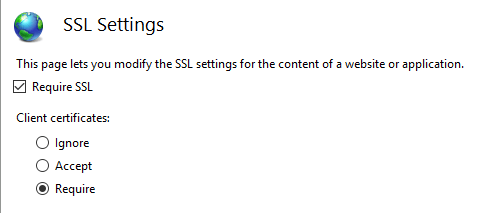
Complete the following steps in IIS Manager:
- Select your site from the Connections tab.
- Double-click the SSL Settings option in the Features View window.
- Check the Require SSL checkbox, and select the Require radio button in the Client certificates section.
Azure and custom web proxies
See the host and deploy documentation for how to configure the certificate forwarding middleware.
Use certificate authentication in Azure Web Apps
No forwarding configuration is required for Azure. Forwarding configuration is set up by the Certificate Forwarding Middleware.
Note
Certificate Forwarding Middleware is required for this scenario.
For more information, see Use a TLS/SSL certificate in your code in Azure App Service (Azure documentation).
Use certificate authentication in custom web proxies
The AddCertificateForwarding method is used to specify:
- The client header name.
- How the certificate is to be loaded (using the
HeaderConverterproperty).
In custom web proxies, the certificate is passed as a custom request header, for example X-SSL-CERT. To use it, configure certificate forwarding in Program.cs:
builder.Services.AddCertificateForwarding(options =>
{
    options.CertificateHeader = "X-SSL-CERT";

    options.HeaderConverter = headerValue =>
    {
        X509Certificate2? clientCertificate = null;

        if (!string.IsNullOrWhiteSpace(headerValue))
        {
            clientCertificate = new X509Certificate2(StringToByteArray(headerValue));
        }

        return clientCertificate!;

        static byte[] StringToByteArray(string hex)
        {
            var numberChars = hex.Length;
            var bytes = new byte[numberChars / 2];

            for (int i = 0; i < numberChars; i += 2)
            {
                bytes[i / 2] = Convert.ToByte(hex.Substring(i, 2), 16);
            }

            return bytes;
        }
    };
});
If the app is reverse proxied by NGINX with the configuration proxy_set_header ssl-client-cert $ssl_client_escaped_cert or deployed on Kubernetes using NGINX Ingress, the client certificate is passed to the app in URL-encoded form. To use the certificate, decode it as follows:
builder.Services.AddCertificateForwarding(options =>
{
    options.CertificateHeader = "ssl-client-cert";

    options.HeaderConverter = (headerValue) =>
    {
        X509Certificate2? clientCertificate = null;

        if (!string.IsNullOrWhiteSpace(headerValue))
        {
            clientCertificate = X509Certificate2.CreateFromPem(
                WebUtility.UrlDecode(headerValue));
        }

        return clientCertificate!;
    };
});
Add the middleware in Program.cs. UseCertificateForwarding is called before the calls to UseAuthentication and UseAuthorization:
var app = builder.Build();

app.UseCertificateForwarding();

app.UseAuthentication();
app.UseAuthorization();
A separate class can be used to implement validation logic. Because the same self-signed certificate is used in this example, ensure that only your certificate can be used. Validate that the thumbprints of both the client certificate and the server certificate match, otherwise any certificate can be used and will be enough to authenticate. This would be used inside the AddCertificate method. You could also validate the subject or the issuer here if you're using intermediate or child certificates.
using System.Security.Cryptography.X509Certificates;

namespace CertAuthSample.Snippets;

public class SampleCertificateValidationService : ICertificateValidationService
{
    public bool ValidateCertificate(X509Certificate2 clientCertificate)
    {
        // Don't hardcode passwords in production code.
        // Use a certificate thumbprint or Azure Key Vault.
        var expectedCertificate = new X509Certificate2(
            Path.Combine("/path/to/pfx"), "1234");

        return clientCertificate.Thumbprint == expectedCertificate.Thumbprint;
    }
}
Implement an HttpClient using a certificate and IHttpClientFactory
In the following example, a client certificate is added to a HttpClientHandler using the ClientCertificates property from the handler. This handler can then be used in a named instance of an HttpClient using the ConfigurePrimaryHttpMessageHandler method. This is setup in Program.cs:
var clientCertificate =
    new X509Certificate2(
      Path.Combine(_environment.ContentRootPath, "sts_dev_cert.pfx"), "1234");

builder.Services.AddHttpClient("namedClient", c =>
{
}).ConfigurePrimaryHttpMessageHandler(() =>
{
    var handler = new HttpClientHandler();
    handler.ClientCertificates.Add(clientCertificate);
    return handler;
});
The IHttpClientFactory can then be used to get the named instance with the handler and the certificate. The CreateClient method with the name of the client defined in Program.cs is used to get the instance. The HTTP request can be sent using the client as required:
public class SampleHttpService
{
    private readonly IHttpClientFactory _httpClientFactory;

    public SampleHttpService(IHttpClientFactory httpClientFactory)
        => _httpClientFactory = httpClientFactory;

    public async Task<JsonDocument> GetAsync()
    {
        var httpClient = _httpClientFactory.CreateClient("namedClient");
        var httpResponseMessage = await httpClient.GetAsync("https://example.com");

        if (httpResponseMessage.IsSuccessStatusCode)
        {
            return JsonDocument.Parse(
                await httpResponseMessage.Content.ReadAsStringAsync());
        }

        throw new ApplicationException($"Status code: {httpResponseMessage.StatusCode}");
    }
}
If the correct certificate is sent to the server, the data is returned. If no certificate or the wrong certificate is sent, an HTTP 403 status code is returned.
Create certificates in PowerShell
Creating the certificates is the hardest part in setting up this flow. A root certificate can be created using the New-SelfSignedCertificate PowerShell cmdlet. When creating the certificate, use a strong password. It's important to add the KeyUsageProperty parameter and the KeyUsage parameter as shown.
Create root CA
New-SelfSignedCertificate -DnsName "root_ca_dev_damienbod.com", "root_ca_dev_damienbod.com" -CertStoreLocation "cert:\LocalMachine\My" -NotAfter (Get-Date).AddYears(20) -FriendlyName "root_ca_dev_damienbod.com" -KeyUsageProperty All -KeyUsage CertSign, CRLSign, DigitalSignature

$mypwd = ConvertTo-SecureString -String "1234" -Force -AsPlainText

Get-ChildItem -Path cert:\localMachine\my\"The thumbprint..." | Export-PfxCertificate -FilePath C:\git\root_ca_dev_damienbod.pfx -Password $mypwd

Export-Certificate -Cert cert:\localMachine\my\"The thumbprint..." -FilePath root_ca_dev_damienbod.crt
Note
The -DnsName parameter value must match the deployment target of the app. For example, "localhost" for development.
Install in the trusted root
The root certificate must be trusted on your host system. Only root certificates created by a certificate authority are trusted by default. For information on how to trust the root certificate on Windows, see the Windows documentation or the Import-Certificate PowerShell cmdlet.
Intermediate certificate
An intermediate certificate can now be created from the root certificate. This isn't required for all use cases, but you might need to create many certificates or need to activate or disable groups of certificates. The TextExtension parameter is required to set the path length in the basic constraints of the certificate.
The intermediate certificate can then be added to the trusted intermediate certificate in the Windows host system.
$mypwd = ConvertTo-SecureString -String "1234" -Force -AsPlainText

$parentcert = ( Get-ChildItem -Path cert:\LocalMachine\My\"The thumbprint of the root..." )

New-SelfSignedCertificate -certstorelocation cert:\localmachine\my -dnsname "intermediate_dev_damienbod.com" -Signer $parentcert -NotAfter (Get-Date).AddYears(20) -FriendlyName "intermediate_dev_damienbod.com" -KeyUsageProperty All -KeyUsage CertSign, CRLSign, DigitalSignature -TextExtension @("2.5.29.19={text}CA=1&pathlength=1")

Get-ChildItem -Path cert:\localMachine\my\"The thumbprint..." | Export-PfxCertificate -FilePath C:\git\AspNetCoreCertificateAuth\Certs\intermediate_dev_damienbod.pfx -Password $mypwd

Export-Certificate -Cert cert:\localMachine\my\"The thumbprint..." -FilePath intermediate_dev_damienbod.crt
Create child certificate from intermediate certificate
A child certificate can be created from the intermediate certificate. This is the end entity and doesn't need to create more child certificates.
$parentcert = ( Get-ChildItem -Path cert:\LocalMachine\My\"The thumbprint from the Intermediate certificate..." )

New-SelfSignedCertificate -certstorelocation cert:\localmachine\my -dnsname "child_a_dev_damienbod.com" -Signer $parentcert -NotAfter (Get-Date).AddYears(20) -FriendlyName "child_a_dev_damienbod.com"

$mypwd = ConvertTo-SecureString -String "1234" -Force -AsPlainText

Get-ChildItem -Path cert:\localMachine\my\"The thumbprint..." | Export-PfxCertificate -FilePath C:\git\AspNetCoreCertificateAuth\Certs\child_a_dev_damienbod.pfx -Password $mypwd

Export-Certificate -Cert cert:\localMachine\my\"The thumbprint..." -FilePath child_a_dev_damienbod.crt
Create child certificate from root certificate
A child certificate can also be created from the root certificate directly.
$rootcert = ( Get-ChildItem -Path cert:\LocalMachine\My\"The thumbprint from the root cert..." )

New-SelfSignedCertificate -certstorelocation cert:\localmachine\my -dnsname "child_a_dev_damienbod.com" -Signer $rootcert -NotAfter (Get-Date).AddYears(20) -FriendlyName "child_a_dev_damienbod.com"

$mypwd = ConvertTo-SecureString -String "1234" -Force -AsPlainText

Get-ChildItem -Path cert:\localMachine\my\"The thumbprint..." | Export-PfxCertificate -FilePath C:\git\AspNetCoreCertificateAuth\Certs\child_a_dev_damienbod.pfx -Password $mypwd

Export-Certificate -Cert cert:\localMachine\my\"The thumbprint..." -FilePath child_a_dev_damienbod.crt
Example root - intermediate certificate - certificate
$mypwdroot = ConvertTo-SecureString -String "1234" -Force -AsPlainText
$mypwd = ConvertTo-SecureString -String "1234" -Force -AsPlainText

New-SelfSignedCertificate -DnsName "root_ca_dev_damienbod.com", "root_ca_dev_damienbod.com" -CertStoreLocation "cert:\LocalMachine\My" -NotAfter (Get-Date).AddYears(20) -FriendlyName "root_ca_dev_damienbod.com" -KeyUsageProperty All -KeyUsage CertSign, CRLSign, DigitalSignature

Get-ChildItem -Path cert:\localMachine\my\0C89639E4E2998A93E423F919B36D4009A0F9991 | Export-PfxCertificate -FilePath C:\git\root_ca_dev_damienbod.pfx -Password $mypwdroot

Export-Certificate -Cert cert:\localMachine\my\0C89639E4E2998A93E423F919B36D4009A0F9991 -FilePath root_ca_dev_damienbod.crt

$rootcert = ( Get-ChildItem -Path cert:\LocalMachine\My\0C89639E4E2998A93E423F919B36D4009A0F9991 )

New-SelfSignedCertificate -certstorelocation cert:\localmachine\my -dnsname "child_a_dev_damienbod.com" -Signer $rootcert -NotAfter (Get-Date).AddYears(20) -FriendlyName "child_a_dev_damienbod.com" -KeyUsageProperty All -KeyUsage CertSign, CRLSign, DigitalSignature -TextExtension @("2.5.29.19={text}CA=1&pathlength=1")

Get-ChildItem -Path cert:\localMachine\my\BA9BF91ED35538A01375EFC212A2F46104B33A44 | Export-PfxCertificate -FilePath C:\git\AspNetCoreCertificateAuth\Certs\child_a_dev_damienbod.pfx -Password $mypwd

Export-Certificate -Cert cert:\localMachine\my\BA9BF91ED35538A01375EFC212A2F46104B33A44 -FilePath child_a_dev_damienbod.crt

$parentcert = ( Get-ChildItem -Path cert:\LocalMachine\My\BA9BF91ED35538A01375EFC212A2F46104B33A44 )

New-SelfSignedCertificate -certstorelocation cert:\localmachine\my -dnsname "child_b_from_a_dev_damienbod.com" -Signer $parentcert -NotAfter (Get-Date).AddYears(20) -FriendlyName "child_b_from_a_dev_damienbod.com"

Get-ChildItem -Path cert:\localMachine\my\141594A0AE38CBBECED7AF680F7945CD51D8F28A | Export-PfxCertificate -FilePath C:\git\AspNetCoreCertificateAuth\Certs\child_b_from_a_dev_damienbod.pfx -Password $mypwd

Export-Certificate -Cert cert:\localMachine\my\141594A0AE38CBBECED7AF680F7945CD51D8F28A -FilePath child_b_from_a_dev_damienbod.crt
When using the root, intermediate, or child certificates, the certificates can be validated using the Thumbprint or PublicKey as required:
using System.Security.Cryptography.X509Certificates;

namespace CertAuthSample.Snippets;

public class SampleCertificateThumbprintsValidationService : ICertificateValidationService
{
    private readonly string[] validThumbprints = new[]
    {
        "141594A0AE38CBBECED7AF680F7945CD51D8F28A",
        "0C89639E4E2998A93E423F919B36D4009A0F9991",
        "BA9BF91ED35538A01375EFC212A2F46104B33A44"
    };

    public bool ValidateCertificate(X509Certificate2 clientCertificate)
        => validThumbprints.Contains(clientCertificate.Thumbprint);
}
Certificate validation caching
.NET 5 or later versions support the ability to enable caching of validation results. The caching dramatically improves performance of certificate authentication, as validation is an expensive operation.
By default, certificate authentication disables caching. To enable caching, call AddCertificateCache in Program.cs:
builder.Services.AddAuthentication(
        CertificateAuthenticationDefaults.AuthenticationScheme)
    .AddCertificate()
    .AddCertificateCache(options =>
    {
        options.CacheSize = 1024;
        options.CacheEntryExpiration = TimeSpan.FromMinutes(2);
    });
The default caching implementation stores results in memory. You can provide your own cache by implementing ICertificateValidationCache and registering it with dependency injection. For example, services.AddSingleton<ICertificateValidationCache, YourCache>().
Optional client certificates
This section provides information for apps that must protect a subset of the app with a certificate. For example, a Razor Page or controller in the app might require client certificates. This presents challenges as client certificates:
- Are a TLS feature, not an HTTP feature.
- Are negotiated per-connection and usually at the start of the connection before any HTTP data is available.
There are two approaches to implementing optional client certificates:
- Using separate host names (SNI) and redirecting. While more work to configure, this is recommended because it works in most environments and protocols.
- Renegotiation during an HTTP request. This has several limitations and is not recommended.
Separate Hosts (SNI)
At the start of the connection, only the Server Name Indication (SNI)† is known. Client certificates can be configured per host name so that one host requires them and another does not.
- Set up binding for the domain and subdomain:
- For example, set up bindings on
contoso.comandmyClient.contoso.com. Thecontoso.comhost doesn't require a client certificate butmyClient.contoso.comdoes. - For more information, see:
- For example, set up bindings on
.NET 5 or later adds more convenient support for redirecting to acquire optional client certificates. For more information, see the Optional certificates sample.
- For requests to the web app that require a client certificate and don't have one:
- Redirect to the same page using the client certificate protected subdomain.
- For example, redirect to
myClient.contoso.com/requestedPage. Because the request tomyClient.contoso.com/requestedPageis a different hostname thancontoso.com/requestedPage, the client establishes a different connection and the client certificate is provided. - For more information, see Introduction to authorization in ASP.NET Core.
† Server Name Indication (SNI) is a TLS extension to include a virtual domain as a part of SSL negotiation. This effectively means the virtual domain name, or a hostname, can be used to identify the network end point.
Renegotiation
TLS renegotiation is a process by which the client and server can re-assess the encryption requirements for an individual connection, including requesting a client certificate if not previously provided. TLS renegotiation is a security risk and isn't recommended because:
- In HTTP/1.1 the server must first buffer or consume any HTTP data that is in flight such as POST request bodies to make sure the connection is clear for the renegotiation. Otherwise the renegotiation can stop responding or fail.
- HTTP/2 and HTTP/3 explicitly prohibit renegotiation.
- There are security risks associated with renegotiation. TLS 1.3 removed renegotiation of the whole connection and replaced it with a new extension for requesting only the client certificate after the start of the connection. This mechanism is exposed via the same APIs and is still subject to the prior constraints of buffering and HTTP protocol versions.
The implementation and configuration of this feature varies by server and framework version.
IIS
IIS manages the client certificate negotiation on your behalf. A subsection of the application can enable the SslRequireCert option to negotiate the client certificate for those requests. See Configuration in the IIS documentation for details.
IIS will automatically buffer any request body data up to a configured size limit before renegotiating. Requests that exceed the limit are rejected with a 413 response. This limit defaults to 48KB and is configurable by setting the uploadReadAheadSize.
HttpSys
HttpSys has two settings which control the client certificate negotiation and both should be set. The first is in netsh.exe under http add sslcert clientcertnegotiation=enable/disable. This flag indicates if the client certificate should be negotiated at the start of a connection and it should be set to disable for optional client certificates. See the netsh docs for details.
The other setting is ClientCertificateMethod. When set to AllowRenegotation, the client certificate can be renegotiated during a request.
NOTE The application should buffer or consume any request body data before attempting the renegotiation, otherwise the request may become unresponsive.
An application can first check the ClientCertificate property to see if the certificate is available. If it is not available, ensure the request body has been consumed before calling GetClientCertificateAsync to negotiate one. Note GetClientCertificateAsync can return a null certificate if the client declines to provide one.
NOTE The behavior of the ClientCertificate property changed in .NET 6. For more information, see this GitHub issue.
Kestrel
Kestrel controls client certificate negotiation with the ClientCertificateMode option.
ClientCertificateMode.DelayCertificate is new option available in .NET 6 or later. When set, an app can check the ClientCertificate property to see if the certificate is available. If it isn't available, ensure the request body has been consumed before calling GetClientCertificateAsync to negotiate one. Note GetClientCertificateAsync can return a null certificate if the client declines to provide one.
NOTE The application should buffer or consume any request body data before attempting the renegotiation, otherwise GetClientCertificateAsync may throw InvalidOperationException: Client stream needs to be drained before renegotiation..
If you're programmatically configuring the TLS settings per SNI host name, call the UseHttps overload (.NET 6 or later) that takes TlsHandshakeCallbackOptions and controls client certificate renegotiation via TlsHandshakeCallbackContext.AllowDelayedClientCertificateNegotation.
Microsoft.AspNetCore.Authentication.Certificate contains an implementation similar to Certificate Authentication for ASP.NET Core. Certificate authentication happens at the TLS level, long before it ever gets to ASP.NET Core. More accurately, this is an authentication handler that validates the certificate and then gives you an event where you can resolve that certificate to a ClaimsPrincipal.
Configure your server for certificate authentication, be it IIS, Kestrel, Azure Web Apps, or whatever else you're using.
Proxy and load balancer scenarios
Certificate authentication is a stateful scenario primarily used where a proxy or load balancer doesn't handle traffic between clients and servers. If a proxy or load balancer is used, certificate authentication only works if the proxy or load balancer:
- Handles the authentication.
- Passes the user authentication information to the app (for example, in a request header), which acts on the authentication information.
An alternative to certificate authentication in environments where proxies and load balancers are used is Active Directory Federated Services (ADFS) with OpenID Connect (OIDC).
Get started
Acquire an HTTPS certificate, apply it, and configure your server to require certificates.
In your web app, add a reference to the Microsoft.AspNetCore.Authentication.Certificate package. Then in the Startup.ConfigureServices method, call
services.AddAuthentication(CertificateAuthenticationDefaults.AuthenticationScheme).AddCertificate(...); with your options, providing a delegate for OnCertificateValidated to do any supplementary validation on the client certificate sent with requests. Turn that information into a ClaimsPrincipal and set it on the context.Principal property.
If authentication fails, this handler returns a 403 (Forbidden) response rather a 401 (Unauthorized), as you might expect. The reasoning is that the authentication should happen during the initial TLS connection. By the time it reaches the handler, it's too late. There's no way to upgrade the connection from an anonymous connection to one with a certificate.
Also add app.UseAuthentication(); in the Startup.Configure method. Otherwise, the HttpContext.User will not be set to ClaimsPrincipal created from the certificate. For example:
public void ConfigureServices(IServiceCollection services)
{
    services.AddAuthentication(
        CertificateAuthenticationDefaults.AuthenticationScheme)
        .AddCertificate()
        // Adding an ICertificateValidationCache results in certificate auth caching the results.
        // The default implementation uses a memory cache.
        .AddCertificateCache();

    // All other service configuration
}

public void Configure(IApplicationBuilder app, IHostingEnvironment env)
{
    app.UseAuthentication();

    // All other app configuration
}
The preceding example demonstrates the default way to add certificate authentication. The handler constructs a user principal using the common certificate properties.
Configure certificate validation
The CertificateAuthenticationOptions handler has some built-in validations that are the minimum validations you should perform on a certificate. Each of these settings is enabled by default.
AllowedCertificateTypes = Chained, SelfSigned, or All (Chained | SelfSigned)
Default value: CertificateTypes.Chained
This check validates that only the appropriate certificate type is allowed. If the app is using self-signed certificates, this option needs to be set to CertificateTypes.All or CertificateTypes.SelfSigned.
ValidateCertificateUse
Default value: true
This check validates that the certificate presented by the client has the Client Authentication extended key use (EKU), or no EKUs at all. As the specifications say, if no EKU is specified, then all EKUs are deemed valid.
ValidateValidityPeriod
Default value: true
This check validates that the certificate is within its validity period. On each request, the handler ensures that a certificate that was valid when it was presented hasn't expired during its current session.
RevocationFlag
Default value: X509RevocationFlag.ExcludeRoot
A flag that specifies which certificates in the chain are checked for revocation.
Revocation checks are only performed when the certificate is chained to a root certificate.
RevocationMode
Default value: X509RevocationMode.Online
A flag that specifies how revocation checks are performed.
Specifying an online check can result in a long delay while the certificate authority is contacted.
Revocation checks are only performed when the certificate is chained to a root certificate.
Can I configure my app to require a certificate only on certain paths?
This isn't possible. Remember the certificate exchange is done at the start of the HTTPS conversation, it's done by the server before the first request is received on that connection so it's not possible to scope based on any request fields.
Handler events
The handler has two events:
OnAuthenticationFailed: Called if an exception happens during authentication and allows you to react.OnCertificateValidated: Called after the certificate has been validated, passed validation and a default principal has been created. This event allows you to perform your own validation and augment or replace the principal. For examples include:Determining if the certificate is known to your services.
Constructing your own principal. Consider the following example in
Startup.ConfigureServices:services.AddAuthentication( CertificateAuthenticationDefaults.AuthenticationScheme) .AddCertificate(options => { options.Events = new CertificateAuthenticationEvents { OnCertificateValidated = context => { var claims = new[] { new Claim( ClaimTypes.NameIdentifier, context.ClientCertificate.Subject, ClaimValueTypes.String, context.Options.ClaimsIssuer), new Claim(ClaimTypes.Name, context.ClientCertificate.Subject, ClaimValueTypes.String, context.Options.ClaimsIssuer) }; context.Principal = new ClaimsPrincipal( new ClaimsIdentity(claims, context.Scheme.Name)); context.Success(); return Task.CompletedTask; } }; });
If you find the inbound certificate doesn't meet your extra validation, call context.Fail("failure reason") with a failure reason.
For real functionality, you'll probably want to call a service registered in dependency injection that connects to a database or other type of user store. Access your service by using the context passed into your delegate. Consider the following example in Startup.ConfigureServices:
services.AddAuthentication(
    CertificateAuthenticationDefaults.AuthenticationScheme)
    .AddCertificate(options =>
    {
        options.Events = new CertificateAuthenticationEvents
        {
            OnCertificateValidated = context =>
            {
                var validationService =
                    context.HttpContext.RequestServices
                        .GetRequiredService<ICertificateValidationService>();

                if (validationService.ValidateCertificate(
                    context.ClientCertificate))
                {
                    var claims = new[]
                    {
                        new Claim(
                            ClaimTypes.NameIdentifier,
                            context.ClientCertificate.Subject,
                            ClaimValueTypes.String,
                            context.Options.ClaimsIssuer),
                        new Claim(
                            ClaimTypes.Name,
                            context.ClientCertificate.Subject,
                            ClaimValueTypes.String,
                            context.Options.ClaimsIssuer)
                    };

                    context.Principal = new ClaimsPrincipal(
                        new ClaimsIdentity(claims, context.Scheme.Name));
                    context.Success();
                }

                return Task.CompletedTask;
            }
        };
    });
Conceptually, the validation of the certificate is an authorization concern. Adding a check on, for example, an issuer or thumbprint in an authorization policy, rather than inside OnCertificateValidated, is perfectly acceptable.
Configure your server to require certificates
Kestrel
In Program.cs, configure Kestrel as follows:
public static void Main(string[] args)
{
    CreateHostBuilder(args).Build().Run();
}

public static IHostBuilder CreateHostBuilder(string[] args)
{
    return Host.CreateDefaultBuilder(args)
        .ConfigureWebHostDefaults(webBuilder =>
        {
            webBuilder.UseStartup<Startup>();
            webBuilder.ConfigureKestrel(o =>
            {
                o.ConfigureHttpsDefaults(o =>
                    o.ClientCertificateMode =  ClientCertificateMode.RequireCertificate);
            });
        });
}
Note
Endpoints created by calling Listen before calling ConfigureHttpsDefaults won't have the defaults applied.
IIS
Complete the following steps in IIS Manager:
- Select your site from the Connections tab.
- Double-click the SSL Settings option in the Features View window.
- Check the Require SSL checkbox, and select the Require radio button in the Client certificates section.
Azure and custom web proxies
See the host and deploy documentation for how to configure the certificate forwarding middleware.
Use certificate authentication in Azure Web Apps
No forwarding configuration is required for Azure. Forwarding configuration is set up by the Certificate Forwarding Middleware.
Note
Certificate Forwarding Middleware is required for this scenario.
For more information, see Use a TLS/SSL certificate in your code in Azure App Service (Azure documentation).
Use certificate authentication in custom web proxies
The AddCertificateForwarding method is used to specify:
- The client header name.
- How the certificate is to be loaded (using the
HeaderConverterproperty).
In custom web proxies, the certificate is passed as a custom request header, for example X-SSL-CERT. To use it, configure certificate forwarding in Startup.ConfigureServices:
public void ConfigureServices(IServiceCollection services)
{
    services.AddCertificateForwarding(options =>
    {
        options.CertificateHeader = "X-SSL-CERT";
        options.HeaderConverter = (headerValue) =>
        {
            X509Certificate2 clientCertificate = null;

            if(!string.IsNullOrWhiteSpace(headerValue))
            {
                byte[] bytes = StringToByteArray(headerValue);
                clientCertificate = new X509Certificate2(bytes);
            }

            return clientCertificate;
        };
    });
}

private static byte[] StringToByteArray(string hex)
{
    int NumberChars = hex.Length;
    byte[] bytes = new byte[NumberChars / 2];

    for (int i = 0; i < NumberChars; i += 2)
    {
        bytes[i / 2] = Convert.ToByte(hex.Substring(i, 2), 16);
    }

    return bytes;
}
If the app is reverse proxied by NGINX with the configuration proxy_set_header ssl-client-cert $ssl_client_escaped_cert or deployed on Kubernetes using NGINX Ingress, the client certificate is passed to the app in URL-encoded form. To use the certificate, decode it as follows:
In Startup.ConfigureServices (Startup.cs):
services.AddCertificateForwarding(options =>
{
    options.CertificateHeader = "ssl-client-cert";
    options.HeaderConverter = (headerValue) =>
    {
        X509Certificate2 clientCertificate = null;

        if (!string.IsNullOrWhiteSpace(headerValue))
        {
            string certPem = WebUtility.UrlDecode(headerValue);
            clientCertificate = X509Certificate2.CreateFromPem(certPem);
        }

        return clientCertificate;
    };
});
The Startup.Configure method then adds the middleware. UseCertificateForwarding is called before the calls to UseAuthentication and UseAuthorization:
public void Configure(IApplicationBuilder app, IWebHostEnvironment env)
{
    ...

    app.UseRouting();

    app.UseCertificateForwarding();
    app.UseAuthentication();
    app.UseAuthorization();

    app.UseEndpoints(endpoints =>
    {
        endpoints.MapControllers();
    });
}
A separate class can be used to implement validation logic. Because the same self-signed certificate is used in this example, ensure that only your certificate can be used. Validate that the thumbprints of both the client certificate and the server certificate match, otherwise any certificate can be used and will be enough to authenticate. This would be used inside the AddCertificate method. You could also validate the subject or the issuer here if you're using intermediate or child certificates.
using System.IO;
using System.Security.Cryptography.X509Certificates;

namespace AspNetCoreCertificateAuthApi
{
    public class MyCertificateValidationService
    {
        public bool ValidateCertificate(X509Certificate2 clientCertificate)
        {
            // Do not hardcode passwords in production code
            // Use thumbprint or key vault
            var cert = new X509Certificate2(
                Path.Combine("sts_dev_cert.pfx"), "1234");

            if (clientCertificate.Thumbprint == cert.Thumbprint)
            {
                return true;
            }

            return false;
        }
    }
}
Implement an HttpClient using a certificate and the HttpClientHandler
The HttpClientHandler could be added directly in the constructor of the HttpClient class. Care should be taken when creating instances of the HttpClient. The HttpClient will then send the certificate with each request.
private async Task<JsonDocument> GetApiDataUsingHttpClientHandler()
{
    var cert = new X509Certificate2(Path.Combine(_environment.ContentRootPath, "sts_dev_cert.pfx"), "1234");
    var handler = new HttpClientHandler();
    handler.ClientCertificates.Add(cert);
    var client = new HttpClient(handler);

    var request = new HttpRequestMessage()
    {
        RequestUri = new Uri("https://localhost:44379/api/values"),
        Method = HttpMethod.Get,
    };
    var response = await client.SendAsync(request);
    if (response.IsSuccessStatusCode)
    {
        var responseContent = await response.Content.ReadAsStringAsync();
        var data = JsonDocument.Parse(responseContent);
        return data;
    }

    throw new ApplicationException($"Status code: {response.StatusCode}, Error: {response.ReasonPhrase}");
}
Implement an HttpClient using a certificate and a named HttpClient from IHttpClientFactory
In the following example, a client certificate is added to a HttpClientHandler using the ClientCertificates property from the handler. This handler can then be used in a named instance of an HttpClient using the ConfigurePrimaryHttpMessageHandler method. This is setup in Startup.ConfigureServices:
var clientCertificate =
    new X509Certificate2(
      Path.Combine(_environment.ContentRootPath, "sts_dev_cert.pfx"), "1234");

services.AddHttpClient("namedClient", c =>
{
}).ConfigurePrimaryHttpMessageHandler(() =>
{
    var handler = new HttpClientHandler();
    handler.ClientCertificates.Add(clientCertificate);
    return handler;
});
The IHttpClientFactory can then be used to get the named instance with the handler and the certificate. The CreateClient method with the name of the client defined in the Startup class is used to get the instance. The HTTP request can be sent using the client as required.
private readonly IHttpClientFactory _clientFactory;

public ApiService(IHttpClientFactory clientFactory)
{
    _clientFactory = clientFactory;
}

private async Task<JsonDocument> GetApiDataWithNamedClient()
{
    var client = _clientFactory.CreateClient("namedClient");

    var request = new HttpRequestMessage()
    {
        RequestUri = new Uri("https://localhost:44379/api/values"),
        Method = HttpMethod.Get,
    };
    var response = await client.SendAsync(request);
    if (response.IsSuccessStatusCode)
    {
        var responseContent = await response.Content.ReadAsStringAsync();
        var data = JsonDocument.Parse(responseContent);
        return data;
    }

    throw new ApplicationException($"Status code: {response.StatusCode}, Error: {response.ReasonPhrase}");
}
If the correct certificate is sent to the server, the data is returned. If no certificate or the wrong certificate is sent, an HTTP 403 status code is returned.
Create certificates in PowerShell
Creating the certificates is the hardest part in setting up this flow. A root certificate can be created using the New-SelfSignedCertificate PowerShell cmdlet. When creating the certificate, use a strong password. It's important to add the KeyUsageProperty parameter and the KeyUsage parameter as shown.
Create root CA
New-SelfSignedCertificate -DnsName "root_ca_dev_damienbod.com", "root_ca_dev_damienbod.com" -CertStoreLocation "cert:\LocalMachine\My" -NotAfter (Get-Date).AddYears(20) -FriendlyName "root_ca_dev_damienbod.com" -KeyUsageProperty All -KeyUsage CertSign, CRLSign, DigitalSignature

$mypwd = ConvertTo-SecureString -String "1234" -Force -AsPlainText

Get-ChildItem -Path cert:\localMachine\my\"The thumbprint..." | Export-PfxCertificate -FilePath C:\git\root_ca_dev_damienbod.pfx -Password $mypwd

Export-Certificate -Cert cert:\localMachine\my\"The thumbprint..." -FilePath root_ca_dev_damienbod.crt
Note
The -DnsName parameter value must match the deployment target of the app. For example, "localhost" for development.
Install in the trusted root
The root certificate needs to be trusted on your host system. A root certificate which was not created by a certificate authority won't be trusted by default. For information on how to trust the root certificate on Windows, see this question.
Intermediate certificate
An intermediate certificate can now be created from the root certificate. This isn't required for all use cases, but you might need to create many certificates or need to activate or disable groups of certificates. The TextExtension parameter is required to set the path length in the basic constraints of the certificate.
The intermediate certificate can then be added to the trusted intermediate certificate in the Windows host system.
$mypwd = ConvertTo-SecureString -String "1234" -Force -AsPlainText

$parentcert = ( Get-ChildItem -Path cert:\LocalMachine\My\"The thumbprint of the root..." )

New-SelfSignedCertificate -certstorelocation cert:\localmachine\my -dnsname "intermediate_dev_damienbod.com" -Signer $parentcert -NotAfter (Get-Date).AddYears(20) -FriendlyName "intermediate_dev_damienbod.com" -KeyUsageProperty All -KeyUsage CertSign, CRLSign, DigitalSignature -TextExtension @("2.5.29.19={text}CA=1&pathlength=1")

Get-ChildItem -Path cert:\localMachine\my\"The thumbprint..." | Export-PfxCertificate -FilePath C:\git\AspNetCoreCertificateAuth\Certs\intermediate_dev_damienbod.pfx -Password $mypwd

Export-Certificate -Cert cert:\localMachine\my\"The thumbprint..." -FilePath intermediate_dev_damienbod.crt
Create child certificate from intermediate certificate
A child certificate can be created from the intermediate certificate. This is the end entity and doesn't need to create more child certificates.
$parentcert = ( Get-ChildItem -Path cert:\LocalMachine\My\"The thumbprint from the Intermediate certificate..." )

New-SelfSignedCertificate -certstorelocation cert:\localmachine\my -dnsname "child_a_dev_damienbod.com" -Signer $parentcert -NotAfter (Get-Date).AddYears(20) -FriendlyName "child_a_dev_damienbod.com"

$mypwd = ConvertTo-SecureString -String "1234" -Force -AsPlainText

Get-ChildItem -Path cert:\localMachine\my\"The thumbprint..." | Export-PfxCertificate -FilePath C:\git\AspNetCoreCertificateAuth\Certs\child_a_dev_damienbod.pfx -Password $mypwd

Export-Certificate -Cert cert:\localMachine\my\"The thumbprint..." -FilePath child_a_dev_damienbod.crt
Create child certificate from root certificate
A child certificate can also be created from the root certificate directly.
$rootcert = ( Get-ChildItem -Path cert:\LocalMachine\My\"The thumbprint from the root cert..." )

New-SelfSignedCertificate -certstorelocation cert:\localmachine\my -dnsname "child_a_dev_damienbod.com" -Signer $rootcert -NotAfter (Get-Date).AddYears(20) -FriendlyName "child_a_dev_damienbod.com"

$mypwd = ConvertTo-SecureString -String "1234" -Force -AsPlainText

Get-ChildItem -Path cert:\localMachine\my\"The thumbprint..." | Export-PfxCertificate -FilePath C:\git\AspNetCoreCertificateAuth\Certs\child_a_dev_damienbod.pfx -Password $mypwd

Export-Certificate -Cert cert:\localMachine\my\"The thumbprint..." -FilePath child_a_dev_damienbod.crt
Example root - intermediate certificate - certificate
$mypwdroot = ConvertTo-SecureString -String "1234" -Force -AsPlainText
$mypwd = ConvertTo-SecureString -String "1234" -Force -AsPlainText

New-SelfSignedCertificate -DnsName "root_ca_dev_damienbod.com", "root_ca_dev_damienbod.com" -CertStoreLocation "cert:\LocalMachine\My" -NotAfter (Get-Date).AddYears(20) -FriendlyName "root_ca_dev_damienbod.com" -KeyUsageProperty All -KeyUsage CertSign, CRLSign, DigitalSignature

Get-ChildItem -Path cert:\localMachine\my\0C89639E4E2998A93E423F919B36D4009A0F9991 | Export-PfxCertificate -FilePath C:\git\root_ca_dev_damienbod.pfx -Password $mypwdroot

Export-Certificate -Cert cert:\localMachine\my\0C89639E4E2998A93E423F919B36D4009A0F9991 -FilePath root_ca_dev_damienbod.crt

$rootcert = ( Get-ChildItem -Path cert:\LocalMachine\My\0C89639E4E2998A93E423F919B36D4009A0F9991 )

New-SelfSignedCertificate -certstorelocation cert:\localmachine\my -dnsname "child_a_dev_damienbod.com" -Signer $rootcert -NotAfter (Get-Date).AddYears(20) -FriendlyName "child_a_dev_damienbod.com" -KeyUsageProperty All -KeyUsage CertSign, CRLSign, DigitalSignature -TextExtension @("2.5.29.19={text}CA=1&pathlength=1")

Get-ChildItem -Path cert:\localMachine\my\BA9BF91ED35538A01375EFC212A2F46104B33A44 | Export-PfxCertificate -FilePath C:\git\AspNetCoreCertificateAuth\Certs\child_a_dev_damienbod.pfx -Password $mypwd

Export-Certificate -Cert cert:\localMachine\my\BA9BF91ED35538A01375EFC212A2F46104B33A44 -FilePath child_a_dev_damienbod.crt

$parentcert = ( Get-ChildItem -Path cert:\LocalMachine\My\BA9BF91ED35538A01375EFC212A2F46104B33A44 )

New-SelfSignedCertificate -certstorelocation cert:\localmachine\my -dnsname "child_b_from_a_dev_damienbod.com" -Signer $parentcert -NotAfter (Get-Date).AddYears(20) -FriendlyName "child_b_from_a_dev_damienbod.com"

Get-ChildItem -Path cert:\localMachine\my\141594A0AE38CBBECED7AF680F7945CD51D8F28A | Export-PfxCertificate -FilePath C:\git\AspNetCoreCertificateAuth\Certs\child_b_from_a_dev_damienbod.pfx -Password $mypwd

Export-Certificate -Cert cert:\localMachine\my\141594A0AE38CBBECED7AF680F7945CD51D8F28A -FilePath child_b_from_a_dev_damienbod.crt
When using the root, intermediate, or child certificates, the certificates can be validated using the Thumbprint or PublicKey as required.
using System.Collections.Generic;
using System.IO;
using System.Security.Cryptography.X509Certificates;

namespace AspNetCoreCertificateAuthApi
{
    public class MyCertificateValidationService
    {
        public bool ValidateCertificate(X509Certificate2 clientCertificate)
        {
            return CheckIfThumbprintIsValid(clientCertificate);
        }

        private bool CheckIfThumbprintIsValid(X509Certificate2 clientCertificate)
        {
            var listOfValidThumbprints = new List<string>
            {
                "141594A0AE38CBBECED7AF680F7945CD51D8F28A",
                "0C89639E4E2998A93E423F919B36D4009A0F9991",
                "BA9BF91ED35538A01375EFC212A2F46104B33A44"
            };

            if (listOfValidThumbprints.Contains(clientCertificate.Thumbprint))
            {
                return true;
            }

            return false;
        }
    }
}
Certificate validation caching
.NET 5 or later versions support the ability to enable caching of validation results. The caching dramatically improves performance of certificate authentication, as validation is an expensive operation.
By default, certificate authentication disables caching. To enable caching, call AddCertificateCache in Startup.ConfigureServices:
public void ConfigureServices(IServiceCollection services)
{
    services.AddAuthentication(
        CertificateAuthenticationDefaults.AuthenticationScheme)
            .AddCertificate()
            .AddCertificateCache(options =>
            {
                options.CacheSize = 1024;
                options.CacheEntryExpiration = TimeSpan.FromMinutes(2);
            });
}
The default caching implementation stores results in memory. You can provide your own cache by implementing ICertificateValidationCache and registering it with dependency injection. For example, services.AddSingleton<ICertificateValidationCache, YourCache>().
Optional client certificates
This section provides information for apps that must protect a subset of the app with a certificate. For example, a Razor Page or controller in the app might require client certificates. This presents challenges as client certificates:
- Are a TLS feature, not an HTTP feature.
- Are negotiated per-connection and usually at the start of the connection before any HTTP data is available.
There are two approaches to implementing optional client certificates:
- Using separate host names (SNI) and redirecting. While more work to configure, this is recommended because it works in most environments and protocols.
- Renegotiation during an HTTP request. This has several limitations and is not recommended.
Separate Hosts (SNI)
At the start of the connection, only the Server Name Indication (SNI)† is known. Client certificates can be configured per host name so that one host requires them and another does not.
- Set up binding for the domain and subdomain:
- For example, set up bindings on
contoso.comandmyClient.contoso.com. Thecontoso.comhost doesn't require a client certificate butmyClient.contoso.comdoes. - For more information, see:
- For example, set up bindings on
.NET 5 or later adds more convenient support for redirecting to acquire optional client certificates. For more information, see the Optional certificates sample.
- For requests to the web app that require a client certificate and don't have one:
- Redirect to the same page using the client certificate protected subdomain.
- For example, redirect to
myClient.contoso.com/requestedPage. Because the request tomyClient.contoso.com/requestedPageis a different hostname thancontoso.com/requestedPage, the client establishes a different connection and the client certificate is provided. - For more information, see Introduction to authorization in ASP.NET Core.
† Server Name Indication (SNI) is a TLS extension to include a virtual domain as a part of SSL negotiation. This effectively means the virtual domain name, or a hostname, can be used to identify the network end point.
Renegotiation
TLS renegotiation is a process by which the client and server can re-assess the encryption requirements for an individual connection, including requesting a client certificate if not previously provided. TLS renegotiation is a security risk and isn't recommended because:
- In HTTP/1.1 the server must first buffer or consume any HTTP data that is in flight such as POST request bodies to make sure the connection is clear for the renegotiation. Otherwise the renegotiation can stop responding or fail.
- HTTP/2 and HTTP/3 explicitly prohibit renegotiation.
- There are security risks associated with renegotiation. TLS 1.3 removed renegotiation of the whole connection and replaced it with a new extension for requesting only the client certificate after the start of the connection. This mechanism is exposed via the same APIs and is still subject to the prior constraints of buffering and HTTP protocol versions.
The implementation and configuration of this feature varies by server and framework version.
IIS
IIS manages the client certificate negotiation on your behalf. A subsection of the application can enable the SslRequireCert option to negotiate the client certificate for those requests. See Configuration in the IIS documentation for details.
IIS will automatically buffer any request body data up to a configured size limit before renegotiating. Requests that exceed the limit are rejected with a 413 response. This limit defaults to 48KB and is configurable by setting the uploadReadAheadSize.
HttpSys
HttpSys has two settings which control the client certificate negotiation and both should be set. The first is in netsh.exe under http add sslcert clientcertnegotiation=enable/disable. This flag indicates if the client certificate should be negotiated at the start of a connection and it should be set to disable for optional client certificates. See the netsh docs for details.
The other setting is ClientCertificateMethod. When set to AllowRenegotation, the client certificate can be renegotiated during a request.
NOTE The application should buffer or consume any request body data before attempting the renegotiation, otherwise the request may become unresponsive.
There is a known issue where enabling AllowRenegotation can cause the renegotiation to happen synchronously when accessing the ClientCertificate property. Call the GetClientCertificateAsync method to avoid this. This has been addressed in .NET 6. For more information, see this GitHub issue. Note GetClientCertificateAsync can return a null certificate if the client declines to provide one.
Kestrel
Kestrel controls client certificate negotiation with the ClientCertificateMode option.
For .NET 5 or earlier Kestrel does not support renegotiating after the start of a connection to acquire a client certificate. This feature has been added in .NET 6.
Microsoft.AspNetCore.Authentication.Certificate contains an implementation similar to Certificate Authentication for ASP.NET Core. Certificate authentication happens at the TLS level, long before it ever gets to ASP.NET Core. More accurately, this is an authentication handler that validates the certificate and then gives you an event where you can resolve that certificate to a ClaimsPrincipal.
Configure your server for certificate authentication, be it IIS, Kestrel, Azure Web Apps, or whatever else you're using.
Proxy and load balancer scenarios
Certificate authentication is a stateful scenario primarily used where a proxy or load balancer doesn't handle traffic between clients and servers. If a proxy or load balancer is used, certificate authentication only works if the proxy or load balancer:
- Handles the authentication.
- Passes the user authentication information to the app (for example, in a request header), which acts on the authentication information.
An alternative to certificate authentication in environments where proxies and load balancers are used is Active Directory Federated Services (ADFS) with OpenID Connect (OIDC).
Get started
Acquire an HTTPS certificate, apply it, and configure your server to require certificates.
In your web app, add a reference to the Microsoft.AspNetCore.Authentication.Certificate package. Then in the Startup.ConfigureServices method, call
services.AddAuthentication(CertificateAuthenticationDefaults.AuthenticationScheme).AddCertificate(...); with your options, providing a delegate for OnCertificateValidated to do any supplementary validation on the client certificate sent with requests. Turn that information into a ClaimsPrincipal and set it on the context.Principal property.
If authentication fails, this handler returns a 403 (Forbidden) response rather a 401 (Unauthorized), as you might expect. The reasoning is that the authentication should happen during the initial TLS connection. By the time it reaches the handler, it's too late. There's no way to upgrade the connection from an anonymous connection to one with a certificate.
Also add app.UseAuthentication(); in the Startup.Configure method. Otherwise, the HttpContext.User will not be set to ClaimsPrincipal created from the certificate. For example:
public void ConfigureServices(IServiceCollection services)
{
    services.AddAuthentication(
        CertificateAuthenticationDefaults.AuthenticationScheme)
        .AddCertificate();

    // All other service configuration
}

public void Configure(IApplicationBuilder app, IHostingEnvironment env)
{
    app.UseAuthentication();

    // All other app configuration
}
The preceding example demonstrates the default way to add certificate authentication. The handler constructs a user principal using the common certificate properties.
Configure certificate validation
The CertificateAuthenticationOptions handler has some built-in validations that are the minimum validations you should perform on a certificate. Each of these settings is enabled by default.
AllowedCertificateTypes = Chained, SelfSigned, or All (Chained | SelfSigned)
Default value: CertificateTypes.Chained
This check validates that only the appropriate certificate type is allowed. If the app is using self-signed certificates, this option needs to be set to CertificateTypes.All or CertificateTypes.SelfSigned.
ValidateCertificateUse
Default value: true
This check validates that the certificate presented by the client has the Client Authentication extended key use (EKU), or no EKUs at all. As the specifications say, if no EKU is specified, then all EKUs are deemed valid.
ValidateValidityPeriod
Default value: true
This check validates that the certificate is within its validity period. On each request, the handler ensures that a certificate that was valid when it was presented hasn't expired during its current session.
RevocationFlag
Default value: X509RevocationFlag.ExcludeRoot
A flag that specifies which certificates in the chain are checked for revocation.
Revocation checks are only performed when the certificate is chained to a root certificate.
RevocationMode
Default value: X509RevocationMode.Online
A flag that specifies how revocation checks are performed.
Specifying an online check can result in a long delay while the certificate authority is contacted.
Revocation checks are only performed when the certificate is chained to a root certificate.
Can I configure my app to require a certificate only on certain paths?
This isn't possible. Remember the certificate exchange is done at the start of the HTTPS conversation, it's done by the server before the first request is received on that connection so it's not possible to scope based on any request fields.
Handler events
The handler has two events:
OnAuthenticationFailed: Called if an exception happens during authentication and allows you to react.OnCertificateValidated: Called after the certificate has been validated, passed validation and a default principal has been created. This event allows you to perform your own validation and augment or replace the principal. For examples include:Determining if the certificate is known to your services.
Constructing your own principal. Consider the following example in
Startup.ConfigureServices:services.AddAuthentication( CertificateAuthenticationDefaults.AuthenticationScheme) .AddCertificate(options => { options.Events = new CertificateAuthenticationEvents { OnCertificateValidated = context => { var claims = new[] { new Claim( ClaimTypes.NameIdentifier, context.ClientCertificate.Subject, ClaimValueTypes.String, context.Options.ClaimsIssuer), new Claim(ClaimTypes.Name, context.ClientCertificate.Subject, ClaimValueTypes.String, context.Options.ClaimsIssuer) }; context.Principal = new ClaimsPrincipal( new ClaimsIdentity(claims, context.Scheme.Name)); context.Success(); return Task.CompletedTask; } }; });
If you find the inbound certificate doesn't meet your extra validation, call context.Fail("failure reason") with a failure reason.
For real functionality, you'll probably want to call a service registered in dependency injection that connects to a database or other type of user store. Access your service by using the context passed into your delegate. Consider the following example in Startup.ConfigureServices:
services.AddAuthentication(
    CertificateAuthenticationDefaults.AuthenticationScheme)
    .AddCertificate(options =>
    {
        options.Events = new CertificateAuthenticationEvents
        {
            OnCertificateValidated = context =>
            {
                var validationService =
                    context.HttpContext.RequestServices
                        .GetRequiredService<ICertificateValidationService>();

                if (validationService.ValidateCertificate(
                    context.ClientCertificate))
                {
                    var claims = new[]
                    {
                        new Claim(
                            ClaimTypes.NameIdentifier,
                            context.ClientCertificate.Subject,
                            ClaimValueTypes.String,
                            context.Options.ClaimsIssuer),
                        new Claim(
                            ClaimTypes.Name,
                            context.ClientCertificate.Subject,
                            ClaimValueTypes.String,
                            context.Options.ClaimsIssuer)
                    };

                    context.Principal = new ClaimsPrincipal(
                        new ClaimsIdentity(claims, context.Scheme.Name));
                    context.Success();
                }

                return Task.CompletedTask;
            }
        };
    });
Conceptually, the validation of the certificate is an authorization concern. Adding a check on, for example, an issuer or thumbprint in an authorization policy, rather than inside OnCertificateValidated, is perfectly acceptable.
Configure your server to require certificates
Kestrel
In Program.cs, configure Kestrel as follows:
public static void Main(string[] args)
{
    CreateHostBuilder(args).Build().Run();
}

public static IHostBuilder CreateHostBuilder(string[] args)
{
    return Host.CreateDefaultBuilder(args)
        .ConfigureWebHostDefaults(webBuilder =>
        {
            webBuilder.UseStartup<Startup>();
            webBuilder.ConfigureKestrel(o =>
            {
                o.ConfigureHttpsDefaults(o =>
                    o.ClientCertificateMode =  ClientCertificateMode.RequireCertificate);
            });
        });
}
Note
Endpoints created by calling Listen before calling ConfigureHttpsDefaults won't have the defaults applied.
IIS
Complete the following steps in IIS Manager:
- Select your site from the Connections tab.
- Double-click the SSL Settings option in the Features View window.
- Check the Require SSL checkbox, and select the Require radio button in the Client certificates section.
Azure and custom web proxies
See the host and deploy documentation for how to configure the certificate forwarding middleware.
Use certificate authentication in Azure Web Apps
No forwarding configuration is required for Azure. Forwarding configuration is set up by the Certificate Forwarding Middleware.
Note
Certificate Forwarding Middleware is required for this scenario.
For more information, see Use a TLS/SSL certificate in your code in Azure App Service (Azure documentation).
Use certificate authentication in custom web proxies
The AddCertificateForwarding method is used to specify:
- The client header name.
- How the certificate is to be loaded (using the
HeaderConverterproperty).
In custom web proxies, the certificate is passed as a custom request header, for example X-SSL-CERT. To use it, configure certificate forwarding in Startup.ConfigureServices:
public void ConfigureServices(IServiceCollection services)
{
    services.AddCertificateForwarding(options =>
    {
        options.CertificateHeader = "X-SSL-CERT";
        options.HeaderConverter = (headerValue) =>
        {
            X509Certificate2 clientCertificate = null;

            if(!string.IsNullOrWhiteSpace(headerValue))
            {
                byte[] bytes = StringToByteArray(headerValue);
                clientCertificate = new X509Certificate2(bytes);
            }

            return clientCertificate;
        };
    });
}

private static byte[] StringToByteArray(string hex)
{
    int NumberChars = hex.Length;
    byte[] bytes = new byte[NumberChars / 2];

    for (int i = 0; i < NumberChars; i += 2)
    {
        bytes[i / 2] = Convert.ToByte(hex.Substring(i, 2), 16);
    }

    return bytes;
}
If the app is reverse proxied by NGINX with the configuration proxy_set_header ssl-client-cert $ssl_client_escaped_cert or deployed on Kubernetes using NGINX Ingress, the client certificate is passed to the app in URL-encoded form. To use the certificate, decode it as follows:
Add the namespace for System.Net to the top of Startup.cs:
using System.Net;
In Startup.ConfigureServices:
services.AddCertificateForwarding(options =>
{
    options.CertificateHeader = "ssl-client-cert";
    options.HeaderConverter = (headerValue) =>
    {
        X509Certificate2 clientCertificate = null;

        if (!string.IsNullOrWhiteSpace(headerValue))
        {
            var bytes = UrlEncodedPemToByteArray(headerValue);
            clientCertificate = new X509Certificate2(bytes);
        }

        return clientCertificate;
    };
});
Add the UrlEncodedPemToByteArray method:
private static byte[] UrlEncodedPemToByteArray(string urlEncodedBase64Pem)
{
    var base64Pem = WebUtility.UrlDecode(urlEncodedBase64Pem);
    var base64Cert = base64Pem
        .Replace("-----BEGIN CERTIFICATE-----", string.Empty)
        .Replace("-----END CERTIFICATE-----", string.Empty)
        .Trim();

    return Convert.FromBase64String(base64Cert);
}
The Startup.Configure method then adds the middleware. UseCertificateForwarding is called before the calls to UseAuthentication and UseAuthorization:
public void Configure(IApplicationBuilder app, IWebHostEnvironment env)
{
    ...

    app.UseRouting();

    app.UseCertificateForwarding();
    app.UseAuthentication();
    app.UseAuthorization();

    app.UseEndpoints(endpoints =>
    {
        endpoints.MapControllers();
    });
}
A separate class can be used to implement validation logic. Because the same self-signed certificate is used in this example, ensure that only your certificate can be used. Validate that the thumbprints of both the client certificate and the server certificate match, otherwise any certificate can be used and will be enough to authenticate. This would be used inside the AddCertificate method. You could also validate the subject or the issuer here if you're using intermediate or child certificates.
using System.IO;
using System.Security.Cryptography.X509Certificates;

namespace AspNetCoreCertificateAuthApi
{
    public class MyCertificateValidationService
    {
        public bool ValidateCertificate(X509Certificate2 clientCertificate)
        {
            // Do not hardcode passwords in production code
            // Use thumbprint or key vault
            var cert = new X509Certificate2(
                Path.Combine("sts_dev_cert.pfx"), "1234");

            if (clientCertificate.Thumbprint == cert.Thumbprint)
            {
                return true;
            }

            return false;
        }
    }
}
Implement an HttpClient using a certificate and the HttpClientHandler
The HttpClientHandler could be added directly in the constructor of the HttpClient class. Care should be taken when creating instances of the HttpClient. The HttpClient will then send the certificate with each request.
private async Task<JsonDocument> GetApiDataUsingHttpClientHandler()
{
    var cert = new X509Certificate2(Path.Combine(_environment.ContentRootPath, "sts_dev_cert.pfx"), "1234");
    var handler = new HttpClientHandler();
    handler.ClientCertificates.Add(cert);
    var client = new HttpClient(handler);

    var request = new HttpRequestMessage()
    {
        RequestUri = new Uri("https://localhost:44379/api/values"),
        Method = HttpMethod.Get,
    };
    var response = await client.SendAsync(request);
    if (response.IsSuccessStatusCode)
    {
        var responseContent = await response.Content.ReadAsStringAsync();
        var data = JsonDocument.Parse(responseContent);
        return data;
    }

    throw new ApplicationException($"Status code: {response.StatusCode}, Error: {response.ReasonPhrase}");
}
Implement an HttpClient using a certificate and a named HttpClient from IHttpClientFactory
In the following example, a client certificate is added to a HttpClientHandler using the ClientCertificates property from the handler. This handler can then be used in a named instance of an HttpClient using the ConfigurePrimaryHttpMessageHandler method. This is setup in Startup.ConfigureServices:
var clientCertificate =
    new X509Certificate2(
      Path.Combine(_environment.ContentRootPath, "sts_dev_cert.pfx"), "1234");

services.AddHttpClient("namedClient", c =>
{
}).ConfigurePrimaryHttpMessageHandler(() =>
{
    var handler = new HttpClientHandler();
    handler.ClientCertificates.Add(clientCertificate);
    return handler;
});
The IHttpClientFactory can then be used to get the named instance with the handler and the certificate. The CreateClient method with the name of the client defined in the Startup class is used to get the instance. The HTTP request can be sent using the client as required.
private readonly IHttpClientFactory _clientFactory;

public ApiService(IHttpClientFactory clientFactory)
{
    _clientFactory = clientFactory;
}

private async Task<JsonDocument> GetApiDataWithNamedClient()
{
    var client = _clientFactory.CreateClient("namedClient");

    var request = new HttpRequestMessage()
    {
        RequestUri = new Uri("https://localhost:44379/api/values"),
        Method = HttpMethod.Get,
    };
    var response = await client.SendAsync(request);
    if (response.IsSuccessStatusCode)
    {
        var responseContent = await response.Content.ReadAsStringAsync();
        var data = JsonDocument.Parse(responseContent);
        return data;
    }

    throw new ApplicationException($"Status code: {response.StatusCode}, Error: {response.ReasonPhrase}");
}
If the correct certificate is sent to the server, the data is returned. If no certificate or the wrong certificate is sent, an HTTP 403 status code is returned.
Create certificates in PowerShell
Creating the certificates is the hardest part in setting up this flow. A root certificate can be created using the New-SelfSignedCertificate PowerShell cmdlet. When creating the certificate, use a strong password. It's important to add the KeyUsageProperty parameter and the KeyUsage parameter as shown.
Create root CA
New-SelfSignedCertificate -DnsName "root_ca_dev_damienbod.com", "root_ca_dev_damienbod.com" -CertStoreLocation "cert:\LocalMachine\My" -NotAfter (Get-Date).AddYears(20) -FriendlyName "root_ca_dev_damienbod.com" -KeyUsageProperty All -KeyUsage CertSign, CRLSign, DigitalSignature

$mypwd = ConvertTo-SecureString -String "1234" -Force -AsPlainText

Get-ChildItem -Path cert:\localMachine\my\"The thumbprint..." | Export-PfxCertificate -FilePath C:\git\root_ca_dev_damienbod.pfx -Password $mypwd

Export-Certificate -Cert cert:\localMachine\my\"The thumbprint..." -FilePath root_ca_dev_damienbod.crt
Note
The -DnsName parameter value must match the deployment target of the app. For example, "localhost" for development.
Install in the trusted root
The root certificate needs to be trusted on your host system. A root certificate which was not created by a certificate authority won't be trusted by default. For information on how to trust the root certificate on Windows, see this question.
Intermediate certificate
An intermediate certificate can now be created from the root certificate. This isn't required for all use cases, but you might need to create many certificates or need to activate or disable groups of certificates. The TextExtension parameter is required to set the path length in the basic constraints of the certificate.
The intermediate certificate can then be added to the trusted intermediate certificate in the Windows host system.
$mypwd = ConvertTo-SecureString -String "1234" -Force -AsPlainText

$parentcert = ( Get-ChildItem -Path cert:\LocalMachine\My\"The thumbprint of the root..." )

New-SelfSignedCertificate -certstorelocation cert:\localmachine\my -dnsname "intermediate_dev_damienbod.com" -Signer $parentcert -NotAfter (Get-Date).AddYears(20) -FriendlyName "intermediate_dev_damienbod.com" -KeyUsageProperty All -KeyUsage CertSign, CRLSign, DigitalSignature -TextExtension @("2.5.29.19={text}CA=1&pathlength=1")

Get-ChildItem -Path cert:\localMachine\my\"The thumbprint..." | Export-PfxCertificate -FilePath C:\git\AspNetCoreCertificateAuth\Certs\intermediate_dev_damienbod.pfx -Password $mypwd

Export-Certificate -Cert cert:\localMachine\my\"The thumbprint..." -FilePath intermediate_dev_damienbod.crt
Create child certificate from intermediate certificate
A child certificate can be created from the intermediate certificate. This is the end entity and doesn't need to create more child certificates.
$parentcert = ( Get-ChildItem -Path cert:\LocalMachine\My\"The thumbprint from the Intermediate certificate..." )

New-SelfSignedCertificate -certstorelocation cert:\localmachine\my -dnsname "child_a_dev_damienbod.com" -Signer $parentcert -NotAfter (Get-Date).AddYears(20) -FriendlyName "child_a_dev_damienbod.com"

$mypwd = ConvertTo-SecureString -String "1234" -Force -AsPlainText

Get-ChildItem -Path cert:\localMachine\my\"The thumbprint..." | Export-PfxCertificate -FilePath C:\git\AspNetCoreCertificateAuth\Certs\child_a_dev_damienbod.pfx -Password $mypwd

Export-Certificate -Cert cert:\localMachine\my\"The thumbprint..." -FilePath child_a_dev_damienbod.crt
Create child certificate from root certificate
A child certificate can also be created from the root certificate directly.
$rootcert = ( Get-ChildItem -Path cert:\LocalMachine\My\"The thumbprint from the root cert..." )

New-SelfSignedCertificate -certstorelocation cert:\localmachine\my -dnsname "child_a_dev_damienbod.com" -Signer $rootcert -NotAfter (Get-Date).AddYears(20) -FriendlyName "child_a_dev_damienbod.com"

$mypwd = ConvertTo-SecureString -String "1234" -Force -AsPlainText

Get-ChildItem -Path cert:\localMachine\my\"The thumbprint..." | Export-PfxCertificate -FilePath C:\git\AspNetCoreCertificateAuth\Certs\child_a_dev_damienbod.pfx -Password $mypwd

Export-Certificate -Cert cert:\localMachine\my\"The thumbprint..." -FilePath child_a_dev_damienbod.crt
Example root - intermediate certificate - certificate
$mypwdroot = ConvertTo-SecureString -String "1234" -Force -AsPlainText
$mypwd = ConvertTo-SecureString -String "1234" -Force -AsPlainText

New-SelfSignedCertificate -DnsName "root_ca_dev_damienbod.com", "root_ca_dev_damienbod.com" -CertStoreLocation "cert:\LocalMachine\My" -NotAfter (Get-Date).AddYears(20) -FriendlyName "root_ca_dev_damienbod.com" -KeyUsageProperty All -KeyUsage CertSign, CRLSign, DigitalSignature

Get-ChildItem -Path cert:\localMachine\my\0C89639E4E2998A93E423F919B36D4009A0F9991 | Export-PfxCertificate -FilePath C:\git\root_ca_dev_damienbod.pfx -Password $mypwdroot

Export-Certificate -Cert cert:\localMachine\my\0C89639E4E2998A93E423F919B36D4009A0F9991 -FilePath root_ca_dev_damienbod.crt

$rootcert = ( Get-ChildItem -Path cert:\LocalMachine\My\0C89639E4E2998A93E423F919B36D4009A0F9991 )

New-SelfSignedCertificate -certstorelocation cert:\localmachine\my -dnsname "child_a_dev_damienbod.com" -Signer $rootcert -NotAfter (Get-Date).AddYears(20) -FriendlyName "child_a_dev_damienbod.com" -KeyUsageProperty All -KeyUsage CertSign, CRLSign, DigitalSignature -TextExtension @("2.5.29.19={text}CA=1&pathlength=1")

Get-ChildItem -Path cert:\localMachine\my\BA9BF91ED35538A01375EFC212A2F46104B33A44 | Export-PfxCertificate -FilePath C:\git\AspNetCoreCertificateAuth\Certs\child_a_dev_damienbod.pfx -Password $mypwd

Export-Certificate -Cert cert:\localMachine\my\BA9BF91ED35538A01375EFC212A2F46104B33A44 -FilePath child_a_dev_damienbod.crt

$parentcert = ( Get-ChildItem -Path cert:\LocalMachine\My\BA9BF91ED35538A01375EFC212A2F46104B33A44 )

New-SelfSignedCertificate -certstorelocation cert:\localmachine\my -dnsname "child_b_from_a_dev_damienbod.com" -Signer $parentcert -NotAfter (Get-Date).AddYears(20) -FriendlyName "child_b_from_a_dev_damienbod.com"

Get-ChildItem -Path cert:\localMachine\my\141594A0AE38CBBECED7AF680F7945CD51D8F28A | Export-PfxCertificate -FilePath C:\git\AspNetCoreCertificateAuth\Certs\child_b_from_a_dev_damienbod.pfx -Password $mypwd

Export-Certificate -Cert cert:\localMachine\my\141594A0AE38CBBECED7AF680F7945CD51D8F28A -FilePath child_b_from_a_dev_damienbod.crt
When using the root, intermediate, or child certificates, the certificates can be validated using the Thumbprint or PublicKey as required.
using System.Collections.Generic;
using System.IO;
using System.Security.Cryptography.X509Certificates;

namespace AspNetCoreCertificateAuthApi
{
    public class MyCertificateValidationService
    {
        public bool ValidateCertificate(X509Certificate2 clientCertificate)
        {
            return CheckIfThumbprintIsValid(clientCertificate);
        }

        private bool CheckIfThumbprintIsValid(X509Certificate2 clientCertificate)
        {
            var listOfValidThumbprints = new List<string>
            {
                "141594A0AE38CBBECED7AF680F7945CD51D8F28A",
                "0C89639E4E2998A93E423F919B36D4009A0F9991",
                "BA9BF91ED35538A01375EFC212A2F46104B33A44"
            };

            if (listOfValidThumbprints.Contains(clientCertificate.Thumbprint))
            {
                return true;
            }

            return false;
        }
    }
}
Optional client certificates
This section provides information for apps that must protect a subset of the app with a certificate. For example, a Razor Page or controller in the app might require client certificates. This presents challenges as client certificates:
- Are a TLS feature, not an HTTP feature.
- Are negotiated per-connection and usually at the start of the connection before any HTTP data is available.
There are two approaches to implementing optional client certificates:
- Using separate host names (SNI) and redirecting. While more work to configure, this is recommended because it works in most environments and protocols.
- Renegotiation during an HTTP request. This has several limitations and is not recommended.
Separate Hosts (SNI)
At the start of the connection, only the Server Name Indication (SNI)† is known. Client certificates can be configured per host name so that one host requires them and another does not.
- Set up binding for the domain and subdomain:
- For example, set up bindings on
contoso.comandmyClient.contoso.com. Thecontoso.comhost doesn't require a client certificate butmyClient.contoso.comdoes. - For more information, see:
- Kestrel web server in ASP.NET Core:
- ListenOptions.UseHttps
- ClientCertificateMode
- Note Kestrel does not currently support multiple TLS configurations on one binding, you'll need two bindings with unique IPs or ports. For more information, see this GitHub issue.
- IIS
- HTTP.sys: Configure Windows Server
- Kestrel web server in ASP.NET Core:
- For example, set up bindings on
.NET 5 or later adds more convenient support for redirecting to acquire optional client certificates. For more information, see the Optional certificates sample.
- For requests to the web app that require a client certificate and don't have one:
- Redirect to the same page using the client certificate protected subdomain.
- For example, redirect to
myClient.contoso.com/requestedPage. Because the request tomyClient.contoso.com/requestedPageis a different hostname thancontoso.com/requestedPage, the client establishes a different connection and the client certificate is provided. - For more information, see Introduction to authorization in ASP.NET Core.
† Server Name Indication (SNI) is a TLS extension to include a virtual domain as a part of SSL negotiation. This effectively means the virtual domain name, or a hostname, can be used to identify the network end point.
Renegotiation
TLS renegotiation is a process by which the client and server can re-assess the encryption requirements for an individual connection, including requesting a client certificate if not previously provided. TLS renegotiation is a security risk and isn't recommended because:
- In HTTP/1.1 the server must first buffer or consume any HTTP data that is in flight such as POST request bodies to make sure the connection is clear for the renegotiation. Otherwise the renegotiation can stop responding or fail.
- HTTP/2 and HTTP/3 explicitly prohibit renegotiation.
- There are security risks associated with renegotiation. TLS 1.3 removed renegotiation of the whole connection and replaced it with a new extension for requesting only the client certificate after the start of the connection. This mechanism is exposed via the same APIs and is still subject to the prior constraints of buffering and HTTP protocol versions.
The implementation and configuration of this feature varies by server and framework version.
IIS
IIS manages the client certificate negotiation on your behalf. A subsection of the application can enable the SslRequireCert option to negotiate the client certificate for those requests. See Configuration in the IIS documentation for details.
IIS will automatically buffer any request body data up to a configured size limit before renegotiating. Requests that exceed the limit are rejected with a 413 response. This limit defaults to 48KB and is configurable by setting the uploadReadAheadSize.
HttpSys
HttpSys has two settings which control the client certificate negotiation and both should be set. The first is in netsh.exe under http add sslcert clientcertnegotiation=enable/disable. This flag indicates if the client certificate should be negotiated at the start of a connection and it should be set to disable for optional client certificates. See the netsh docs for details.
The other setting is ClientCertificateMethod. When set to AllowRenegotation, the client certificate can be renegotiated during a request.
NOTE The application should buffer or consume any request body data before attempting the renegotiation, otherwise the request may become unresponsive.
There is a known issue where enabling AllowRenegotation can cause the renegotiation to happen synchronously when accessing the ClientCertificate property. Call the GetClientCertificateAsync method to avoid this. This has been addressed in .NET 6. For more information, see this GitHub issue. Note GetClientCertificateAsync can return a null certificate if the client declines to provide one.
Kestrel
Kestrel controls client certificate negotiation with the ClientCertificateMode option.
For .NET 5 or earlier Kestrel does not support renegotiating after the start of a connection to acquire a client certificate. This feature has been added in .NET 6.
Leave questions, comments, and other feedback on optional client certificates in this GitHub discussion issue.
Collaborate with us on GitHub
The source for this content can be found on GitHub, where you can also create and review issues and pull requests. For more information, see our contributor guide.
ASP.NET Core