Note
Access to this page requires authorization. You can try signing in or changing directories.
Access to this page requires authorization. You can try changing directories.
Important
Azure Data Studio is retired as of February 28, 2026. You should migrate to Visual Studio Code. For more information, see What's happening with Azure Data Studio.
Notebook Views is ideal for consumers of notebook results such as data analysis outcomes. Notebook authors can hide complexities and select the cells that are relevant for consumers.
One notebook can have multiple views and work for any kernel.
Notebook Views is now available in Azure Data Studio, starting with the October 2021 release (1.33.0).
Note
This feature is in preview and may be changed prior to general availability. Enabling preview features in Azure Data Studio is required to use this feature, see preview features.
Get started
Enable Notebook Views from Settings.
Go to Settings, then search for
notebook view. Ensure that Notebook Views: Enabled is selected.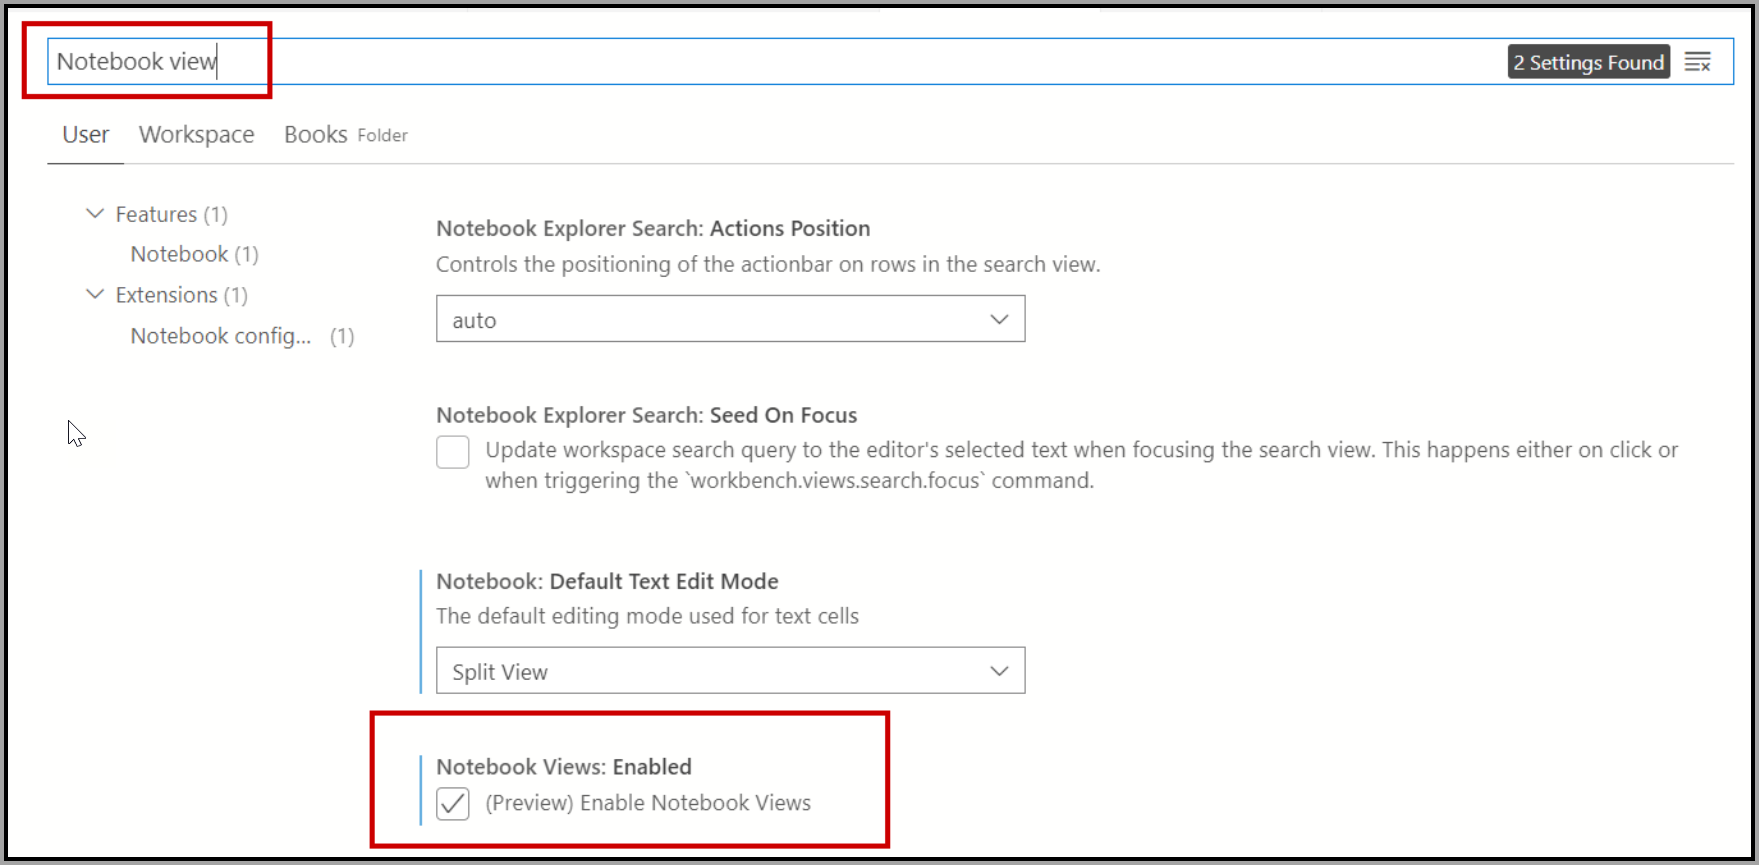
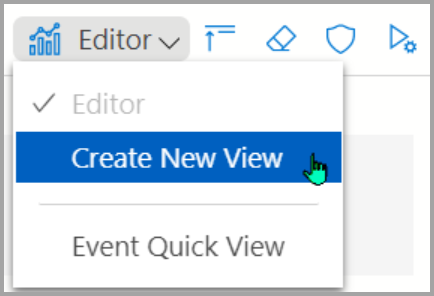
In an existing notebook, select Editor and choose Create New View.
Now you can see that all the cells (both text and code cells) have been added to the View canvas.
Resize, move, and delete cells
From here, you can delete, resize, and move the cells from the view.
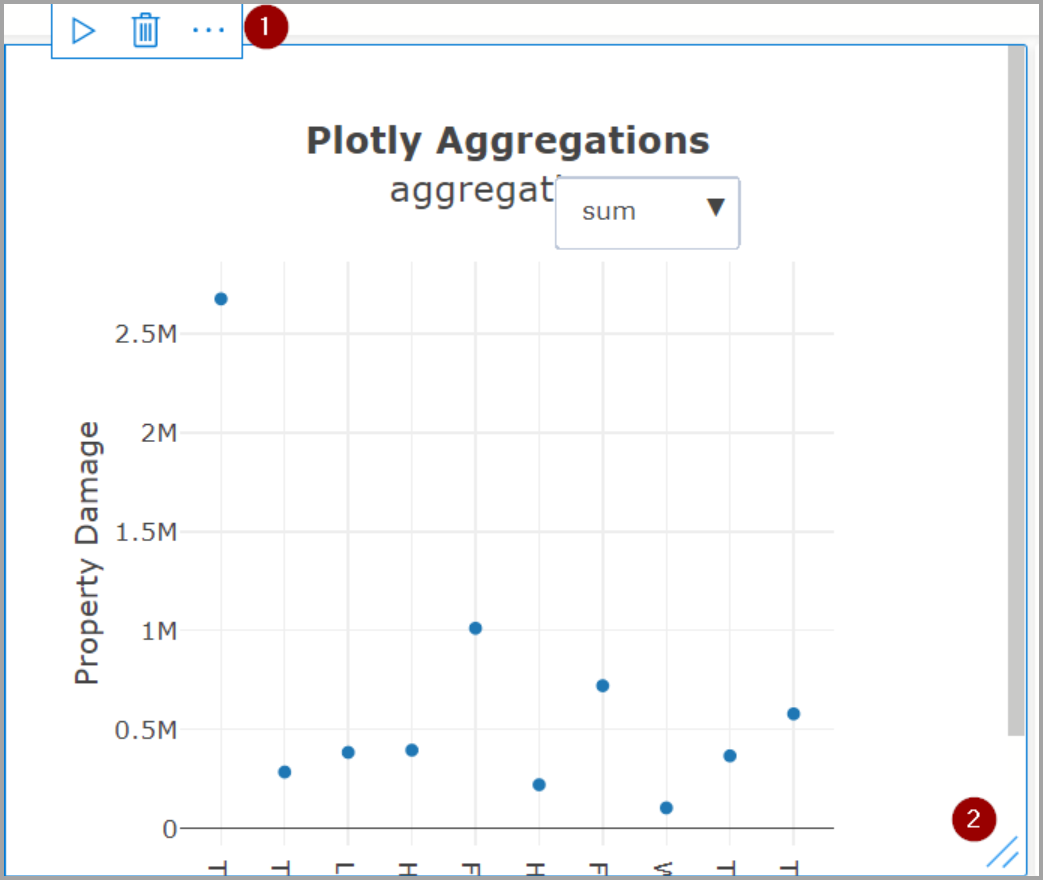
- To delete, select the cell and select the Delete button on top of the cell (circle 1 in the screenshot).
- To resize, select the cell and hover to the bottom-right corner (circle 2 of the screenshot), and your cursor should be in resize mode.
- To move, select the cell and drag the cell to the desired location.
- To run the cell only, select the cell to activate the cell, then select the Run button from the top menu (circle 1 of the screenshot).
Note
If the cell in the notebook has dependencies on the previous cells, this might result in an error.
Insert and run all cell views

- To add new cells, select the Insert Cells button on the top right of the Editor view.
- To refresh the view, select Run All. This runs all the cells in the notebook, in the background, even if they aren't on the view itself.
Manage views

- To navigate to another view or create a new one, use the View drop-down list
- To rename the view, select the gear button on the top right of the view.
- To delete the view, select the Delete button on the top right. of the view.