Note
Access to this page requires authorization. You can try signing in or changing directories.
Access to this page requires authorization. You can try changing directories.
Applies to: Azure Stack HCI, versions 22H2 and 21H2; Windows Server 2022, Windows Server 2019
Important
Azure Stack HCI is now part of Azure Local. However, older versions of Azure Stack HCI, for example 22H2 will continue to reference Azure Stack HCI and won't reflect the name change. Learn more.
Warning
The deployment instructions provided in this article apply to an older version, Azure Stack HCI, version 22H2. For new deployments, we recommend that you use the latest generally available version of Azure Local, see About Azure Local deployment.
This article describes how to set up an Azure Stack HCI or Windows Server cluster with a cluster witness in Azure (known as a cloud witness).
We recommend setting up a cluster witness for clusters with two, three, or four nodes. The witness helps the cluster determine which nodes have the most up-to-date cluster data if some nodes can't communicate with the rest of the cluster. You can host the cluster witness on a file share located on another server, or use a cloud witness.
To learn more about cluster witnesses and quorum, see Understanding cluster and pool quorum on Azure Stack HCI. To manage the witness, including setting a file share witness, see Change cluster settings.
Before you begin
Before you can create a cloud witness, you must have an Azure account and subscription, and register your Azure Stack HCI cluster with Azure. For more information, see the following articles:
- Make sure that port 443 is open in your firewalls and that
*.core.windows.netis included in any firewall allowlists you're using between the cluster and Azure Storage. For details, see Required firewall URLs. - If your network uses a proxy server for internet access, you must configure proxy settings for Azure Stack HCI.
- Create an Azure account.
- If applicable, create an additional Azure subscription.
- Connect Azure Stack HCI to Azure.
- Make sure DNS is available for the cluster.
Create an Azure storage account
This section describes how to create an Azure storage account. This account is used to store an Azure blob file used for arbitration for a specific cluster. You can use the same Azure storage account to configure a cloud witness for multiple clusters.
Sign in to the Azure portal.
On the Azure portal home menu, under Azure services, select Storage accounts. If this icon is missing, select Create a resource to create a Storage accounts resource first.
On the Storage accounts page, select New.
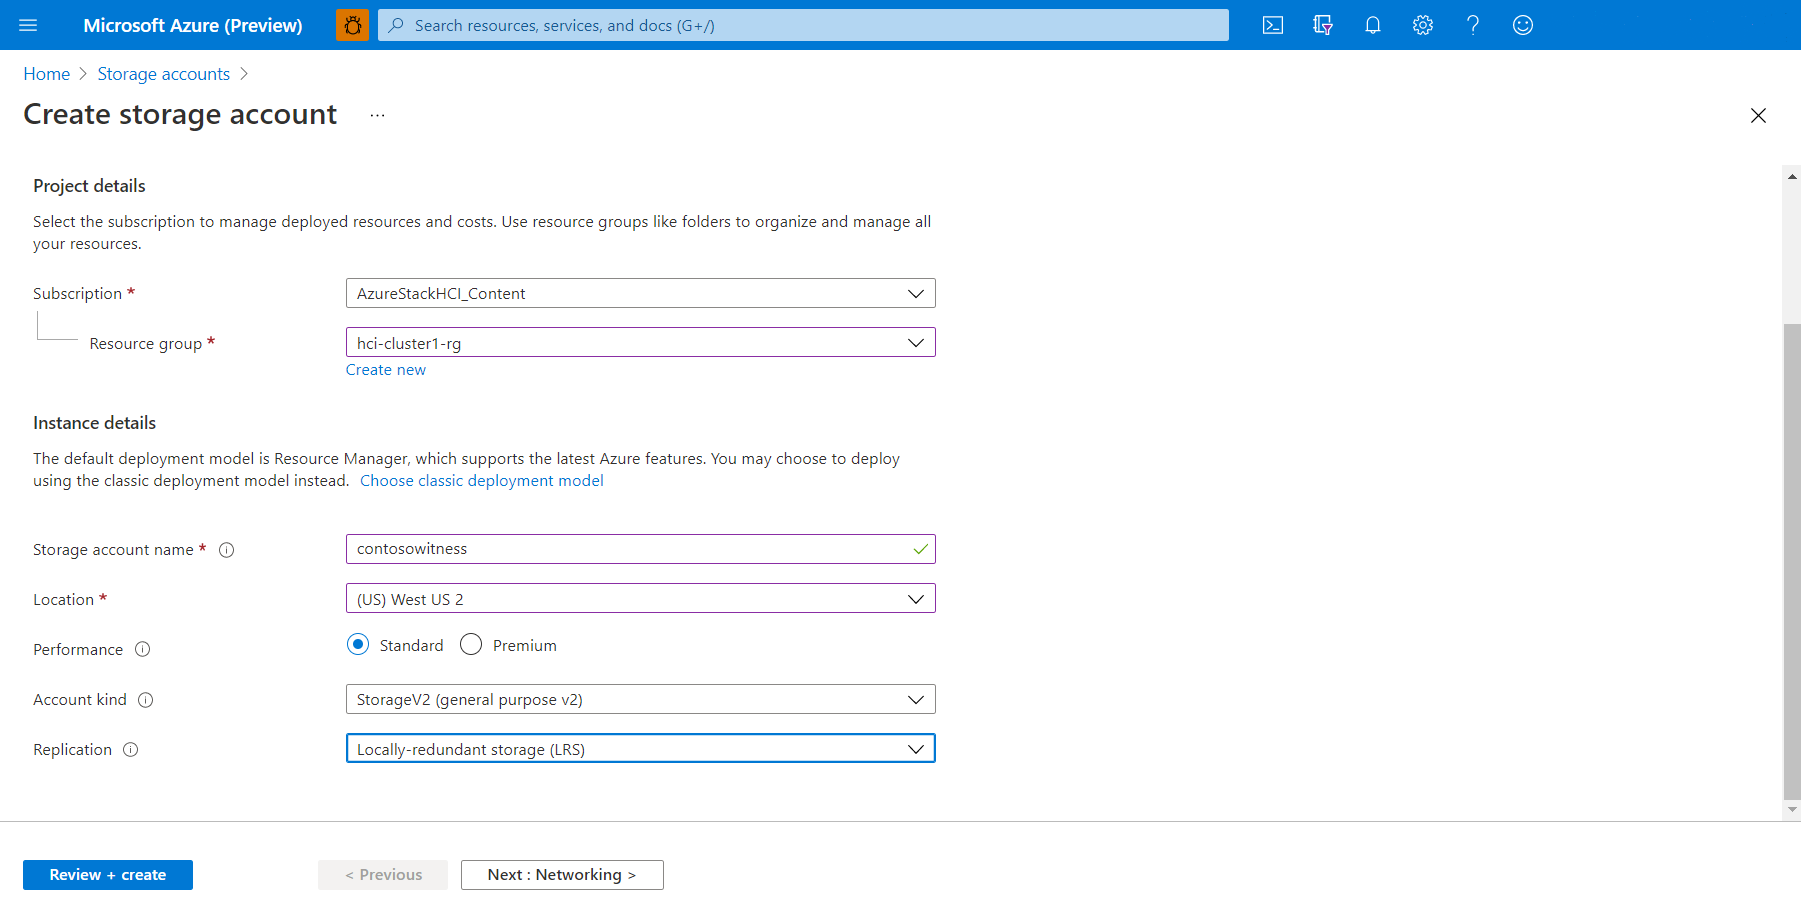
On the Create storage account page, complete the following:
- Select the Azure Subscription to apply the storage account to.
- Select the Azure Resource group to apply the storage account to.
- Enter a Storage account name.
Storage account names must be between 3 and 24 characters in length and may contain numbers and lowercase letters only. This name must also be unique within Azure. - Select a Location that is closest to you physically.
- For Performance, select Standard.
- For Account kind, select Storage general purpose.
- For Replication, select Locally-redundant storage (LRS).
- When finished, select Review + create.
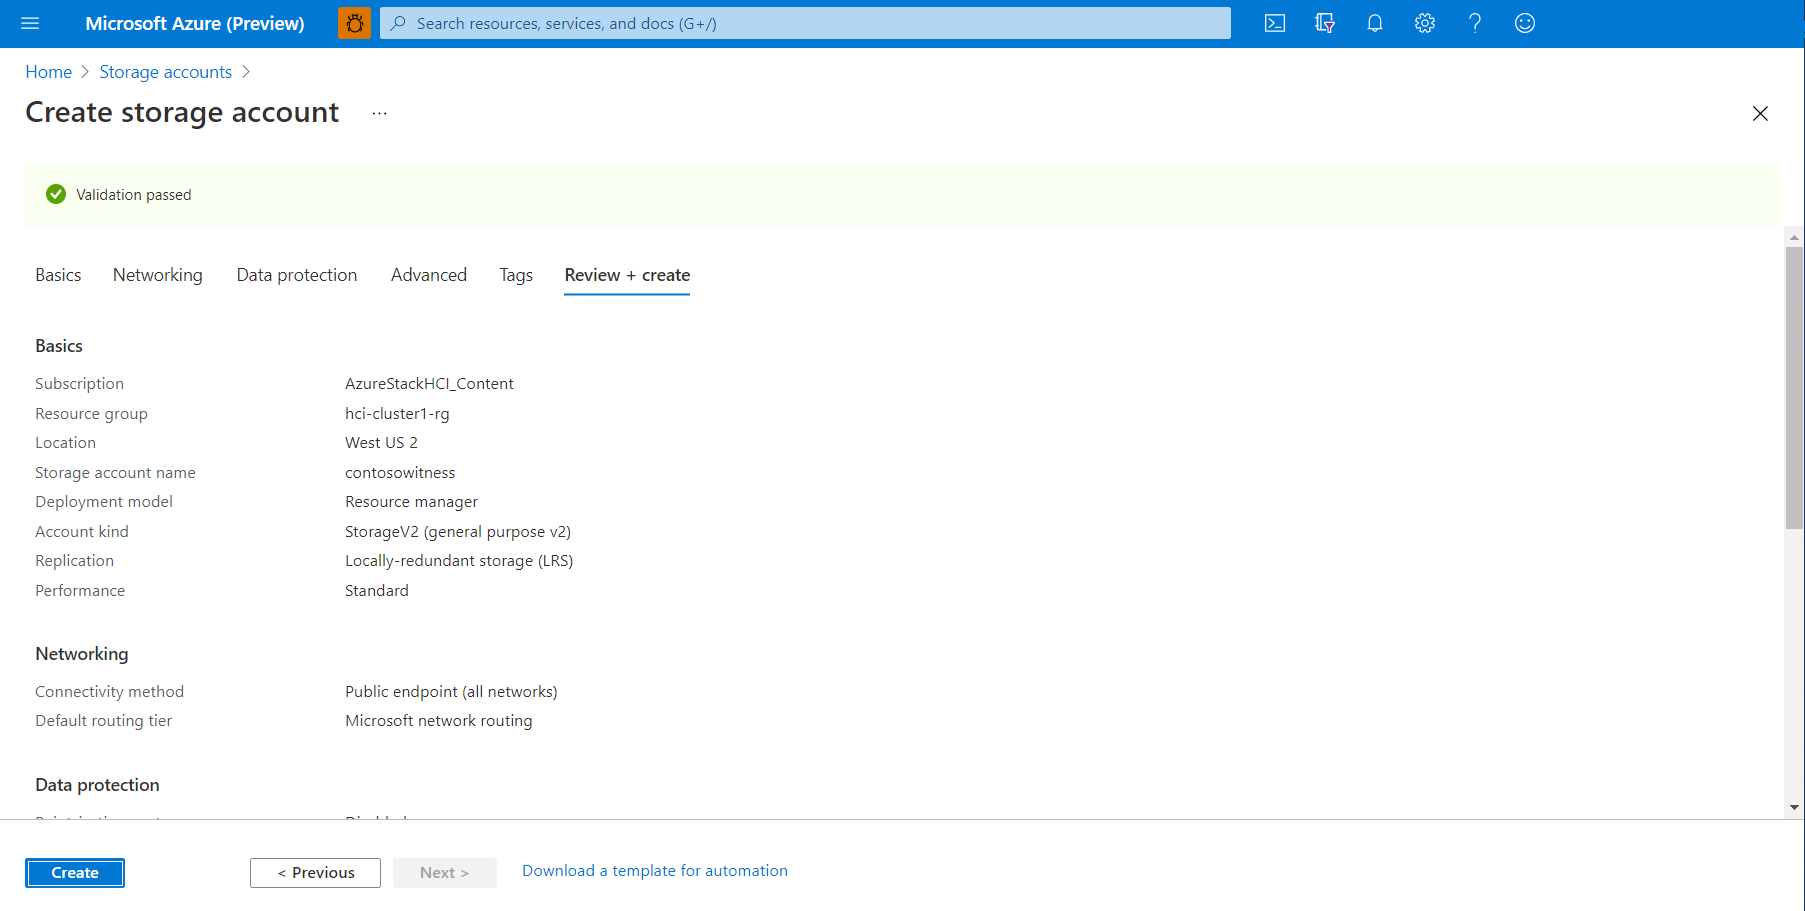
Ensure that the storage account passes validation and then review account settings. When finished, select Create.
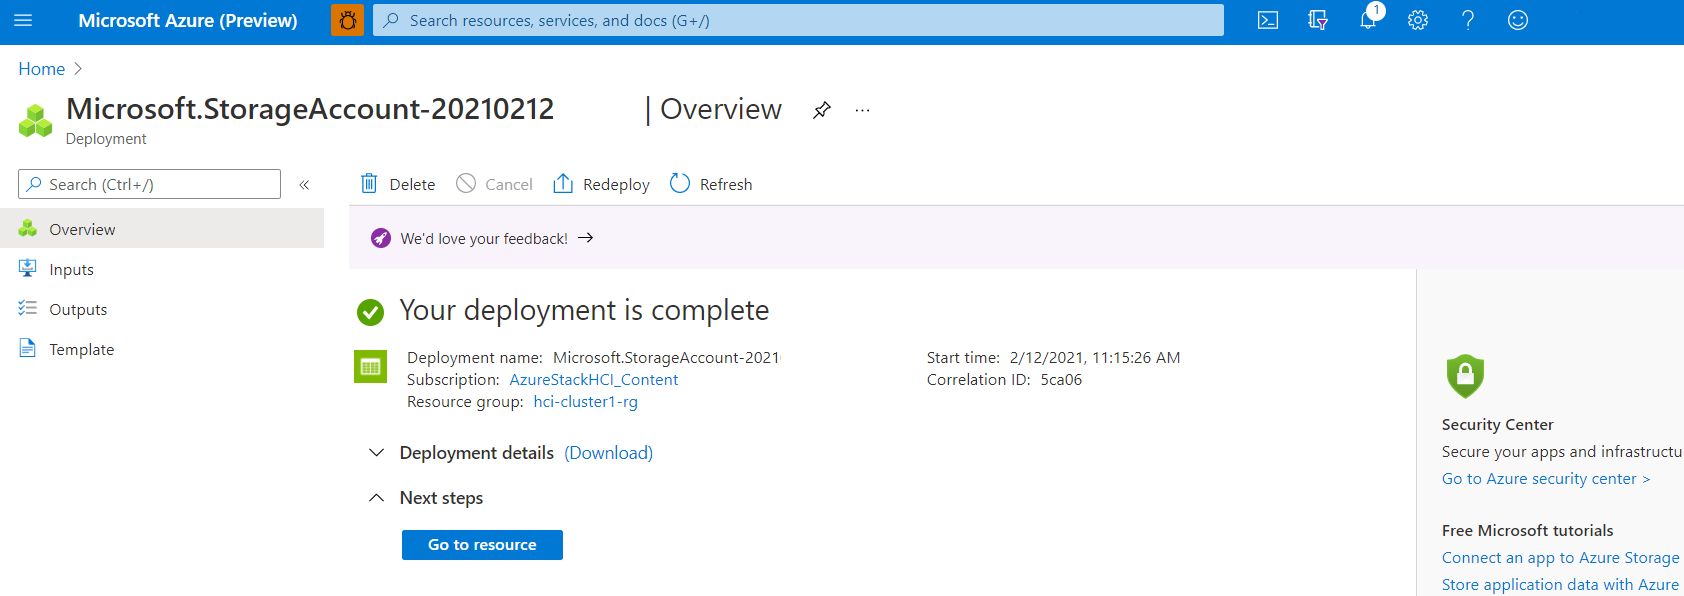
It may take a few seconds for account deployment to occur in Azure. When deployment is complete, select Go to resource.
Copy the access key and endpoint URL
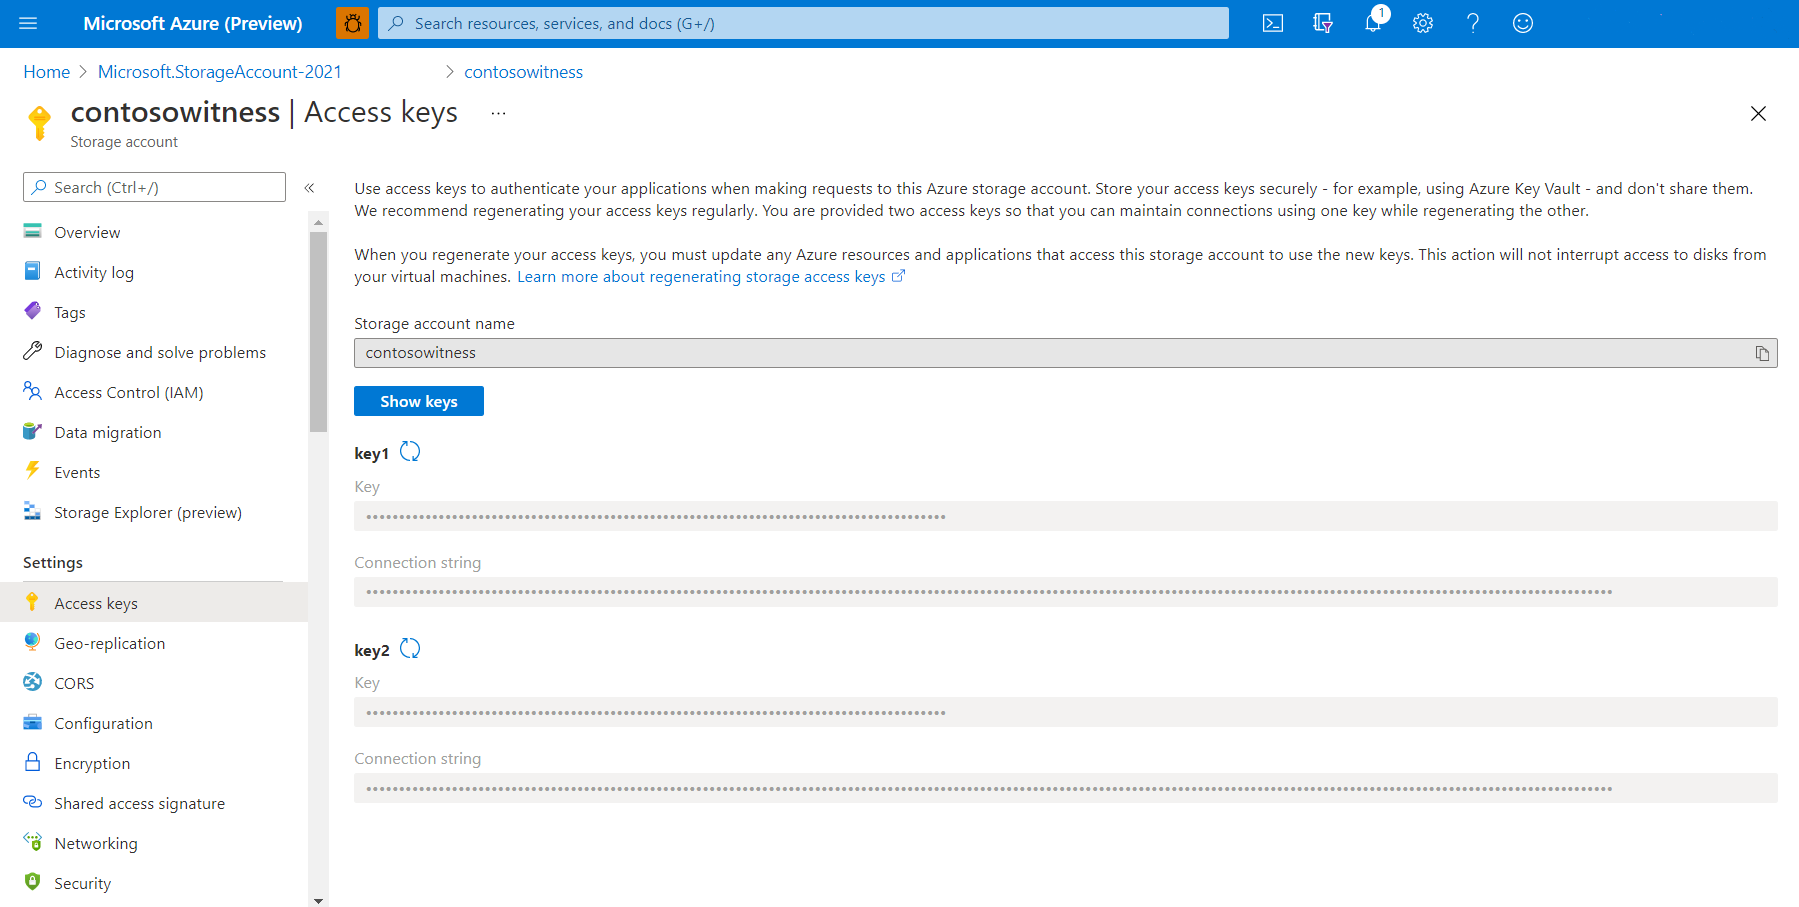
When you create an Azure storage account, the process automatically generates two access keys, a primary key (key1) and a secondary key (key2). For the first time creation of a cloud witness, key1 is used. The endpoint URL is also generated automatically.
An Azure cloud witness uses a blob file for storage, with an endpoint generated of the form storage_account_name.blob.core.windows.net as the endpoint.
Note
An Azure cloud witness uses HTTPS (default port 443) to establish communication with the Azure blob service. Ensure that the HTTPS port is accessible.
Copy the account name and access key
In the Azure portal, under Settings, select Access keys.
Select Show keys to display key information.
Select the copy-and-paste icon to the right of the Storage account name and key1 fields and paste each text string to Notepad or other text editor.
Copy the endpoint URL (optional)
The endpoint URL is optional and may not be needed for a cloud witness.
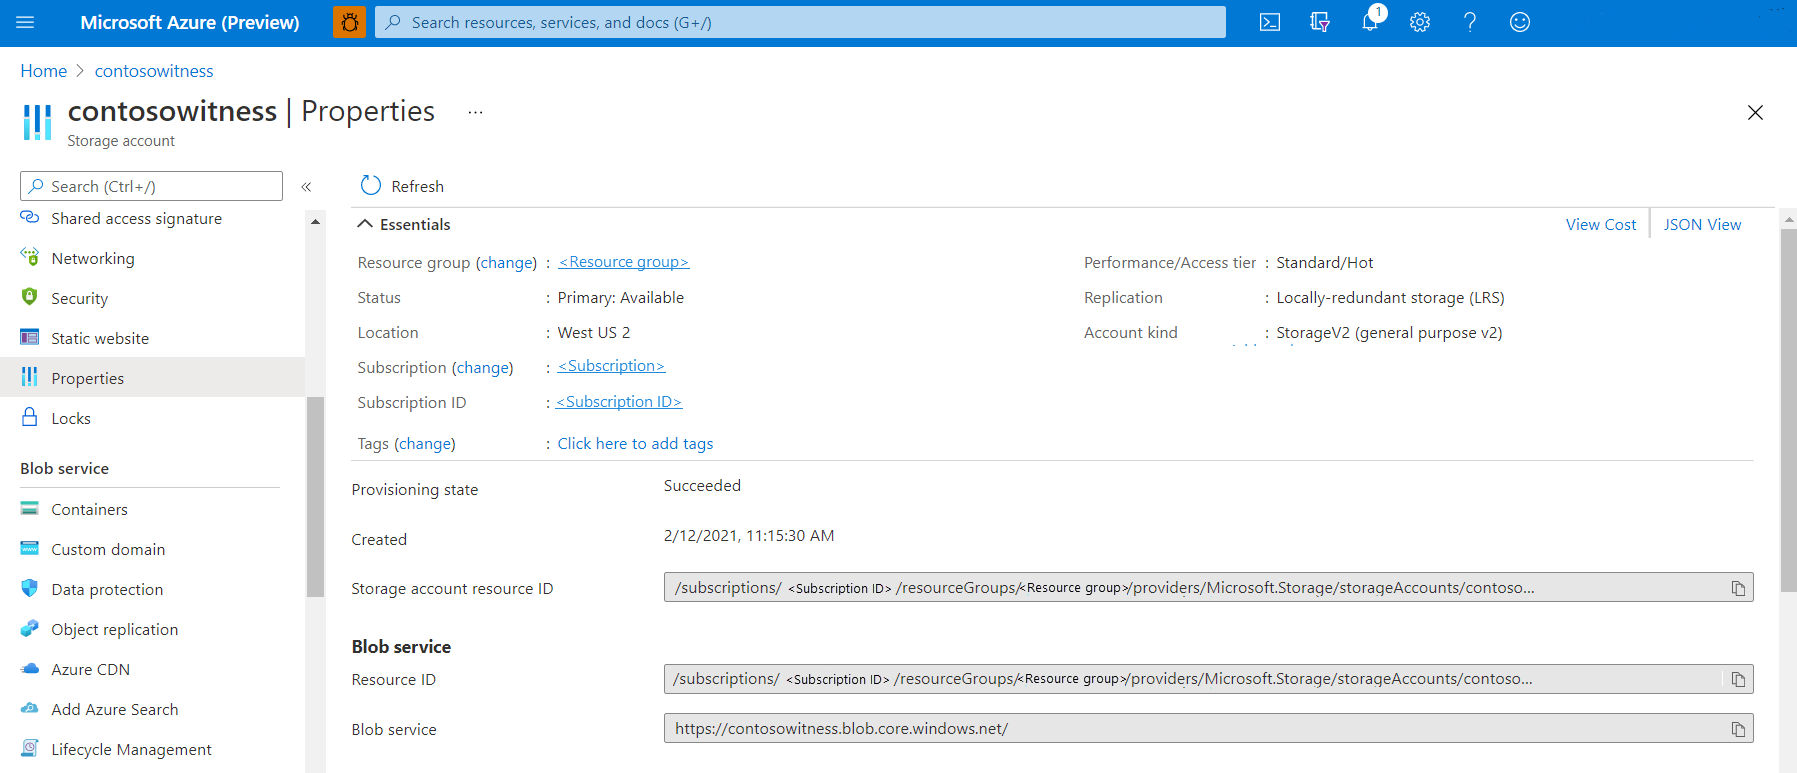
In the Azure portal, select Properties.
Select Show keys to display endpoint information.
Under Blob service, select the copy-and-paste icon to the right of the Blob service field and paste the text string to Notepad or other text editor.
Create a cloud witness using Windows Admin Center
Now you're ready to create a witness instance for your cluster using Windows Admin Center.
In Windows Admin Center, select Cluster Manager from the top drop-down arrow.
Under Cluster connections, select the cluster.
Under Tools, select Settings.
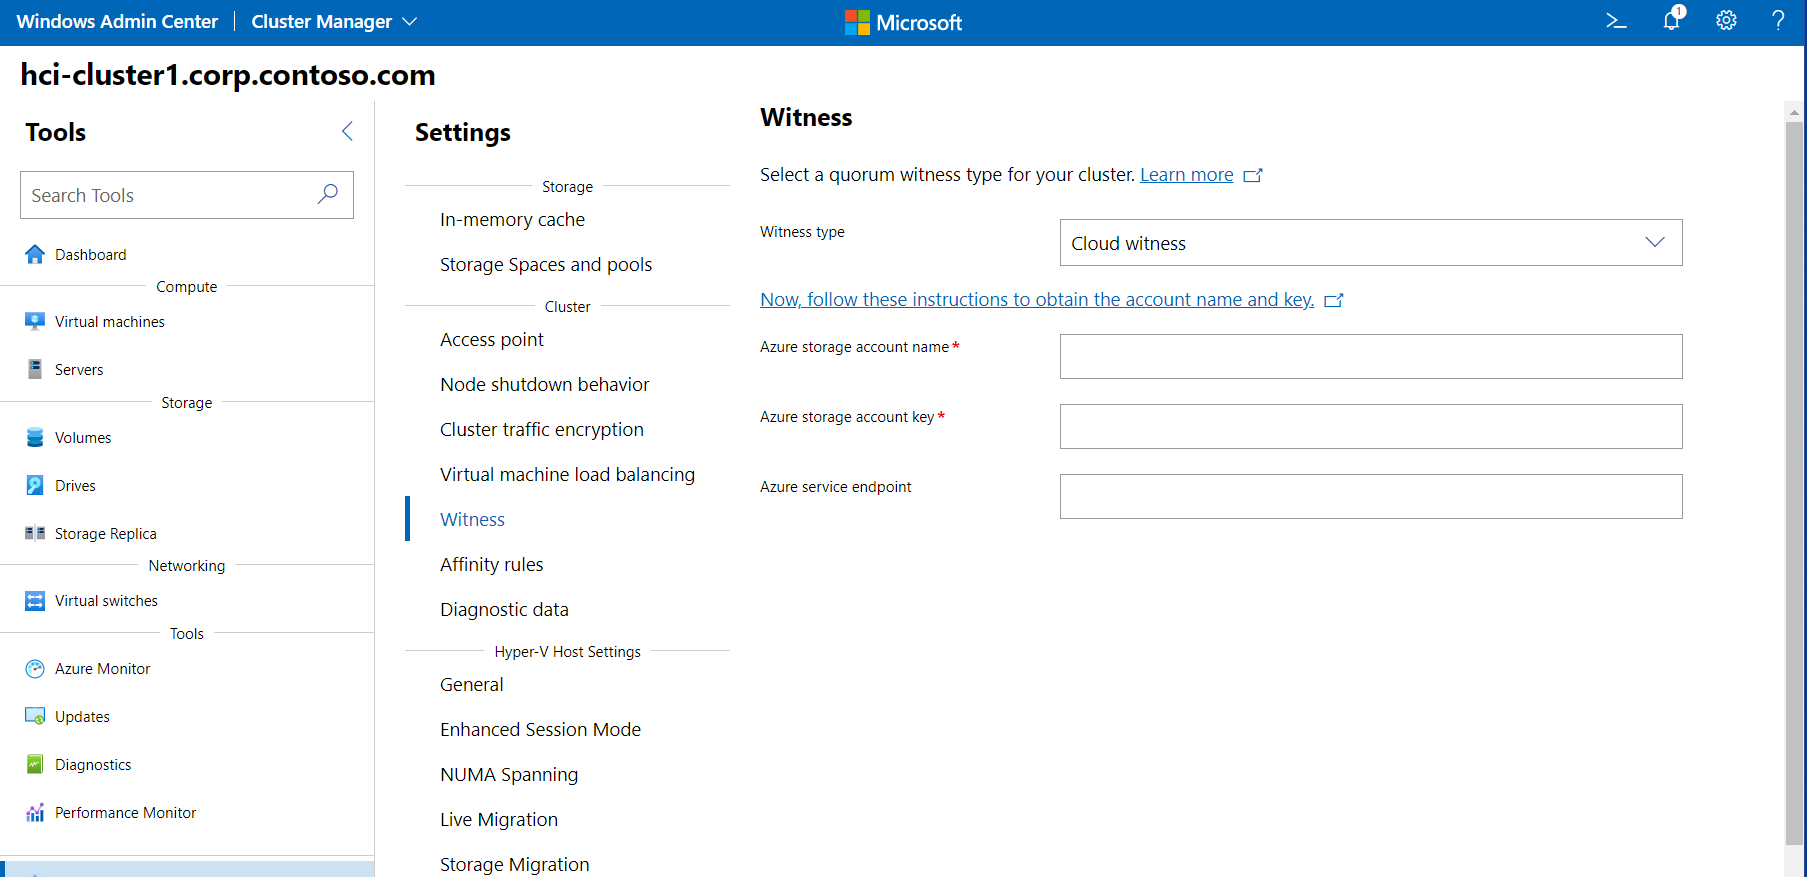
In the right pane, select Witness.
For Witness type, select one of the following:
- Cloud witness - enter your Azure storage account name, access key, and endpoint URL, as described previously
- File share witness - enter the file share path "(//server/share)"
For a cloud witness, for the following fields, paste the text strings you copied previously for:
- Azure storage account name
- Azure storage access key
- Azure service endpoint
When finished, select Save. It might take a bit for the information to propagate to Azure.
Note
The third option, Disk witness, isn't suitable for use in stretched clusters.
Create a cloud witness using Windows PowerShell
Alternatively, you can create a witness instance for your cluster using PowerShell.
Use the following cmdlet to create an Azure cloud witness. Enter the Azure storage account name and access key information as described previously:
Set-ClusterQuorum –Cluster "Cluster1" -CloudWitness -AccountName "AzureStorageAccountName" -AccessKey "AzureStorageAccountAccessKey"
Use the following cmdlet to create a file share witness. Enter the path to the file server share:
Set-ClusterQuorum -FileShareWitness "\\fileserver\share" -Credential (Get-Credential)
Next steps
To perform the next management task related to this article, see:
For more information on cluster quorum, see Understanding cluster and pool quorum on Azure Stack HCI.
For more information about creating and managing Azure Storage Accounts, see Create a storage account.


