Note
Access to this page requires authorization. You can try signing in or changing directories.
Access to this page requires authorization. You can try changing directories.
Lifecycle workflows provide several tasks that send email notifications. You can customize email notifications to suit the needs of a specific workflow. For a list of these tasks, see Lifecycle workflow built-in tasks.
Email tasks allow for the customization of:
- Recipients
- Sender domain
- Organizational branding
- Subject
- Message body
- Email language
When you're customizing the subject or message body, we recommend that you also enable the custom sender domain and organizational branding. Otherwise, your email will contain an additional security disclaimer.
For more information on these customizable parameters, see Common email task parameters.
Prerequisites
Using this feature requires Microsoft Entra ID Governance or Microsoft Entra Suite licenses. To find the right license for your requirements, see Microsoft Entra ID Governance licensing fundamentals.
Customize email by using the Microsoft Entra admin center
When you're customizing an email sent via lifecycle workflows, you can choose to customize either a new task or an existing task. You do these customizations the same way whether the task is new or existing, but the following steps walk you through updating an existing task. To customize emails sent from tasks within workflows by using the Microsoft Entra admin center:
Sign in to the Microsoft Entra admin center as at least a Lifecycle Workflows Administrator.
Browse to ID Governance > Lifecycle workflows > workflows.
Select the workflow that contains the email tasks you want to customize.
On the pane that lists tasks, select the task for which you want to customize the email.
On the pane for the specific task under Basics, you can edit the task name or description, along with configuring which recipient or recipients you want to send the email to outside the default audience.

Note
CC recipients are only available if the recipient is the user themselves or their manager. If there are multiple CC recipients, they're copied on the single individual email.
Select the Email Customization tab.
Enter a custom subject, a message body, and the email language translation option that will be used to translate the message body of the email.
If you stay with the default templates and don't customize the subject and body of the email, the text will be automatically translated into the recipient's preferred language. If you select an email language, the determination based on the recipient's preferred language will be overridden. If you specify a custom subject or body, it won't be translated.
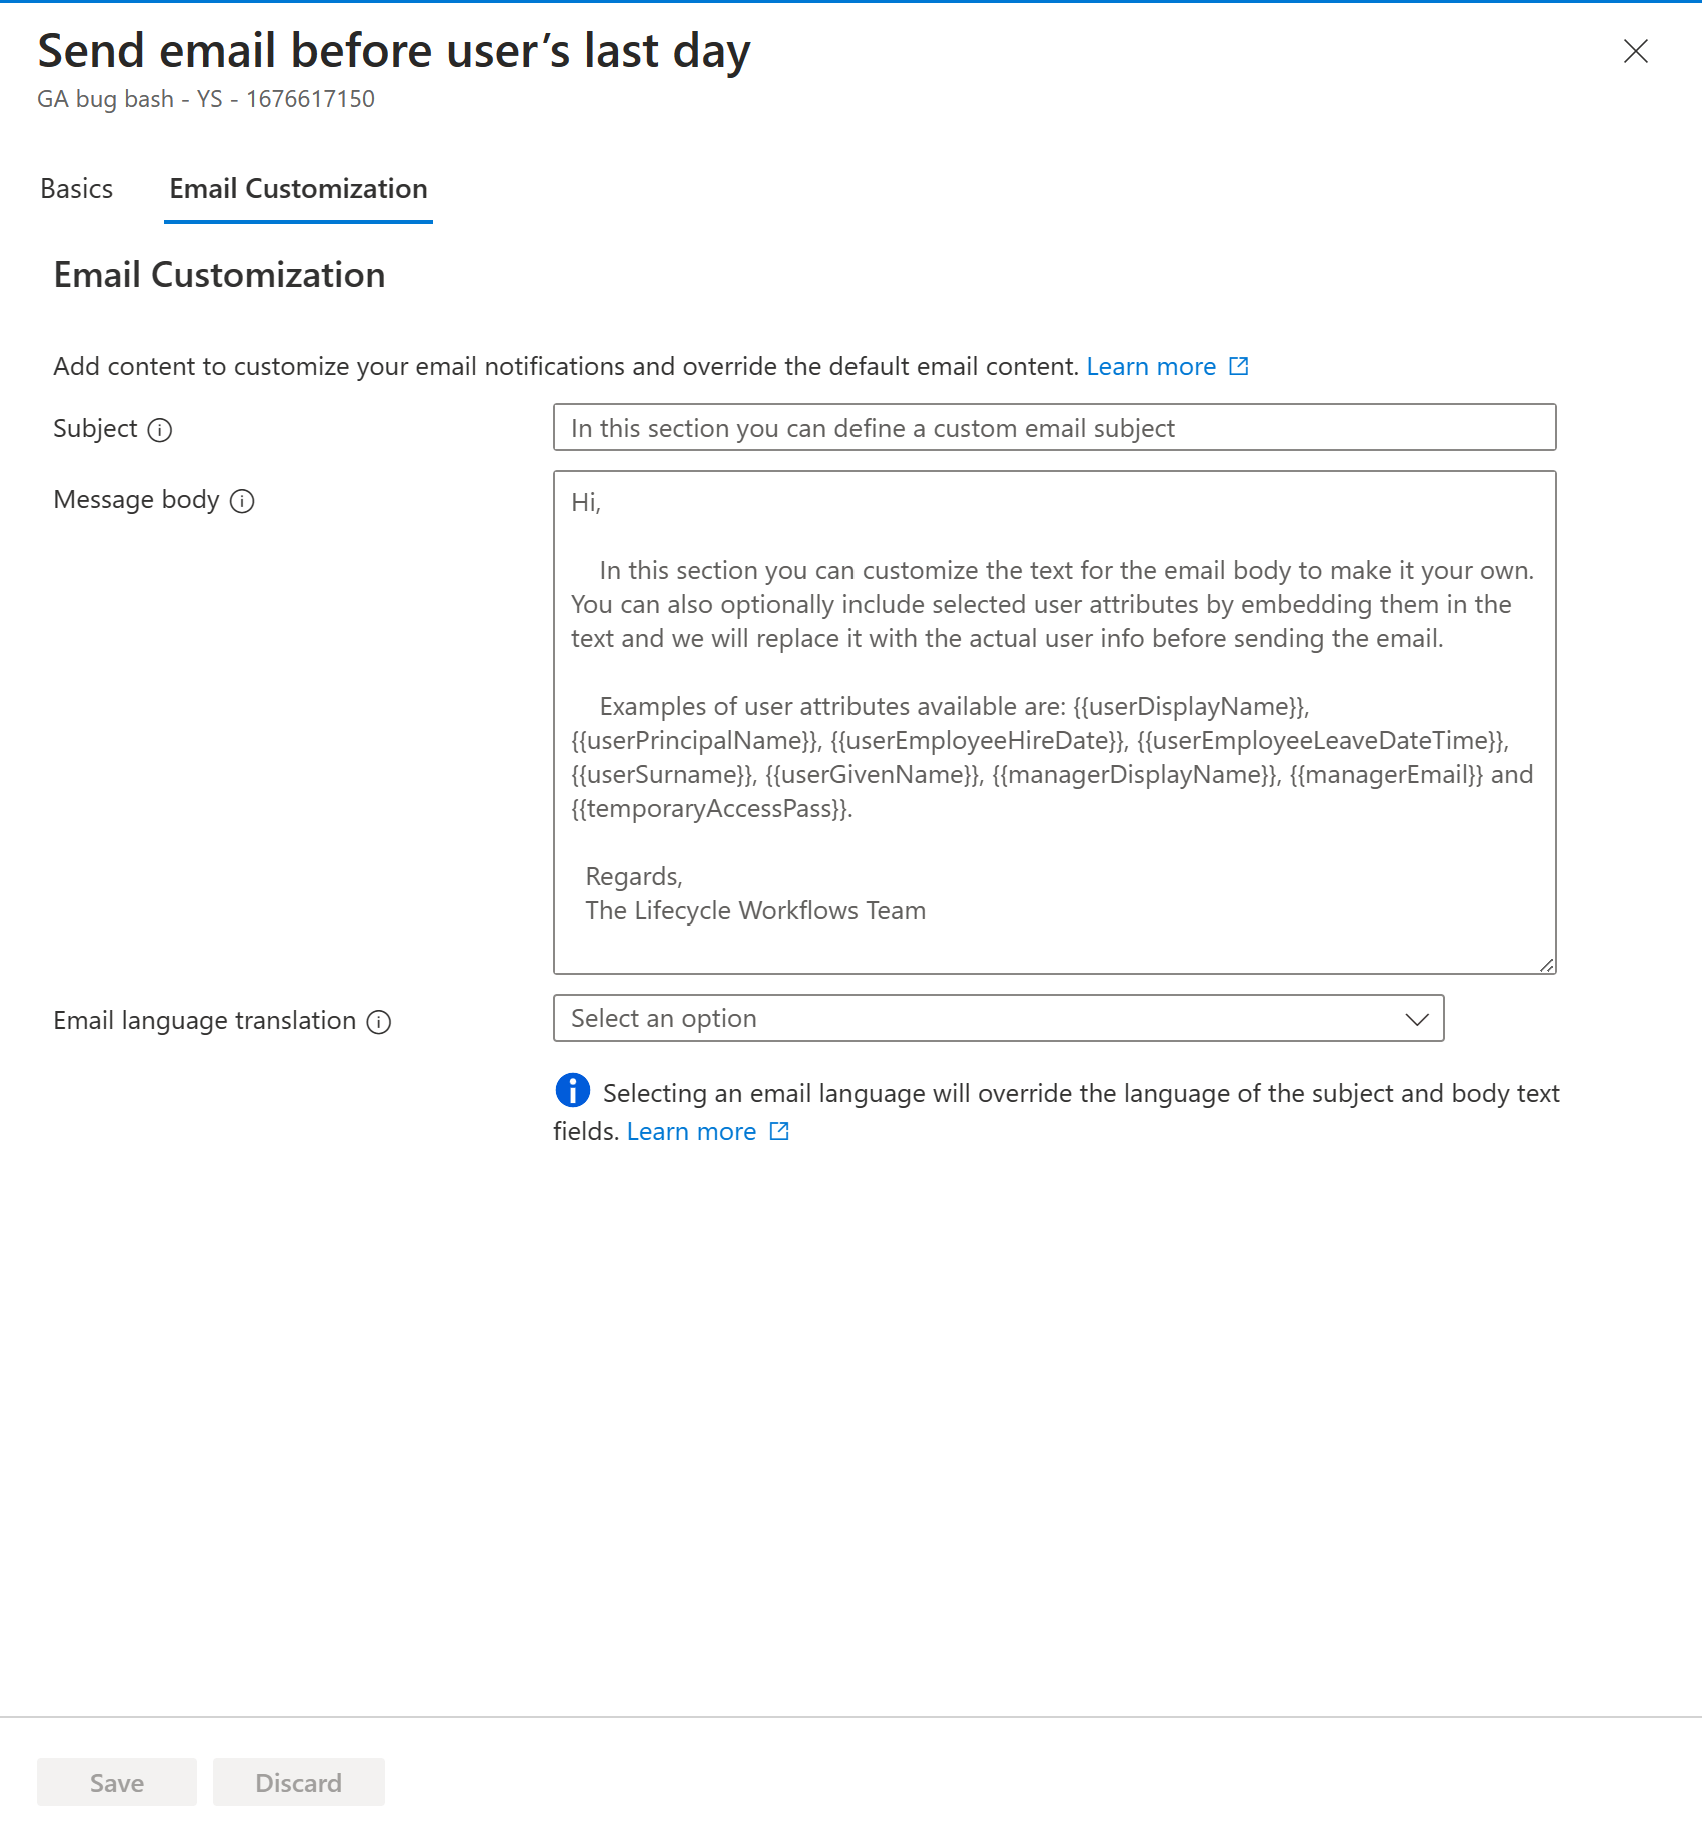
Select Save to capture your changes in the customized email.
Format attributes within customized emails
To further personalize customized emails, you can take advantage of dynamic attributes. By placing dynamic attributes in specific attributes, you can specifically call out values such as a user's name, their generated Temporary Access Pass, or even their manager's email.
To use dynamic attributes within your customized emails, you must follow formatting rules. The proper format is:
{{dynamic attribute}}
The following screenshot is an example of the proper format for dynamic attributes within a customized email:
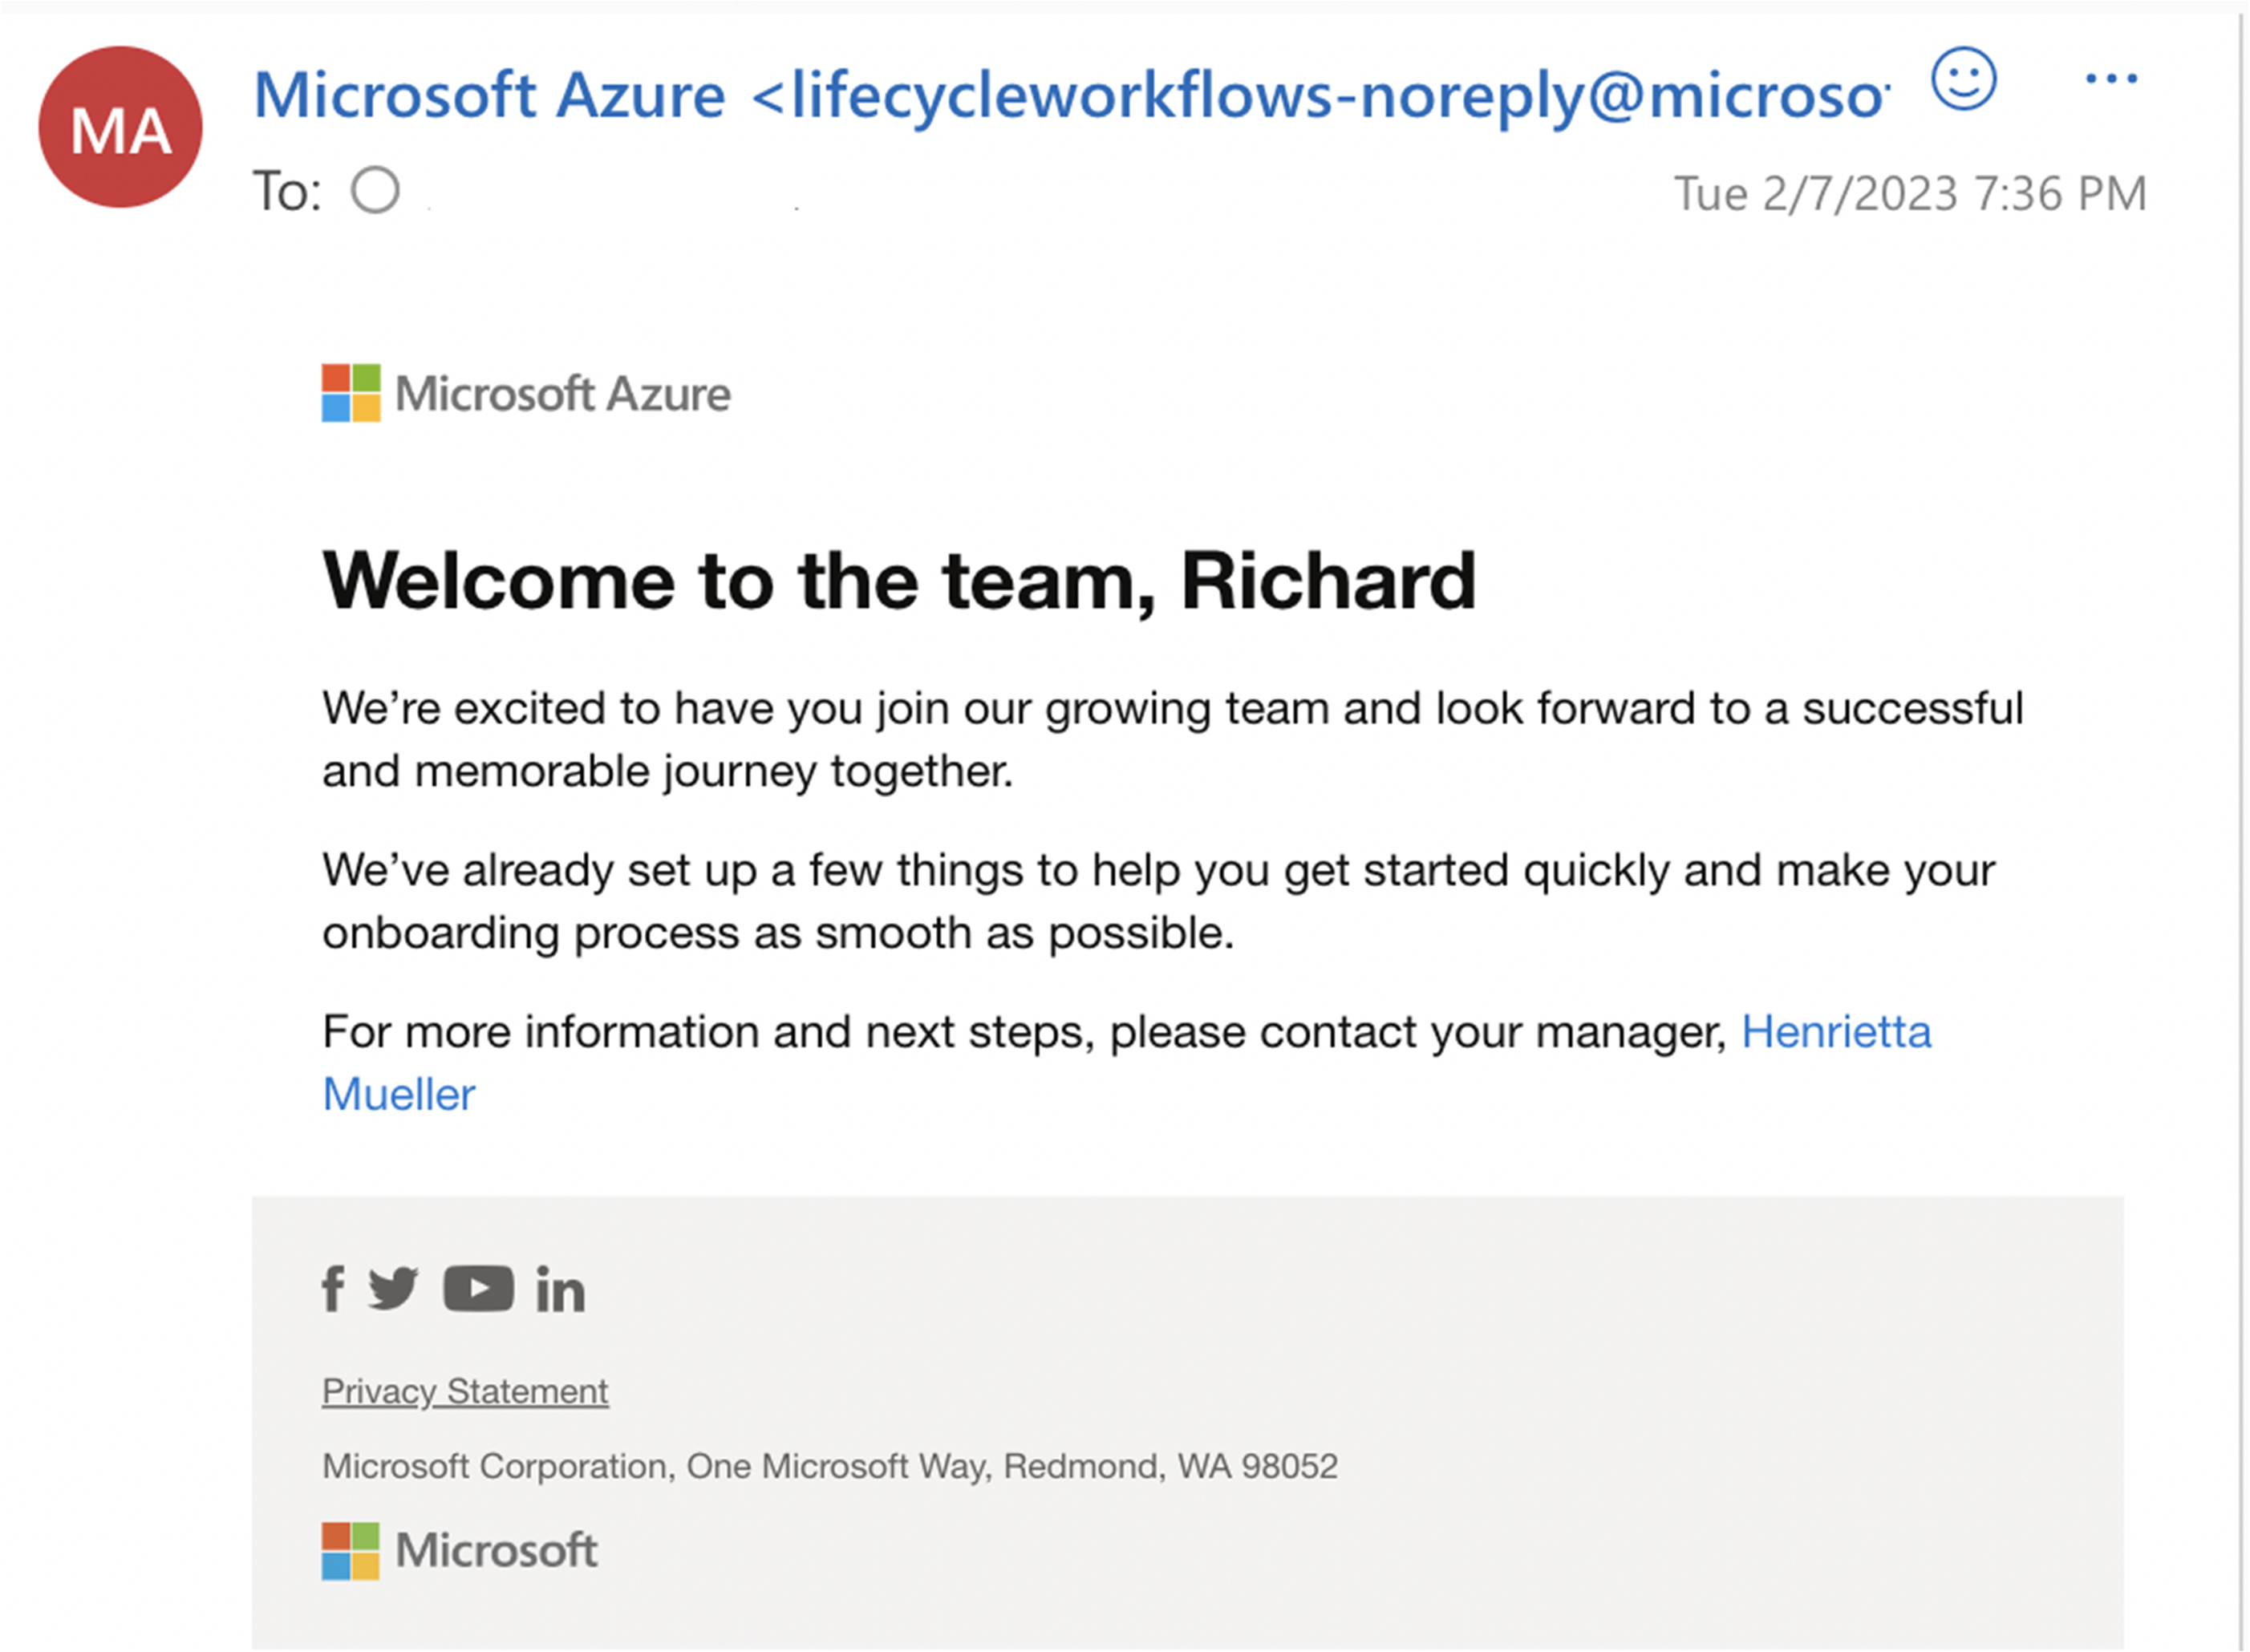
When you're typing a dynamic attribute, the email is written the following way:
Welcome to the team, {{userGivenName}}

We're excited to have you join our growing team and look forward to a successful and memorable journey together.

We've already set up a few things to help you get started quickly and make your onboarding process as smooth as possible.

For more information and next steps, please contact your manager, {{managerDisplayName}}
For a full list of dynamic attributes that you can use with customized emails, see Dynamic attributes within email.
Use custom branding and domain in emails sent via workflows
You can customize emails that you send via lifecycle workflows to have your own company branding and to use your company domain. When you opt in to using custom branding and a custom domain, every email that you send by using lifecycle workflows reflects these settings.
To enable these features, you need the following prerequisites:
- A verified domain. To add a custom domain, see Managing custom domain names in Microsoft Entra ID.
- Custom branding set within Microsoft Entra ID if you want to use your custom branding in emails. To set organizational branding within your Azure tenant, see Configure your company branding.
Note
For compliance with the RFC for sending and receiving email, we recommend using a domain that has the appropriate DNS records to facilitate email validation, like SPF, DKIM, DMARC, and MX. Learn more about Exchange Online email routing.
After you meet the prerequisites, follow these steps:
On the page for lifecycle workflows, select Workflow settings.
On the Workflow settings pane, for Email domain, select your domain from the drop-down list of verified domains.
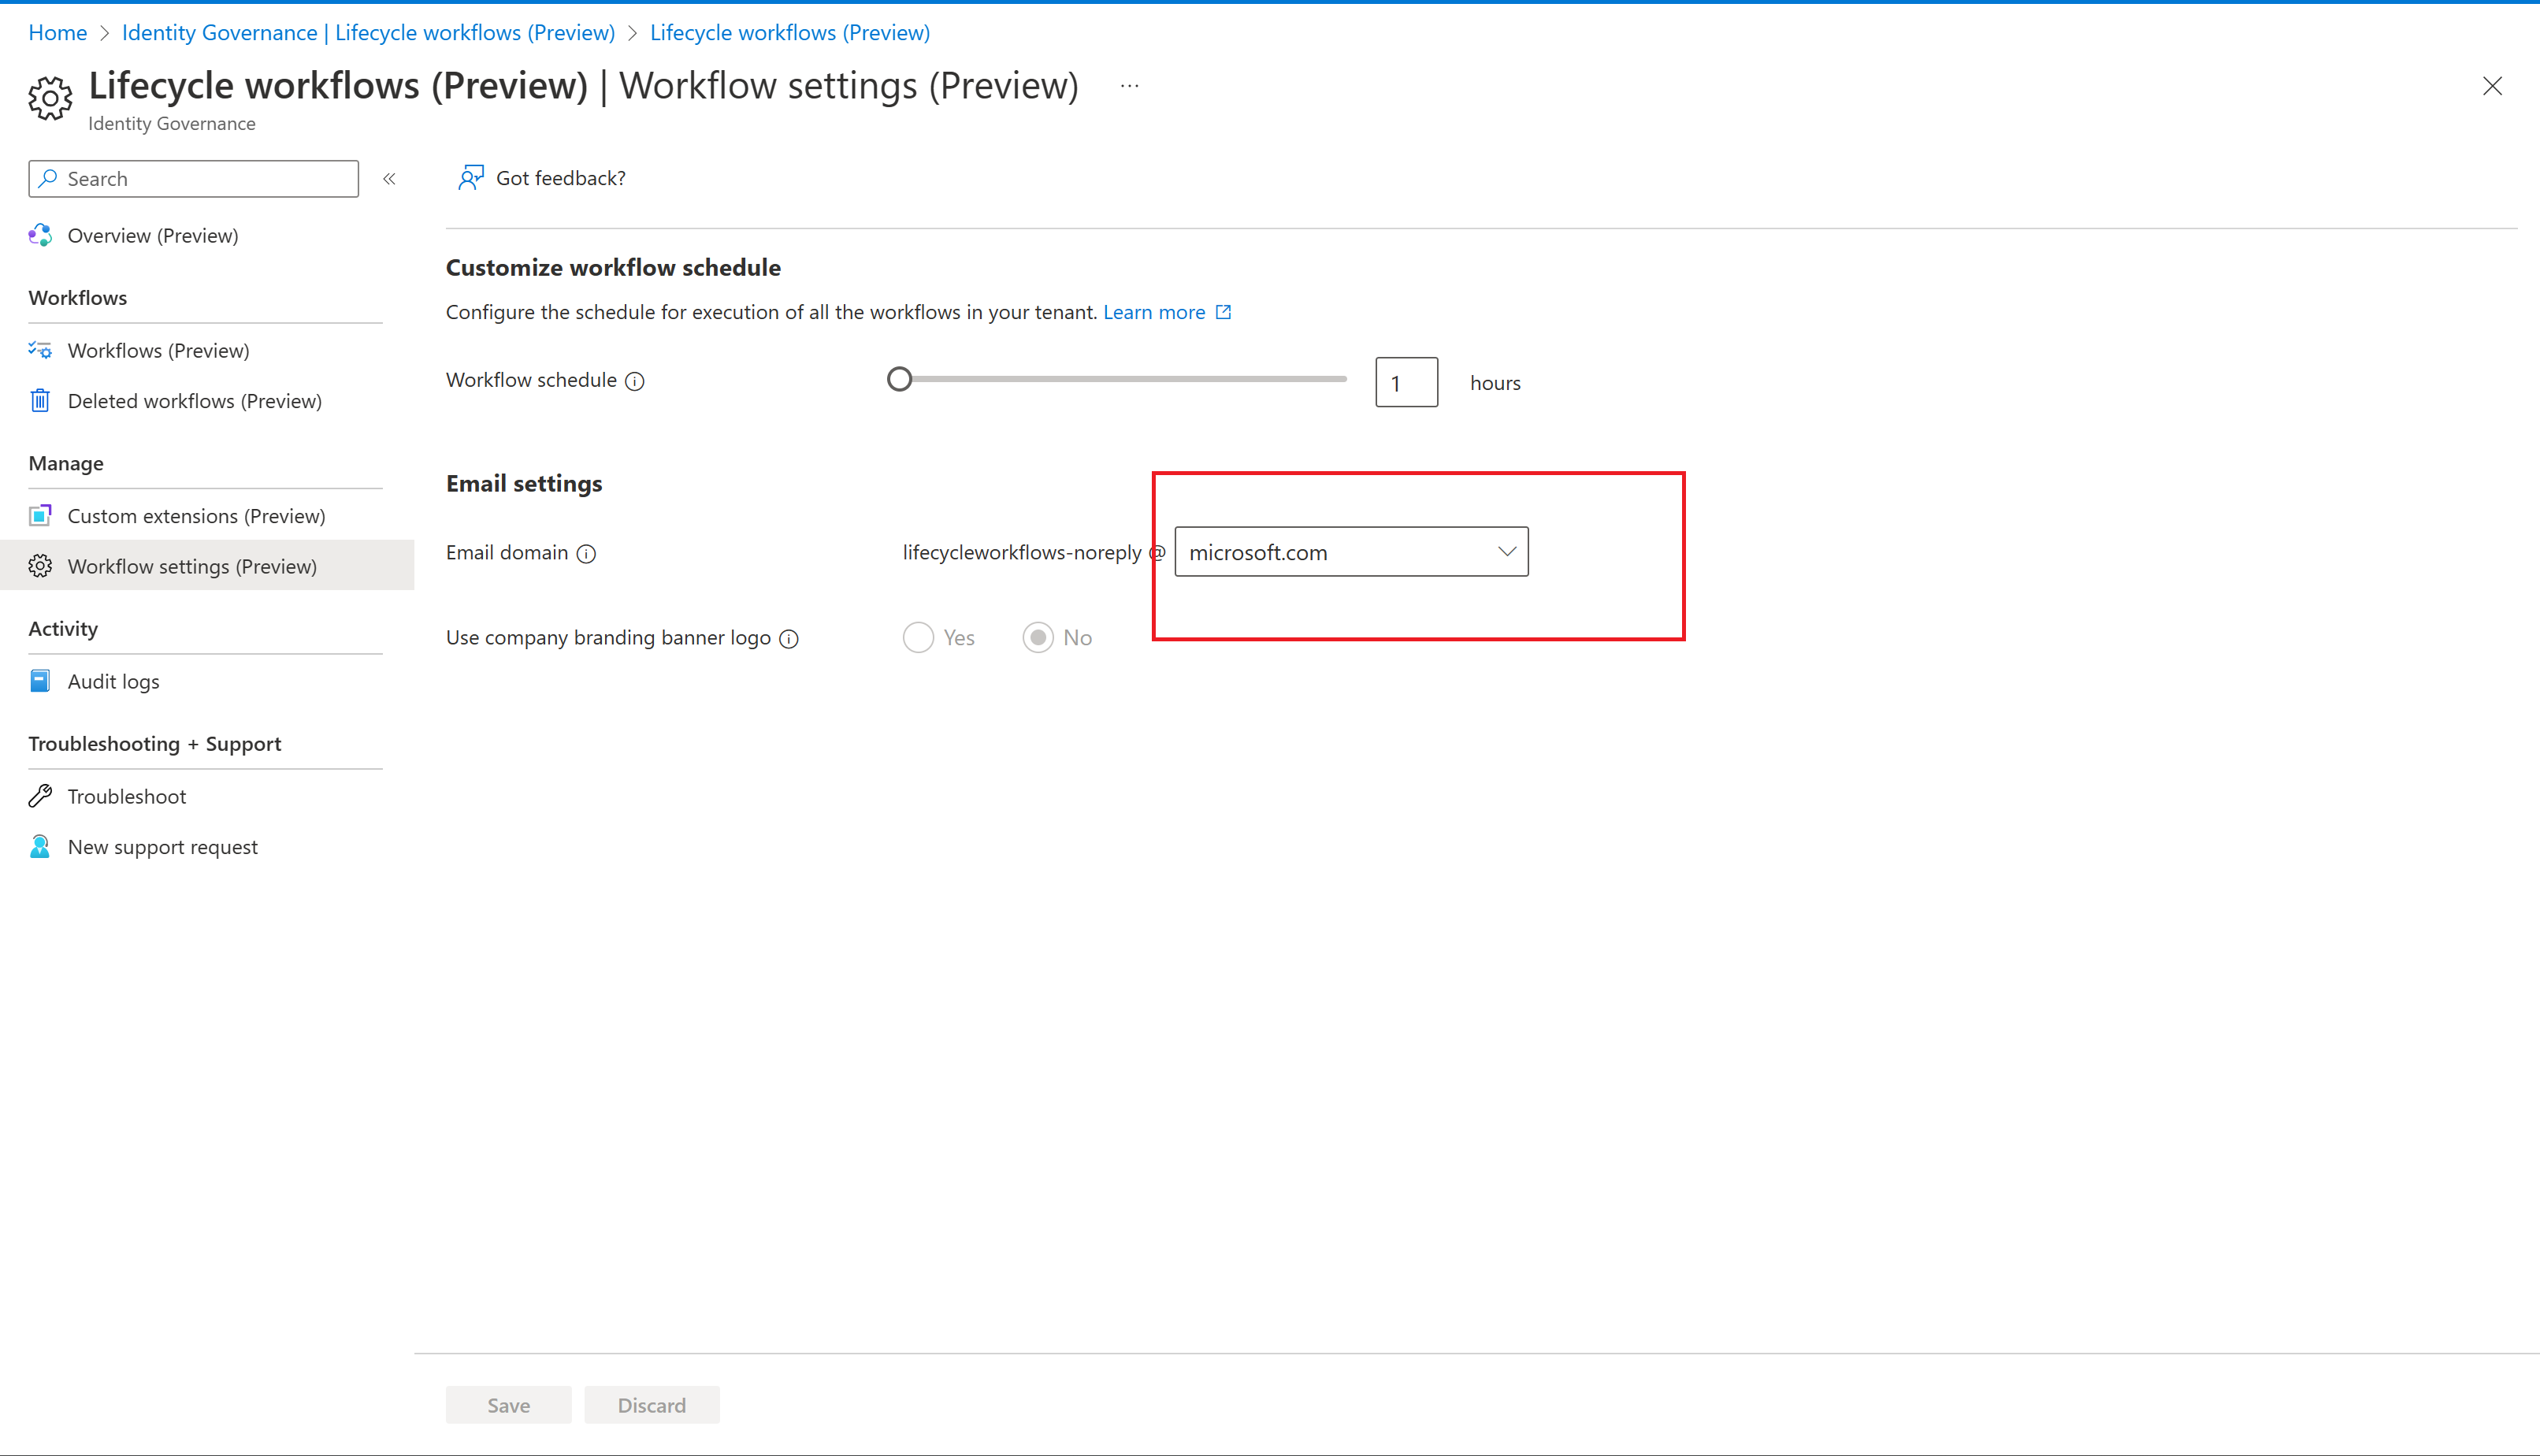
Turn on the Use company branding banner logo toggle if you want to use company branding in emails.

Customize email by using Microsoft Graph
To customize email by using the Microsoft Graph API, see workflow: createNewVersion.
Set custom branding and domain workflow settings by using Microsoft Graph
To turn on custom branding and domain feature settings in lifecycle workflows by using the Microsoft Graph API, see lifecycleManagementSettings resource type.