Note
Access to this page requires authorization. You can try signing in or changing directories.
Access to this page requires authorization. You can try changing directories.
The Microsoft Entra Verified ID Network simplifies the verification of credentials by streamlining the discovery of issuers' decentralized identifiers (DIDs) and credential types. In this article, we review the steps required to use the network.
Prerequisites
To use the Microsoft Entra Verified ID Network, you need to:
- Complete Getting started and the subsequent tutorial set.
What is the Microsoft Entra Verified ID Network?
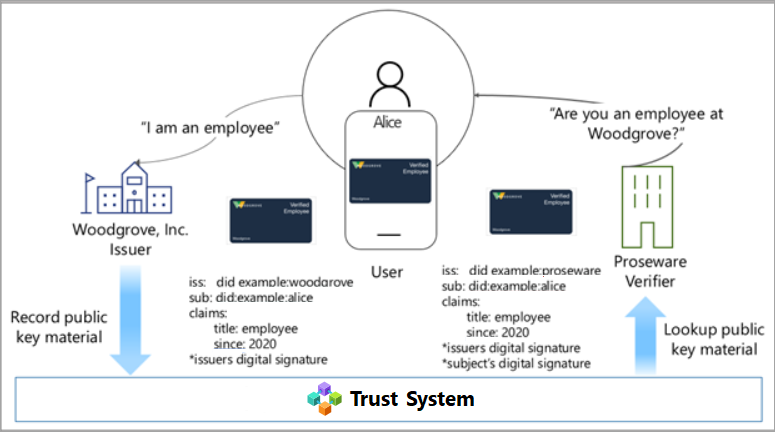
In our scenario, Proseware is a verifier. Woodgrove is the issuer. The verifier needs to know Woodgrove's issuer DID and the verifiable credential type that represents Woodgrove employees before it can create a presentation request for a verified credential for Woodgrove employees. The necessary information might come from some kind of manual exchange between the companies, but this approach would be both manual and complex.
The Microsoft Entra Verified ID Network makes this process easier. Woodgrove, as an issuer, can publish credential types to the Microsoft Entra Verified ID Network. Proseware, as the verifier, can search for published credential types and schemas in the Microsoft Entra Verified ID Network. With this information, Woodgrove can create a presentation request and easily invoke the Request Service API.
How do I use the Microsoft Entra Verified ID Network?
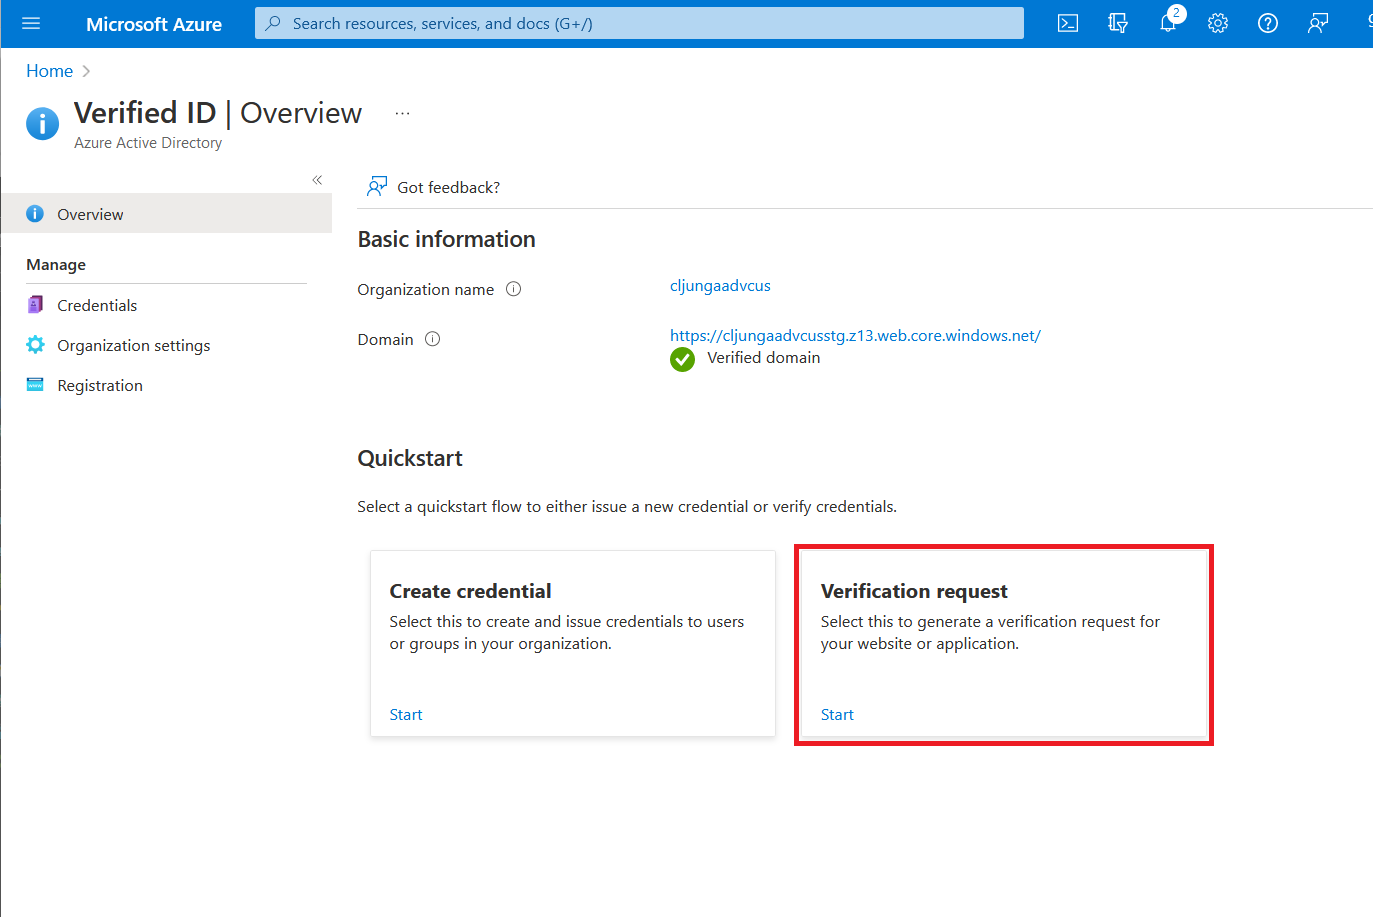
On the start page of Microsoft Entra Verified ID in the Azure portal, you have a quickstart named Verification request. Selecting start takes you to a page where you can browse the Verifiable Credentials Network.
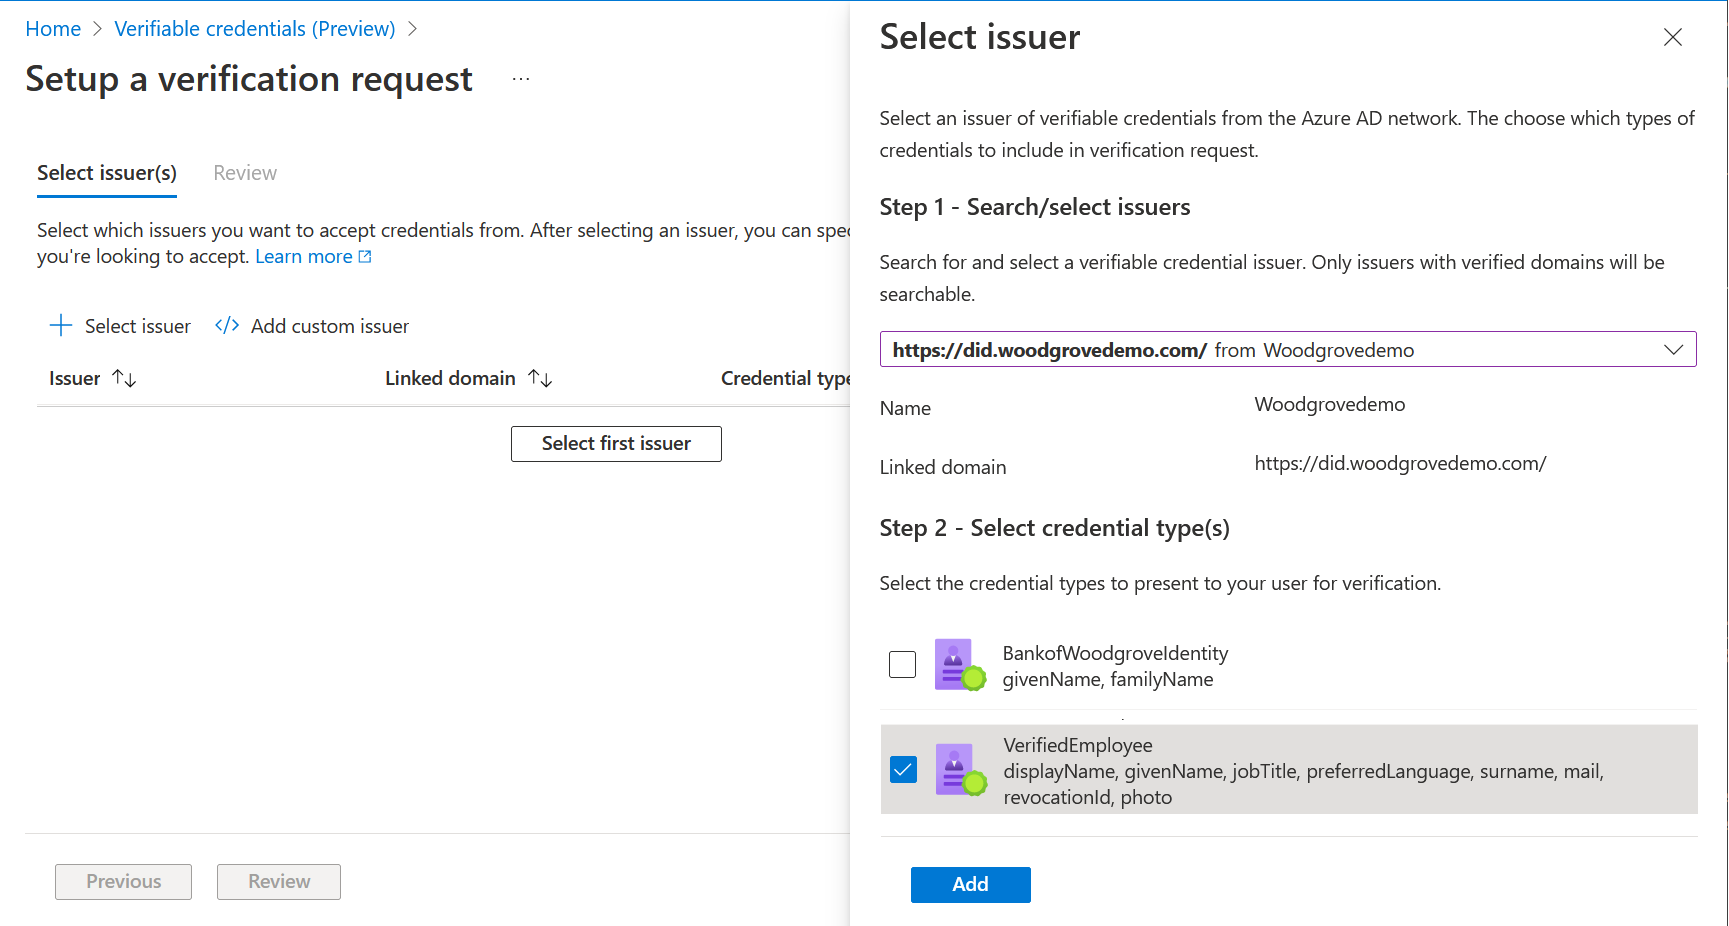
When you choose Select first issuer, a panel opens on the right side of the screen where you can search for issuers by their linked domains. If you're looking for something from Woodgrove, enter woodgrove in the search text box. After you select an issuer in the list, the available credential types appear in the lower part labeled Step 2. Select the type you want to use and select Add to return to the first screen. If the expected linked domain isn't in the list, it means that the linked domain isn't verified yet. If the list of credentials is empty, it means that the issuer verified the linked domain but hasn't published any credential types yet.
On the first screen, Woodgrove is now in the issuer list. The next step is to select Review.
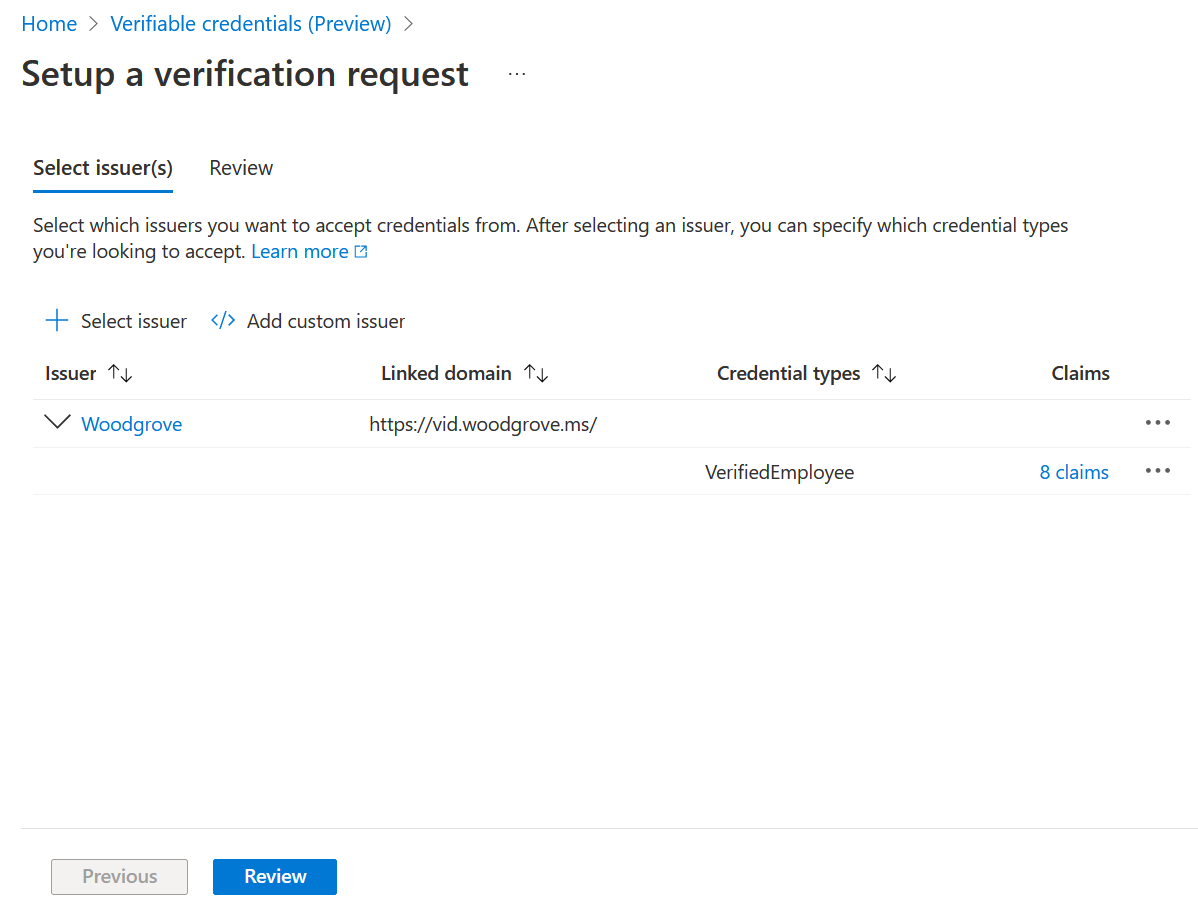
The Review screen displays a skeleton presentation request JSON payload for the Request Service API. The important pieces of information are the DID inside the
acceptedIssuerscollection and thetypevalue. This information is needed to create a presentation request. The request prompts the user for a credential of a certain type issued by a trusted organization.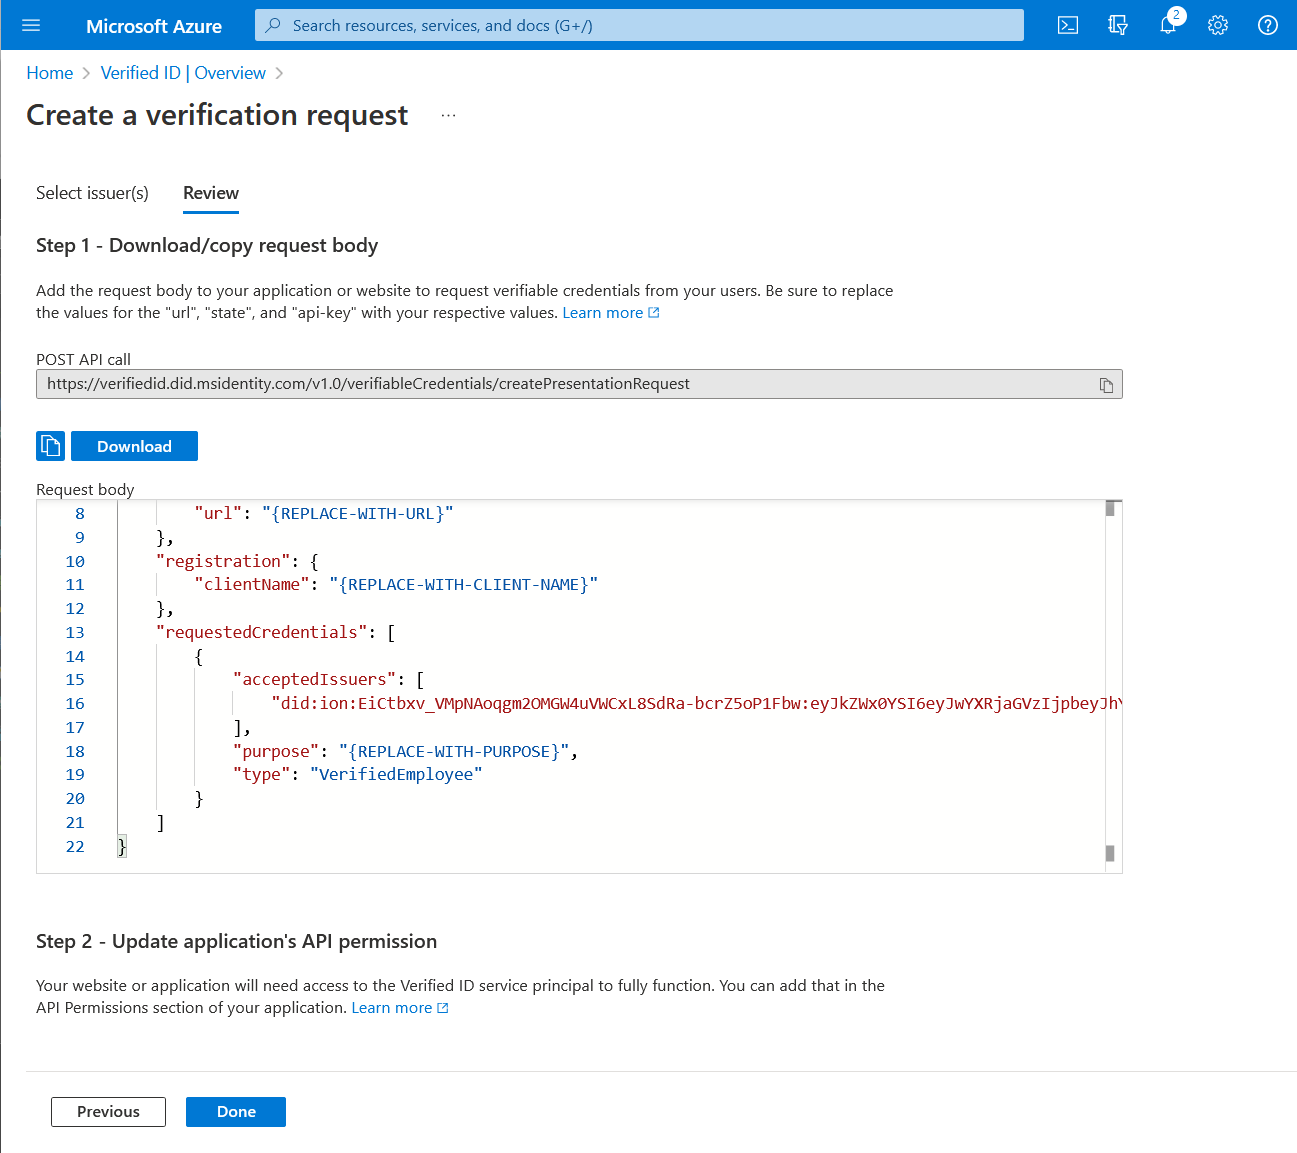
How do I make my linked domain searchable?
Linked domains that are verified are searchable. Unverified domains aren't searchable.
How do I make my credential types visible in the list?
Each credential type that was created has an attribute named availableInVcDirectory that makes it visible in the list. You can update this attribute to make the credential type visible or not. For more information, see Admin API reference.
What is public when a credential type is made visible?
When you make a credential type available in the Microsoft Entra Verified ID Network, only the issuing DID, the credential type, and its schema are made public. This information was already public before making it visible because of how decentralized identities work. Making the credential type visible makes it searchable in the Microsoft Entra Verified ID Network.
Next steps
For more information, see: