Configure Microsoft Entra Verified ID with VU Security Digital Identity as your Identity Verification Partner
In this article, learn to integrate Microsoft Entra Verified ID with VU Security Digital Identity to create secure and frictionless digital experiences. Enhance biometric onboarding and verification scenarios throughout the lifecycle of citizens and organizations.
Digital Identity has flexible onboarding, authentication, and verification processes on devices. It improves user experience and security without affecting business processes.
Prerequisites
To get started, ensure the following prerequisites are met:
A tenant configured for Microsoft Entra Verified ID.
- Use a tenant, or create an Azure account for free.
Complete the Digital Identity onboarding process.
- To create an account, go to VU Security and select Contact.
Important
To proceed, use the VU Security-provided URL for users to be issued Verified IDs.
Scenario description
Digital Identity is a link between users who need to access an application and applications that require secure access control, regardless of how users access the system.
To enable faster and easier user onboarding, replace some human interactions with verifiable credentials. For a user to create or remotely access an account, enable Verified ID with Digital Identity. Verify identity without using vulnerable or complex passwords, or require users to be on-site.
Learn more about account onboarding.
In this account onboarding scenario, Digital Identity plays the Trusted ID proofing issuer role.
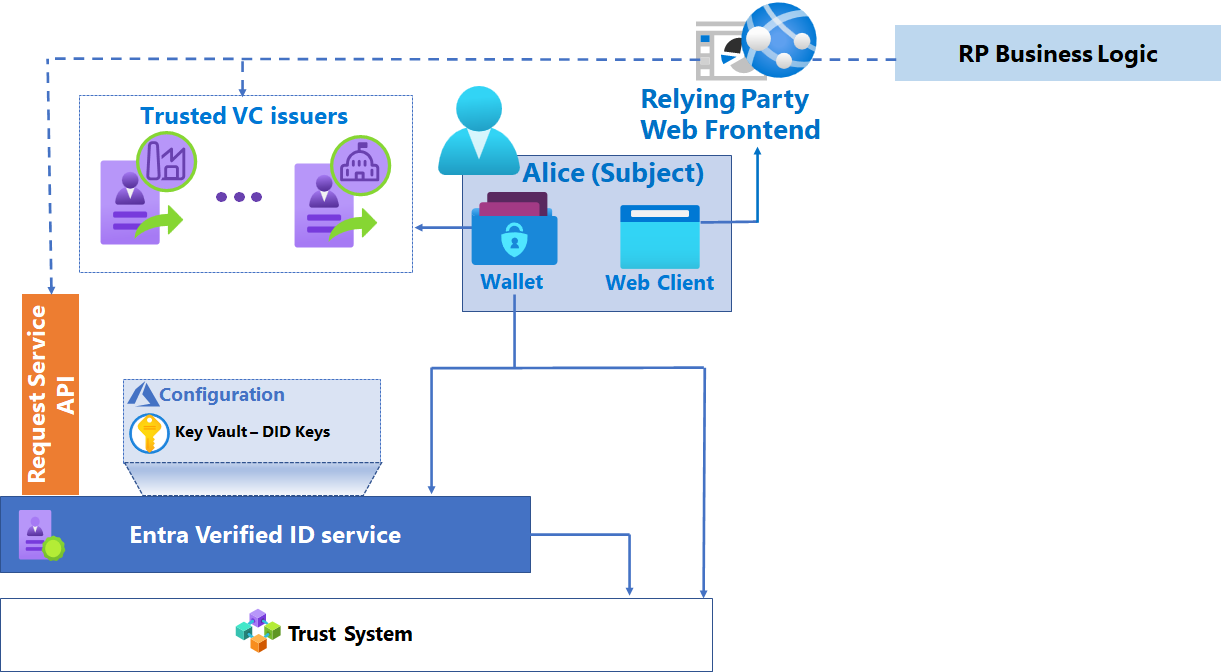
Configure applications to use Digital Identity
Incorporate Digital Identity into your apps.
Select issuer
As a developer you can share these steps with your tenant administrator to obtain the verification request URL, and body for your application or website to request Verified IDs from your users.
Go to the Microsoft Entra admin center - Verified ID
Tip
Confirm the tenant configured for Verified ID meets prerequisites.
Go to Quickstart
Select Verification Request.
Select Start.
Select Select Issuer.
In Search, in the Issuers drop-down, find VU Security.
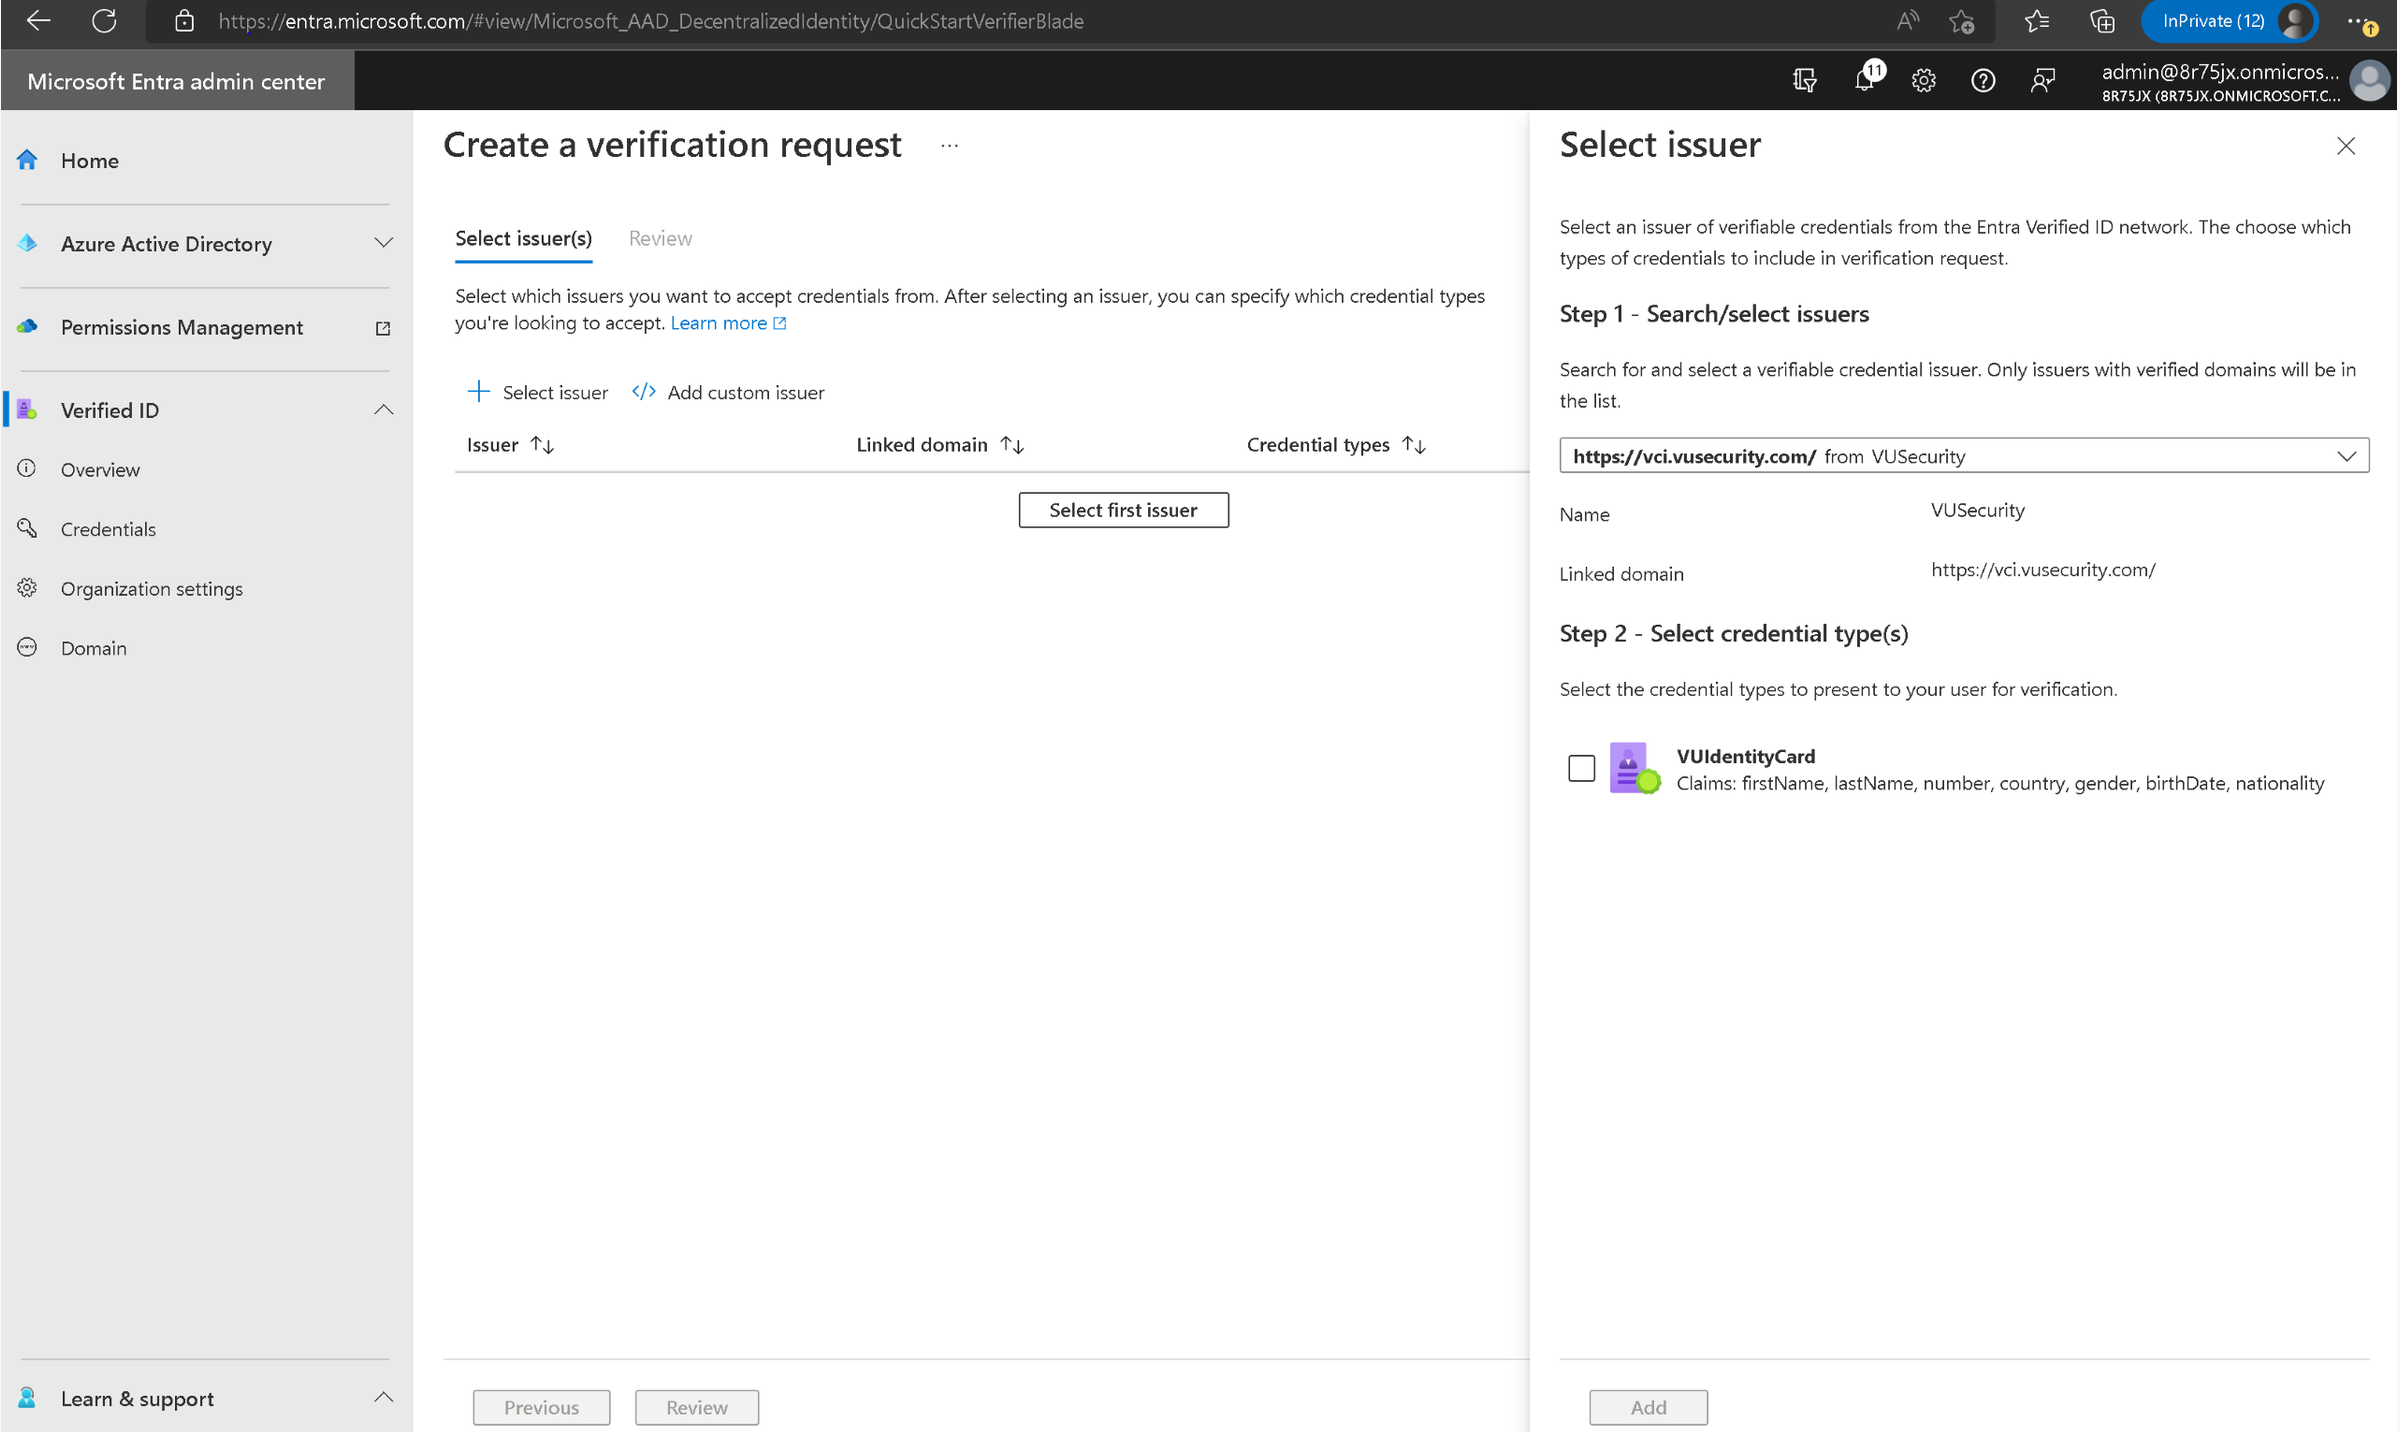
Compare the VUIdentityCard credential with attributes such as firstname, lastname, number, country, region, gender, birth date, nationality. etc.
Note
Number attribute refers to a national ID. For example, the Documento Nacional de Identidad (DNI) in Argentina.
Select Add.
Select Review.
Download the request body.
Copy/paste POST API request URL.
Update an application or website
With the request URL and body from the tenant administrator, update your application or website.
To request Verified IDs from your users, add the request URL and body to your application or website.
Note
If you're using a sample app, replace the contents of the
presentation_request_config.jsonwith the request body obtained in the previous instructions. The sample code overwrites thetrustedIssuersvalues withIssuerAuthorityvalue fromappsettings.json.Copy the
trustedIssuersvalue from the payload toIssuerAuthorityin theappsettings.jsonfile.Replace the values for url, state, and api-key with your values.
To obtain an access token for the Verified ID service request Service Principal, grant needed permissions for your app.
Test the user flow
User flow is specific to your application or website. However, with a sample app, see related documentation.
Next steps
Feedback
Coming soon: Throughout 2024 we will be phasing out GitHub Issues as the feedback mechanism for content and replacing it with a new feedback system. For more information see: https://aka.ms/ContentUserFeedback.
Submit and view feedback for