Note
Access to this page requires authorization. You can try signing in or changing directories.
Access to this page requires authorization. You can try changing directories.
Applies only to: ![]() Foundry (classic) portal. This article isn't available for the new Foundry portal. Learn more about the new portal.
Foundry (classic) portal. This article isn't available for the new Foundry portal. Learn more about the new portal.
Note
Links in this article might open content in the new Microsoft Foundry documentation instead of the Foundry (classic) documentation you're viewing now.
In this tutorial, you set up the resources needed to build a custom knowledge retrieval (RAG) chat app with the Microsoft Foundry SDK. This is part one of a three-part tutorial series. You create the resources here, build the app in part two, and evaluate it in part three. In this part, you:
- Create a project
- Create an Azure AI Search index
- Install the Azure CLI and sign in
- Install Python and packages
- Deploy models into your project
- Configure your environment variables
If you completed other tutorials or quickstarts, you might have already created some of the resources needed for this tutorial. If you did, feel free to skip those steps.
Prerequisites
Important
This article provides legacy support for hub-based projects. It will not work for Foundry projects. See How do I know which type of project I have?
SDK compatibility note: Code examples require a specific Microsoft Foundry SDK version. If you encounter compatibility issues, consider migrating from a hub-based to a Foundry project.
- An Azure account with an active subscription and Owner or Contributor role assigned. If you don't have one, create an account for free.
- Microsoft Foundry: Owner or Contributor role to create a project.
Create a hub-based project
To create a hub-based project in Microsoft Foundry, follow these steps:
-
Sign in to Microsoft Foundry. Make sure the New Foundry toggle is off. These steps refer to Foundry (classic).

-
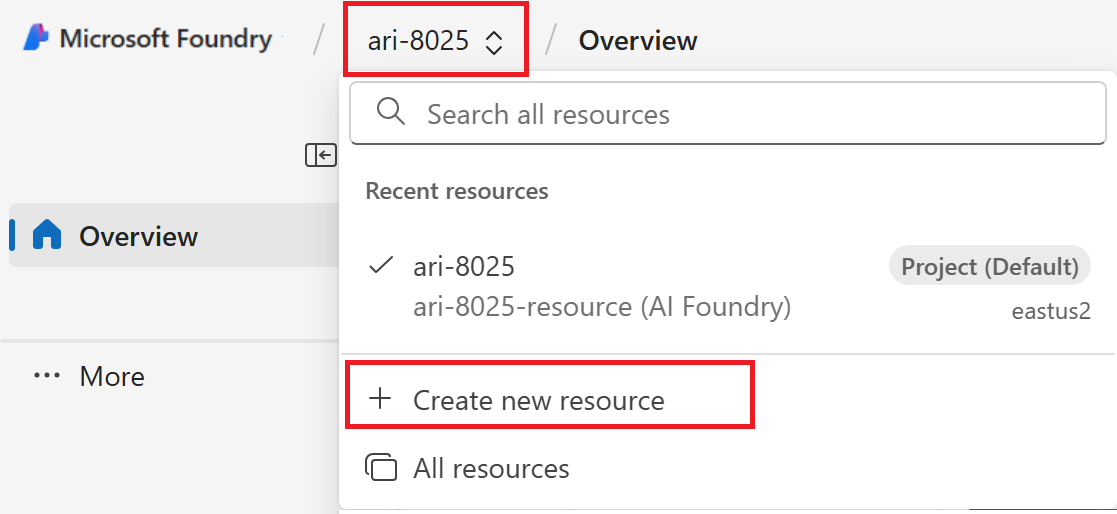
What you do next depends on where you are:
If you're not in a project, or you don't have any projects yet: Select Create new in the top right to create a new Foundry project

If you're in a project: Select the project breadcrumb, then select Create new resource.
Select AI hub resource, then select Next.
Enter a name for the project.
If you have a hub, you'll see the one you most recently used selected.
If you have access to more than one hub, you can select a different hub from the dropdown.
If you want to create a new one, select Create a new hub from the dropdown.
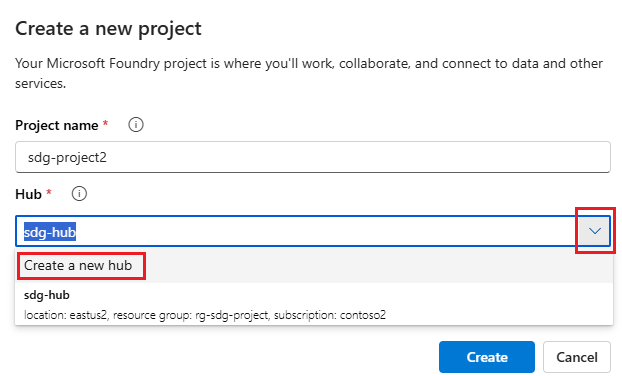
If you don't have a hub, a default one is created for you.
Select Create.

Deploy models
You need two models to build a RAG-based chat app: an Azure OpenAI chat model (gpt-4o-mini) and an Azure OpenAI embedding model (text-embedding-ada-002). Deploy these models in your Foundry project by using this set of steps for each model.
These steps deploy a model to a real-time endpoint from the Foundry portal model catalog:
Tip
Because you can customize the left pane in the Microsoft Foundry portal, you might see different items than shown in these steps. If you don't see what you're looking for, select ... More at the bottom of the left pane.
On the left pane, select Model catalog.
Select the gpt-4o-mini model from the list of models. You can use the search bar to find it.
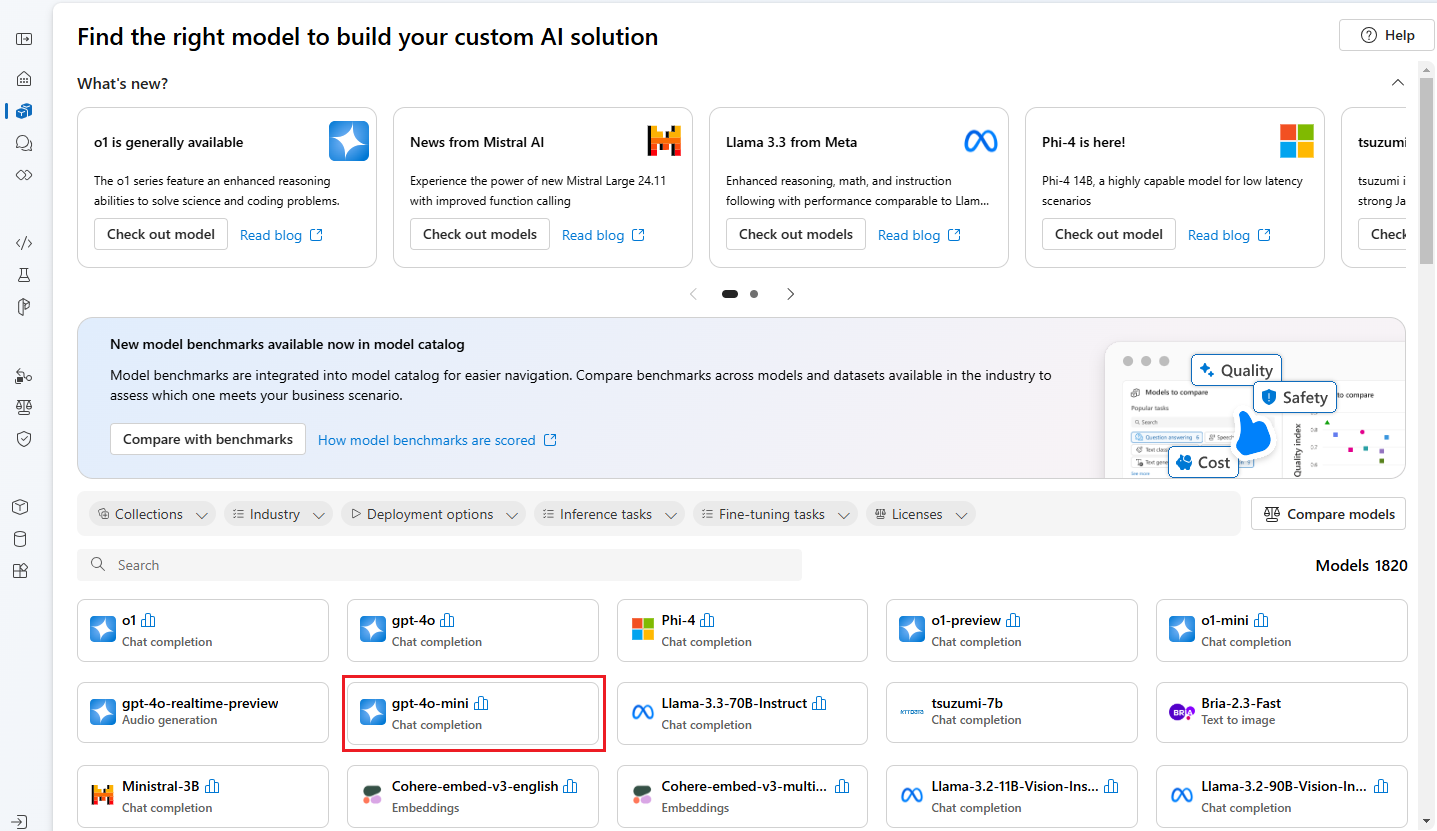
On the model details page, select Use this model.
Leave the default Deployment name and select Deploy. Or, if the model isn't available in your region, a different region is selected for you and connected to your project. In this case, select Connect and deploy.

After you deploy the gpt-4o-mini, repeat the steps to deploy the text-embedding-ada-002 model.
Create an Azure AI Search service
The goal of this application is to ground the model responses in your custom data. The search index retrieves relevant documents based on the user's question.
You need an Azure AI Search service and connection to create a search index.
Note
Creating an Azure AI Search service and subsequent search indexes incurs costs. To confirm the cost before creating the resource, check the pricing and pricing tiers for the Azure AI Search service on the creation page. For this tutorial, use a pricing tier of Basic or higher.
If you already have an Azure AI Search service, go to the next section.
Otherwise, create an Azure AI Search service by using the Azure portal.
Tip
This step is the only time you use the Azure portal in this tutorial series. You do the rest of your work in the Foundry portal or in your local development environment.
- Create an Azure AI Search service in the Azure portal.
- Select your resource group and instance details. Check the pricing and pricing tiers on this page. For this tutorial, use a pricing tier of Basic or higher.
- Continue through the wizard and select Review + assign to create the resource.
- Confirm the details of your Azure AI Search service, including the estimated cost.
- Select Create to create the Azure AI Search service.
Connect the Azure AI Search to your project
If your project already has an Azure AI Search connection, go to Install the Azure CLI and sign in.
In the Foundry portal, check for an Azure AI Search connected resource.
In Foundry, go to your project and select Management center from the left pane.
In the Connected resources section, look to see if you have a connection of type Azure AI Search.
If you have an Azure AI Search connection, you can skip the next steps.
Otherwise, select New connection and then Azure AI Search.
Find your Azure AI Search service in the options and select Add connection.
Use API key for Authentication.
Important
The API key option isn't recommended for production. The recommended approach is Microsoft Entra ID authentication, which requires the Search Index Data Contributor and Search Service Contributor roles (configured in Prerequisites). For more information, see Connect to Azure AI Search using roles. For this tutorial, API key is acceptable if you want to proceed quickly. Switch to Entra ID before deploying to production.
Select Add connection.
Create a new Python environment
In the IDE of your choice, create a new folder for your project. Open a terminal window in that folder.
First, create a new Python environment. Don't install packages into your global Python installation. Always use a virtual or conda environment when installing Python packages. Otherwise, you can break your global install of Python.
If needed, install Python
Use Python 3.10 or later, but at least Python 3.9 is required. If you don't have a suitable version of Python installed, follow the instructions in the VS Code Python Tutorial for the easiest way of installing Python on your operating system.
Create a virtual environment
If you already have Python 3.10 or higher installed, create a virtual environment by using the following commands:
When you activate the Python environment, running python or pip from the command line uses the Python interpreter in the .venv folder of your application.
Note
Use the deactivate command to exit the Python virtual environment. You can reactivate it later when needed.
Install packages
Install the required packages.
Create a file named requirements.txt in your project folder. Add the following packages to the file:
azure-ai-projects==1.0.0b10
azure-ai-inference[prompts]
azure-identity
azure-search-documents
pandas
python-dotenv
opentelemetry-api
References: Azure AI Projects client library, azure-ai-inference, python-dotenv.
Install the required packages:
pip install -r requirements.txt
Configure environment variables
Your project connection string is required to call Azure OpenAI in Microsoft Foundry Models from your code. In this quickstart, you save this value in a .env file, which is a file that contains environment variables that your application can read.
Create a .env file, and paste the following code:
AIPROJECT_CONNECTION_STRING=<your-connection-string>
AISEARCH_INDEX_NAME="example-index"
EMBEDDINGS_MODEL="text-embedding-ada-002"
INTENT_MAPPING_MODEL="gpt-4o-mini"
CHAT_MODEL="gpt-4o-mini"
EVALUATION_MODEL="gpt-4o-mini"
Find your connection string in the Foundry project you created in the Foundry playground quickstart. Open the project, then find the connection string on the Overview page. Copy the connection string and paste it into the
.envfile.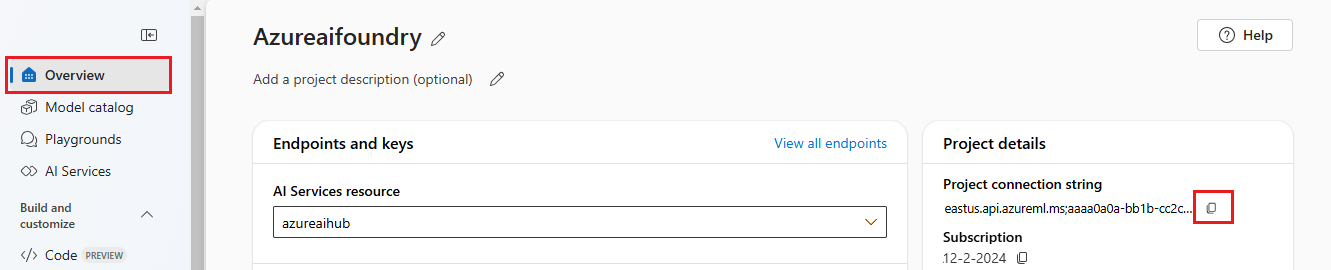
If you don't yet have a search index, keep the value "example-index" for
AISEARCH_INDEX_NAME. In Part 2 of this tutorial you'll create the index using this name. If you have previously created a search index that you want to use instead, update the value to match the name of that search index.If you changed the names of the models when you deployed them, update the values in the
.envfile to match the names you used.
Tip
If you're working in VS Code, close and reopen the terminal window after you've saved changes in the .env file.
Warning
Ensure that your .env is in your .gitignore file so that you don't accidentally check it into your git repository.
Install the Azure CLI and sign in
You install the Azure CLI and sign in from your local development environment so that your code can use your user credentials to call Azure services through Foundry.
In most cases you can install Azure CLI from your terminal using the following command:
You can follow instructions How to install the Azure CLI if these commands don't work for your particular operating system or setup.
After you install the Azure CLI, sign in using the az login command and sign-in using the browser:
az login
Alternatively, you can sign in manually via the browser with a device code.
az login --use-device-code
Keep this terminal window open to run your python scripts from here as well, now that you signed in.
Verify your setup
Verify that your environment is set up correctly by running a quick test:
import os
from azure.identity import DefaultAzureCredential
import azure.ai.projects

# Check the SDK version
print(f"Azure AI Projects SDK version: {azure.ai.projects.__version__}")

# Test that you can connect to your project
project = AIProjectClient.from_connection_string(
    conn_str=os.environ["AIPROJECT_CONNECTION_STRING"], credential=DefaultAzureCredential()
)
print("✓ Setup verified! Ready to build your RAG app.")
If you see "Setup successful!", your Azure credentials and SDK are configured correctly.
Tip
This tutorial requires Azure AI Projects SDK version 1.0.0b10. The SDK version displayed above helps you verify compatibility. If you have a different version, the from_connection_string() method may not be available. To install the required version, run pip install azure-ai-projects==1.0.0b10.
References: Azure AI Projects client library, DefaultAzureCredential.
Create helper script
Create a folder for your work. Create a file named config.py in this folder. You'll use this helper script in the next two parts of the tutorial series. The script loads your environment variables and initializes the Azure AI Projects client. Add the following code:
# ruff: noqa: ANN201, ANN001

import os
import sys
import pathlib
import logging
from azure.identity import DefaultAzureCredential
from azure.ai.projects import AIProjectClient
from azure.ai.inference.tracing import AIInferenceInstrumentor

# load environment variables from the .env file
from dotenv import load_dotenv

load_dotenv()

# Set "./assets" as the path where assets are stored, resolving the absolute path:
ASSET_PATH = pathlib.Path(__file__).parent.resolve() / "assets"

# Configure an root app logger that prints info level logs to stdout
logger = logging.getLogger("app")
logger.setLevel(logging.INFO)
logger.addHandler(logging.StreamHandler(stream=sys.stdout))


# Returns a module-specific logger, inheriting from the root app logger
def get_logger(module_name):
    return logging.getLogger(f"app.{module_name}")


# Enable instrumentation and logging of telemetry to the project
def enable_telemetry(log_to_project: bool = False):
    AIInferenceInstrumentor().instrument()

    # enable logging message contents
    os.environ["AZURE_TRACING_GEN_AI_CONTENT_RECORDING_ENABLED"] = "true"

    if log_to_project:
        from azure.monitor.opentelemetry import configure_azure_monitor

        project = AIProjectClient.from_connection_string(
            conn_str=os.environ["AIPROJECT_CONNECTION_STRING"], credential=DefaultAzureCredential()
        )
        tracing_link = f"https://ai.azure.com/tracing?wsid=/subscriptions/{project.scope['subscription_id']}/resourceGroups/{project.scope['resource_group_name']}/providers/Microsoft.MachineLearningServices/workspaces/{project.scope['project_name']}"
        application_insights_connection_string = project.telemetry.get_connection_string()
        if not application_insights_connection_string:
            logger.warning(
                "No application insights configured, telemetry will not be logged to project. Add application insights at:"
            )
            logger.warning(tracing_link)

            return

        configure_azure_monitor(connection_string=application_insights_connection_string)
        logger.info("Enabled telemetry logging to project, view traces at:")
        logger.info(tracing_link)
References: AIProjectClient, DefaultAzureCredential, load_dotenv.
Note
This script also uses a package you haven't installed yet, azure.monitor.opentelemetry. You'll install this package in the next part of the tutorial series.
Clean up resources
To avoid incurring unnecessary Azure costs, delete the resources you created in this tutorial if they're no longer needed. To manage resources, you can use the Azure portal.
But don't delete them yet if you want to build a chat app in the next part of this tutorial series.
Next step
In this tutorial, you set up everything you need to build a custom chat app with the Azure AI SDK. In the next part of this tutorial series, you build the custom app.