Note
Access to this page requires authorization. You can try signing in or changing directories.
Access to this page requires authorization. You can try changing directories.
Applies only to: ![]() Foundry (classic) portal. This article isn't available for the new Foundry portal. Learn more about the new portal.
Foundry (classic) portal. This article isn't available for the new Foundry portal. Learn more about the new portal.
Note
Links in this article might open content in the new Microsoft Foundry documentation instead of the Foundry (classic) documentation you're viewing now.
Warning
Prompt Flow feature development ended on April 20, 2026. The feature will be fully retired on April 20, 2027. On the retirement date, Prompt Flow enters read-only mode. Your existing flows will continue to operate until that date.
Recommended action: Migrate your Prompt Flow workloads to Microsoft Agent Framework before April 20, 2027.
Multimodal Large Language Models (LLMs) can process and interpret diverse forms of data inputs. These models elevate the capabilities of language-only systems. Among the various data types, images are important for many real-world applications. Incorporating image data into AI systems provides an essential layer of visual understanding.
In this article, you learn:
- How to use image data in prompt flow
- How to use built-in GPT-4V tool to analyze image inputs.
- How to build a chatbot that can process image and text inputs.
- How to create a batch run using image data.
- How to consume online endpoint with image data.
Important
This article provides legacy support for hub-based projects. It will not work for Foundry projects. See How do I know which type of project I have?
SDK compatibility note: Code examples require a specific Microsoft Foundry SDK version. If you encounter compatibility issues, consider migrating from a hub-based to a Foundry project.
Image type in prompt flow
Prompt flow input and output support Image as a new data type.
To use image data in prompt flow authoring page:
Add a flow input, select the data type as Image. You can upload, drag and drop an image file, paste an image from clipboard, or specify an image URL or the relative image path in the flow folder.

Preview the image. If the image isn't displayed correctly, delete the image and add it again.

You might want to preprocess the image using the Python tool before feeding it to the LLM. For example, you can resize or crop the image to a smaller size.

from promptflow import tool
from promptflow.contracts.multimedia import Image as PFImage
from PIL import Image as Image
import io

@tool
def process_image(input_image: PFImage) -> PFImage:
    # convert the input image data to a BytesIO object
    data_byteIO = io.BytesIO(input_image)

    # Open the image data as a PIL Image object
    image = Image.open(data_byteIO)

    # crop image
    cropped_image = image.crop((100, 100, 900, 900))

    # Convert the cropped image back to BytesIO
    byte_arr = io.BytesIO()
    cropped_image.save(byte_arr, format = 'JPEG')

    # Create a new prompt flow Image object with the cropped image data
    # This image is now ready to be returned
    cropped_PF_image = PFImage(byte_arr.getvalue(), mime_type = "image/jpeg")

    return cropped_PF_image
   ```

> [!IMPORTANT]
> To process images by using a Python function, use the `Image` class that you import from the `promptflow.contracts.multimedia` package. The `Image` class represents an `Image` type within prompt flow. It works with image data in byte format, which is convenient when you need to handle or manipulate the image data directly.
>
> To return the processed image data, use the `Image` class to wrap the image data. Create an `Image` object by providing the image data in bytes and the [MIME type](https://developer.mozilla.org/docs/Web/HTTP/Basics_of_HTTP/MIME_types/Common_types) `mime_type`. The MIME type lets the system understand the format of the image data, or it can be `*` for unknown type.
Run the Python node and check the output. In this example, the Python function returns the processed Image object. Select the image output to preview the image.
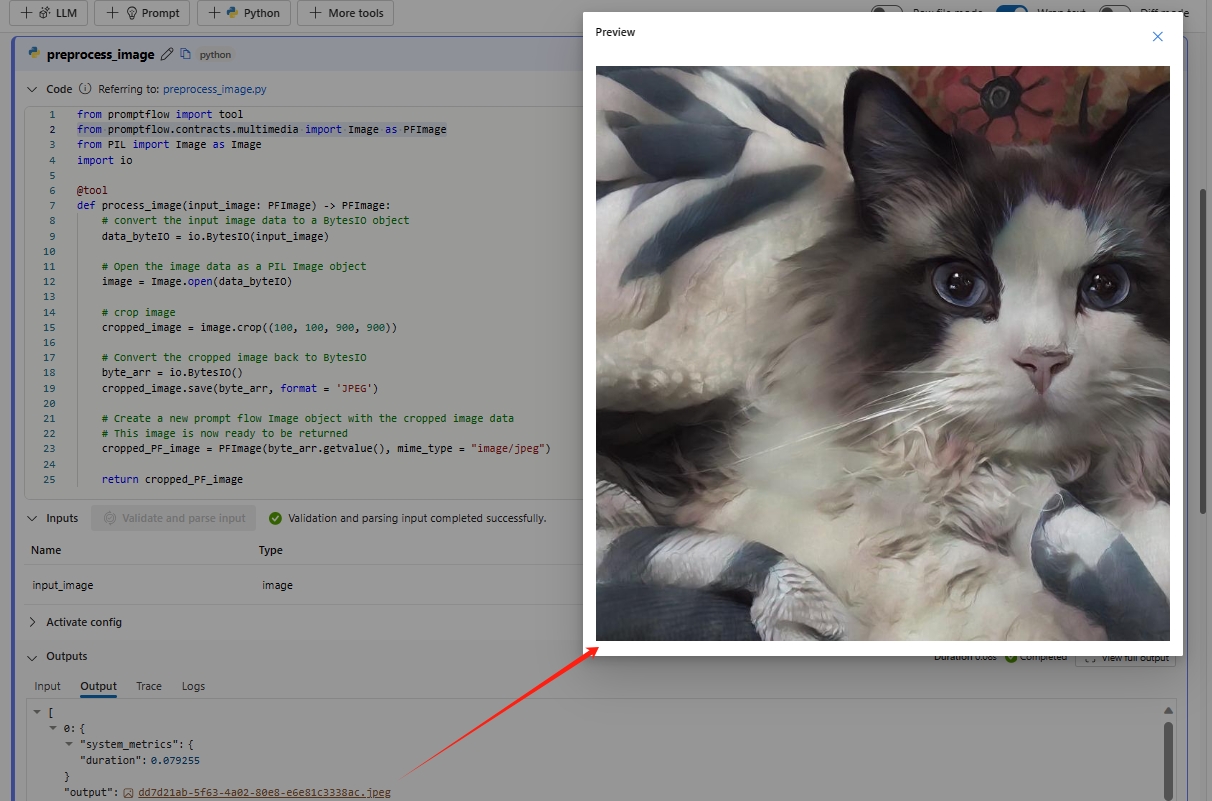
If the Image object from Python node is set as the flow output, you can preview the image in the flow output page as well.


Use GPT-4V tool
The Azure OpenAI GPT-4 Turbo with Vision tool and OpenAI GPT-4V are built-in tools in prompt flow that use the OpenAI GPT-4V model to answer questions based on input images. You can find the tool by selecting + More tools in the flow authoring page.
Add the Azure OpenAI GPT-4 Turbo with Vision tool to the flow. Make sure you have an Azure OpenAI connection, with the availability of GPT-4 vision-preview models.

The Jinja template for composing prompts in the GPT-4V tool follows a similar structure to the chat API in the LLM tool. To represent an image input within your prompt, use the syntax . You can pass image input in the user, system, and assistant messages.
After you compose the prompt, select Validate and parse input to parse the input placeholders. The image input represented by  is parsed as image type with the input name as INPUT NAME.
You can assign a value to the image input through the following ways:
- Reference from the flow input of Image type.
- Reference from other node's output of Image type.
- Upload, drag, paste an image, or specify an image URL or the relative image path.
Build a chatbot to process images
In this section, you learn how to build a chatbot that can process image and text inputs.
Assume you want to build a chatbot that can answer any questions about the image and text together. You can achieve this by following the steps in this section.
Create a chat flow.
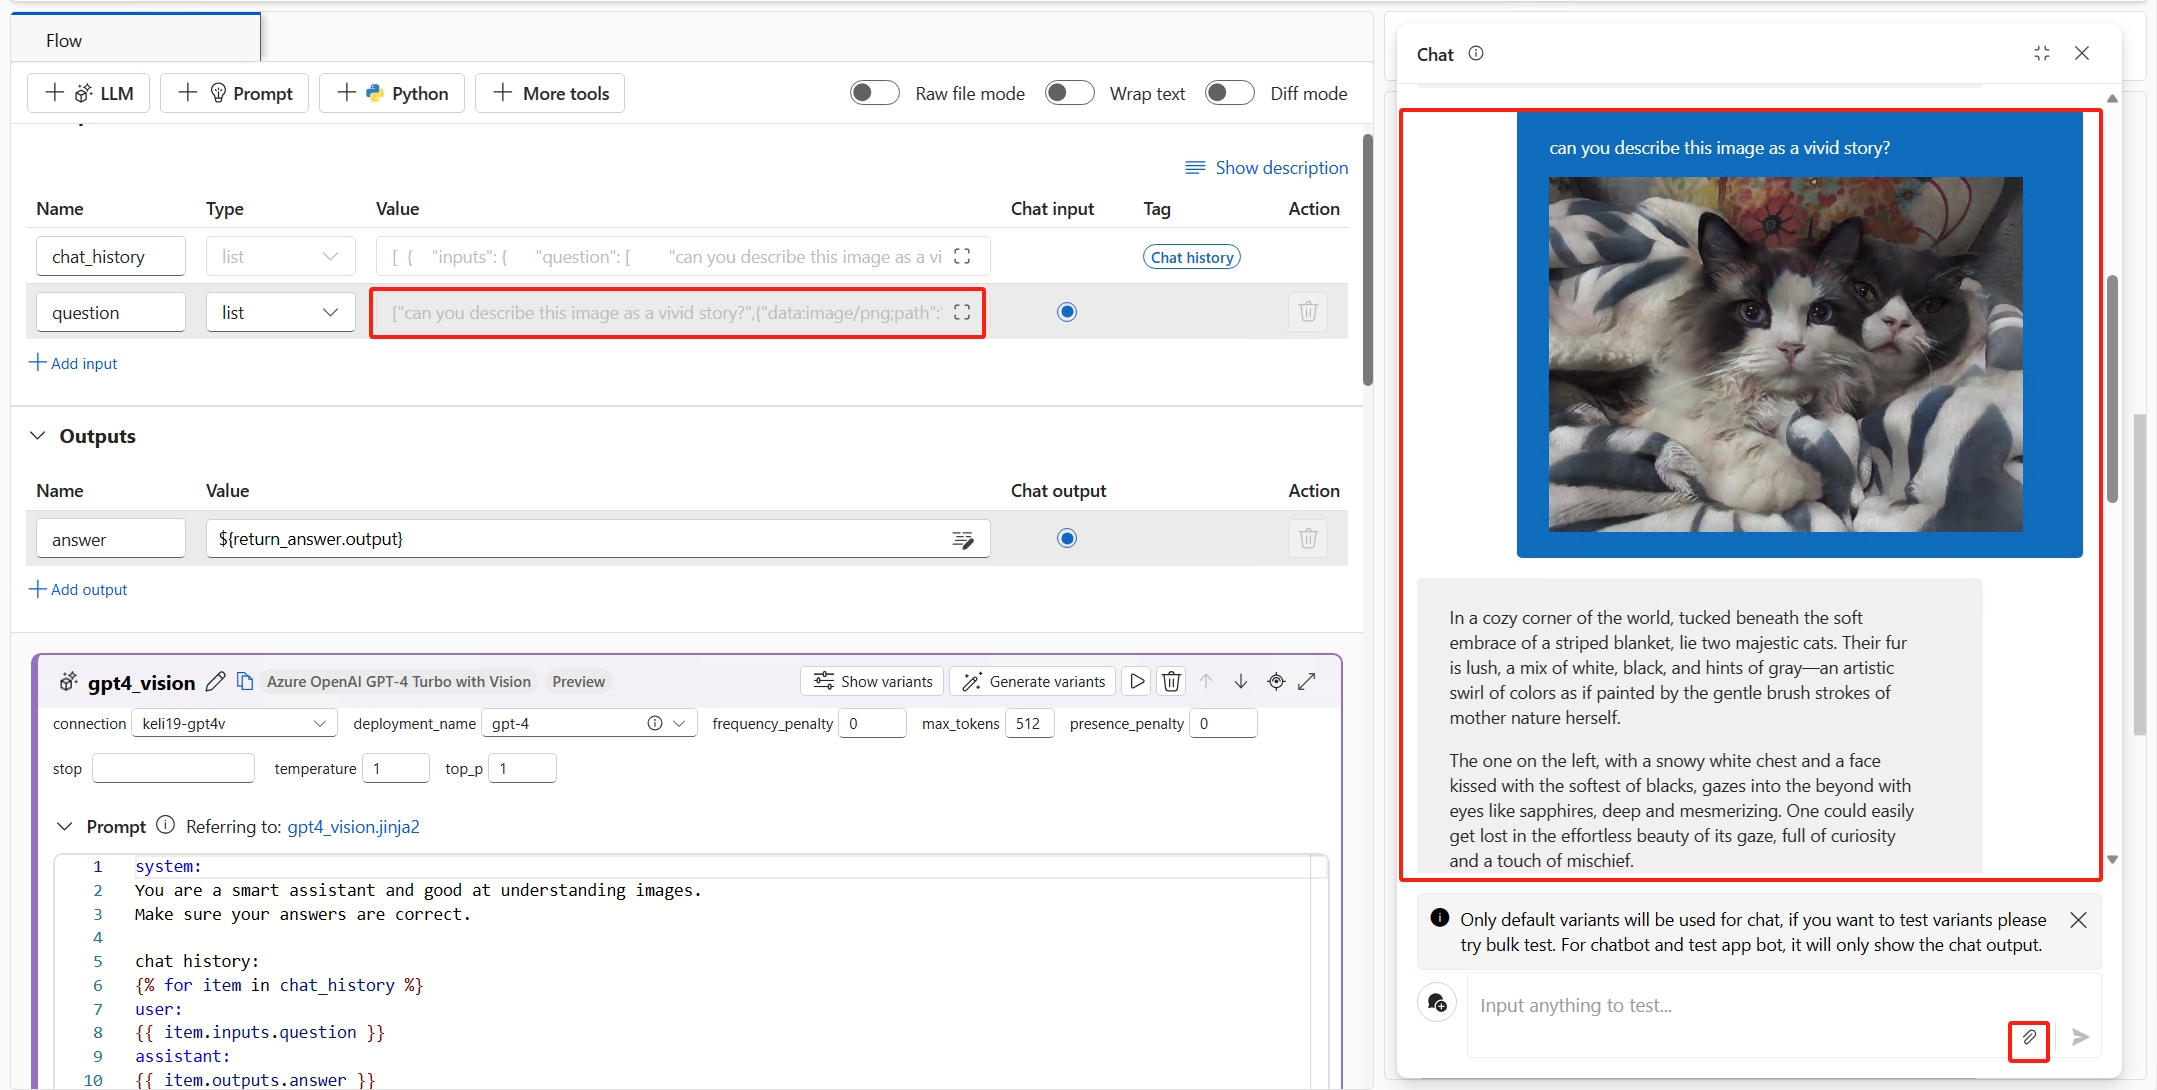
In Inputs, select the data type as list. In the chat box, the user can input a mixed sequence of texts and images, and the prompt flow service transforms that input into a list.

Add the GPT-4V tool to the flow. You can copy the prompt from the default LLM tool chat and paste it into the GPT-4V tool. Then, delete the default LLM tool chat from the flow.

In this example,
{{question}}refers to the chat input, which is a list of texts and images.In Outputs, change the value of "answer" to the name of your vision tool's output, for example,
${gpt_vision.output}.
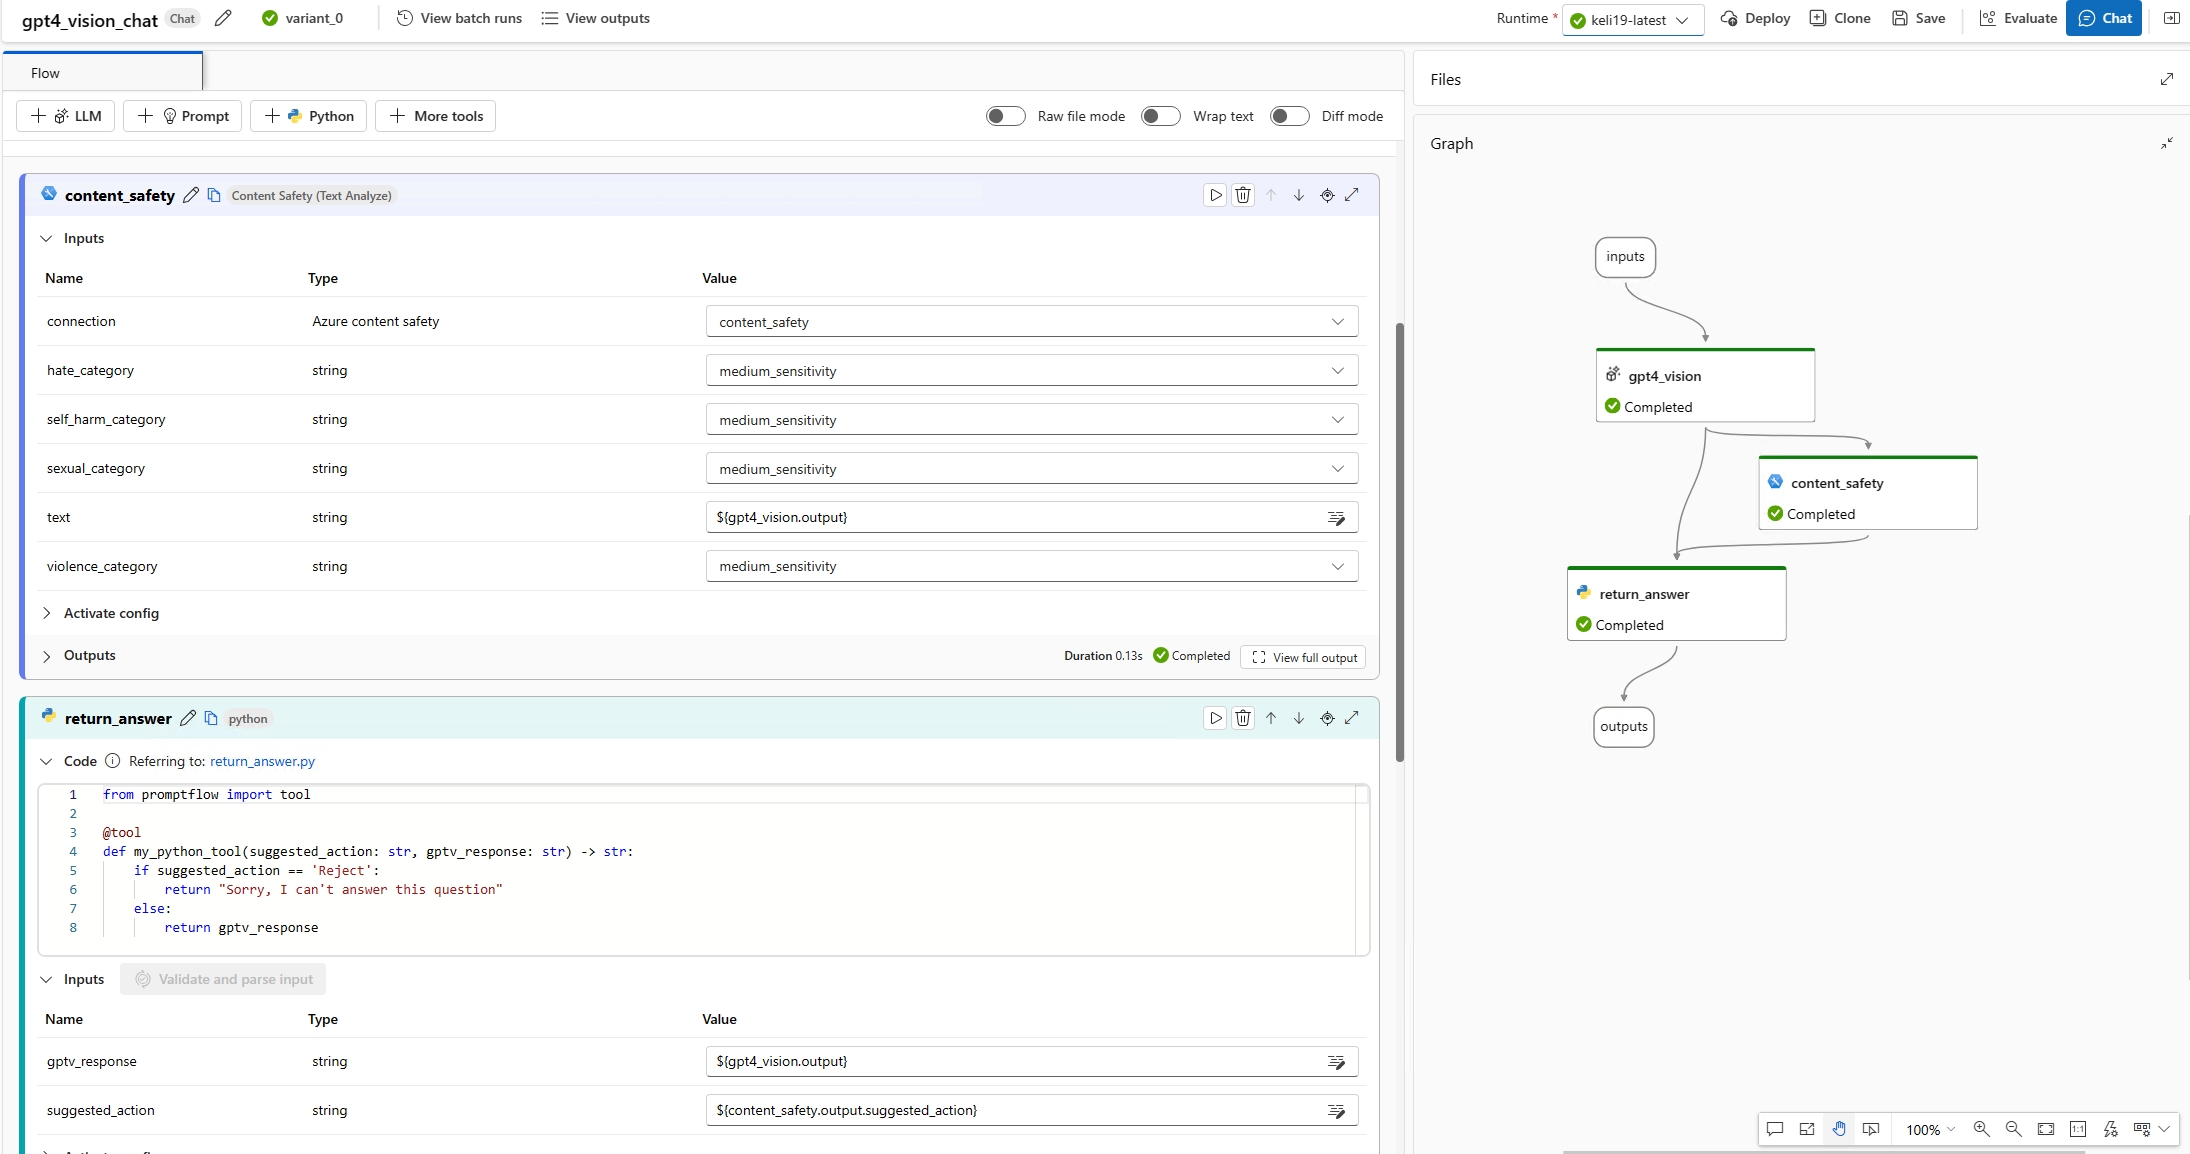
(Optional) Add any custom logic to the flow to process the GPT-4V output. For example, you can add the Guardrails & controls tool to detect if the answer contains any inappropriate content, and return a final answer to the user.
Test the chatbot. Open the chat window, and input any questions with images. The chatbot answers the questions based on the image and text inputs. The chat input value is automatically backfilled from the input in the chat window. You can find the texts with images in the chat box which is translated into a list of texts and images.


Note
To enable your chatbot to respond with rich text and images, make the chat output list type. The list should consist of strings (for text) and prompt flow Image objects (for images) in custom order.

Create a batch run using image data
A batch run lets you test the flow with a large dataset. You can represent image data in three ways: by using an image file, a public image URL, or a Base64 string.
- Image file: To test image files in a batch run, you need to prepare a data folder. This folder should contain a batch run entry file in
jsonlformat located in the root directory, along with all image files stored in the same folder or subfolders.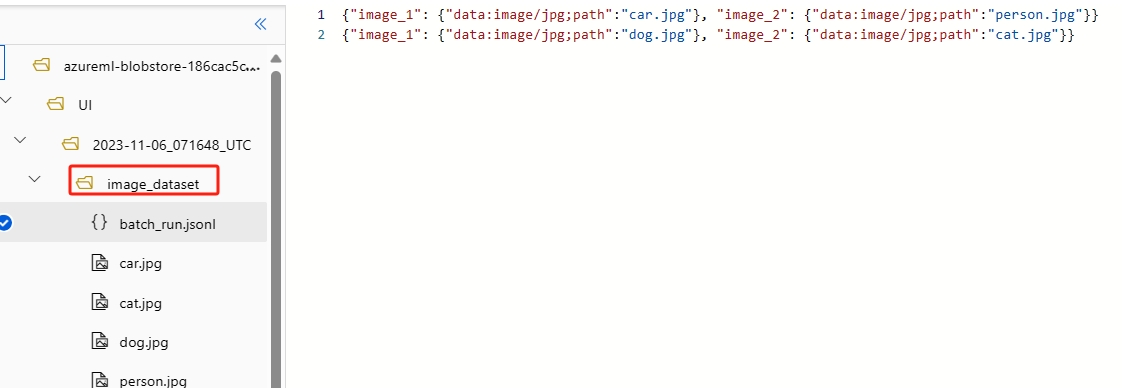 In the entry file, use the format
 {"data:<mime type>;path": "<image relative path>"}to reference each image file. For example,{"data:image/png;path": "./images/1.png"}. - Public image URL: Reference the image URL in the entry file by using the format
{"data:<mime type>;url": "<image URL>"}. For example,{"data:image/png;url": "https://www.example.com/images/1.png"}. - Base64 string: Reference a Base64 string in the entry file by using the format
{"data:<mime type>;base64": "<base64 string>"}. For example,{"data:image/png;base64": "iVBORw0KGgoAAAANSUhEUgAAAGQAAABLAQMAAAC81rD0AAAABGdBTUEAALGPC/xhBQAAACBjSFJNAAB6JgAAgIQAAPoAAACA6AAAdTAAAOpgAAA6mAAAF3CculE8AAAABlBMVEUAAP7////DYP5JAAAAAWJLR0QB/wIt3gAAAAlwSFlzAAALEgAACxIB0t1+/AAAAAd0SU1FB+QIGBcKN7/nP/UAAAASSURBVDjLY2AYBaNgFIwCdAAABBoAAaNglfsAAAAZdEVYdGNvbW1lbnQAQ3JlYXRlZCB3aXRoIEdJTVDnr0DLAAAAJXRFWHRkYXRlOmNyZWF0ZQAyMDIwLTA4LTI0VDIzOjEwOjU1KzAzOjAwkHdeuQAAACV0RVh0ZGF0ZTptb2RpZnkAMjAyMC0wOC0yNFQyMzoxMDo1NSswMzowMOEq5gUAAAAASUVORK5CYII="}.

In summary, prompt flow uses a unique dictionary format to represent an image: {"data:<mime type>;<representation>": "<value>"}. The <mime type> refers to HTML standard MIME image types. The <representation> refers to the supported image representations: path, url, and base64.
Create a batch run
In flow authoring, select Evaluate->Custom evaluation to start a batch run. In Batch run settings, select a dataset. You can select a folder that contains the entry file and image files, or you can select a file that contains only the entry file. You can preview the entry file and perform input mapping to align the columns in the entry file with the flow inputs.

View batch run results
You can check the batch run outputs in the run detail page. Select the image object in the output table to preview the image.

If the batch run outputs contain images, you can check the flow_outputs dataset with the output jsonl file and the output images.

Consume online endpoint with image data
You can deploy a flow to an online endpoint for real-time inference.
The Test tab in the deployment detail page doesn't support image inputs or outputs.
For now, you can test the endpoint by sending a request that includes image inputs.
To consume the online endpoint with image input, represent the image by using the format {"data:<mime type>;<representation>": "<value>"}. In this case, <representation> can either be url or base64.
If the flow generates image output, it returns the output in base64 format. For example, {"data:<mime type>;base64": "<base64 string>"}.