Note
Access to this page requires authorization. You can try signing in or changing directories.
Access to this page requires authorization. You can try changing directories.
APPLIES TO: Developer | Basic | Standard | Premium
API Management now supports built-in OAuth 2.0 application-based access to product APIs using the client credentials flow. This feature allows API managers to register Microsoft Entra ID applications, streamlining secure API access for developers through OAuth 2.0 authorization.
Note
Applications are currently in limited preview. To sign up, fill this form.
With this feature:
- API managers set a product property to enable application-based access.
- API managers register client applications in Microsoft Entra ID to limit access to specific products.
- Developers can access client application credentials using the API Management developer portal.
- Using the OAuth 2.0 client credentials flow, developers or apps obtain tokens that they can include in API requests
- Tokens presented in API requests are validated by the API Management gateway to authorize access to the product's APIs.
Prerequisites
An API Management instance deployed in the Premium, Standard, Basic, or Developer tier. If you need to deploy an instance, see Create an API Management service instance.
At least one product in your API Management instance, with at least one API assigned to it.
- The product should be in the Published state so that it can be accessed by developers through the developer portal.
- For testing, you can use the default Starter product and the Echo API that's added to it.
- If you want to create a product, see Create and publish a product.
Sufficient permissions in your Microsoft Entra tenant to assign the Application Administrator role, which requires at least the Privileged Role Administrator role.
Optionally, add one or more users in your API Management instance.
- If you choose to use Azure PowerShell locally:
- Install the latest version of the Az PowerShell module.
- Connect to your Azure account using the Connect-AzAccount cmdlet.
- If you choose to use Azure Cloud Shell:
- See Overview of Azure Cloud Shell for more information.
Configure managed identity
Enable a system-assigned managed identity for API Management in your API Management instance.
Assign the identity the Application Administrator RBAC role in Microsoft Entra ID. To assign the role:
- Sign in to the portal and navigate to Microsoft Entra ID.
- In the left menu, select Manage > Roles and administrators.
- Select Application administrator.
- In the left menu, select Manage > Assignments > + Add assignments.
- In the Add assignments page, search for the API Management instance's managed identity by name (the name of the API Management instance). Select the managed identity, and then select Add.
Enable application based access for product
Follow these steps to enable Application based access for a product. A product must have this setting enabled to be associated with a client application in later steps.
The following example uses the Starter product, but choose any published product that has at least one API assigned to it.
- Sign in to the portal at the following custom URL for the applications feature: https://portal.azure.com/?feature.customPortal=false&Microsoft_Azure_ApiManagement=applications
- Navigate to your API Management instance.
- In the left menu, under APIs, select Products.
- Choose the product that you want to configure, such as the Starter product.
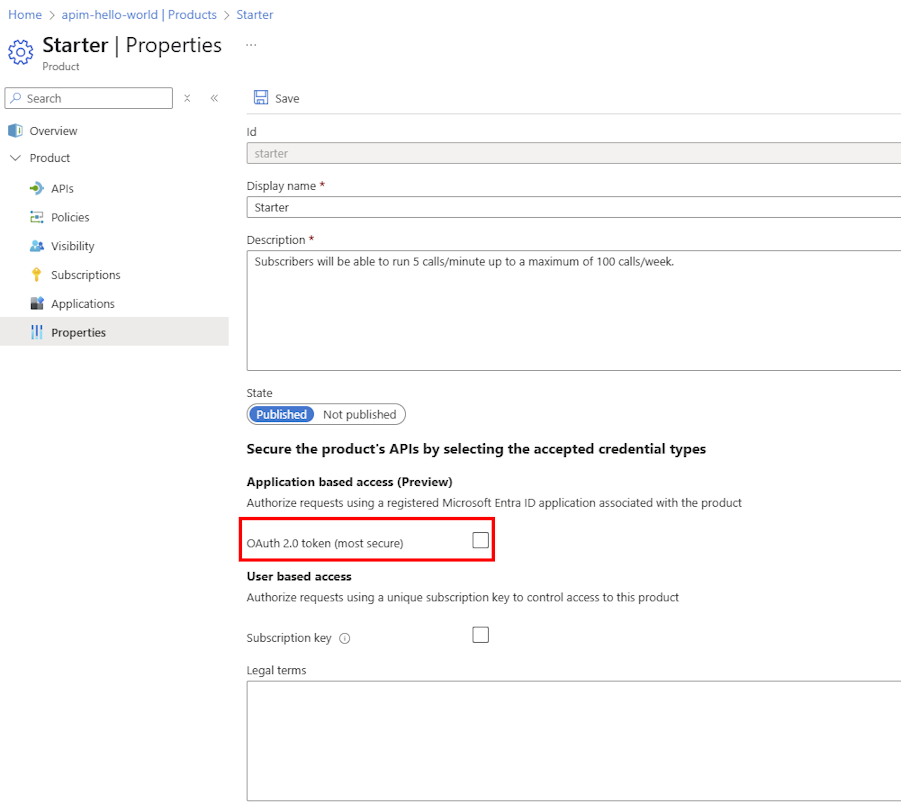
- In the left menu, under Product, select Properties.
- In the Application based access section, enable the OAuth 2.0 token (most secure) setting.
- Optionally, enable the Subscription key setting. If you enable both application based access and a subscription requirement, the API Management gateway can accept either an OAuth 2.0 token or a subscription key for access to the product's APIs.
- Select Save.
Tip
You can also enable the OAuth 2.0 token setting when creating a new product.
Enabling application based access creates a backend enterprise application in Microsoft Entra ID to represent the product. The backend application ID is displayed in the product's Properties page.
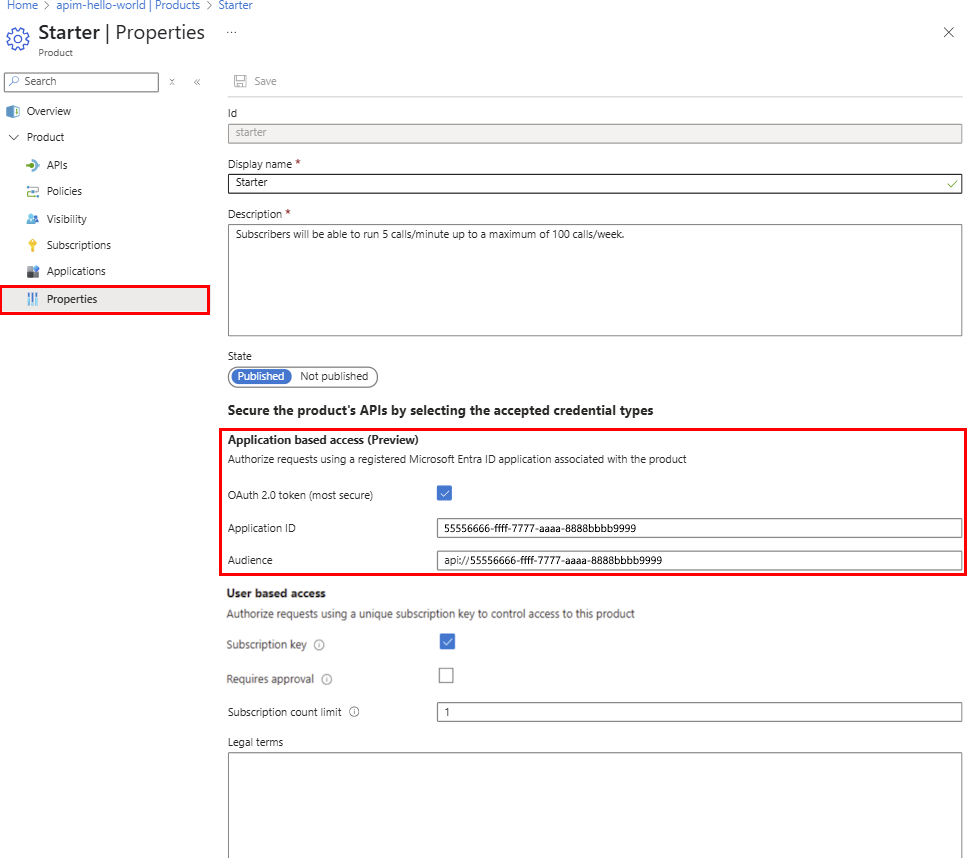
Note
This application ID is set as the Audience value when creating a client application to access the product. Also use this value when generating a token to call the product API.
(Optional) Review product application settings in Microsoft Entra ID
Optionally review settings of the backend enterprise application created in Microsoft Entra ID to represent the product.
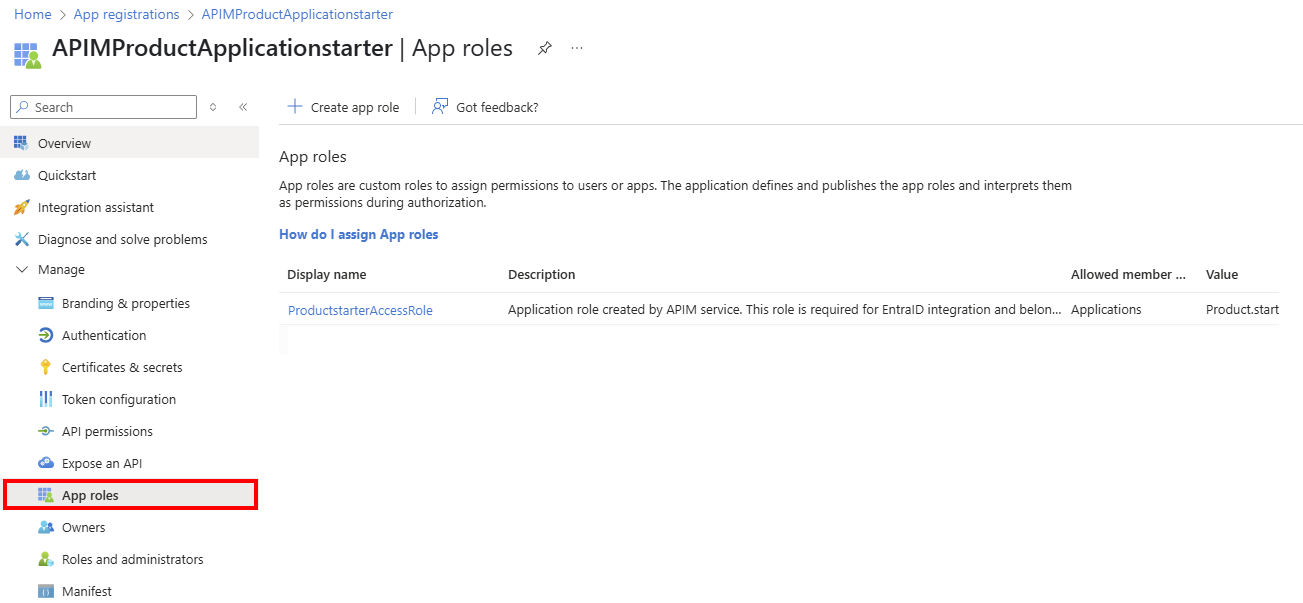
The application is named with the following format: APIMProductApplication<product-name>. For example, if the product name is Starter, the application name is APIMProductApplicationStarter. The application has an App role defined.
To review application settings in App registrations:
- Sign in to the portal and navigate to Microsoft Entra ID > Manage > App registrations.
- Select All applications.
- Search for and select the application created by API Management.
- In the left menu, under Manage, select App roles.
- Confirm the application role that set by Azure API Management, as shown in the following screenshot:
Register client application to access product
Now register a client application that limits access to one or more products.
- A product must have Application based access enabled to be associated with a client application.
- Each client application has a single user (owner) in the API Management instance. Only the owner can access product APIs through the application.
- A product can be associated with more than one client application.
To register a client application:
Sign in to the portal at the following custom URL for the applications feature: https://portal.azure.com/?feature.customPortal=false&Microsoft_Azure_ApiManagement=applications
Navigate to your API Management instance.
In the left menu, under APIs, select Applications > + Register application.
In the Register an application page, enter the following application settings:
- Name: Enter a name for the application.
- Owner: Select the owner of the application from the dropdown list of users in the API Management instance.
- Grant access to selected products: Select one or more products in the API Management instance that were previously enabled for Application based access.
- Description: Optionally enter a description.
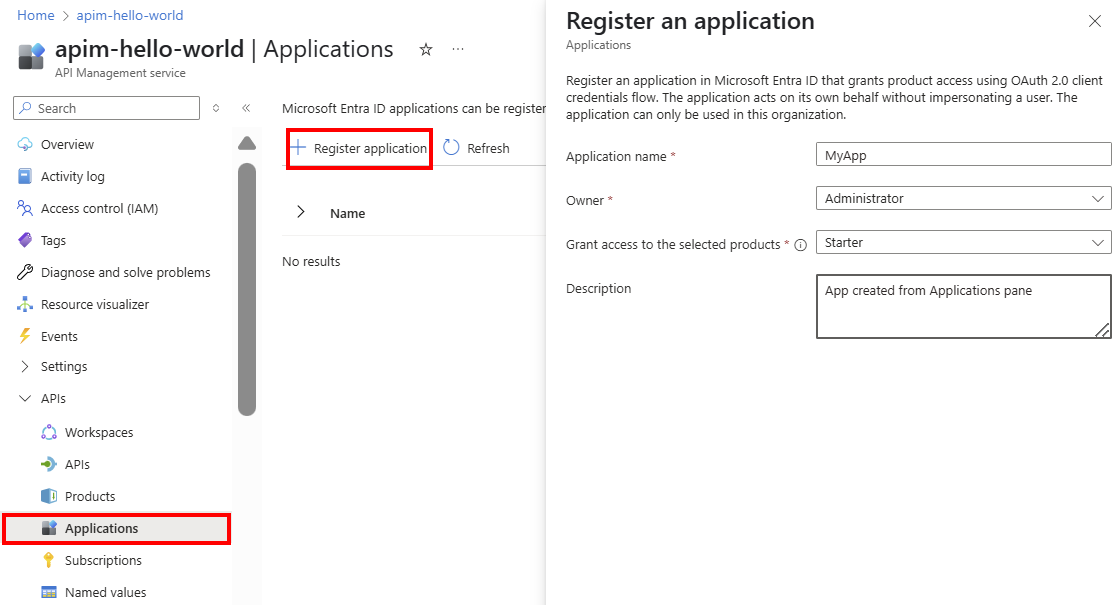
Select Register.
The application is added to the list of applications on the Applications page. Select the application to view details such as the Client ID. You need this ID to generate a token to call the product API.
Tip
- After creating an application, optionally associate it with other products. Select the application on the Applications page, and then select Details > Products > + Add product.
- You can also create or associate an application by editing a product from the Products page.
Generate client secret
A client secret must be generated for the client application to use the OAuth 2.0 client credentials flow. The secret is valid for one year but can be regenerated at any time.
On the Applications page, select the application that you created.
On the application's Overview page, next to Client Secret, select Add secret.
On the New client secret page, select Generate.
A client secret is generated and displayed in the Client secret field. Make sure to copy the secret value and store it securely. You won't be able to retrieve it again after you close the page.
Select Close.
(Optional) Review client application settings in Microsoft Entra ID
Optionally review settings of the client application in Microsoft Entra ID.
The application is named with the following format: APIMApplication<product-name>. For example, if the product name is Starter, the application name is similar to APIMApplicationStarter.
To review application settings in App registrations:
Sign in to the portal and navigate to Microsoft Entra ID > Manage > App registrations.
Select All applications.
Search for and select the client application created by API Management.
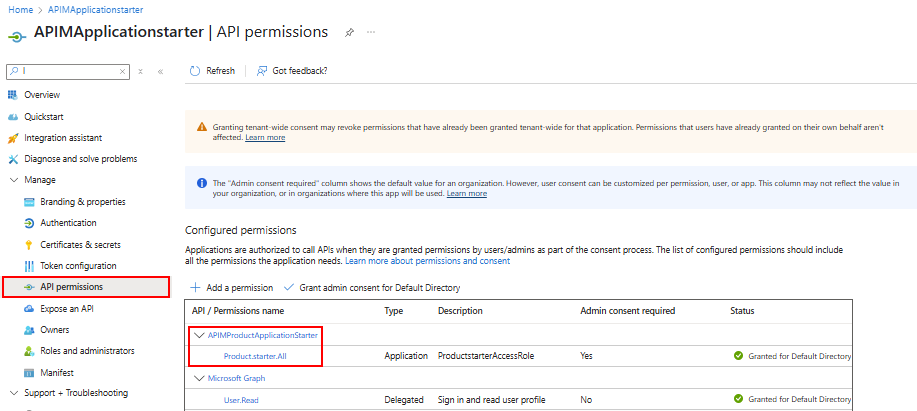
In the left menu, under Manage, select API permissions.
Confirm that the application has permissions to access the backend product application or applications.
For example, if the client application grants access to the Starter product, the application has Product.Starter.All permissions to access the APIMProductApplicationStarter application.
Get application settings in developer portal
Users can sign in to the developer portal to view the client applications that they own.
Sign in to the developer portal (
https://<your-apim-instance-name>.developer.azure-api.net) using a user account that was set as the owner of a client application.In the top navigation menu, select Applications.
Applications that the user owns appear in the list.
Select an application to view its details, such as the Client ID, Client secret, and Scope. These values are needed to generate a token to call the product APIs.

Create token and use with API call
After you enable application-based access for a product and register a client application, a developer or app can generate a token to call the product's APIs. The token must be included in the Authorization header of a request.
For example, a developer or app can run the following Azure PowerShell scripts to call the client application to generate a token, and then use the token to call a product API in API Management.
Caution
The following scripts are examples for testing purposes only. In production, use a secure method to store and retrieve the client secret.
Call client application to generate token
# Replace placeholder values with your own values.

$clientId = "00001111-aaaa-2222-bbbb-3333cccc4444" # Client (application) ID of client application
$clientSecret = "******" # Retrieve secret of client application in developer portal
$scopeOfOtherApp = "api://55556666-ffff-7777-aaaa-8888bbbb9999/.default" # Value of Audience in product properties
$tenantId = "aaaabbbb-0000-cccc-1111-dddd2222eeee" # Directory (tenant) ID in Microsoft Entra ID

$body = @{
    grant_type    = "client_credentials"
    client_id     = $clientId
    client_secret = $clientSecret
    scope         = $scopeOfOtherApp
}
$response = Invoke-RestMethod -Method Post -Uri "https://login.microsoftonline.com/$tenantId/oauth2/v2.0/token" -ContentType "application/x-www-form-urlencoded" -Body $body
$token = $response.access_token
Call product API using token
The token generated in the previous step is used to call a product API. The token is passed in the Authorization header of the request. The API Management instance validates the token and authorizes access to the API.
The following script shows an example call to the echo API.
# Gatewate endpoint to call. Update with URI of API operation you want to call.
$uri = "https://<gateway-hostname>/echo/resource?param1=sample"
$headers = @{
   "Authorization" = "Bearer $token"  # $token is the token generated in the previous script.
}
$body = @{
    "hello" = "world"
} | ConvertTo-Json -Depth 5

$getresponse = Invoke-RestMethod -Method Post -Uri $uri -ContentType "application/x-www-form-urlencoded" -Headers $headers -Body $body
Write-Host "Response:"
$getresponse | ConvertTo-Json -Depth 5
Troubleshooting
Internal server error when registering applications in the portal
If you're unable to list applications, or you receive an internal server error when registering applications in the portal, check the following:
- The Application Administrator role is assigned to the API Management instance's managed identity in Microsoft Entra ID.
- You're signed in to the portal at the following custom URL for the applications feature: https://portal.azure.com/?feature.customPortal=false&Microsoft_Azure_ApiManagement=applications. This URL is required to access the applications feature in API Management.