Note
Access to this page requires authorization. You can try signing in or changing directories.
Access to this page requires authorization. You can try changing directories.
In this quickstart, you learn how to create and deploy your first Aspire app to Azure App Service. Azure App Service provides a fully managed platform for hosting web apps with built-in infrastructure maintenance, security patching, and scaling.
You can complete this entire quickstart in your browser by using the official Aspire development container for GitHub Codespaces. By the end, you have a running Aspire app deployed to Azure App Service.
Important
The Aspire Azure App Service integration is currently in preview.
This quickstart uses a C# AppHost and .NET projects. Aspire also supports TypeScript AppHosts and polyglot application resources. For more information, see Aspire AppHost and What's new in Aspire 13.5.
Prerequisites
- An Azure account with an active subscription. Create an account for free.
- A GitHub account with access to GitHub Codespaces.
- The Azure CLI available in the codespace for authentication.
Create an Aspire starter app in a GitHub codespace
Create a repository from the Aspire development container template.
In the new repository, select Code > Codespaces > Create codespace on main.
Your browser opens a codespace with Visual Studio Code. The environment includes the Aspire CLI and a trusted local HTTPS development certificate.
For more information, see Develop with Aspire using GitHub Codespaces.
In the terminal, create a new Aspire app:
aspire new aspire-starter --name aspire-starter --output aspire-starterThe command creates a new directory named
aspire-starterwith a complete Aspire solution, including:- An AppHost project for orchestration
- A ServiceDefaults project for shared configurations
- Sample API and web frontend projects
Navigate into the project directory:
cd aspire-starter
Add Azure App Service integration
Configure your Aspire app to deploy to Azure App Service.
Add the Azure App Service hosting integration:
aspire add Aspire.Hosting.Azure.AppServiceThe
aspire addcommand detects the AppHost project and adds theAspire.Hosting.Azure.AppServicepackage. For more information, seeaspire add.Open the aspire-starter/aspire-starter.AppHost/AppHost.cs.
Add an Azure App Service environment after the
CreateBuilderline:builder.AddAzureAppServiceEnvironment("app-service-env");For more information, see Do I need an App Service environment to run Aspire apps?.
Add
.WithExternalHttpEndpoints()to theapiserviceproject. Your completeapiserviceresource should look like:var apiService = builder.AddProject<Projects.aspire_starter_ApiService>("apiservice") .WithExternalHttpEndpoints() .WithHttpHealthCheck("/health");Note
App Service supports only external HTTP and HTTPS endpoints and one distinct target port for each deployed app. The starter template already exposes the frontend endpoint. For more information, see Azure App Service Hosting integration.
From the solution root, run
aspire runto verify the AppHost locally.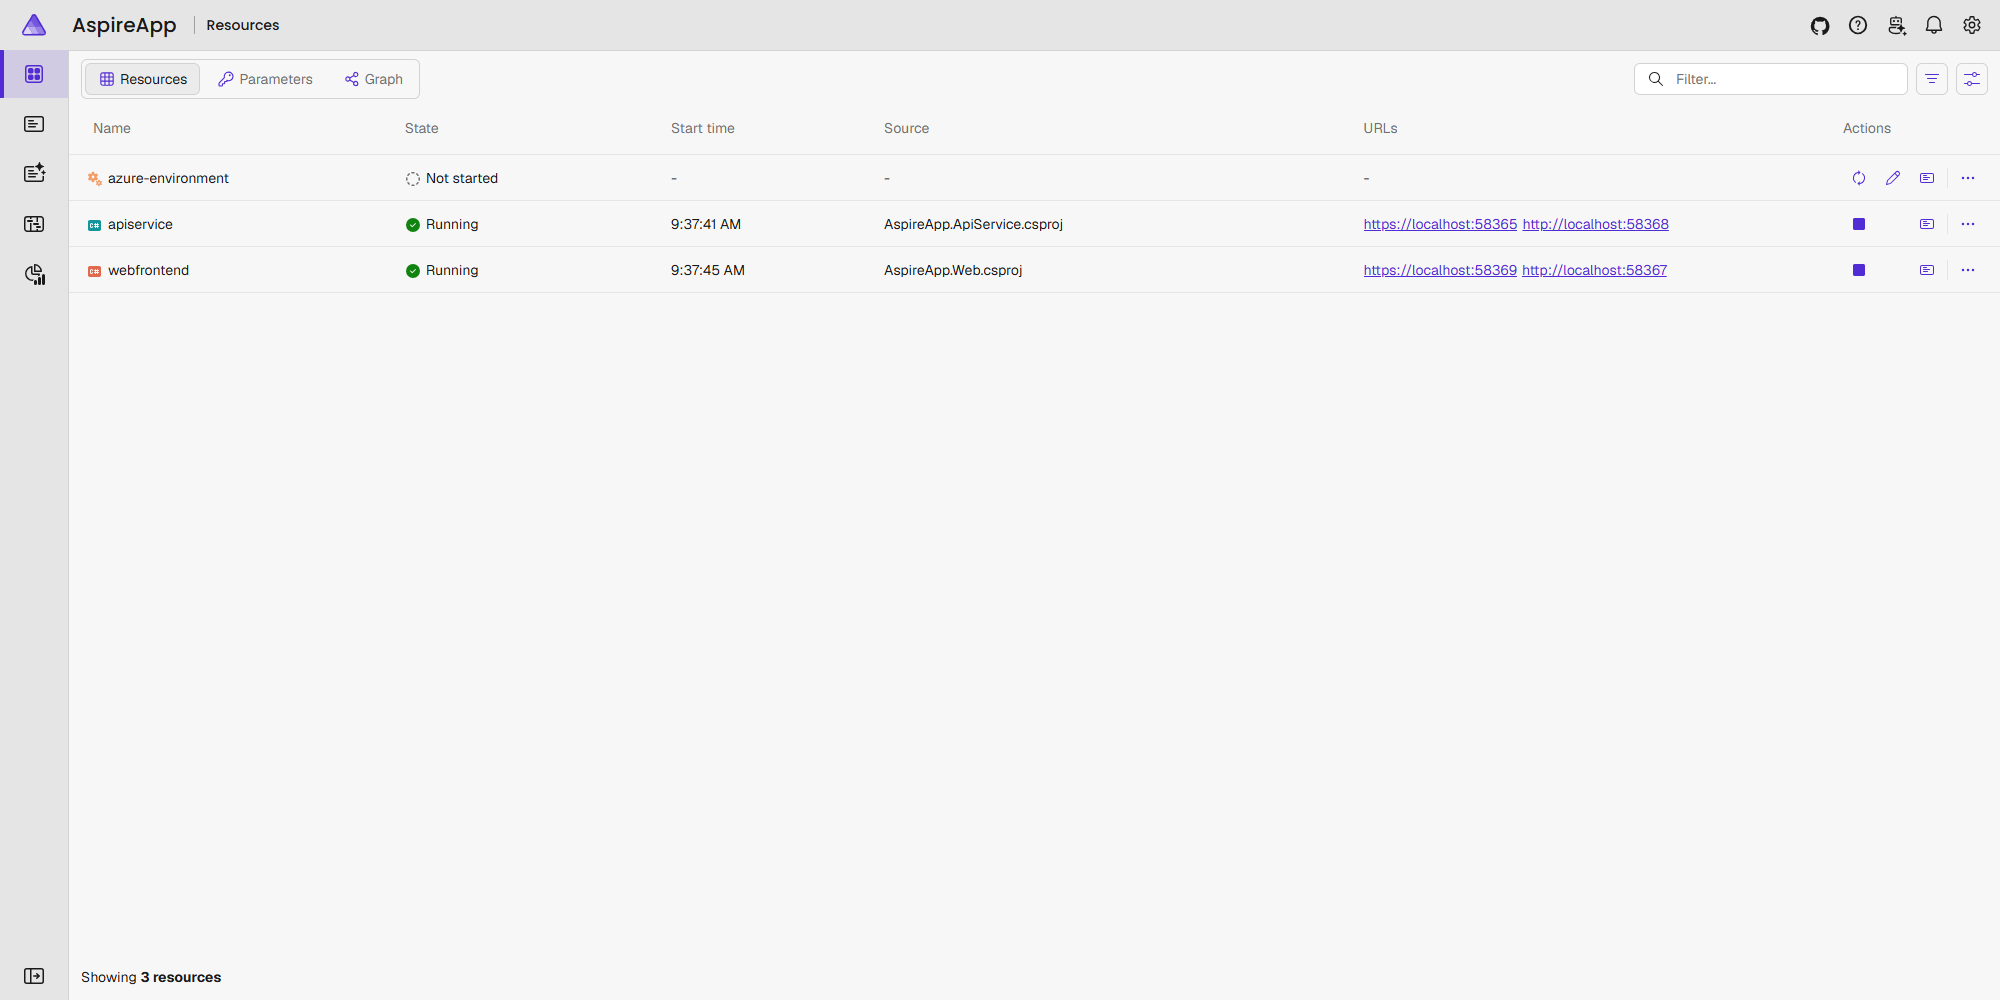
Deploy to Azure
Sign in to Azure:
az loginDeploy the application:
aspire deployWhen prompted, select your Azure subscription, location, and resource group. Aspire stores the selected deployment settings as AppHost user secrets so you can reuse them.
The
aspire deploycommand performs the following actions based on your AppHost.cs code:- Creates or reuses the selected resource group
- Creates an Azure App Service Plan
- Creates an Azure Container Registry
- Creates two App Service web apps (one for the API, one for the frontend)
- Creates a managed Aspire Dashboard resource
- Builds and containerizes your applications
- Pushes the containers to Azure Container Registry
- Deploys the containers to App Service
For more information about deployment settings and authentication, see Deploy to Azure.
When deployment completes, the command displays the endpoint URLs for the deployed services and Aspire Dashboard.
For more information about the deployment flow, see Deploy to Azure App Service.
Browse your Aspire app
In the deployment output, find the URL for the
webfrontendservice. It looks similar to:webfrontend: https://webfrontend-xxxxx.azurewebsites.netCopy the URL and open it in a new browser tab.
You see the Aspire starter app running in Azure App Service. The web frontend communicates with the API service, demonstrating the distributed architecture.
Try navigating through the app to verify it's working correctly.
To view the Aspire Dashboard, find the Aspire Dashboard URL in the deployment output and open it in a new browser tab.
View deployment details in Azure portal
Navigate to the Azure portal.
In the search bar, type resource groups and select Resource Groups.
Find and select the resource group that you chose during
aspire deploy.
You should see the following resources:
- App Service Plan: The hosting infrastructure
- App Services: Your webfrontend and apiservice apps
- Aspire Dashboard: A managed Azure resource protected by role-based access control (RBAC).
- Container Registry: Stores your container images
- User Assigned Identity: Provides secure access between services
Clean up resources
When you no longer need the Azure resources, delete them to avoid incurring charges.
In your codespace terminal, run:
aspire destroyWhen prompted, confirm that you want to destroy the deployed environment.
The command runs the destroy step registered by the App Service environment. For more information, see aspire destroy.
Caution
aspire destroy deletes the entire resource group, including resources that weren't created by Aspire. Review the target resource group before you confirm.
Frequently asked questions
- Do I need an App Service environment to run Aspire apps?
- How do I customize my App Service deployment?
Do I need an App Service environment to run Aspire apps?
No. Despite its name, AddAzureAppServiceEnvironment doesn't provision an App Service Environment in the Isolated tier. It creates an Aspire environment resource that represents the App Service hosting infrastructure for your application.
When you call AddAzureAppServiceEnvironment, it provisions:
- An Azure App Service Plan (Premium P0V3 tier on Linux by default)
- An Azure Container Registry for storing container images
- A user-assigned managed identity for secure access between services
This Aspire environment concept groups your resources together and provides the infrastructure needed to deploy your Aspire apps to Azure App Service.
How do I customize my App Service deployment?
You can customize your App Service deployment by modifying the AppHost.cs configuration. The Aspire Azure App Service integration provides several ways to customize your deployment:
- Configure the App Service Plan: Adjust SKU, tier, and scaling options
- Customize App Service settings: Add environment variables, connection strings, and app settings
- Configure infrastructure: Modify networking, authentication, and other Azure resources
- Use existing resources: Connect to existing App Service Plans or other Azure resources
For more information, see Configure an Aspire app for Azure App Service.
For more information about supported App Service workloads and deployment behavior, see Azure App Service Hosting integration and Deploy to Azure App Service.
Next steps
You successfully deployed an Aspire app to Azure App Service! Here are some next steps to explore: