Note
Access to this page requires authorization. You can try signing in or changing directories.
Access to this page requires authorization. You can try changing directories.
Azure App Service provides a highly scalable, self-patching web app hosting service. In this quickstart, you use the Maven Plugin for Azure App Service Web Apps to deploy a Java web application to a Linux Tomcat server in Azure App Service.
If Maven isn't your preferred development tool, check out similar articles for Java developers:
Prerequisites
-
If you don't have an Azure account, create a free account before you begin.
Run the commands in this quickstart by using Azure Cloud Shell, an interactive shell that you can use through your browser to work with Azure services. To use Cloud Shell:
Select the following Launch Cloud Shell button or go to https://shell.azure.com to open Cloud Shell in your browser.

Sign in to Azure if necessary, and make sure you're in the Bash environment of Cloud Shell.
Select Copy in a code block, paste the code into Cloud Shell, and run it.
Create a Java app
Run the following Maven command in Cloud Shell to create a new app named helloworld:
mvn archetype:generate "-DgroupId=example.demo" "-DartifactId=helloworld" "-DarchetypeArtifactId=maven-archetype-webapp" "-DarchetypeVersion=1.4" "-Dversion=1.0-SNAPSHOT"
Then change your working directory to the project folder by running cd helloworld.
Configure the Maven plugin
The App Service deployment process uses your Azure credentials from Cloud Shell automatically. The Maven plugin authenticates with OAuth or device sign-in. For more information, see Authentication.
Run the following Maven command to configure the deployment by setting the App Service operating system, Java version, and Tomcat version.
mvn com.microsoft.azure:azure-webapp-maven-plugin:2.14.1:config
- For Create new run configuration, type Y and then press Enter.
- For Define value for OS, type 2 for Linux, and then press Enter.
- For Define value for javaVersion, type 1 for Java 21, and then press Enter.
- For Define value for webContainer, type 1 for Tomcat 10.1, and then press Enter.
- For Define value for pricingTier, type 3 for P1V2, and then press Enter.
- For Confirm, type Y and then press Enter.
The output should look similar to the following code:
Please confirm webapp properties
AppName : helloworld-1745408005556
ResourceGroup : helloworld-1745408005556-rg
Region : centralus
PricingTier : P1V2
OS : Linux
Java Version: Java 21
Web server stack: Tomcat 10.1
Deploy to slot : false
Confirm (Y/N) [Y]:
[INFO] Saving configuration to pom.
[INFO] ------------------------------------------------------------------------
[INFO] BUILD SUCCESS
[INFO] ------------------------------------------------------------------------
[INFO] Total time:  01:36 min
[INFO] Finished at: 2025-04-23T11:34:44Z
[INFO] ------------------------------------------------------------------------
After you confirm your choices, the plugin adds the plugin element and required settings to your project's pom.xml file, which configures your web app to run in App Service.
The relevant portion of the pom.xml file should look similar to the following example.
<build>
    <plugins>
        <plugin>
            <groupId>com.microsoft.azure</groupId>
            <artifactId>>azure-webapp-maven-plugin</artifactId>
            <version>x.xx.x</version>
            <configuration>
                <schemaVersion>v2</schemaVersion>
                <resourceGroup>helloworld-1745408005556-rg</resourceGroup>
                <appName>helloworld-1745408005556</appName>
            ...
            </configuration>
        </plugin>
    </plugins>
</build>
The values for <appName> and <resourceGroup>, helloworld-1745408005556 and helloworld-1745408005556-rg for the demo app, are used later.
You can modify the configurations for App Service directly in your pom.xml file.
- For the complete list of configurations, see Common Configurations.
- For configurations specific to App Service, see Azure Web App: Configuration Details.
Deploy the app
With all the configuration ready in the pom.xml file, you can deploy your Java app to Azure with the following single command.
mvn package azure-webapp:deploy
Once you select from a list of available subscriptions, Maven deploys to Azure App Service. When deployment completes, your application is ready.
For this demo, the URL is http://helloworld-1745408005556.azurewebsites.net. When you open the URL with your local web browser, you should see the following app:
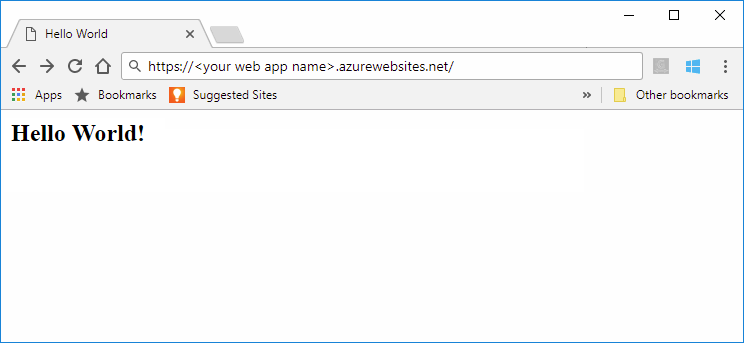
Congratulations! You deployed a Java app to App Service.
Clean up resources
You created the resources for this tutorial in an Azure resource group. If you no longer need them, you can delete the resource group and all its resources by running the following Azure CLI command in Cloud Shell.
az group delete --name helloworld-1745408005556-rg --yes
The command might take a while to run.
Azure App Service provides a highly scalable, self-patching web app hosting service. In this quickstart, you use the Maven Plugin for Azure App Service Web Apps to deploy a Java web application with an embedded Spring Boot, Quarkus, or Tomcat server to App Service. For more information, see azure-webapp-maven-plugin.
If Maven isn't your preferred development tool, check out similar articles for Java developers:
Prerequisites
-
If you don't have an Azure account, create a free account before you begin.
Run the commands in this quickstart by using Azure Cloud Shell, an interactive shell that you can use through your browser to work with Azure services. To use Cloud Shell:
Select the following Launch Cloud Shell button or go to https://shell.azure.com to open Cloud Shell in your browser.
Sign in to Azure if necessary, and make sure you're in the Bash environment of Cloud Shell.
Select Copy in a code block, paste the code into Cloud Shell, and run it.
Get the sample app
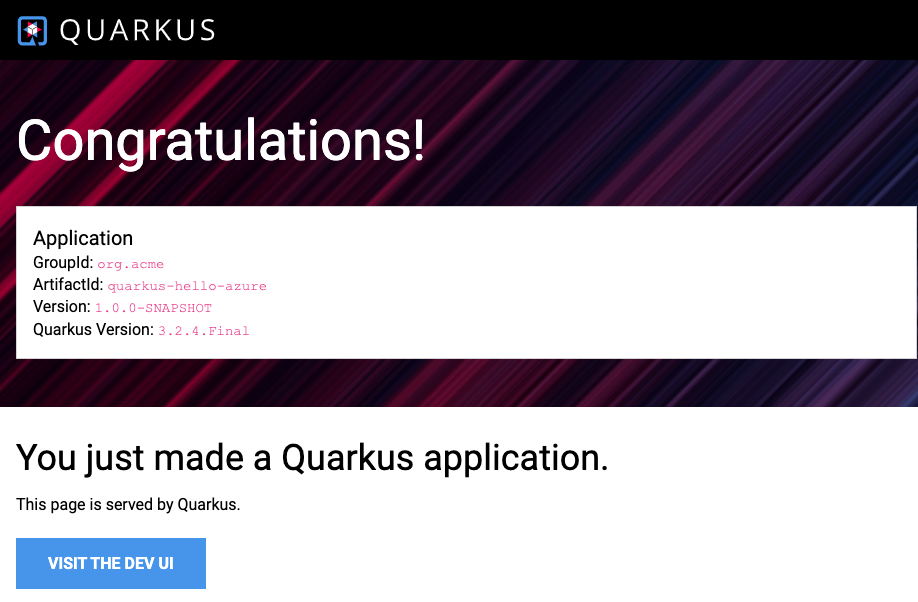
Choose the appropriate tab and follow instructions to get the sample Spring Boot, Quarkus, or Embedded Tomcat web app.
Download and extract the default Spring Boot web application template, or clone it by running the following command. Running the Spring CLI command spring boot new my-webapp also clones the web app.
git clone https://github.com/rd-1-2022/rest-service my-webapp
Then change your working directory to the project folder by running cd my-webapp.
Configure the Maven plugin
The App Service deployment process uses your Azure credentials from Cloud Shell automatically. The Maven plugin authenticates with OAuth or device sign-in. For more information, see Authentication.
Run the following Maven command to configure the deployment by setting the App Service operating system and Java version.
mvn com.microsoft.azure:azure-webapp-maven-plugin:2.14.1:config
- For Create new run configuration, type Y and then press Enter.
- For Define value for OS, type 2 for Linux, and then press Enter.
- For Define value for javaVersion, type 1 for Java 21, and then press Enter.
- For Define value for pricingTier, type 3 for P1v2, and then press Enter.
- For Confirm, type Y and then press Enter.
The output should look similar to the following code:
Please confirm webapp properties
AppName : <generated-app-name>
ResourceGroup : <generated-app-name>-rg
Region : centralus
PricingTier : P1v2
OS : Linux
Java Version: Java 21
Web server stack: Java SE
Deploy to slot : false
Confirm (Y/N) [Y]:
[INFO] Saving configuration to pom.
[INFO] ------------------------------------------------------------------------
[INFO] BUILD SUCCESS
[INFO] ------------------------------------------------------------------------
[INFO] Total time:  47.533 s
[INFO] Finished at: 2025-04-23T12:20:08Z
[INFO] ------------------------------------------------------------------------
After you confirm your choices, the plugin adds the plugin element and required settings to your project's pom.xml file, which configures your web app to run in App Service.
The relevant portion of the pom.xml file should look similar to the following example.
<build>
    <plugins>
        <plugin>
            <groupId>com.microsoft.azure</groupId>
            <artifactId>>azure-webapp-maven-plugin</artifactId>
            <version>x.xx.x</version>
            <configuration>
                <schemaVersion>v2</schemaVersion>
                <resourceGroup>generated-app-name-rg</resourceGroup>
                <appName>generated-app-name</appName>
            ...
            </configuration>
        </plugin>
    </plugins>
</build>
The values for <appName> and <resourceGroup> are used later.
You can modify the configurations for App Service directly in your pom.xml file.
- For the complete list of configurations, see Common Configurations.
- For configurations specific to App Service, see Azure Web App: Configuration Details.
Deploy the app
With all the configuration ready in your pom.xml file, you can deploy your Java app to Azure.
Build the JAR file using the following command.
mvn clean packageTip
Spring Boot produces two JAR files with
mvn package, but theazure-webapp-maven-pluginpicks the right JAR file to deploy automatically.Deploy the app to Azure by using the following command:
mvn azure-webapp:deployOnce you select from a list of available subscriptions, Maven deploys to Azure App Service. When deployment completes, your application is ready, and you see the following output:
[INFO] Successfully deployed the artifact to <URL>
[INFO] ------------------------------------------------------------------------
[INFO] BUILD SUCCESS
[INFO] ------------------------------------------------------------------------
[INFO] Total time:  02:20 min
[INFO] Finished at: 2023-07-26T12:47:50Z
[INFO] ------------------------------------------------------------------------
Open your app's default domain from the Overview page in the Azure portal, and append
/greetingto the URL. You should see the following app: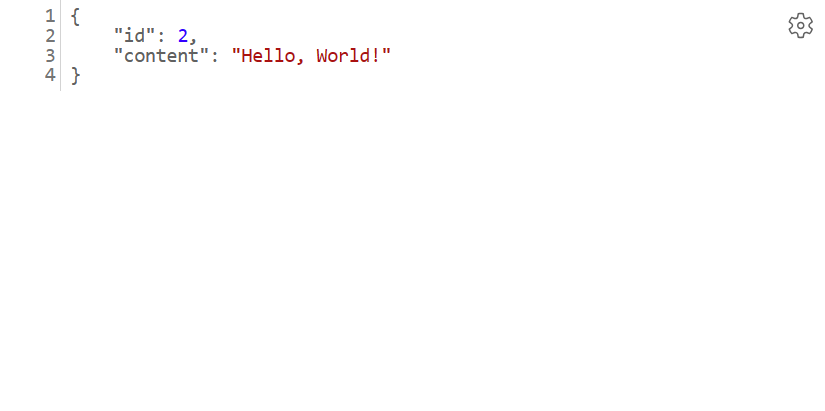
Congratulations! You deployed a Java app to App Service.
Clean up resources
You created the resources for this tutorial in an Azure resource group. If you no longer need them, you can delete the resource group and all its resources by running the following Azure CLI command in Cloud Shell.
az group delete --name <resource group name> --yes
For example, run az group delete --name quarkus-hello-azure-1690375364238-rg --yes. This command might take a while to run.
Azure App Service provides a highly scalable, self-patching web app hosting service. In this quickstart, you use the Maven Plugin for Azure App Service Web Apps to deploy a Java web application to a Linux JBoss EAP server in Azure App Service.
Note
JBoss EAP on App Service now supports "Bring Your Own License" (BYOL) billing, this allows customers with existing Red Hat subscriptions to apply those licenses directly to their JBoss EAP deployments on Azure App Service. Learn more.
If Maven isn't your preferred development tool, check out similar articles for Java developers:
Prerequisites
-
If you don't have an Azure account, create a free account before you begin.
Run the commands in this quickstart by using Azure Cloud Shell, an interactive shell that you can use through your browser to work with Azure services. To use Cloud Shell:
Select the following Launch Cloud Shell button or go to https://shell.azure.com to open Cloud Shell in your browser.
Sign in to Azure if necessary, and make sure you're in the Bash environment of Cloud Shell.
Select Copy in a code block, paste the code into Cloud Shell, and run it.
Create a Java app
Clone the Pet Store demo application.
git clone https://github.com/Azure-Samples/app-service-java-quickstartChange directory to the completed
petstore-ee7project and build it.cd app-service-java-quickstart git checkout 20230308 cd petstore-ee7 mvn clean installIf you see a message about being in detached HEAD state, you can ignore it. You don't make any Git commit in this quickstart, so detached HEAD state is appropriate.
Tip
The
petstore-ee7sample requires Java 11 or newer. Thebooty-duke-app-servicesample project requires Java 17. If your installed version of Java is less than 17, run the build from within the petstore-ee7 directory instead of at the top level.
Configure the Maven plugin
The App Service deployment process uses your Azure credentials from Cloud Shell automatically. The Maven plugin authenticates with OAuth or device sign-in. For more information, see Authentication.
Run the following Maven command to configure the deployment by setting the App Service operating system, Java version, and Jbosseap version.
mvn com.microsoft.azure:azure-webapp-maven-plugin:2.14.1:config
- For Create new run configuration, type Y and then press Enter.
- For Define value for OS, type 2 for Linux, and then press Enter.
- For Define value for javaVersion, type 2 for Java 17, and then press Enter. If you select Java 21, you don't see Jbosseap as an option later.
- For Define value for webContainer, type 4 for Jbosseap 7, and then press Enter.
- For Define value for pricingTier, type 1 for P1v3, and then press Enter.
- For Confirm, type Y and then press Enter.
The output should look similar to the following code:
Please confirm webapp properties
AppName : petstoreee7-1745409173307
ResourceGroup : petstoreee7-1745409173307-rg
Region : centralus
PricingTier : P1v3
OS : Linux
Java Version: Java 17
Web server stack: Jbosseap 4
Deploy to slot : false
Confirm (Y/N) [Y]:
[INFO] Saving configuration to pom.
[INFO] ------------------------------------------------------------------------
[INFO] BUILD SUCCESS
[INFO] ------------------------------------------------------------------------
[INFO] Total time:  01:36 min
[INFO] Finished at: 2025-04-23T11:54:22Z
[INFO] ------------------------------------------------------------------------
After you confirm your choices, the plugin adds the plugin element and required settings to your project's pom.xml file, which configures your web app to run in App Service.
The relevant portion of the pom.xml file should look similar to the following example.
<build>
    <plugins>
        <plugin>
            <groupId>com.microsoft.azure</groupId>
            <artifactId>>azure-webapp-maven-plugin</artifactId>
            <version>x.xx.x</version>
            <configuration>
                <schemaVersion>v2</schemaVersion>
                <resourceGroup>petstoreee7-1745409173307-rg</resourceGroup>
                <appName>petstoreee7-1745409173307</appName>
            ...
            </configuration>
        </plugin>
    </plugins>
</build>
The values for <appName> and <resourceGroup>, petstoreee7-1745409173307 and petstoreee7-1745409173307-rg in the demo app, are used later.
You can modify the configurations for App Service directly in your pom.xml file.
- For the complete list of configurations, see Common Configurations.
- For configurations specific to App Service, see Azure Web App: Configuration Details.
Deploy the app
With all the configuration ready in your pom.xml file, you can deploy your Java app to Azure with the following single command.
# Disable testing, as it requires Wildfly to be installed locally.
mvn package azure-webapp:deploy -DskipTests
Once you select from a list of available subscriptions, Maven deploys to Azure App Service. When deployment completes, your application is ready.
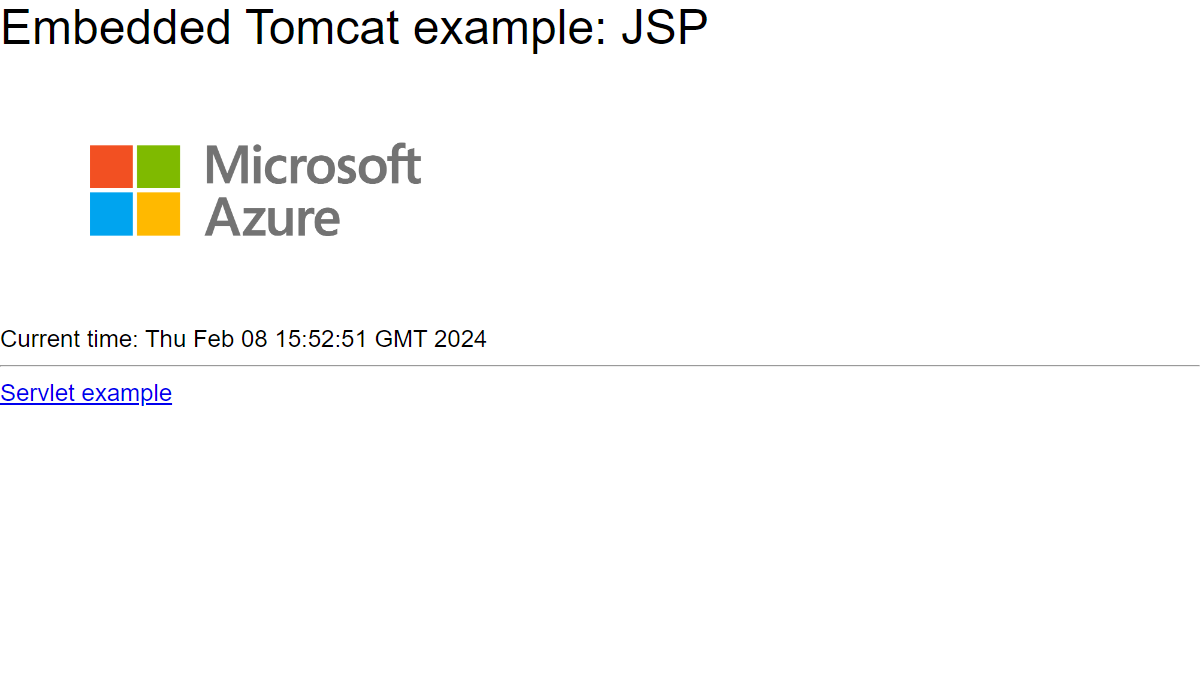
For this demo app, the URL is http://petstoreee7-1745409173307.azurewebsites.net. When you open the URL with your local web browser, you should see the following app:
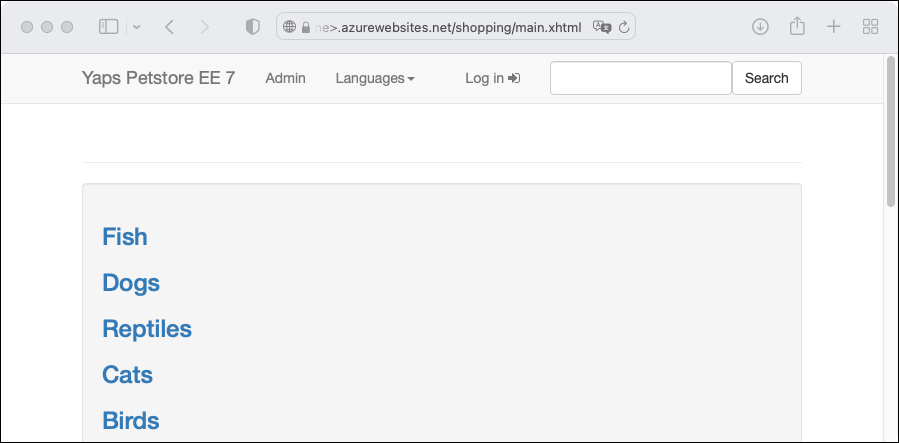
Congratulations! You deployed a Java app to App Service.
Clean up resources
You created the resources for this tutorial in an Azure resource group. If you no longer need them, you can delete the resource group and all its resources by running the following Azure CLI command in Cloud Shell.
az group delete --name petstoreee7-1745409173307-rg --yes
The command might take a while to run.
Related content
- Tutorial: Build a Tomcat web app with Azure App Service on Linux and MySQL
- Tutorial: Build a Java Spring Boot web app with Azure App Service on Linux and Azure Cosmos DB
- Configure continuous deployment to Azure App Service
- Azure App Service on Linux pricing
- Enable diagnostic logging for apps in Azure App Service
- Scale up an app in Azure App Service
- Azure for Java developer documentation
- Deploy and configure a Java SE, Tomcat, or JBoss EAP app in Azure App Service
- Tutorial: Use a custom domain and a managed certificate to secure your app