Note
Access to this page requires authorization. You can try signing in or changing directories.
Access to this page requires authorization. You can try changing directories.
To do end to end TLS, Application Gateway requires the backend instances to be allowed by uploading authentication/trusted root certificates. For the v1 SKU, authentication certificates are required, but for the v2 SKU trusted root certificates are required to allow the certificates.
In this article, you learn how to:
- Export authentication certificate from a backend certificate (for v1 SKU)
- Export trusted root certificate from a backend certificate (for v2 SKU)
Prerequisites
An existing backend certificate is required to generate the authentication certificates or trusted root certificates required for allowing backend instances with Application Gateway. The backend certificate can be the same as the TLS/SSL certificate or different for added security. Application Gateway doesn't provide you with any mechanism to create or purchase a TLS/SSL certificate. For testing purposes, you can create a self-signed certificate but you shouldn't use it for production workloads.
Export authentication certificate (for v1 SKU)
An authentication certificate is required to allow backend instances in Application Gateway v1 SKU. The authentication certificate is the public key of backend server certificates in Base-64 encoded X.509(.CER) format. In this example, you'll use a TLS/SSL certificate for the backend certificate and export its public key to be used as authentication certification. Also, in this example, you'll use the Windows Certificate Manager tool to export the required certificates. You can choose to use any other tool that's convenient.
From your TLS/SSL certificate, export the public key .cer file (not the private key). The following steps help you export the .cer file in Base-64 encoded X.509(.CER) format for your certificate:
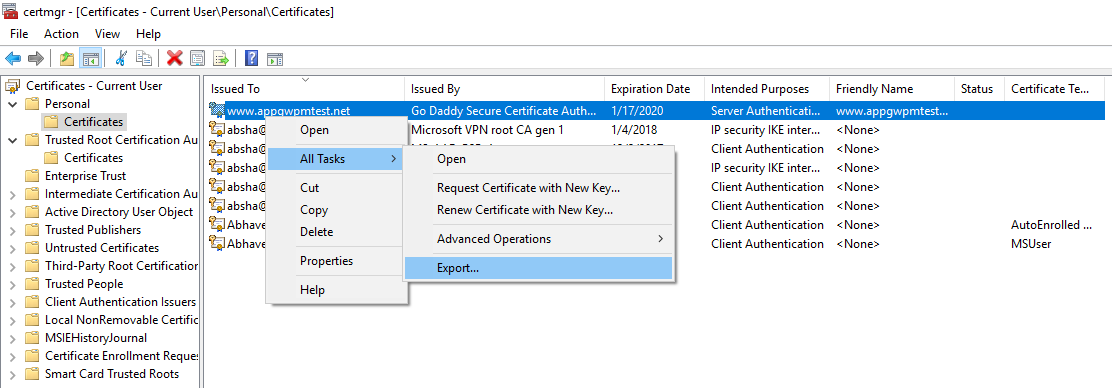
To obtain a .cer file from the certificate, open Manage user certificates. Locate the certificate (typically in 'Certificates - Current User\Personal\Certificates') and right-click. Click All Tasks, and then click Export. This opens the Certificate Export Wizard. If you want to open Certificate Manager in current user scope using PowerShell, you type certmgr in the console window.
Note
If you can't find the certificate under Current User\Personal\Certificates, you may have accidentally opened "Certificates - Local Computer" rather than "Certificates - Current User").
In the Wizard, click Next.

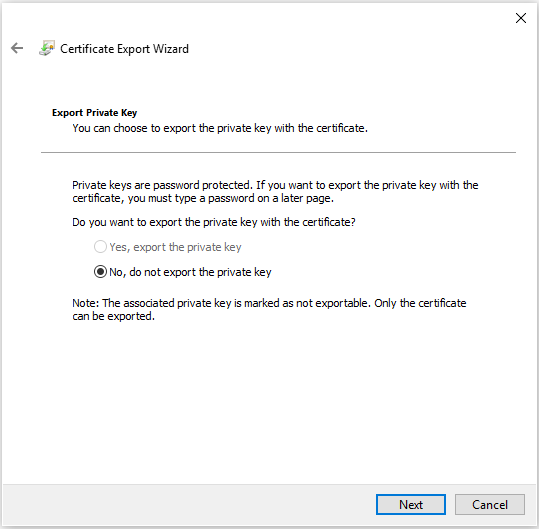
Select No, do not export the private key, and then click Next.
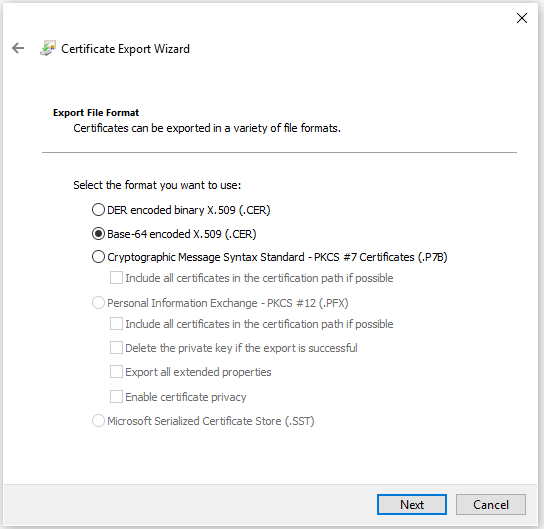
On the Export File Format page, select Base-64 encoded X.509 (.CER)., and then click Next.
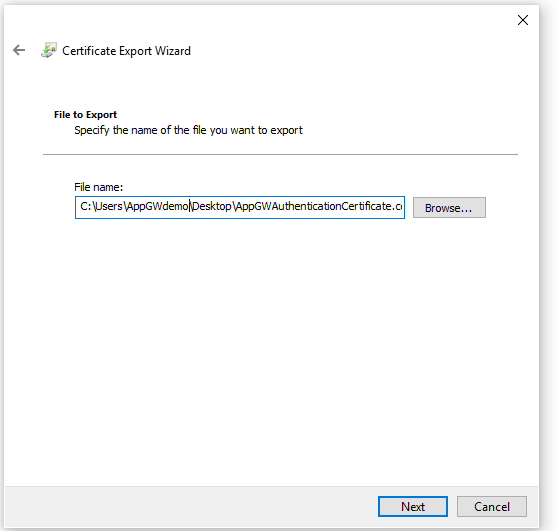
For File to Export, Browse to the location to which you want to export the certificate. For File name, name the certificate file. Then, click Next.
Click Finish to export the certificate.
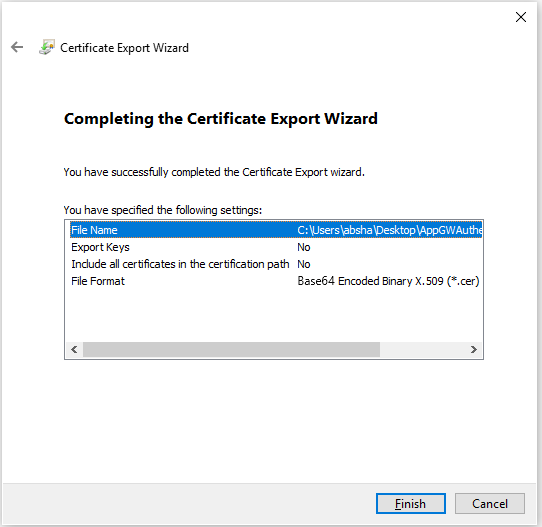
Your certificate is successfully exported.

The exported certificate looks similar to this:

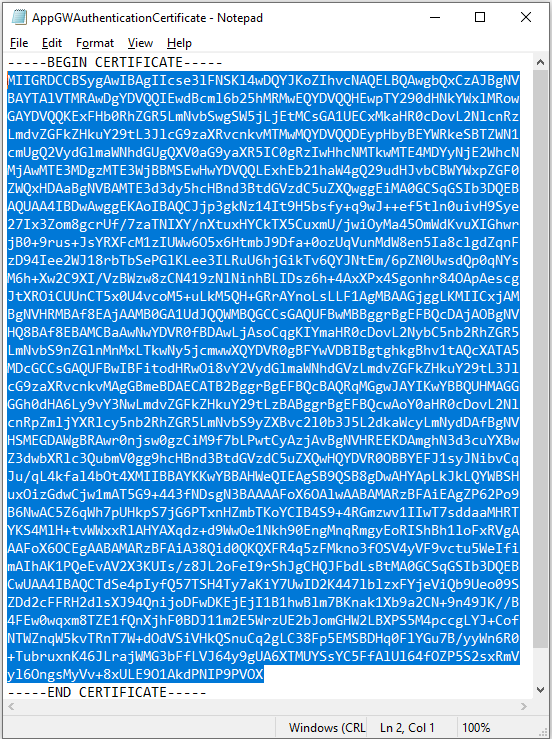
If you open the exported certificate using Notepad, you see something similar to this example. The section in blue contains the information that is uploaded to application gateway. If you open your certificate with Notepad and it doesn't look similar to this, typically this means you didn't export it using the Base-64 encoded X.509(.CER) format. Additionally, if you want to use a different text editor, understand that some editors can introduce unintended formatting in the background. This can create problems when uploaded the text from this certificate to Azure.
Export trusted root certificate (for v2 SKU)
Trusted root certificate is required to allow backend instances in application gateway v2 SKU. The root certificate is a Base-64 encoded X.509(.CER) format root certificate from the backend server certificates. In this example, we'll use a TLS/SSL certificate for the backend certificate, export its public key, and then export the root certificate of the trusted CA from the public key in base64 encoded format to get the trusted root certificate. The intermediate certificate(s) should be bundled with server certificate and installed on the backend server.
The following steps help you export the .cer file for your certificate:
Use the steps 1 - 8 mentioned in the previous section Export authentication certificate (for v1 SKU) to export the public key from your backend certificate.
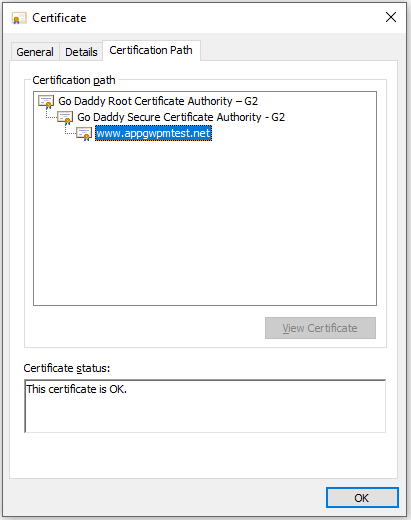
Once the public key has been exported, open the file.
Move to the Certification Path view to view the certification authority.
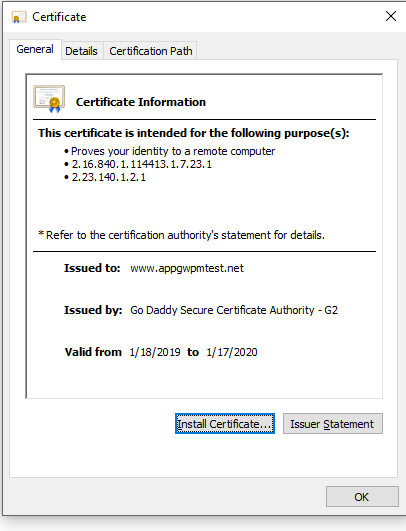
Select the root certificate and click on View Certificate.
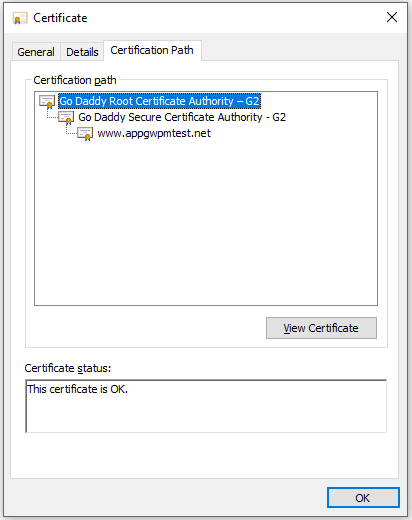
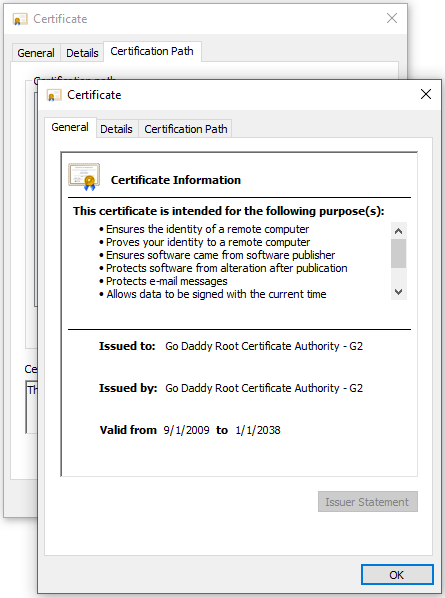
You should see the root certificate details.
Move to the Details view and click Copy to File...
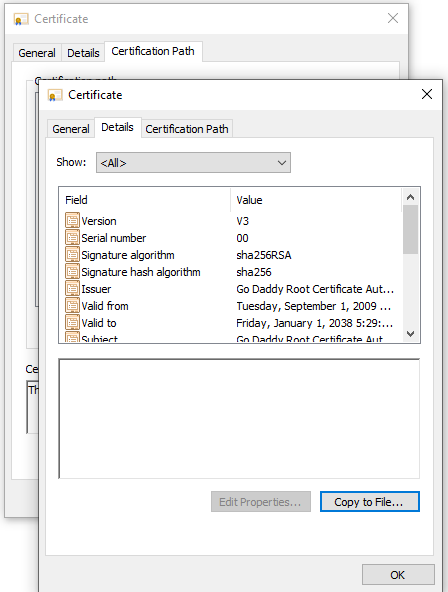
At this point, you've extracted the details of the root certificate from the backend certificate. You'll see the Certificate Export Wizard. Now use steps 2-9 mentioned in the preceding section Export authentication certificate from a backend certificate (for v1 SKU) to export the trusted root certificate in the Base-64 encoded X.509(.CER) format.
Next steps
Now you have the authentication certificate/trusted root certificate in Base-64 encoded X.509(.CER) format. You can add this to the application gateway to allow your backend servers for end to end TLS encryption. See Configure end to end TLS by using Application Gateway with PowerShell.