Note
Access to this page requires authorization. You can try signing in or changing directories.
Access to this page requires authorization. You can try changing directories.
Targeting is a feature management strategy that developers can use to progressively roll out new features to their user base. The strategy is built on the concept of targeting a set of users known as the targeted audience. An audience is made up of specific users, groups, and a designated percentage of the entire user base.
The users can be actual user accounts, but they can also be machines, devices, or any uniquely identifiable entities to which you want to roll out a feature.
The groups are up to your application to define. For example, when you target user accounts, you can use Microsoft Entra groups or groups that denote user locations. When you target machines, you can group them based on rollout stages. You can base groups on any common attributes that you want to use to categorize your audience.
Feature filters provide a way for you to enable or disable a feature flag conditionally. The targeting filter is one of the feature management library's built-in feature filters. You can use a targeting filter to turn a feature on or off for targeted audiences.
This article shows you how to add and configure a targeting filter for a feature flag.
Prerequisites
- An Azure subscription. If you don't have one, create a free account.
- An Azure App Configuration store.
Add a targeting filter
Create a feature flag named Beta in your App Configuration store and open it for editing. For more information about how to add and edit a feature flag, see Create a feature flag and Edit feature flags.
In the Edit feature flag dialog, select Enable feature flag if it isn't already selected. Select Use feature filter, and then select Create.

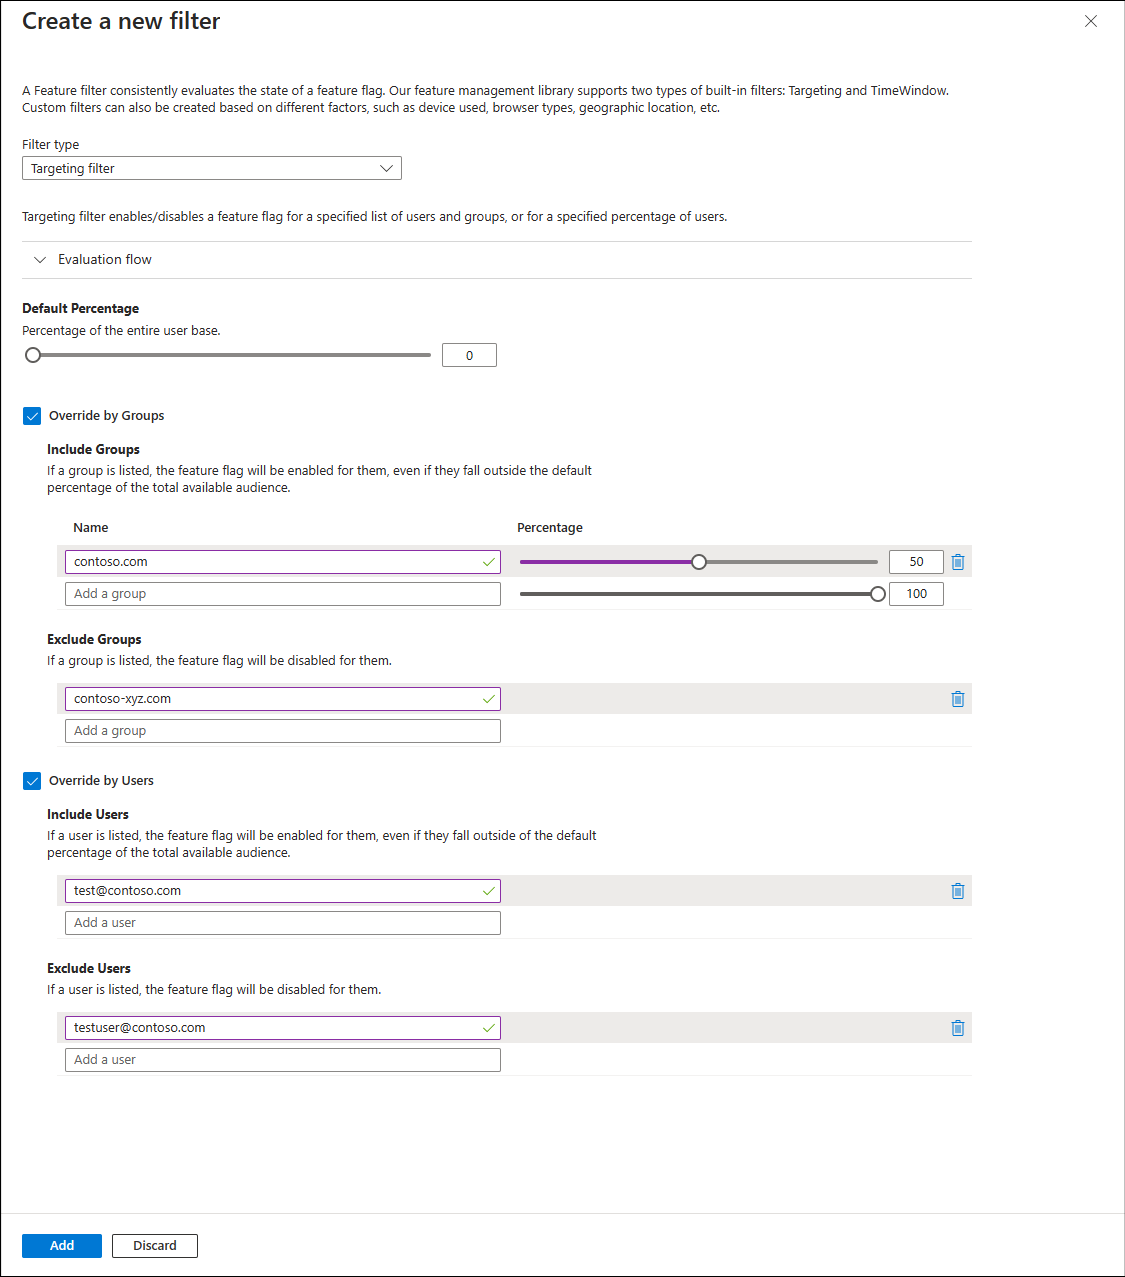
In the Create a new filter dialog, make the following selections:
- Under Filter type, select Targeting filter.
- Select Override by Groups.
- Select Override by Users.
Enter the following information:
- Under Default Percentage, enter 0.
- Under Include Groups:
- For Name, enter
contoso.com. - For Percentage, enter 50.
- For Name, enter
- Under Exclude Groups, enter
contoso-xyz.com. - Under Include Users, enter
test@contoso.com. - Under Exclude Users, enter
testuser@contoso.com.
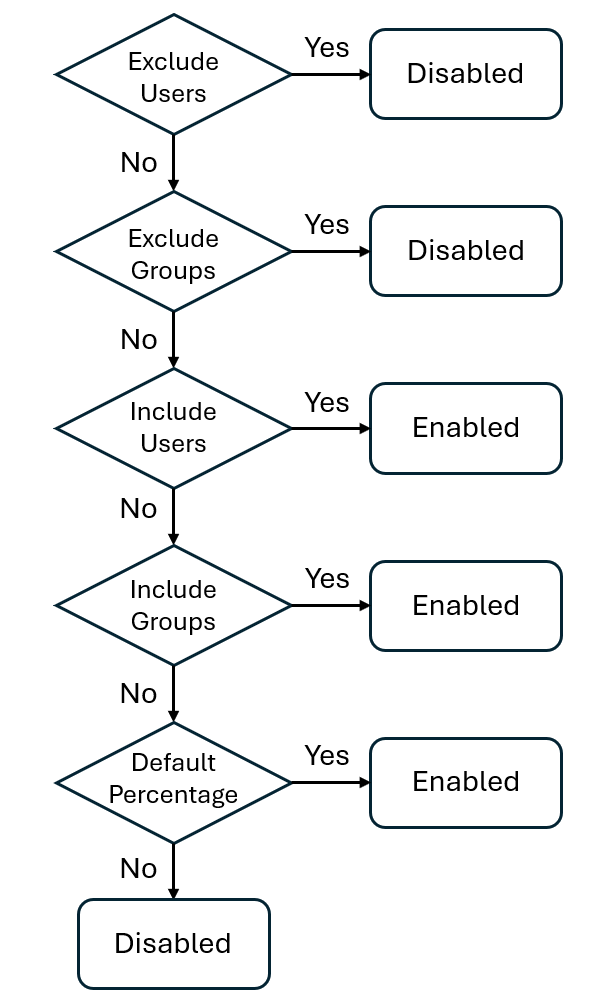
These settings result in the following behavior:
- The feature flag is always disabled for user
testuser@contoso.com, becausetestuser@contoso.comis listed in the Exclude Users section. - The feature flag is always disabled for users in the
contoso-xyz.comgroup, becausecontoso-xyz.comis listed in the Exclude Groups section. - The feature flag is always enabled for user
test@contoso.com, becausetest@contoso.comis listed in the Include Users section. - The feature flag is enabled for 50 percent of users in the
contoso.comgroup, becausecontoso.comis listed in the Include Groups section with a Percentage value of 50. - The feature is always disabled for all other users, because the Default percentage value is set to 0.
The targeting filter is evaluated for a given user as shown in the following diagram.
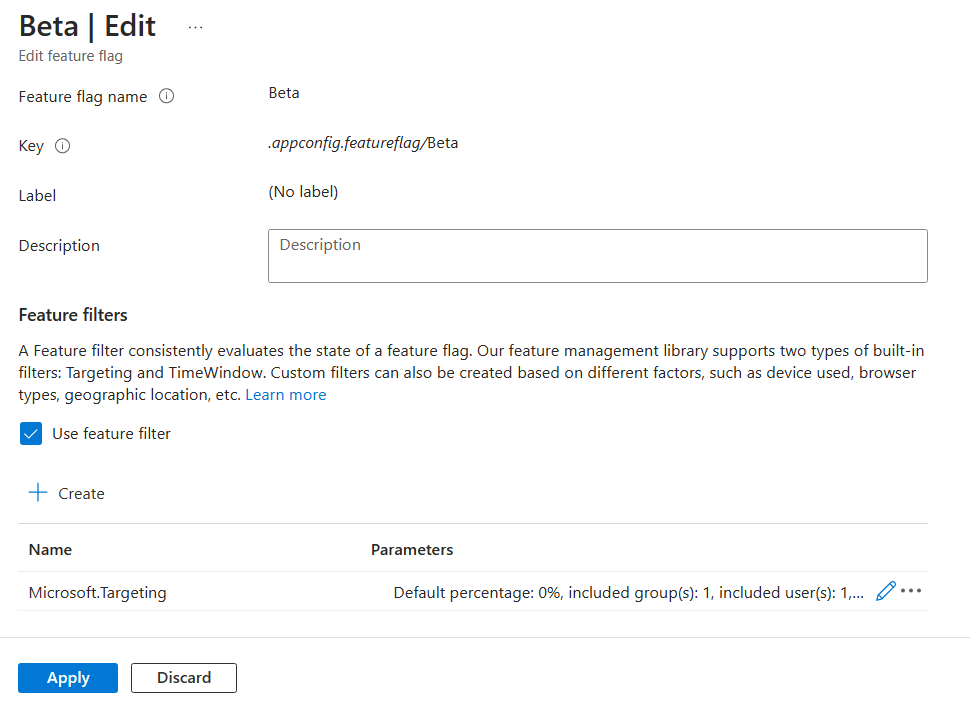
To save the configuration of the targeting filter, select Add. The Edit feature flag page lists the targeting feature filter and its parameters.
To save the feature flag, select Apply.
The targeting filter is added to your feature flag. This targeting filter uses the targeting rule you configured to enable or disable the feature flag for specific users and groups.
To use the feature flag with the targeting filter in your application, see the instructions that are appropriate for your language or platform:


Next steps
To find out more about feature filters, continue to the following articles: