Note
Access to this page requires authorization. You can try signing in or changing directories.
Access to this page requires authorization. You can try changing directories.
Feature filters allow a feature flag to be enabled or disabled conditionally. The time window filter is one of the feature management library's built-in feature filters. It allows you to turn on or off a feature on a schedule. For example, when you have a new product announcement, you can use it to unveil a feature automatically at a planned time. You can also use it to discontinue a promotional discount as scheduled after the marketing campaign ends.
In this article, you learn how to add and configure a time window filter for your feature flags.
Add a time window filter
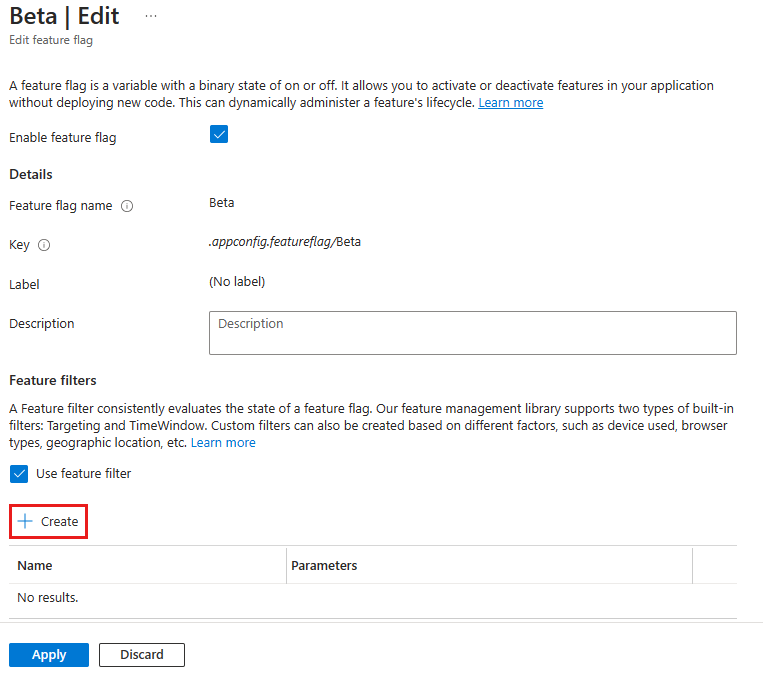
Create a feature flag named Beta in the Feature Manager menu of your App Configuration store and move to the right end of the feature flag you want to modify, then select the More actions ellipsis (...) action and Edit. For more information about how to add and edit a feature flag, see Manage feature flags.
In the Edit pane that opens, check the Enable feature flag checkbox if it's currently unchecked, then check the Use feature filter checkbox and select Create.
The Create a new filter pane opens on the side. Under Filter type, select Time window filter in the dropdown.
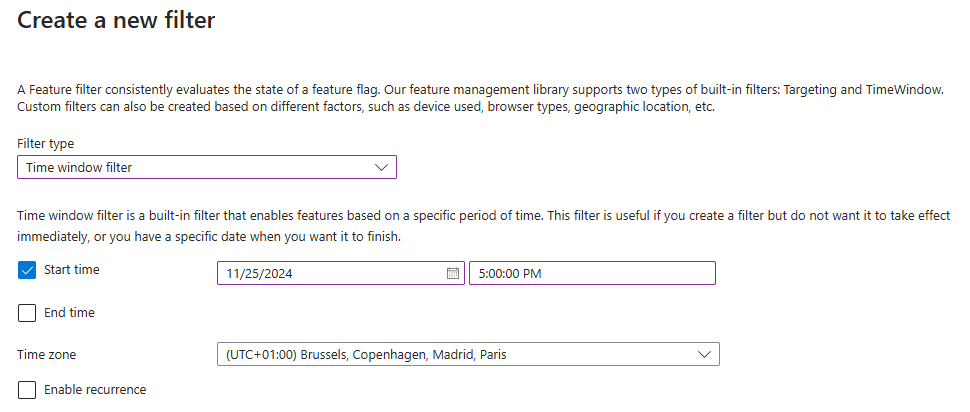
A time window filter includes a start time and/or an end time. Both Start time and End time checkboxes are checked by default.
- Setting a start time allows you to enable the feature flag on a specific date and time. A time window filter with no start time is active as soon as you save the feature filter details.
- Setting an end time allows you to disable the feature flag at a specific date and time. A time window filter with no end time remains active until you disable it.
Uncheck the end time and enter a start time a few minutes ahead of your current time to schedule the Beta feature to be enabled automatically in a few minutes and never be disabled once enabled.
A time zone is selected by default, based on your browser's current time zone. Optionally select another time zone.
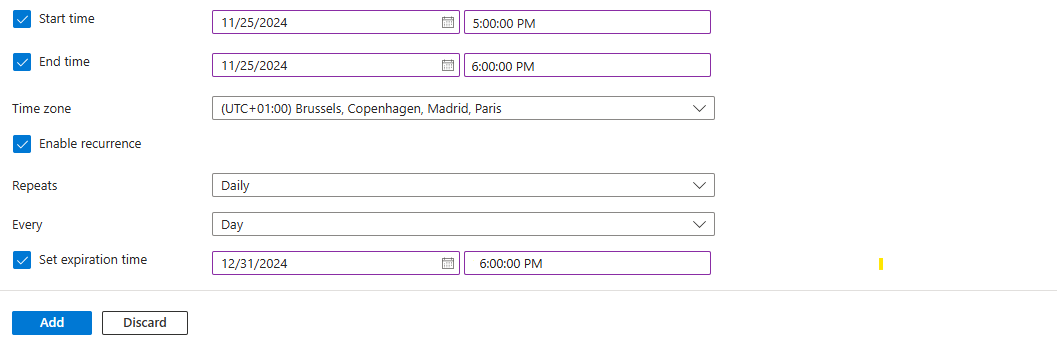
Optionally set a time window recurrence. This option allows you to define a repeating time window, ensuring that the feature flag is automatically activated and deactivated according to your specified schedule, such as during periods of low or high traffic.
A recurring time window filter always has a start time and an end time, defining a base time window that recurs according to the recurrence pattern you specify. Enter a Start time and an End time, then select the Enable recurrence checkbox, and select the recurrence details, including a recurrence pattern and an expiration time.
In this example, you activate the Beta feature daily from 5:00 PM to 6:00 PM, starting November 25 and continuing until December 31. You can alternatively select a weekly frequency and select one or more days of the week for the recurrence.
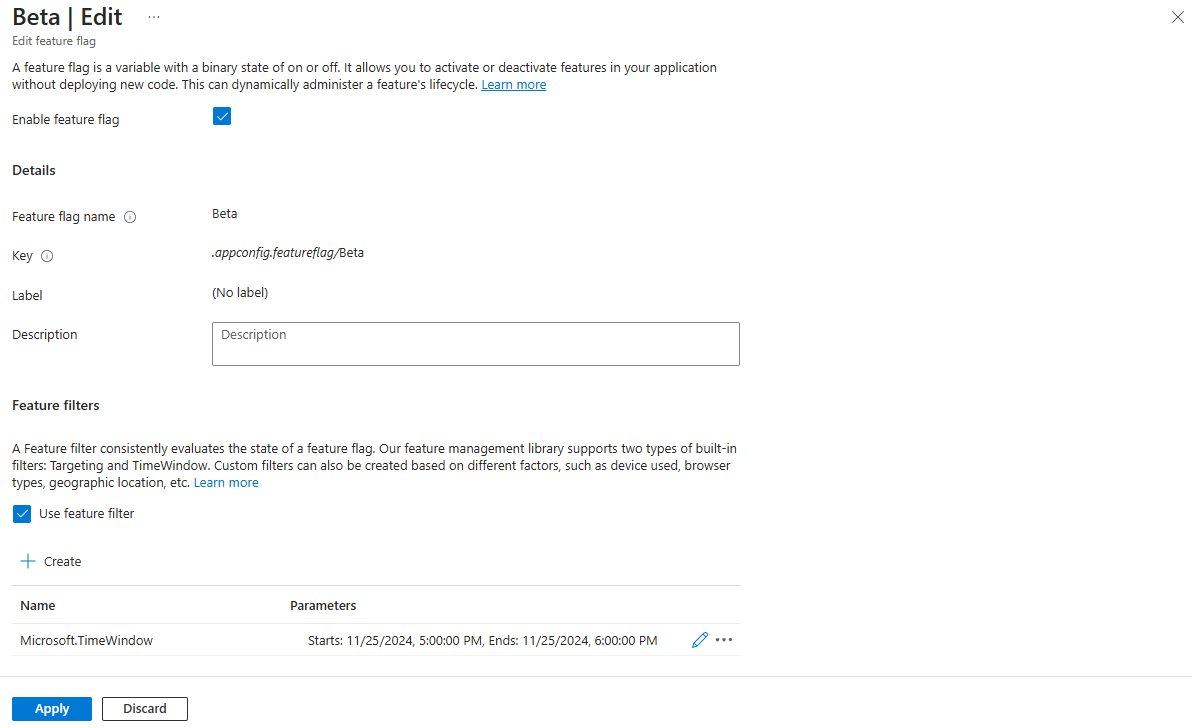
Select Add to save the configuration of the time window filter and return to the Edit feature flag screen.
The time window filter is now listed in the feature filter details, under Feature filters. Select Apply to save the feature flag with the new feature filter.
Now, you successfully added a time window filter to a feature flag.
Continue to the following instructions to use the feature flag with a time window filter in your application for the language or platform you are using.
Next steps
To learn more about the feature filters, continue to the following documents: