Note
Access to this page requires authorization. You can try signing in or changing directories.
Access to this page requires authorization. You can try changing directories.
In this quickstart, you incorporate the feature management capability from Azure App Configuration into a .NET background service. You use App Configuration to centrally store and manage your feature flags.
Prerequisites
Feature management support extends the dynamic configuration feature in App Configuration. The example in this quickstart builds on the .NET background service app introduced in the dynamic configuration tutorial. Before you continue, finish the following tutorial to create a .NET background service app with dynamic configuration first.
Add a feature flag
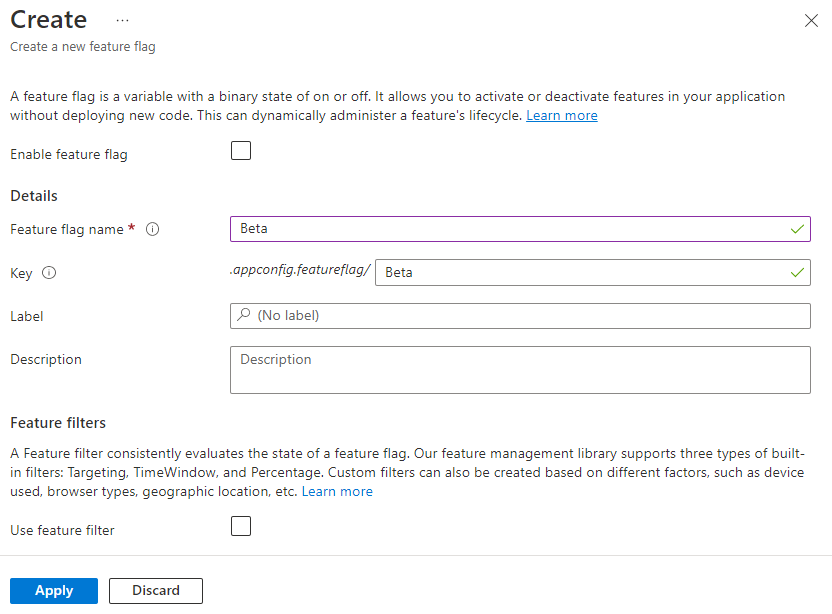
Add a feature flag called Beta to the App Configuration store and leave Label and Description with their default values. For more information about how to add feature flags to a store using the Azure portal or the CLI, go to Create a feature flag.
Use the feature flag
Add references to the
Microsoft.FeatureManagementNuGet package by running the following command:dotnet add package Microsoft.FeatureManagementRun the following command to restore packages for your project:
dotnet restoreOpen Program.cs and add the following statement:
using Microsoft.FeatureManagement;Add a call to the
UseFeatureFlagsmethod inside theAddAzureAppConfigurationcall and register feature management services.// Existing code in Program.cs // ... ... builder.Configuration.AddAzureAppConfiguration(options => { string endpoint = Environment.GetEnvironmentVariable("Endpoint"); options.Connect(new Uri(endpoint), new DefaultAzureCredential()); // Use feature flags options.UseFeatureFlags(); // Register the refresher so that the Worker service can consume it through dependency injection builder.Services.AddSingleton(options.GetRefresher()); }); // Register feature management services builder.Services.AddFeatureManagement(); // The rest of existing code in Program.cs // ... ...Tip
When no parameter is passed to the
UseFeatureFlagsmethod, it loads all feature flags with no label in your App Configuration store. The default refresh interval of feature flags is 30 seconds. You can customize this behavior via theFeatureFlagOptionsparameter. For example, the following code snippet loads only feature flags that start with TestApp: in their key name and have the label dev. The code also changes the refresh interval time to 5 minutes. Note that this refresh interval time is separate from that for regular key-values.options.UseFeatureFlags(featureFlagOptions => { featureFlagOptions.Select("TestApp:*", "dev"); featureFlagOptions.CacheExpirationInterval = TimeSpan.FromMinutes(5); });Open Worker.cs and add the following statement:
using Microsoft.FeatureManagement;Update the constructor of the
Workerservice to obtain instances ofIConfigurationRefresherandIVariantFeatureManagerthrough dependency injection.public class Worker : BackgroundService { private readonly ILogger<Worker> _logger; private readonly IConfigurationRefresher _refresher; private readonly IVariantFeatureManager _featureManager; public Worker(ILogger<Worker> logger, IConfigurationRefresher refresher, IVariantFeatureManager featureManager) { _logger = logger ?? throw new ArgumentNullException(nameof(logger)); _refresher = refresher ?? throw new ArgumentNullException(nameof(refresher)); _featureManager = featureManager ?? throw new ArgumentNullException(nameof(featureManager)); } // ... ... }Update the
ExecuteAsyncmethod to log a message depending on the state of the feature flag.The
TryRefreshAsyncmethod is called at the beginning of every iteration of the task execution to refresh the feature flag. It will be a no-op if the refresh interval time window isn't reached. Theawaitoperator is not used so that the feature flags are refreshed without blocking the current iteration of the task execution. In that case, later iterations of the task execution will get updated value.protected override async Task ExecuteAsync(CancellationToken stoppingToken) { while (!stoppingToken.IsCancellationRequested) { // Intentionally not await TryRefreshAsync to avoid blocking the execution. _refresher.TryRefreshAsync(stoppingToken); if (_logger.IsEnabled(LogLevel.Information)) { if (await _featureManager.IsEnabledAsync("Beta")) { _logger.LogInformation("[{time}]: Worker is running with Beta feature.", DateTimeOffset.Now); } else { _logger.LogInformation("[{time}]: Worker is running.", DateTimeOffset.Now); } } await Task.Delay(TimeSpan.FromSeconds(30), stoppingToken); } }
Build and run the app locally
Run the following command to build the app:
dotnet buildAfter the build successfully completes, run the following command to run the app locally:
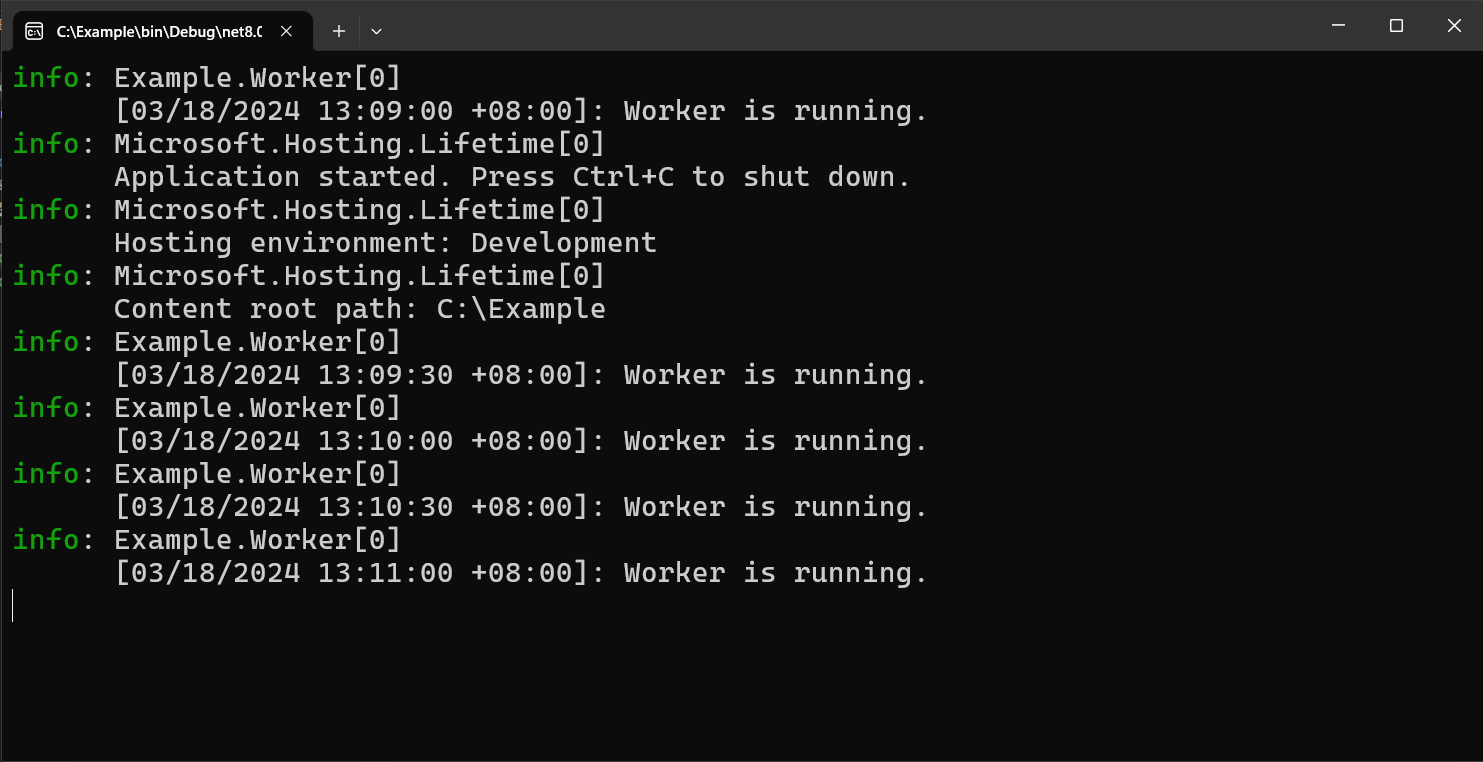
dotnet runYou should see the following outputs in the console.
Sign in to the Azure portal. Select All resources, and select the App Configuration store that you created previously.
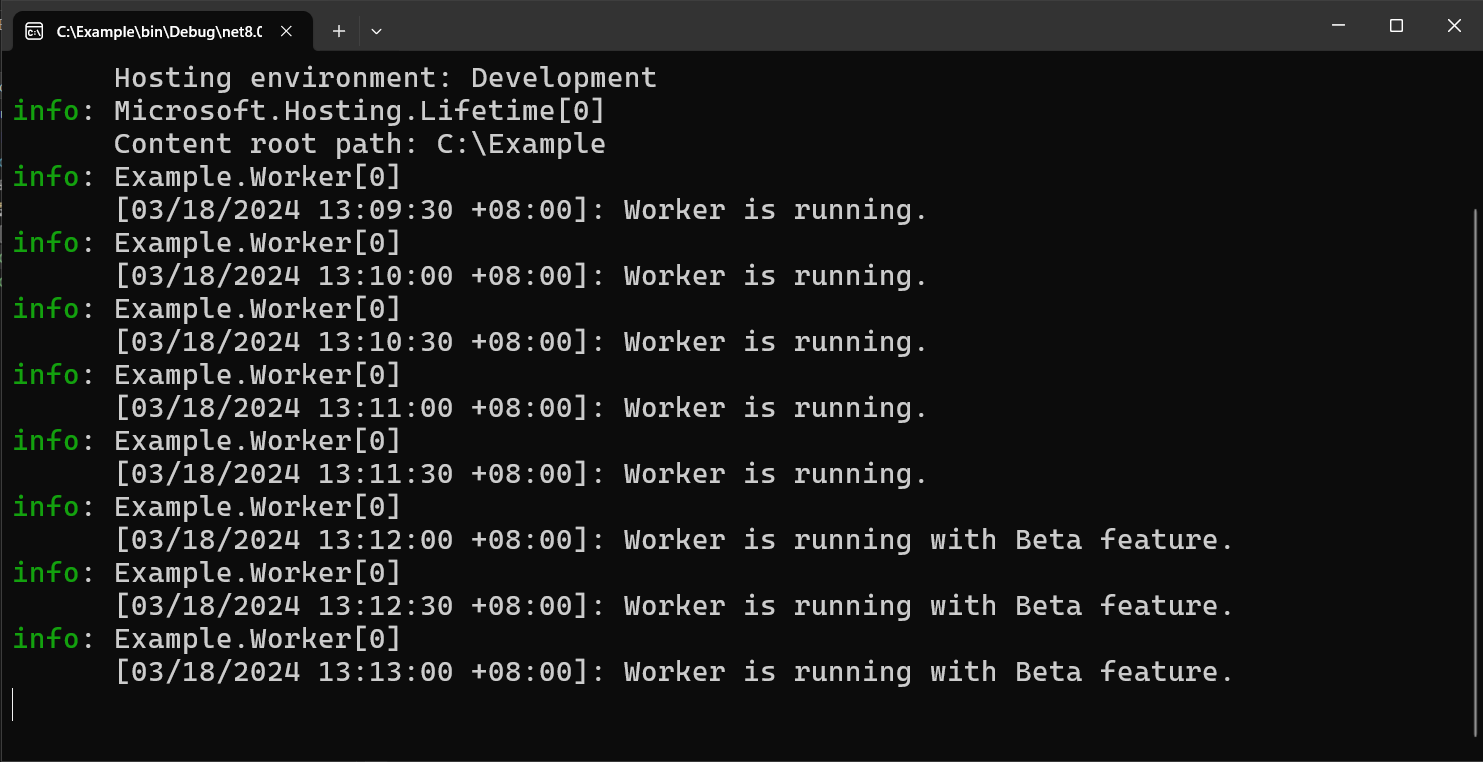
Select Feature manager and locate the Beta feature flag. Enable the flag by selecting the checkbox under Enabled.
Wait a few moments for the refresh interval time window to pass. You will see the updated log message.
Clean up resources
If you don't want to continue using the resources created in this article, delete the resource group you created here to avoid charges.
Important
Deleting a resource group is irreversible. The resource group and all the resources in it are permanently deleted. Ensure that you don't accidentally delete the wrong resource group or resources. If you created the resources for this article inside a resource group that contains other resources you want to keep, delete each resource individually from its respective pane instead of deleting the resource group.
- Sign in to the Azure portal, and select Resource groups.
- In the Filter by name box, enter the name of your resource group.
- In the result list, select the resource group name to see an overview.
- Select Delete resource group.
- You're asked to confirm the deletion of the resource group. Enter the name of your resource group to confirm, and select Delete.
After a few moments, the resource group and all its resources are deleted.
Next steps
In this quickstart, you created a feature flag and used it with a background service.
To enable feature management capability for other types of apps, continue to the following tutorials.
To learn more about managing feature flags in Azure App Configuration, continue to the following tutorial.
For the full feature rundown of the .NET feature management library, continue to the following document.