Note
Access to this page requires authorization. You can try signing in or changing directories.
Access to this page requires authorization. You can try changing directories.
Add and configure a data source for your Agentic Retrieval chat solution by using the developer portal. Follow these step-by-step instructions to set up data ingestion and define indexing parameters.
By default, ingested data is added to the edgeragapp collection unless you select an existing collection or create a new one. To let end users query data in a collection, you must assign them to the app role mapped to that collection.
Important
Agentic Retrieval in Foundry Local is currently in PREVIEW. See the Supplemental Terms of Use for Microsoft Azure Previews for legal terms that apply to Azure features that are in beta, preview, or otherwise not yet released into general availability.
Prerequisites
Before you begin:
- Review the following articles:
- Decide whether to use the default
edgeragappcollection or create a new collection for this data source. For more information, see Collections. - Make sure end users are assigned to the app role for the target collection. For steps, see Create app roles for collection access.
- If you plan to add a SharePoint Server data source and didn't configure SharePoint server-to-server identity parameters during deployment, complete Set up SharePoint server-to-server authentication. You need the following values to add a SharePoint Server data source: Client ID, Issuer ID, Windows SID, and Realm (optional).
- To access to the developer portal, you must have both the "EdgeRAGDeveloper" and "EdgeRAGEndUser" roles in Microsoft Entra.
Set up data ingestion
To get started, create a data source by using the local developer portal.
Go to the developer portal by using the domain name provided during deployment and app registration. For example:
https://arcrag.contoso.com.Sign in with developer credentials that have both "EdgeRAGDeveloper" and "EdgeRAGEndUser" roles assigned. If you have the right access configured, you're automatically redirected to the developer portal.
Select Get Started.
Go to the Data tab.
Select Add a data source.
On the Source data tab, provide the following information:
Field Value Name Name for the data ingestion Data source Network share or SharePoint Server Network share Network File Share Path to your network file server (NFS) share User ID NFS user ID Group ID NFS group ID SharePoint Server SharePoint URL Your SharePoint web application URL (for example, http://sharepoint.contoso.com)Folder path Server-relative path to the document library (for example, /sites/docs/Shared Documents)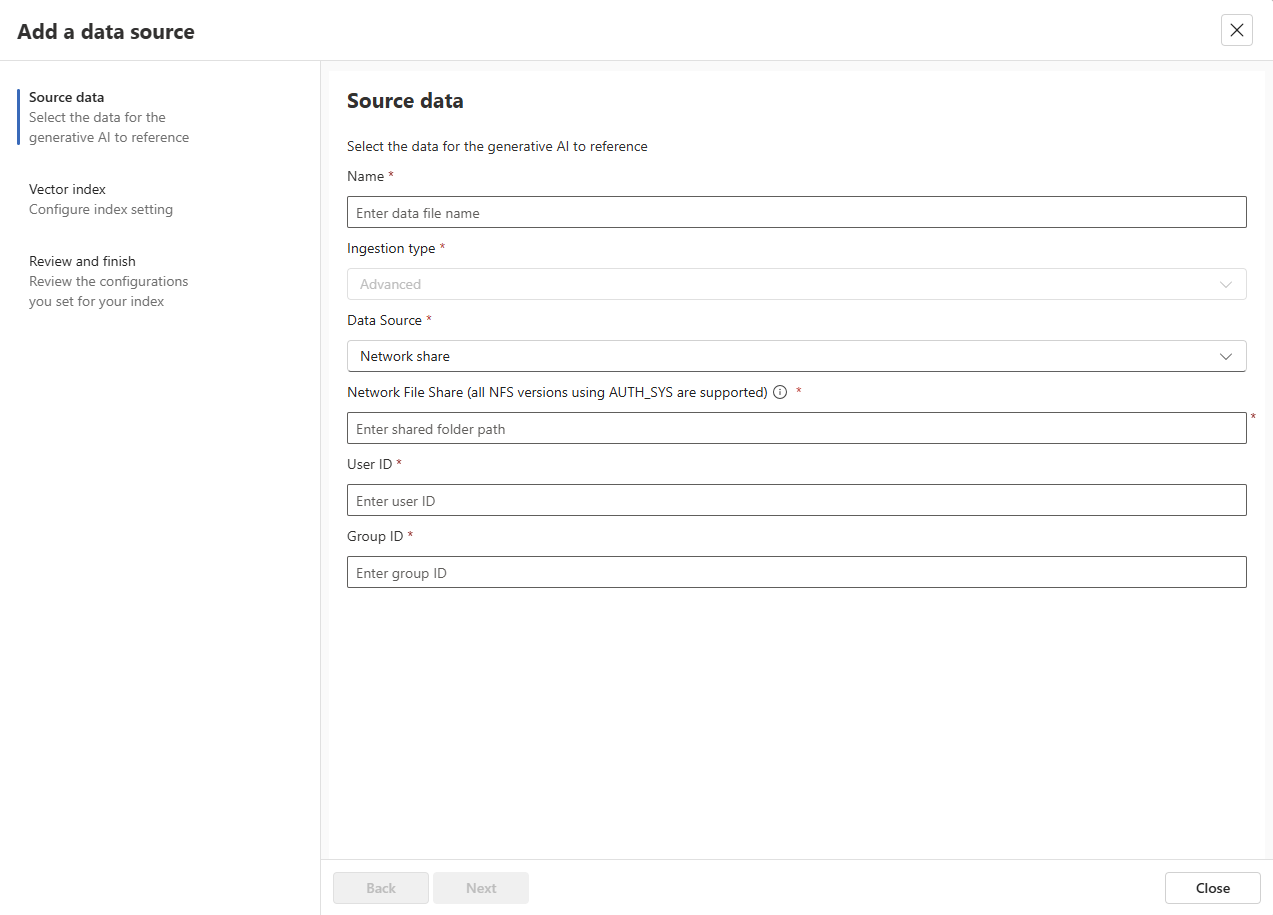
If you selected SharePoint Server as the data source and didn't configure server-to-server identity parameters during deployment, expand Authentication and enter:
Field Value Client ID GUID from your app principal registration Issuer ID GUID from your trusted token issuer registration Windows SID SID for the service account in S-1-5-21-...formatRealm Leave blank for auto-discovery, or enter the realm GUID Select Next.
On the Vector index tab, provide the following information:
Field Value Collection If you have more than one collection set up, select the target collection for ingested data. Choose an existing collection, or use the default edgeragappcollection.Schedule updates Frequency at which your data is synced for updates Chunk size Select the appropriate chunk size Chunk overlap Select the appropriate chunk overlap 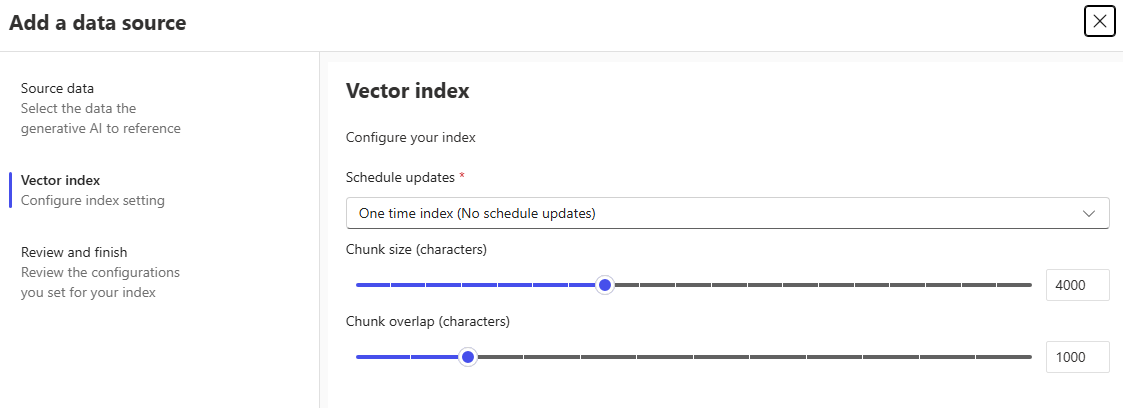
Select Next.
On the Review and finish tab, review your configurations.
When you're satisfied, select Create.

You can also perform data ingestion programmatically using the Ingestion API. When using the API, specify the target collection with the collectionName parameter in the request body.