Note
Access to this page requires authorization. You can try signing in or changing directories.
Access to this page requires authorization. You can try changing directories.
The Deploy tab in the workload orchestration portal displays the targets and the solutions applicable to the targets. It shows targets created at multiple hierarchical levels such as factory and line.
This article describes how to use the workload orchestration portal to deploy, delete, stop, roll back, and retry solutions. If you want information about other tabs in the workload orchestration portal, see Monitor your solutions and Configure your solutions.
Prerequisites
- An Azure subscription. If you don't have an Azure subscription, create one for free before you begin.
- Only users with access to deploy solutions can see the Deploy tab. If you don't see a tab or a feature, it might be due to insufficient permissions. Contact your IT administrator to ensure you have the necessary access.
Navigate the Deploy tab
Sign in to the workload orchestration portal.
Once you sign in, you see the Deploy tab on the left side of the page.
Select the Deploy tab, which lists all targets created in your environment. The Deploy tab shows the target name, type, and other details.
You can filter the list by keyword. To do this, enter the keyword in the search box on the top right of the list next to "Group by:". The list of solutions will be filtered to show only those that match the keyword.

You can also apply filters to the list of solutions. To do this, click on Filter on the top right of the list and select the Column you want to filter by. Then select an Operator and enter the Value you want to filter by. The list of solutions will be filtered to show only those that match the selected column and value.


Deploy a solution
You can deploy a solution to a target by following these steps:
Click on the Deploy tab and click on the target you want to deploy the solution to.

From the list of solutions applicable on that target, select any solution in Publish completed state and click on Deploy Solution.

In the confirmation window, click on Confirm to proceed.

You can see a notification of deployment in progress at the top right corner of the page.

You can click on the status of the solution you deployed, to open the Status details pane showing all the intermediate steps of the operation, along with date and time of completion and the user who initiated it. Details of shared app dependencies associated with the current deployment, if any, also show up on this side-pane.


Deploy a solution to multiple targets
You can deploy a solution to multiple targets at once by following these steps:
Click on the Deploy tab and switch to solution view to view the applicable solutions and their statuses.

You can filter or group solutions by any of the column values. Click on a solution name which has 1 or more targets available to deploy to.

Choose the targets in Publish Completed state and click on Deploy Solution.

In the confirmation window, click on Confirm to proceed.

You can see a notification of deployment in progress at the top right corner of the page.

To view the detailed status of your deployment, click on the notification icon at the top right and click on Show in event logs.

Click on the respective Event name to open the Status details pane showing all the intermediate steps of the operation, along with date and time of completion and the user who initiated it. Details of shared app dependencies associated with the current deployment, if any, also show up on this side-pane.


Roll back a solution
You can undo a deployment and roll back a solution to a previous version. To do this, follow these steps:
Select a solution and click on Rollback.

This opens the confirmation window displaying the details of the failed version and the list of old versions. Choose the version to roll back and click Apply.

Once the deployment finishes, the status of the solution is updated to Deployment Completed.


Retry a failed deployment
If a deployment fails, you can retry the deployment by following these steps:
Choose the solution version with status Deployment failure and click on Retry deployment.

In the confirmation window, click on Confirm to proceed.

Stop a deployed solution
You can stop a deployed solution. This action is useful if you want to stop the solution without deleting it. To stop a solution, follow these steps:
Choose the solution version to be uninstalled and click Stop.

In the confirmation window, click on Confirm to proceed.
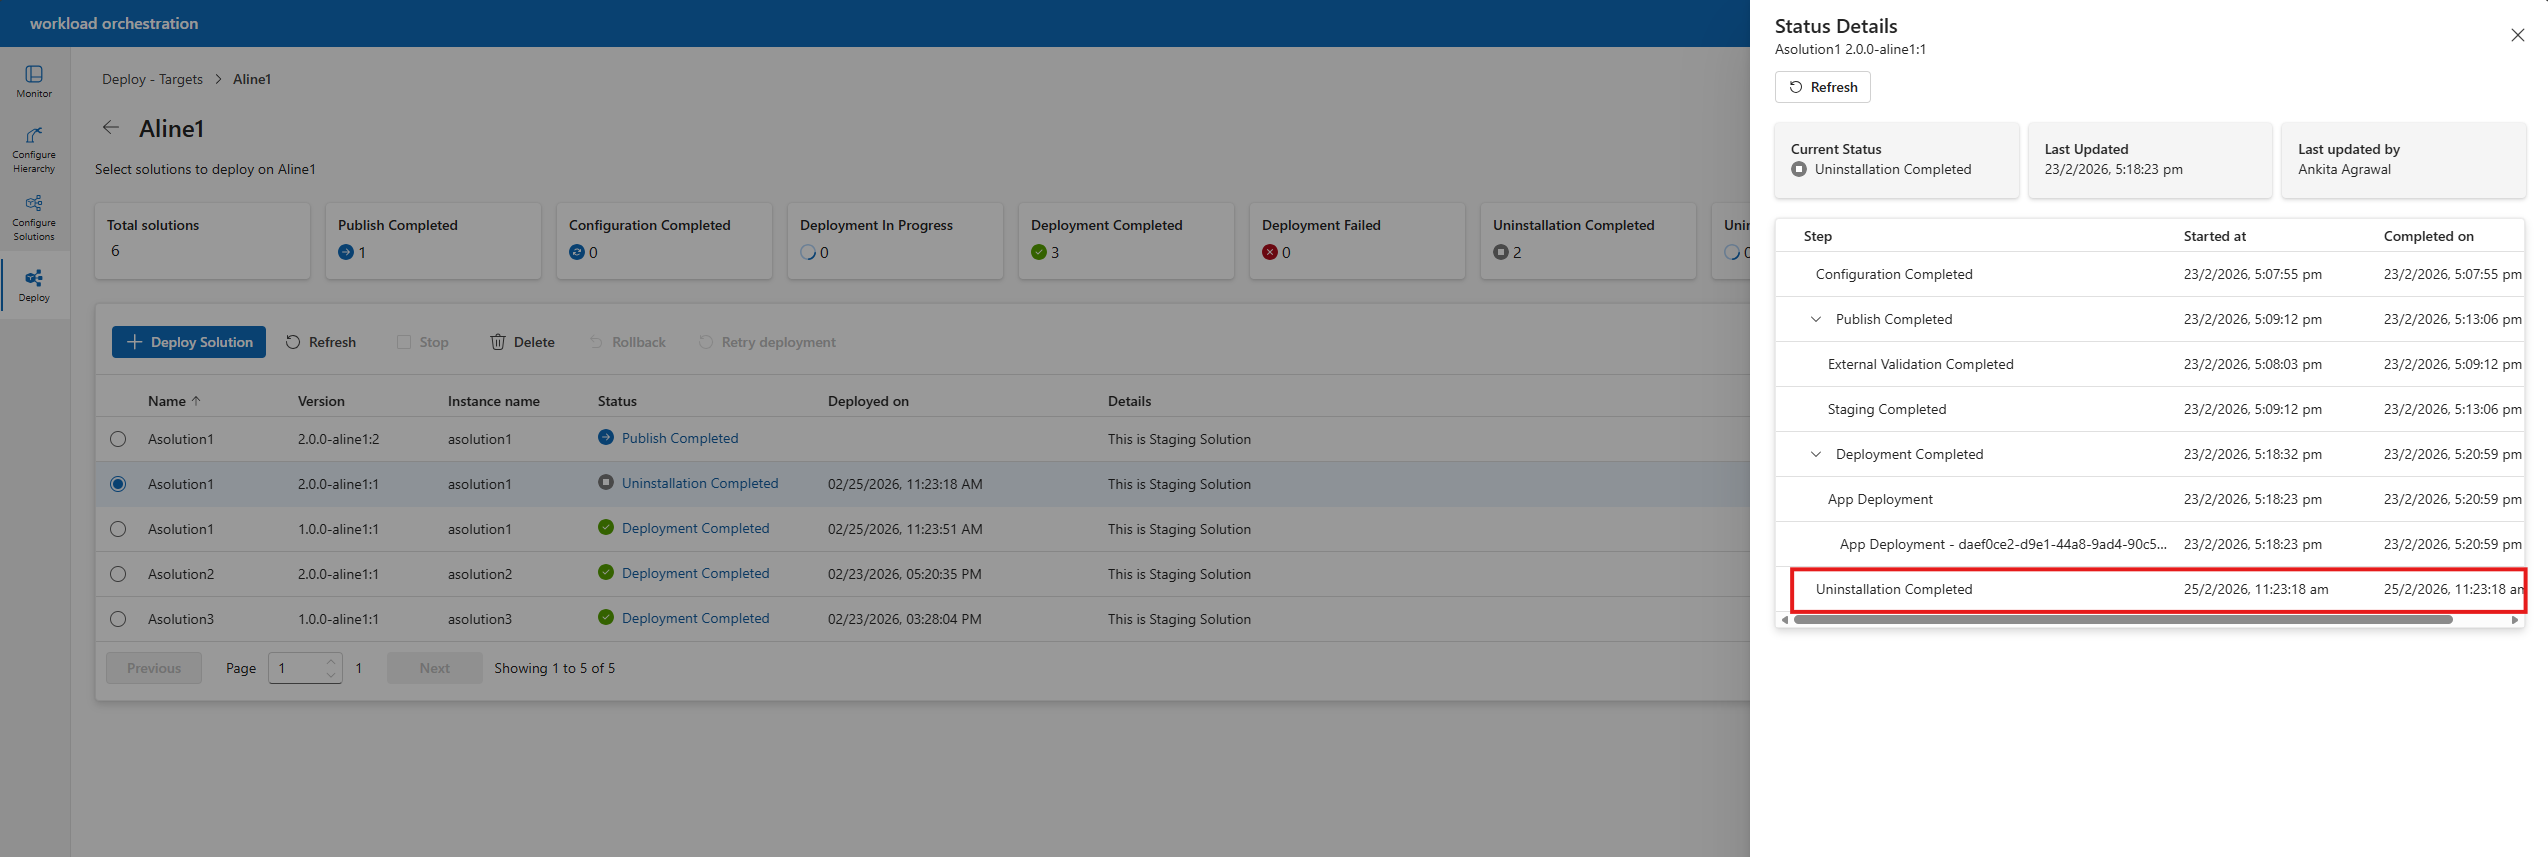
You can click on the solution status to track the uninstallation progress. You will see the following status on completion.


Delete a solution
You can delete a solution before it's deployed, that is, if its status is Stopped, Publish Completed, Uninstallation Completed, or Deployment failure. To delete a solution, follow these steps:
Choose the solution version with status Stopped/Publish Completed/Uninstallation Completed/Deployment failure and click on Delete.

In the confirmation window, click on Confirm to proceed.
