Note
Access to this page requires authorization. You can try signing in or changing directories.
Access to this page requires authorization. You can try changing directories.
The Configure tab in the workload orchestration portal provides a comprehensive view of your solutions at the factory and line hierarchy levels.
This article describes how to use the workload orchestration portal to add configuration values and publish values for deployment for your solutions. If you want information about other tabs in the workload orchestration portal, see Monitor your solutions and Deploy your solutions.
Prerequisites
- An Azure subscription. If you don't have an Azure subscription, create one for free before you begin.
- All users with access to configure platform or solution level parameters can access the Configure tab. If you don't see a tab or a feature, it might be due to insufficient permissions. Contact your IT administrator to ensure you have the necessary access.
Navigate the Configure tab
Sign in to the workload orchestration portal.
Once you sign in, you see the Configure tab on the left side of the page.
The Configure tab provides more sub-tabs: Factory, Line, Solutions, and Published Solutions. The Factory tab shows the status of all solutions deployed in your environment at the factory level, while the Line tab shows the status of all solutions deployed in your environment at the line level. The Solutions tab shows the status of all solutions deployed in your environment, while the Published Solutions tab shows the status of all published solutions.
Important
Hierarchical levels are custom-defined by the IT admin. You can have up to four hierarchical levels and name them per your requirements, for example, country, region, factory, and line levels. In that case, you see the name of the custom-defined levels in the Configure tab, together with the Solutions and Published Solutions tabs.
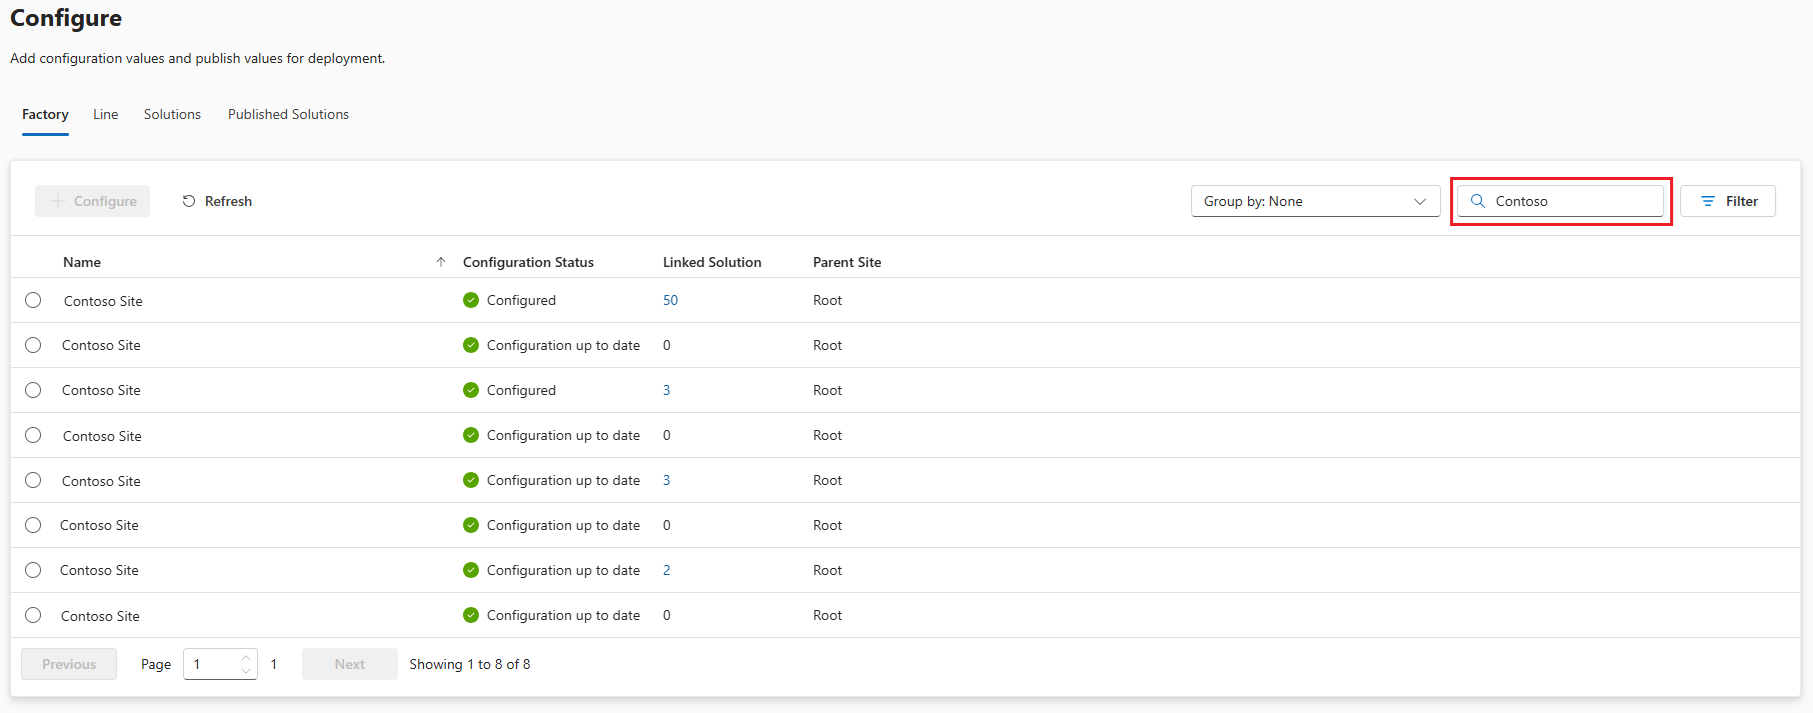
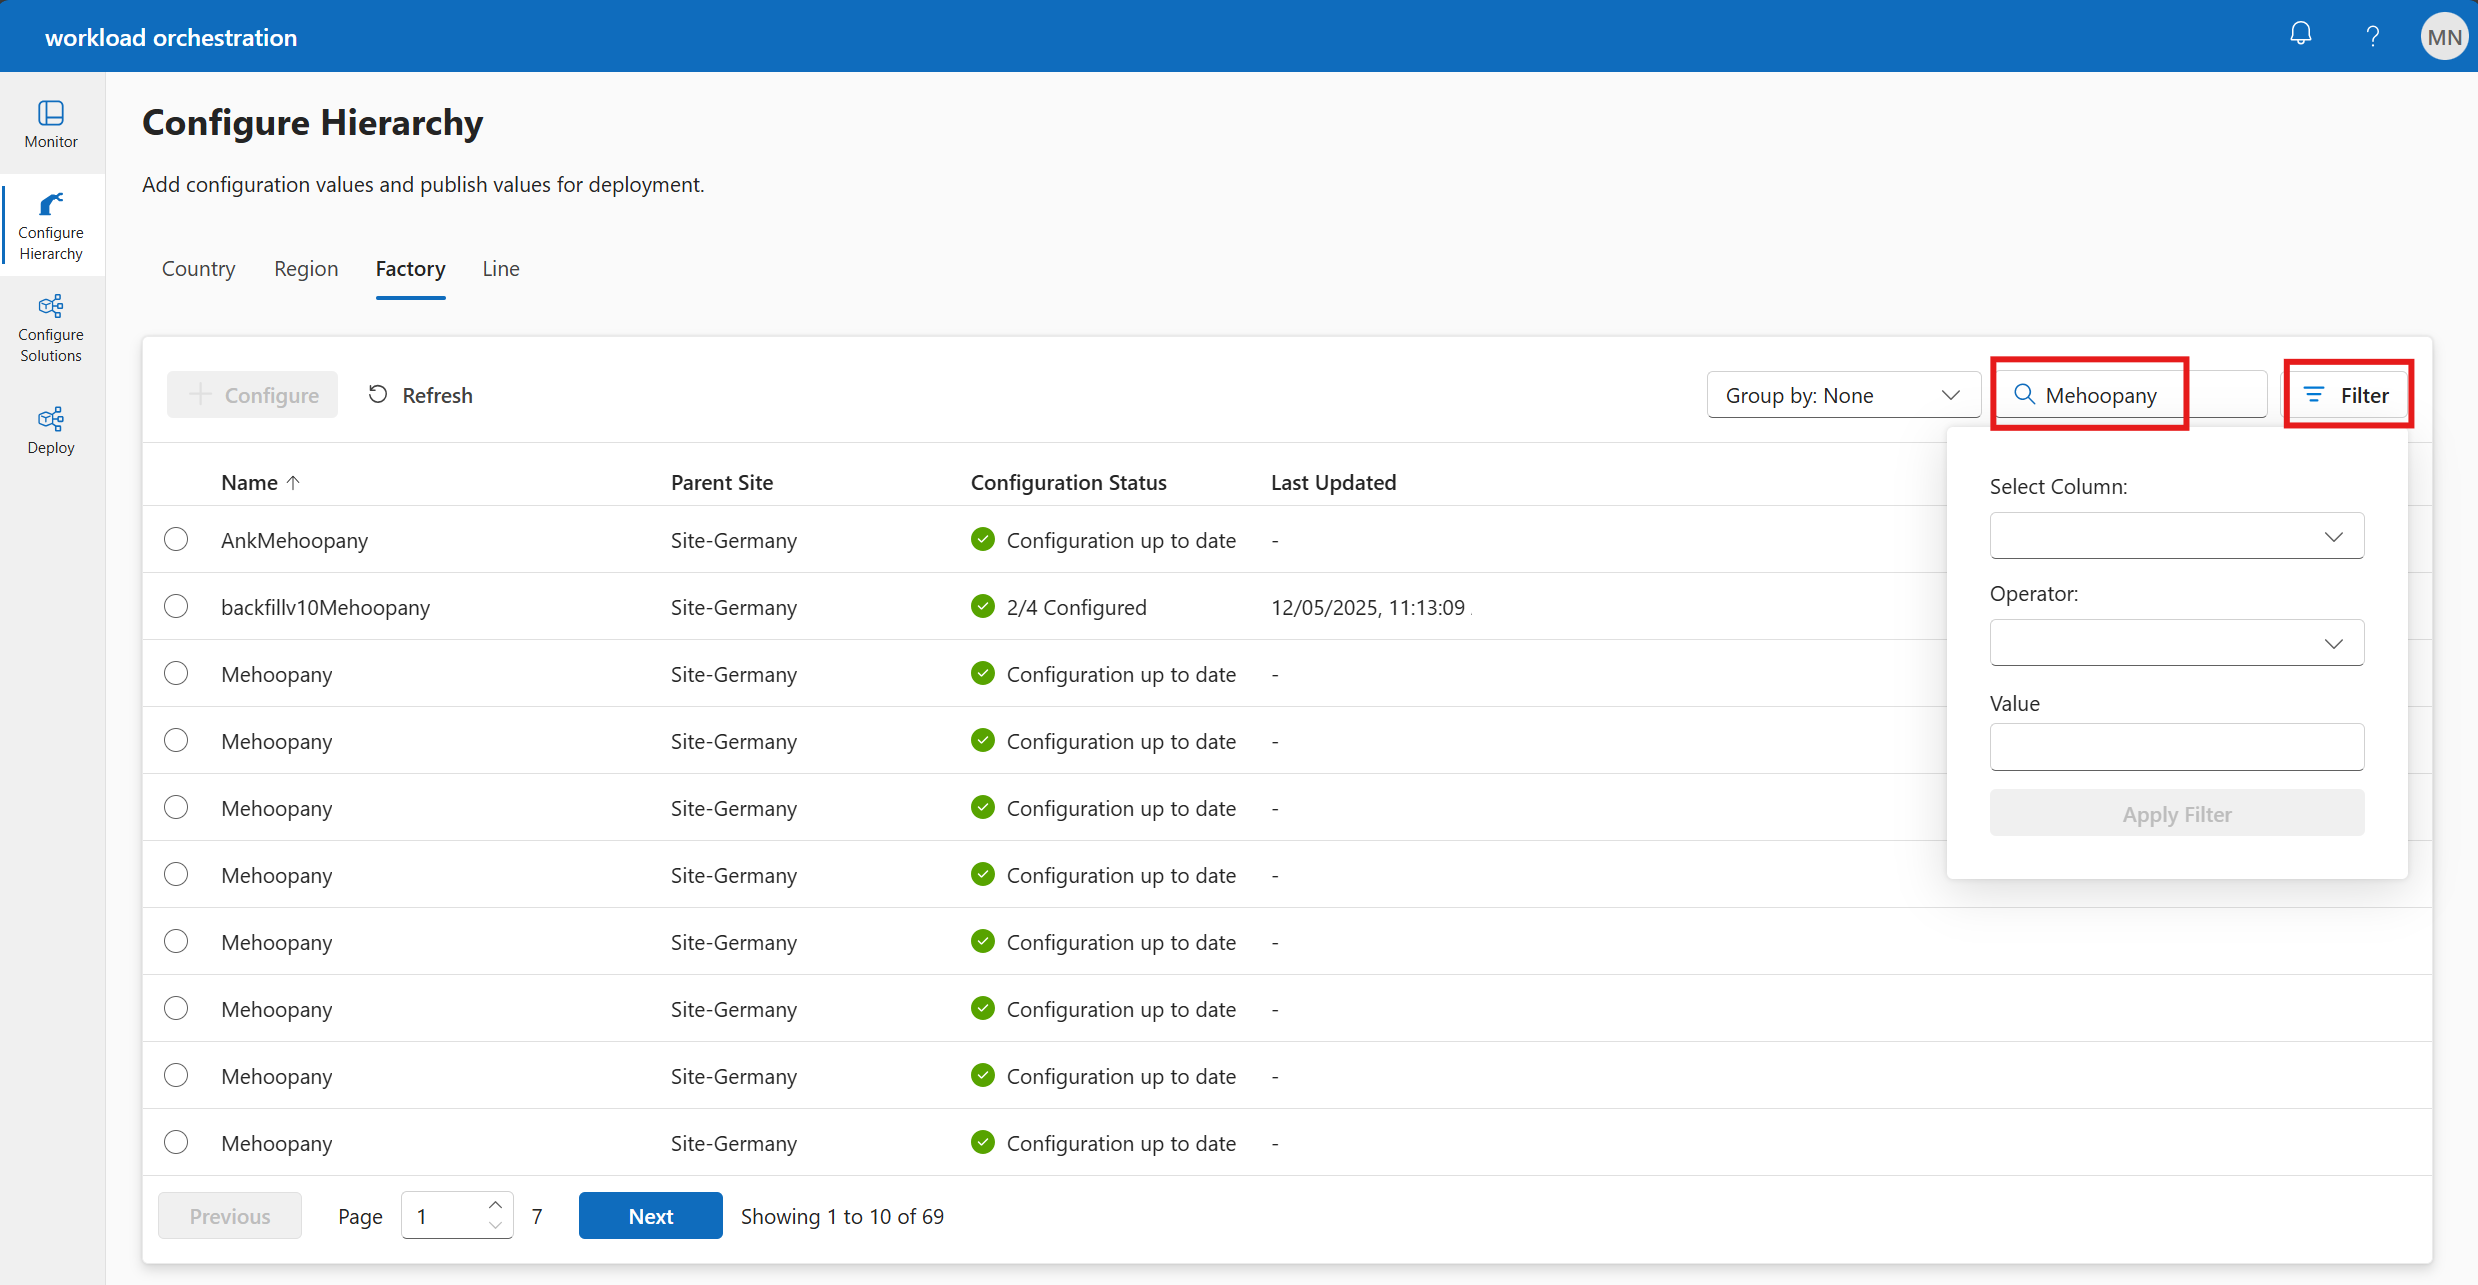
In any of the sub-tabs, you can filter the list by keyword. To do this, enter the keyword in the search box on the top right of the list next to "Group by:". The list of solutions will be filtered to show only those that match the keyword.
You can also apply filters to the list of solutions. To do this, click on Filter on the top right of the list and select the Column you want to filter by. Then select an Operator and enter the Value you want to filter by. The list of solutions will be filtered to show only those that match the selected column and value.


Configure factory parameters
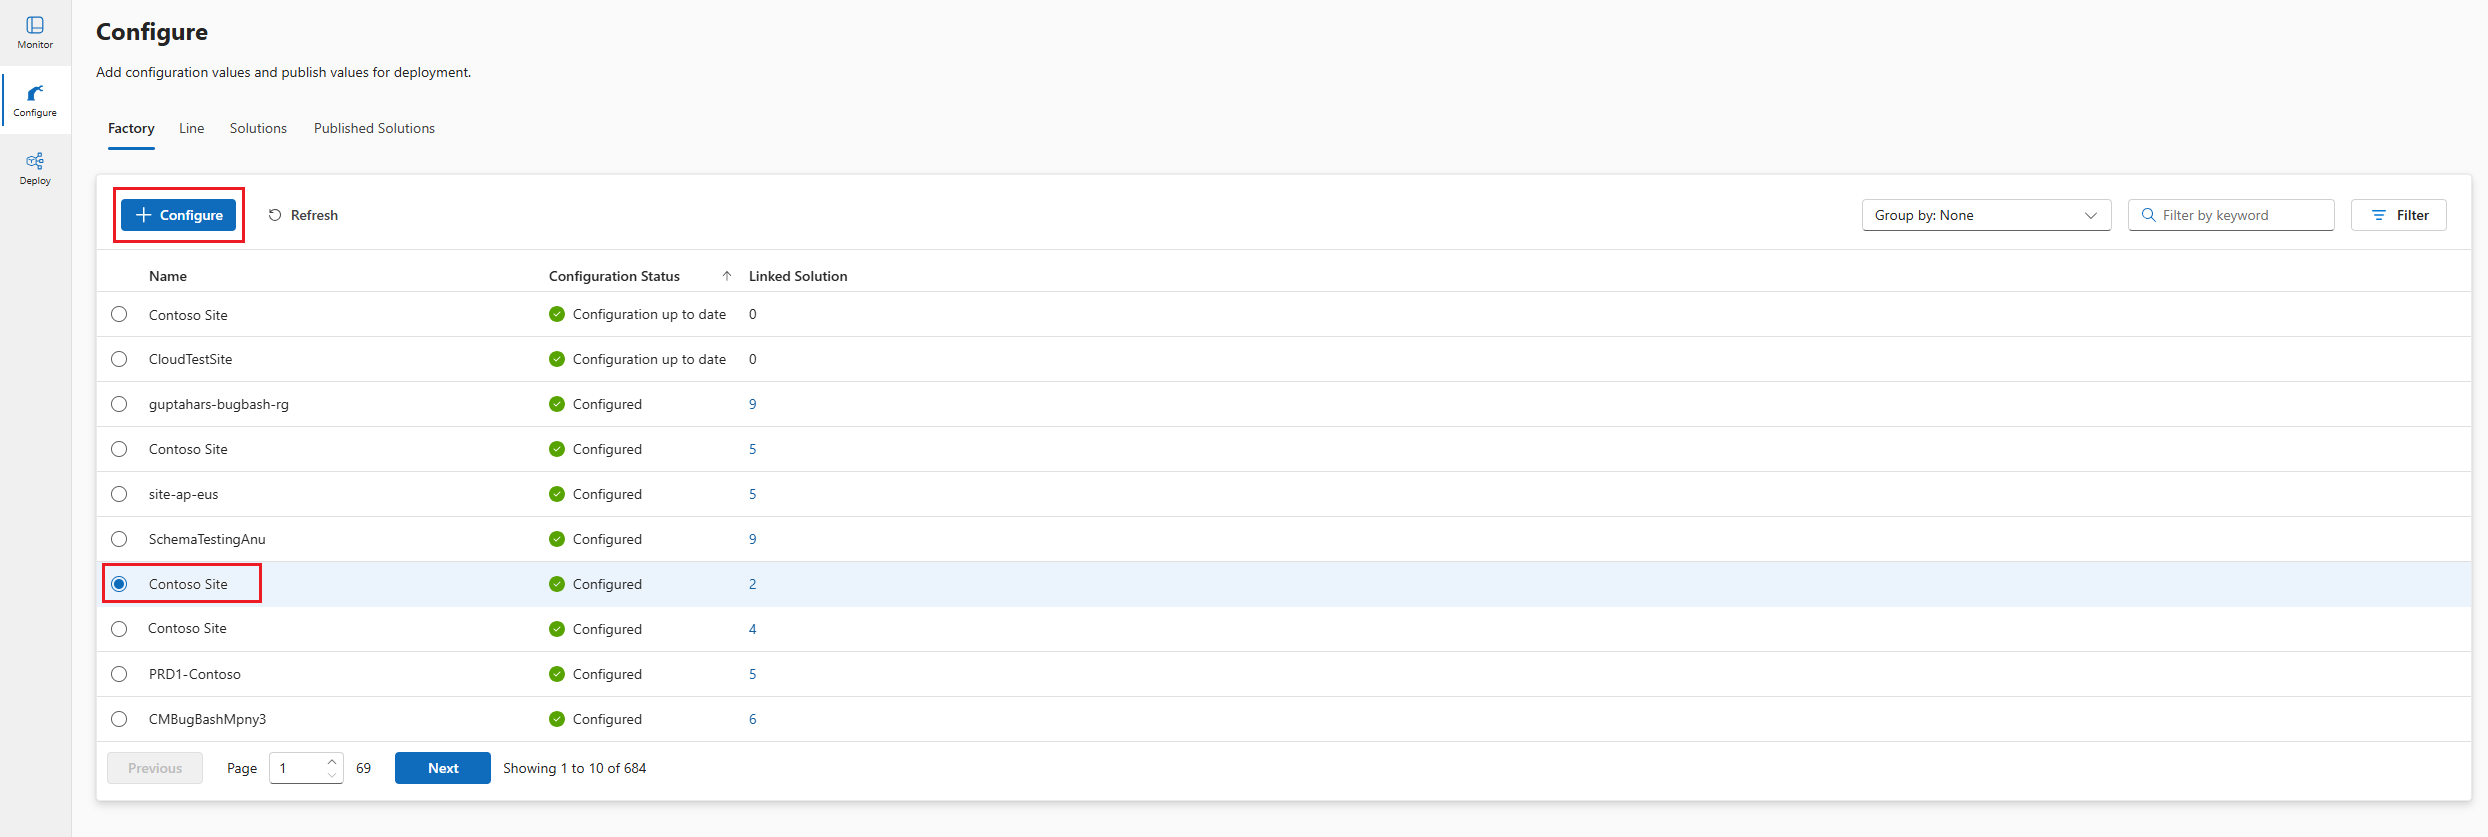
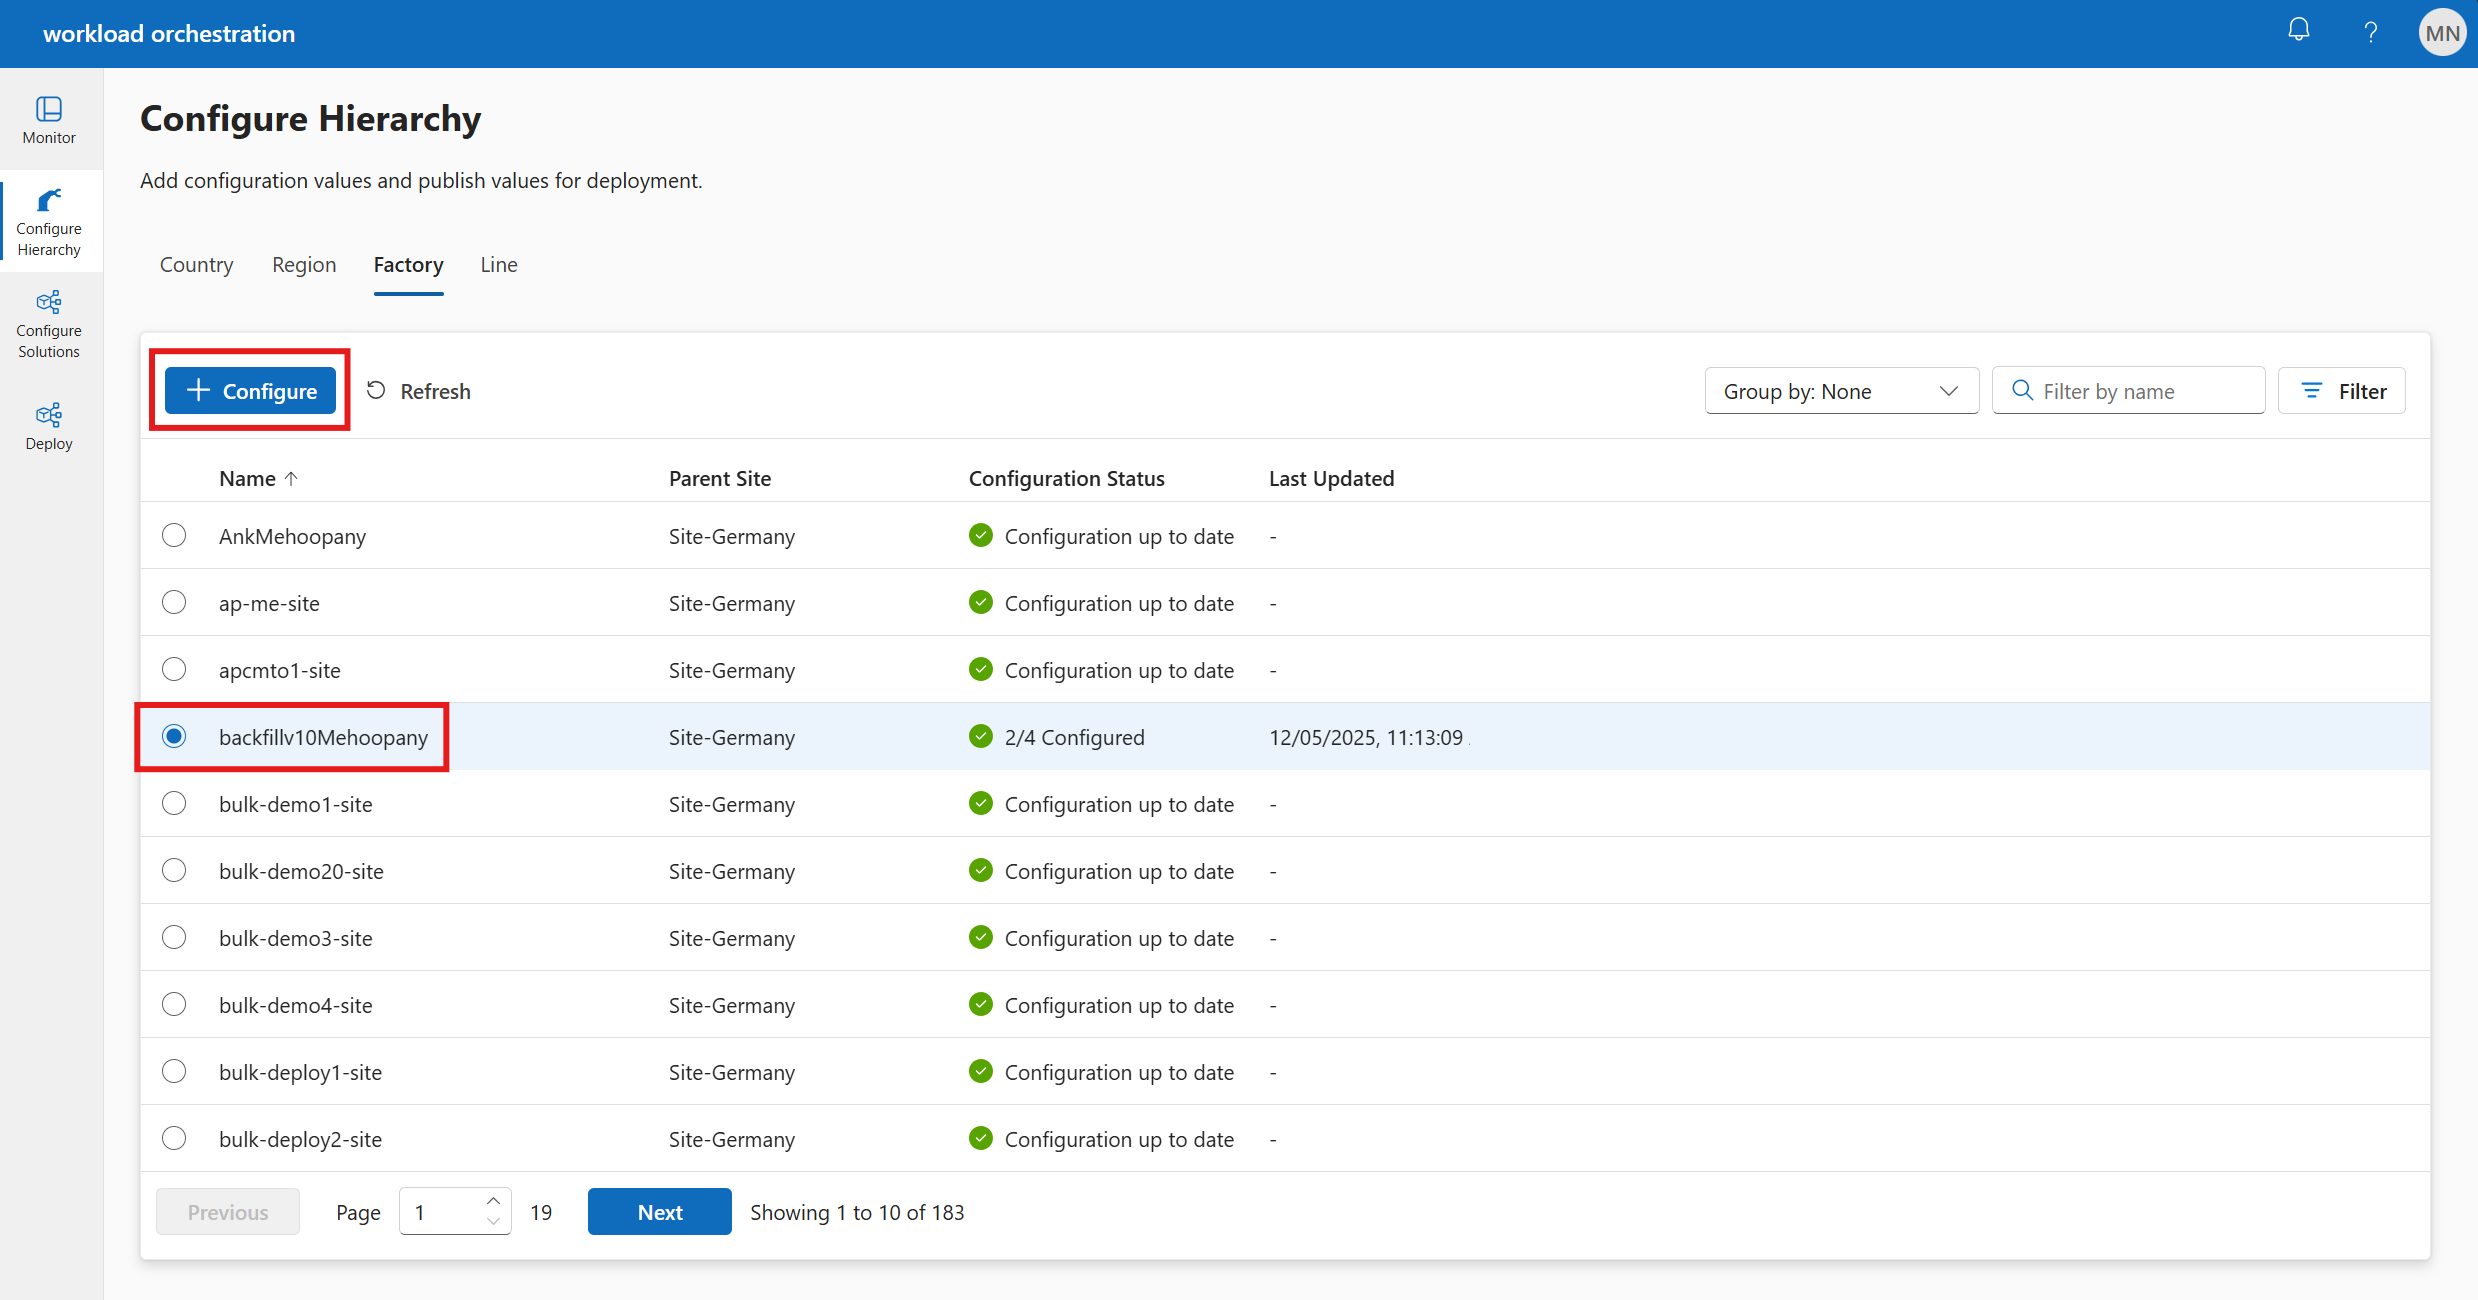
The Factory sub-tab shows the list of factories, including their configuration status, linked solutions, and parent site.

To configure a factory, follow these steps:
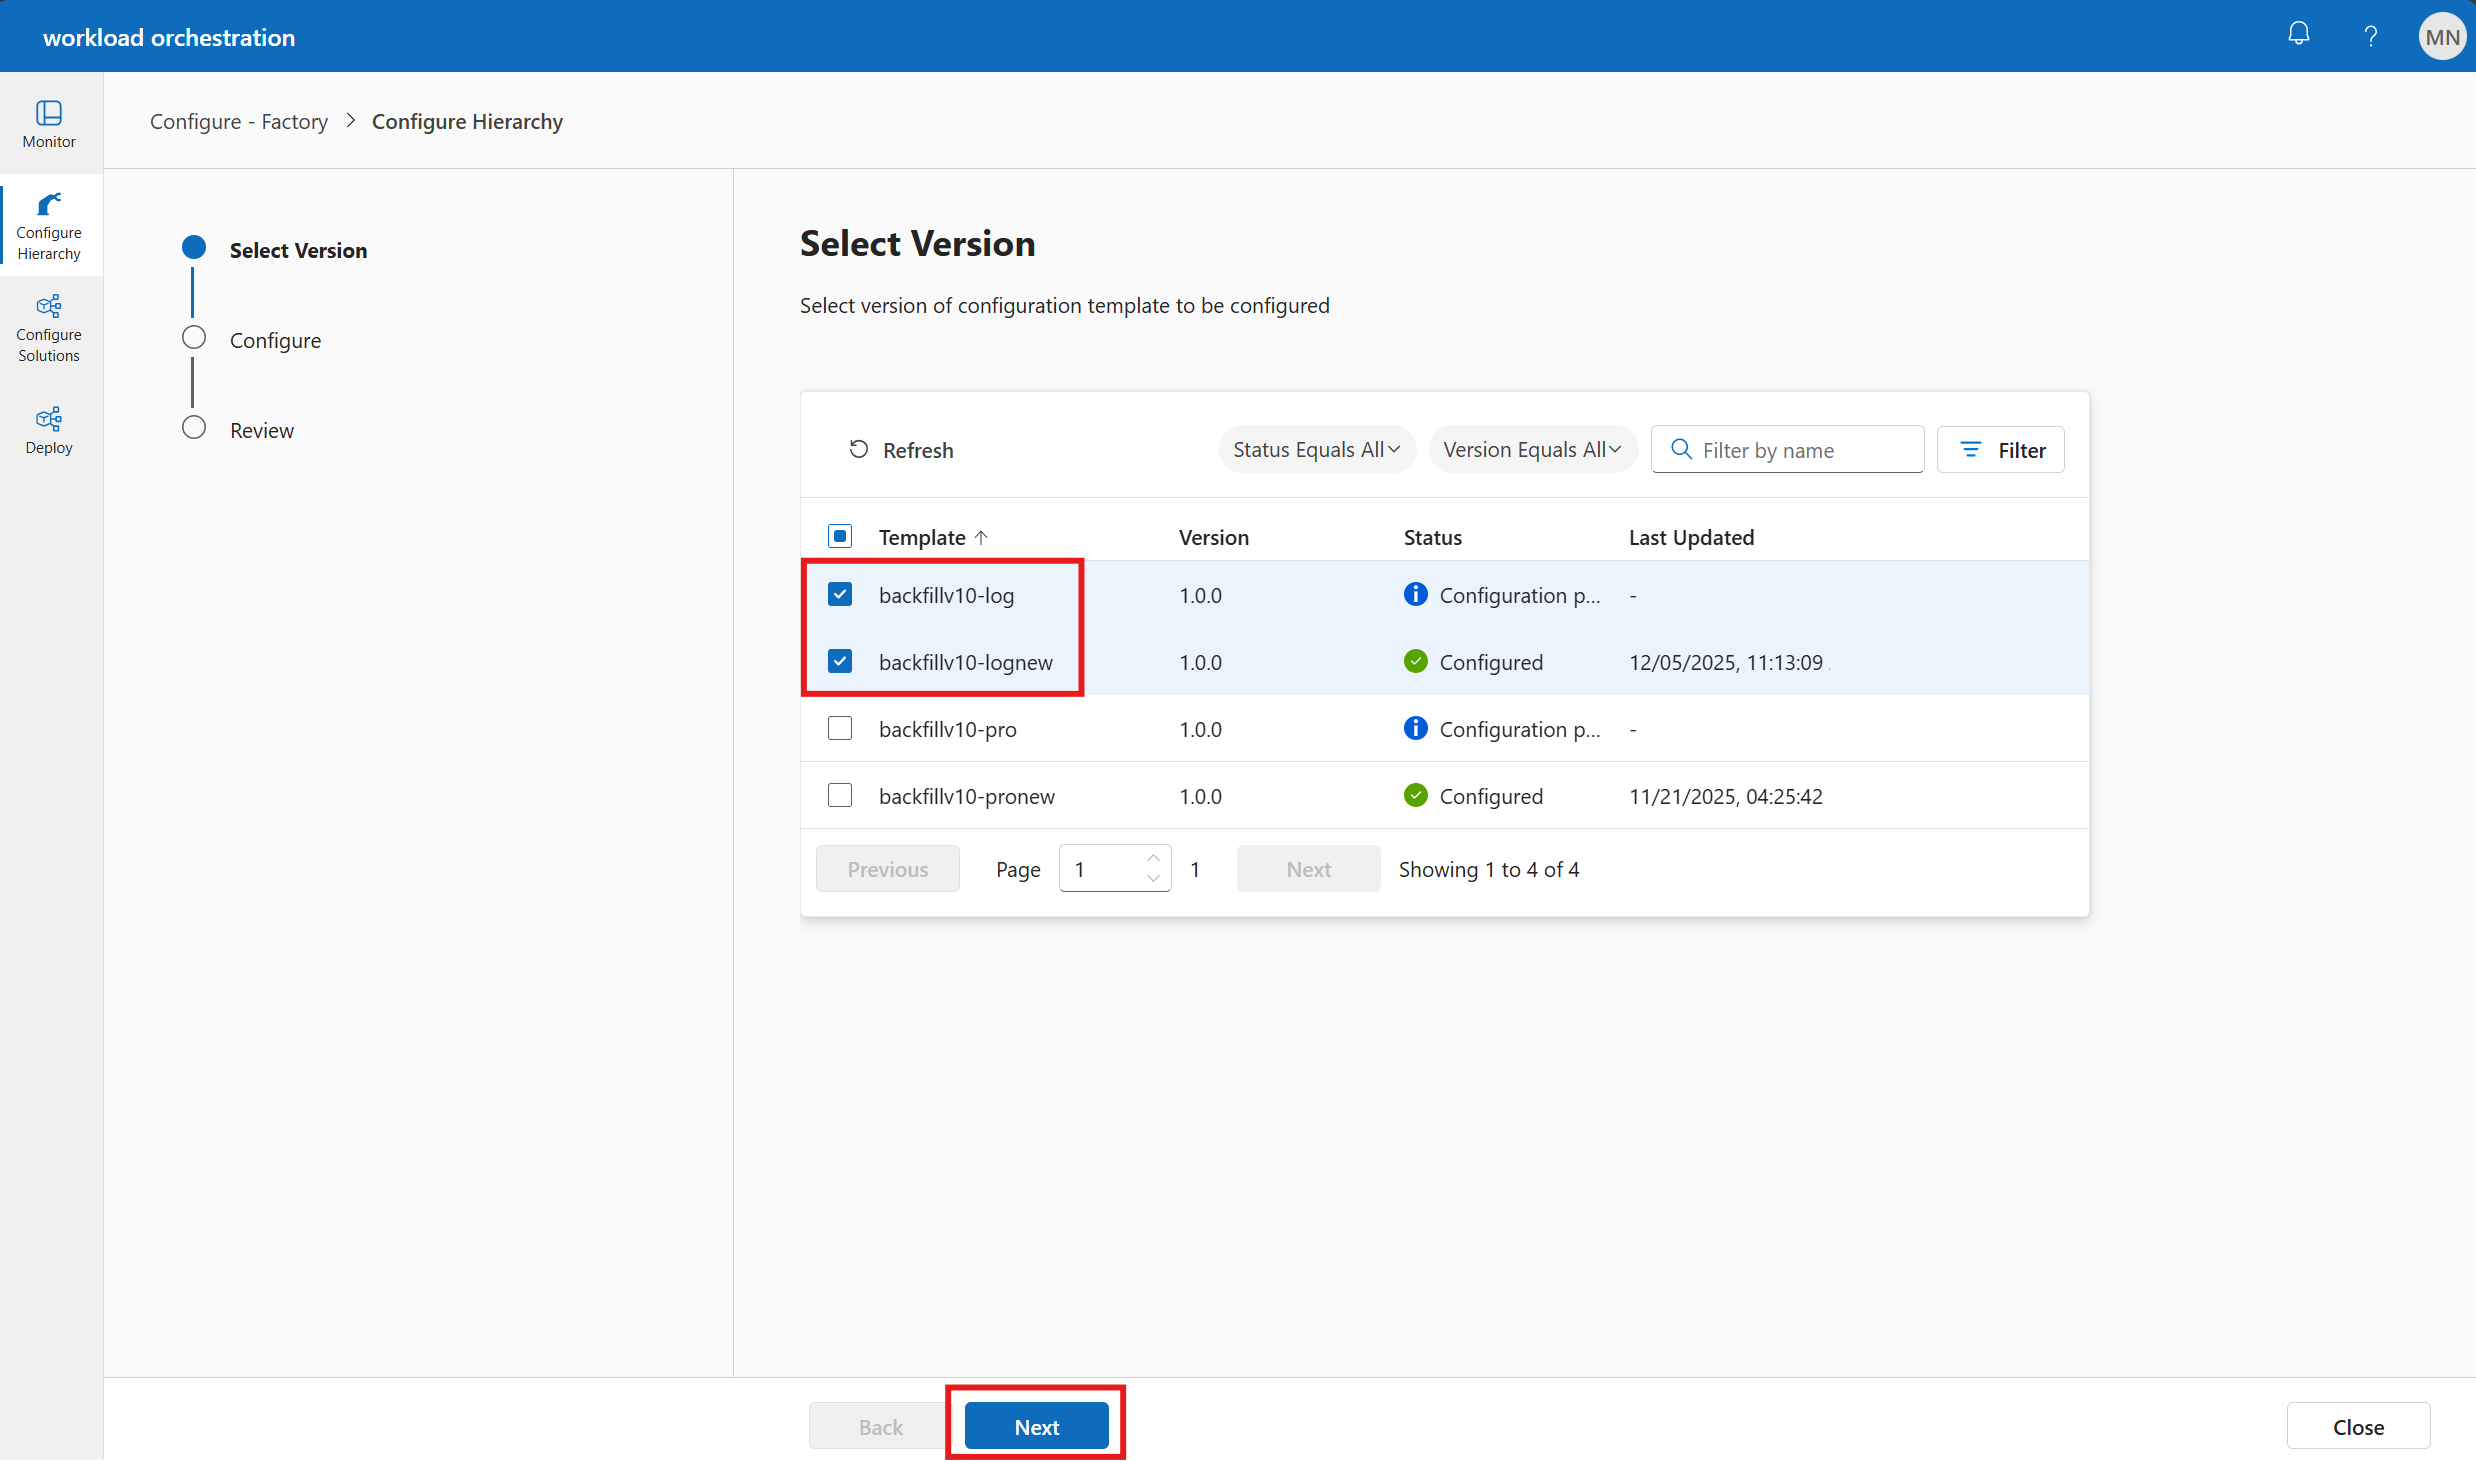
Select the name of the factory you want to configure and click on Configure.
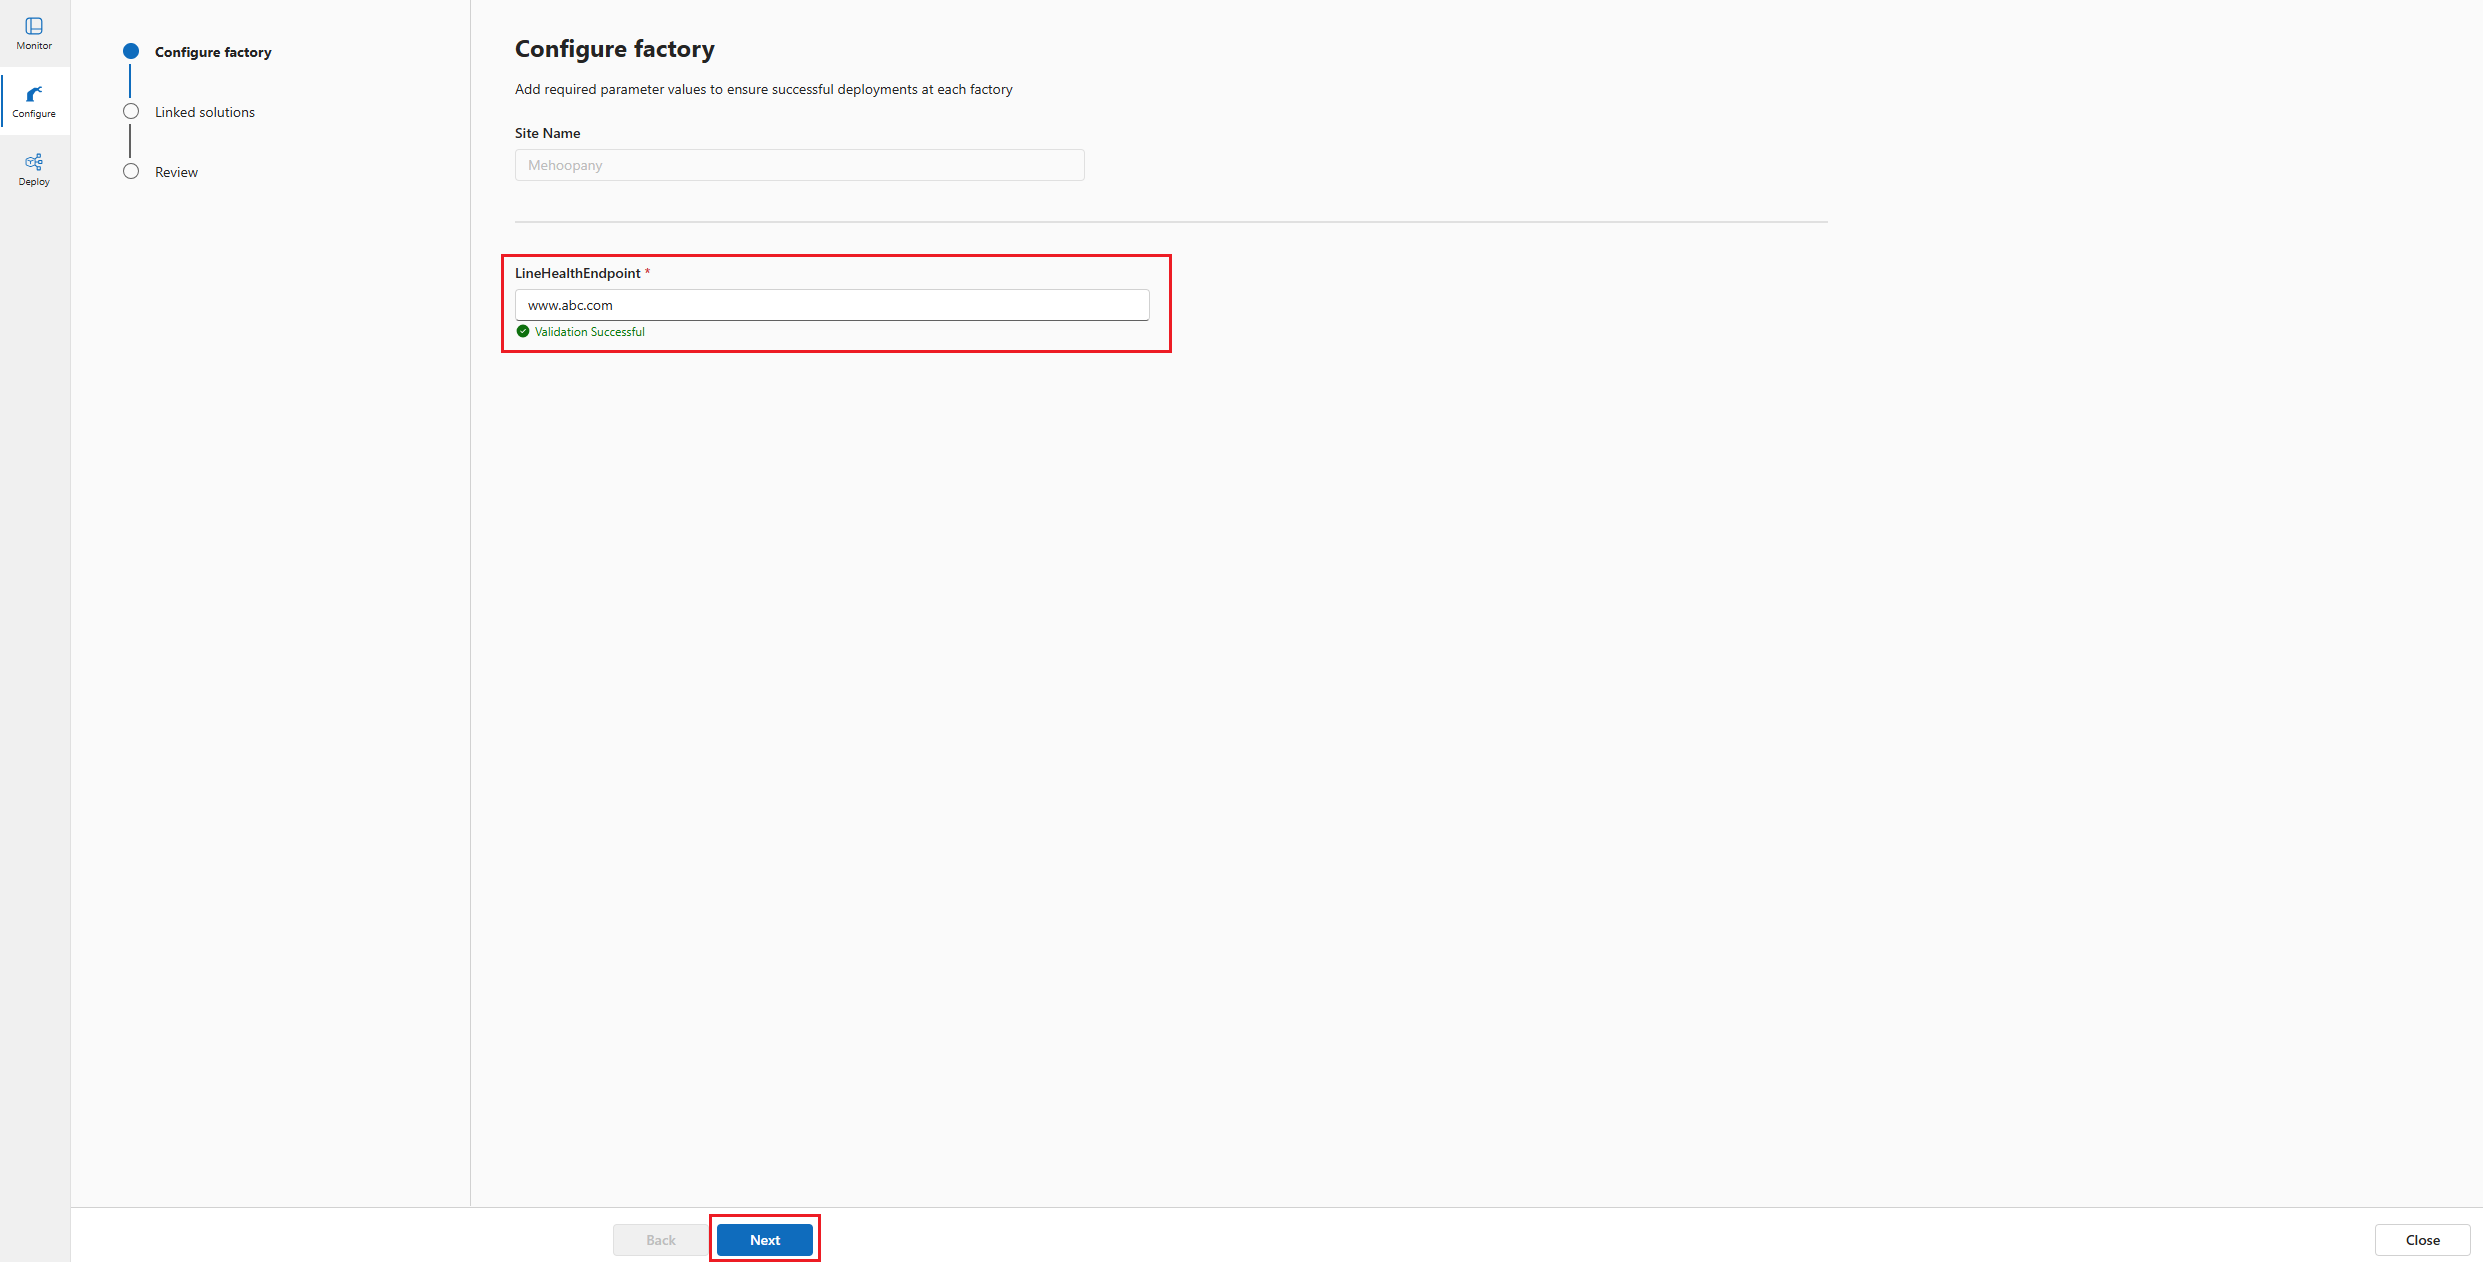
The new details pane shows the configuration values for the selected factory.
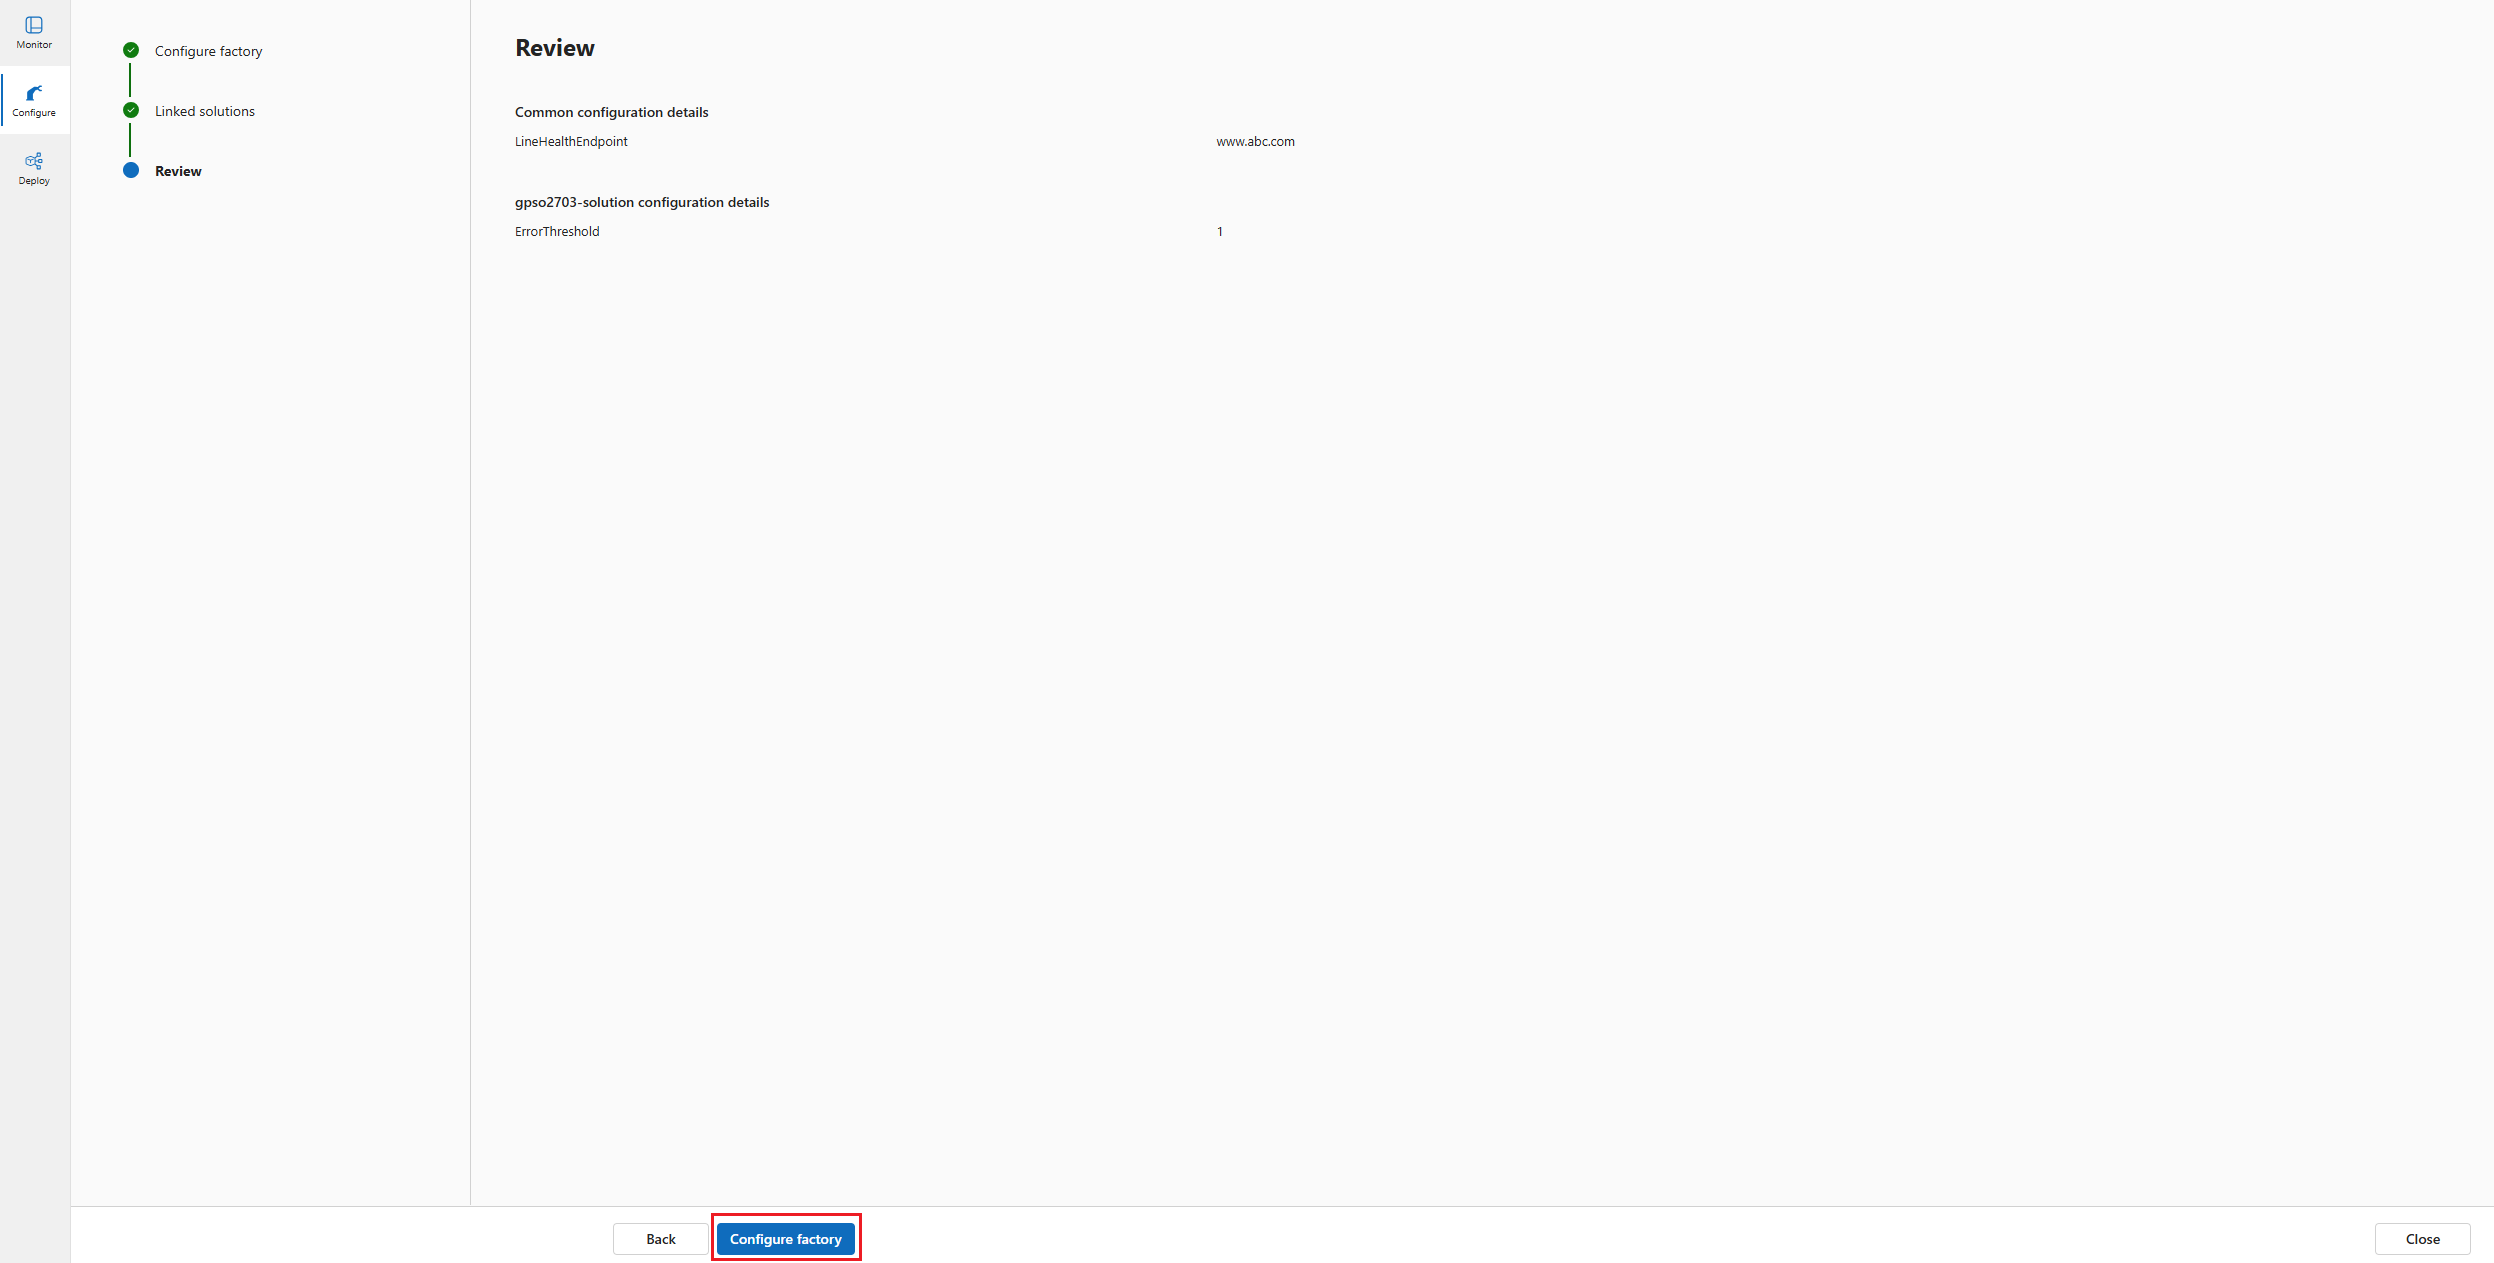
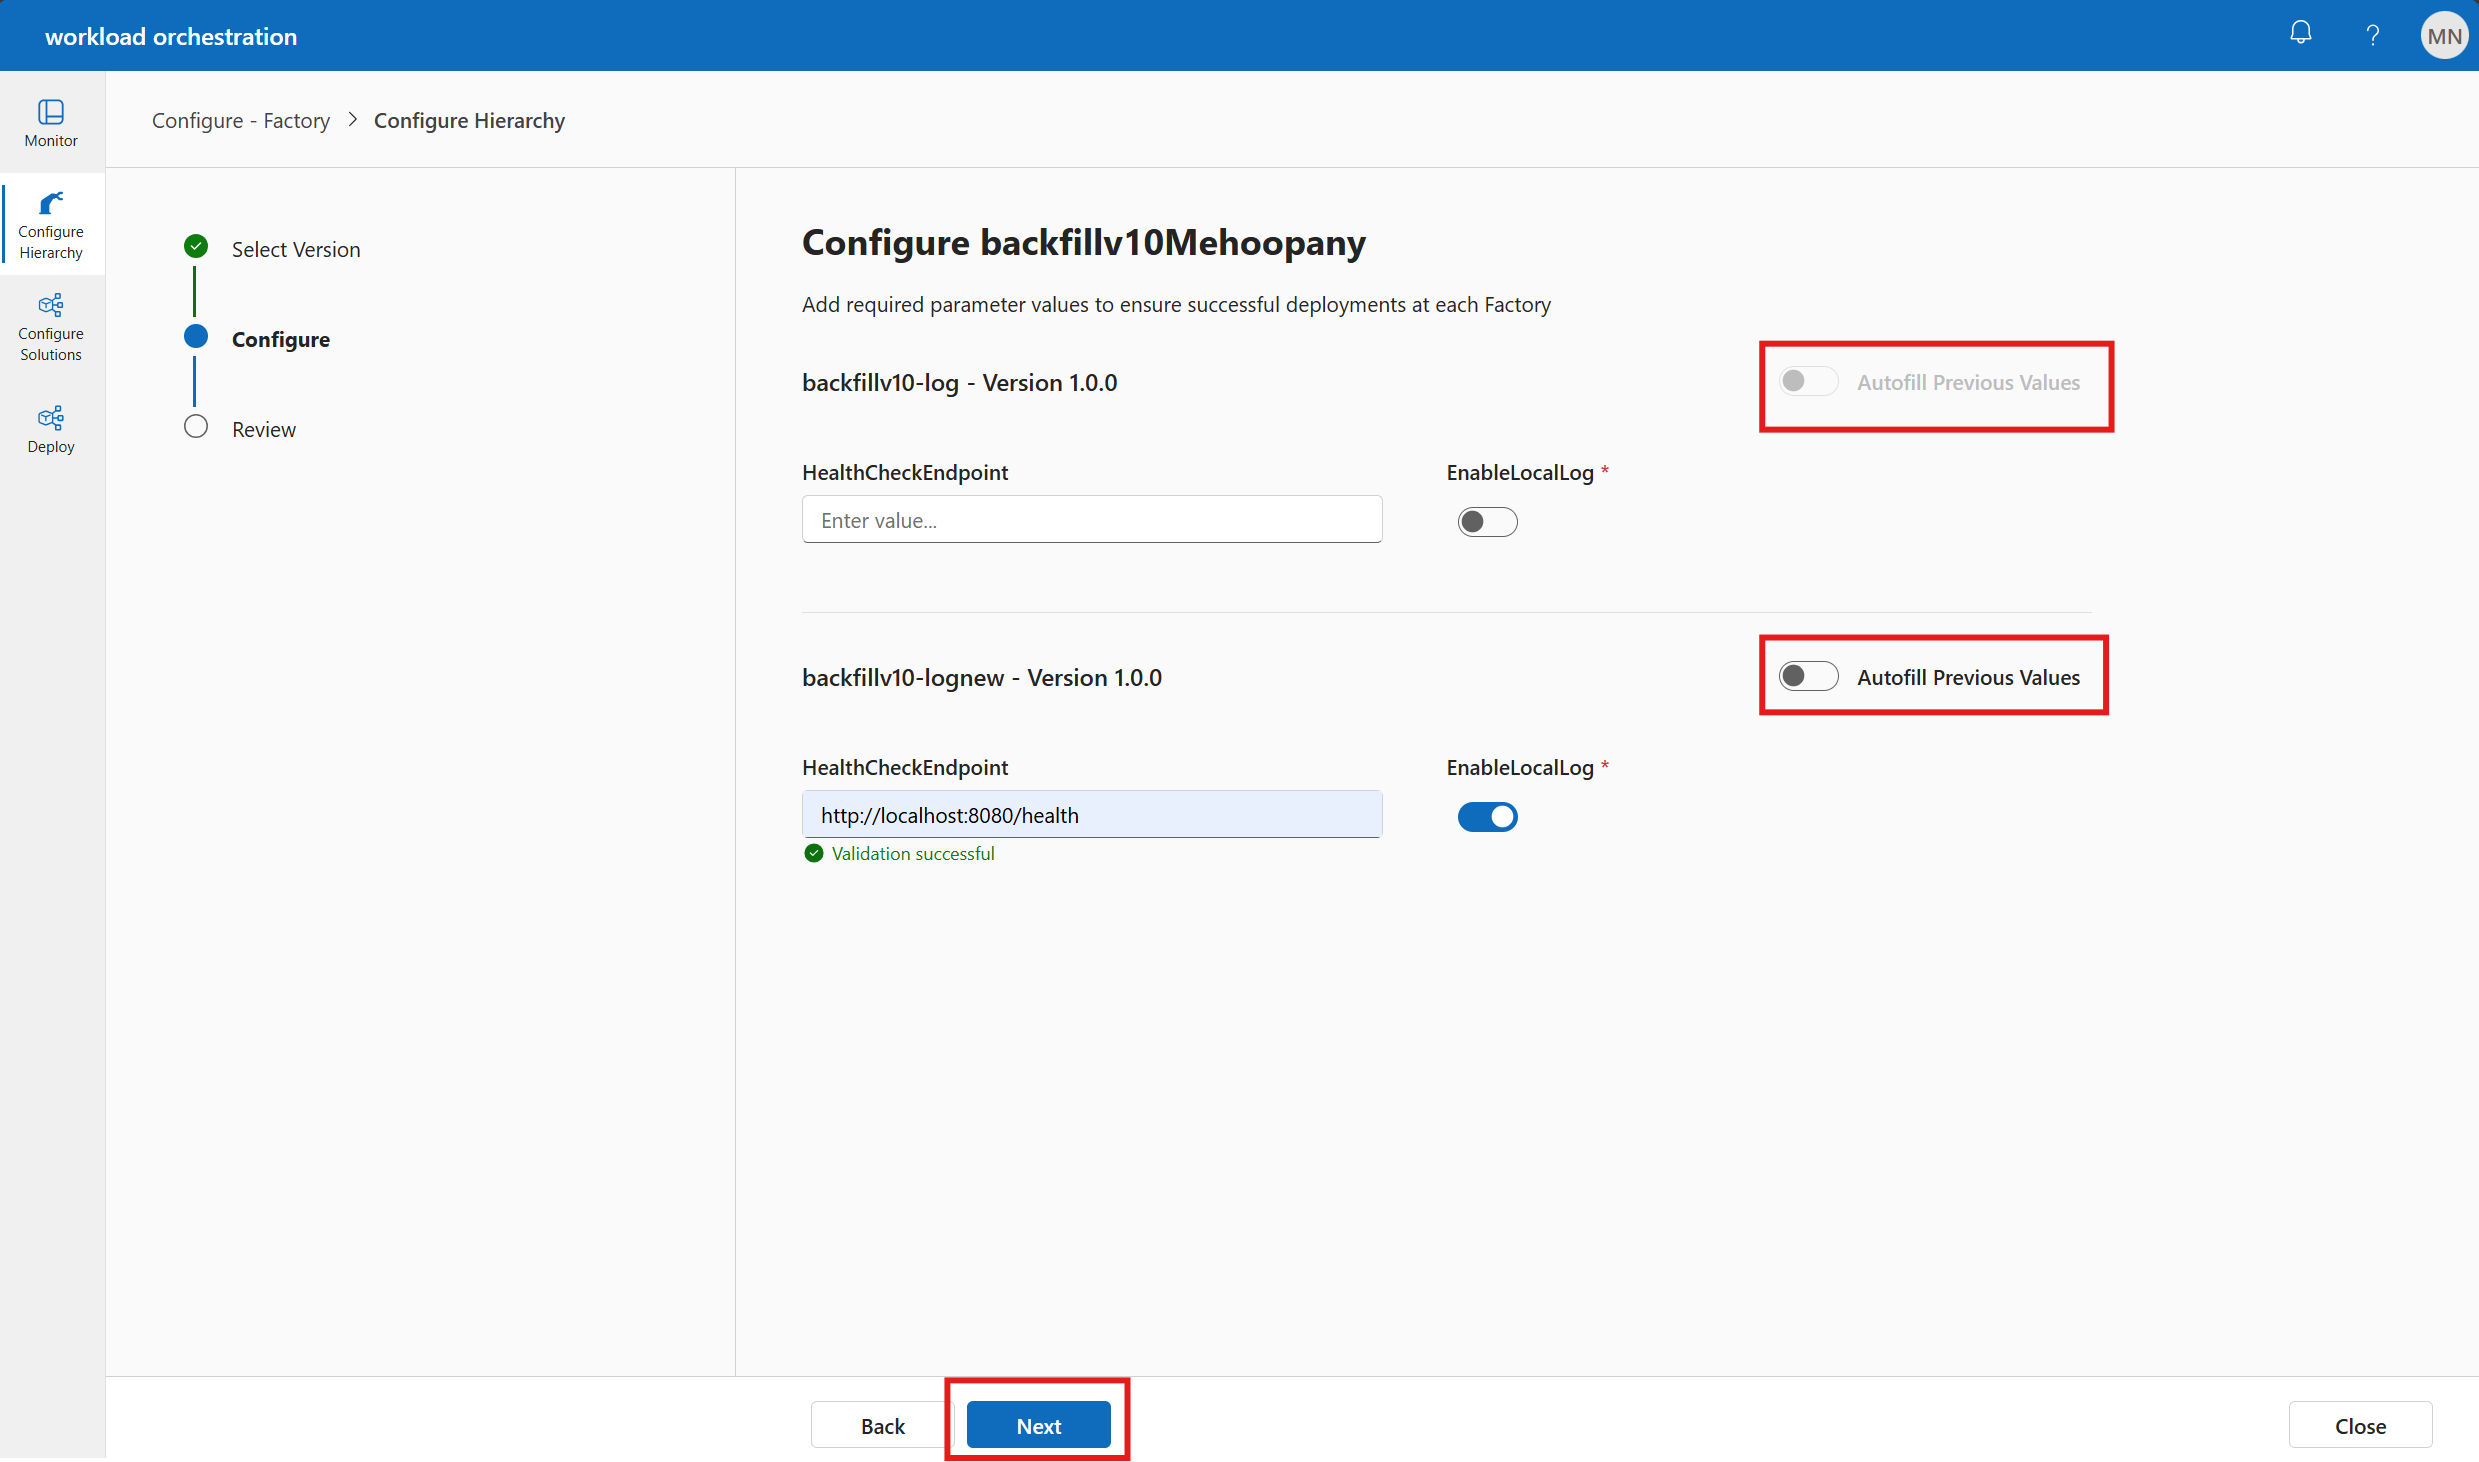
In the Configure factory step, enter the value to configure the factory and click on Next.
In the Linked solutions step, select the solutions and define the common solution parameters. Click on Next.

Review the details and click on Configure factory to apply the changes.


Configure line parameters
The Line sub-tab shows the list of factories, including their configuration status, linked solutions, and parent site.

To configure a line, follow these steps:
Select the name of the line you want to configure and click on Configure Target.
Note
You can update the configuration of a line if its status is not Configuration up to date.
The new details pane shows the configuration values for the selected line.
In the Configure Target step, enter the parameters to ensure the deployment of each target and click on Next.
Review the details and click on Configure Target to apply the changes.


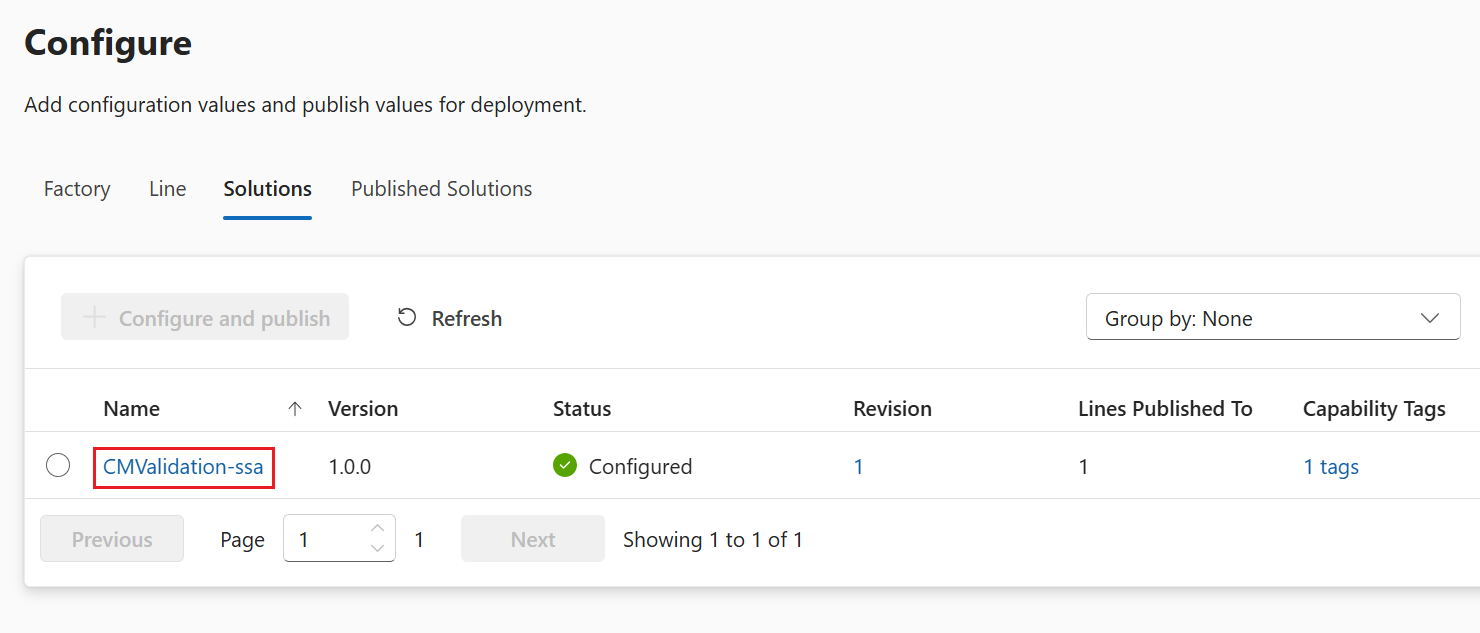
Configure solution parameters
The Solutions sub-tab shows the list of solutions, including their version, status, capabilities, and other details.

To configure a solution, follow these steps:
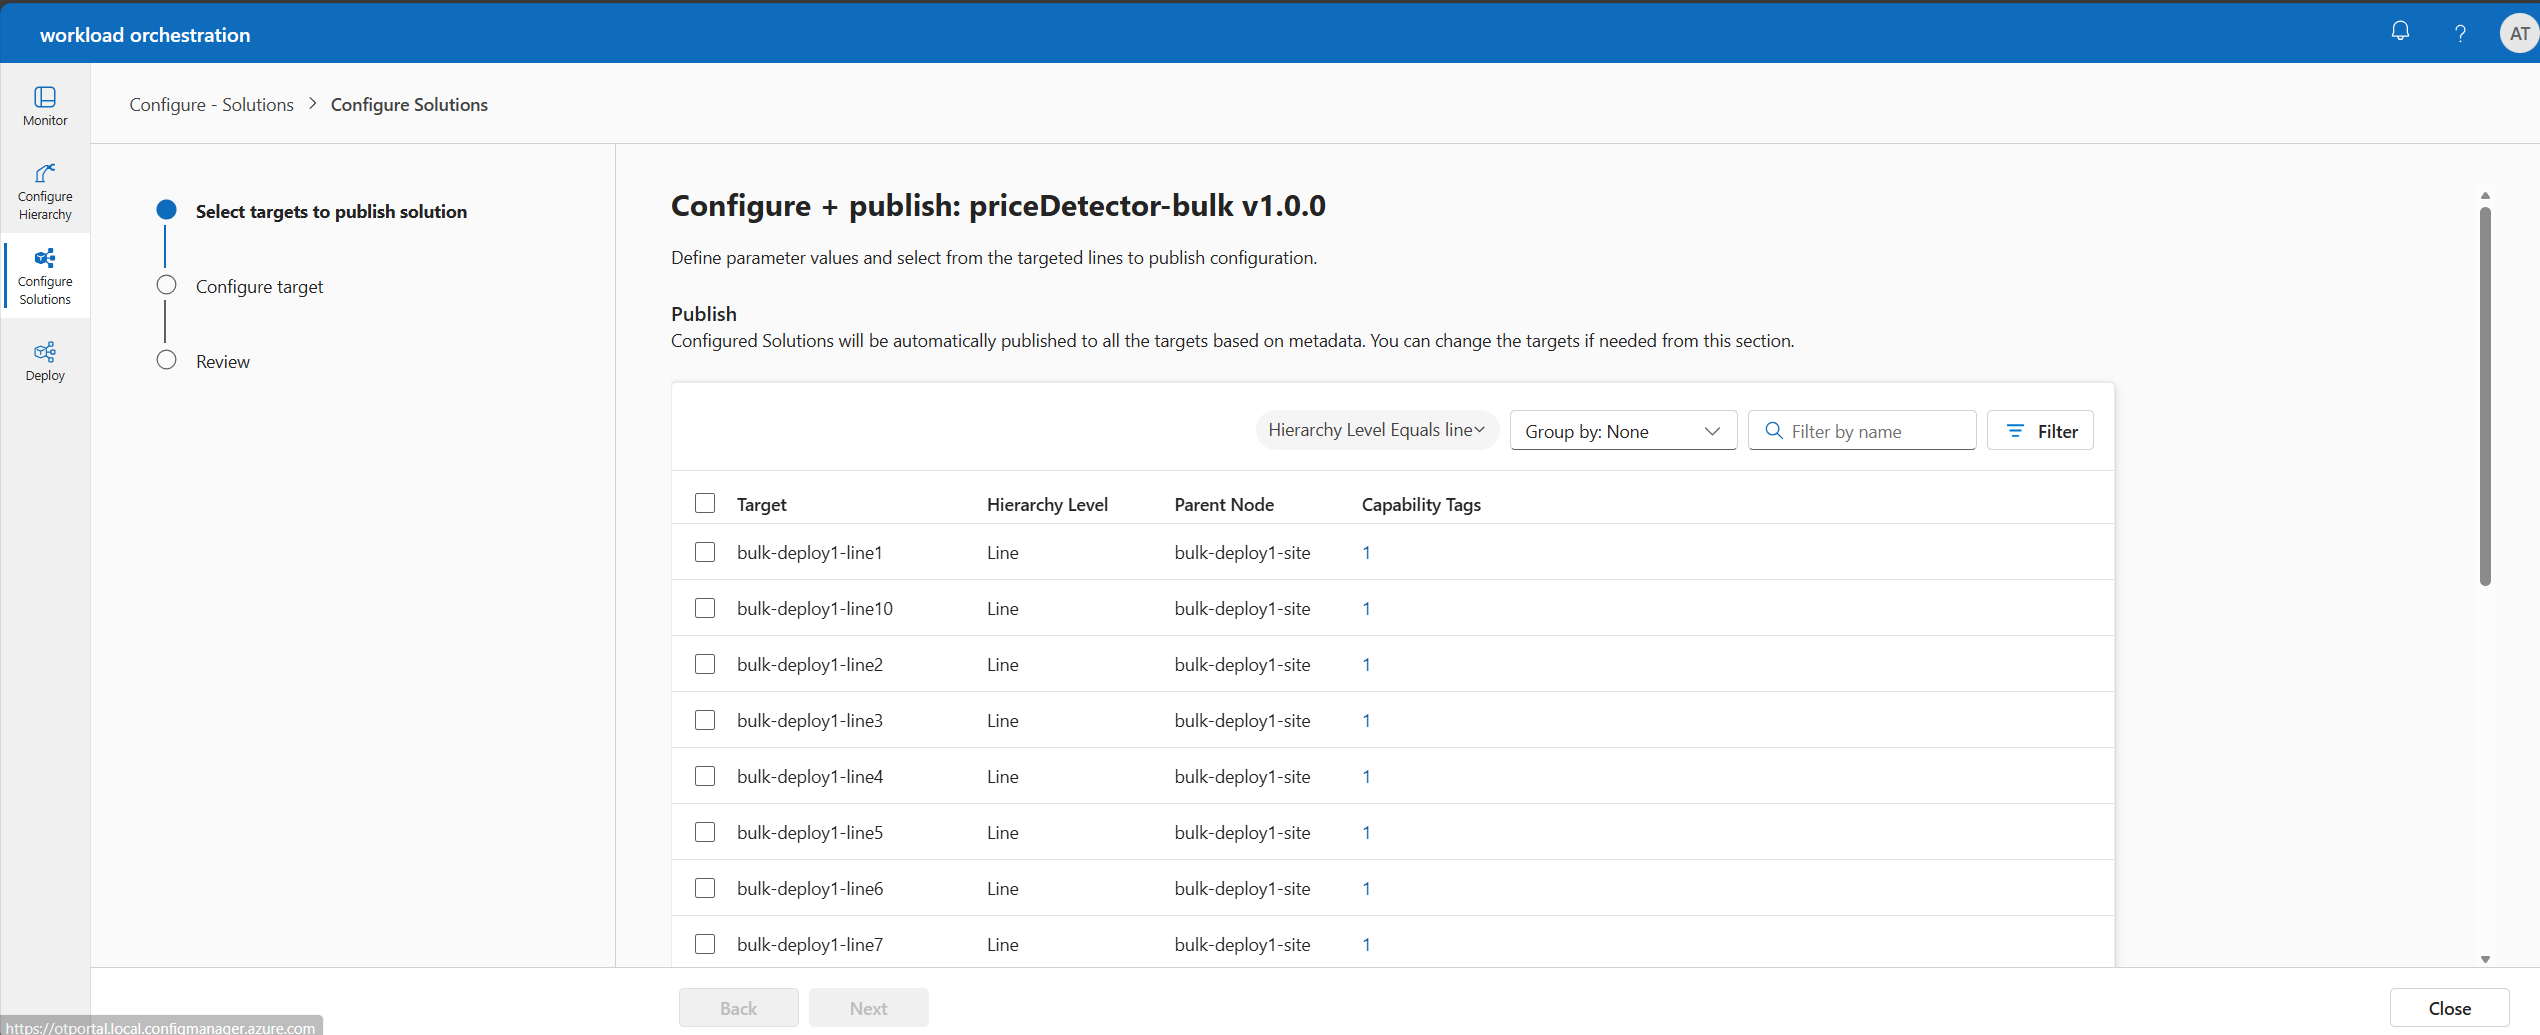
Select the name of a solution with configuration status Configuration pending and click on Configure and publish.

The new details pane shows the configuration values for the selected solution.
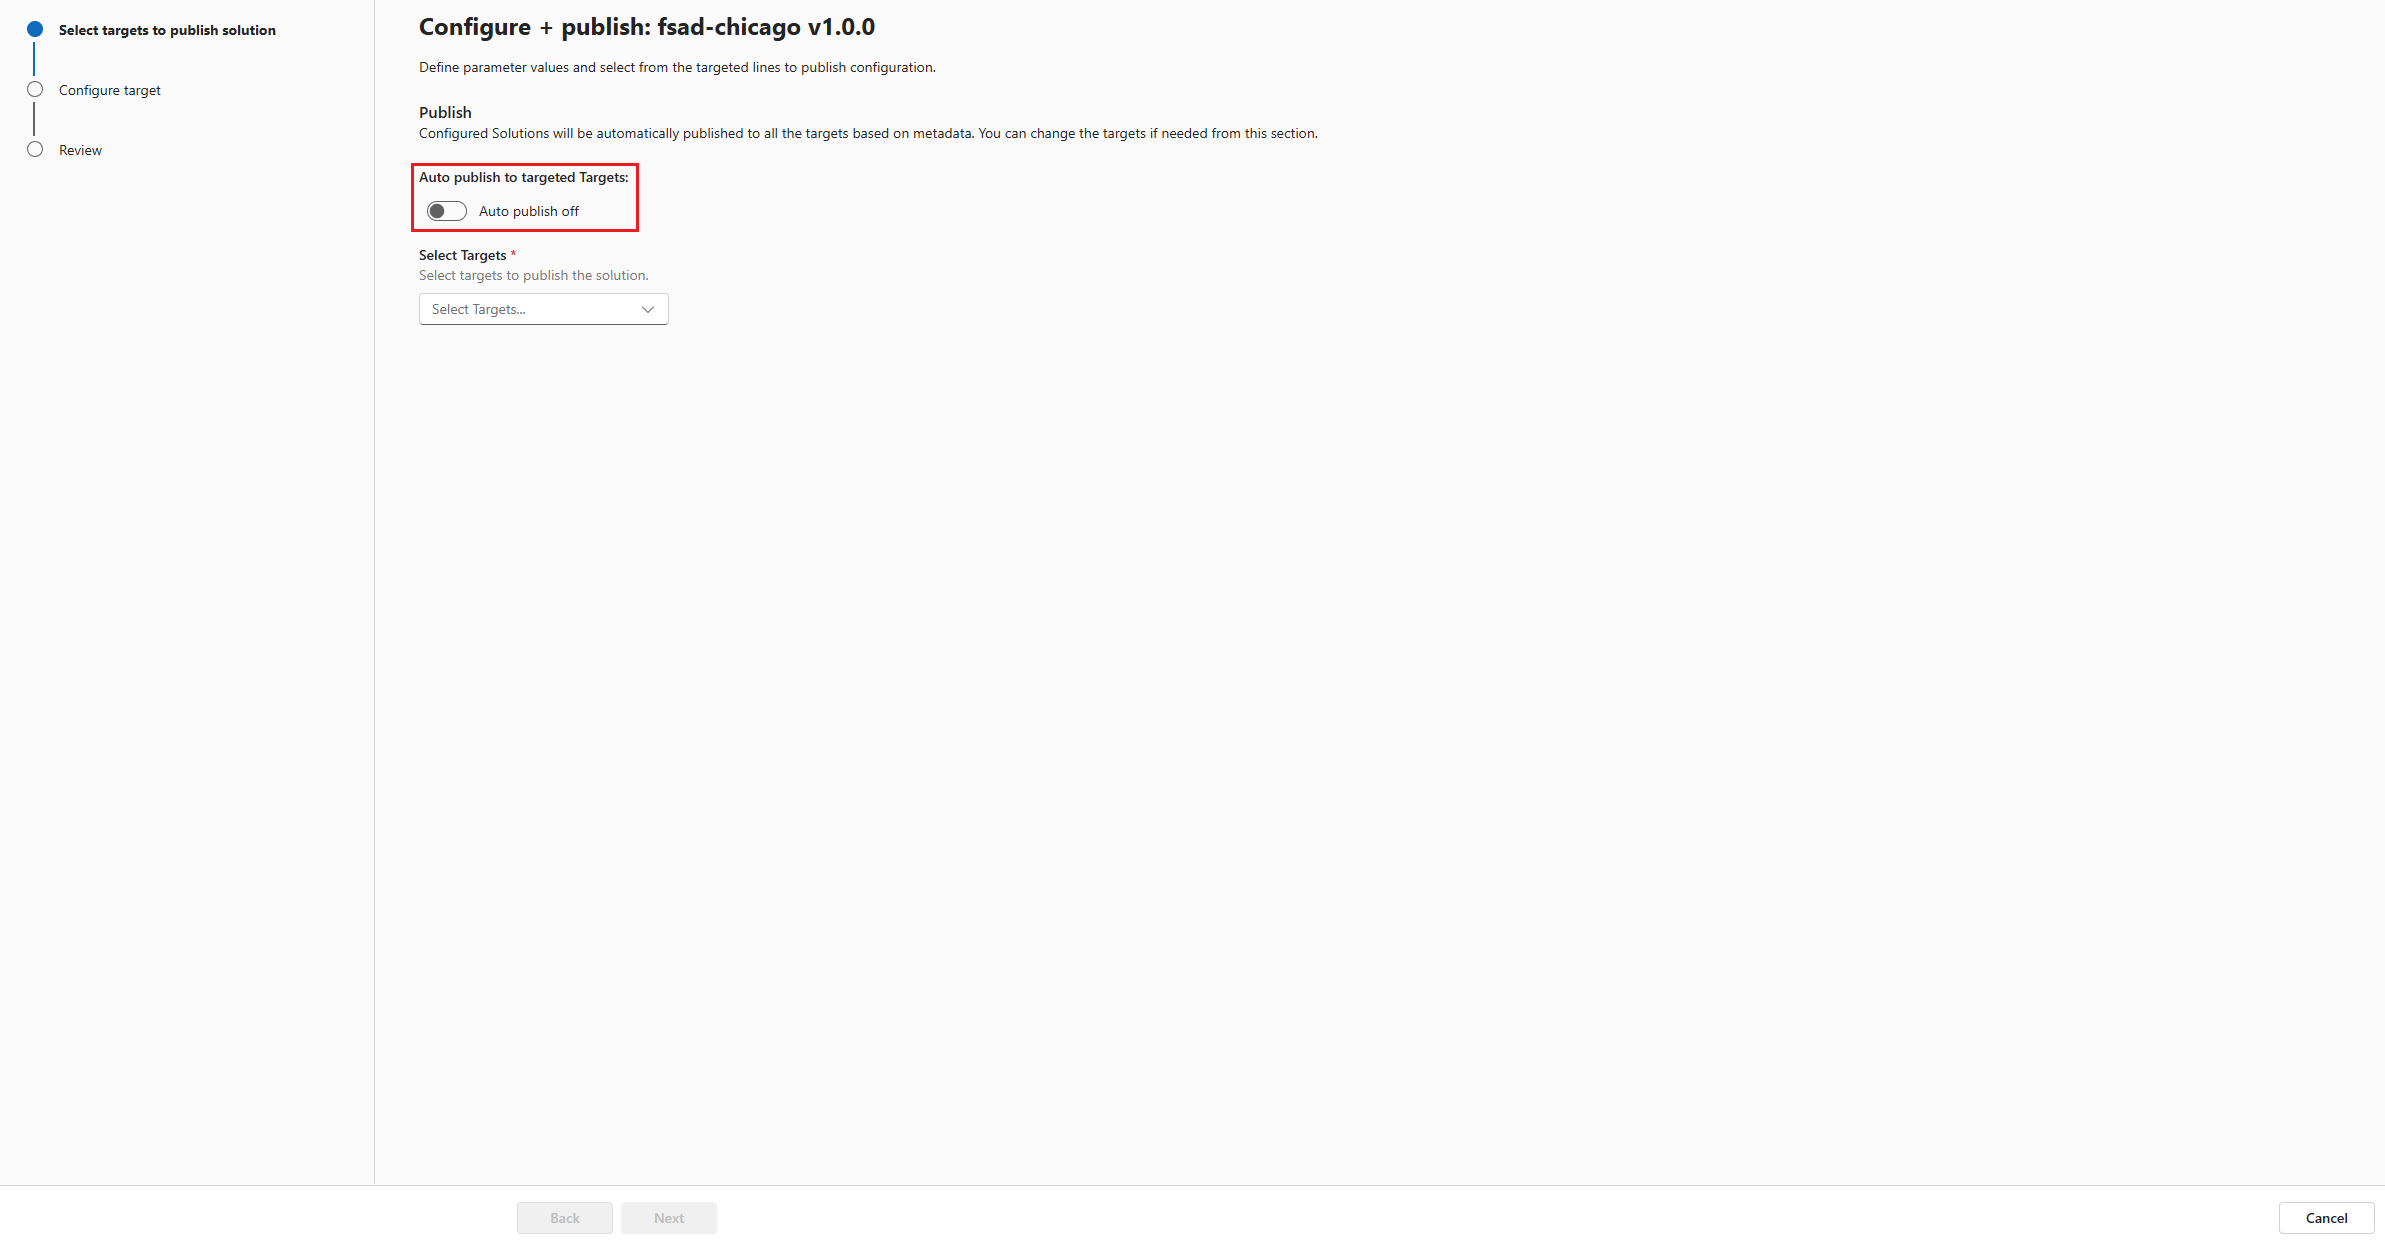
In the Select targets to publish solution step, auto-publish option is enabled by default which means the values will be applied for all targeted lines. You can disable auto-publish and choose certain lines from the dropdown. Click on Next.
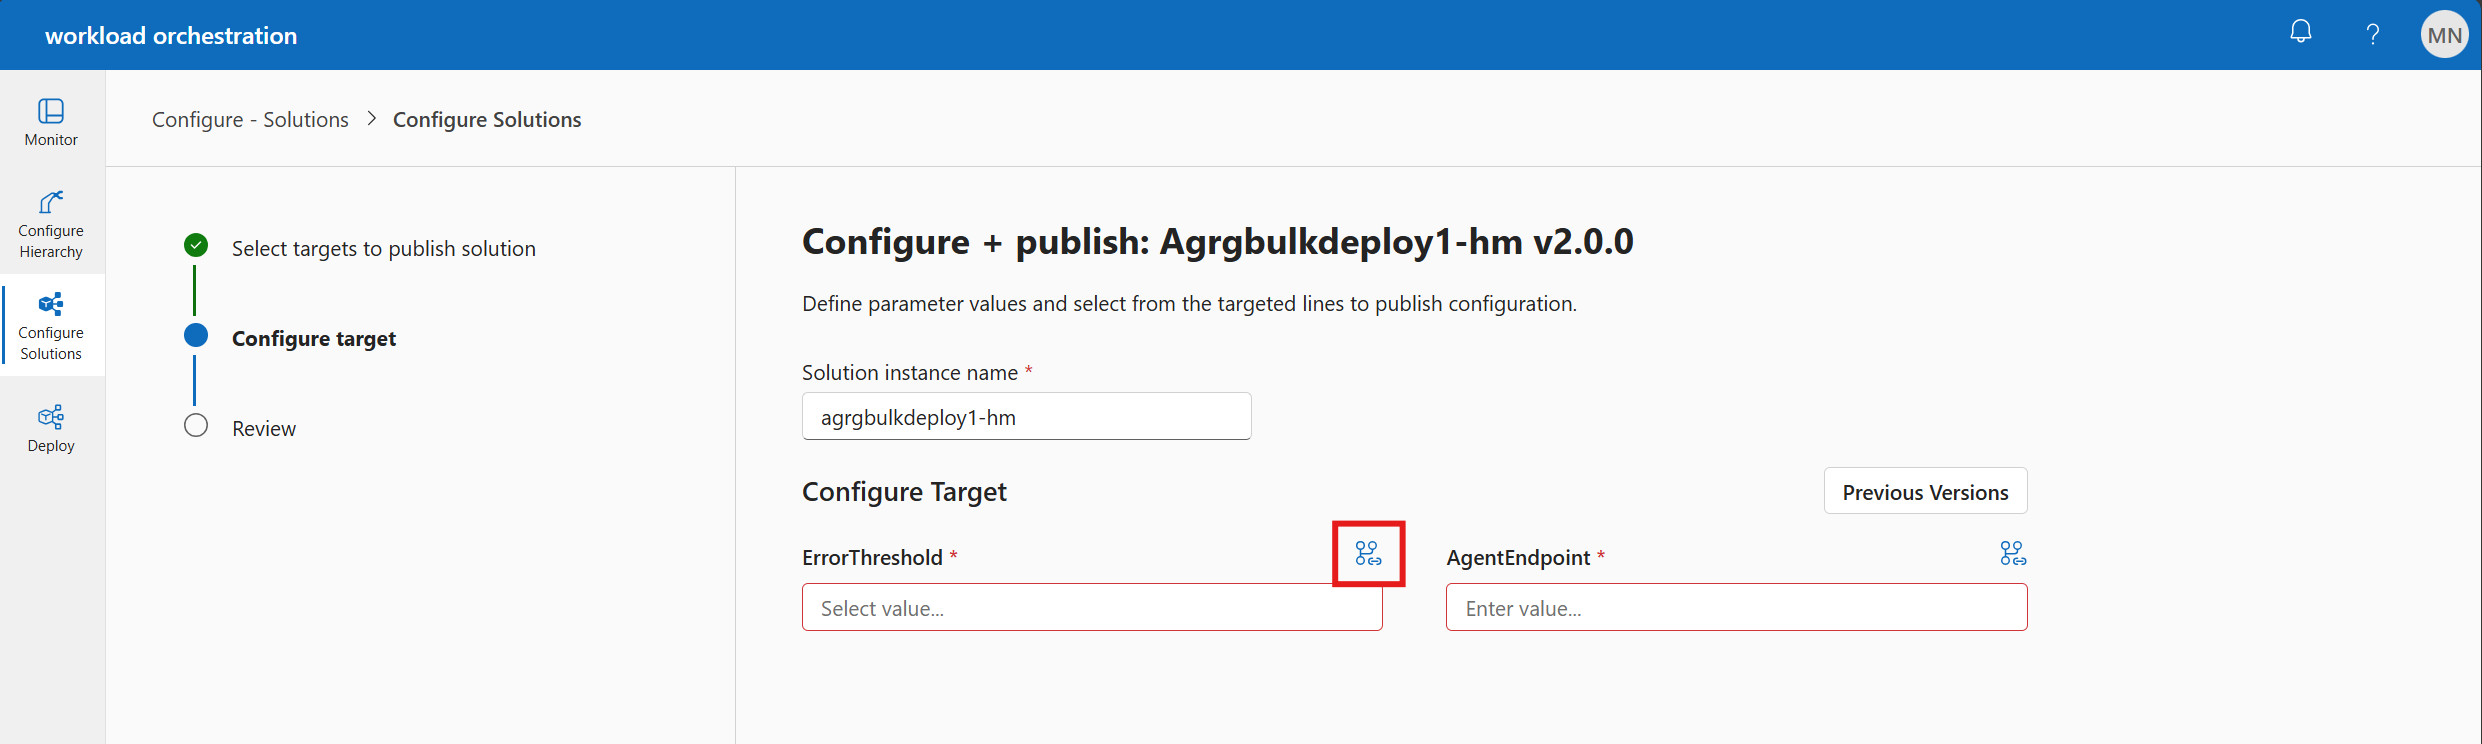
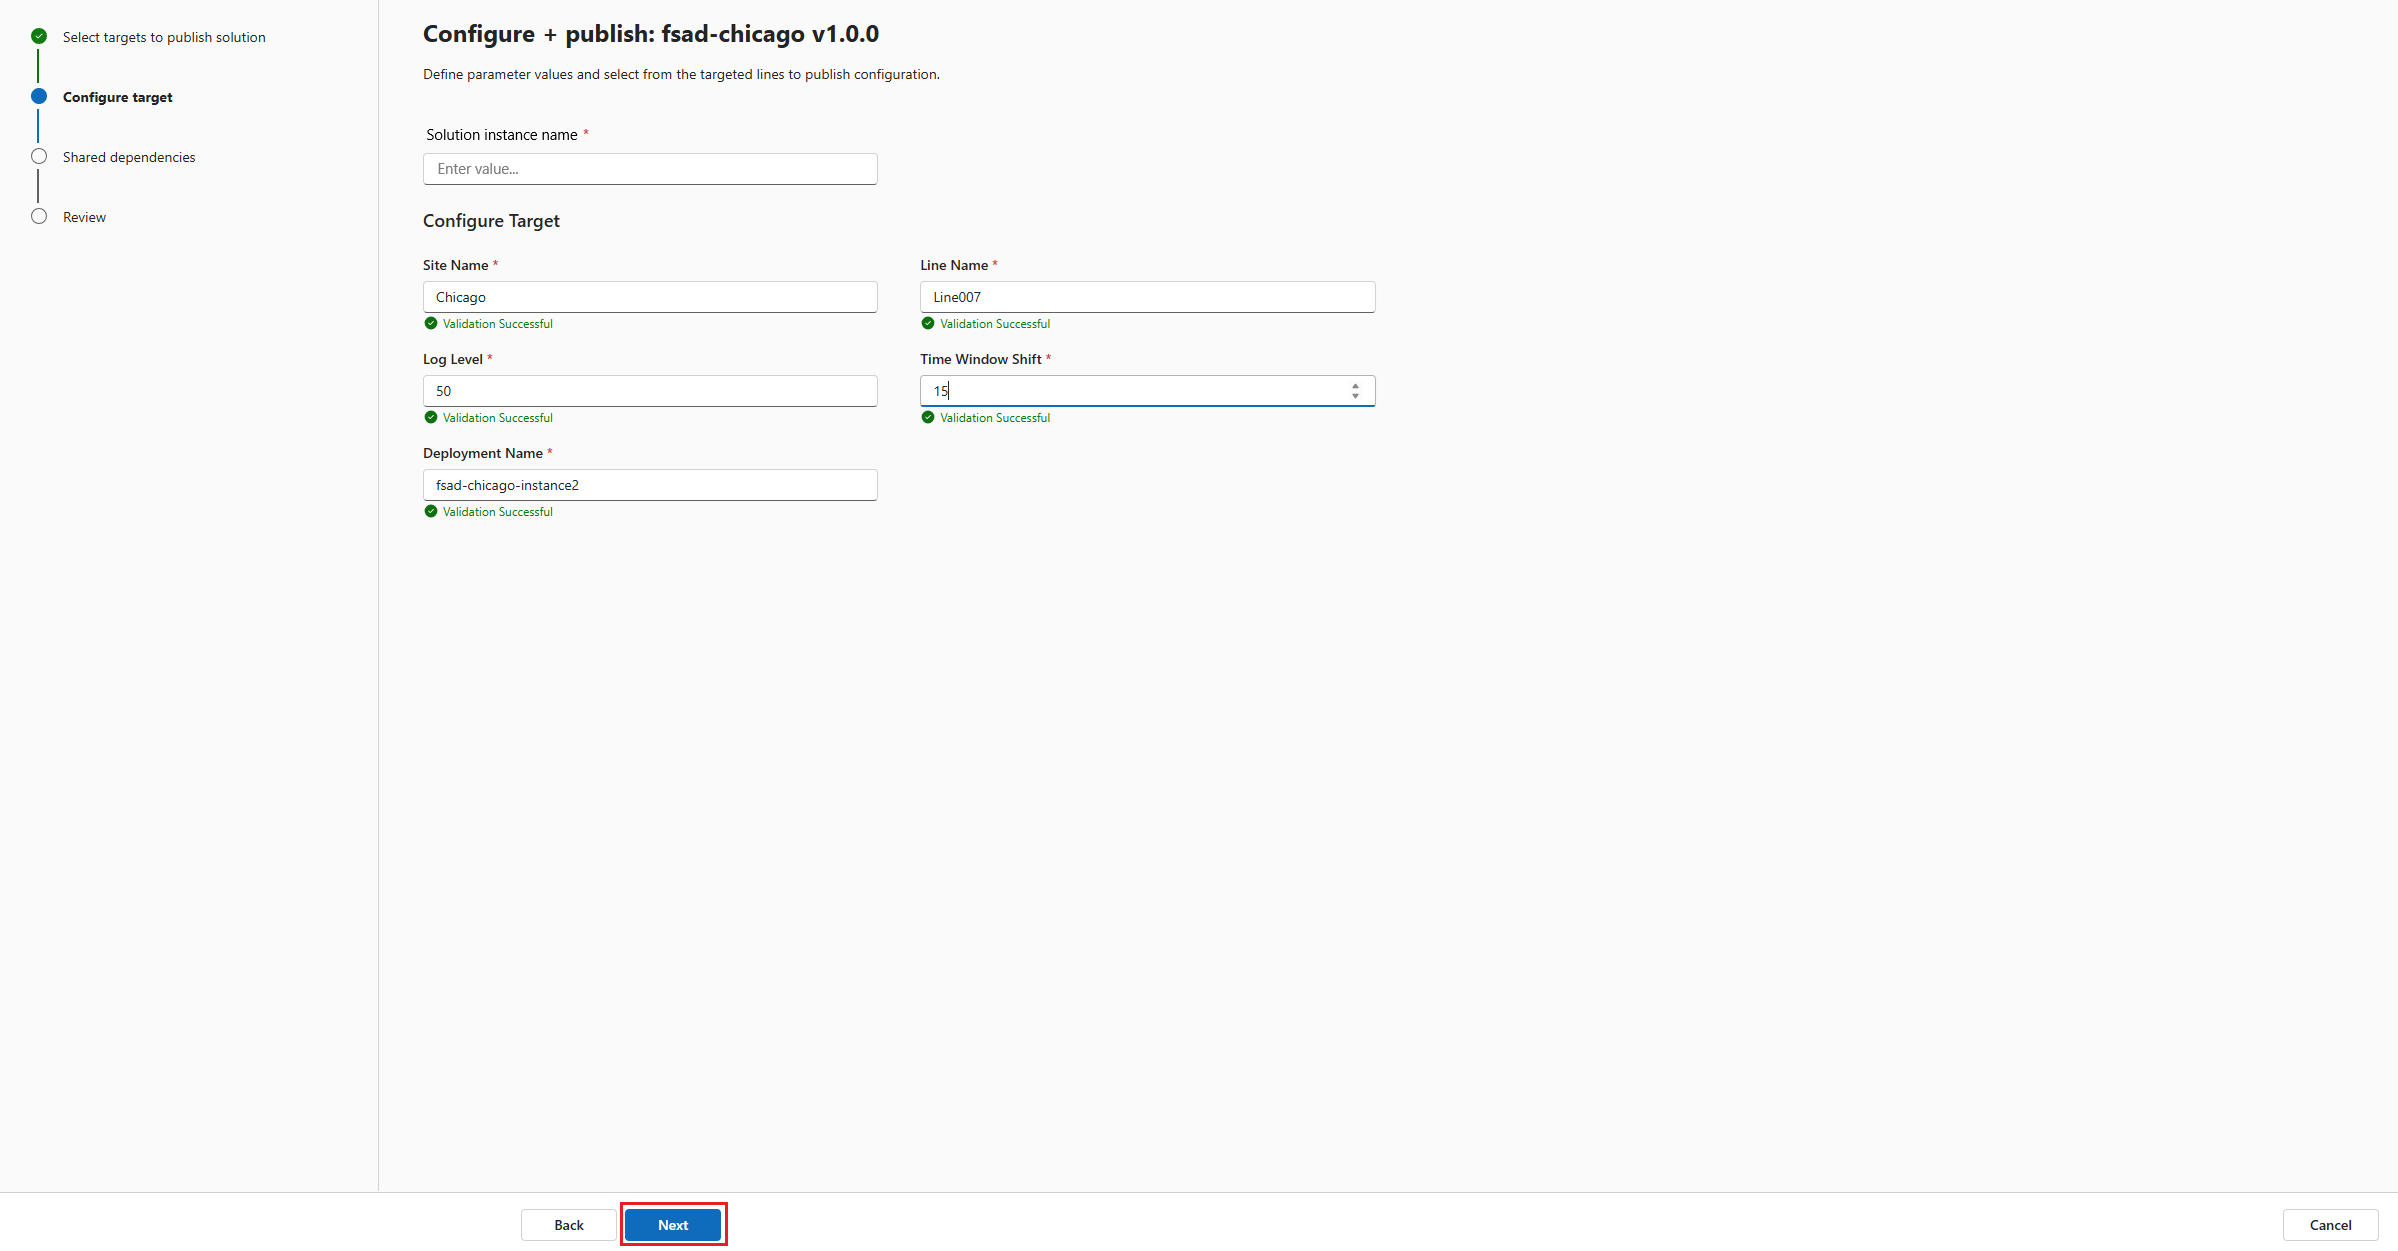
In the Configure target step, enter the instance name and the parameters to publish the solution and click on Next.
Tip
In the authoring process, the default value of a parameter is displayed below the field.
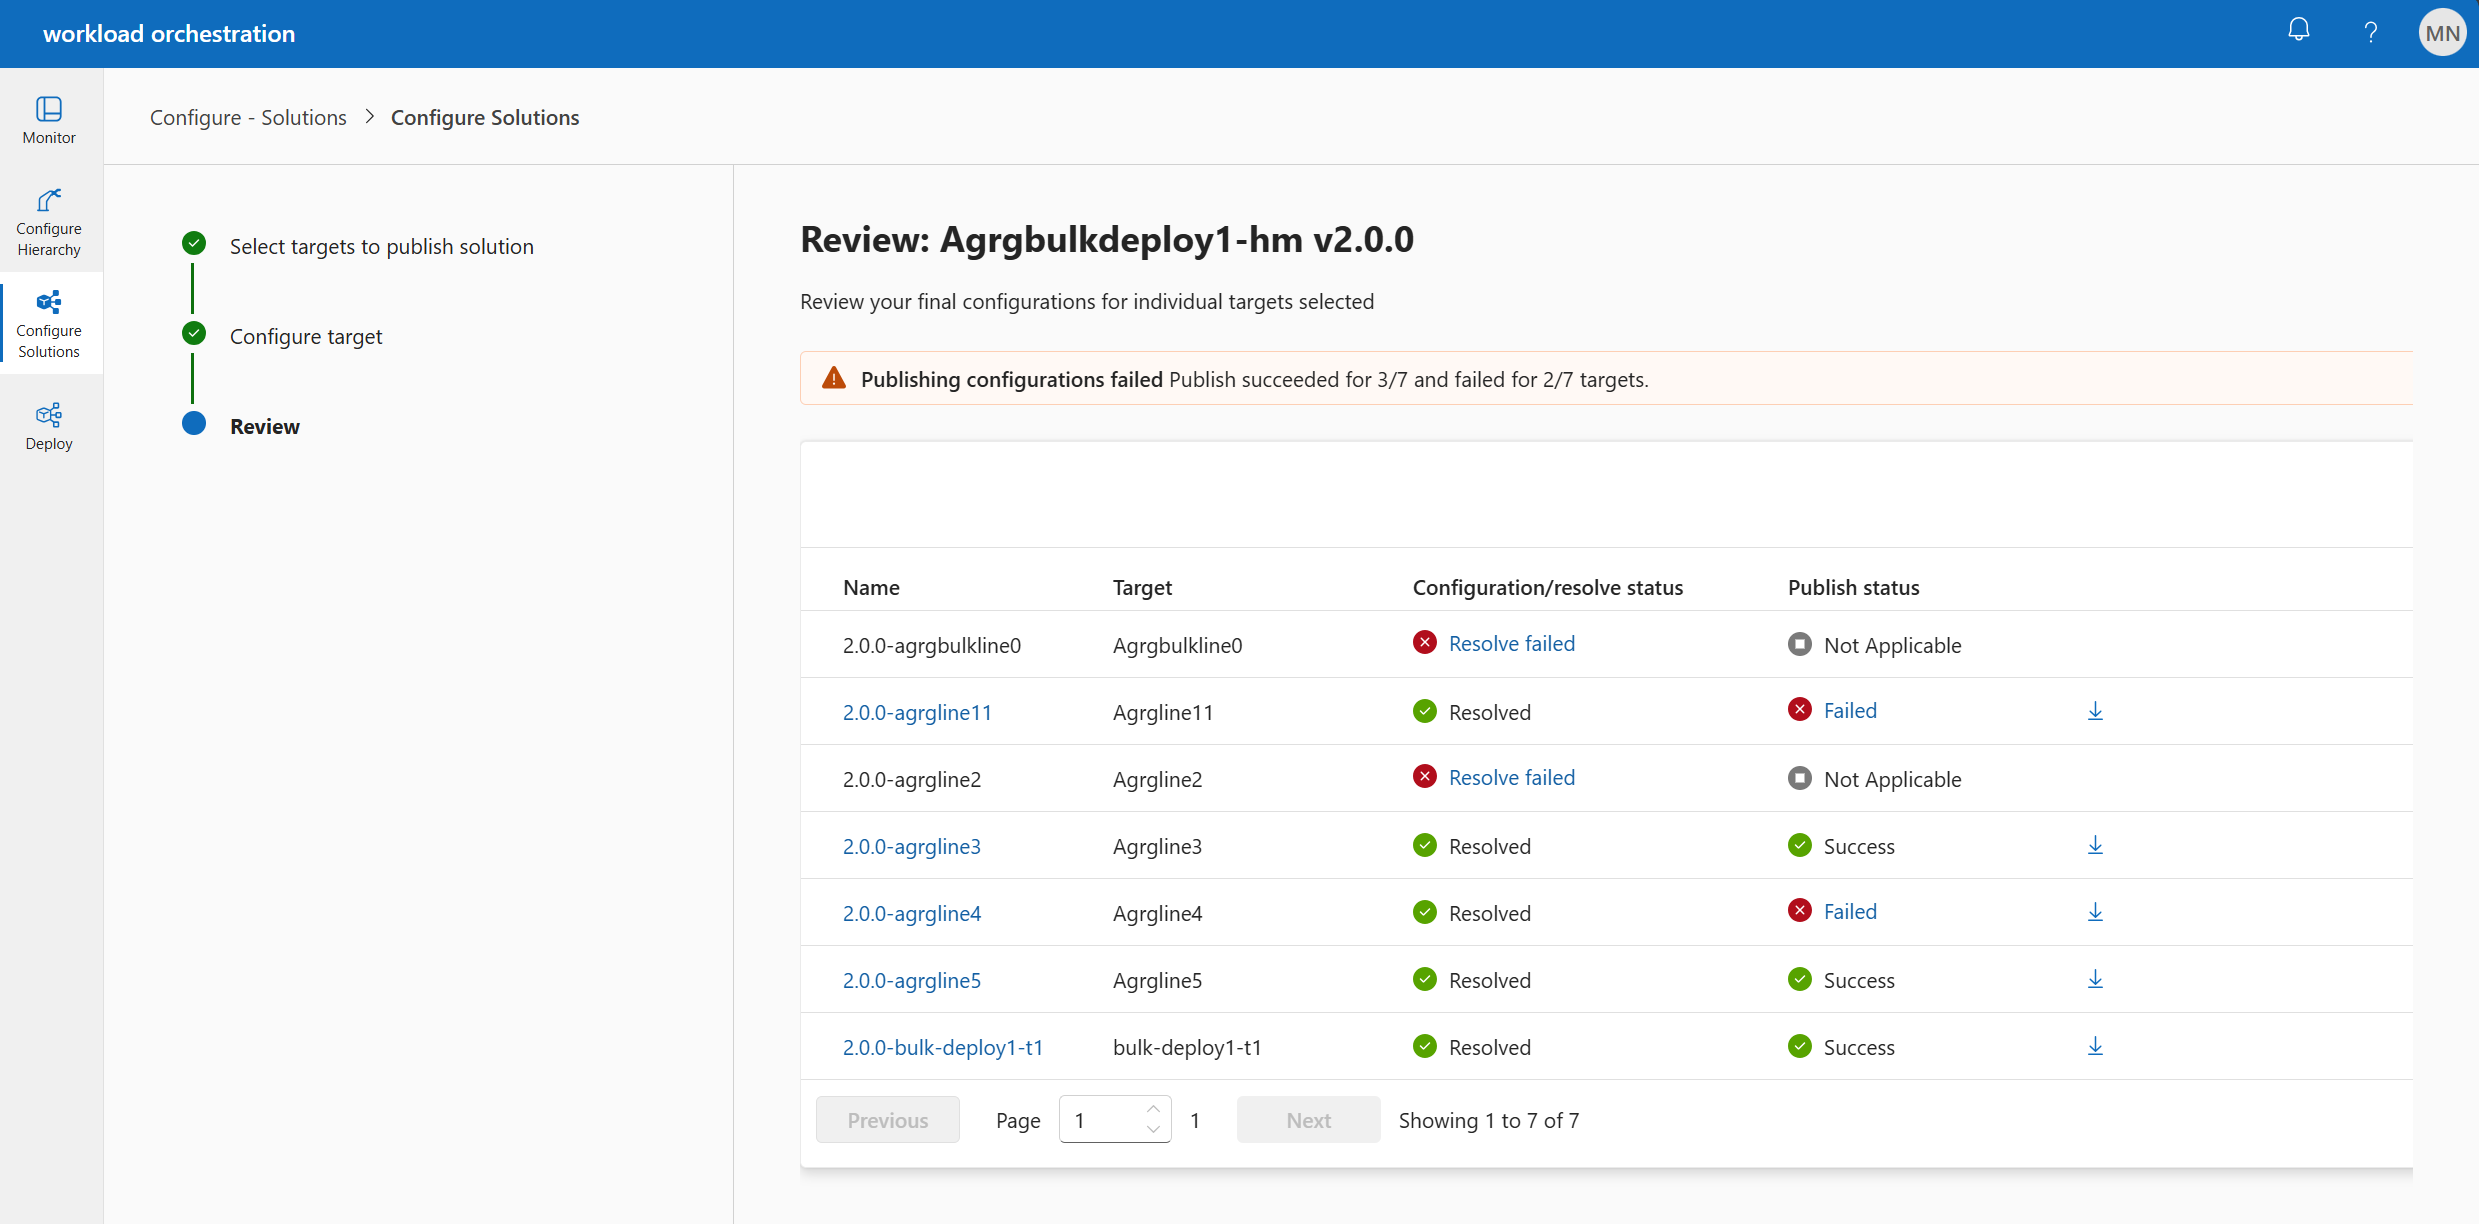
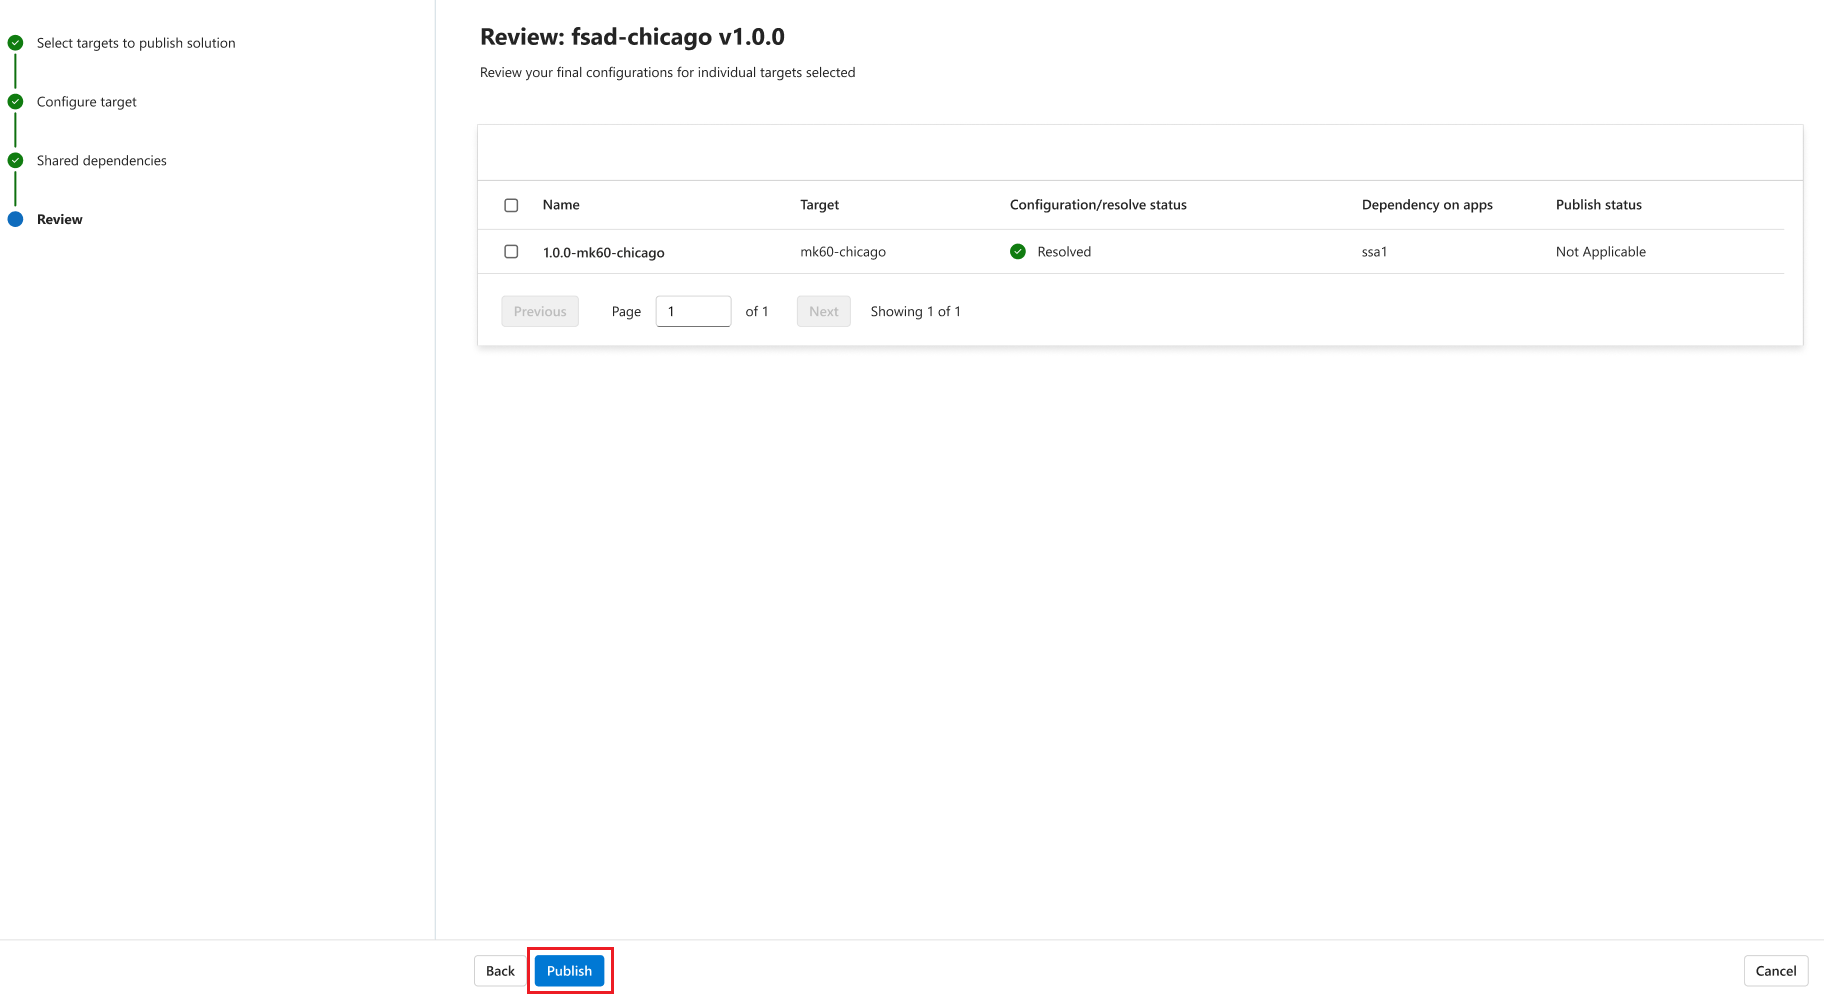
The Review step lists the final details of the configuration values for the selected targets. You can view the target name, configuration status, which shows if the status is resolved or not, and the publish status, which shows if the solution is published or not.

Click on the name of the target to open the pane showing the list of the resolved configuration values.
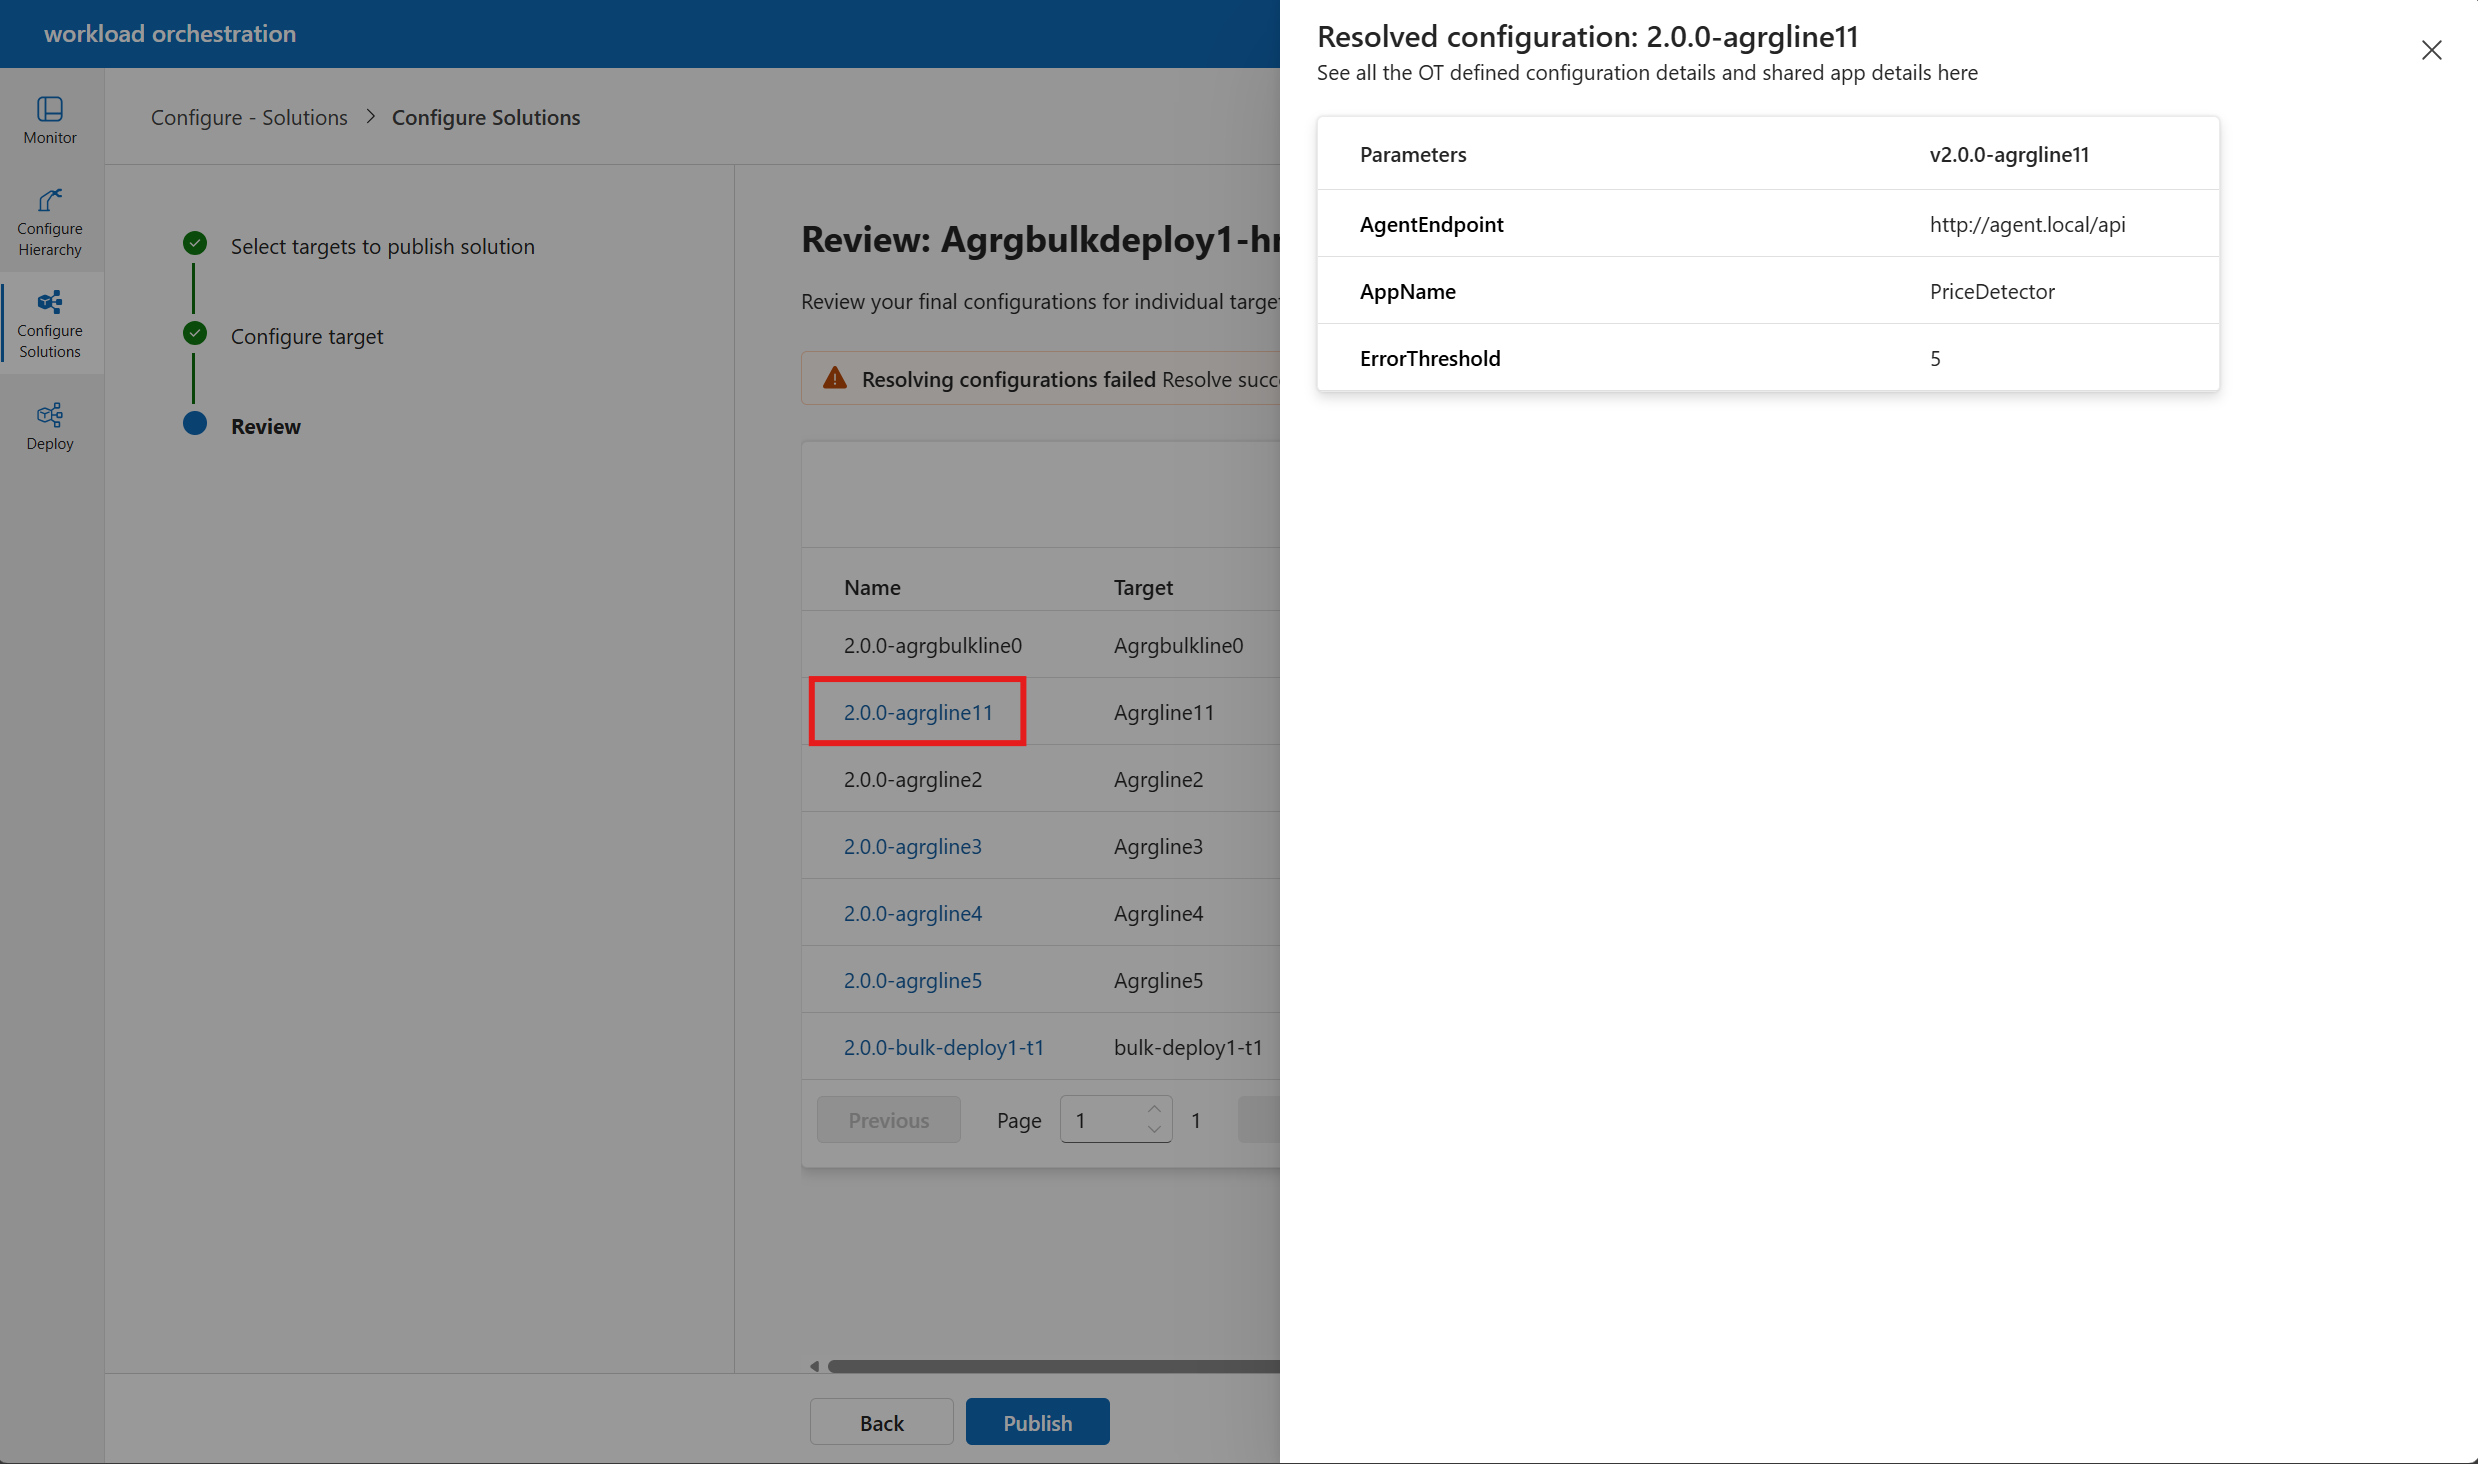
Review the resolved configuration values.

You can click on the download symbol next to the status to download the final configurations.
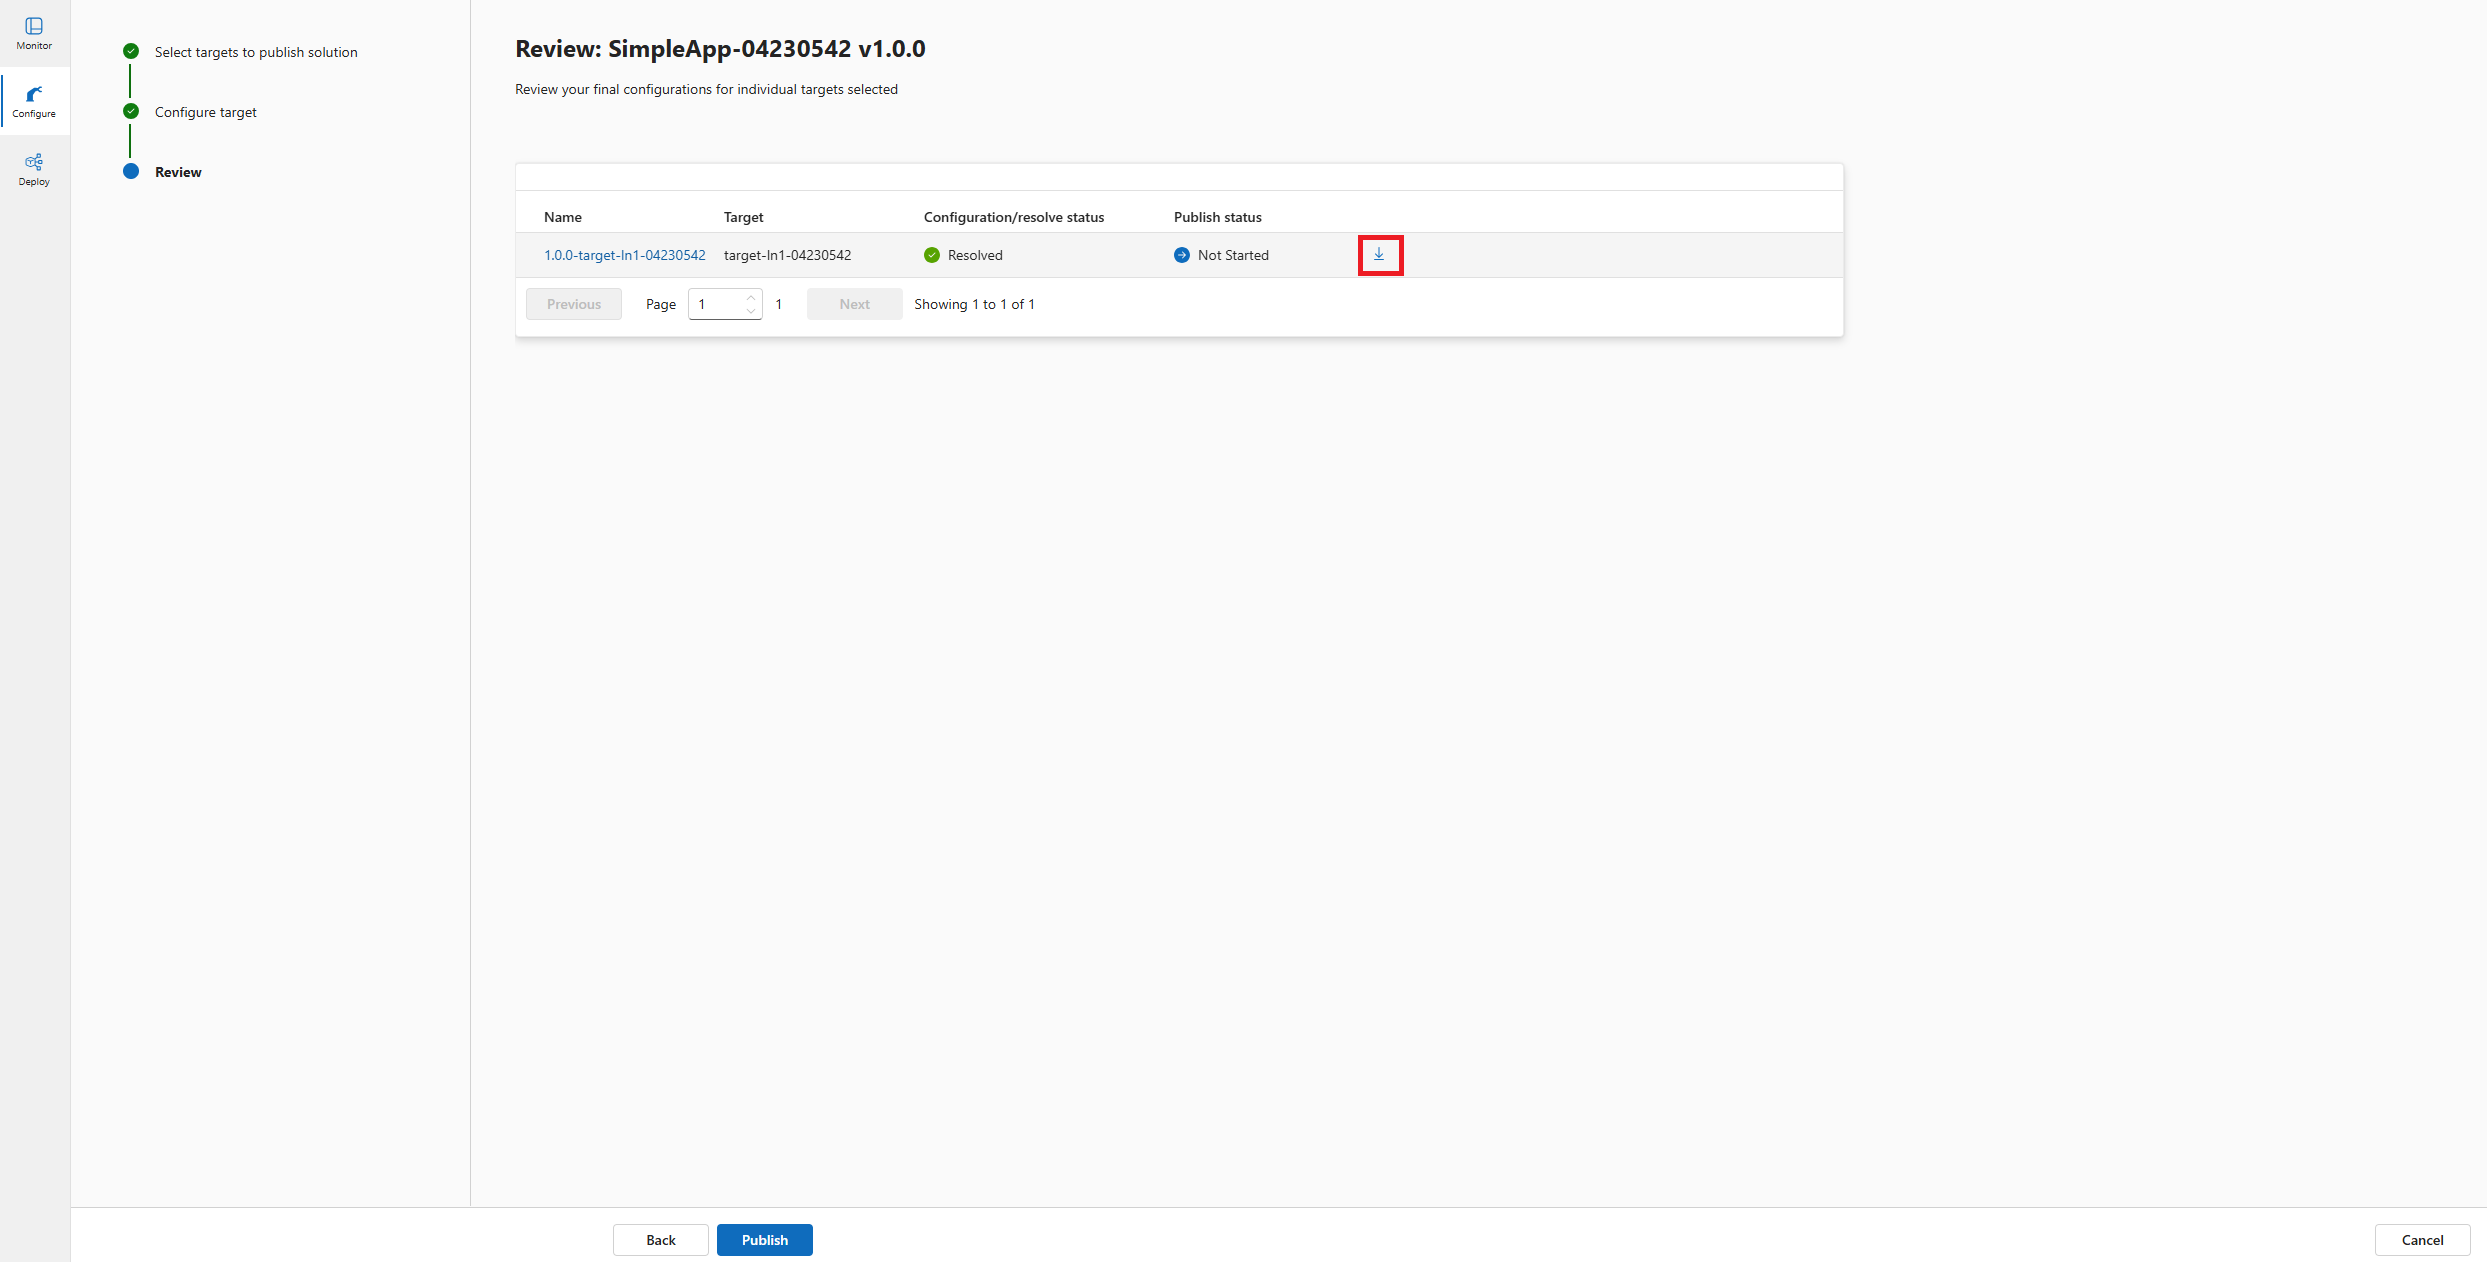
Finally, click on Publish to create a new revision of configuration values for the selected targets.
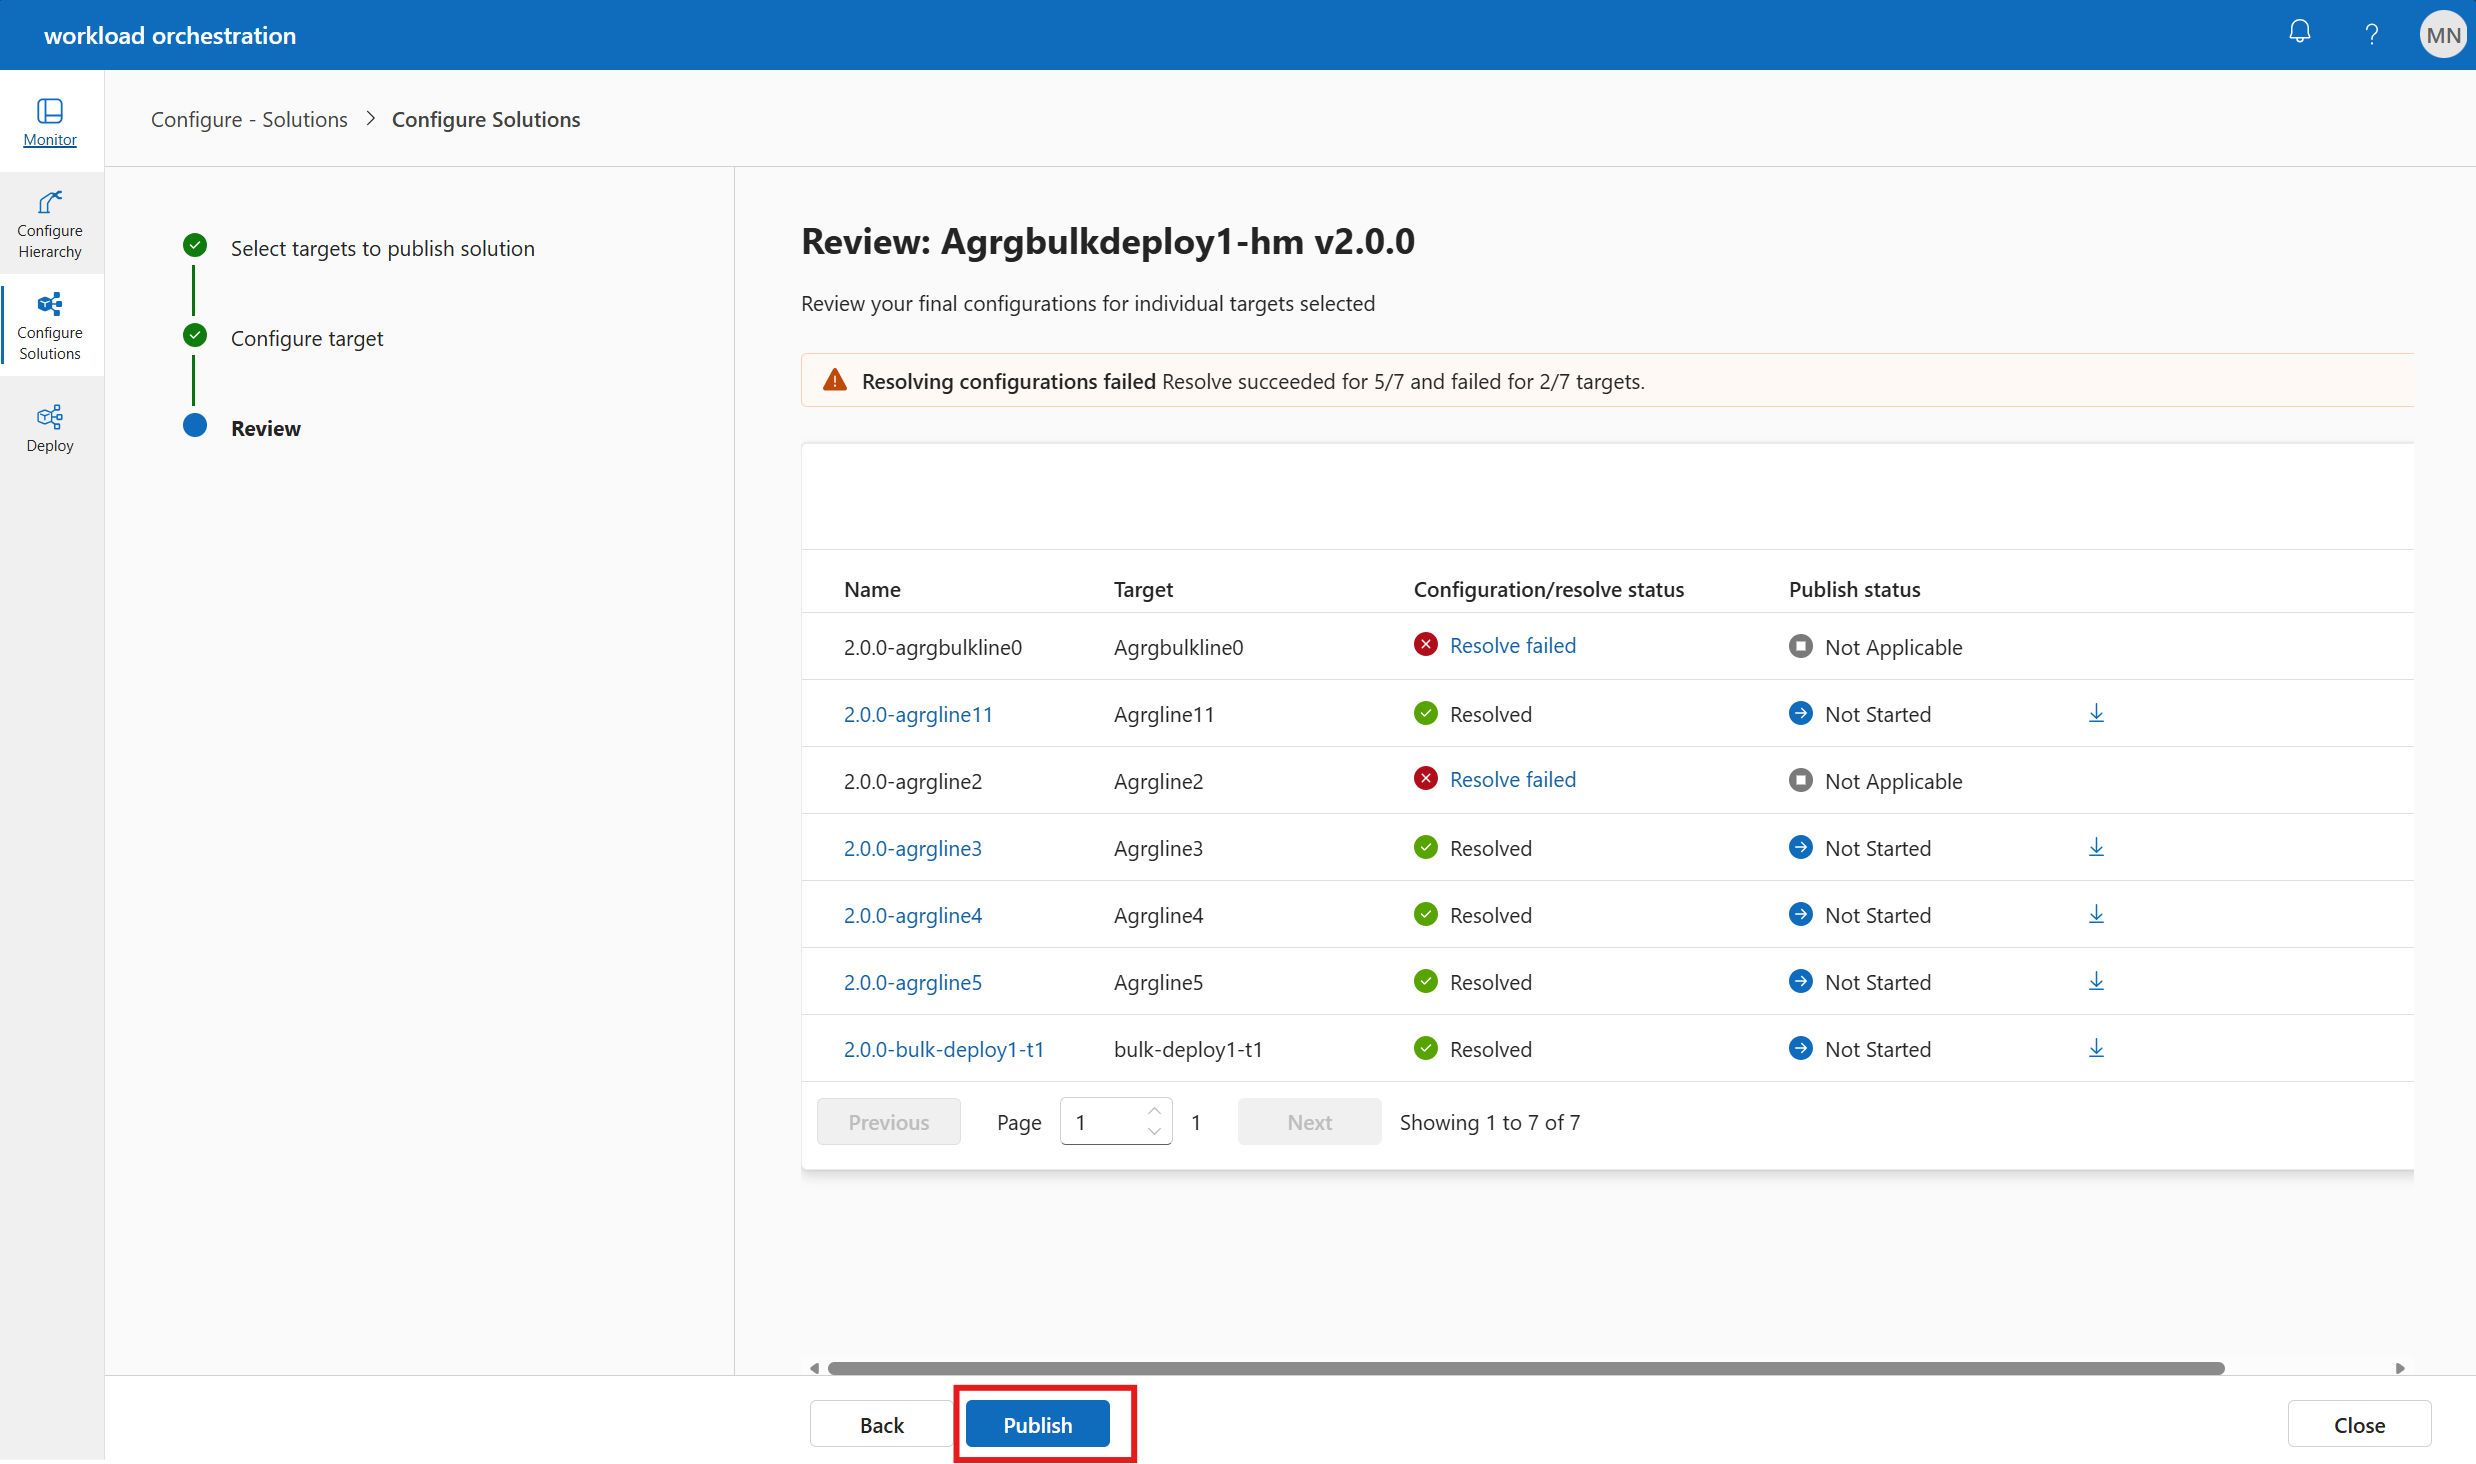
Once the configuration is successful, the publish status is updated to Published.


Configure solution parameters for a solution with dependencies
To configure a solution with dependencies, you need to ensure that the dependent solution is also configured. For example, let's consider a Factory Sensor Anomaly Detector (FSAD) solution, which depends on a Smart Sensor Anomaly (SSA) solution. The FSAD solution is deployed on a child target, while the SSA solution is deployed on a parent target. The FSAD solution uses the SSA solution to synchronize data between devices and servers.
The configuration process is similar to the one described in the previous section, but with some additional steps.
Select the FSAD solution you want to configure and click on Configure and publish.
The new details pane shows the configuration values for the selected solution.
In the Select targets to publish solution step, auto-publish option is enabled by default which means the values will be applied for all targeted lines. You can proceed with auto-publish or choose the targets where the FSAD solution needs to be deployed. Click on Next.
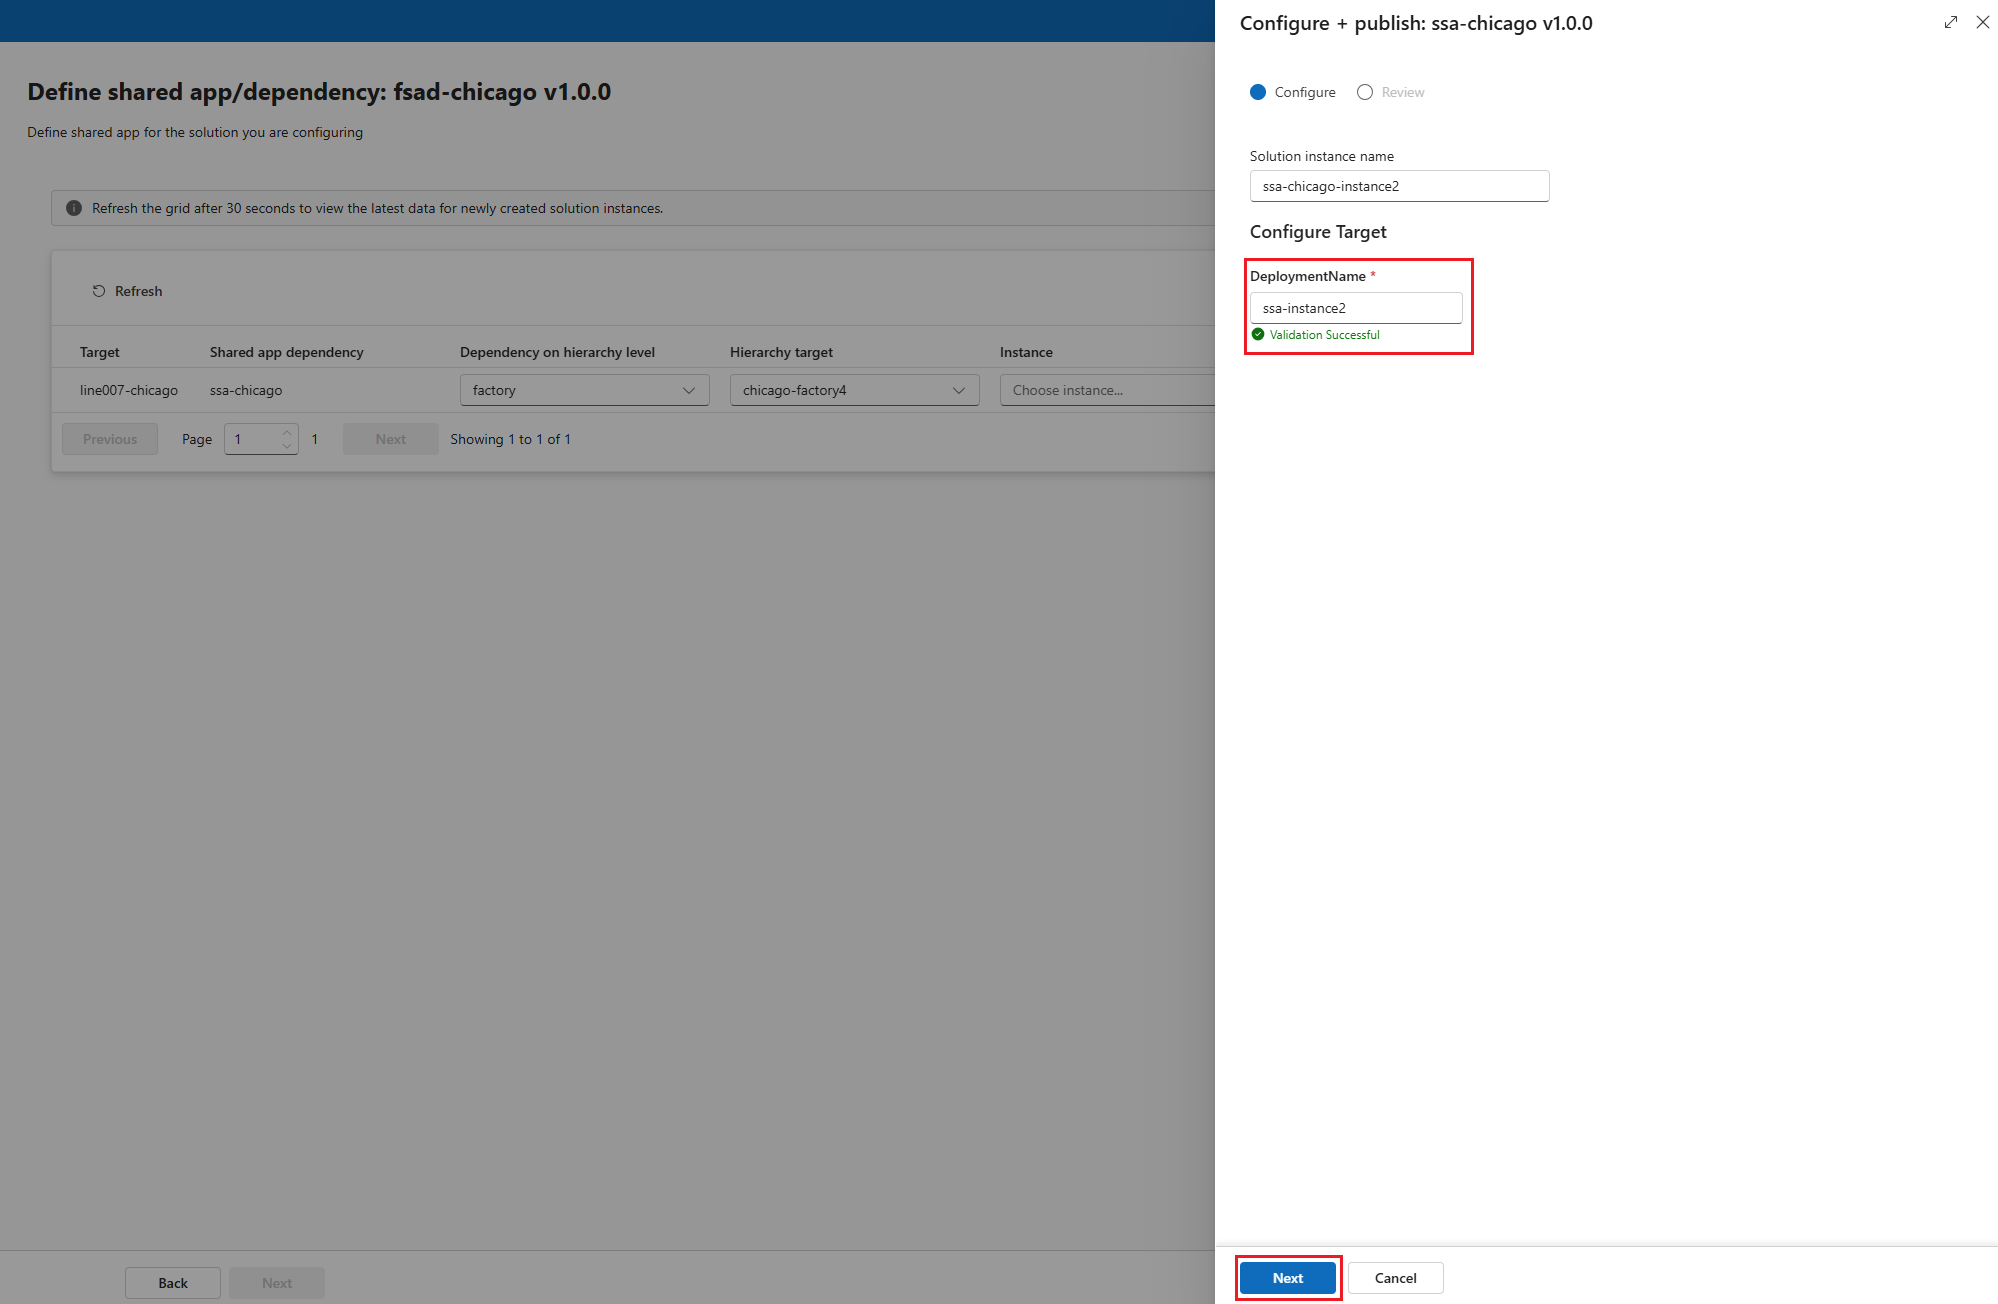
In the Configure target step, enter the instance name for the solution and the values for FSAD configurations.
In the Shared dependencies step, you can see the details of the dependant SSA instance. Under the Instance field, either choose existing or create a new SSA instance.
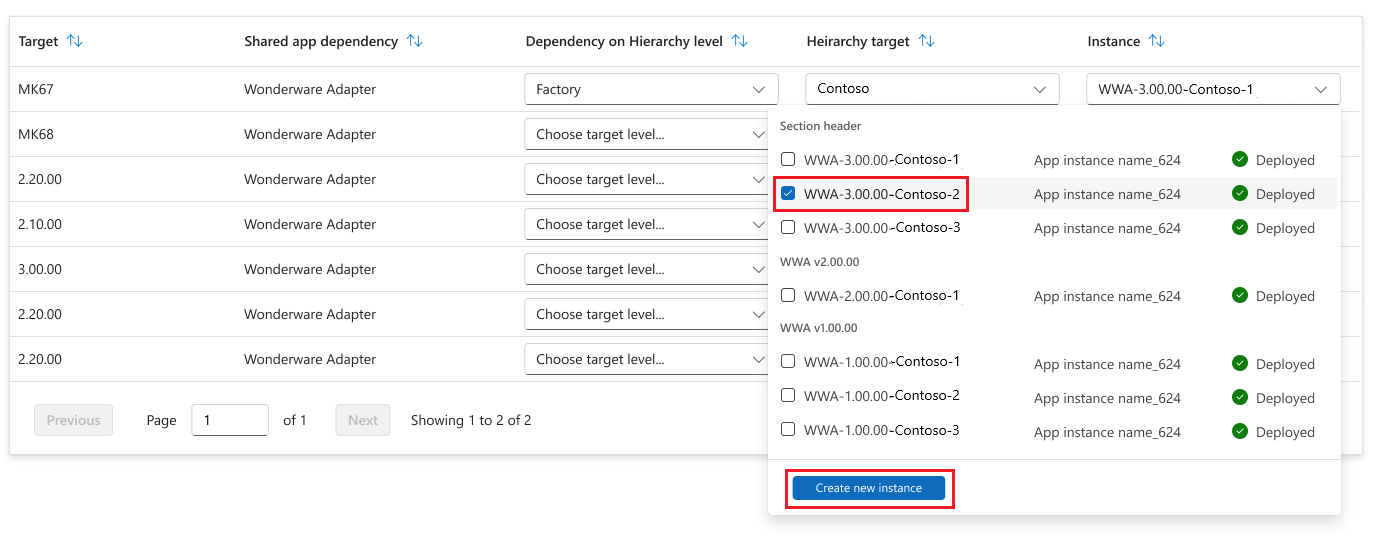
To create a new instance of SSA, enter the new instance name and the configuration values for SSA. Click on Next.
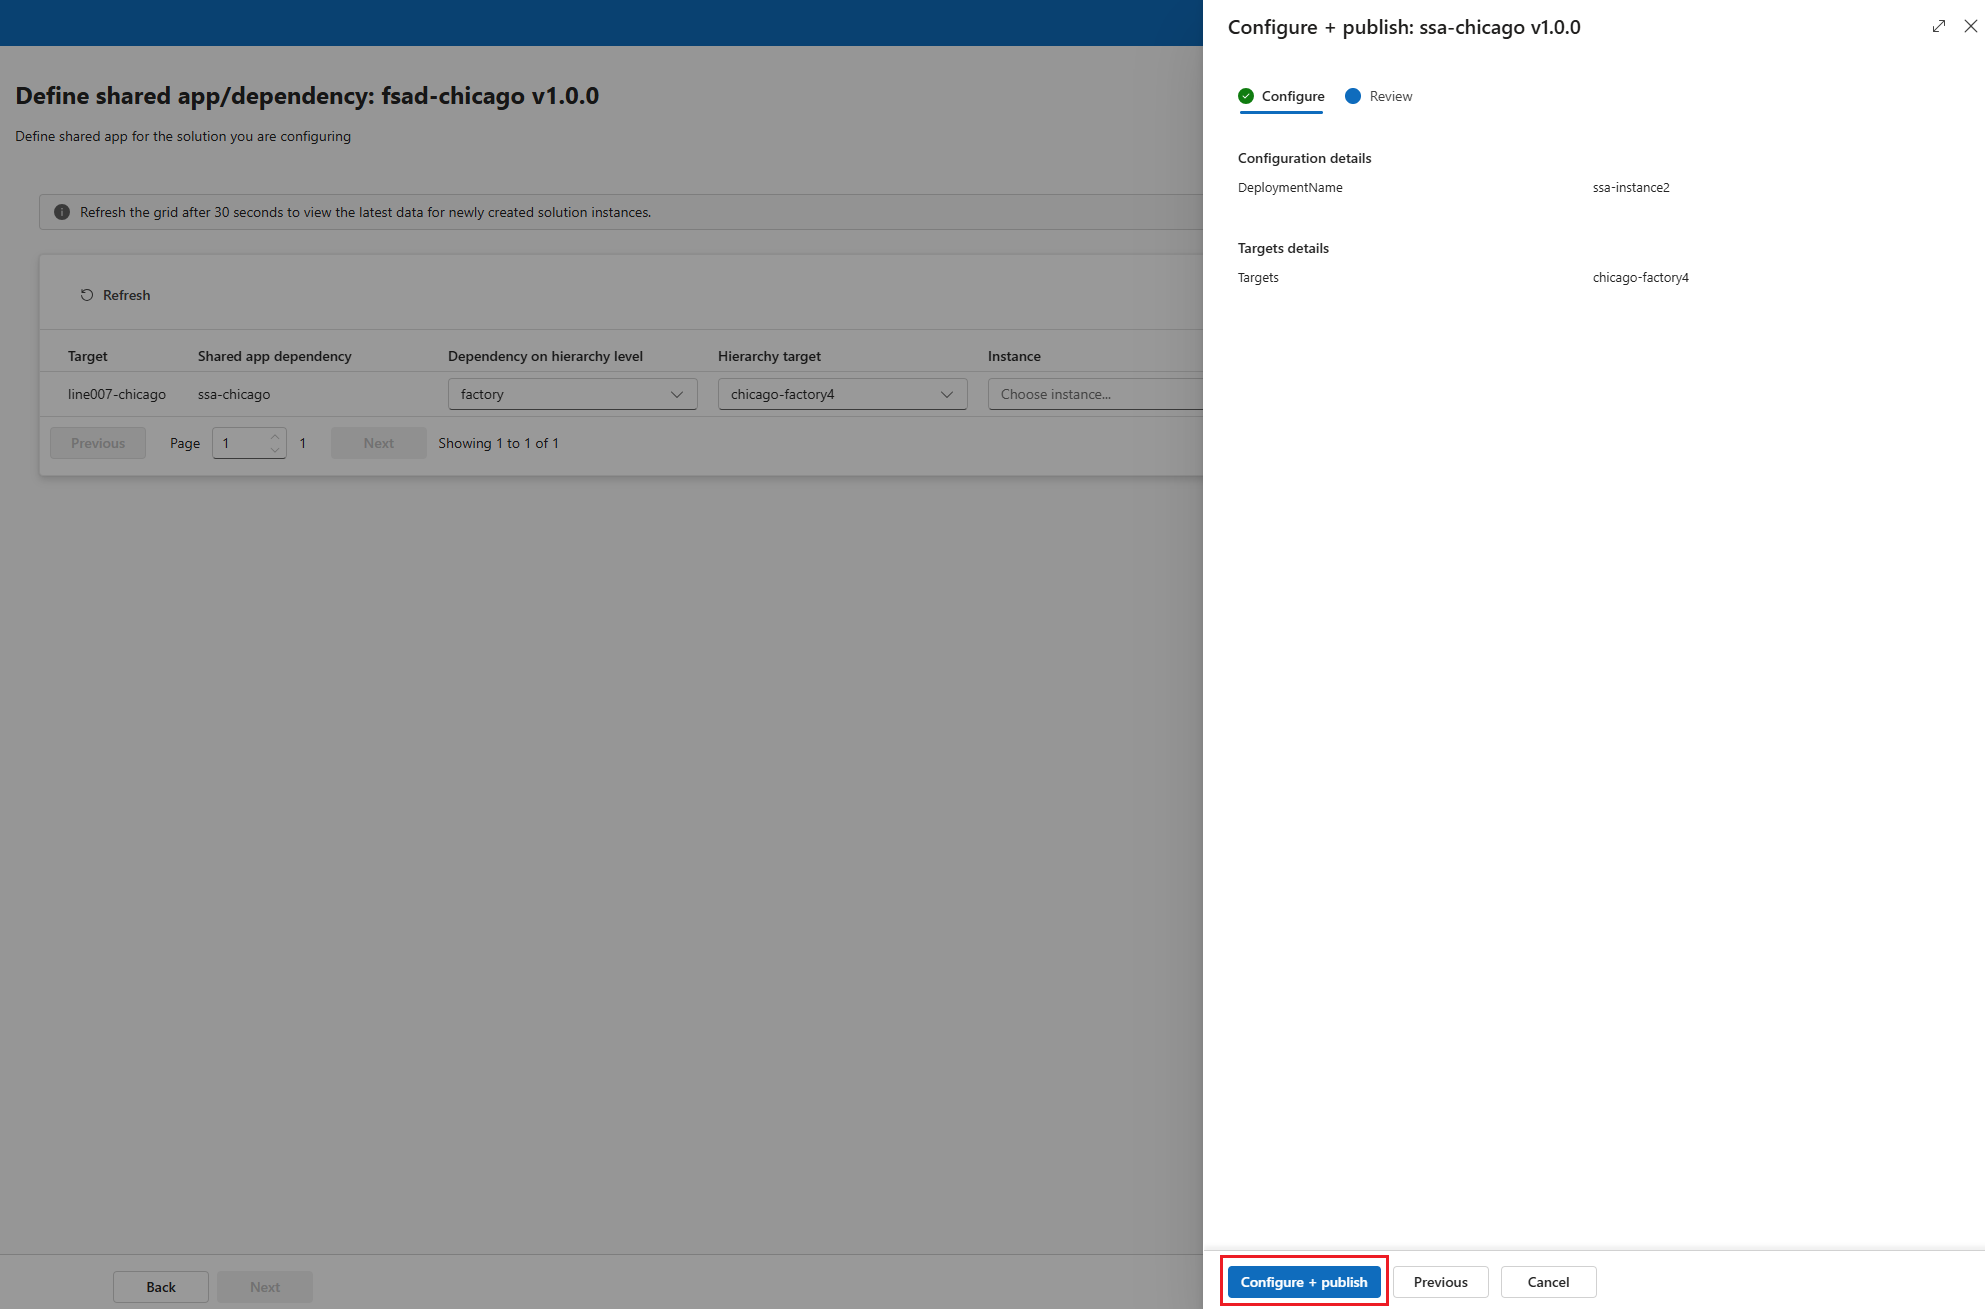
Review the SSA details and click on Configure + publish.
Once the dependant solution details are filled, click on Next.
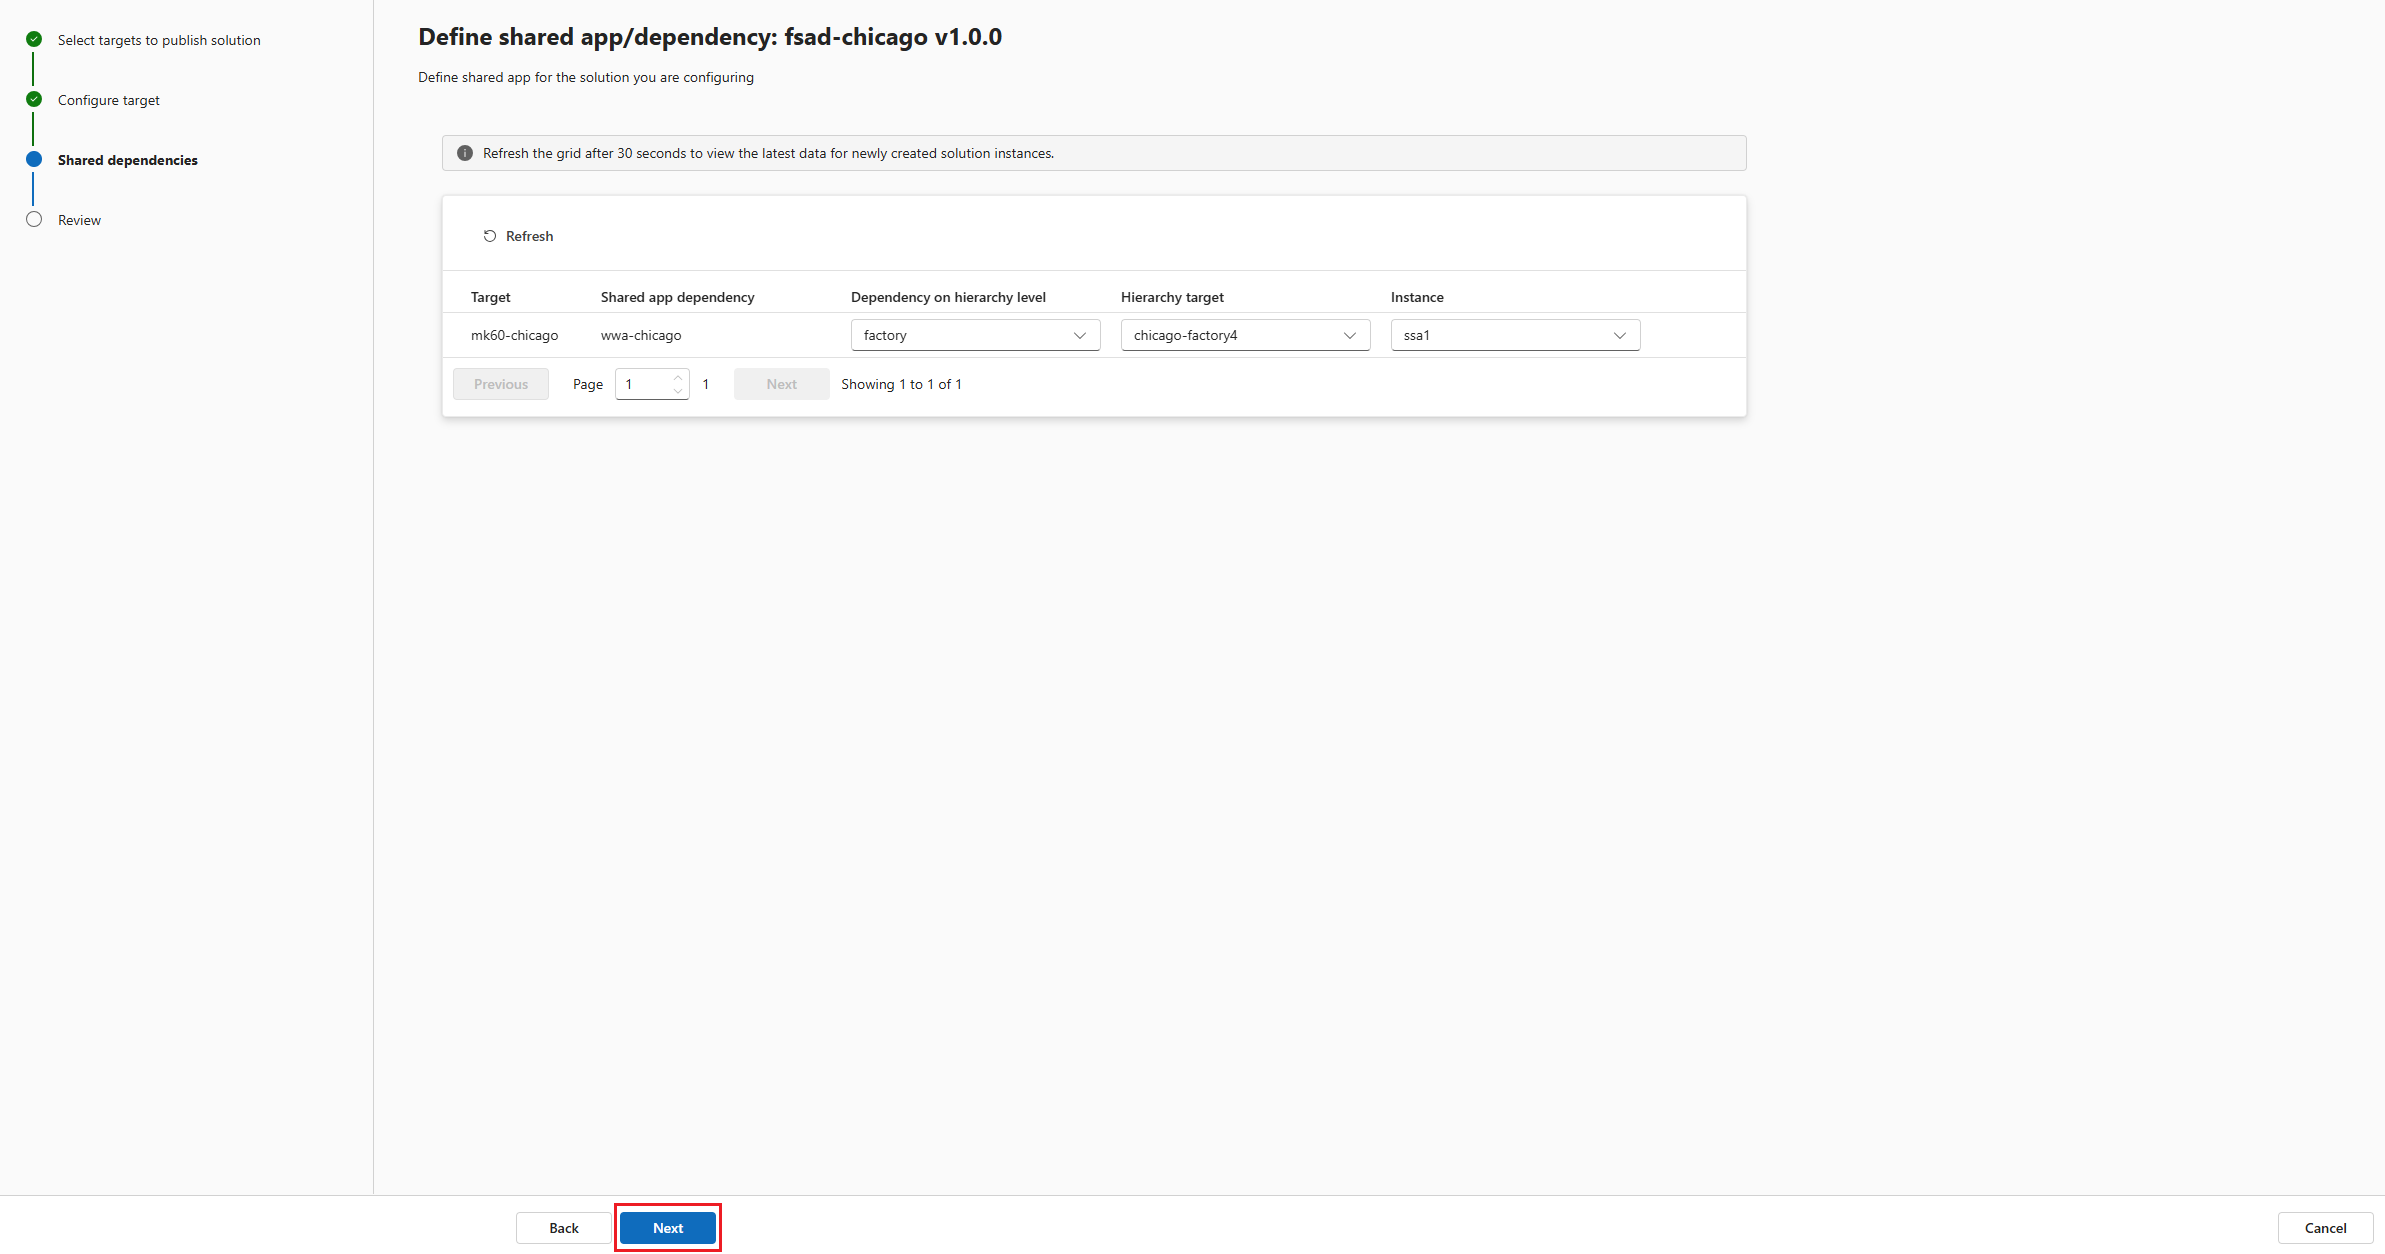
In the Review step, review the FSAD configuration details, status and click on Publish to create a new revision of configuration values for the selected targets.


Show previous revisions of a solution during authoring
You can view the previous revisions of a solution while authoring it. This feature allows you to compare the current configuration with previous revisions and make necessary changes.
While configuring a solution, in the Configure target step, click on Show previous versions.
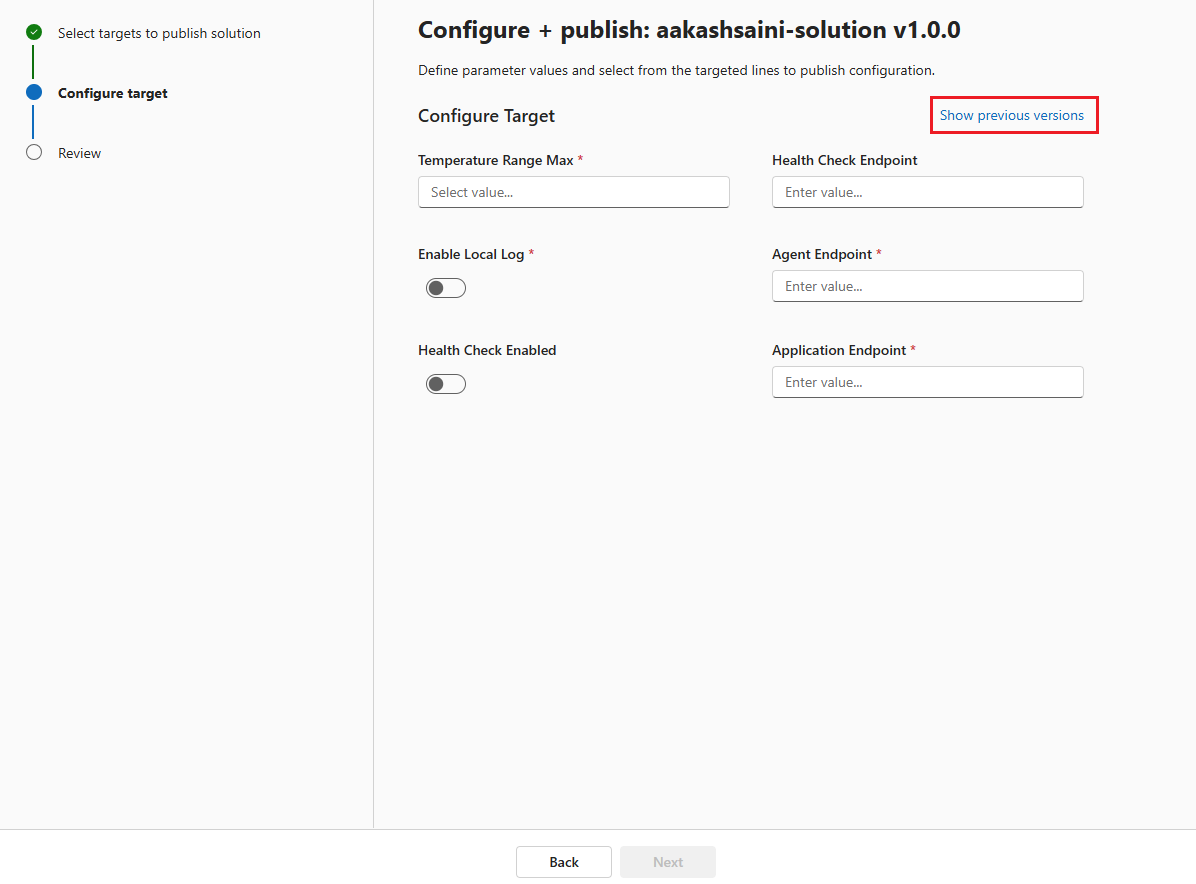
The new pane shows the latest five revisions for the solution version. You can see all the older versions by applying filters.


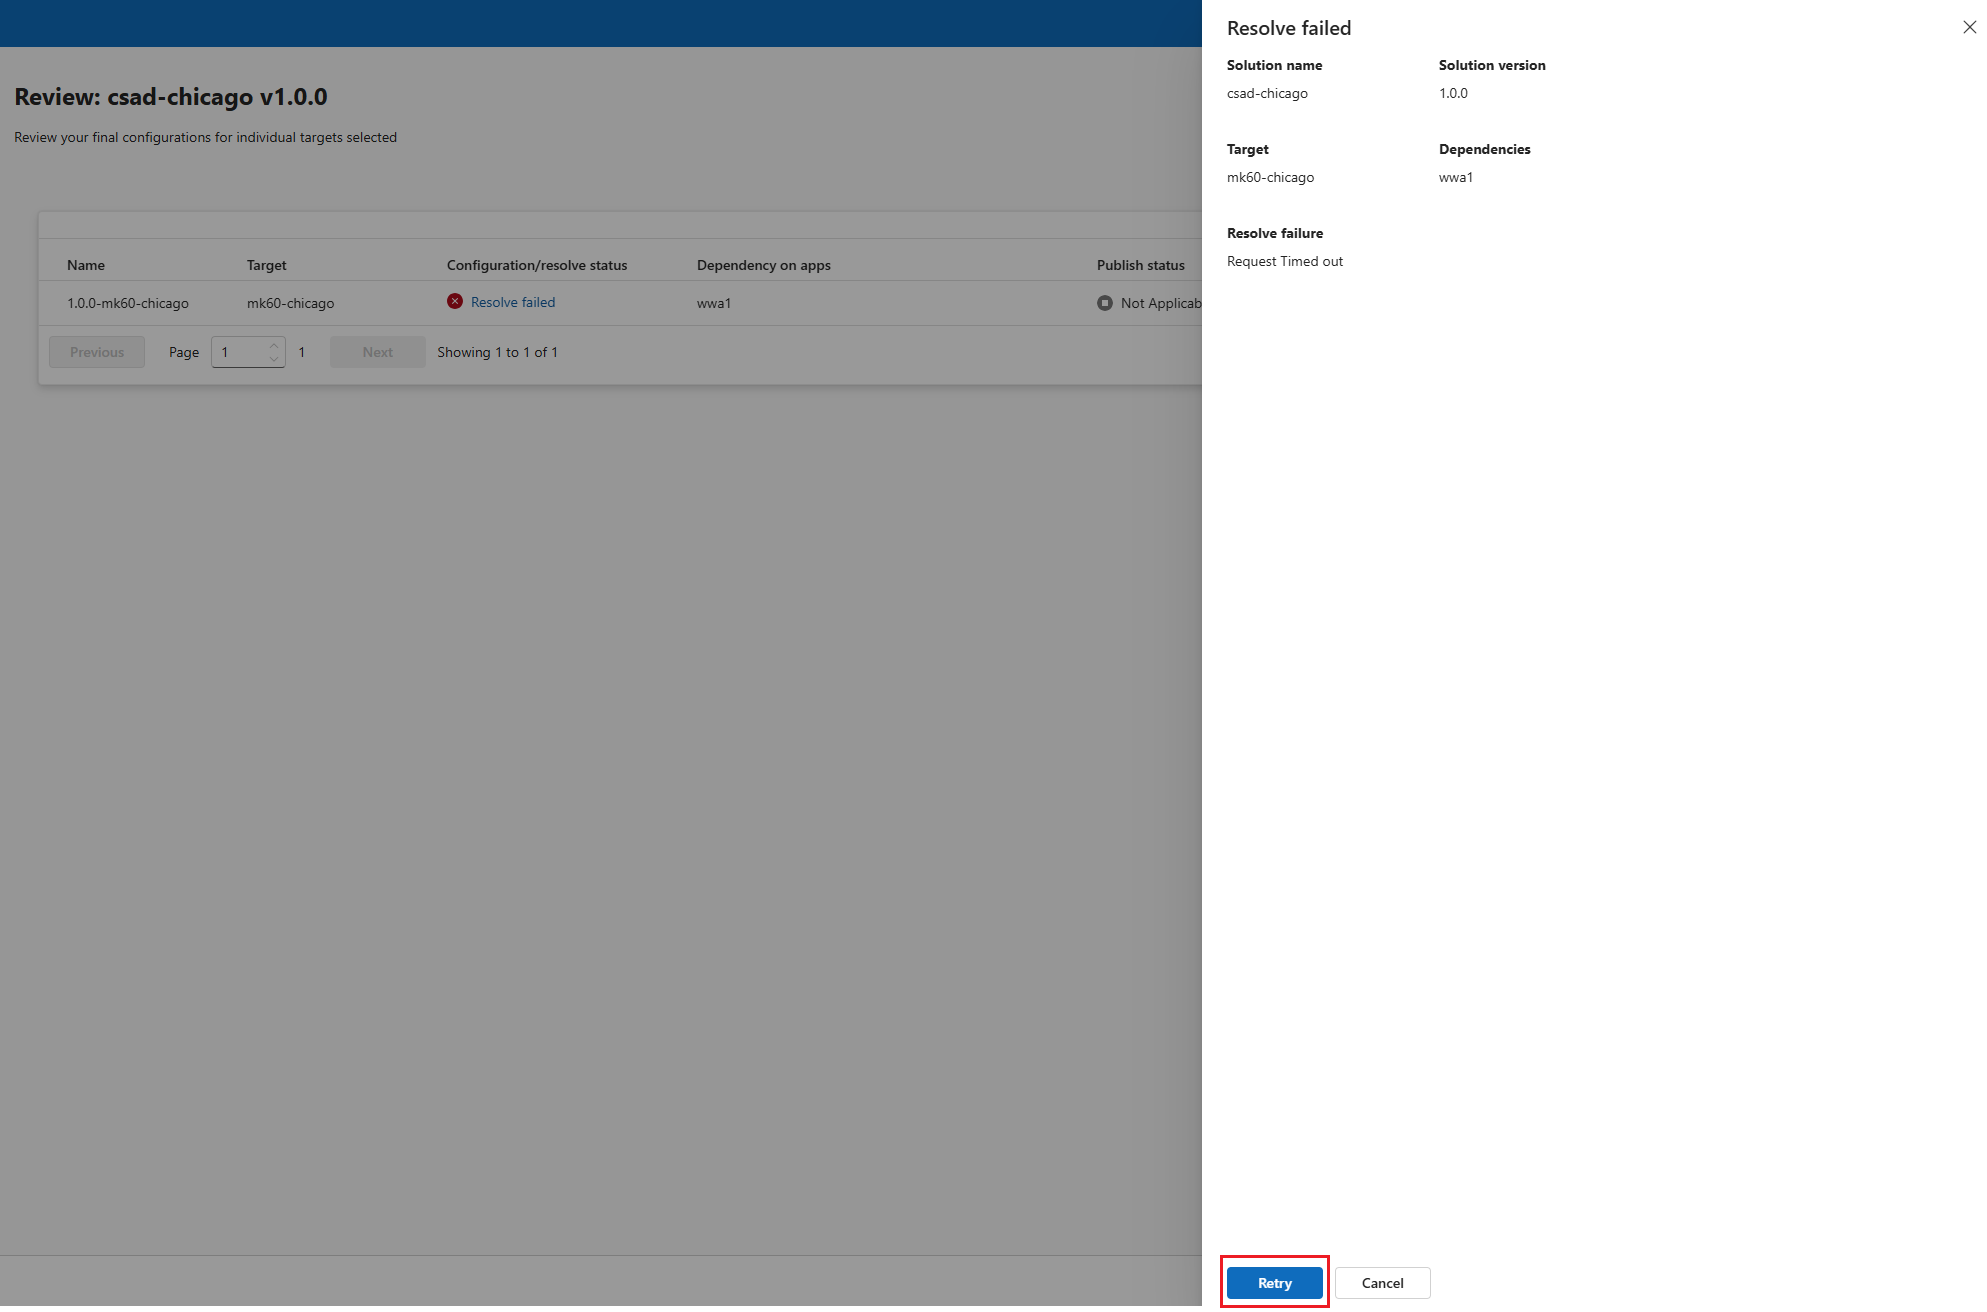
Resolve a solution failure during authoring
During the configuration process, if a solution fails, you can resolve the failure by following these steps:
The Review step shows if a configuration fails. Click on the status Resolve failed to see the details of the failure.
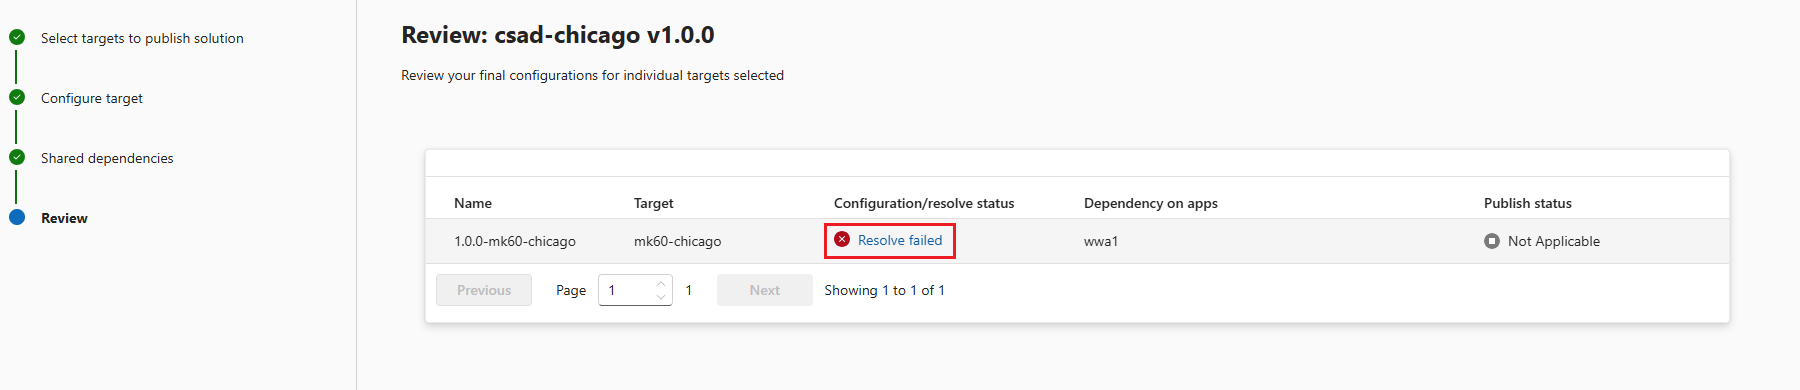
The side pane displays the details. Click on Retry.


View details of a solution version
Click on the solution name to open the details pane.
In the new pane, click on Show all revisions of this version.
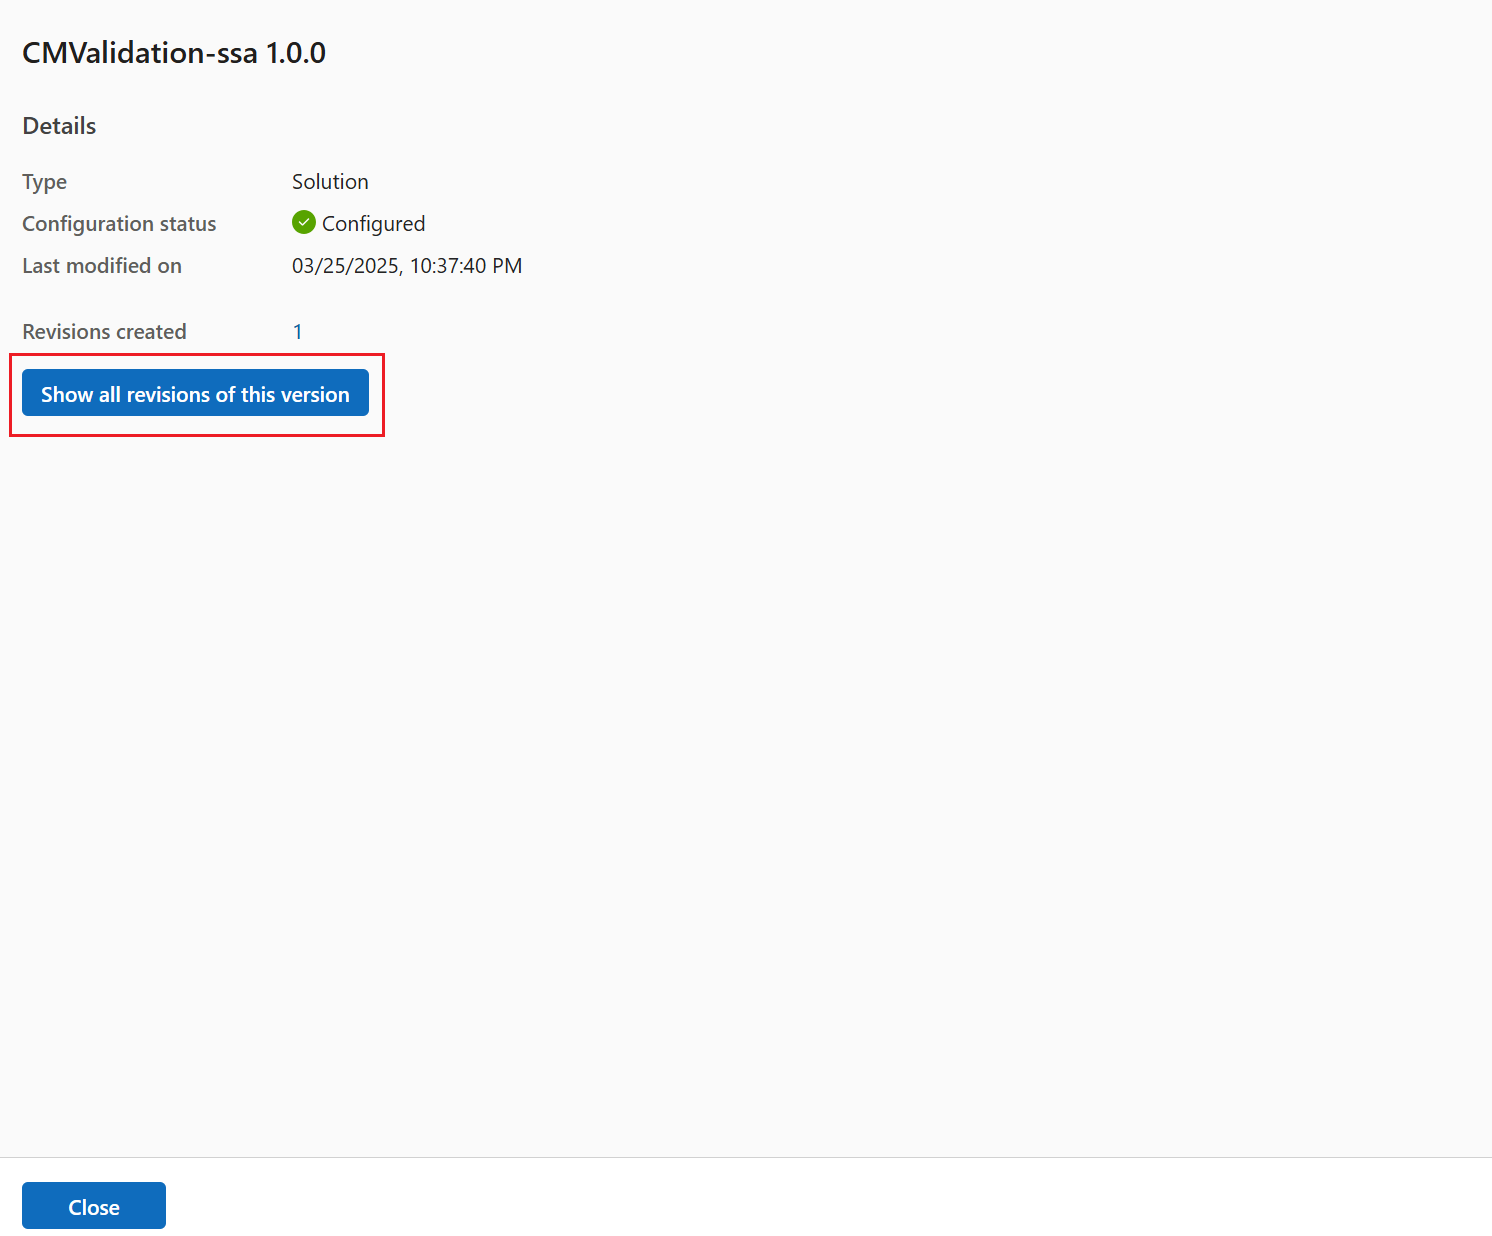
This action opens the Published Solutions sub-tab with filters enabled for solution name and version.
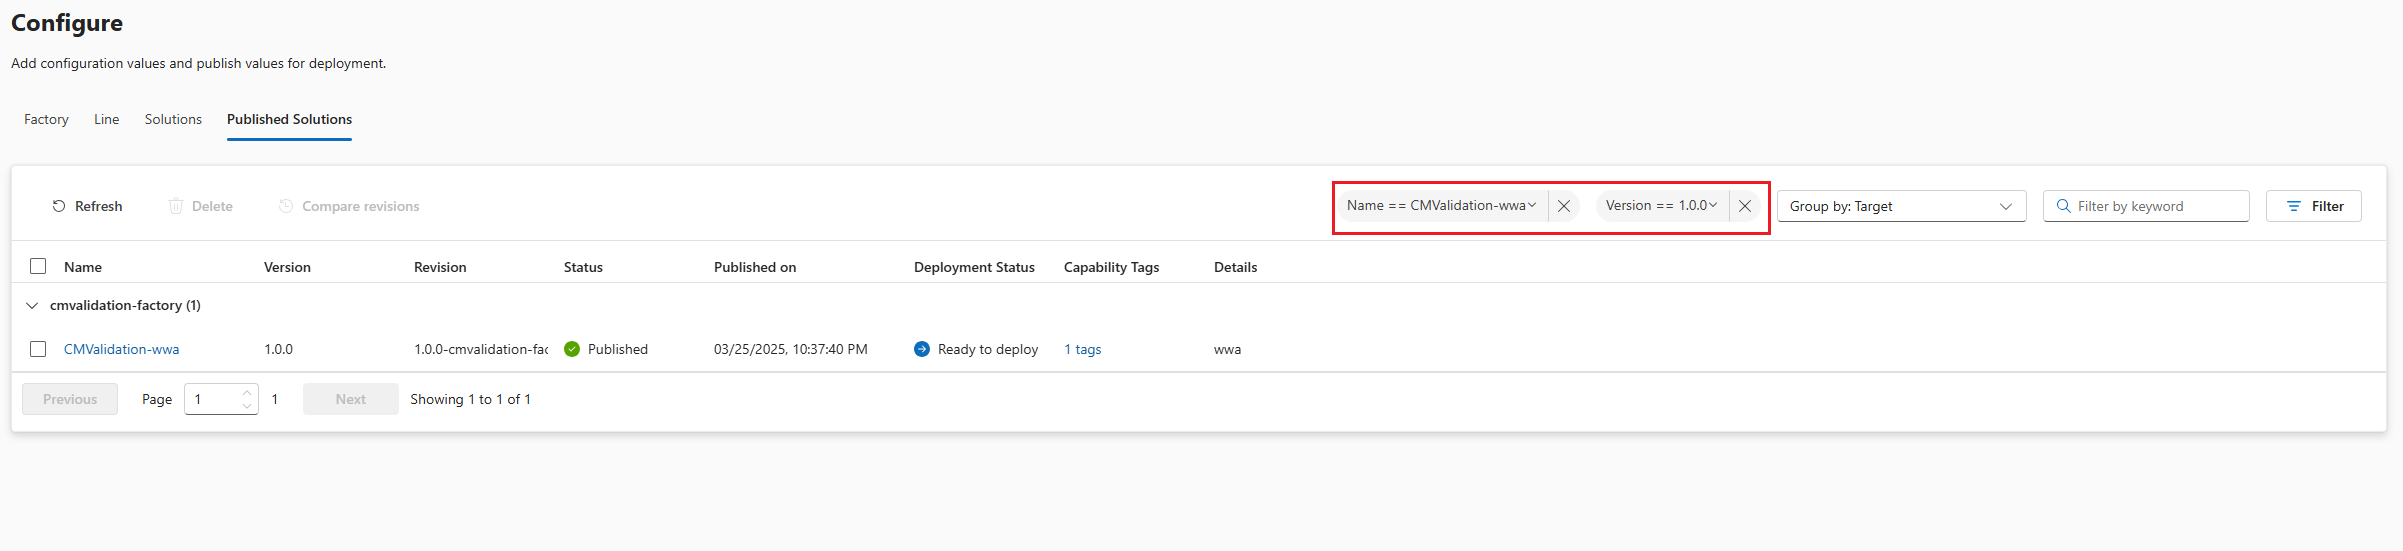


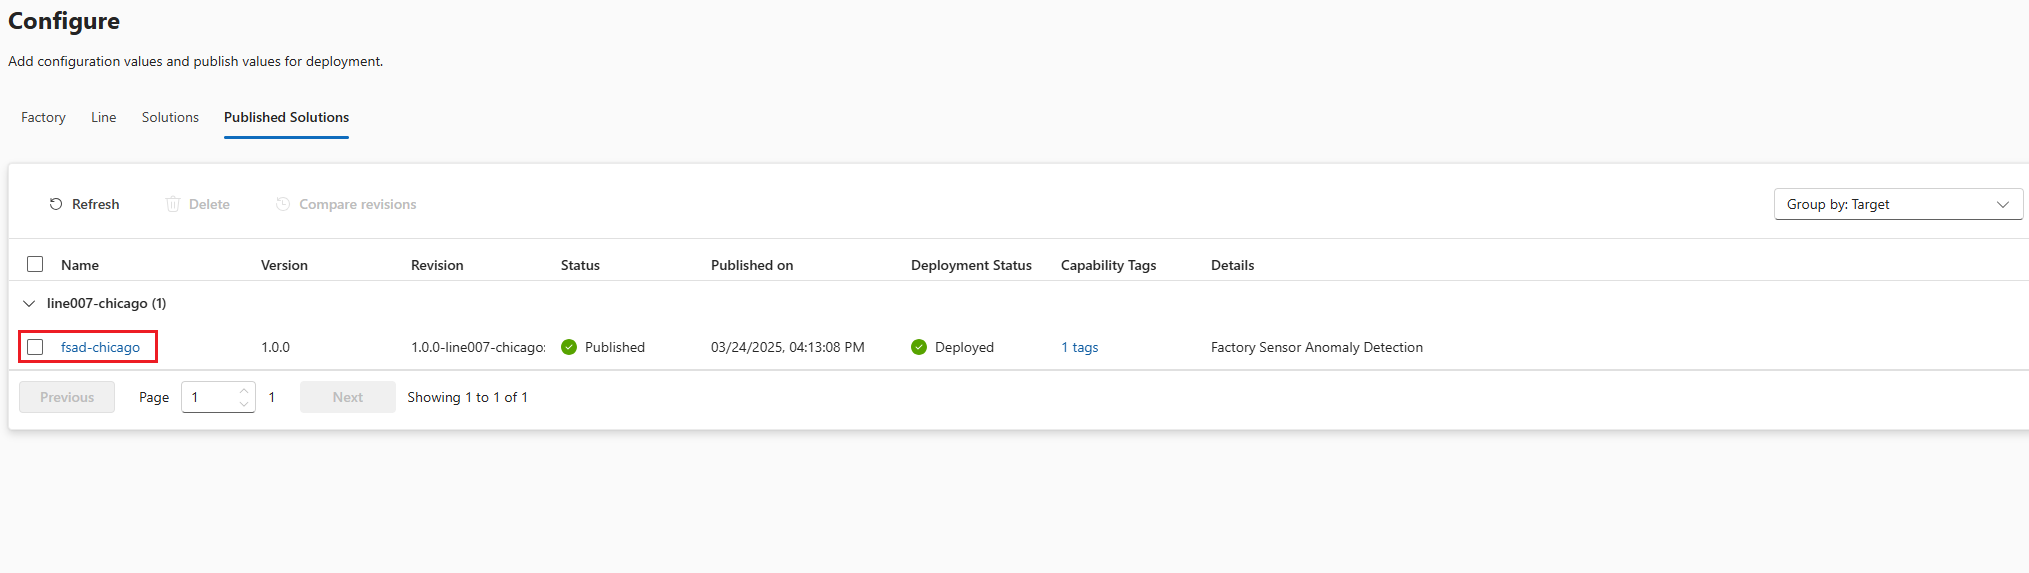
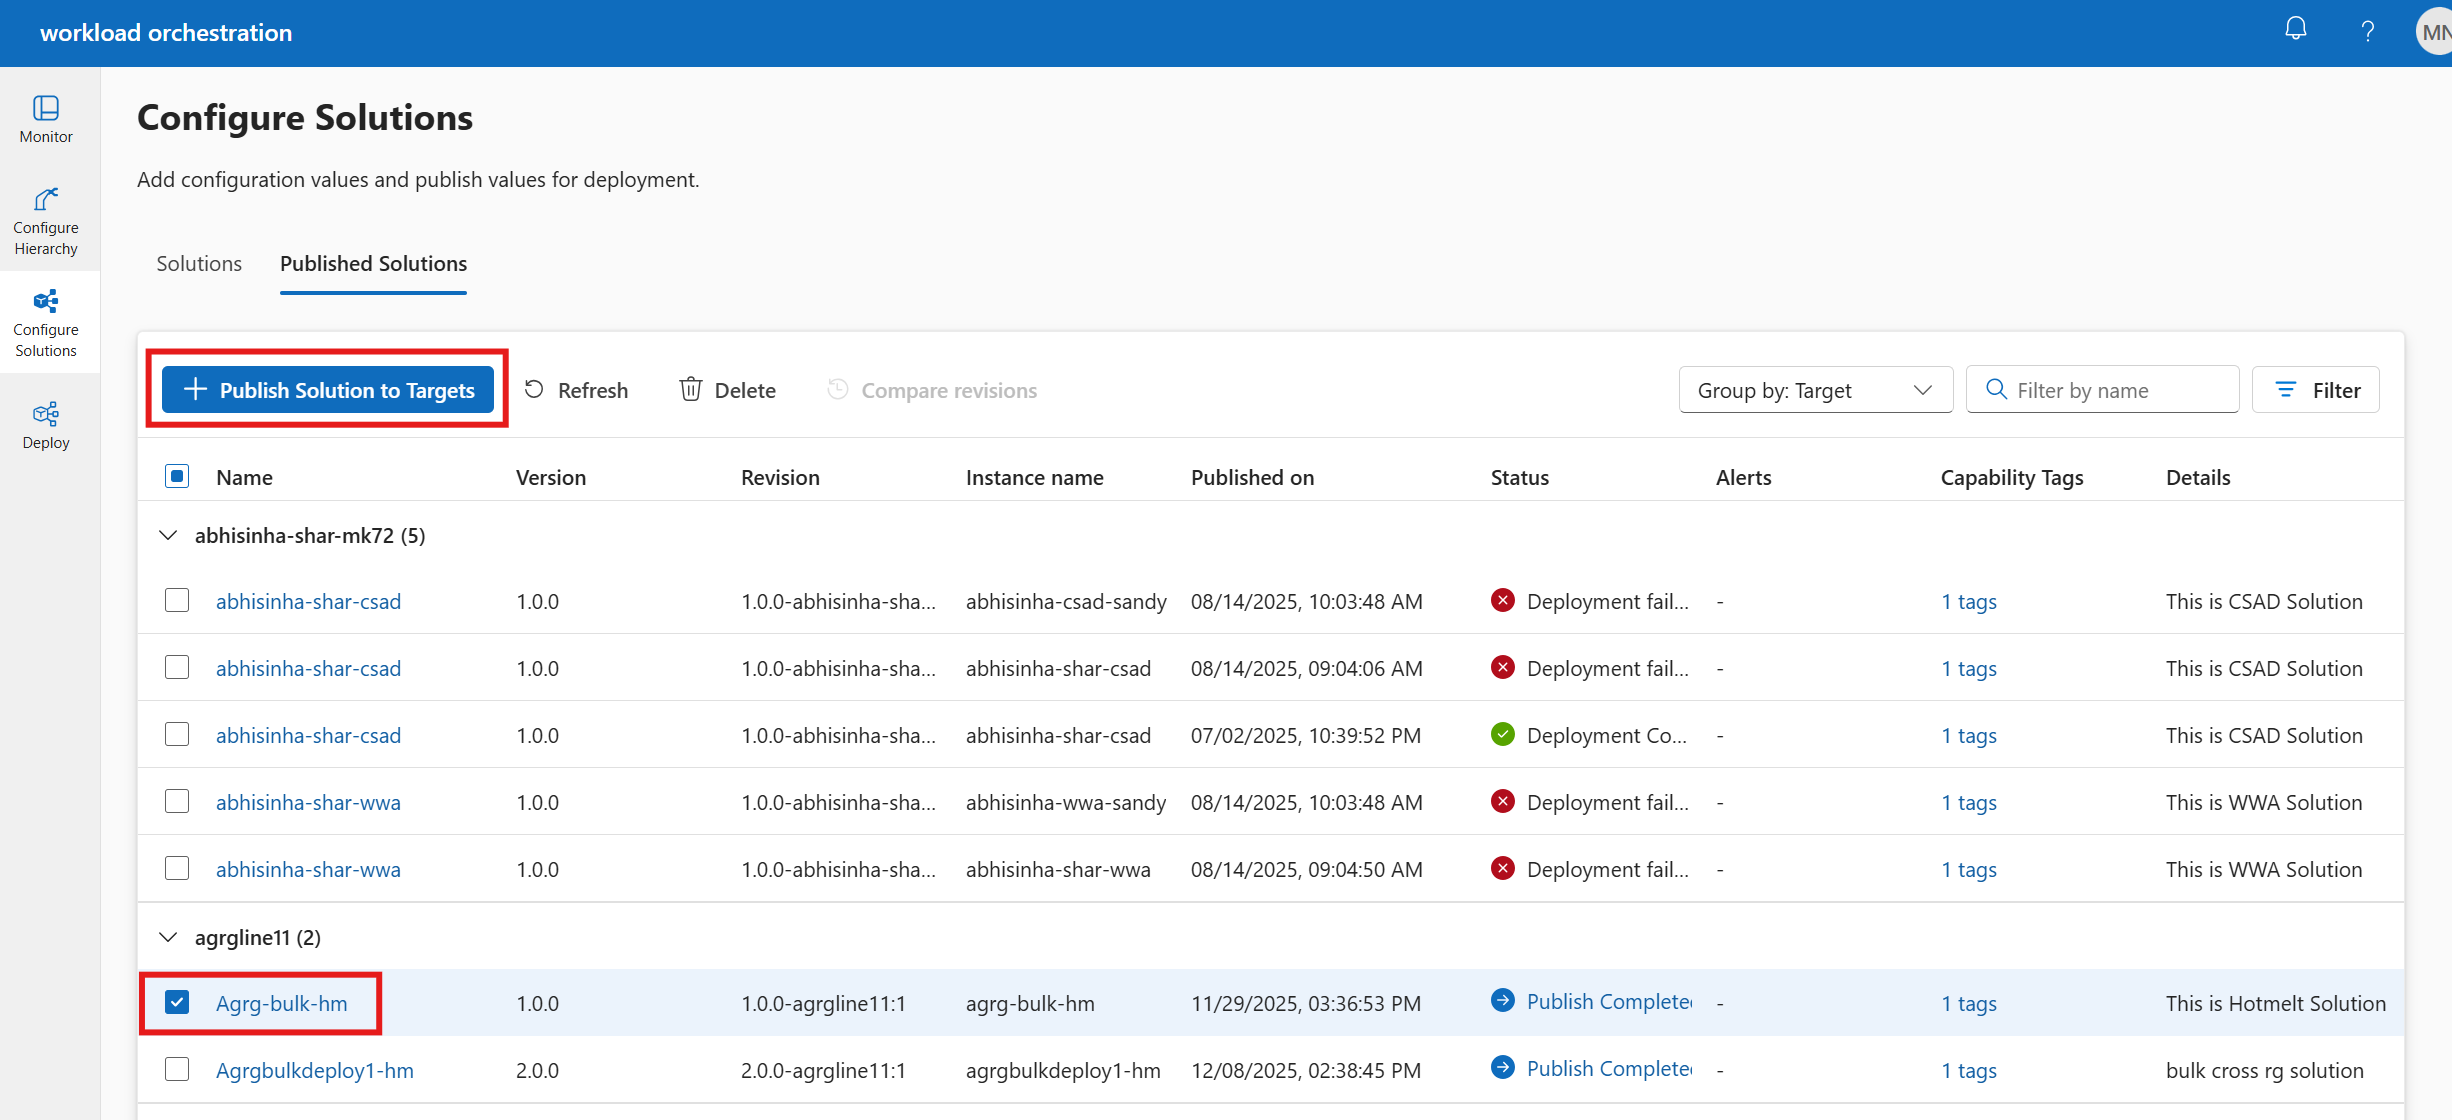
View the published solutions
The Published Solutions sub-tab shows the list of solutions which were authored and published to targets. This implies that the solutions are ready to be deployed.
Click on the solution revision to view the details of the published solution.
The view displays the final configurations, its' values and other details. You can click on Download YAML to export final configurations of the solution.
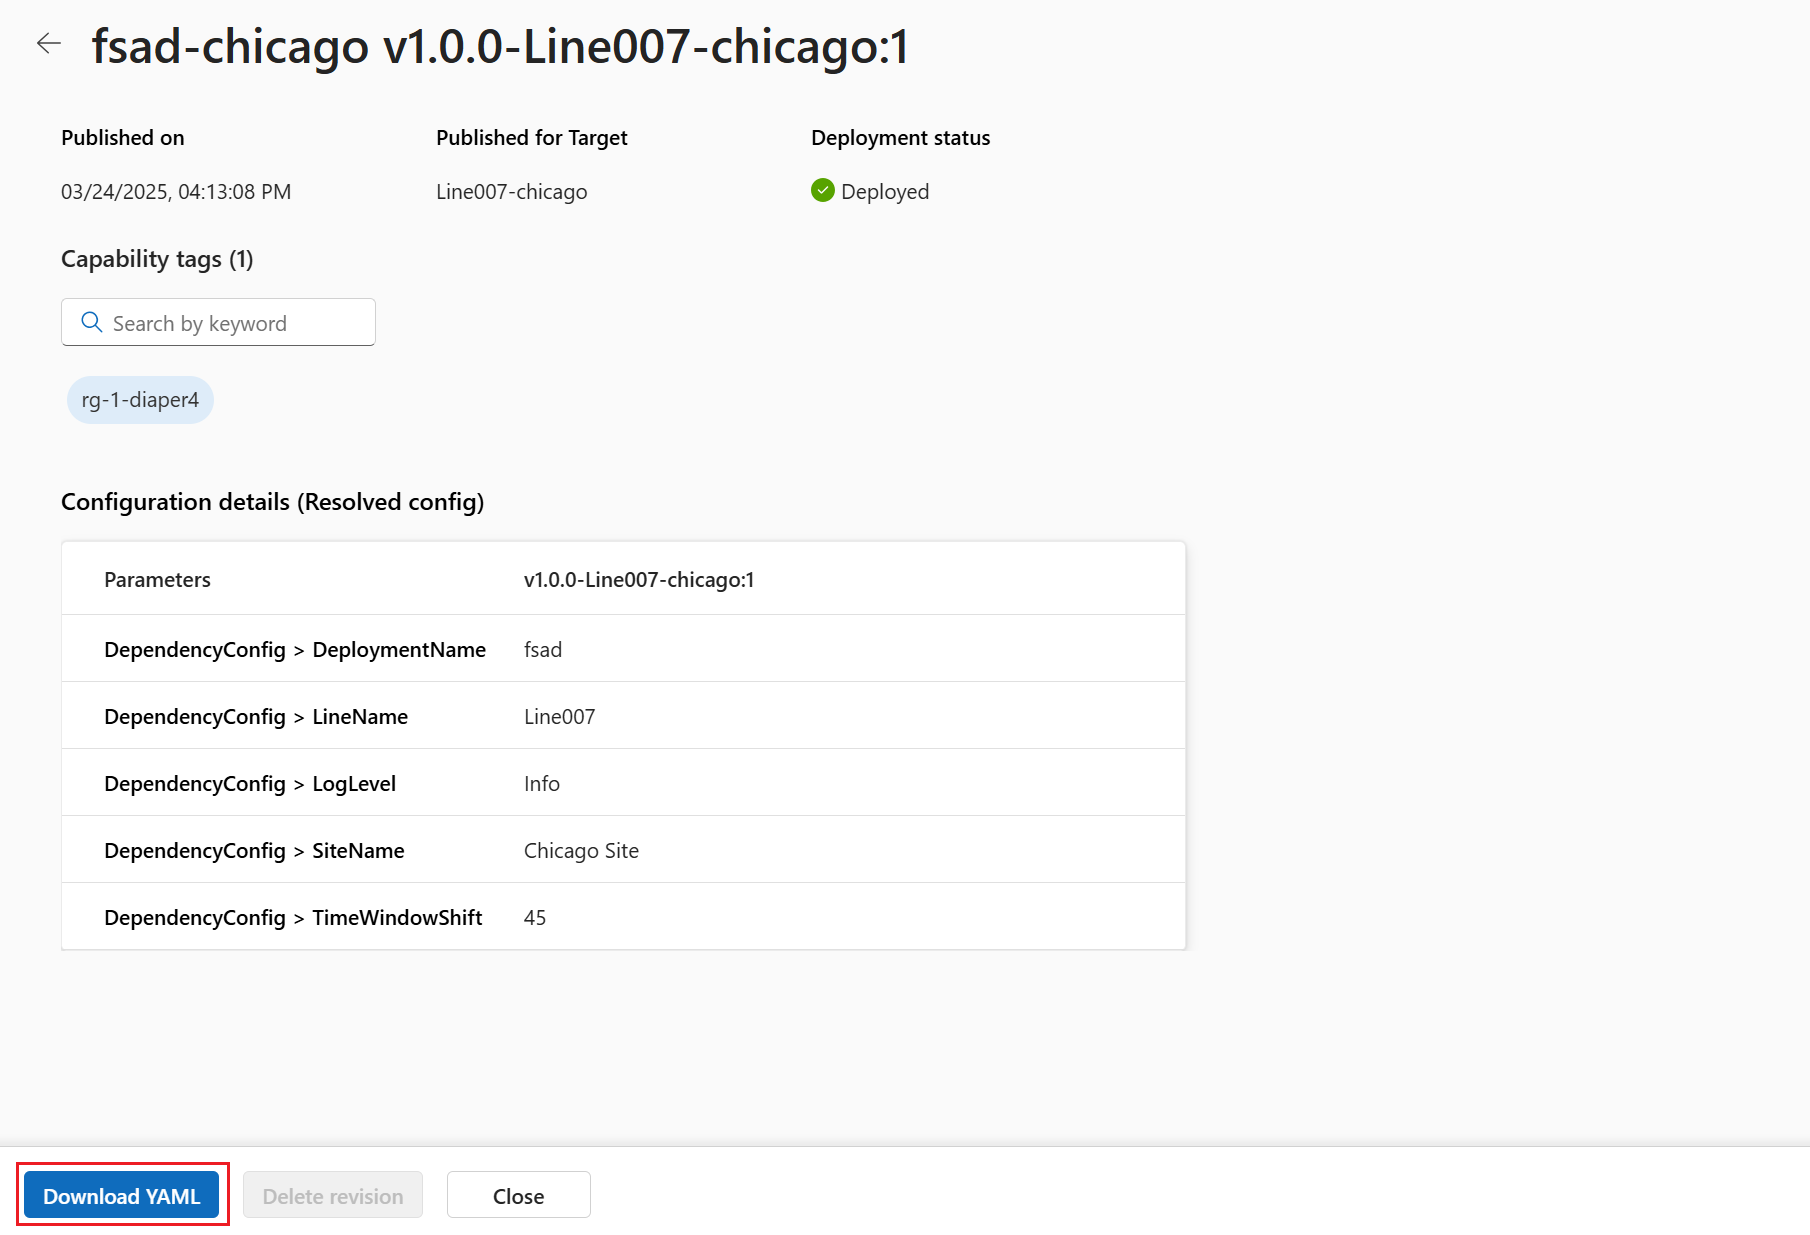
You can delete a solution revision if this isn't yet deployed. Select the solution revision and click on Delete.
If staging is enabled for a solution, you can see the Staging status. For more information, see View staged resources.


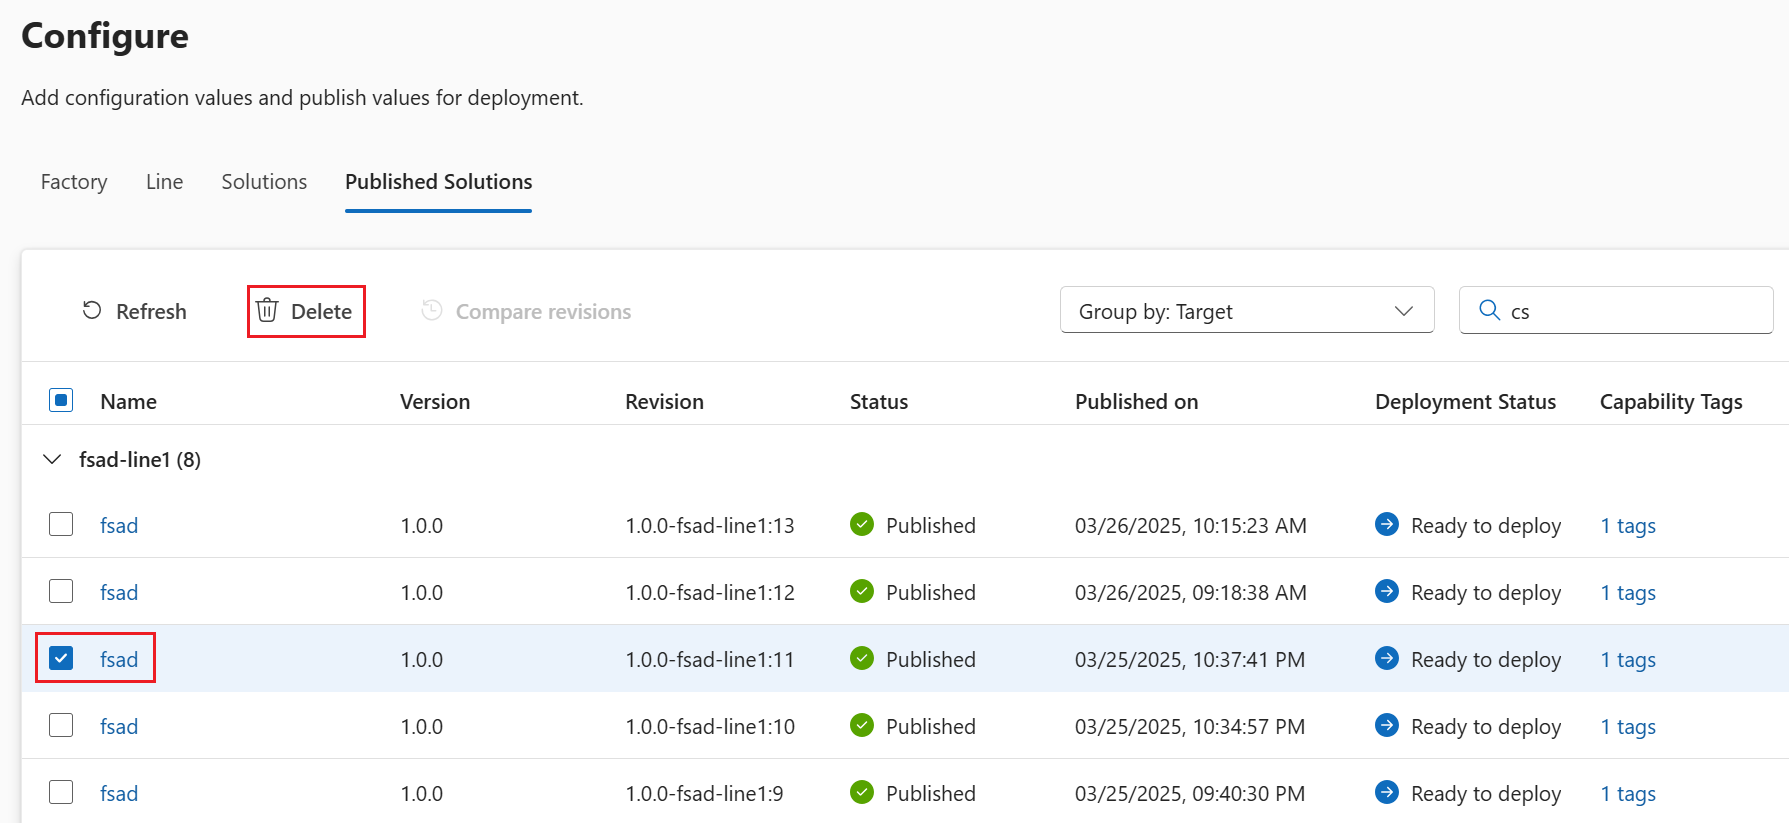
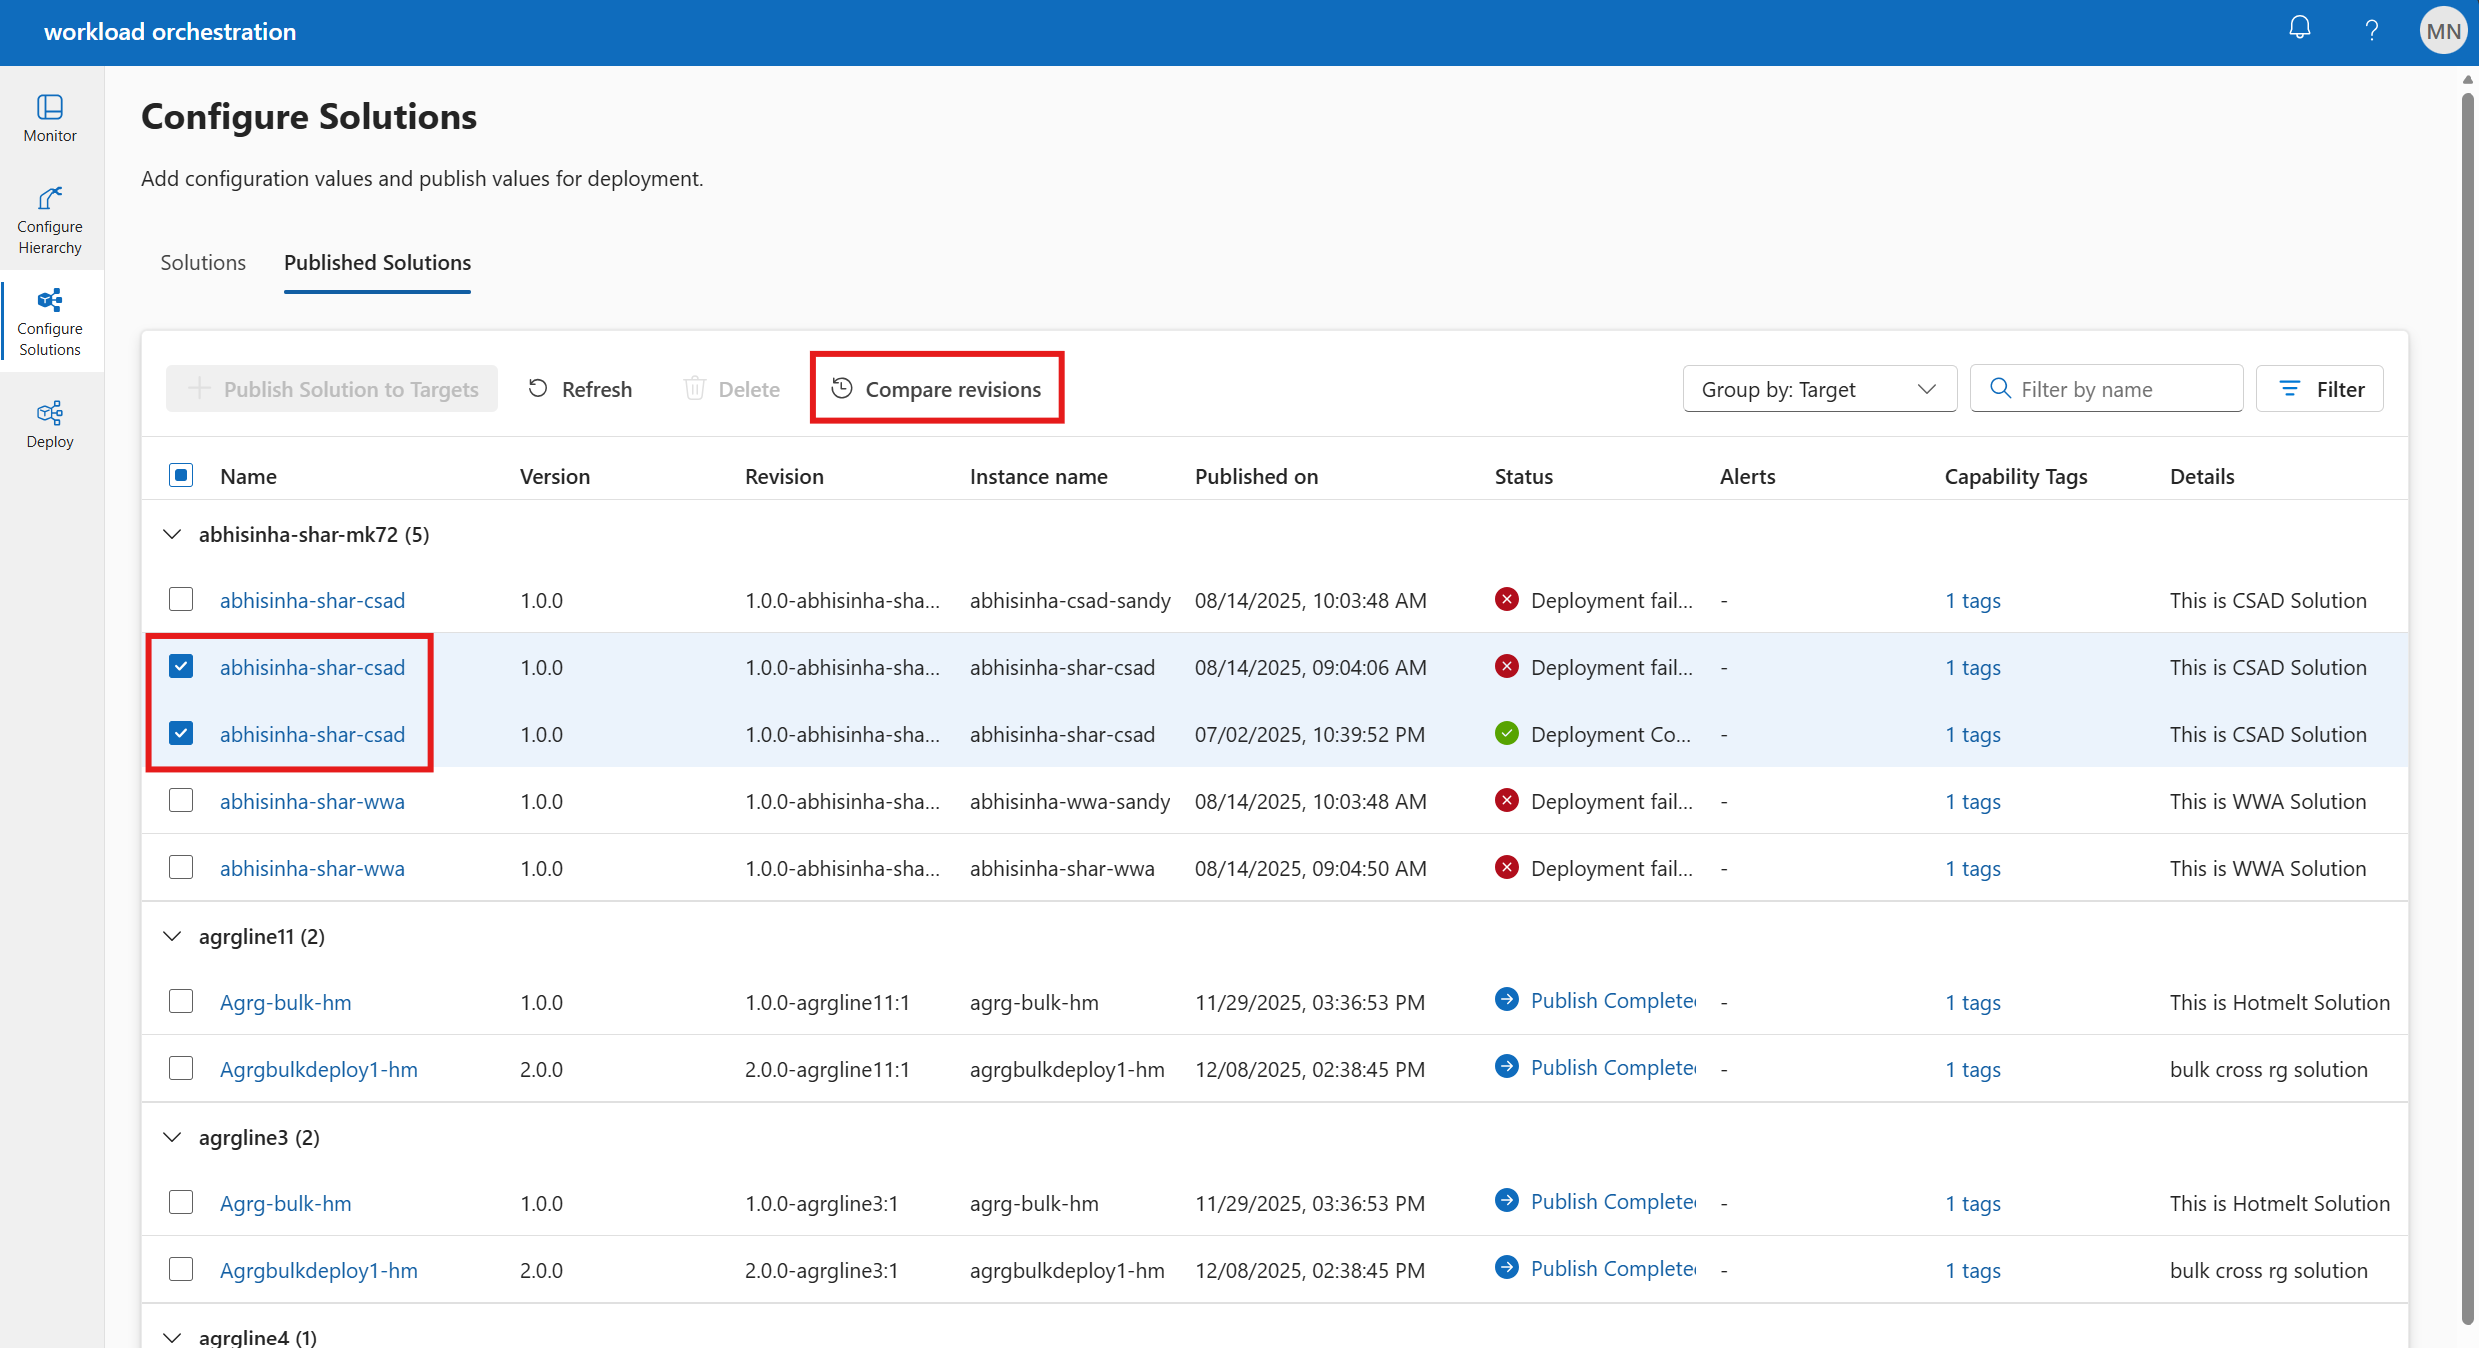
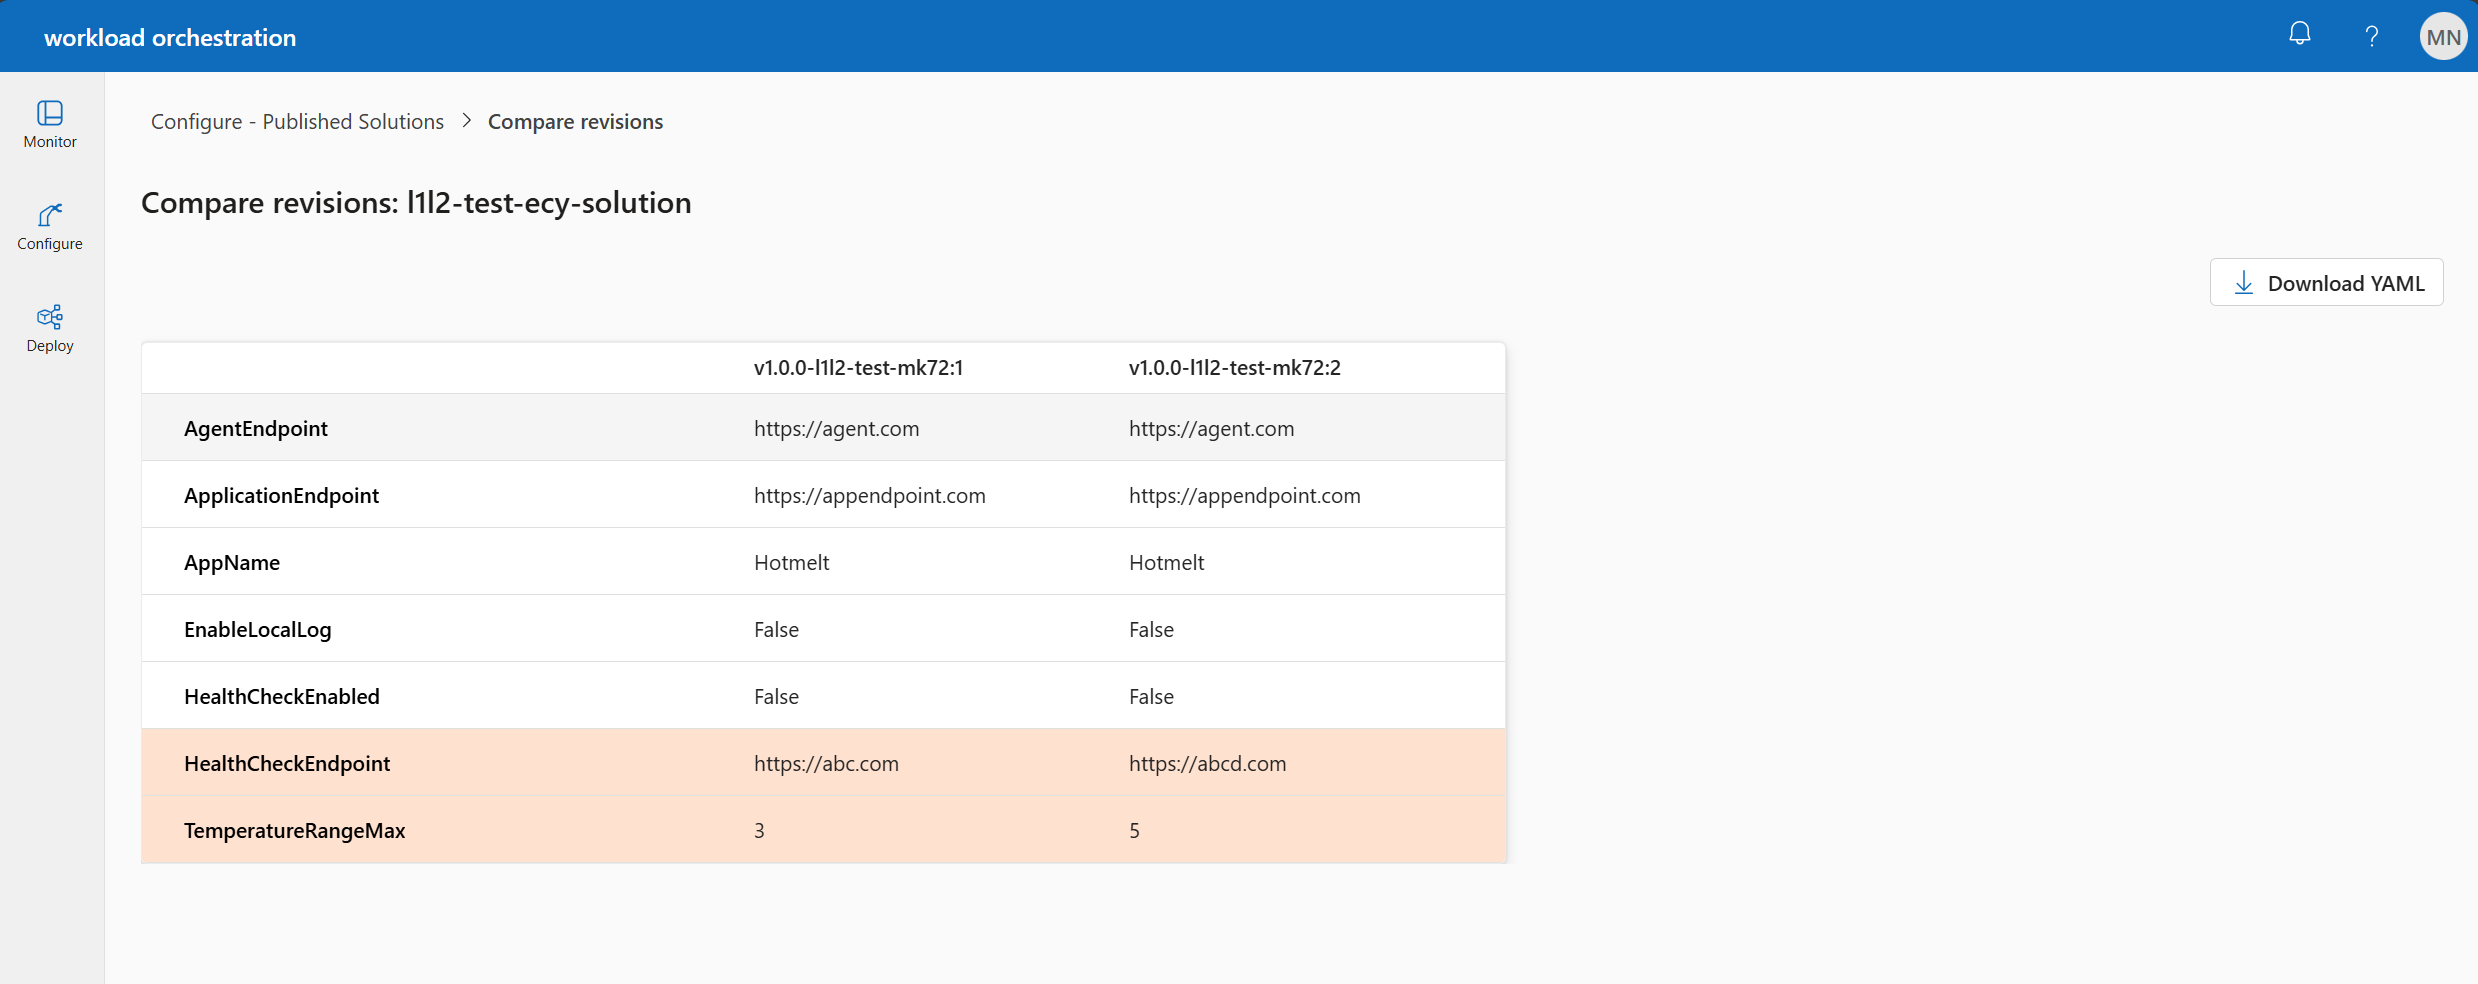
Compare revisions of a solution
You can compare the current configuration with previous revisions of a solution. This feature allows you to see the differences between the current and previous configurations.
Select the revisions to be compared and click on Compare revisions.
The new pane displays the configurations and its values for multiple revisions. The differences are highlighted.


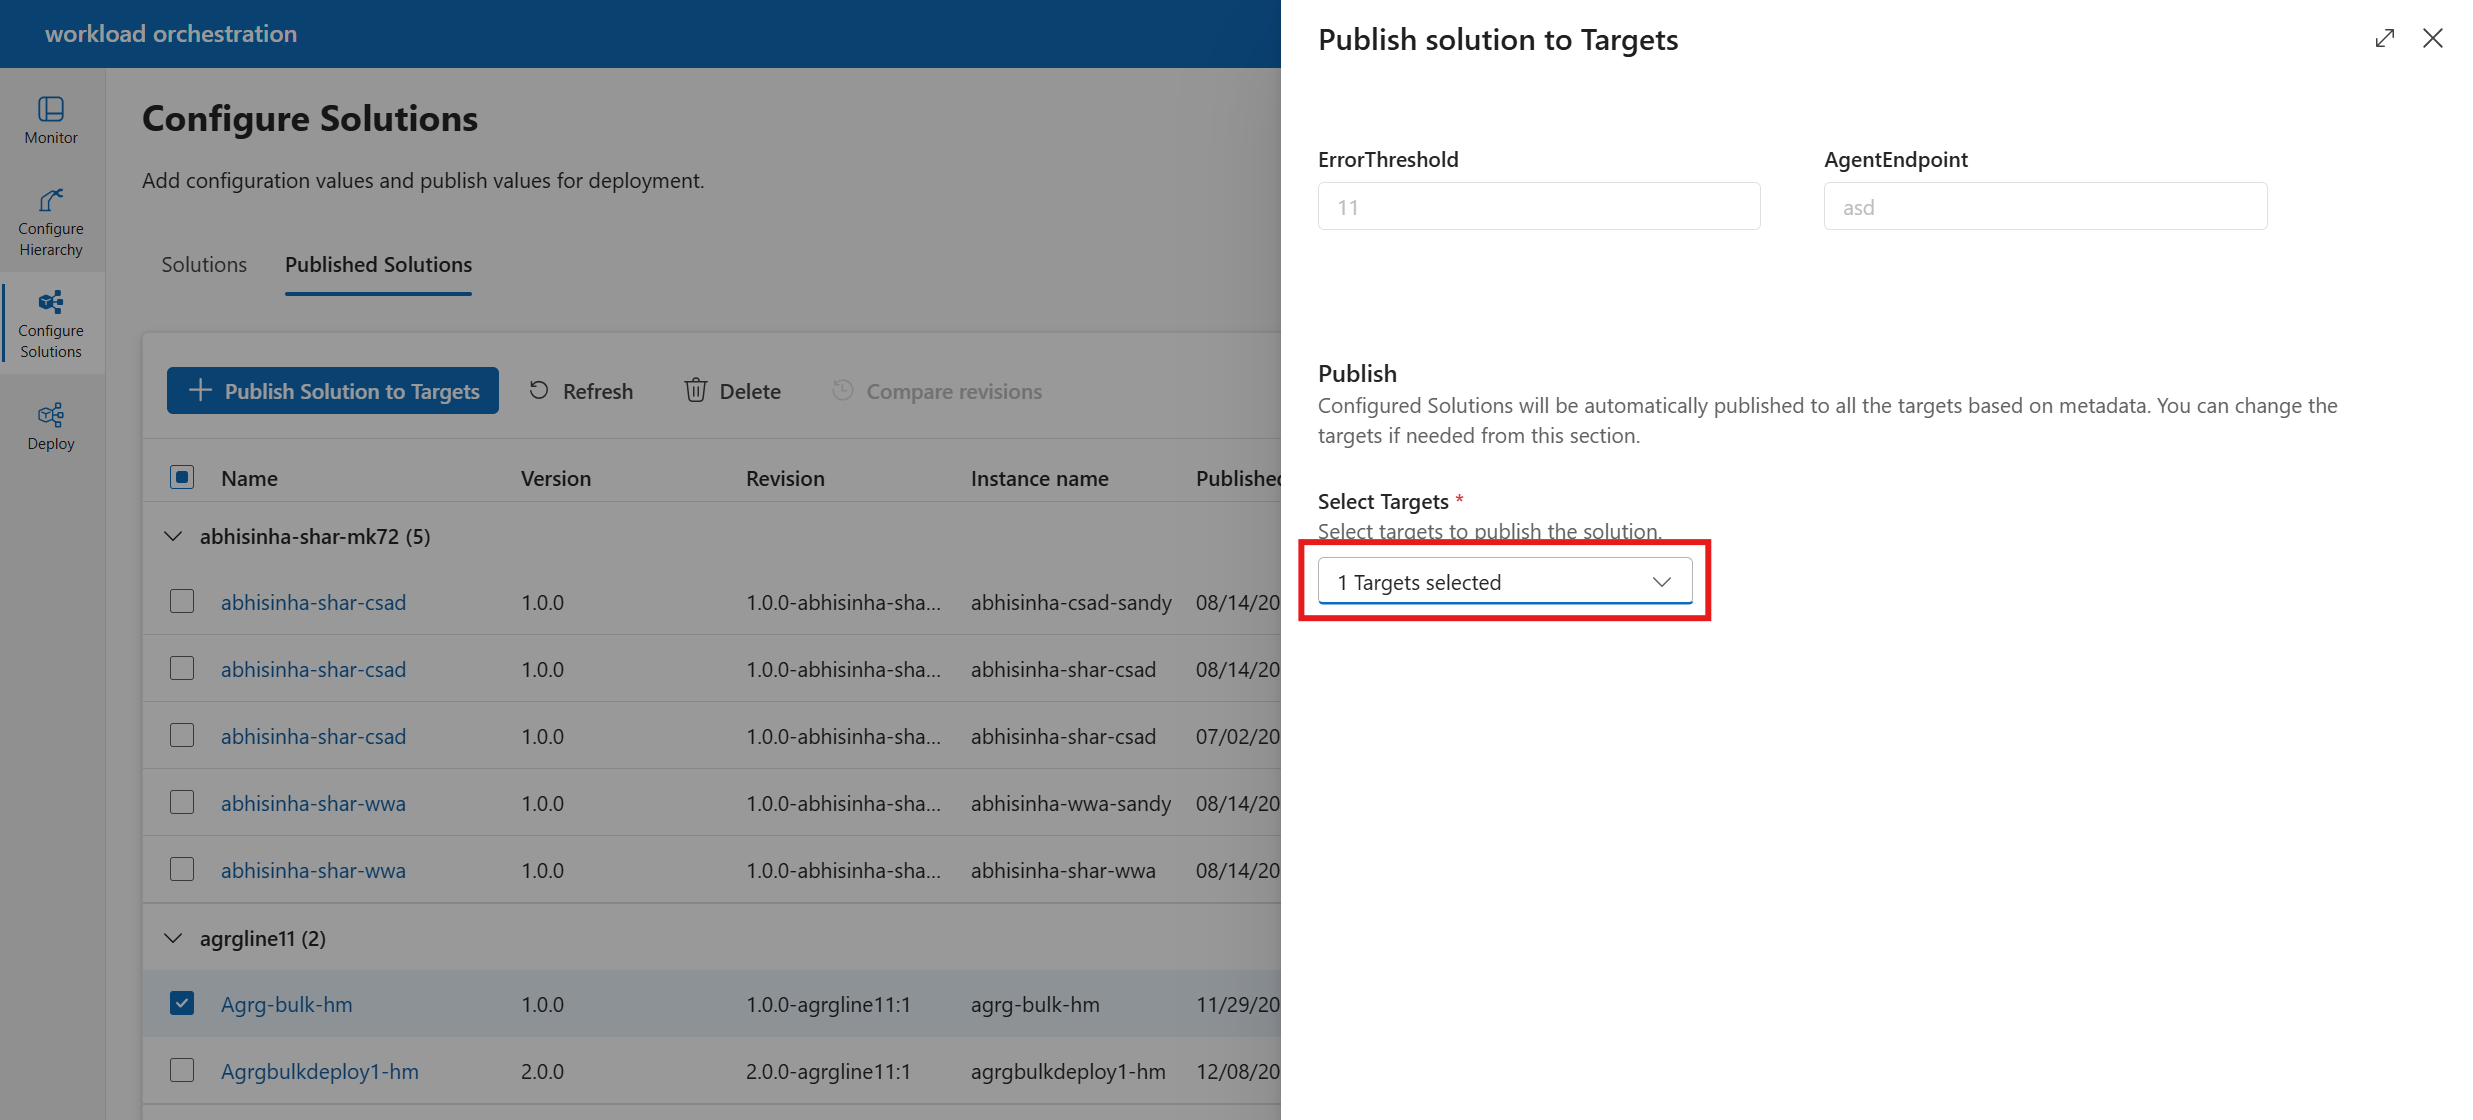
Publish a solution to more targets
You can publish a solution to more targets after the solution is published. This feature allows you to add more targets to the existing solution without creating a new revision.
Select the solution name and click on Publish Solution to Targets.
Select the targets where you want the same configurations to be published. Then, click on Configure + publish.


Configure a solution with external validation enabled
If you enable external validation for workload orchestration, during the configuration of the target you see if external validation is enabled for a particular solution.

Under the "Published Solutions" tab, you can see that the solutions with Publish in progress and Publish failed status have an alert.

Click on the alert to view the details of external validation.

For more information, see External validation for workload orchestration.