Note
Access to this page requires authorization. You can try signing in or changing directories.
Access to this page requires authorization. You can try changing directories.
This article shows you how to create a logic app and integrate it with an Azure Monitor alert. You can use Azure Logic Apps to build and customize workflows for integration. Use Logic Apps to customize your alert notifications. You can:
Customize the alerts email by using your own email subject and body format.
Customize the alert metadata by looking up tags for affected resources or fetching a log query search result. For information on how to access the search result rows that contain alerts data, see:
Integrate with external services by using existing connectors like Outlook, Microsoft Teams, Slack, and PagerDuty. You can also configure the logic app for your own services.
This example creates a logic app that uses the common alerts schema to send details from the alert.
Create a logic app
In the Azure portal, create a new logic app. In the Search bar at the top of the page, enter Logic apps and select it from the drop-down menu.
On the Logic apps page, select Add.
Under Consumption, select Multi-tenant.
On the next page, select the Subscription and Resource group for your logic app.
Set a Logic App name and choose a Region.
Select Review + create > Create.

Select Go to resource after the deployment is finished.

Set up a trigger
On the Logic app page, select Edit in the top action bar.
Select Add a trigger, search for When a HTTP request is received, and select it from the search results.

Paste the common alert schema into the Request Body JSON Schema field from the following JSON:
 {
    "type": "object",
    "properties": {
        "schemaId": {
            "type": "string"
        },
        "data": {
            "type": "object",
            "properties": {
                "essentials": {
                    "type": "object",
                    "properties": {
                        "alertId": {
                            "type": "string"
                        },
                        "alertRule": {
                            "type": "string"
                        },
                        "severity": {
                            "type": "string"
                        },
                        "signalType": {
                            "type": "string"
                        },
                        "monitorCondition": {
                            "type": "string"
                        },
                        "monitoringService": {
                            "type": "string"
                        },
                        "alertTargetIDs": {
                            "type": "array",
                            "items": {
                                "type": "string"
                            }
                        },
                        "originAlertId": {
                            "type": "string"
                        },
                        "firedDateTime": {
                            "type": "string"
                        },
                        "resolvedDateTime": {
                            "type": "string"
                        },
                        "description": {
                            "type": "string"
                        },
                        "essentialsVersion": {
                            "type": "string"
                        },
                        "alertContextVersion": {
                            "type": "string"
                        }
                    }
                },
                "alertContext": {
                    "type": "object",
                    "properties": {}
                }
            }
        }
    }
}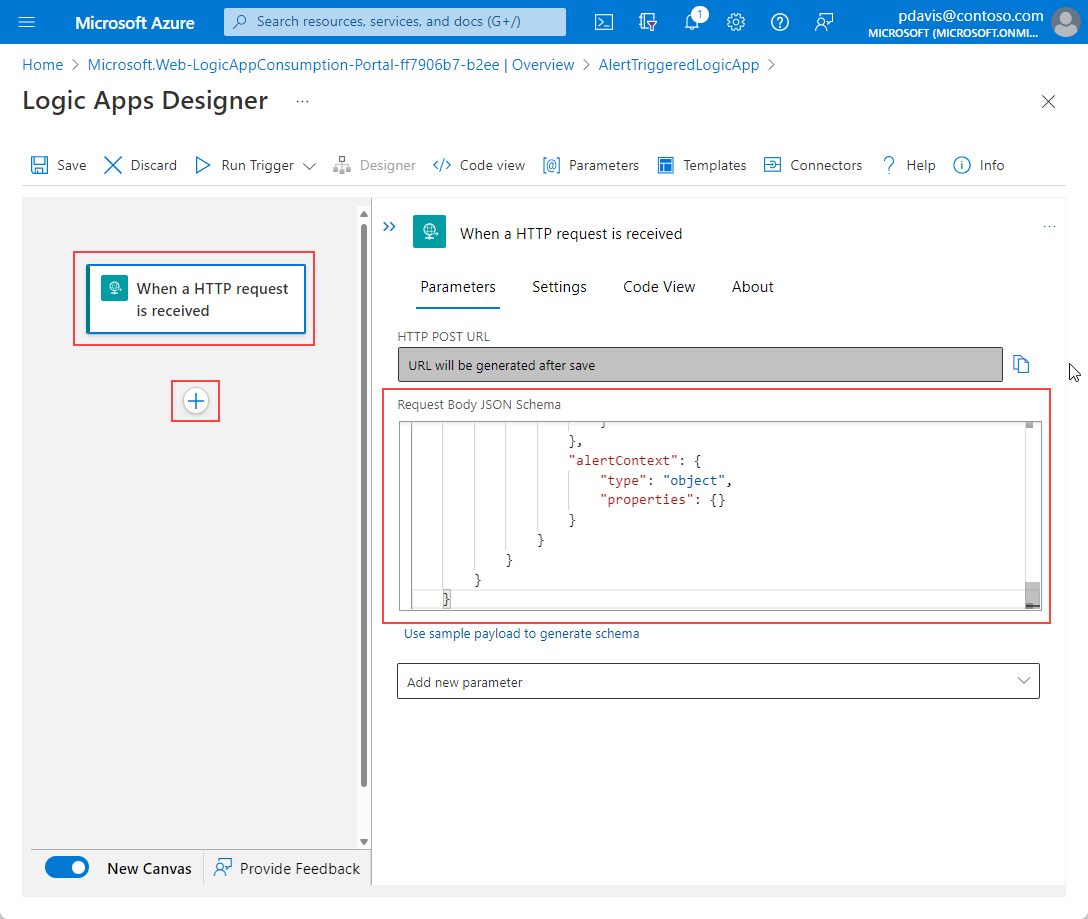
(Optional). You can customize the alert notification by extracting information about the affected resource on which the alert fired, for example, the resource's tags. You can then include those resource tags in the alert payload and use the information in your logical expressions for sending the notifications. To do this step, we will:
- Create a variable for the affected resource IDs.
- Split the resource ID into an array so that we can use its various elements (for example, subscription and resource group).
- Use the Azure Resource Manager connector to read the resource's metadata.
- Fetch the resource's tags, which can then be used in subsequent steps of the logic app.
Select + > Add an action to insert a new step.
In the Search field, search for and select Initialize variable.
In the Name field, enter the name of the variable, such as AffectedResource.
In the Type field, select Array.
In the Value field, select fx to open the Function pop-up window. Enter the string
split(triggerBody()?['data']?['essentials']?['alertTargetIDs'][0], '/')in the empty field at the top and select Add.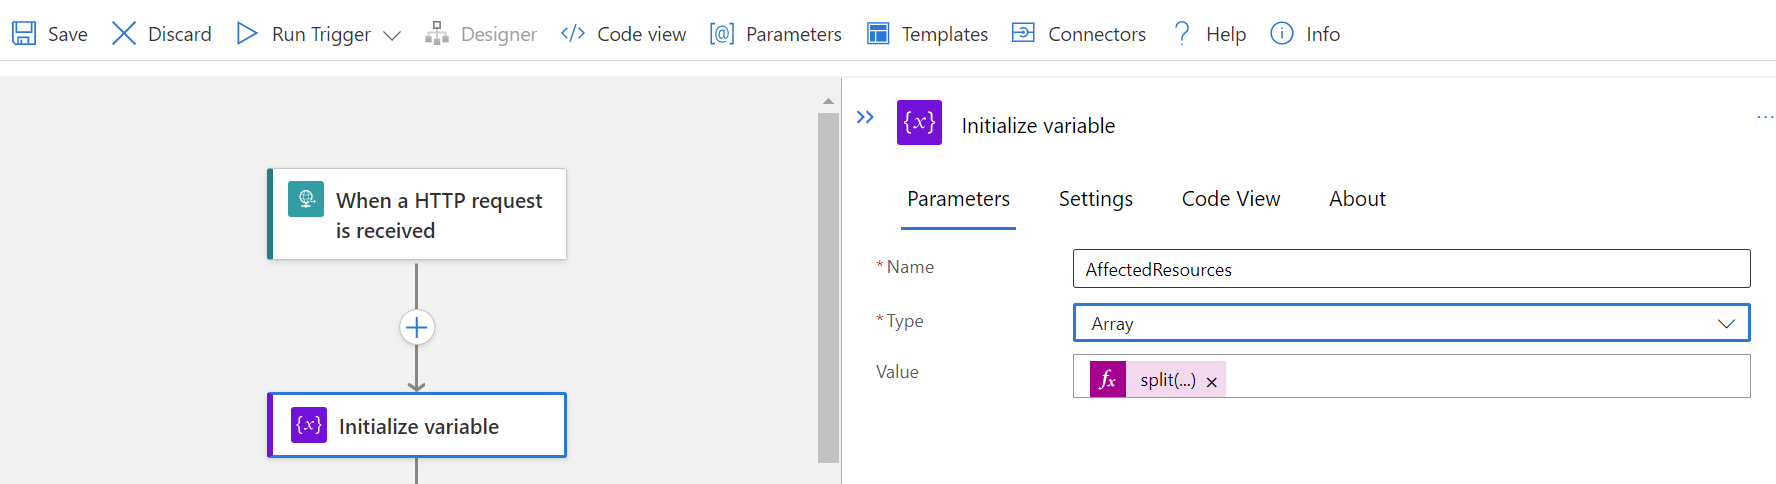
Select + > Add an action to insert another step.
In the Search field, search for and select Azure Resource Manager > See more > Read a resource.
Select an Authentication method and Sign in.
Populate the fields of the Read a resource action with the array values from the
AffectedResourcevariable. In each of the fields, select the field and scroll down to Enter a custom value. Select fx to open the Function pop-up window. Enter the corresponding string from this table in the empty field at the top and select Add.Field String value Subscription variables('AffectedResource')[2]Resource Group variables('AffectedResource')[4]Resource Provider variables('AffectedResource')[6]Short Resource ID concat(variables('AffectedResource')[7], '/', variables('AffectedResource')[8])Client Api Version Resource type's API version To find your resource type's API version, select the JSON view link on the top right-hand side of the resource overview page.
The Resource JSON page is displayed with the ResourceID and API version at the top of the page.
The dynamic content now includes tags from the affected resource. You can use those tags when you configure your notifications as described in the following steps.


Set up an action
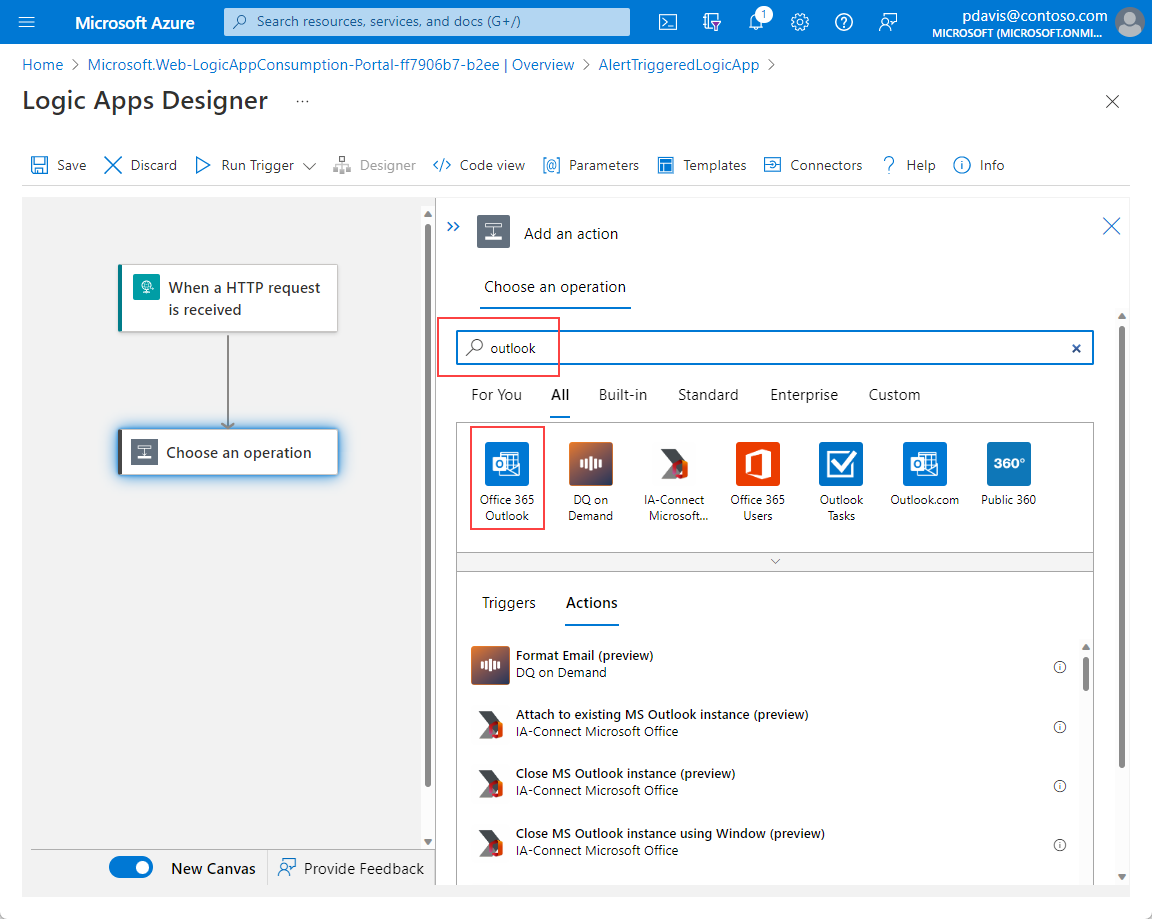
Select + > Add an action to insert a new step.
In the search field, search for Send an email (V2).
Under Office 365 Outlook, select Send an email (V2) from the list of actions.
Sign in to Office 365 when you're prompted to create a connection.
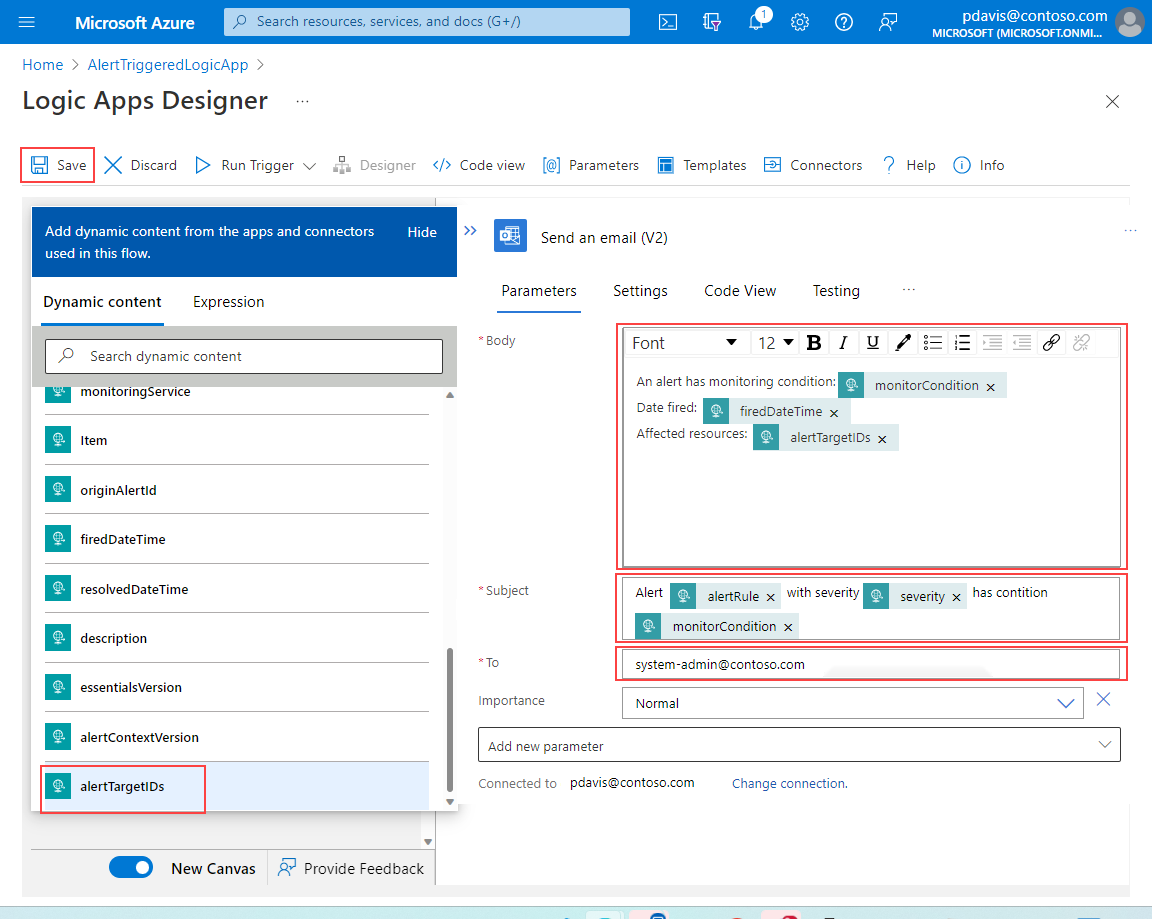
Enter the email address to send the alert to the To field.
In the Subject field, create the subject text by entering static text and including content taken from the alert payload by choosing fields from the Dynamic content list.
For example:
- Alert: Select alertRule from the Dynamic content list.
- with severity: Select severity from the Dynamic content list.
- has condition: Select monitorCondition from the Dynamic content list.
Create the email Body by entering static text and including content taken from the alert payload by choosing fields from the Dynamic content list.
For example:
- Monitoring condition: Select monitorCondition from the Dynamic content list.
- Date fired: Select firedDateTime from the Dynamic content list.
- Affected resources: Select alertTargetIDs from the Dynamic content list.
Select Save.


You created a logic app that sends an email to the specified address, with details from the alert that triggered it.
The next step is to create an action group to trigger your logic app.


Create an action group
To trigger your logic app, create an action group. Then create an alert that uses that action group.
Go to the Azure Monitor page and select Alerts from the pane on the left.
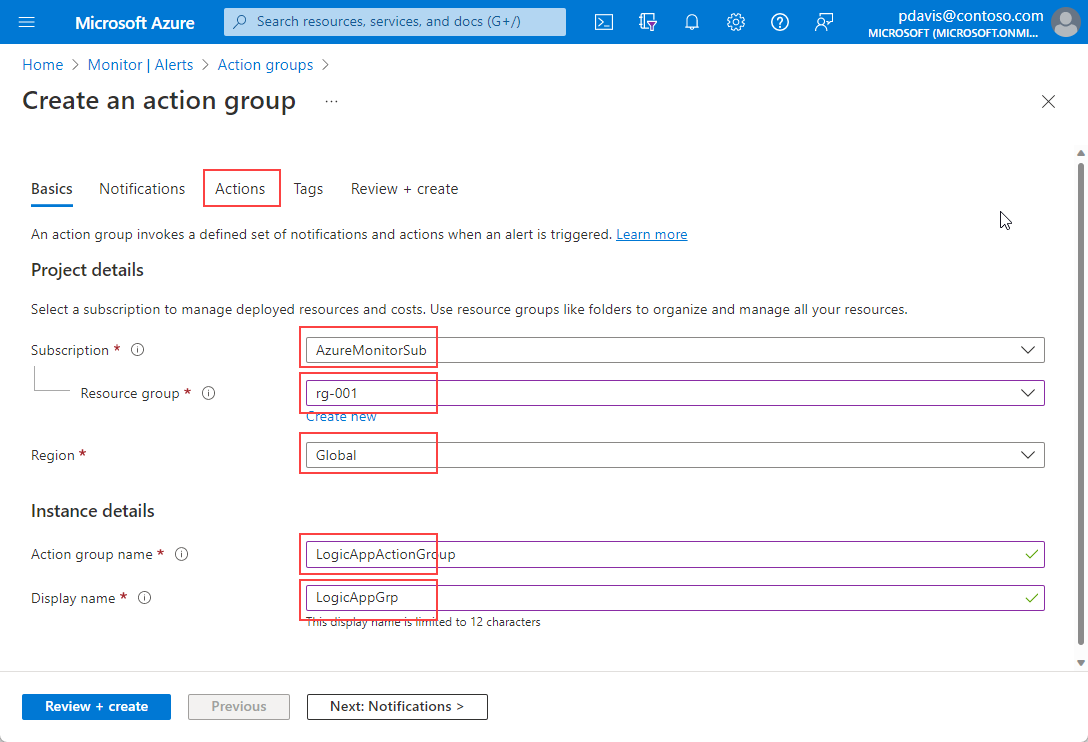
Select Action groups > Create.
Select values for Subscription, Resource group, and Region.
Enter a name for Action group name and Display name.
Select the Actions tab.
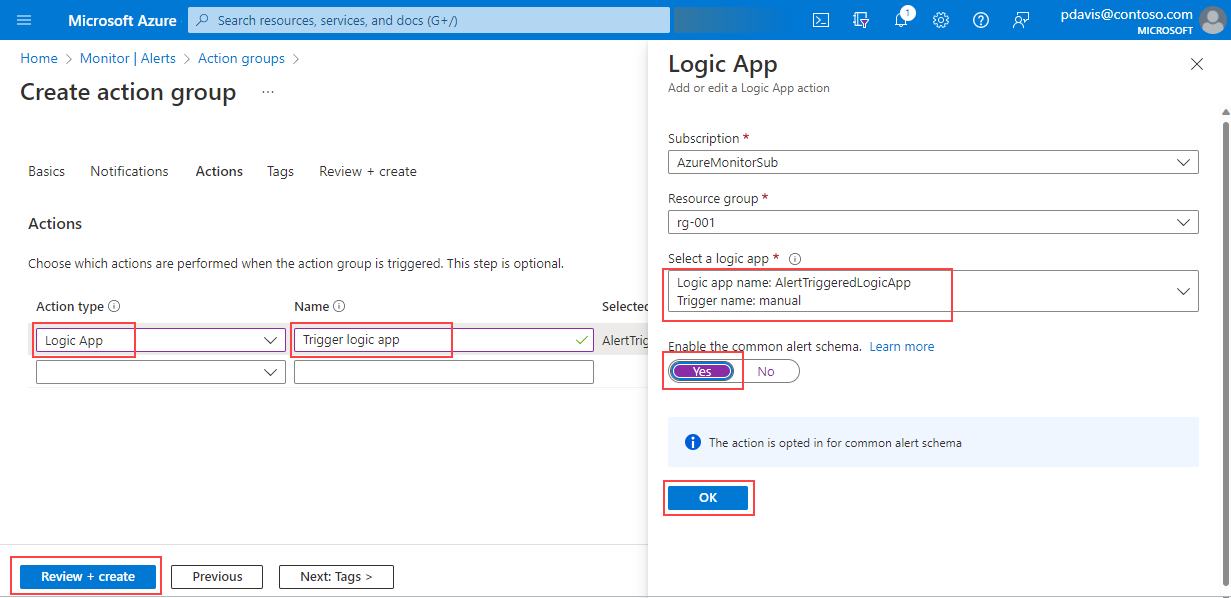
On the Actions tab under Action type, select Logic App.
In the Logic App section, select your logic app from the dropdown.
Set Enable common alert schema to Yes. If you select No, the alert type determines which alert schema is used. For more information about alert schemas, see Context-specific alert schemas.
Select OK.
Enter a name in the Name field.
Select Review + create > Create.


Test your action group
Go to the Azure Monitor page and select Alerts from the pane on the left.
Go to Action groups and select your logic app.
Select Test in the top action bar.
Select a sample alert type from the Select sample type dropdown.
Select Test.
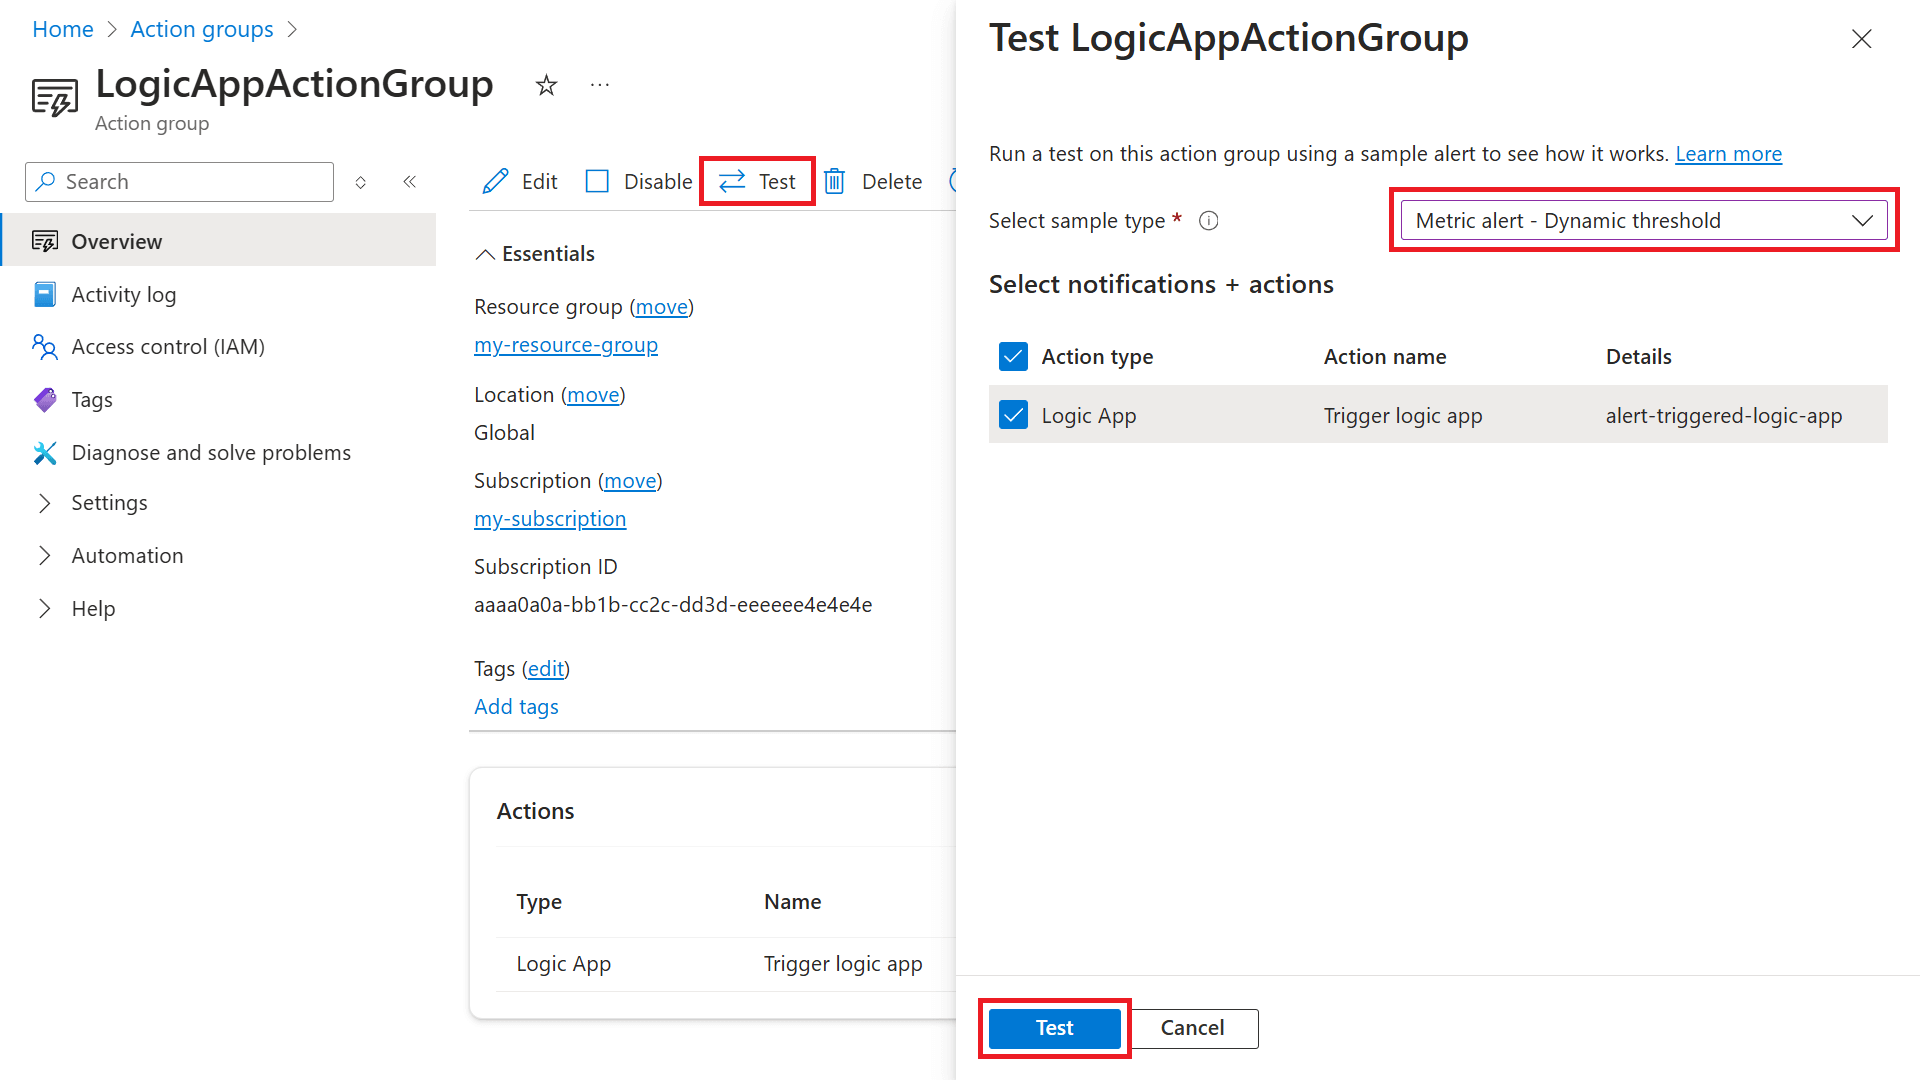
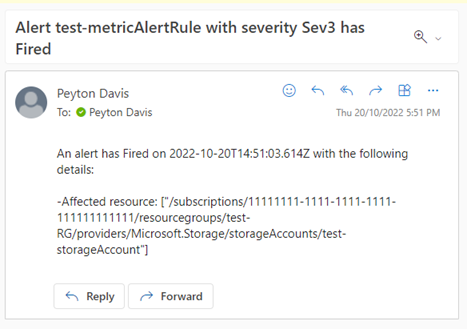
The following email is sent to the specified account:


Create a rule by using your action group
Create an alert rule for one of your resources.
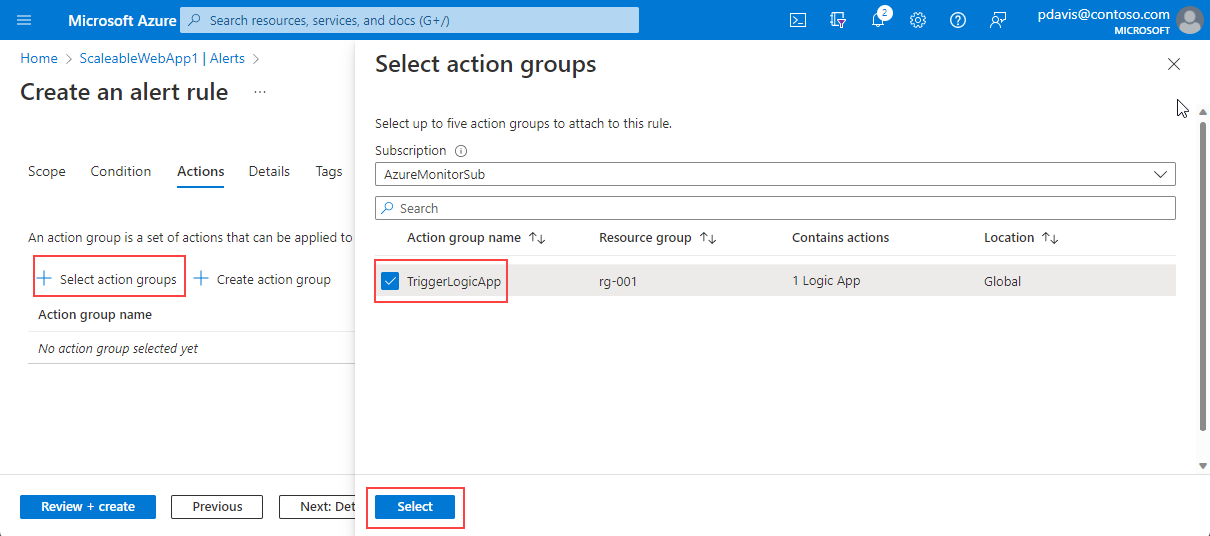
On the Actions tab of your rule, choose Use action groups.
Select your action group from the list.
Choose Select.
Finish the creation of your rule.