Note
Access to this page requires authorization. You can try signing in or changing directories.
Access to this page requires authorization. You can try changing directories.
Data collection rules let you filter and transform log data before sending the data to an Azure table or a custom table. This article explains how to create custom tables and add custom columns to tables in your Log Analytics workspace.
Important
Whenever you update a table schema, be sure to update any data collection rules that send data to the table. The table schema you define in your data collection rule determines how Azure Monitor streams data to the destination table. Azure Monitor doesn't update data collection rules automatically when you make table schema changes.
Prerequisites
| Action | Permission required |
|---|---|
| Manage a table | Microsoft.OperationalInsights/workspaces/* permission at the Log Analytics workspace scope or higher. For example, as provided by the privileged built-in role, Log Analytics contributor. |
To ingest data to the table, you might need the following:
Data collection endpoint (DCE). For more information, see DCE.
A sample of at least one record of the source data in a JSON file. This is used to create custom tables in the portal, such as what's required to collect text and JSON data sources from VMs
[
  {
    "TimeGenerated": "supported_datetime_format",
    "<column_name_1>": "<column_name_1_value>",
    "<column_name_2>": "<column_name_2_value>"
  },
  {
    "TimeGenerated": "supported_datetime_format",
    "<column_name_1>": "<column_name_1_value>",
    "<column_name_2>": "<column_name_2_value>"
  },
  {
    "TimeGenerated": "supported_datetime_format",
    "<column_name_1>": "<column_name_1_value>",
    "<column_name_2>": "<column_name_2_value>"
  }
]
All tables in a Log Analytics workspace must have a
TimeGeneratedcolumn, which is used to identify the ingestion time of the record. If the column is missing, it's automatically added to the transformation in your DCR for the table. For information, see supported datetime formats.
Create a custom table
Azure tables have predefined schemas. To store log data in a different schema, use data collection rules to define how to collect, transform, and send the data to a custom table in your Log Analytics workspace. To create a custom table with the Auxiliary plan, see Set up a table with the Auxiliary plan.
Important
Custom tables have a suffix of _CL; for example, tablename_CL. The Azure portal adds the _CL suffix to the table name automatically. When you create a custom table using a different method, you need to add the _CL suffix yourself. The tablename_CL in the DataFlows Streams properties in your data collection rules must match the tablename_CL name in the Log Analytics workspace.
Warning
Table names are used for billing purposes so they shouldn't contain sensitive information.
To create a custom table using the Azure portal:
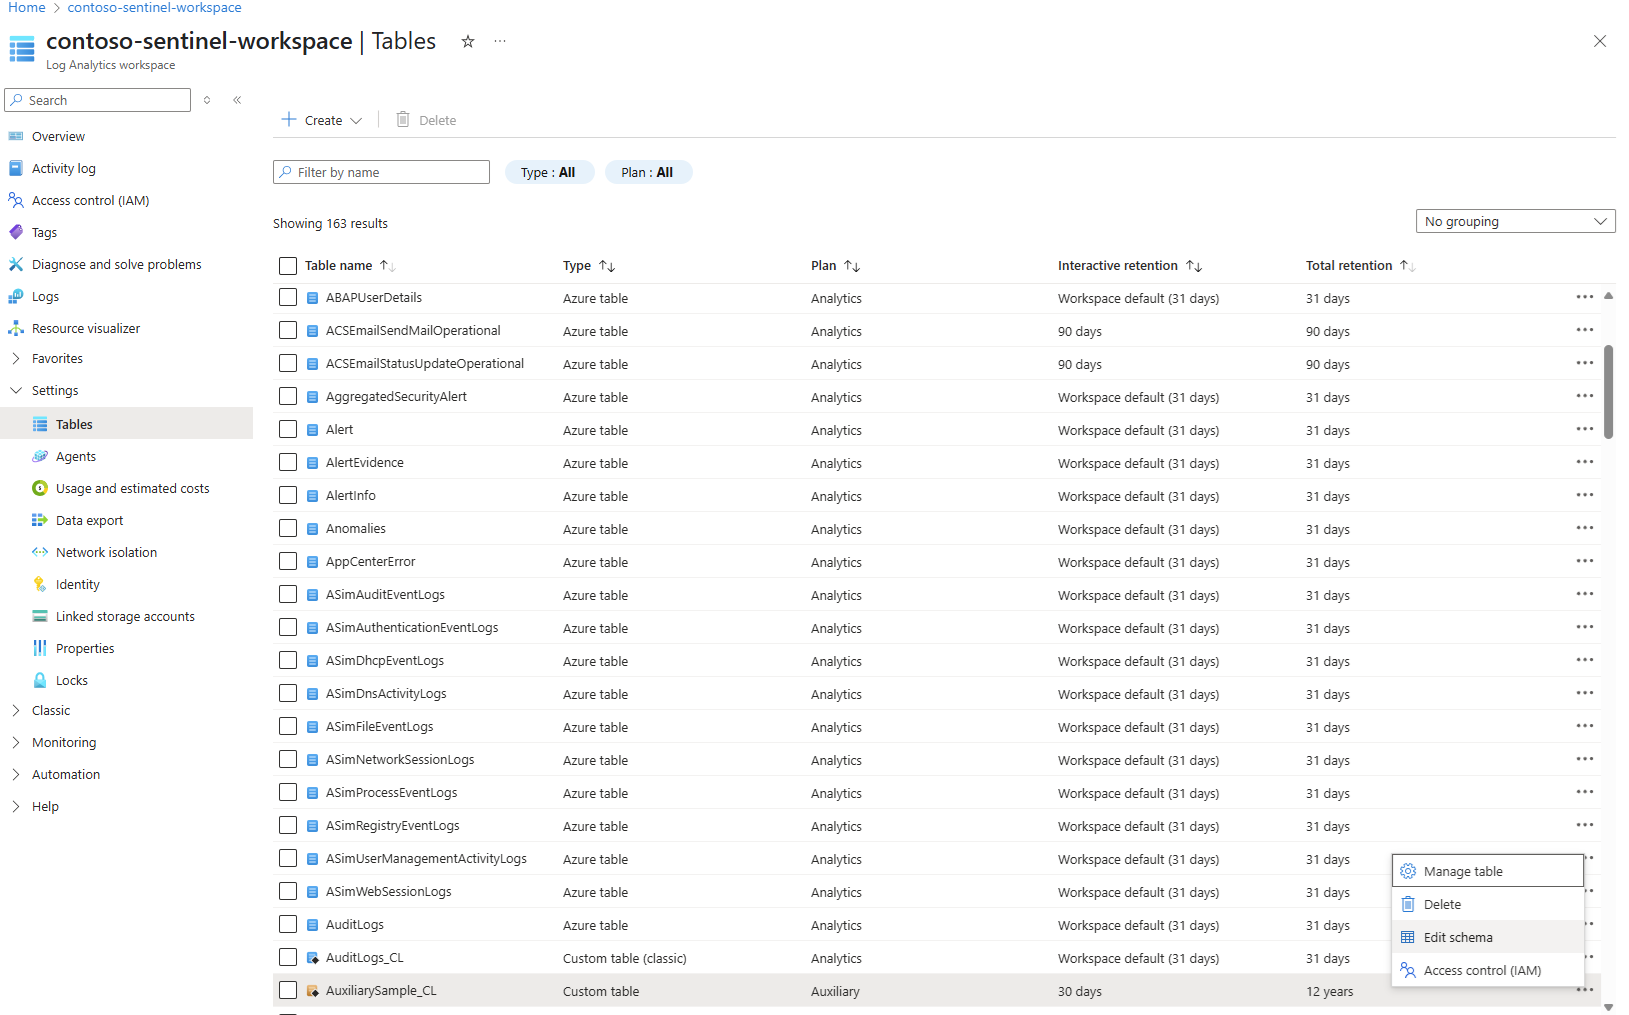
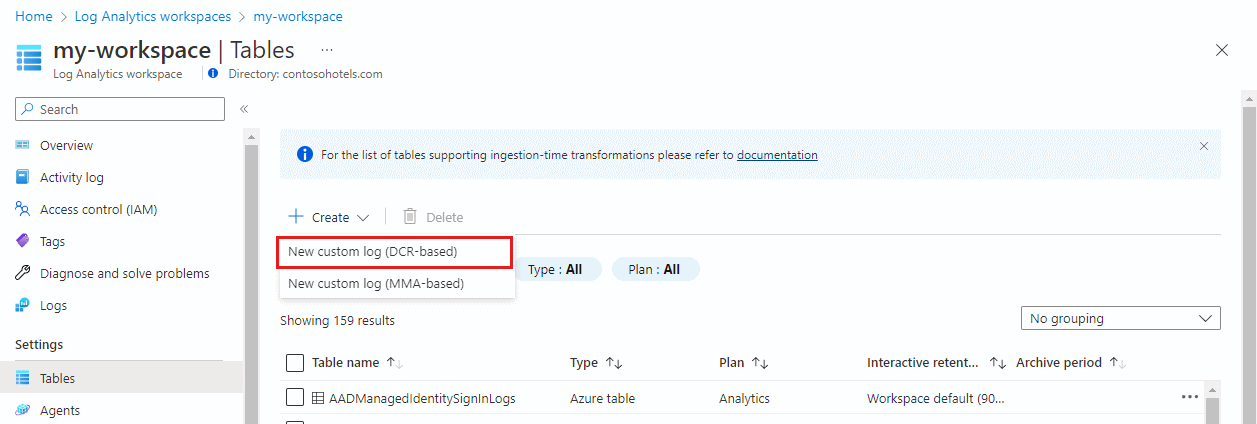
From the Log Analytics workspaces menu, select Tables.
Select Create and then New custom log (DCR-based).
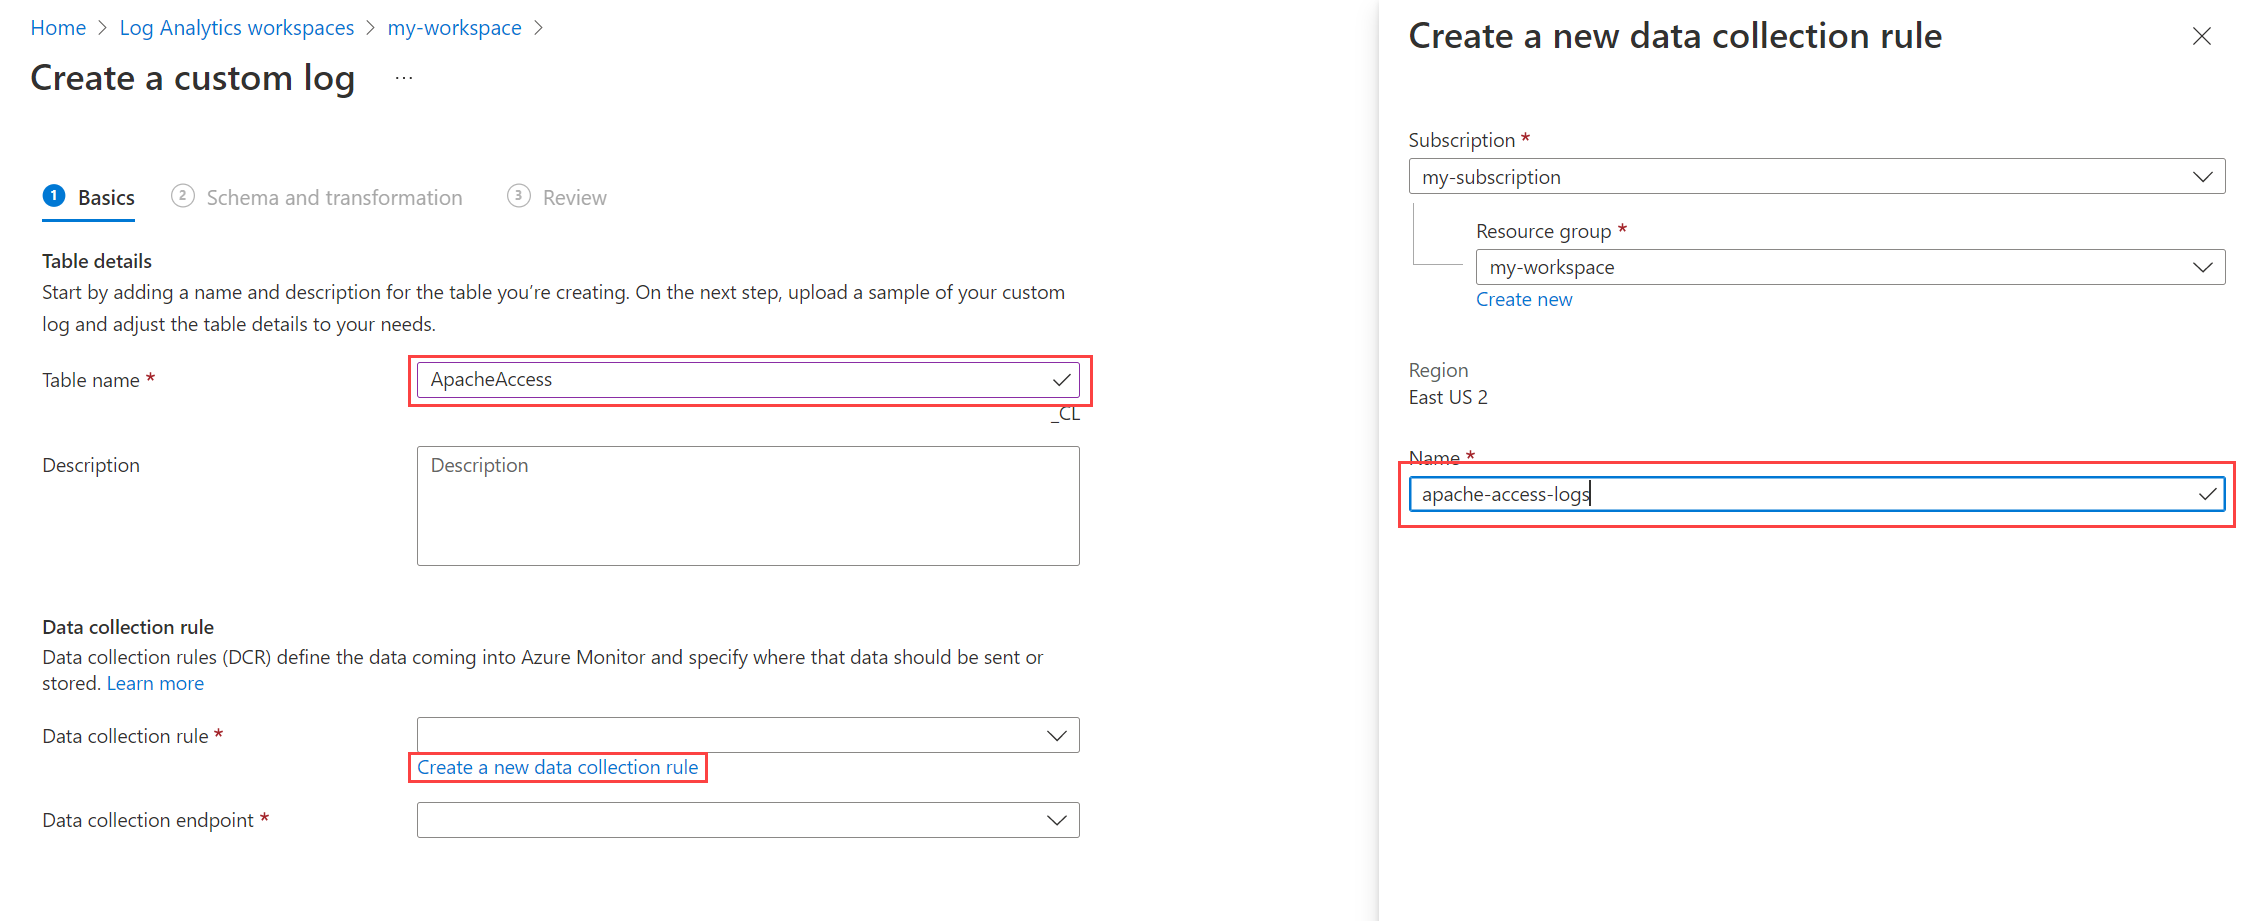
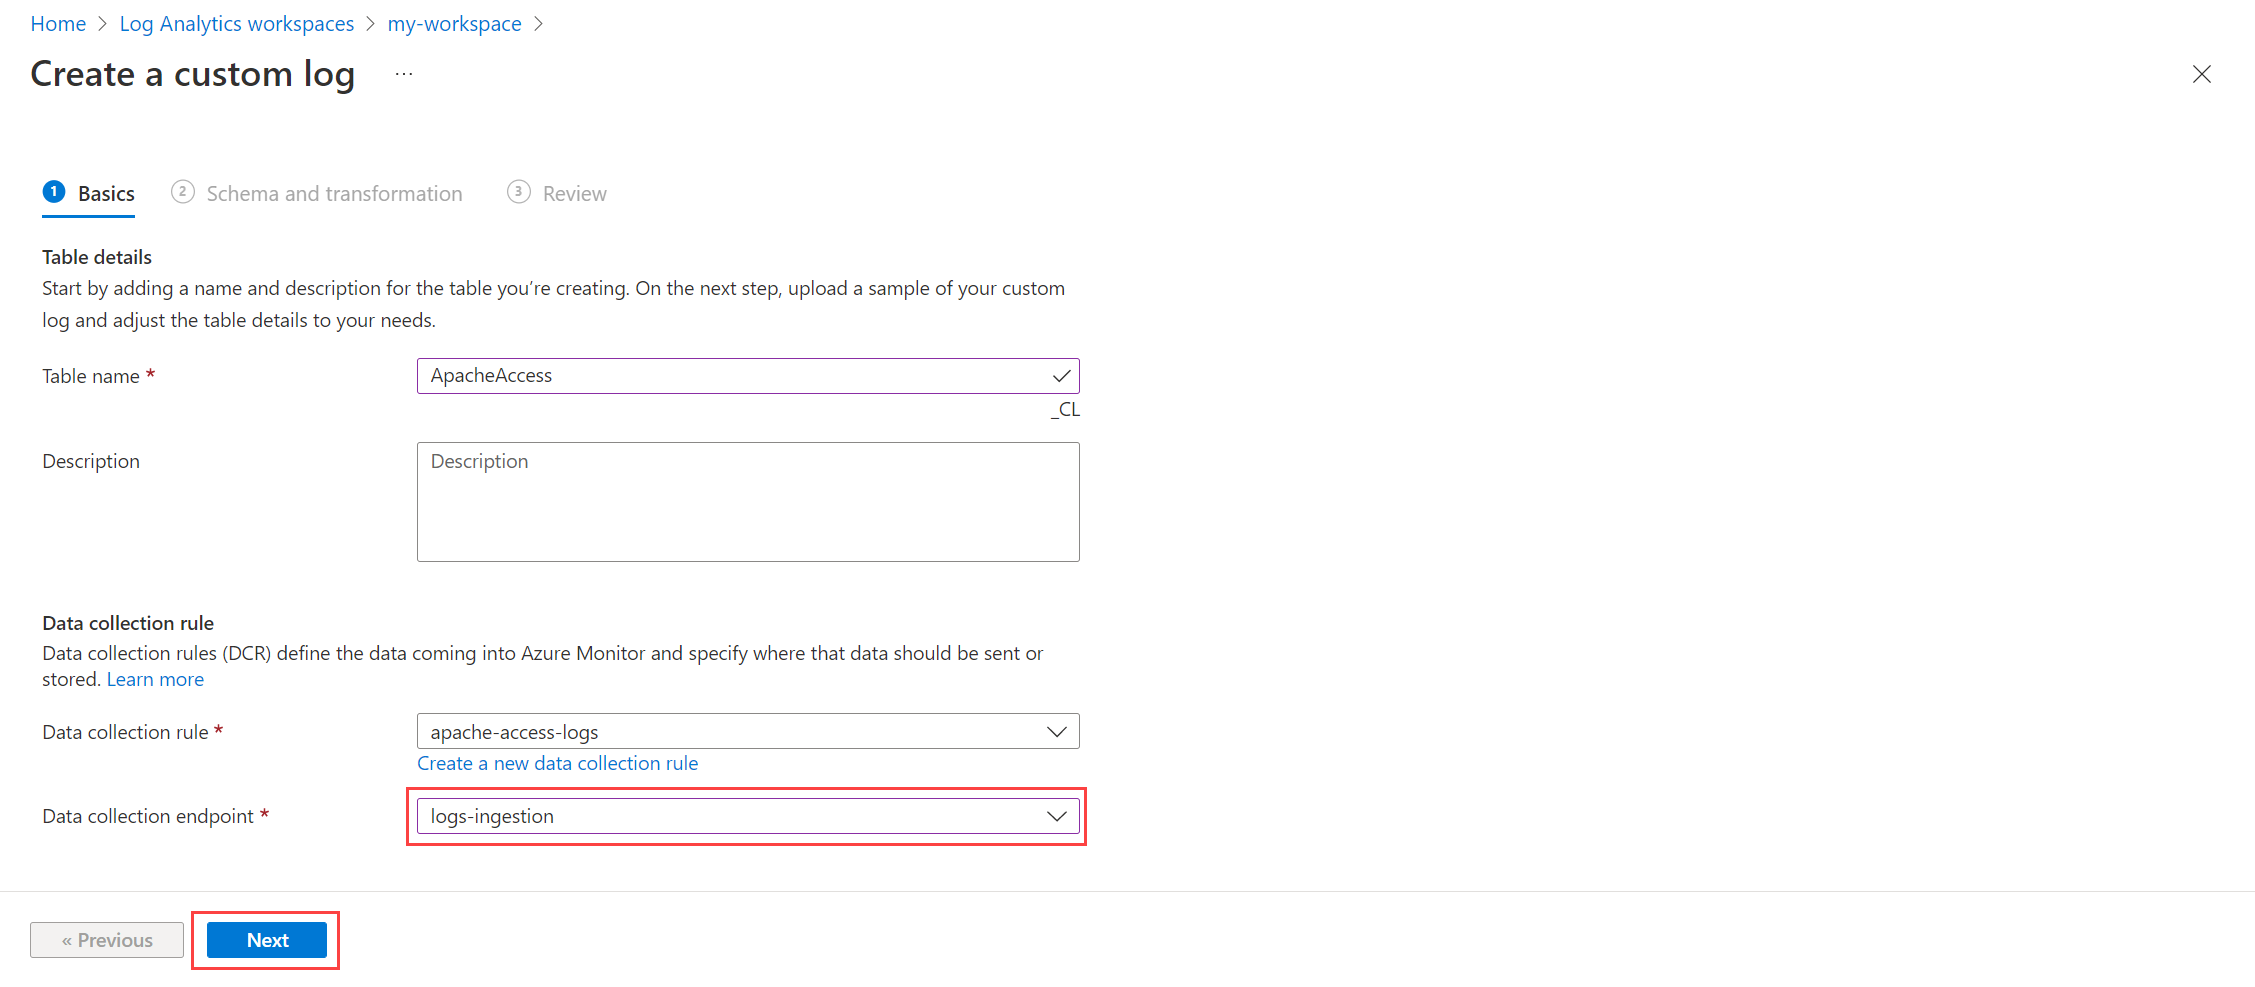
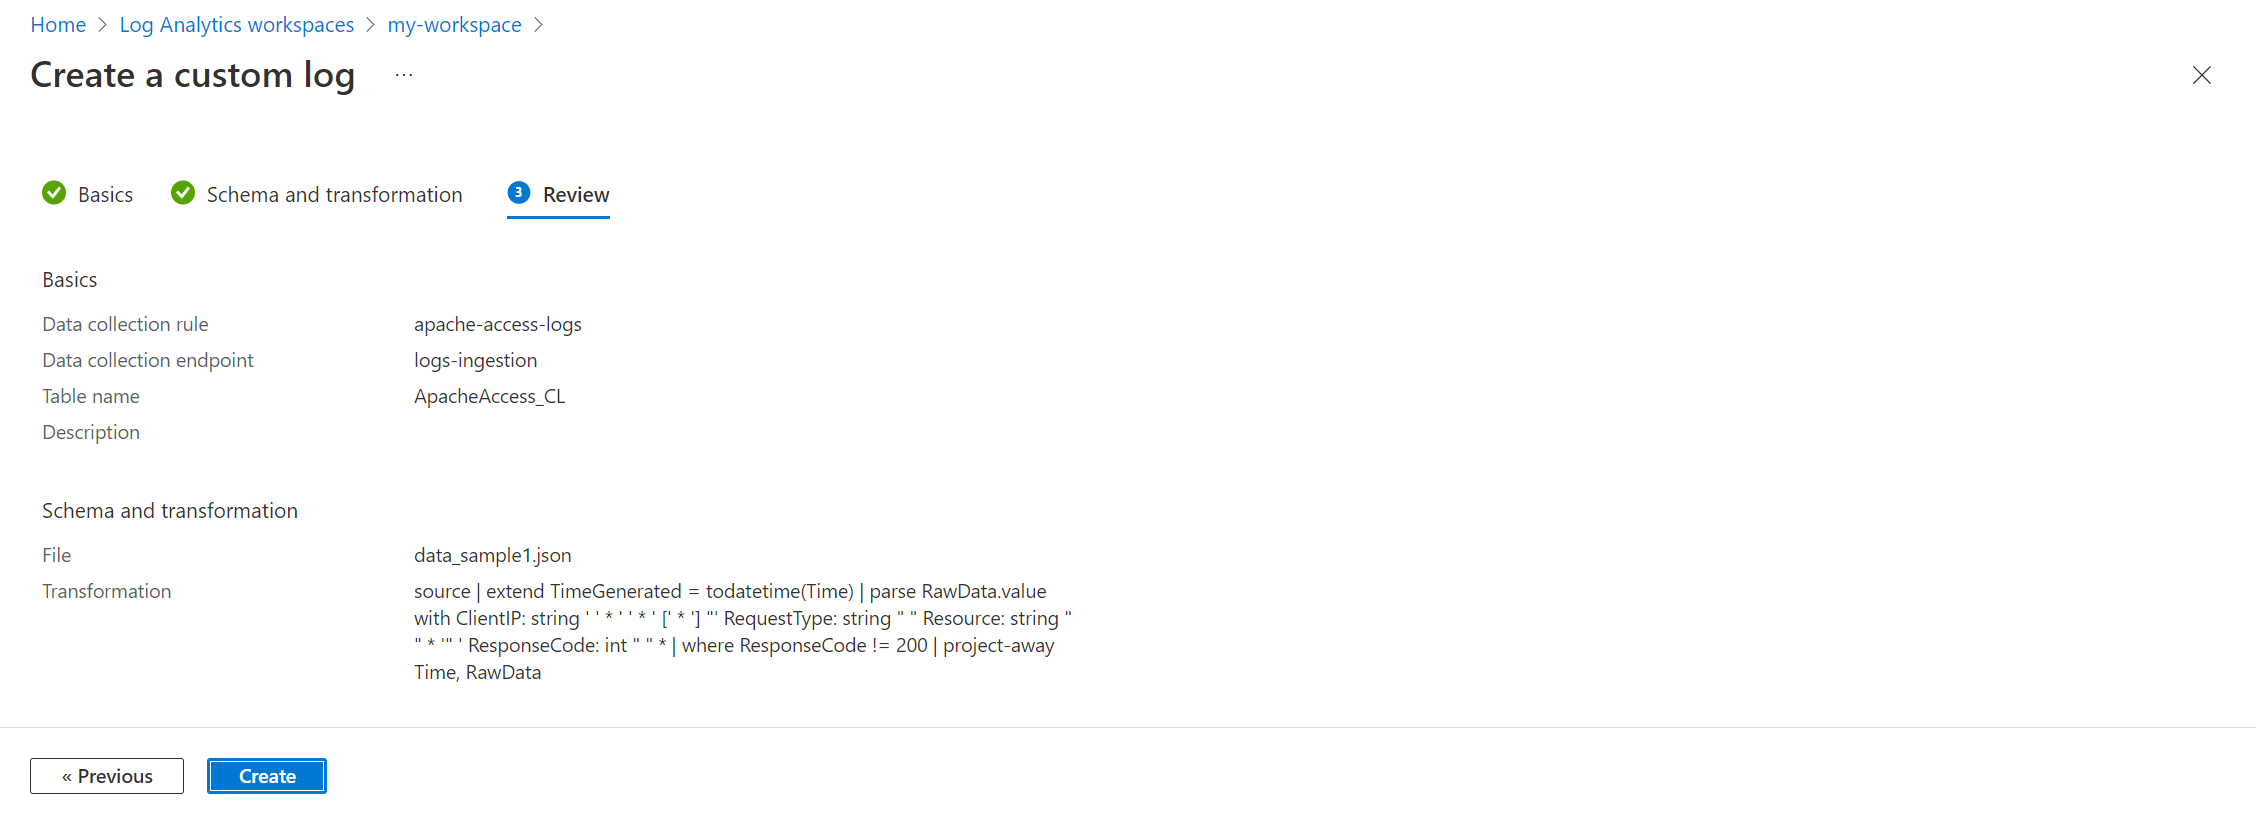
Specify a name and, optionally, a description for the table. You don't need to add the _CL suffix to the custom table's name - this is added automatically to the name you specify in the portal.
Select an existing data collection rule from the Data collection rule dropdown, or select Create a new data collection rule and specify the Subscription, Resource group, and Name for the new data collection rule.
Select a data collection endpoint and select Next.
Select Browse for files and locate the JSON file with the sample data for your new table.
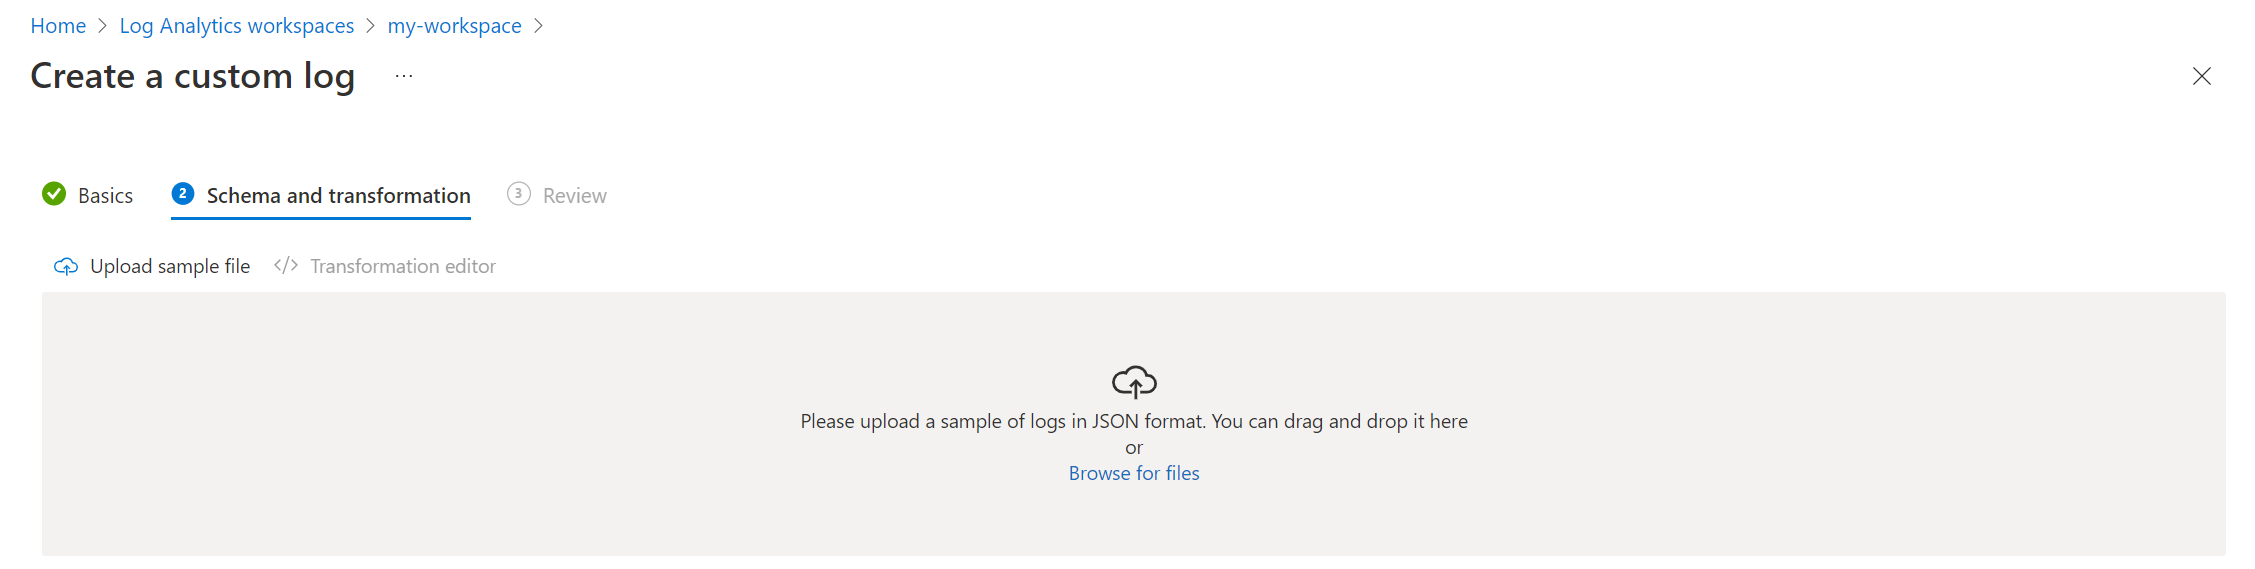
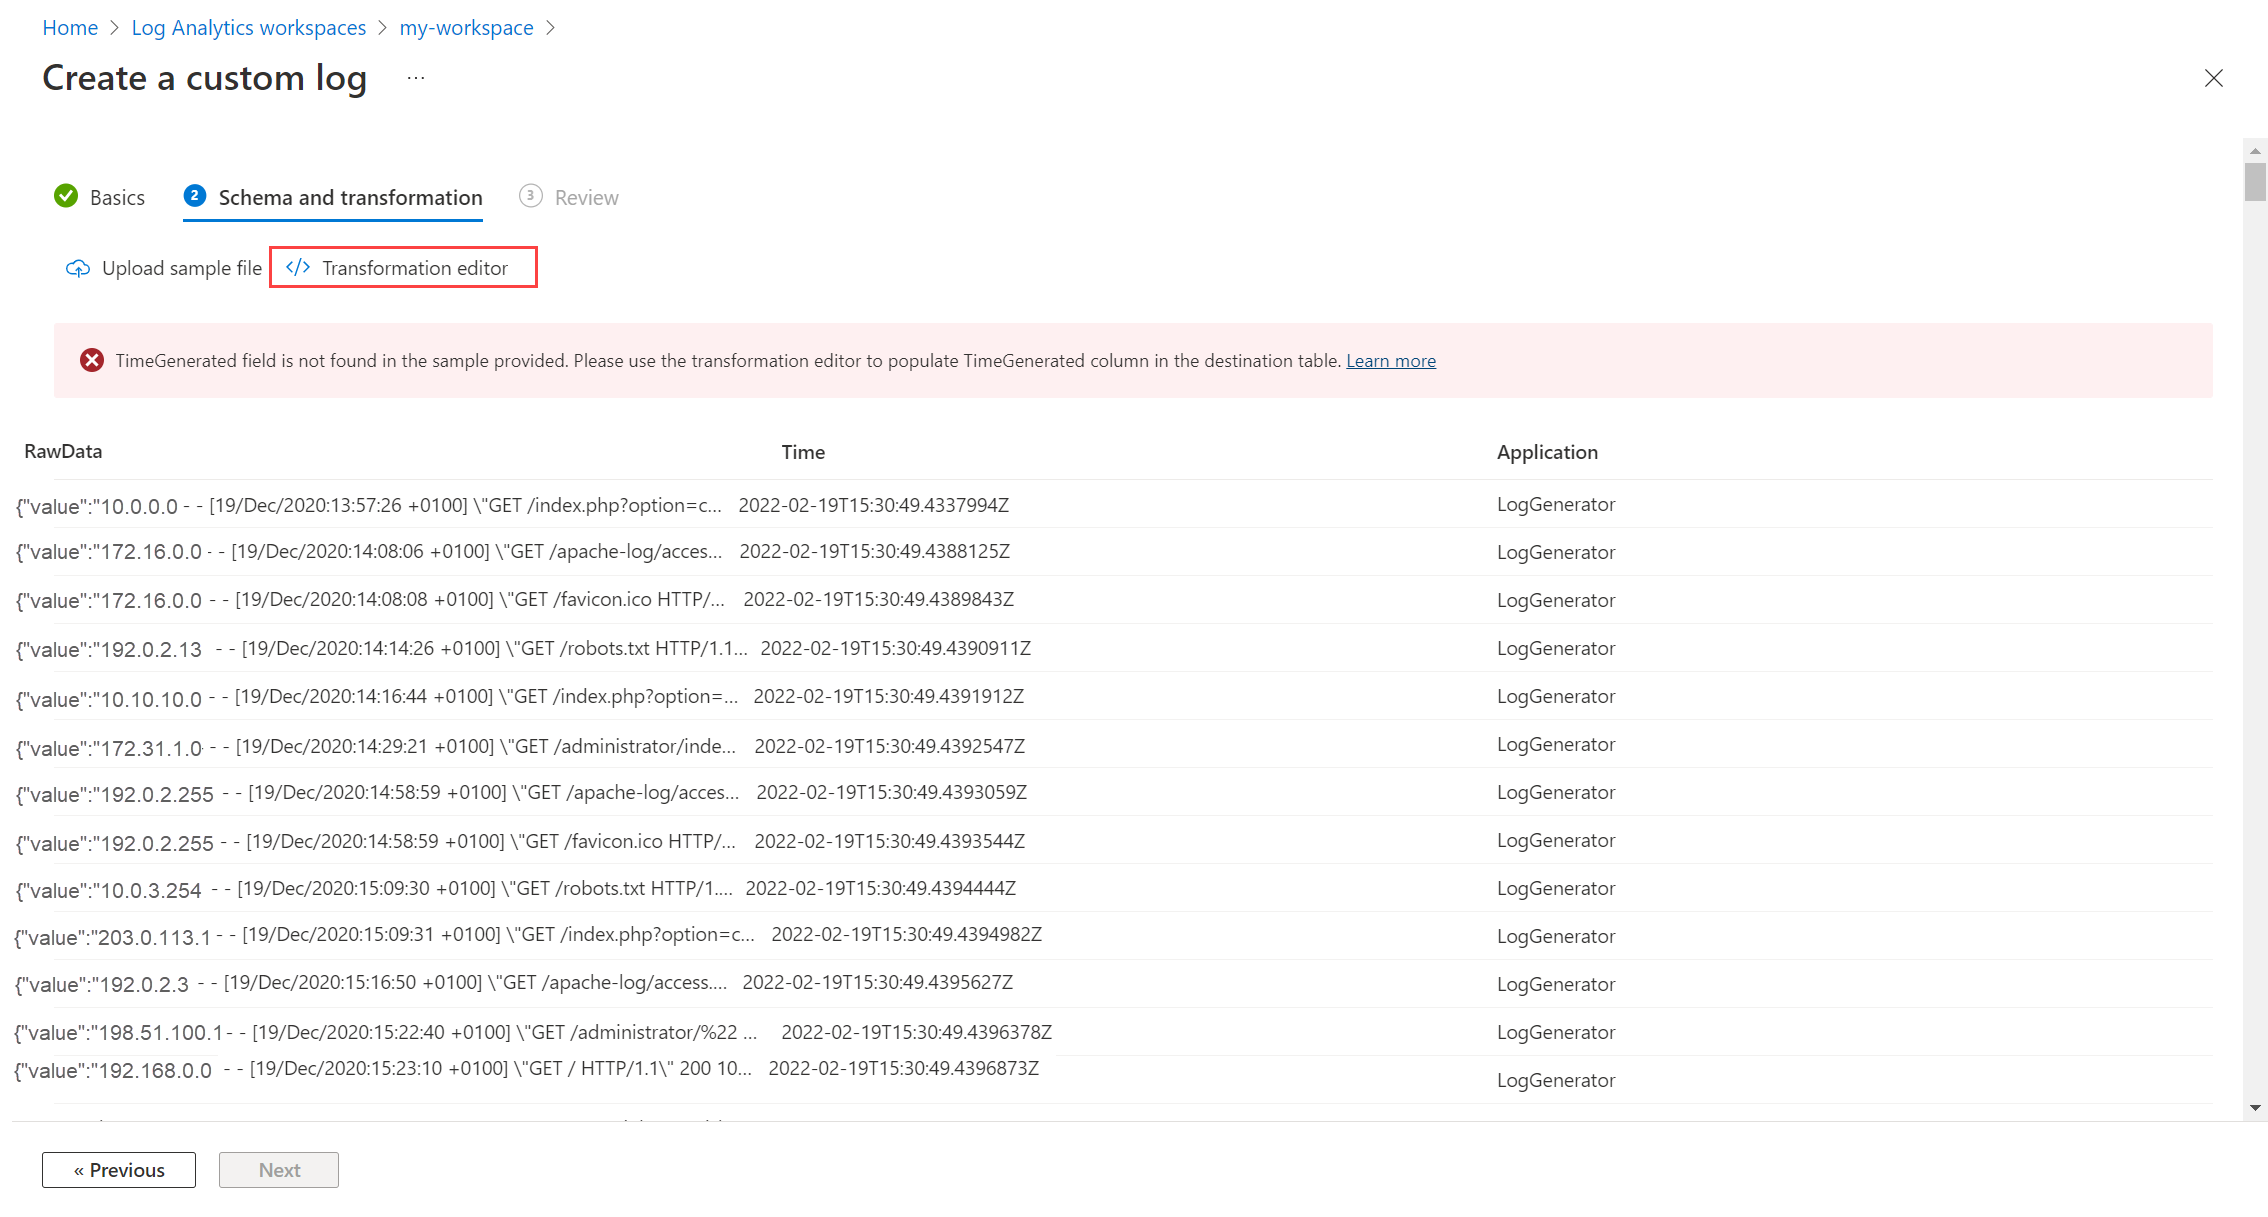
If your sample data doesn't include a
TimeGeneratedcolumn, you receive a message that a transformation is being created with this column.If you want to transform log data before ingestion into your table:
Select Transformation editor.
The transformation editor lets you create a transformation for the incoming data stream. This is a KQL query that runs against each incoming record. Azure Monitor Logs stores the results of the query in the destination table.
Select Run to view the results.
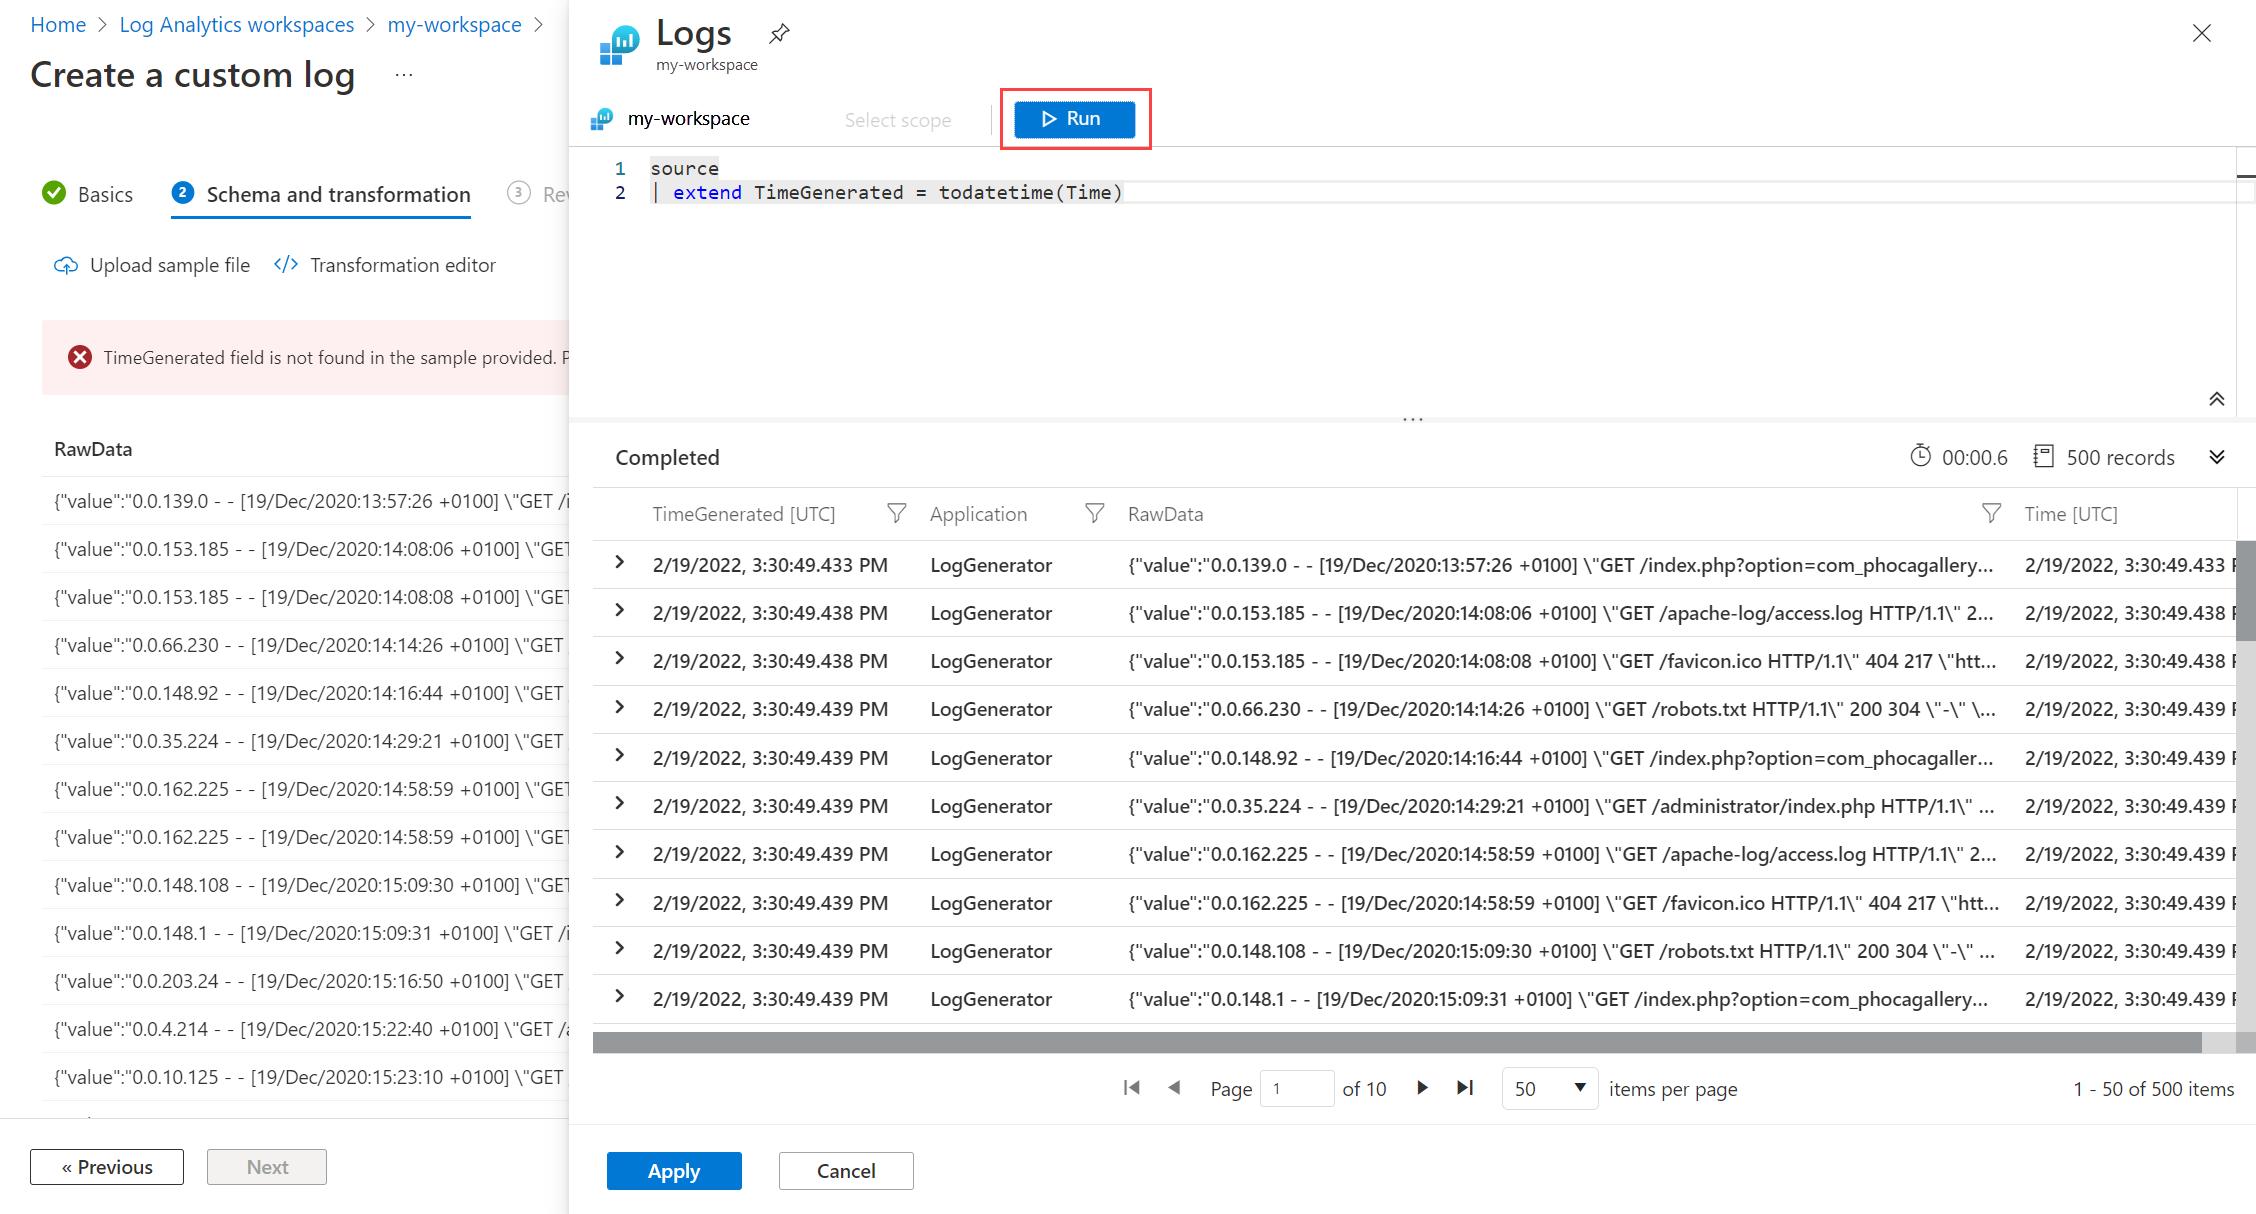
Select Apply to save the transformation and view the schema of the table that's about to be created. Select Next to proceed.
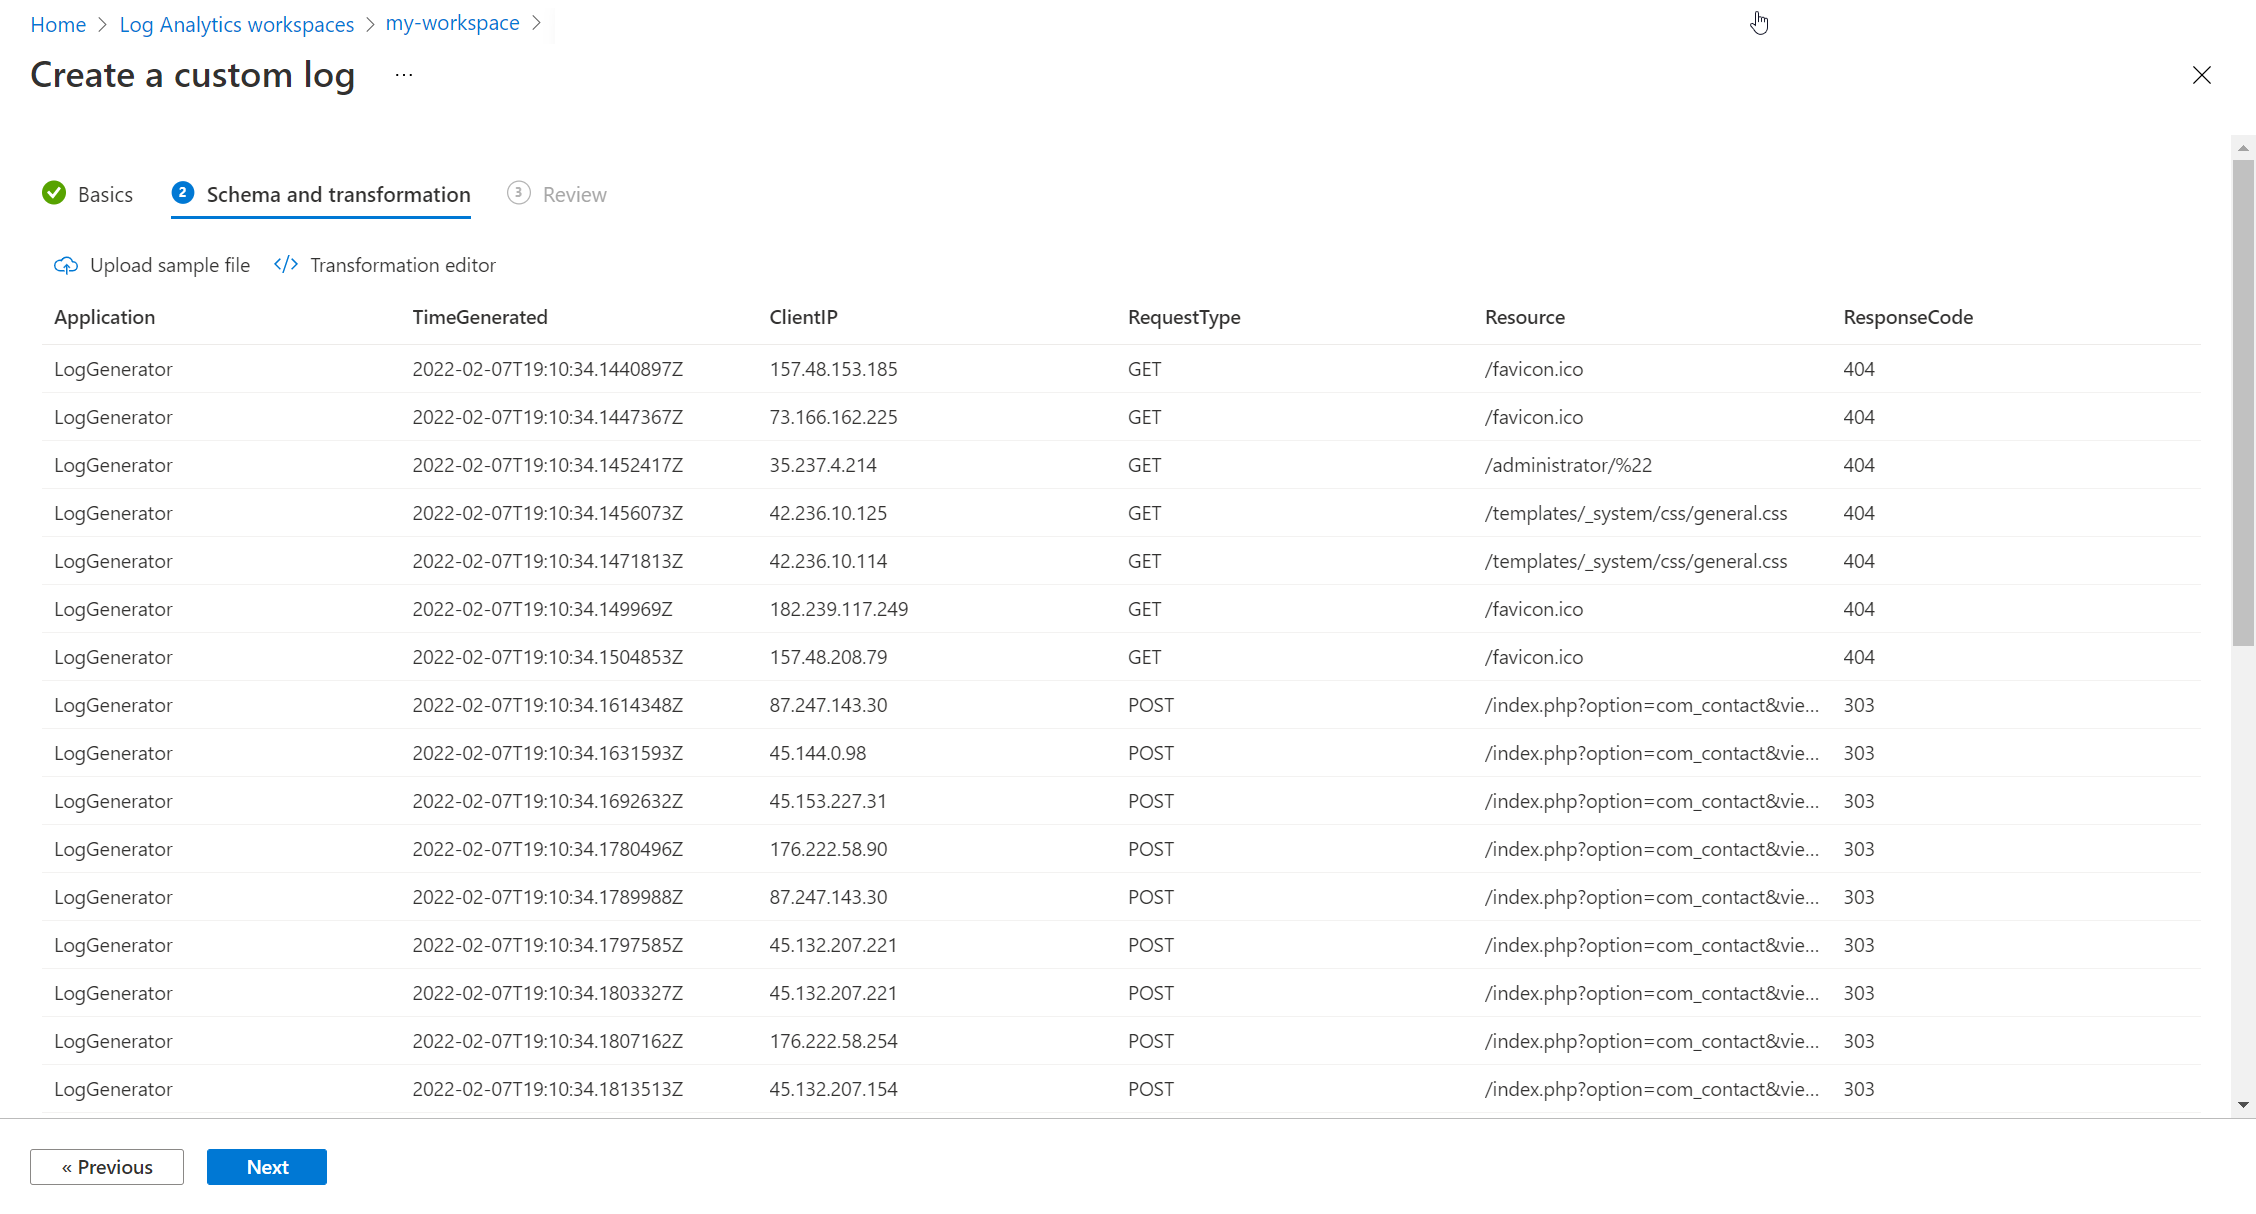
Verify the final details and select Create to save the custom log.


Delete a table
You can delete any table that's not an Azure table, but how the data is deleted depends on the table type.
For more information, see What happens to data when you delete a table in a Log Analytics workspace.
To delete a table from the Azure portal:
From the Log Analytics workspace menu, select Tables.
Search for the tables you want to delete by name, or by selecting Search results in the Type field.
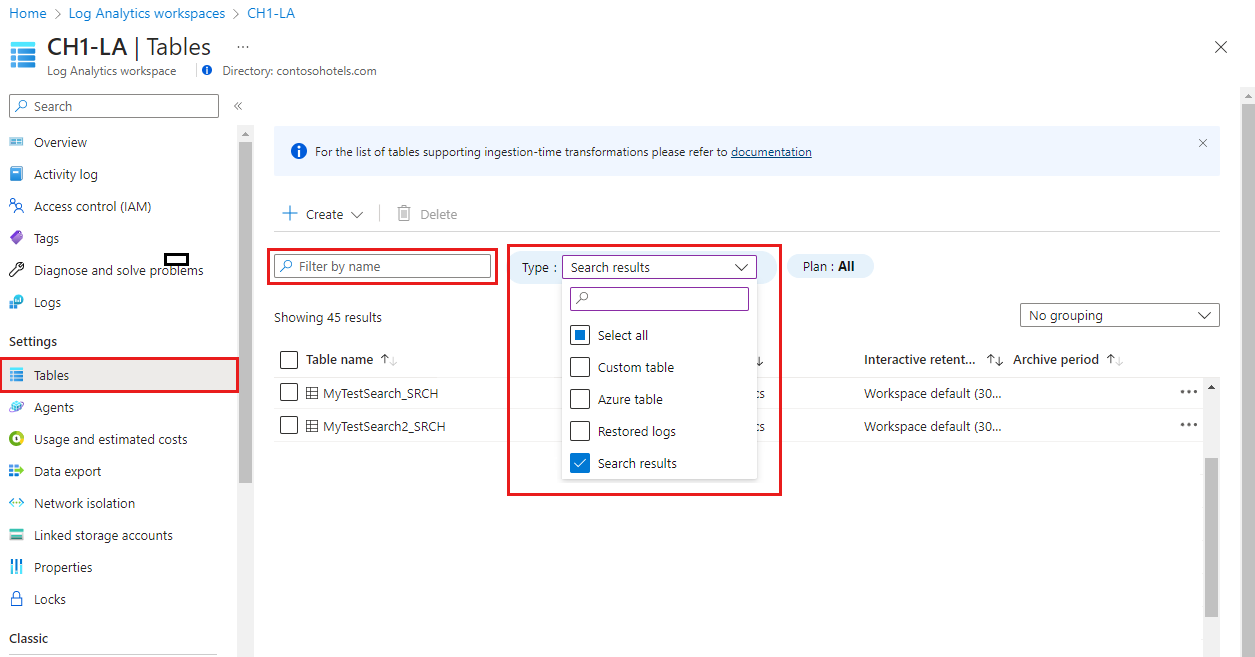
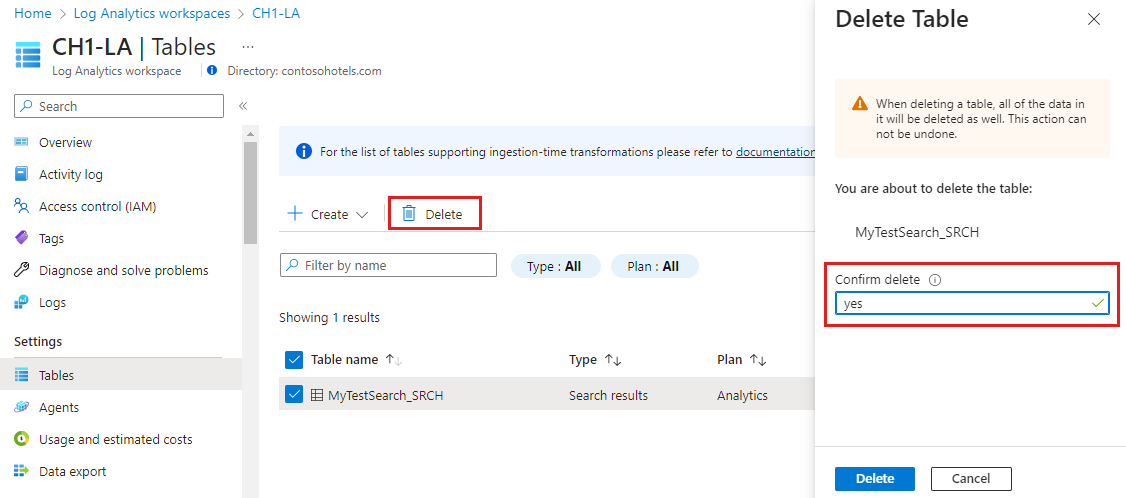
Select the table you want to delete, select the ellipsis ( ... ) to the right of the table, select Delete, and confirm the deletion by typing yes.


Add or delete a custom column
Custom tables allow modification of the schema by adding or deleting columns after table creation. Azure tables only allow adding and deleting custom columns.
Use these rules when defining column names for custom tables:
Column names must start with a letter (A-Z or a-z).
After the first character, use only letters, digits, or underscores.
Don't use spaces, dots, dashes, or other punctuation in column names.
Non-ASCII letters (for example, Æ, É, Ö) aren't supported in column names.
Column names are only case sensitive for Analytics and Basic tables. Auxiliary log table ingestion drops data to duplicate column names when the only difference is case.
Column names must be 2 to 45 characters long.
Custom column names in Azure tables must end in
_CFDon't use names that conflict with system or reserved columns, including
id,BilledSize,IsBillable,InvalidTimeGenerated,TenantId,Title,Type,UniqueId,_ItemId,_ResourceGroup,_ResourceId,_SubscriptionId,_TimeReceived.
Important
The schema rules for custom tables are stricter than general Kusto identifier rules. Kusto can reference unusual property names with quoting in queries, but the custom table schema accepts only letters, digits, and underscores for column names.
To add a custom column to a table in your Log Analytics workspace, or delete a column:
From the Log Analytics workspaces menu, select Tables.
Select the ellipsis ( ... ) to the right of the table you want to edit and select Edit schema.
This opens the Schema Editor screen.
Scroll down to the Custom Columns section of the Schema Editor screen.
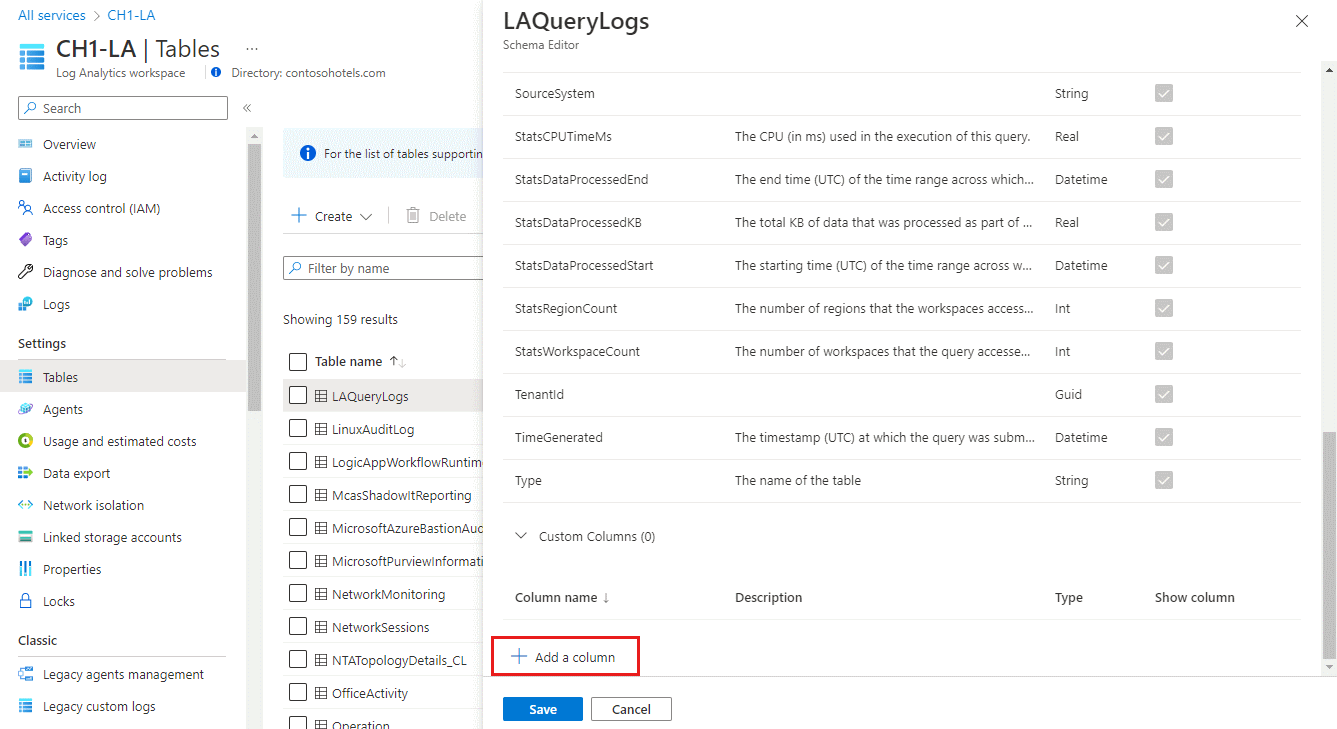
To add a new column:
- Select Add a column.
- Set the column name and description (optional), and select the expected value type from the Type dropdown.
- Select Save to save the new column.
To delete a column, select the Delete icon to the left of the column you want to delete.
