Manage data retention in a Log Analytics workspace
A Log Analytics workspace retains data in two states:
- Interactive retention: In this state, data is available for monitoring, troubleshooting, and near-real-time analytics.
- Long-term retention: In this low-cost state, data isn't available for table plan features, but can be accessed through search jobs.
This article explains how Log Analytics workspaces retain data and how to manage the data retention of tables in your workspace.
Interactive, long-term, and total retention
By default, all tables in a Log Analytics workspace retain data for 30 days, except for log tables with 90-day default retention. During this period - the interactive retention period - you can retrieve the data from the table through queries, and the data is available for visualizations, alerts, and other features and services, based on the table plan.
You can extend the interactive retention period of tables with the Analytics plan to up to two years. The Basic and Auxiliary plans have a fixed interactive retention period of 30 days.
Note
You can reduce the interactive retention period of Analytics tables to as little as four days using the API or CLI. However, since 31 days of interactive retention are included in the ingestion price, lowering the retention period below 31 days doesn't reduce costs.
To retain data in the same table beyond the interactive retention period, extend the table's total retention to up to 12 years. At the end of the interactive retention period, the data stays in the table for the remainder of the total retention period you configure. During this period - the long-term retention period - run a search job to retrieve the specific data you need from the table and make it available for interactive queries in a search results table.

How retention modifications work
When you shorten a table's total retention, Azure Monitor Logs waits 30 days before removing the data, so you can revert the change and avoid data loss if you made an error in configuration.
When you increase total retention, the new retention period applies to all data that was already ingested into the table and wasn't yet removed.
When you change the long-term retention settings of a table with existing data, the change takes effect immediately.
Example:
- You have an existing Analytics table with 180 days of interactive retention and no long-term retention.
- You change the interactive retention to 90 days without changing the total retention period of 180 days.
- Azure Monitor automatically treats the remaining 90 days of total retention as low-cost, long-term retention, so that data that's 90-180 days old isn't lost.
Permissions required
| Action | Permissions required |
|---|---|
| Configure default interactive retention for Analytics tables in a Log Analytics workspace | Microsoft.OperationalInsights/workspaces/write and microsoft.operationalinsights/workspaces/tables/write permissions to the Log Analytics workspace, as provided by the Log Analytics Contributor built-in role, for example |
| Get retention setting by table for a Log Analytics workspace | Microsoft.OperationalInsights/workspaces/tables/read permissions to the Log Analytics workspace, as provided by the Log Analytics Reader built-in role, for example |
Configure the default interactive retention period of Analytics tables
The default interactive retention period of all tables in a Log Analytics workspace is 30 days. You can change the default interactive period of Analytics tables to up to two years by modifying the workspace-level data retention setting. Basic and Auxiliary tables have a fixed interactive retention period of 30 days.
Changing the default workspace-level data retention setting automatically affects all Analytics tables to which the default setting still applies in your workspace. If you've already changed the interactive retention of a particular table, that table isn't affected when you change the workspace default data retention setting.
Important
Workspaces with 30-day retention might keep data for 31 days. If you need to retain data for 30 days only to comply with a privacy policy, configure the default workspace retention to 30 days using the API and update the immediatePurgeDataOn30Days workspace property to true. This operation is currently only supported using the Workspaces - Update API.
To set the default interactive retention period of Analytics tables within a Log Analytics workspace:
From the Log Analytics workspaces menu in the Azure portal, select your workspace.
Select Usage and estimated costs in the left pane.
Select Data Retention at the top of the page.
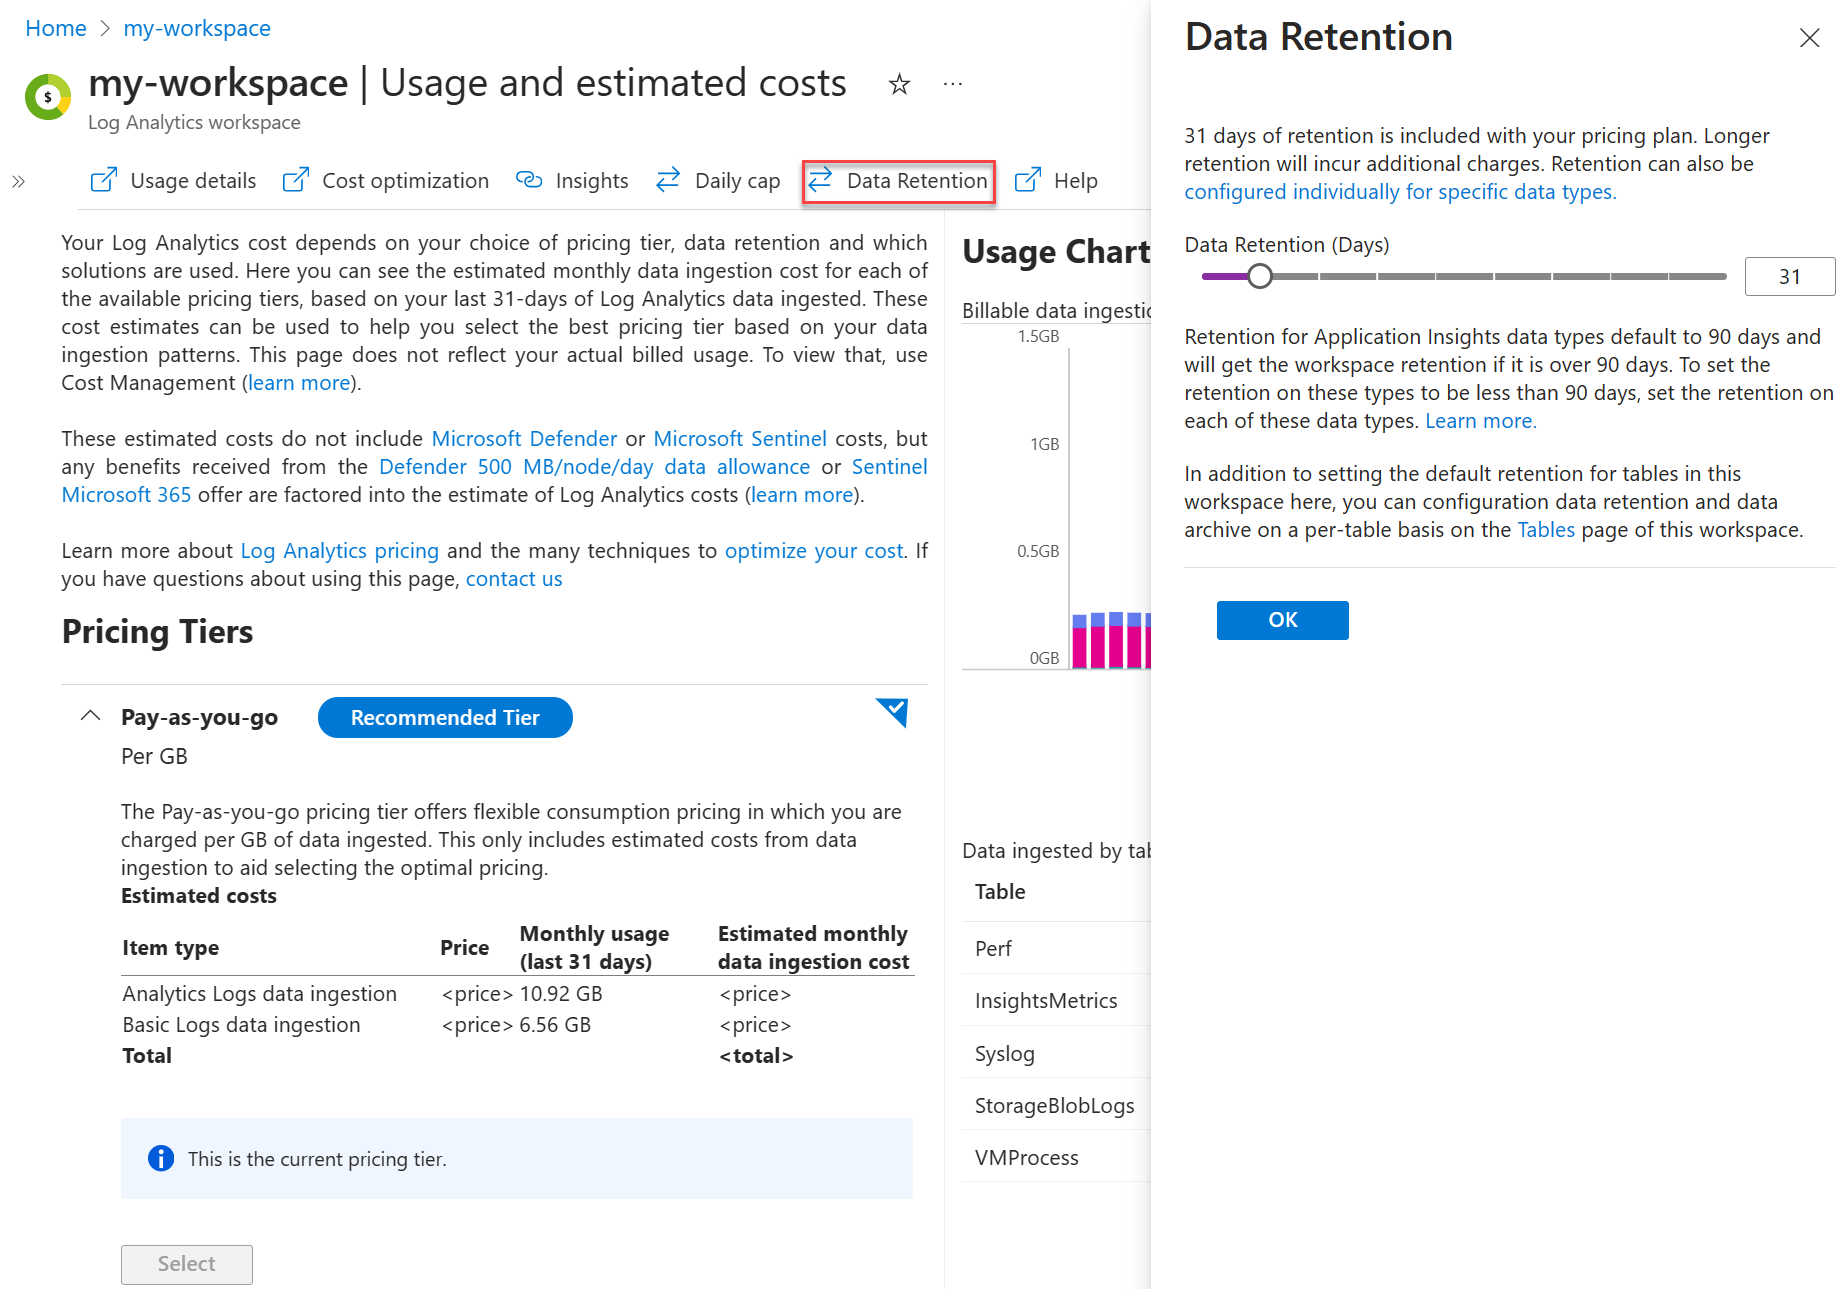
Move the slider to increase or decrease the number of days, and then select OK.

Configure table-level retention
By default, all tables with the Analytics data plan inherit the Log Analytics workspace's default interactive retention setting and have no long-term retention. You can increase the interactive retention period of Analytics tables to up to 730 days at an extra cost.
To add long-term retention to a table with any data plan, set total retention to up to 12 years (4,383 days). The Auxiliary table plan is currently in public preview, during which the plan's total retention is fixed at 365 days.
Note
Currently, you can set total retention to up to 12 years through the Azure portal and API. CLI and PowerShell are limited to seven years; support for 12 years will follow.
To modify the retention setting for a table in the Azure portal:
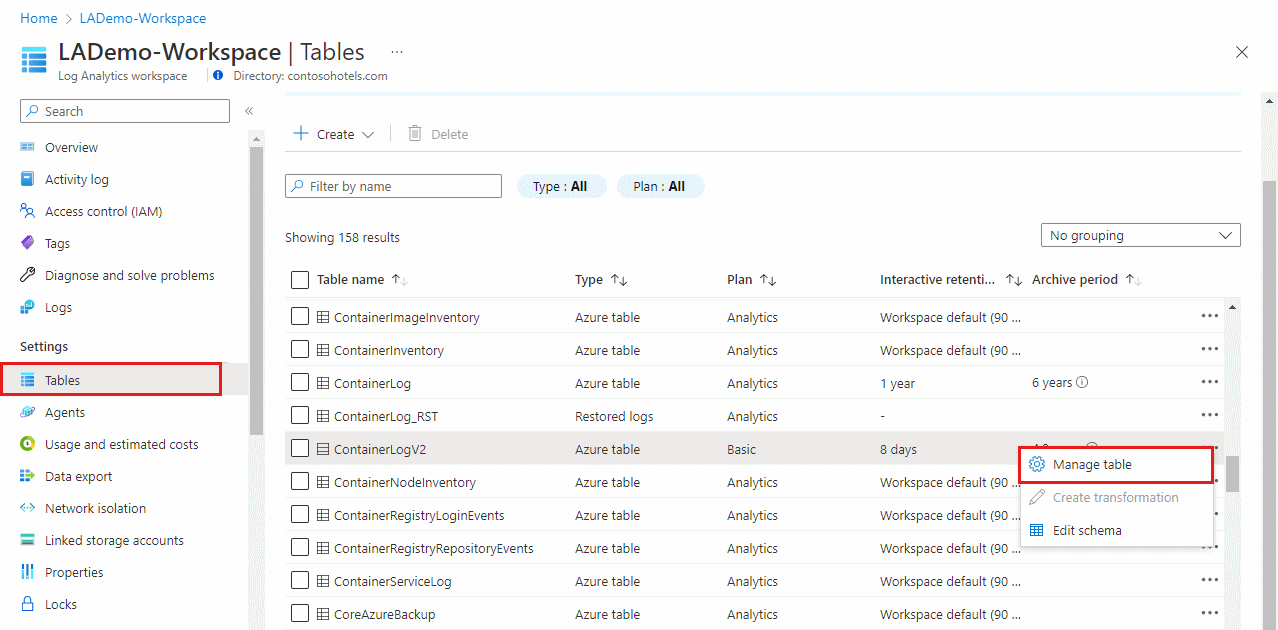
From the Log Analytics workspaces menu, select Tables.
The Tables screen lists all the tables in the workspace.
Select the context menu for the table you want to configure and select Manage table.
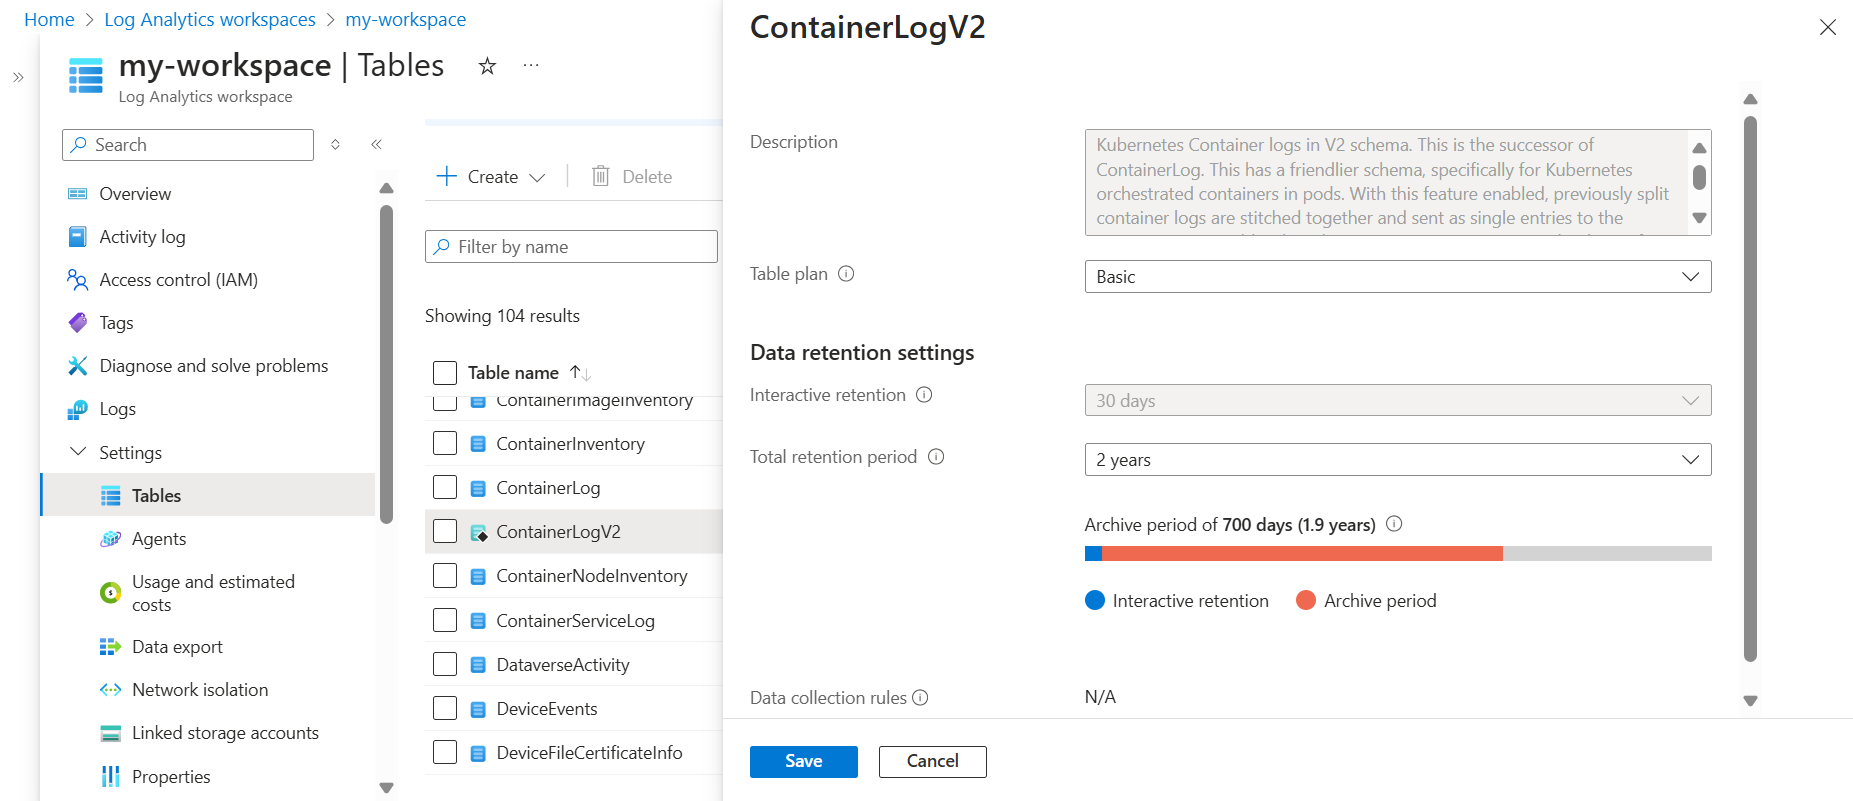
Configure the interactive retention and total retention settings in the Data retention settings section of the table configuration screen.


Get retention settings by table
To view a table's retention settings in the Azure portal, from the Log Analytics workspaces menu, select Tables.
The Tables screen shows the interactive retention and total retention periods for all the tables in the workspace.

What happens to data when you delete a table in a Log Analytics workspace?
A Log Analytics workspace can contain several types of tables. What happens when you delete the table is different for each:
| Table type | Data retention | Recommendations |
|---|---|---|
| Azure table | An Azure table holds logs from an Azure resource or data required by an Azure service or solution and can't be deleted. When you stop streaming data from the resource, service, or solution, data remains in the workspace until the end of the retention period defined for the table. | To minimize charges, set table-level retention to four days before you stop streaming logs to the table. |
Custom log table (table_CL) |
Soft deletes the table until the end of the table-level retention or default workspace retention period. During the soft delete period, you continue to pay for data retention and can recreate the table and access the data by setting up a table with the same name and schema. Fourteen days after you delete a custom table, Azure Monitor removes the table-level retention configuration and applies the default workspace retention. | To minimize charges, set table-level retention to four days before you delete the table. |
Search results table (table_SRCH) |
Deletes the table and data immediately and permanently. | |
Restored table (table_RST) |
Deletes the hot cache provisioned for the restore, but source table data isn't deleted. |
Log tables with 90-day default retention
By default, the Usage and AzureActivity tables keep data for at least 90 days at no charge. When you increase the workspace retention to more than 90 days, you also increase the retention of these tables. These tables are also free from data ingestion charges.
Tables related to Application Insights resources also keep data for 90 days at no charge. You can adjust the retention of each of these tables individually:
AppAvailabilityResultsAppBrowserTimingsAppDependenciesAppExceptionsAppEventsAppMetricsAppPageViewsAppPerformanceCountersAppRequestsAppSystemEventsAppTraces
Pricing model
The charge for adding interactive retention and long-term retention is calculated based on the volume of data you retain, in GB, and the number or days for which you retain the data. Log data that has _IsBillable == false isn't subject to ingestion or retention charges.
For more information, see Azure Monitor pricing.
Next steps
Learn more about:
Feedback
Coming soon: Throughout 2024 we will be phasing out GitHub Issues as the feedback mechanism for content and replacing it with a new feedback system. For more information see: https://aka.ms/ContentUserFeedback.
Submit and view feedback for