Note
Access to this page requires authorization. You can try signing in or changing directories.
Access to this page requires authorization. You can try changing directories.
You can deploy new volumes in the logical availability zone of your choice. You can also populate existing volumes with availability zone information. To better understand availability zones, see Use availability zone volume placement for high availability.
Requirements and considerations
Important
If you're using availability zones with custom roles or the built-in Contributor RBAC role, ensure you have the appropriate permissions set. Not having certain permissions can cause issues in the Azure portal. For configuration details, see Configure custom RBAC roles.
This feature doesn't guarantee free capacity in the availability zone. For example, even if you can deploy a VM in availability zone 3 of the East US region, it doesn’t guarantee free Azure NetApp Files capacity in that zone. If no sufficient capacity is available, volume creation fails.
After a volume is created with an availability zone, the specified availability zone can’t be modified. Volumes can’t be moved between availability zones.
NetApp accounts and capacity pools aren't bound by the availability zone. A capacity pool can contain volumes in different availability zones.
This feature provides zonal volume placement, with latency within the zonal latency envelopes. It does not provide proximity placement towards compute. As such, it does not provide lowest latency guarantee.
Each data center is assigned to a physical zone. Physical zones are mapped to logical zones in your Azure subscription. Azure subscriptions are automatically assigned this mapping at the time a subscription is created. This feature aligns with the generic logical-to-physical availability zone mapping for the subscription.
VMs and Azure NetApp Files volumes are to be deployed separately, within the same logical availability zone to create zone alignment between VMs and Azure NetApp Files. The availability zone volume placement feature doesn't create zonal VMs upon volume creation, or vice versa.
For volumes in different availability zones, Azure NetApp Files allows you to create volumes with the same file path (NFS), share name (SMB), or volume path (dual-protocol).
Important
We don't recommend that you use availability zones for Terraform-managed volumes. If you do, you must add the zone property to your volume.
Create a volume with an availability zone
Select Volumes from your capacity pool. Then select + Add volume to create a volume.
For details about volume creation, see:
In the Create a Volume page, under the Basic tab, select the Availability Zone dropdown menu to specify an availability zone where Azure NetApp Files resources are present.
Important
Logical availability zones for the subscription without Azure NetApp Files presence are marked
(Unavailable)and are greyed out.
Follow the UI to create the volume. The Review + Create page shows the selected availability zone you specified.

Navigate to Properties to confirm your availability zone configuration.


Populate an existing volume with availability zone information
Navigate to the volume that you want to populate with availability zone information.
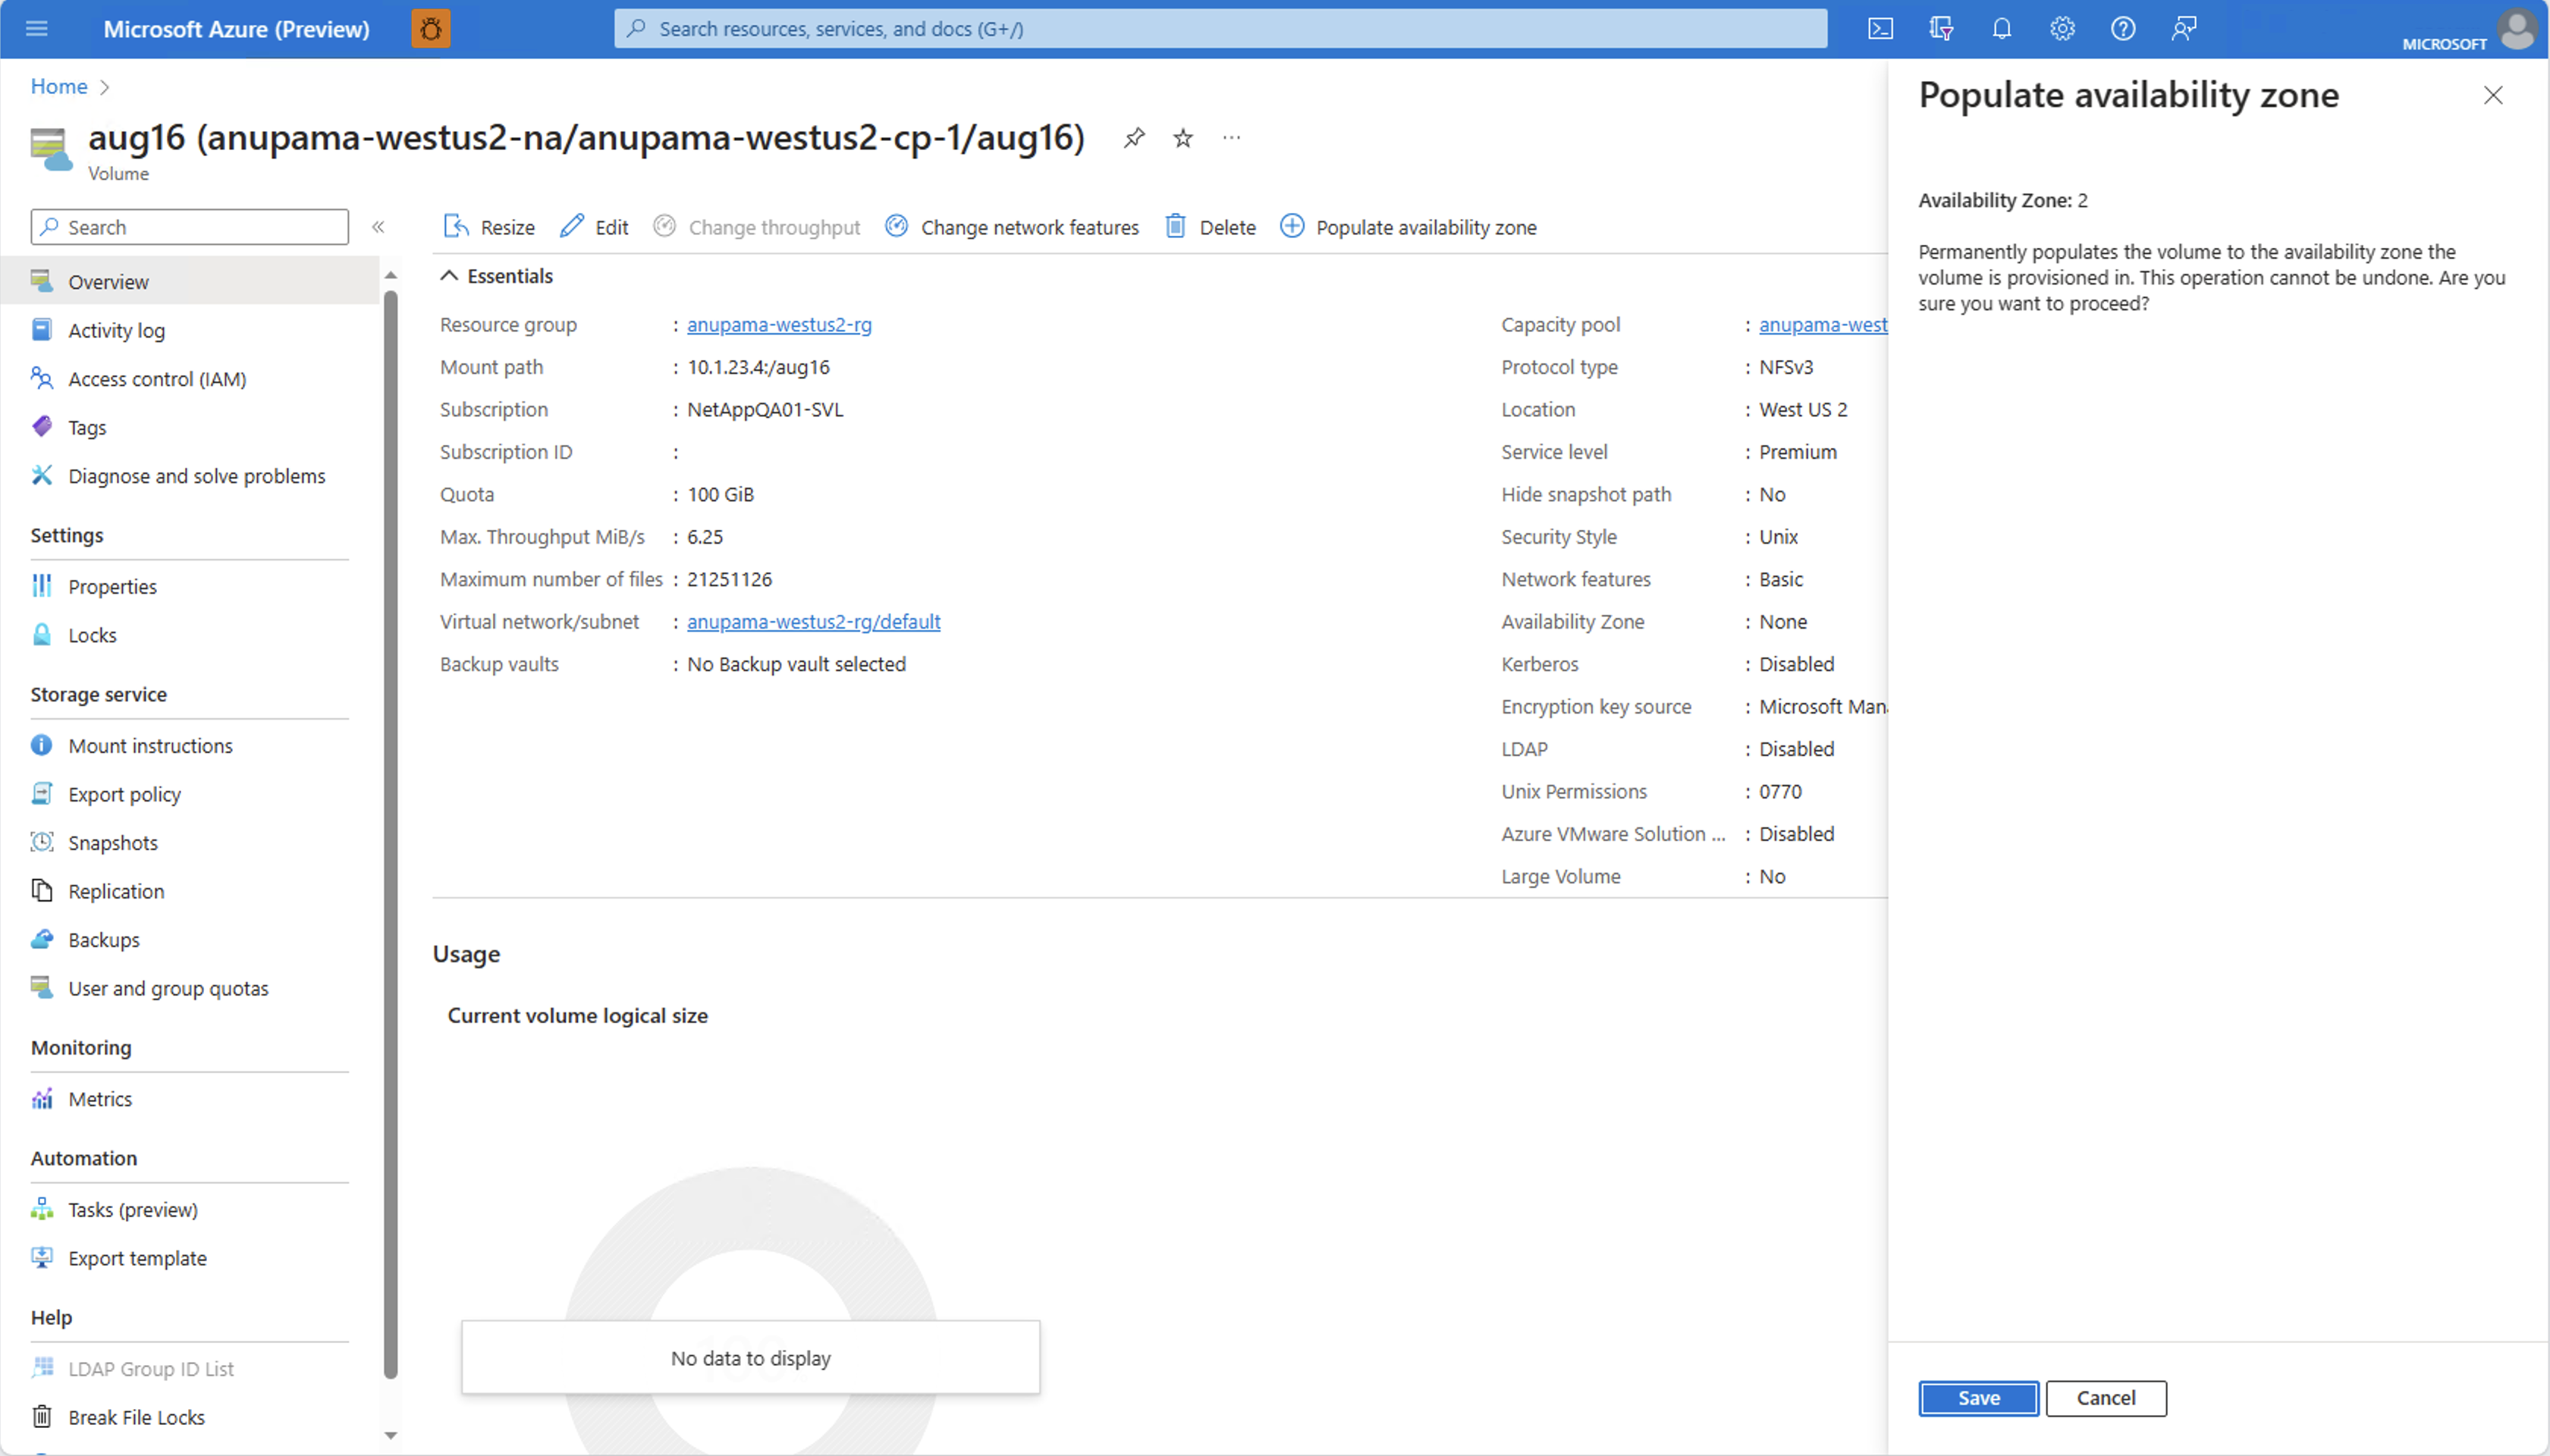
Select Populate availability zone.
The Populate Availability Zone window appears and displays the availability zone in which the Azure NetApp Files volume is deployed.
Select Save if you want to populate this availability zone to the volume, or select Cancel if you want to keep the volume regional.
Important
Availability zone information can only be populated as provided. You can't select an availability zone or move the volume to another availability zone by using this feature. If you want to move this volume to another availability zone, consider using cross-zone replication (after populating the volume with the availability zone information).

Populate availability zone for Terraform-managed volumes
The populate availability zone features requires a zone property on the volume. You can set the zone property only when you create the Terraform-managed volume, but you can't modify the property after you create the volume. Adding the zone property after you create the volume can cause data loss or loss of the volume if the specified zone value doesn't match the availability zone.
Important
To prevent data loss on any Azure resource that includes volatile resources, you should use the prevent_destroy lifecycle argument.
Navigate to the Terraform module
terraform.tfstatefile. The"zone"property should be an empty string.In the Terraform-managed volume's configuration file (
main.tf), locate the lifecycle configuration block for the volume resource. Modify the block withignore_changes = [zone]. If no lifecycle configuration block exists, add it:lifecycle { ignore_changes = [zone] }In the Azure portal, locate the Terraform-managed volume. In the volume Overview, select Populate availability zone and make note of the availability zone. Do not select save.
In the volume's configuration file (
main.tf), add a value forzone, entering the numerical value you retrieved in the previous step. For example, if the volume's availability zone is 1, enterzone = 1.Save the file.
Return to the Azure portal. Select Save to populate the availability zone.
Run
terraform planto confirm that no changes will be made to your volume. The CLI output should display:No changes. Your infrastructure matches the configuration.Run
terraform applyto apply the changes. You should see the same CLI output as in the previous step.
If you need to delete and recreate the volume in a different availability zone, remove the ignore_changes = [zone] line in the configuration file then run terraform plan followed by terraform apply.
Configure custom RBAC roles
If you're using a custom RBAC role or the built-in Contributor role and managing availability zones in the Azure portal, you might not be able to access network features and Availability Zone options in the Azure portal. To ensure you have the appropriate access, add the Microsoft.NetApp/locations/* permission. The wildcard encompasses the following permissions:
Microsoft.NetApp/locations/{location}/checkNameAvailabilityMicrosoft.NetApp/locations/{location}/checkFilePathAvailabilityMicrosoft.NetApp/locations/{location}/checkQuotaAvailabilityMicrosoft.NetApp/locations/{location}/quotaLimitsMicrosoft.NetApp/locations/{location}/quotaLimits/{quotaLimitName}Microsoft.NetApp/locations/{location}/regionInfoMicrosoft.NetApp/locations/{location}/regionInfosMicrosoft.NetApp/locations/{location}/queryNetworkSiblingSetMicrosoft.NetApp/locations/{location}/updateNetworkSiblingSet
Steps
In your Azure NetApp Files subscription, select Access control (IAM).
Select Roles then choose the custom role you want to modify. Select the three dots (
...) then Edit.To update the custom role, select JSON. Modify the JSON file to include the locations wild card permission (
Microsoft.NetApp/locations/*). For example:{ "properties": { "roleName": "", "description": "", "assignableScopes": ["/subscription/<subscriptionID>" ], "permissions": [ { "actions": [ "Microsoft.NetApp/locations/*", "Microsoft.NetApp/netAppAccounts/read", "Microsoft.NetApp/netAppAccounts/renewCredentials/action", "Microsoft.NetApp/netAppAccounts/capacityPools/read" ], "notActions": [], "dataActions": [], "notDataActions": [] }] } }Select Review + update.
Sign out of your Azure account, and then log back in to confirm that the permissions are in effect and the options are visible.
Next steps
- Use availability zone volume placement for application high availability with Azure NetApp Files
- Create an NFS volume for Azure NetApp Files
- Create an SMB volume for Azure NetApp Files
- Create a dual-protocol volume for Azure NetApp Files
- Understand cross-zone replication of Azure NetApp Files
- Create cross-zone replication