Create server configured with user-assigned managed identity and cross-tenant CMK for TDE
Applies to: ![]() Azure SQL Database
Azure SQL Database
In this guide, we'll go through the steps to create an Azure SQL logical server with transparent data encryption (TDE) and customer-managed keys (CMK), utilizing a user-assigned managed identity to access an Azure Key Vault in a different Microsoft Entra tenant than the logical server's tenant. For more information, see Cross-tenant customer-managed keys with transparent data encryption.
Note
Microsoft Entra ID was previously known as Azure Active Directory (Azure AD).
Prerequisites
- This guide presupposes that you possess two Microsoft Entra tenants.
- The first contains the Azure SQL Database resource, a multi-tenant Microsoft Entra application, and a user-assigned managed identity.
- The second tenant houses the Azure Key Vault.
- For comprehensive instructions on setting up cross-tenant CMK and the RBAC permissions necessary for configuring Microsoft Entra applications and Azure Key Vault, refer to one of the following guides:
Required resources on the first tenant
For the purpose of this tutorial, we'll assume the first tenant belongs to an independent software vendor (ISV), and the second tenant is from their client. For more information on this scenario, see Cross-tenant customer-managed keys with transparent data encryption.
Before we can configure TDE for Azure SQL Database with a cross-tenant CMK, we need to have a multi-tenant Microsoft Entra application that is configured with a user-assigned managed identity assigned as a federated identity credential for the application. Follow one of the guides in the Prerequisites.
On the first tenant where you want to create the Azure SQL Database, create and configure a multi-tenant Microsoft Entra application
Configure the user-assigned managed identity as a federated identity credential for the multi-tenant application
Record the application name and application ID. This can be found in the Azure portal > Microsoft Entra ID > Enterprise applications and search for the created application
Required resources on the second tenant
Note
Azure AD and MSOnline PowerShell modules are deprecated as of March 30, 2024. To learn more, read the deprecation update. After this date, support for these modules are limited to migration assistance to Microsoft Graph PowerShell SDK and security fixes. The deprecated modules will continue to function through March, 30 2025.
We recommend migrating to Microsoft Graph PowerShell to interact with Microsoft Entra ID (formerly Azure AD). For common migration questions, refer to the Migration FAQ. Note: Versions 1.0.x of MSOnline may experience disruption after June 30, 2024.
On the second tenant where the Azure Key Vault resides, create a service principal (application) using the application ID from the registered application from the first tenant. Here's some examples of how to register the multi-tenant application. Replace
<TenantID>and<ApplicationID>with the client Tenant ID from Microsoft Entra ID and Application ID from the multi-tenant application, respectively:PowerShell:
Connect-AzureAD -TenantID <TenantID>
New-AzADServicePrincipal  -ApplicationId <ApplicationID>
The Azure CLI:
az login --tenant <TenantID>
az ad sp create --id <ApplicationID>
Go to the Azure portal > Microsoft Entra ID > Enterprise applications and search for the application that was just created.
Create an Azure Key Vault if you don't have one, and create a key
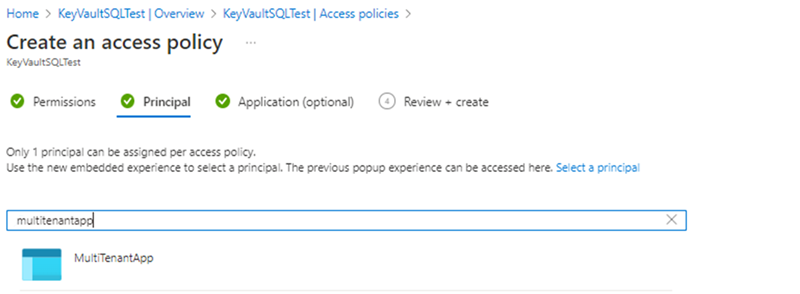
Create or set the access policy.
- Select the Get, Wrap Key, Unwrap Key permissions under Key permissions when creating the access policy
- Select the multi-tenant application created in the first step in the Principal option when creating the access policy
Once the access policy and key has been created, Retrieve the key from Key Vault and record the Key Identifier
Create server configured with TDE with cross-tenant customer-managed key (CMK)
This guide will walk you through the process of creating a logical server and database on Azure SQL with a user-assigned managed identity, as well as how to set a cross-tenant customer managed key. The user-assigned managed identity is a must for setting up a customer-managed key for transparent data encryption during the server creation phase.
Important
The user or application using APIs to create SQL logical servers needs the SQL Server Contributor and Managed Identity Operator RBAC roles or higher on the subscription.
Browse to the Select SQL deployment option page in the Azure portal.
If you aren't already signed in to Azure portal, sign in when prompted.
Under SQL databases, leave Resource type set to Single database, and select Create.
On the Basics tab of the Create SQL Database form, under Project details, select the desired Azure Subscription.
For Resource group, select Create new, enter a name for your resource group, and select OK.
For Database name enter a database name. For example,
ContosoHR.For Server, select Create new, and fill out the New server form with the following values:
- Server name: Enter a unique server name. Server names must be globally unique for all servers in Azure, not just unique within a subscription. Enter something like
mysqlserver135, and the Azure portal will let you know if it's available or not. - Server admin login: Enter an admin login name, for example:
azureuser. - Password: Enter a password that meets the password requirements, and enter it again in the Confirm password field.
- Location: Select a location from the dropdown list
- Server name: Enter a unique server name. Server names must be globally unique for all servers in Azure, not just unique within a subscription. Enter something like
Select Next: Networking at the bottom of the page.
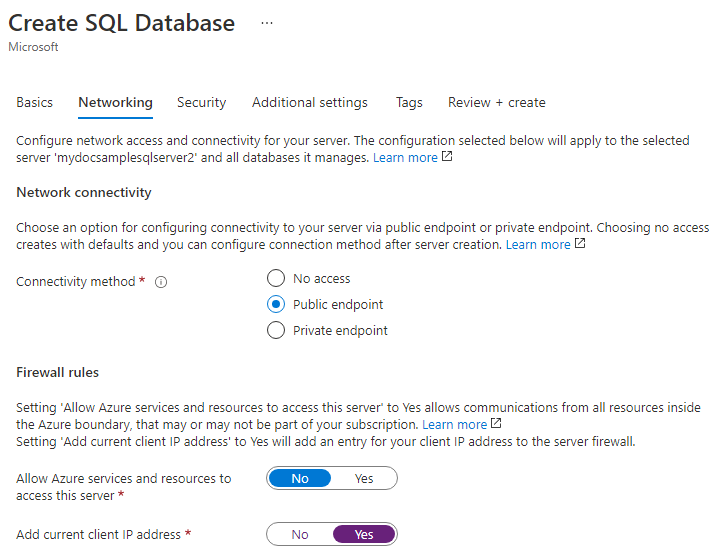
On the Networking tab, for Connectivity method, select Public endpoint.
For Firewall rules, set Add current client IP address to Yes. Leave Allow Azure services and resources to access this server set to No. The rest of the selections on this page can be left as default.
Select Next: Security at the bottom of the page.
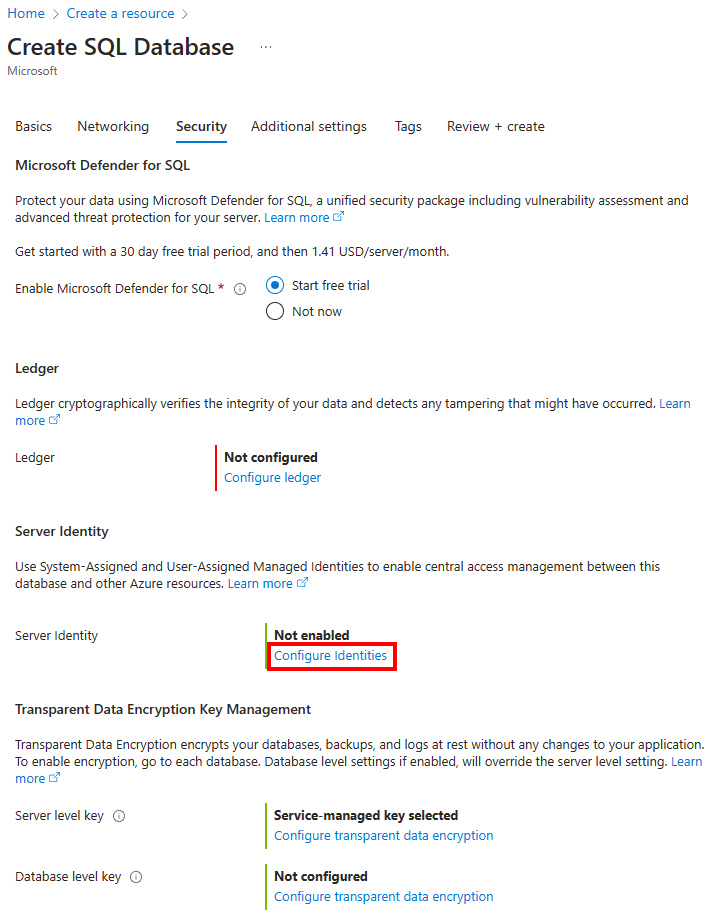
On the Security tab, under Identity, select Configure Identities.
On the Identity menu, select Off for System assigned managed identity and then select Add under User assigned managed identity. Select the desired Subscription and then under User assigned managed identities, select the desired user-assigned managed identity from the selected subscription. Then select the Add button.
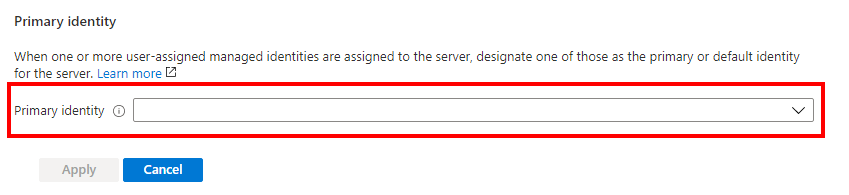
Under Primary identity, select the same user-assigned managed identity selected in the previous step.
For Federated client identity, select the Change identity option, and search for the multi-tenant application that you created in the Prerequisites.
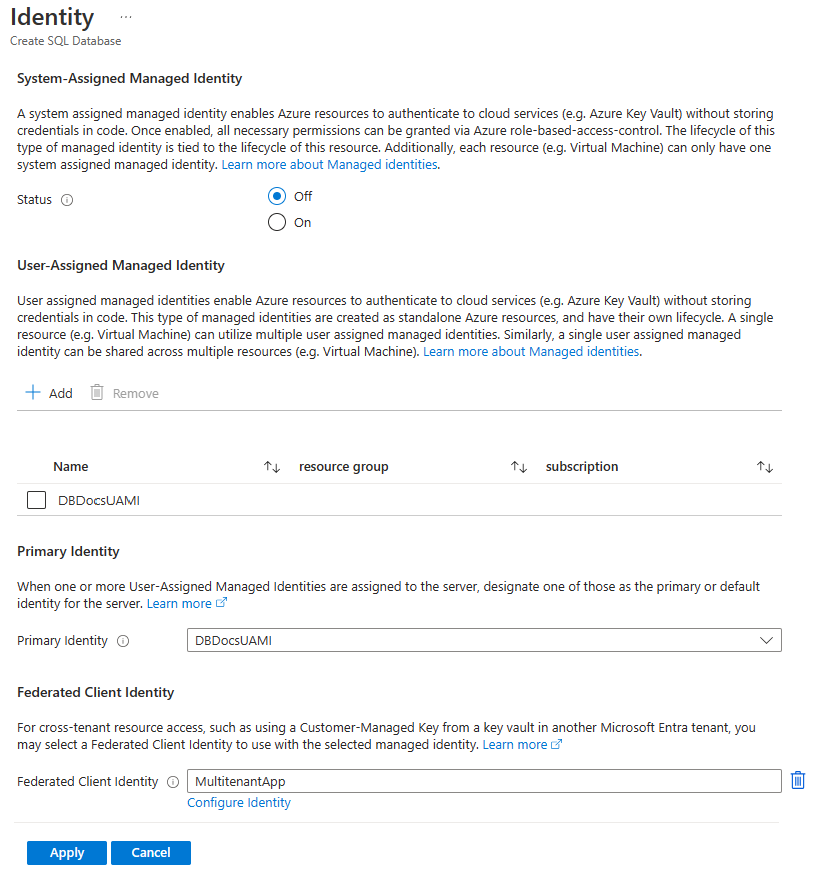
Note
If the multi-tenant application hasn't been added to the key vault access policy with the required permissions (Get, Wrap Key, Unwrap Key), using this application for identity federation in the Azure portal will show an error. Make sure that the permissions are configured correctly before configuring the federated client identity.
Select Apply
On the Security tab, under Transparent data encryption, select Configure transparent data encryption. Select Customer-managed key, and an option to Enter a key identifier will appear. Add the Key Identifier obtained from the key in the second tenant.
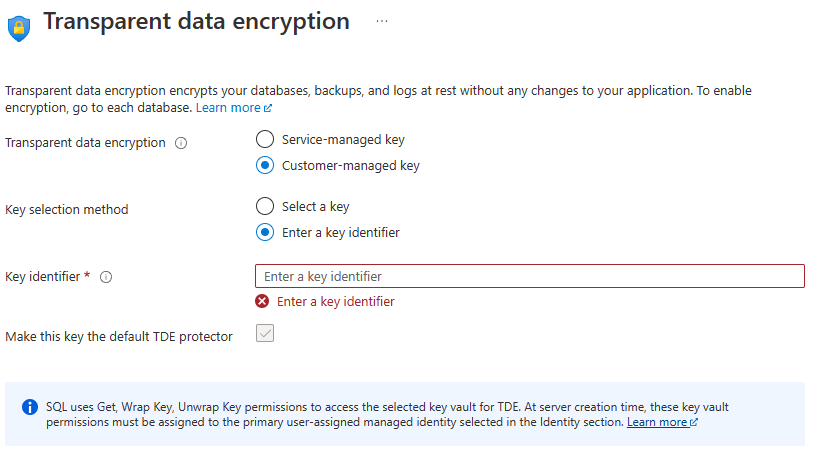
Select Apply
Select Review + create at the bottom of the page
On the Review + create page, after reviewing, select Create.
Next steps
- Get started with Azure Key Vault integration and Bring Your Own Key support for TDE: Turn on TDE using your own key from Key Vault
- Cross-tenant customer-managed keys with transparent data encryption