Stop and start an instance - Azure SQL Managed Instance
Applies to: ![]() Azure SQL Managed Instance
Azure SQL Managed Instance
This article describes how to stop and start an instance to save on billing costs when you're using Azure SQL Managed Instance. You can stop and start your instance by using the Azure portal, Azure PowerShell, Azure CLI, or REST API.
Note
The stop and start feature for managed instances is available only for SQL managed instances in the General Purpose service tier.
Overview
To save on billing costs, you can stop your General Purpose managed instance when you're not using it. Stopping an instance is similar to deallocating a virtual machine. When an instance is in a stopped state, you're no longer billed for compute and licensing costs but still billed for data and backup storage.
Stopping a managed instance clears all cached data.
This feature introduces three new managed instance states, as the following diagram indicates:
- Stopping
- Stopped
- Starting

After the stop operation is initiated, it typically takes about 5 minutes to stop the instance. However, starting an instance takes about 20 minutes from the moment the start operation is initiated. Only managed instances in a ready state can be stopped. After the instance is stopped, it stays in a stopped state until a start operation is initiated, either manually or triggered with a defined schedule. Only instances that are in a stopped state can be started.
When you create a managed instance, start a stopped managed instance, or resize a managed instance (such as changing the service tier, storage, hardware generation, or number of vCores), Azure allocates compute resources to the underlying virtual cluster. While there's continual investment in additional infrastructure to support customer demand, there might be occasional resource allocation failures from unprecedented growth of demand for Azure services in specific regions. This might result in a prolonged operation duration (approximately 4 hours if there's a new virtual cluster buildout, in accordance with management operation durations), or a failure to start the instance, in which case you should try again later.
Important
As a platform as a service (PaaS) service, SQL Managed Instance is responsible for compliance for every part of the system components. If there's an urgent need for system maintenance that requires the instance to be online, Azure can initiate the start operation and keep the instance online until the maintenance operation is completed, at which time Azure stops the instance. Compute and license charges are applied for the entire time the instance is in an online state.
Action types
There are two ways to stop and start an instance: either manually on demand or by creating a schedule.
Manual commands
You can use manual commands to immediately trigger a stop and start action. Manual commands are good for instances that have longer periods of inactivity without regular patterns, or for testing purposes. Alternatively, you can use Azure Automation schedules or any custom solution that creates customized and more flexible schedules that you can't set up by using the built-in stop and start scheduler in SQL Managed Instance.
Scheduled commands
You can also create a schedule with one or more multiple points of time when a stop or start action is triggered. Scheduled commands are good for instances that have regular patterns, such as starting an instance every weekday at 8 AM, stopping it at 5 PM, and then starting it during the weekend at 7 AM and stopping it at 11 AM. Scheduling your commands eliminates the need for you to create custom solutions or to use Azure Automation to create stop and start schedules.
Scheduled items represent points in time when stop and start events are initiated, not when the instance is up and running. When you're creating a schedule, take the operation duration into account. For example, if you want to have your instance up and running at 8 AM, you can define a schedule that initiates the start operation at 7:40 AM.
Consider the following rules for a stop and start schedule:
- Scheduled items are defined as a stop-and-start pair, and they must have both stop and start values populated. It's not possible to have a populated stop value with a missing start value, and vice versa.
- There can't be an overlap of scheduled pairs. If there's an overlap of scheduled times, the API returns an error.
- The time span between any two successive actions (that is, a start after a stop or a stop after a start) must be at least one hour. For example, if a start is scheduled for 10 AM, the stop action can't be scheduled before 11 AM.
- If there are conflicting operations when a stop is triggered (such as scaling vCore in progress), the mechanism retries after 10 minutes. If after 10 minutes the conflicting operation is still active, the stop operation gets skipped.
Billing
Stopped instances don't get billed for vCores and the SQL license, they're charged only for data and backup storage. However, vCores and license billing is charged for every started hour. For example, at 12:01, you're charged for the entire hour, even if the instance is stopped within the hour.
Azure Hybrid Benefit
The Azure Hybrid Benefit (AHB) is applied per resource. If your instance is using the Azure Hybrid Benefit to save on licensing costs, to apply that benefit to another resource when the instance is in a stopped state, you must first disable AHB on the instance, and then stop the instance. Similarly, after you restart the instance, you have to reenable AHB on it to apply the licensing benefit.
Reserved instance pricing
Reserved instance pricing (reserved capacity) is applied for the vCores and hours emitted. When an instance that's eligible for reserved pricing is stopped, reserved pricing is automatically redirected to another instance, if one exists. You can use the stop and start feature to overprovision reserved instance pricing.
For example, let's say that you've purchased a managed instance with a reserved capacity of 16 vCores. You can run two instances with 8 vCores each from 1 PM to 2 PM, stop both instances, and then run two different instances with 8 vCores each from 2 PM to 3 PM. This approach would consume your 16 vCore limit for each hour, spread among four instances in total.
Reservation discounts are offered on a "use it or lose it" basis. That is, if you don't have matching resources for a specified hour, the reservation quantity for that hour is lost. Unused reserved hours can't be carried forward.
Limitations of the stop and start feature
Consider the following limitations:
- You can't stop instances that:
- Have an ongoing management operation (such as an ongoing restore, vCore scaling, and so on)
- Are part of a failover group
- Use the Managed Instance link
- have zone redundancy enabled
- are part of Instance pool
- While a managed instance is in a stopped state, it's not possible to change its configuration properties. To change any properties, you must start the instance.
- While the instance is in a stopped state, it's not possible to take backups. For example, let's say that you have long-term backups configured, with yearly backups in place. If you stop the instance during the defined yearly backup period, the backup is skipped. We recommend that you keep the instance up and running during the yearly backup period.
- It's not possible to cancel the stop or start operation after it's been initiated.
Prerequisites
To use the instance stop and start feature, your instance must meet the following prerequisites:
- Your instance has to be part of a subnet with the November 2022 feature wave enabled.
- Your instance has to be in the General Purpose service tier.
Instances that don't meet the prerequisites won't see the stop and start controls on the Overview page for the SQL managed instance resource.
Prepare command line environment
Skip this step if you're using the Azure portal.
If you want to stop or start an instance by using PowerShell or the Azure CLI you need to prepare your environment by configuring command line tools, and defining your parameters.
Alternatively to configuring your command line tools, you can also use the Azure Cloud Shell, which is a free interactive shell you can use to run the steps in this article. It has common preinstalled Azure tools and configured to use with your account. If you don't have an Azure subscription, create an Azure free account before you begin.
To open the Cloud Shell, select Try it from the upper right corner of a code block. You can also launch Cloud Shell in a separate browser tab by going to https://shell.azure.com.
To stop and start your instance with PowerShell, you can install Azure PowerShell, or use the Azure Cloud Shell.
When Cloud Shell opens, verify that PowerShell is selected for your environment. Subsequent sessions use Azure CLI in a PowerShell environment. Select Copy to copy the blocks of code, paste it into the Cloud Shell, and press Enter to run it.
Once PowerShell or Cloud Shell is launched, define the parameters:
$SubscriptionId = "<Subscription-ID>"
$SqlMIName = "<SQL-MI-name>"
$RgName = "<SQL-MI-resource-group>"

# Login-AzAccount
Select-AzSubscription -SubscriptionName $SubscriptionID
Stop the managed instance
You can stop the instance by using:
- Azure portal
- PowerShell
- The Azure CLI
- Invoke the REST API call through any tool
To stop your managed instance by using the Azure portal, go to the Overview page of your instance, and then select the Stop button.
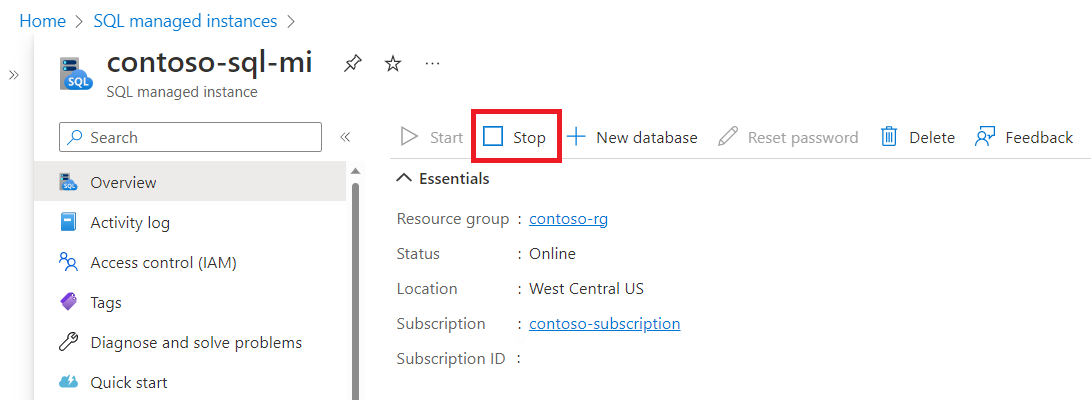
If your instance is already stopped, the Stop button is unavailable.
Start the managed instance
You can start the instance by using:
- Azure portal
- PowerShell
- The Azure CLI
- Invoke the REST API call through any tool
After your managed instance is stopped, to start it by using the Azure portal, go to the Overview page of your instance, and then select the Start button.
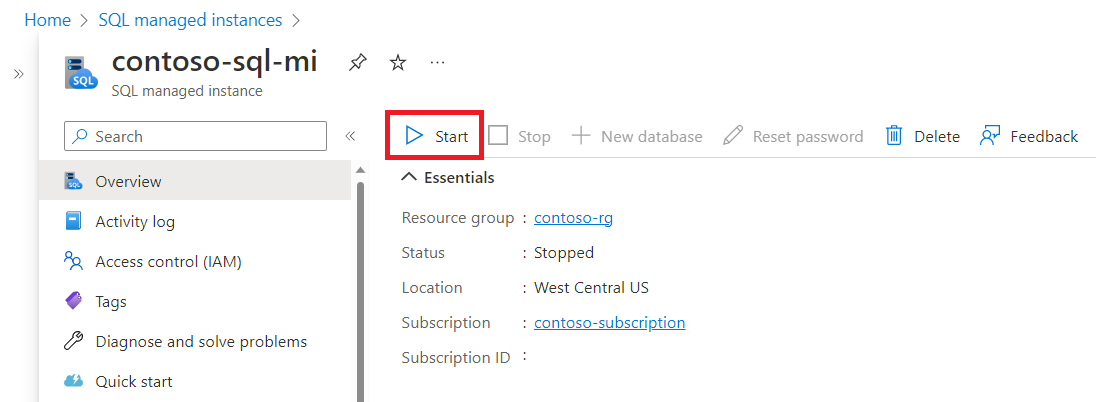
If your instance is already started, the Start button is unavailable.
Manage a stop and start schedule
You can manage a stop and start schedule by using:
- Azure portal
- PowerShell
- The Azure CLI
- Invoke the REST API call through any tool
To manage a stop and start schedule by using the Azure portal, go to your instance, and then select Start/Stop Schedule in the resource menu.

On the Start/Stop Schedule pane, you can:
- View existing schedules.
- Specify the time zone of your scheduled events in the Time zone dropdown list.
- Create a new schedule by selecting Create a schedule item.
- Modify an existing schedule by selecting the pencil icon.
- Delete an existing schedule by selecting the trash can icon.
Note
Currently, the Activity Log only captures operations initiated via Azure Resource Manager (ARM). The scheduled start and stop operations are not tracked on the Actitity Log. Hence, at this time, it is not possible to view the history of the scheduled start and stop operations via the Activity Log in Azure portal or via any monitoring that is based on such logs.
Next steps
- For an overview, see What is Azure SQL Managed Instance?.
- Learn about connectivity architecture in SQL Managed Instance.
- Learn how to modify an existing virtual network for SQL Managed Instance.
- For a tutorial that shows how to create a virtual network, create an instance, and restore a database from a database backup, see Create Azure SQL Managed Instance (Azure portal).
- For DNS issues, see Resolve private DNS names in Azure SQL Managed Instance.
Feedback
Coming soon: Throughout 2024 we will be phasing out GitHub Issues as the feedback mechanism for content and replacing it with a new feedback system. For more information see: https://aka.ms/ContentUserFeedback.
Submit and view feedback for