Note
Access to this page requires authorization. You can try signing in or changing directories.
Access to this page requires authorization. You can try changing directories.
Applies to: ![]() Azure SQL Database
Azure SQL Database
This guide teaches you to migrate your Oracle schemas to SQL Server on Azure Virtual Machines by using SQL Server Migration Assistant for Oracle.
For other migration guides, see Database Migration.
Prerequisites
To migrate your Oracle schema to SQL Server on Azure Virtual Machines, you need:
- A supported source environment.
- SQL Server Migration Assistant (SSMA) for Oracle.
- A target SQL Server VM.
- The necessary permissions for SSMA for Oracle and the provider.
- Connectivity and sufficient permissions to access the source and the target.
Pre-migration
To prepare to migrate to the cloud, verify that your source environment is supported and that you've addressed any prerequisites. Doing so helps to ensure an efficient and successful migration.
This part of the process involves:
- Conducting an inventory of the databases that you need to migrate.
- Assessing those databases for potential migration problems or blockers.
- Resolving any problems that you uncover.
Discover
Use MAP Toolkit to identify existing data sources and details about the features your business is using. Doing so gives you a better understanding of the migration and help you plan for it. This process involves scanning the network to identify your organization's Oracle instances and the versions and features you're using.
To use MAP Toolkit to do an inventory scan, follow these steps:
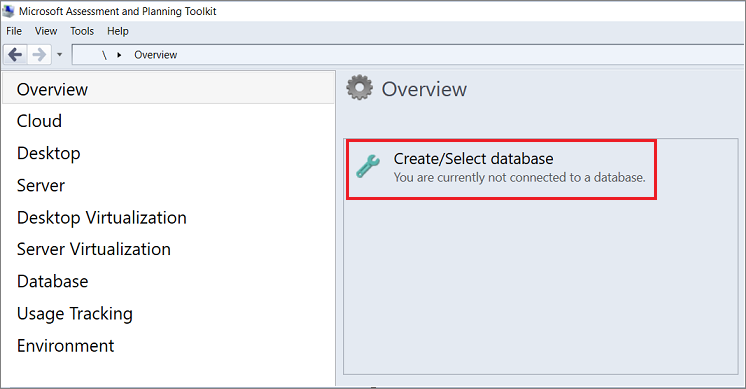
Open MAP Toolkit.
Select Create/Select database:
Select Create an inventory database. Enter the name for the new inventory database and a brief description, and then select OK

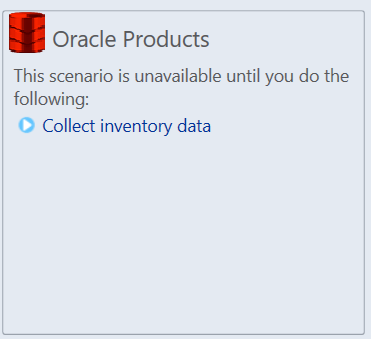
Select Collect inventory data to open the Inventory and Assessment Wizard:
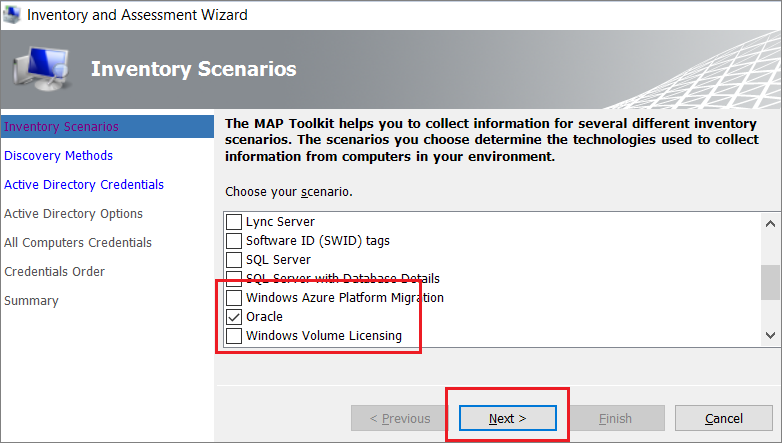
In the Inventory and Assessment Wizard, select Oracle, and then select Next:
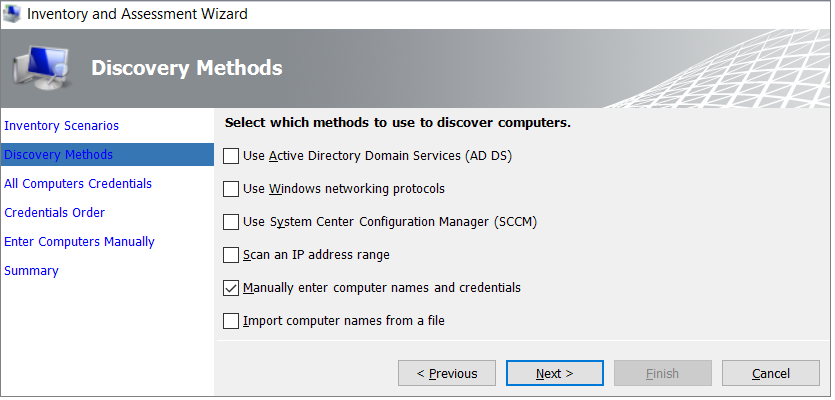
Select the computer search option that best suits your business needs and environment, and then select Next:
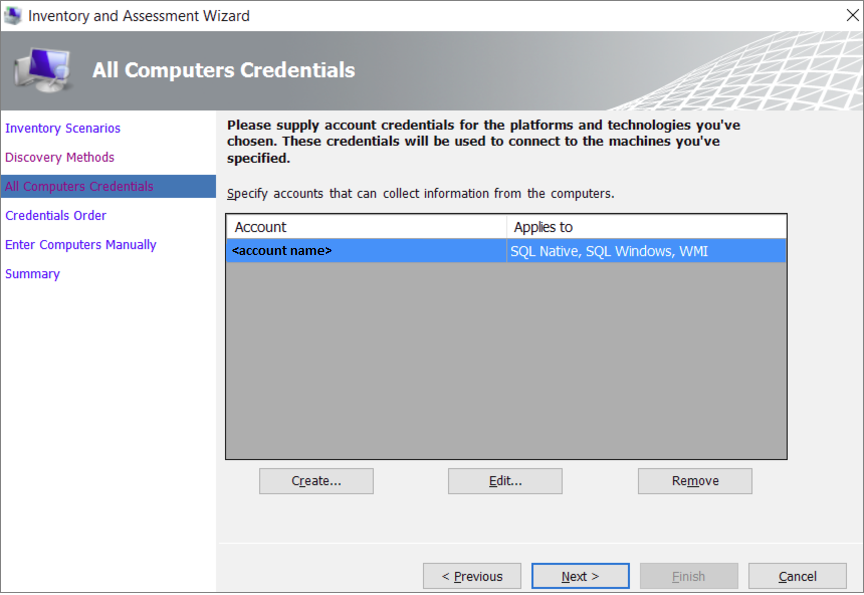
Either enter credentials or create new credentials for the systems that you want to explore, and then select Next:
Set the order of the credentials, and then select Next:

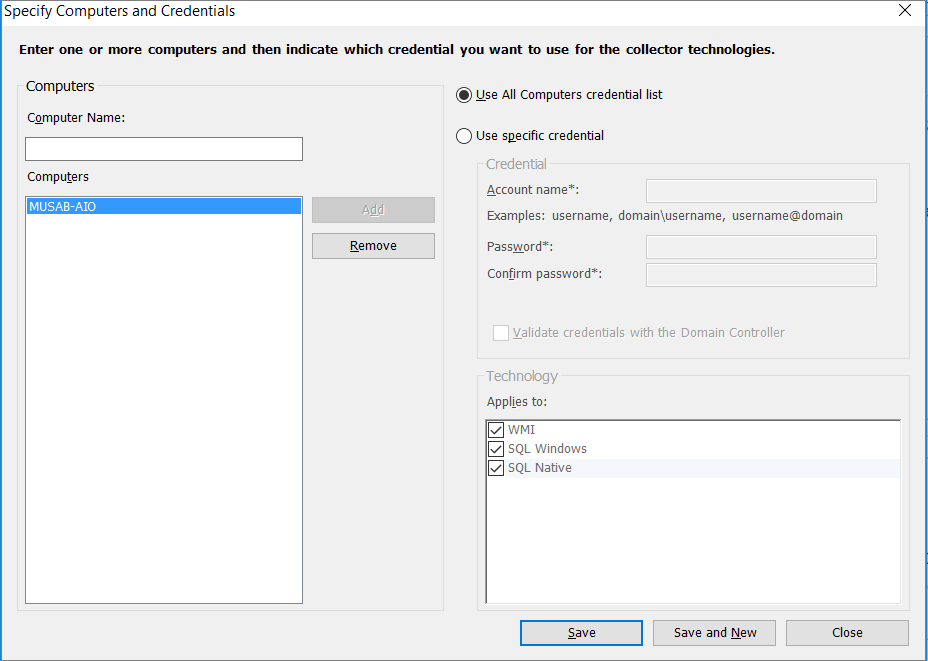
Enter the credentials for each computer you want to discover. You can use unique credentials for every computer/machine, or you can use the All Computers credential list.
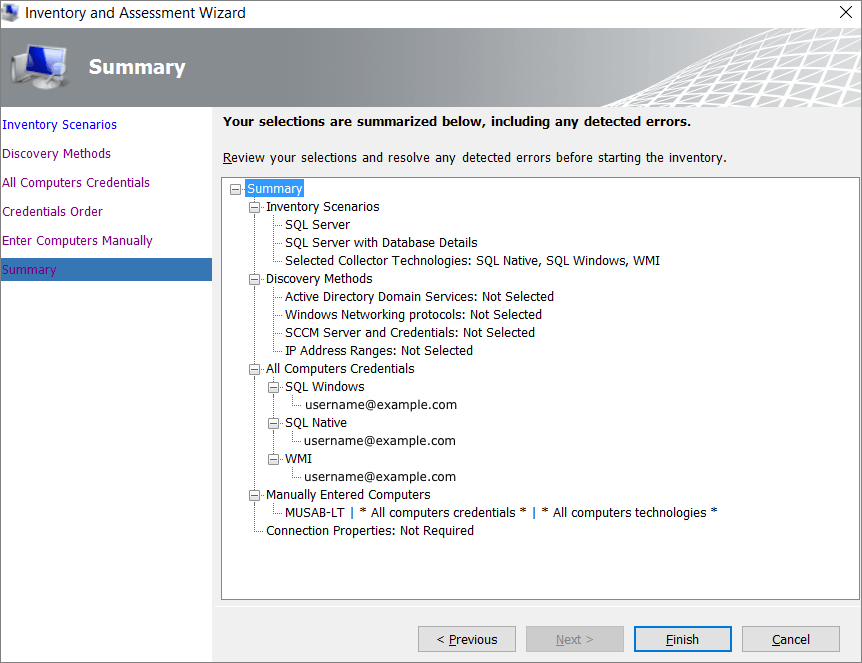
Verify your selections, and then select Finish:
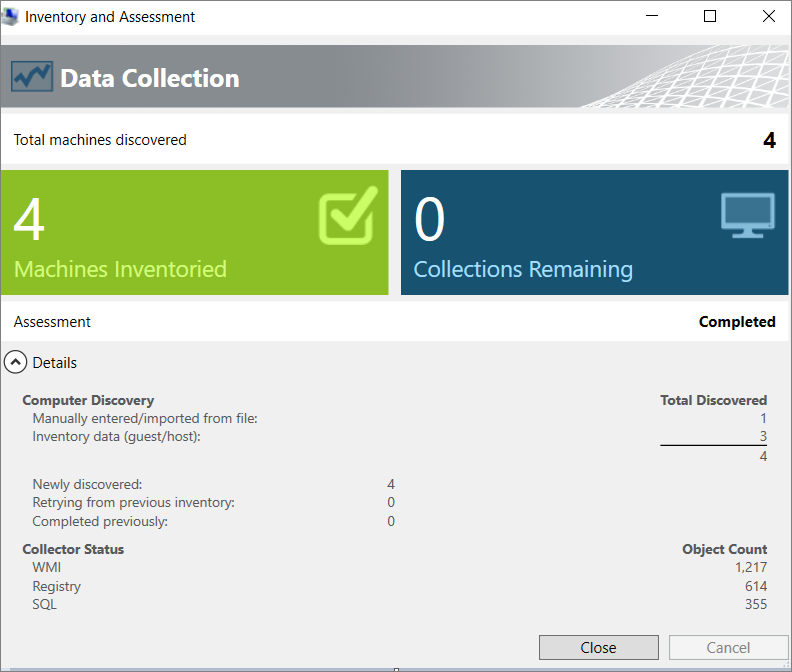
After the scan finishes, view the Data Collection summary. The scan might take a few minutes, depending on the number of databases. Select Close when you're done:
Select Options to generate a report about the Oracle assessment and database details. Select both options, one at a time, to generate the report.


Assess
After you identify the data sources, use SQL Server Migration Assistant for Oracle to assess the Oracle instances migrating to the SQL Server VM. The assistant helps you understand the gaps between the source and destination databases. You can review database objects and data, assess databases for migration, migrate database objects to SQL Server, and then migrate data to SQL Server.
To create an assessment, follow these steps:
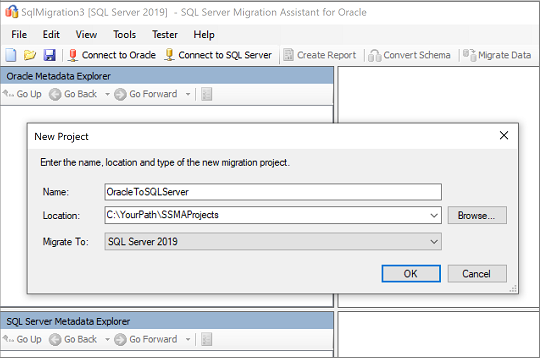
On the File menu, select New Project.
Provide a project name and a location for your project, and then select a SQL Server migration target from the list. Select OK:
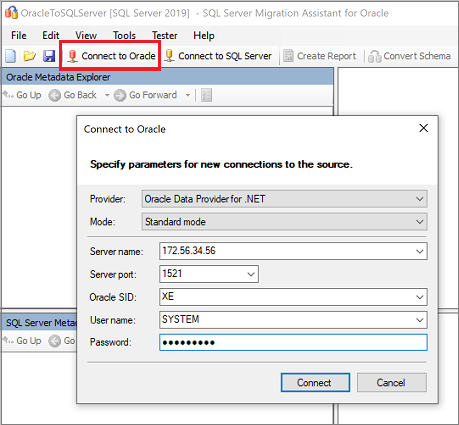
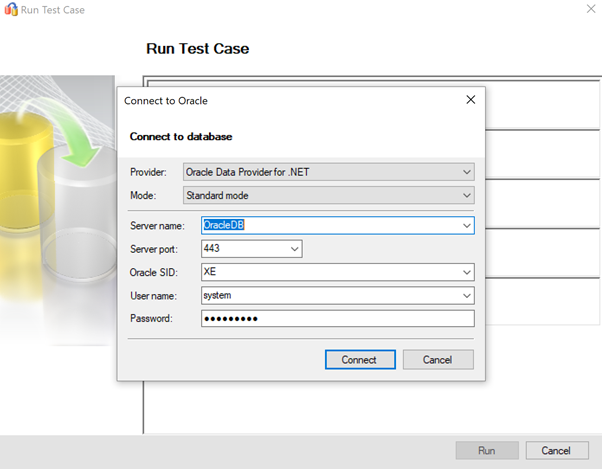
Select Connect to Oracle. Enter values for the Oracle connection in the Connect to Oracle dialog box:
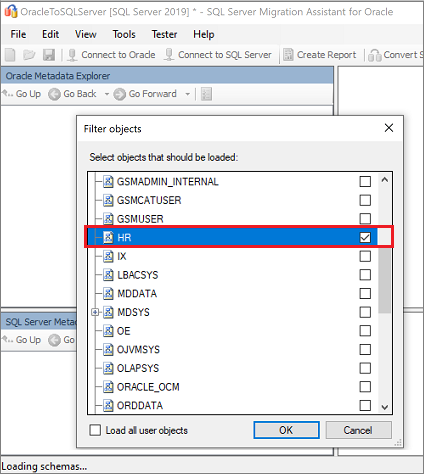
Select the Oracle schemas that you want to migrate:
In Oracle Metadata Explorer, right-click the Oracle schema that you want to migrate, and then select Create Report. Doing so generates an HTML report. Or, you can select the database and then select Create report in the top menu.
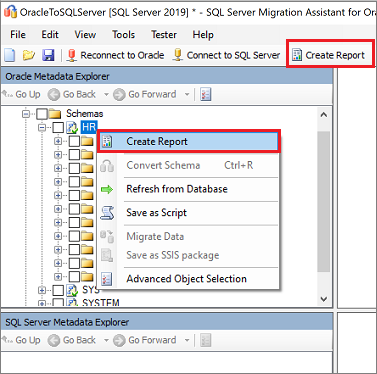
Review the HTML report for conversion statistics, errors, and warnings. Analyze it to understand conversion problems and resolutions.
You can also open the report in Excel to get an inventory of Oracle objects and the effort required to complete schema conversions. The default location for the report is the report folder in
SSMAProjects.For example:
drive:\<username>\Documents\SSMAProjects\MyOracleMigration\report\report_2016_11_12T02_47_55\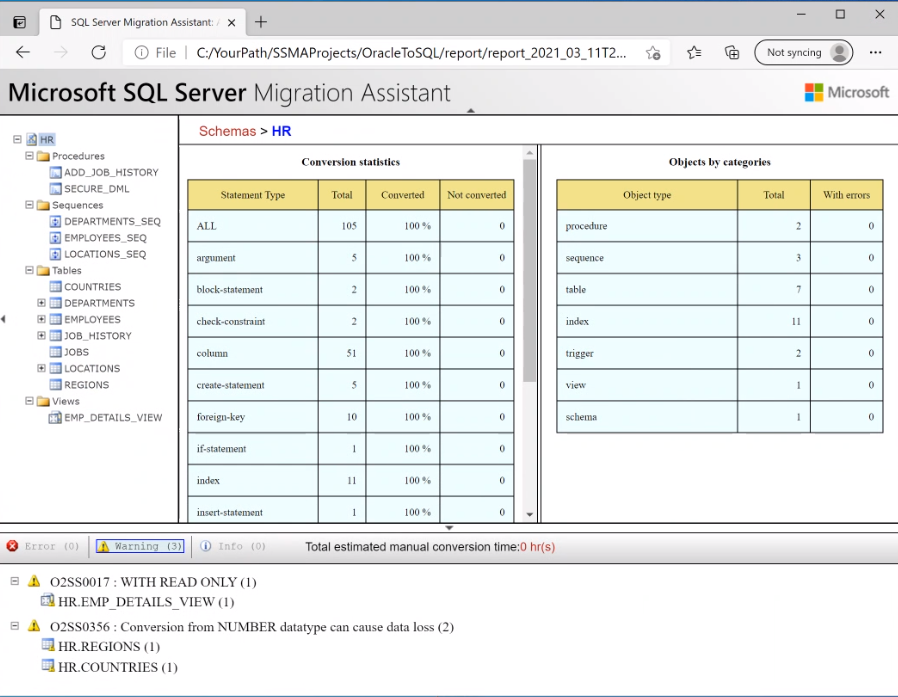

Validate data types
Validate the default data type mappings and change them based on requirements, if necessary. To do so, follow these steps:
On the Tools menu, select Project Settings.
Select the Type Mappings tab.
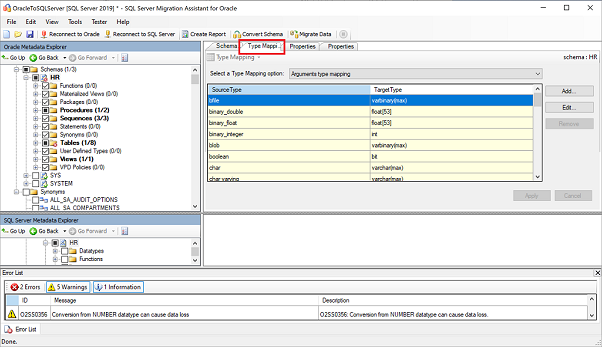
You can change the type mapping for each table by selecting the table in Oracle Metadata Explorer.
Convert the schema
To convert the schema, follow these steps:
(Optional) To convert dynamic or ad hoc queries, right-click the node and select Add statement.
Select Connect to SQL Server in the top menu.
Enter connection details for your SQL Server on Azure VM.
Select your target database from the list, or provide a new name. If you provide a new name, a database is created on the target server.
Provide authentication details.
Select Connect.

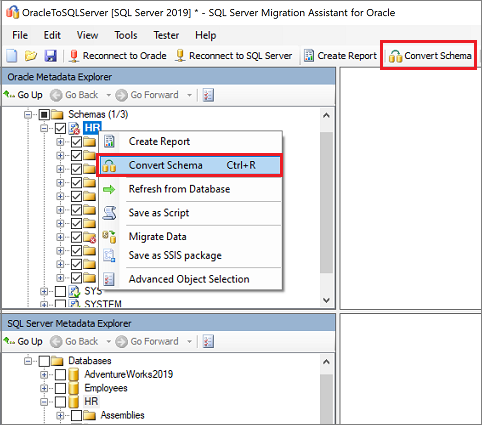
Right-click the Oracle schema in Oracle Metadata Explorer and select Convert Schema. Or, you can select Convert schema in the top menu:
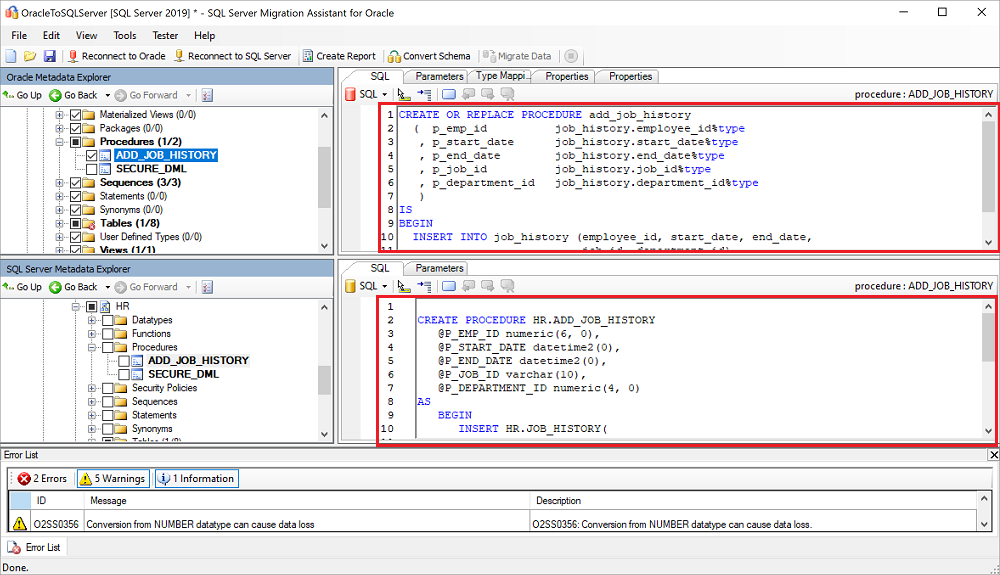
After the schema conversion is complete, review the converted objects and compare them to the original objects to identify potential problems. Use the recommendations to address any problems:

Compare the converted Transact-SQL text to the original stored procedures and review the recommendations:
You can save the project locally for an offline schema remediation exercise. To do so, select Save Project on the File menu. Saving the project locally lets you evaluate the source and target schemas offline and perform remediation before you publish the schema to SQL Server.
Select Review results in the Output pane, and then review errors in the Error list pane.
Save the project locally for an offline schema remediation exercise. Select Save Project on the File menu. This gives you an opportunity to evaluate the source and target schemas offline and perform remediation before you publish the schema to SQL Server on Azure Virtual Machines.


Migrate
After you have the necessary prerequisites in place and have completed the tasks associated with the pre-migration stage, you're ready to start the schema and data migration. Migration involves two steps: publishing the schema and migrating the data.
To publish your schema and migrate the data, follow these steps:
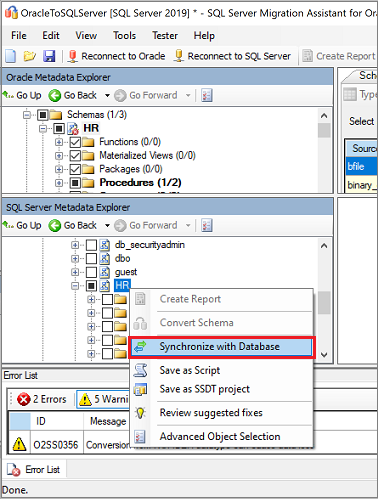
Publish the schema: right-click the database in SQL Server Metadata Explorer and select Synchronize with Database. Doing so publishes the Oracle schema to SQL Server on Azure Virtual Machines.
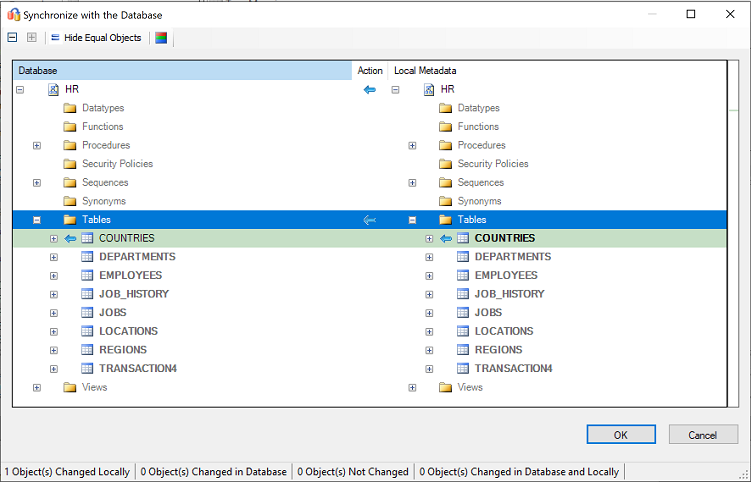
Review the mapping between your source project and your target:
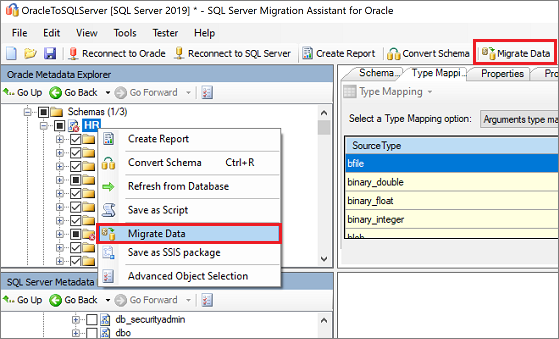
Migrate the data: right-click the database or object that you want to migrate in Oracle Metadata Explorer and select Migrate Data. Or, you can select the Migrate Data tab. To migrate data for an entire database, select the check box next to the database name. To migrate data from individual tables, expand the database, expand Tables, and then select the checkboxes next to the tables. To omit data from individual tables, clear the checkboxes.
Provide connection details for Oracle and SQL Server on Azure Virtual Machines in the dialog box.
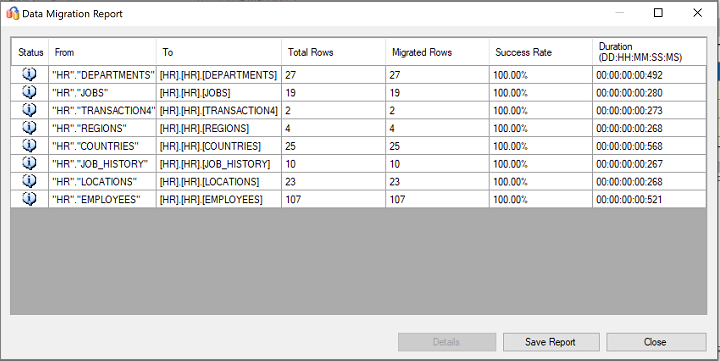
After the migration finishes, view the Data Migration Report:
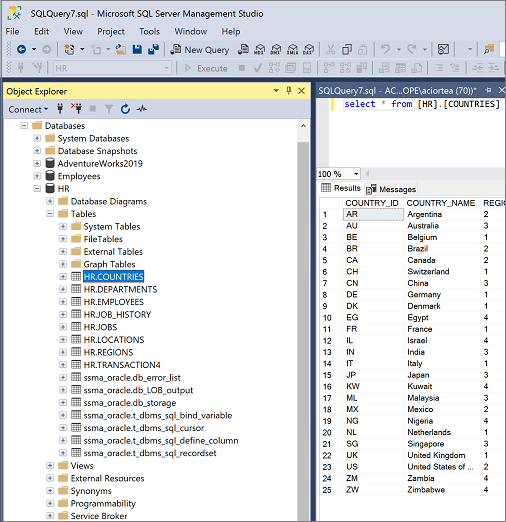
Connect to your SQL Server on Azure Virtual Machines instance by using SQL Server Management Studio. Validate the migration by reviewing the data and schema:
Instead of using SSMA, you could use SQL Server Integration Services (SSIS) to migrate the data. For more information, see:
- The article SQL Server Integration Services.
- The white paper SSIS for Azure and Hybrid Data Movement.
Post-migration
After you complete the migration stage, you need to complete a series of post-migration tasks to ensure that everything is running as smoothly and efficiently as possible.
Remediate applications
After the data is migrated to the target environment, all the applications that previously consumed the source need to start consuming the target. Making those changes might require changes to the applications.
Perform tests
To test your database migration, complete these activities:
Develop validation tests. To test database migration, you need to use SQL queries. Create the validation queries to run against both the source and target databases. Your validation queries should cover the scope that you've defined.
Set up a test environment. The test environment should contain a copy of the source database and the target database. Be sure to isolate the test environment.
Run validation tests. Run the validation tests against the source and the target, and then analyze the results.
Run performance tests. Run performance test against the source and the target, and then analyze and compare the results.
Validate migrated objects
Microsoft SQL Server Migration Assistant for Oracle Tester (SSMA Tester) allows you to test migrated database objects. The SSMA Tester is used to verify that converted objects behave in the same way.
Create test case
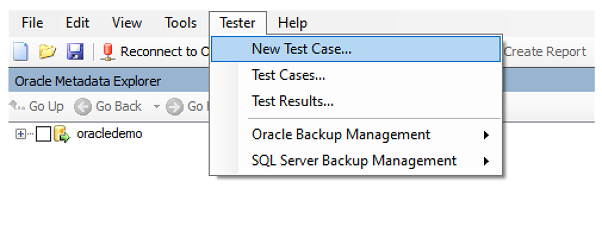
Open SSMA for Oracle, select Tester followed by New Test Case.
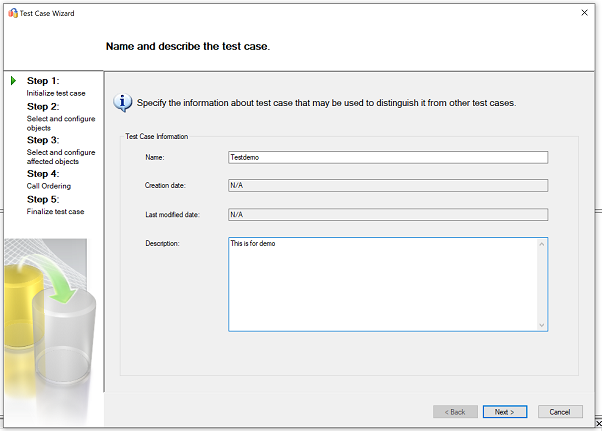
On the Test Case wizard, provide the following information:
Name: Enter the name to identify the test case.
Creation date: Today's current date, defined automatically.
Last Modified date: Filled in automatically, shouldn't be changed.
Description: Enter any additional information to identify the purpose of the test case.
Select the objects that are part of the test case from the Oracle object tree located on the left side.
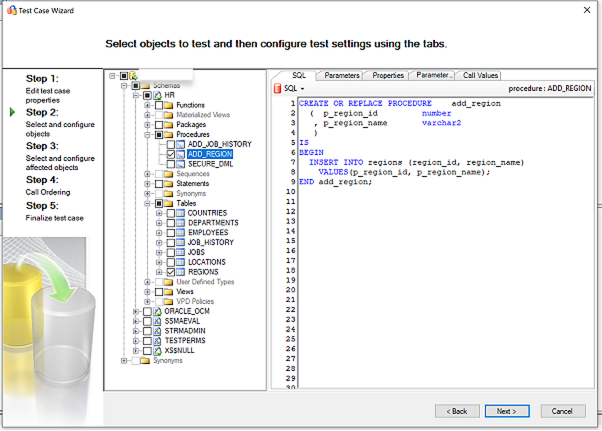
In this example, stored procedure
ADD_REGIONand tableREGIONare selected.To learn more, see Selecting and Configuring Objects to Test (OracleToSQL)
Next, select the tables, foreign keys, and other dependent objects from the Oracle object tree in the left window.

To learn more, see Selecting and Configuring Affected Objects (OracleToSQL)
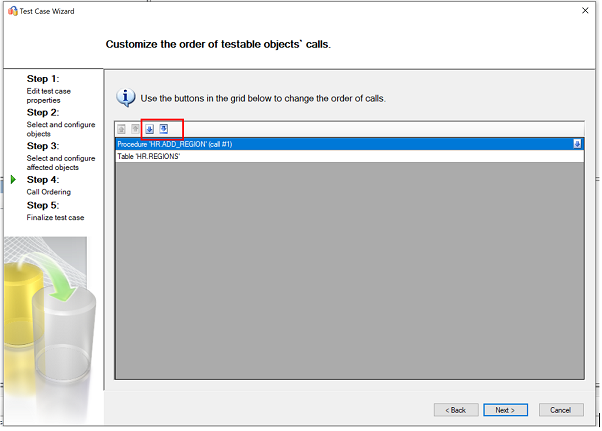
Review the evaluation sequence of objects. Change the order by selecting the buttons in the grid.
Finalize the test case by reviewing the information provided in the previous steps. Configure the test execution options based on the test scenario.
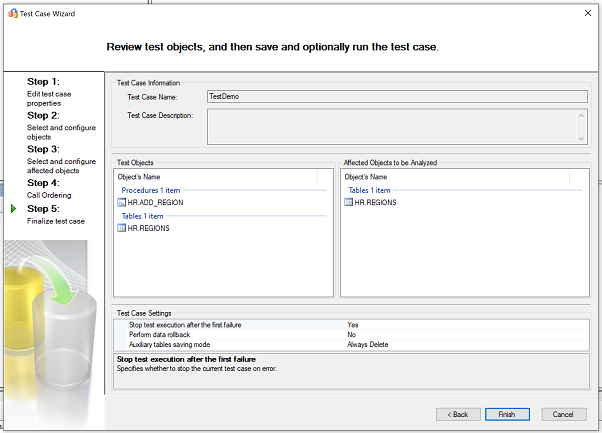
For more information on test case settings, Finishing Test Case Preparation (OracleToSQL)
Select Finish to create the test case.
Run test case
When SSMA Tester runs a test case, the test engine executes the objects selected for testing and generates a verification report.
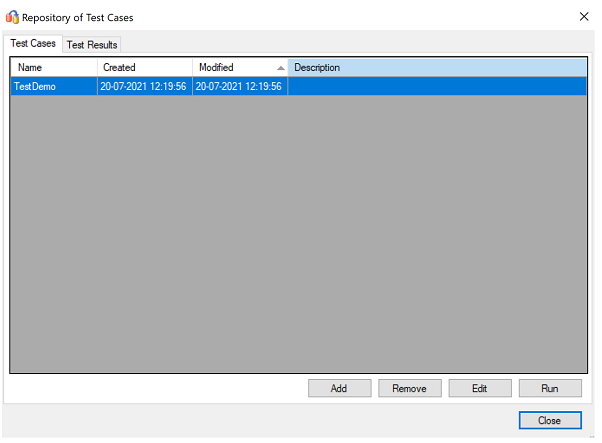
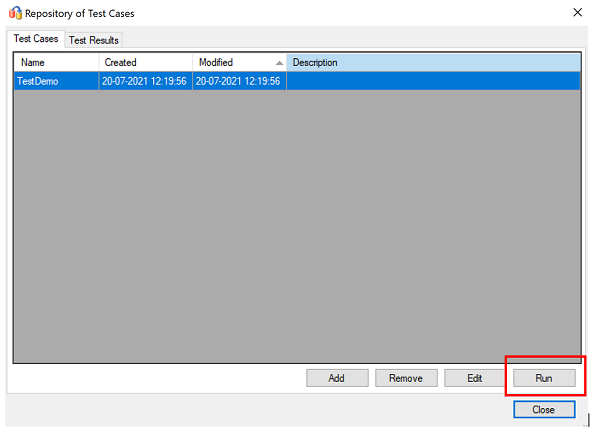
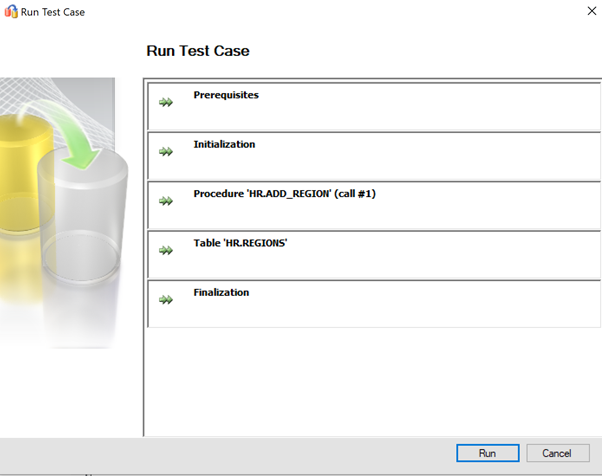
Select the test case from test repository and then select run.
Review the launch test case and select run.
Next, provide Oracle source credentials. Select connect after entering the credentials.
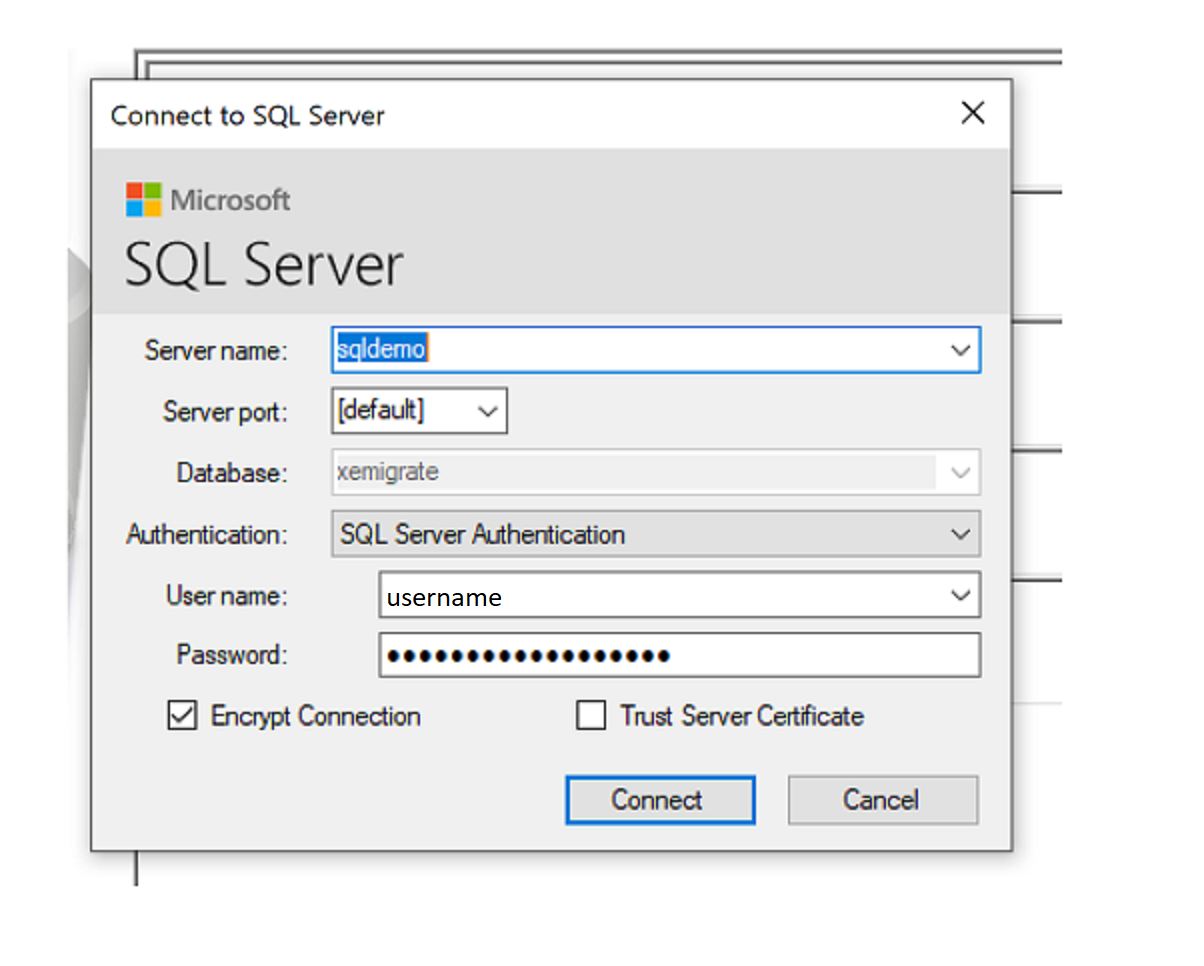
Provide target SQL Server credentials and select connect.
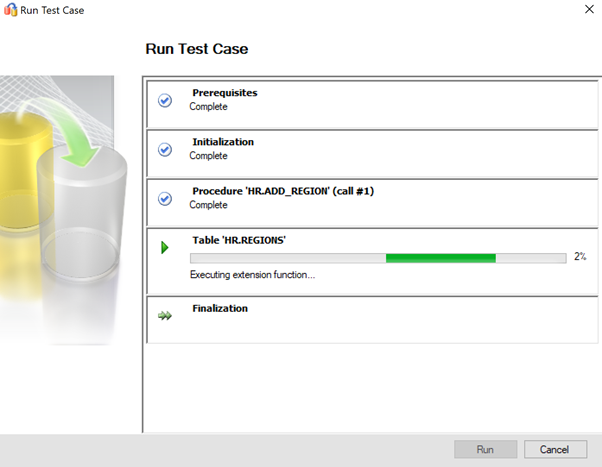
On success, the test case moves to initialization stage.
A real-time progress bar shows the execution status of the test run.
Review the report after the test is completed. The report provides the statistics, any errors during the test run and a detail report.
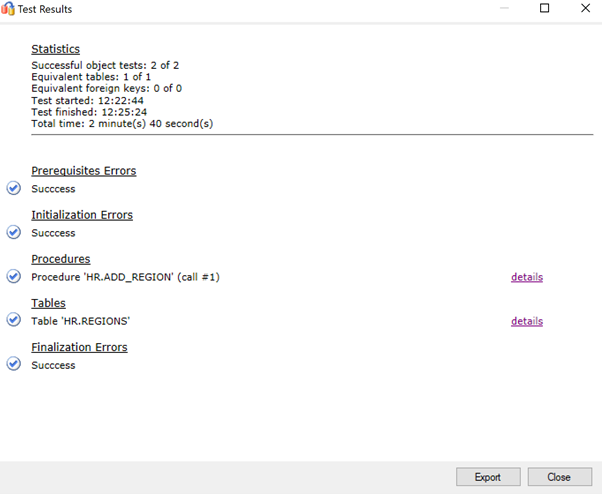
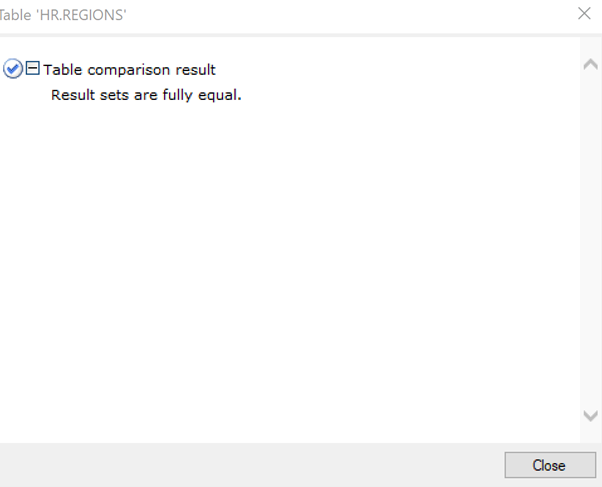
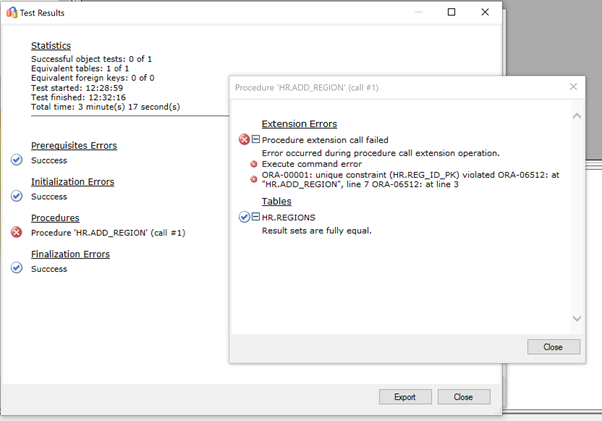
Select details to get more information.
Example of positive data validation.
Example of failed data validation.

Optimize
The post-migration phase is crucial for reconciling any data accuracy problems and verifying completeness. It's also critical for addressing performance issues with the workload.
Note
For more information about these problems and specific steps to mitigate them, see the Post-migration validation and optimization guide.
Migration resources
For more help with completing this migration scenario, see the following resources, which were developed to support a real-world migration project.
| Title/link | Description |
|---|---|
| Data Workload Assessment Model and Tool | This tool provides suggested best-fit target platforms, cloud readiness, and application/database remediation levels for a given workload. It offers a basic calculation and report generation that helps to accelerate large estate assessments by providing an automated and uniform target-platform decision process. |
| Oracle Inventory Script Artifacts | This asset includes a PL/SQL query that targets Oracle system tables and provides a count of objects by schema type, object type, and status. It also provides a rough estimate of raw data in each schema and the sizing of tables in each schema, with results stored in a CSV format. |
| Automate SSMA Oracle Assessment Collection & Consolidation | This set of resources uses a .csv file as entry (sources.csv in the project folders) to produce the XML files that you need to run an SSMA assessment in console mode. You provide the source.csv file by taking an inventory of existing Oracle instances. The output files are AssessmentReportGeneration_source_1.xml, ServersConnectionFile.xml, and VariableValueFile.xml. |
| SSMA issues and possible remedies when migrating Oracle databases | With Oracle, you can assign a non-scalar condition in a WHERE clause. SQL Server doesn't support this type of condition. So SSMA for Oracle doesn't convert queries that have a non-scalar condition in the WHERE clause. Instead, it generates an error: O2SS0001. This white paper provides details on the problem and ways to resolve it. |
| Oracle to SQL Server Migration Handbook | This document focuses on the tasks associated with migrating an Oracle schema to the latest version of SQL Server. If the migration requires changes to features/functionality, you need to carefully consider the possible effect of each change on the applications that use the database. |
| Oracle to SQL Server - Database Compare utility | SSMA for Oracle Tester is the recommended tool to automatically validate the database object conversion and data migration, and it's a superset of Database Compare functionality. If you're looking for an alternative data validation option, you can use the Database Compare utility to compare data down to the row or column level in all or selected tables, rows, and columns. |
The Data SQL Engineering team developed these resources. This team's core charter is to unblock and accelerate complex modernization for data-platform migration projects to the Microsoft Azure data platform.
Related content
- Azure Global infrastructure center
- Services and tools for data migration
- What is Azure SQL?
- What is SQL Server on Azure Windows Virtual Machines?
- Cloud Adoption Framework for Azure
- Best practices to cost and size workloads migrated to Azure
- Change the license model for a SQL virtual machine in Azure
- Extend support for SQL Server with Azure