Azure Update Manager for SQL Server on Azure VMs
Applies to: ![]() SQL Server on Azure VM
SQL Server on Azure VM
This article explains how to integrate Azure Update Manager with your SQL virtual machines resource for your SQL Server on Windows or Linux Azure Virtual Machines (VMs). With Azure Update Manager, you can automatically install Cumulative Updates for your SQL Server, as well as SQL Server and OS updates marked as Critical or Important.
Overview
Azure Update Manager is a unified service to help you manage and govern updates for all your virtual machines and SQL Server instances at scale. Unlike with Automated Patching, Azure Update Manager installs Cumulative Updates for SQL Server.
With the Azure Update Manager, you can:
- Perform updates on demand
- Manage updates at scale for multiple VMs
- Configure schedules for your patches within designated maintenance windows
- Perform periodic assessments, which automatically check your VMs for updates every 24 hours and reports machines out of compliance
Caution
You should use either Azure Update Manager or Automated Patching to manage automatic updates for your SQL Server VM, but not both. Enabling both Automated Patching and Azure Update Manager could lead to unexpected behavior, scheduling conflicts, and unintentional changes outside of designated maintenance windows. Disable Automated Patching before using Azure Update Manager or migrate directly to Azure Update Manager using PowerShell.
Enable Azure Update Manager
You can enable Azure Update Manager for your SQL Server VM through the Azure portal.
Go to your SQL virtual machines resource in the Azure portal.
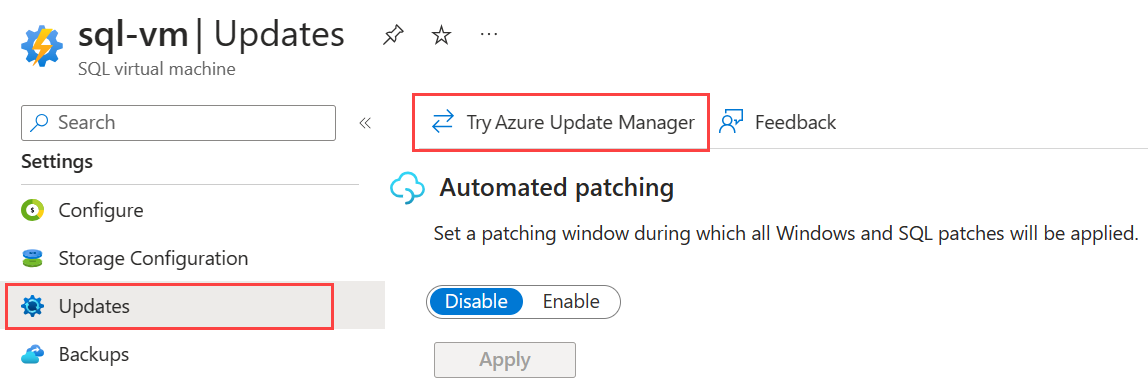
Select Updates under Settings in the resource menu.
Choose Disable to disable Automated Patching as you shouldn't use Azure Update Manager if you've enabled Automated Patching.
Select Try Azure Update Manager from the navigation bar to open the new Updates page, which integrates Azure Update Manager into your SQL virtual machines resource. If you see Leave new experience instead, then you've already enabled Azure Update Manager integration and no further action is necessary.
(Optional) If you want to go back to Automated Patching, select Leave new experience to go back to the Automated Patching page, and then select Enable to enable Automated Patching. This disables the Azure Update Manager integration.
On the Updates page, select Settings from the navigation bar and then choose Enable Microsoft updates to allow SQL Server VMs to receive updates.

Check for updates
Although Azure Update Manager offers a robust scheduling tool for your updates, you can manually check for updates by choosing Check for updates from the navigation bar, and then selecting OK to trigger the assessment now.
After the assessment completes, refresh Azure Update Manager by selecting Refresh from the navigation bar to display the list of all available updates, including SQL Server Cumulative Updates.
On demand updates
If you want to install a specific update on demand, choose One-time update from the navigation bar to open the Install one-time updates page.
By default, the Machines tab of the Install one-time updates page displays the SQL Server VM that you already have open, but you can choose Add machine to add additional virtual machines that you want to update on demand.
To update your machines, follow these steps:
- Check the box next to the machines you want to update, and then select Next to navigate to the Updates tab.
- On the Updates tab, choose the type of updates you want to install based on their classification, KB ID, or after a specific patch publish date.
- Check the updates that will be installed based on your selection in the Preview of selected updates to install section. Updates that require a restart of the VM have a Reboot status of CanRequestReboot.
- Select Next and choose the installation properties that best suit your needs, such as when to reboot the VM.
- Select Next to perform a final review of your options, and then select Install to start your patching process.
Update management at scale
One of the benefits of the Azure Update Manager is the ability to manage your entire fleet of SQL Server on Azure VMs from one place. From Azure Update Manager, you can filter based on subscriptions, resource groups, and workloads.
You can access the Azure Update Manager by typing Azure Update Manager in the portal search box, or by choosing Azure Update Manager from the Updates page of the SQL virtual machines resource.
To update multiple SQL Server VMs, follow these steps:
- Go to the Azure Update Manager in the Azure portal.
- Select Machines under Manage.
- Filter the workload by SQL virtual machine.
- Check the boxes next to the machines you want to update, and then select Enable Microsoft updates from the navigation bar to allow Microsoft updates to all of the chosen VMs.
- To update the chosen VMs, first select Check for updates to determine if any updates are available for the selected VMs.
- Next, select either One-time update to perform an update on demand, or Schedule updates to create a schedule to update the selected VMs.
Periodic assessments
Another benefit of the Azure Update Manager is the ability to use periodic assessments to automatically check for available updates for your SQL Server VMs, and verify if your all VMs are in compliance from a central place. Update Manager checks for updates every 24 hours for each VM that has periodic assessments enabled.
You can enable periodic assessments for a specific SQL Server VM by selecting Enable now next to Periodic assessment on the Recommended updates tab from your Updates page of the SQL virtual machines resource.
Alternatively, to enable periodic assessments for multiple SQL Server VMs, follow these steps:
Go to the Azure Update Manager in the Azure portal.
Select Machines under Manage.
- For Windows, filter the workload by SQL virtual machine.
- For Linux, filter the workload by OS.
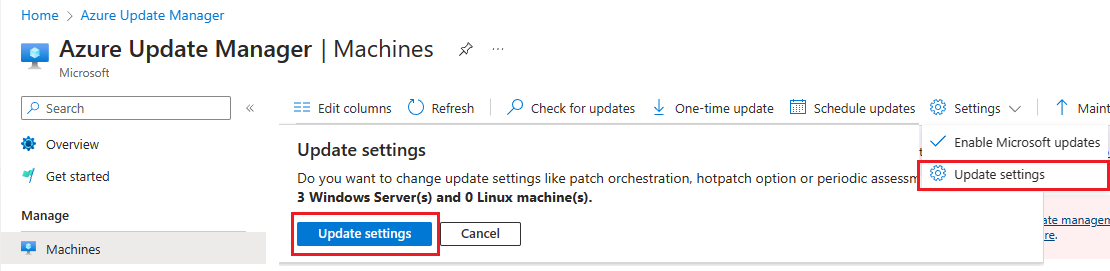
Check the boxes next to the machines you want to enable periodic assessments on, and then select Update settings from the Settings dropdown list in the navigation bar.
Select Update settings on the Update Settings dialog box to go to the Change update settings page.
You can update the Periodic assessment setting for the machines you selected in the Azure Update Manager and you can also choose Add machine to configure settings for additional machines.
Select Save once you're done making your changes to navigate back to the Azure Update Manager.
Schedule updates
Azure Update Manager offers robust scheduling capabilities. You can create a schedule for a single VM, or assign multiple machines to the same schedule, giving you greater flexibility and control over when your fleet of SQL Server VMs is patched.
You can configure a schedule for a specific SQL Server VM by selecting Schedule updates from the Updates page of the SQL virtual machines resource, or you can configure schedules for multiple VMs by selecting Schedule updates from the Azure Update Manager.
To configure a schedule for multiple SQL Server VMs, follow these steps:
Go to the Azure Update Manager in the Azure portal.
Select Machines under Manage.
- For Windows, filter the workload by SQL virtual machine.
- For Linux, filter the workload by OS.
Check the boxes next to the machines you want to configure a schedule for, to open the Create a maintenance configuration page.
On the Basics tab, fill out details for your subscription, resource group, and configuration details, such as the name of your schedule.
Select Add a schedule to define your maintenance window.
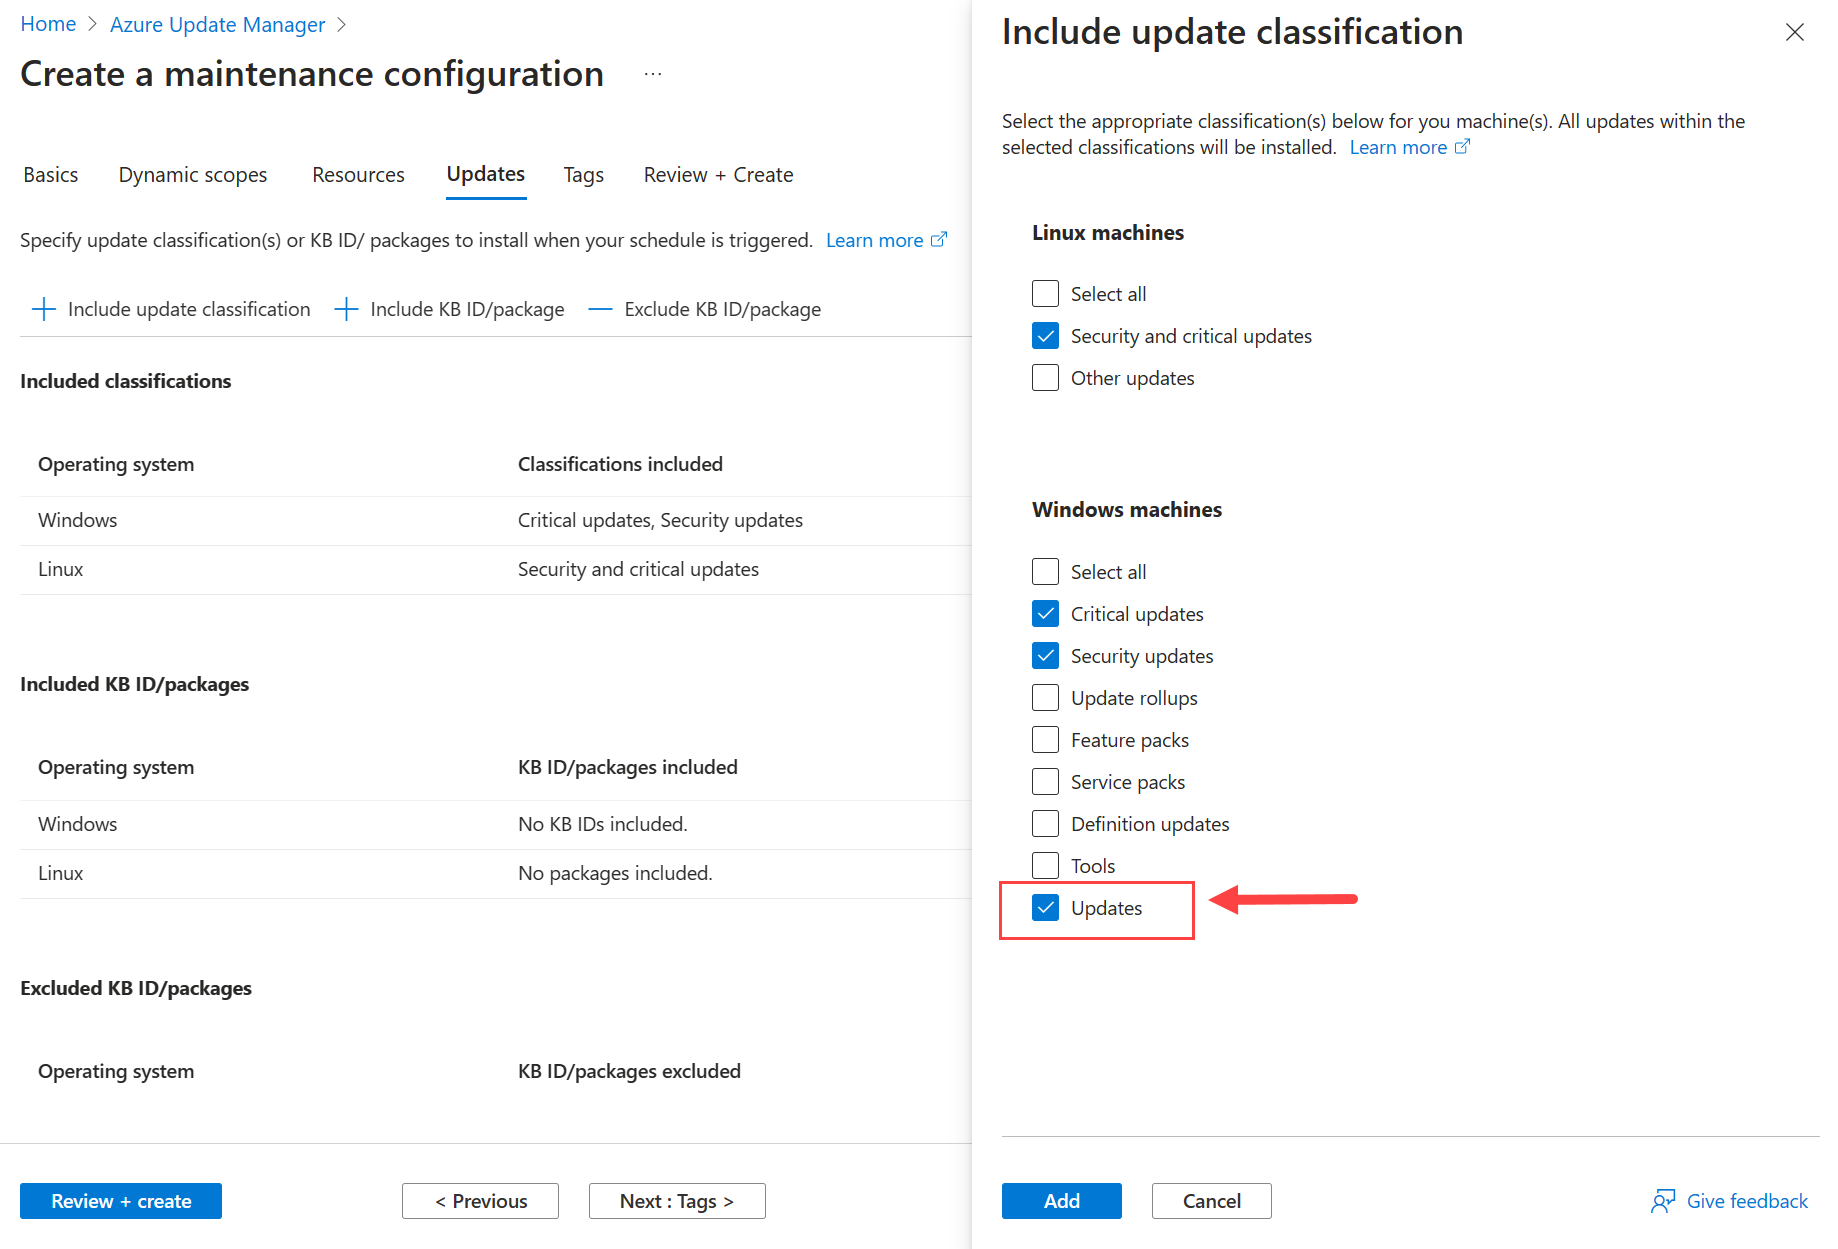
(Optional) On the Updates tab, select Include update classification, and then check the box next to Updates if you want to install SQL Server Cumulative updates automatically within the specified schedule. Select Add to save your settings.
Select Review + create to create your schedule.
After the schedule is created, go back to the Azure Update Manager and select the VMs you want to use the new schedule.
Select Update settings on the Update Settings dialog box to go to the Change update settings page.
Update the Patch orchestration option to Customer Managed Schedules to ensure your VMs are patched based on your chosen schedule instead of autopatched based on default Microsoft settings.

Migrate from Automated Patching to Azure Update Manager
If you're currently using Automated Patching, and want to migrate to Azure Update Manager, you can do so by using the MigrateSQLVMPatchingSchedule PowerShell module to perform following steps:
- Disable Automated Patching
- Enable Microsoft Update on the virtual machine
- Create a new maintenance configuration in Azure Update Manager with a similar schedule to Automated Patching
- Assign the virtual machine to the maintenance configuration
To migrate to Azure Update Manager by using PowerShell, use the following sample script:
$rgname = 'YourResourceGroup'
$vmname = 'YourVM'

# Install latest migration module
Install-Module -Name MigrateSQLVMPatchingSchedule-Module -Force -AllowClobber

# Import the module
Import-Module MigrateSQLVMPatchingSchedule-Module

Convert-SQLVMPatchingSchedule -ResourceGroupName $rgname -VmName $vmname
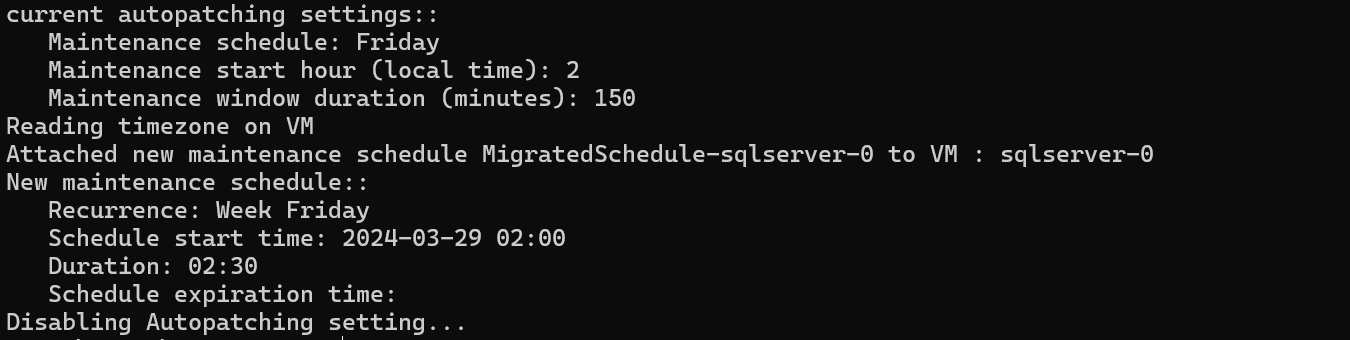
The output of the script includes details about the old schedule in Automated Patching and details about the new schedule in Azure Update Manager. For example, if the Automated Patching schedule was every Friday, with a start hour of 2am, and a duration of 150 minutes, the output from the script is:
Considerations
Consider the following:
- Automated patching via the SQL Server IaaS Agent extension is incompatible with the Azure Update Manager. If you choose to use the Azure Update Manager to manage your SQL Server VMs, be sure to disable automated patching to avoid unexpected and unscheduled patching.
- Azure Update Manager isn't aware if you have an Always On availability group configured for your SQL Server VM, so be cautious when creating your patching schedules for your availability group replicas to avoid unexpected failovers.
Next steps
To learn more, review the following articles:
- About Azure Update Manager.
- Check and install on-demand updates.
- Schedule patching configuration on Azure VMs.
- Update configuration settings in Azure Update Manager.
For more information, see the following articles:
Feedback
Coming soon: Throughout 2024 we will be phasing out GitHub Issues as the feedback mechanism for content and replacing it with a new feedback system. For more information see: https://aka.ms/ContentUserFeedback.
Submit and view feedback for