Note
Access to this page requires authorization. You can try signing in or changing directories.
Access to this page requires authorization. You can try changing directories.
This quickstart describes how to restore the entire SAP HANA to a snapshot restore point using the Azure portal.
Azure Backup now allows you to restore the SAP HANA snapshot and storage snapshot as disks by selecting Attach and then mount them to the target machine.
Note
Currently, Azure Backup doesn't automatically restore the HANA system to the required point.
For more information about the supported configurations and scenarios, see SAP HANA backup support matrix.
Prerequisites
Before you start restoring the database, consider the following prerequisites:
- Ensure that you have the backup configured and have the recovery points created to do restore. Learn more about the configuration of backup for HANA database instance snapshots on Azure VM.
- Ensure that you have the required permissions for the snapshot restore.
Restore the SAP HANA database
In the following sections, you'll learn how to restore the system to the snapshot restore point.
Select and mount the snapshot
To select and mount the snapshot, do the following:
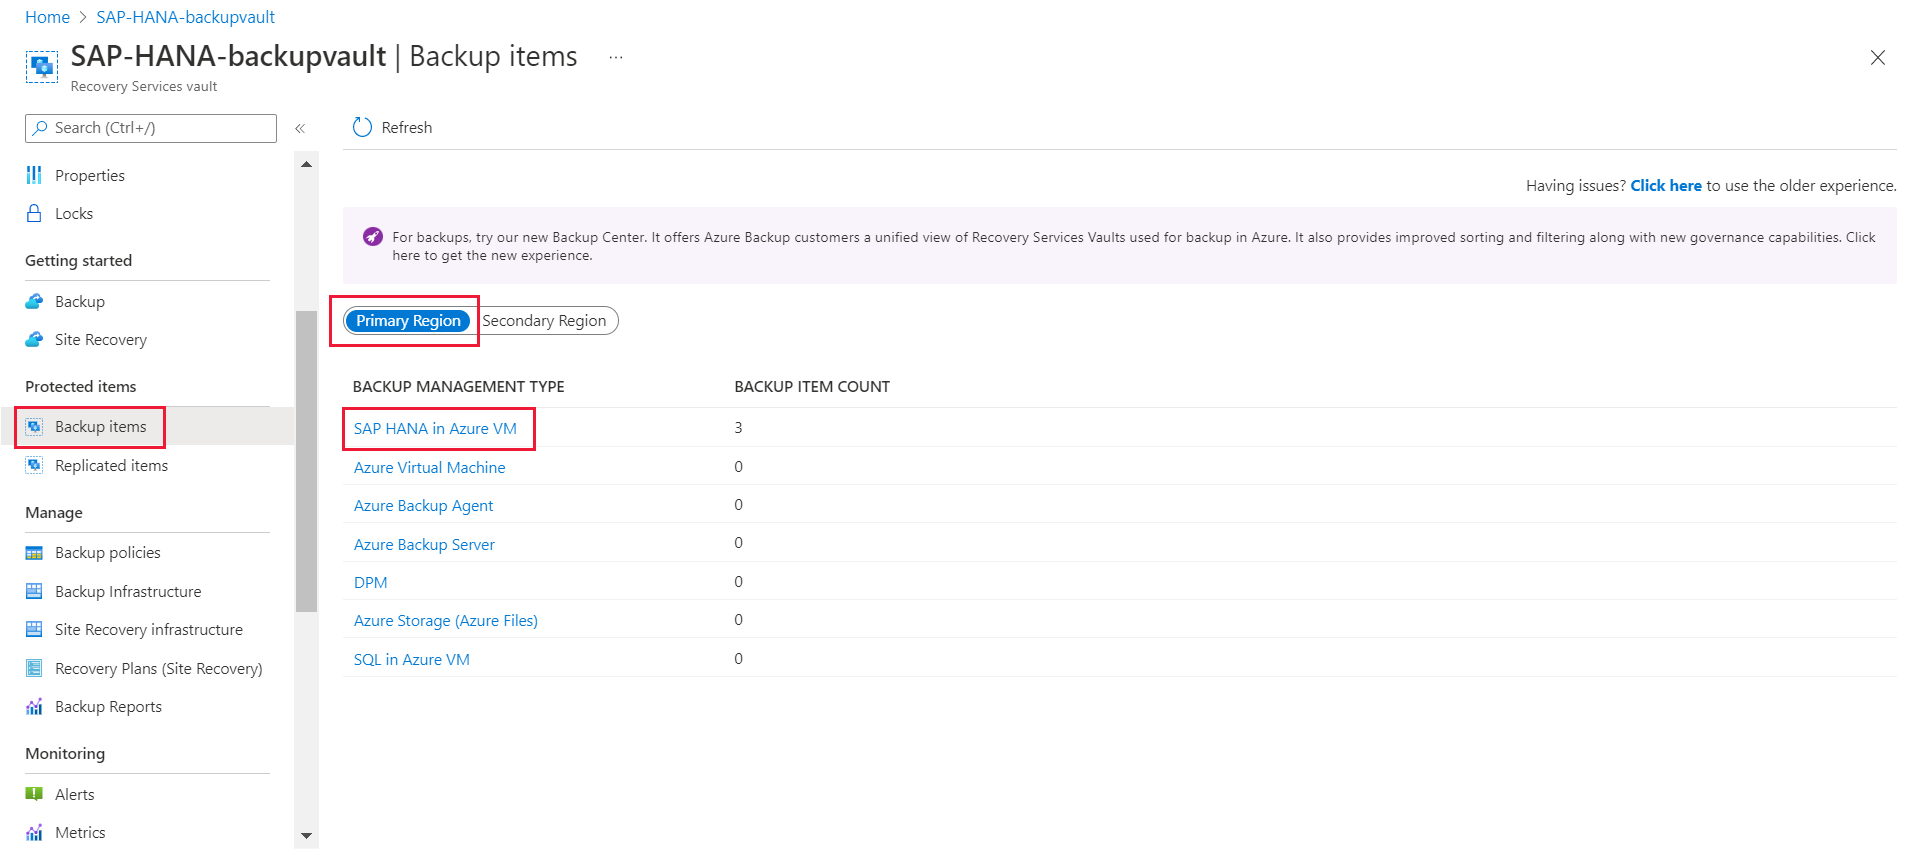
In the Azure portal, go to the Recovery Services vault.
On the left pane, select Backup items.
Select Primary Region, and then select SAP HANA in Azure VM.
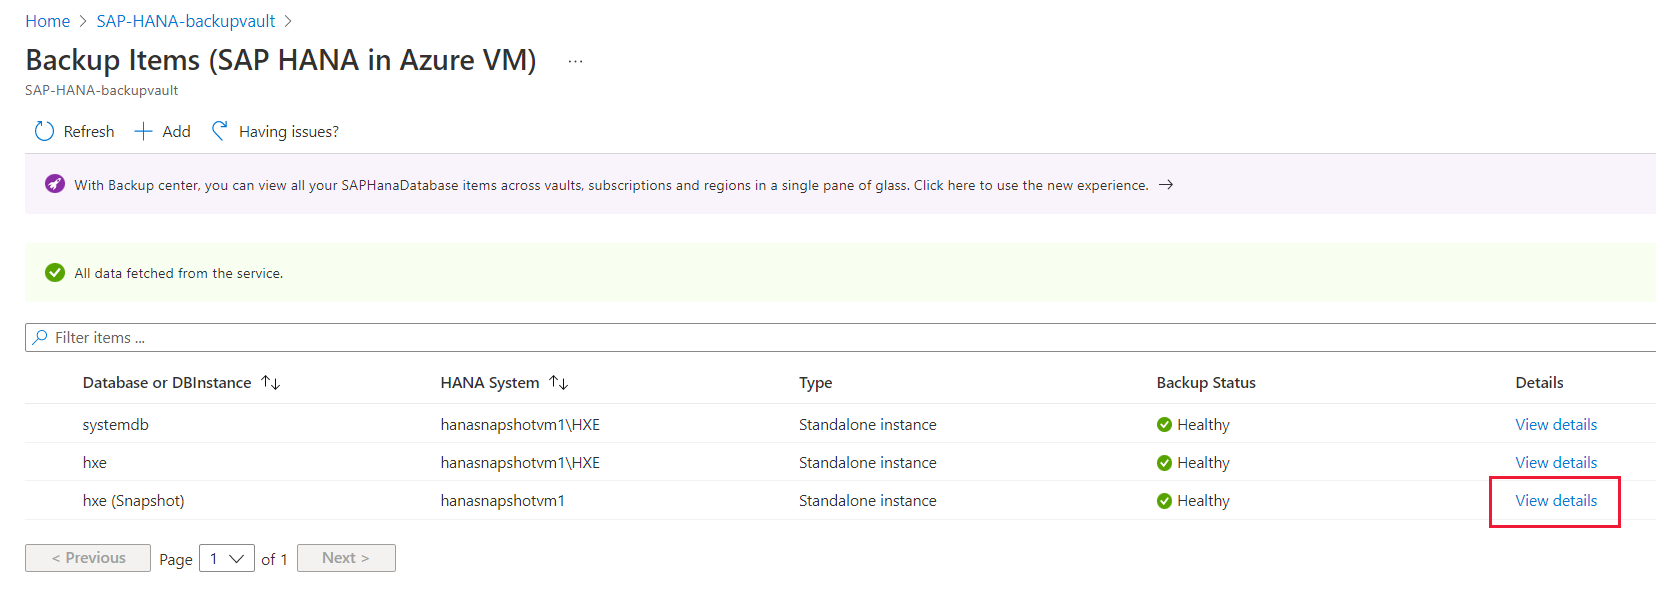
On the Backup Items page, select View details corresponding to the SAP HANA snapshot instance.
Select Restore.
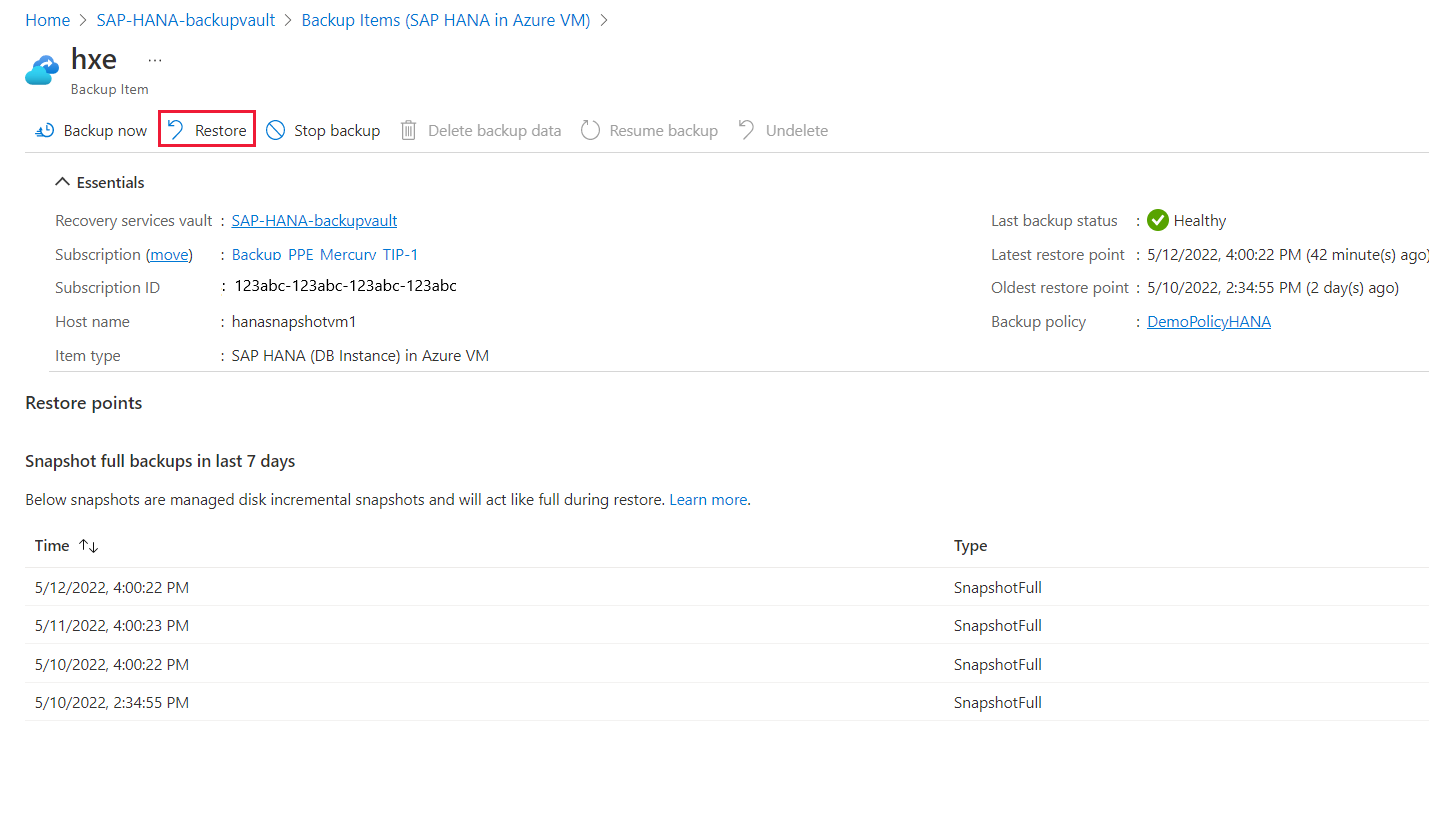
On the Restore pane, select the target VM to which the disks should be attached, the required HANA instance, and the resource group.
On the Restore Point pane, choose Select.

Note
Attach and mount only option creates disks from the selected snapshot point and mounts to the targeted VM. After the restore is complete, use HANA studio to initiate the restore-from-snapshot process and complete the system database restore to the latest recovery point. Then run the pre-registration script on the target VM to reset the backup user credentials. Then proceed to complete the tenant DB restore process, to the same snapshot or logpoint-in-time via backing
On the Select restore point pane, select a recovery point, and then select OK.
Select the corresponding resource group and the managed identity to which all permissions are assigned for restore.
Select Validate to check to ensure that all the permissions are assigned to the managed identity for the relevant scopes.
If the permissions aren't assigned, select Assign missing roles/identity.
After the roles are assigned, the Azure portal automatically re-validates the permission updates.
Select OK to create disks from snapshots, attach them to the target VM, and mount them.

Restore the system database
To restore the system database using the Azure portal, follow these steps:
Go to the Restore pane, and then select System Database (Including attach and mount).
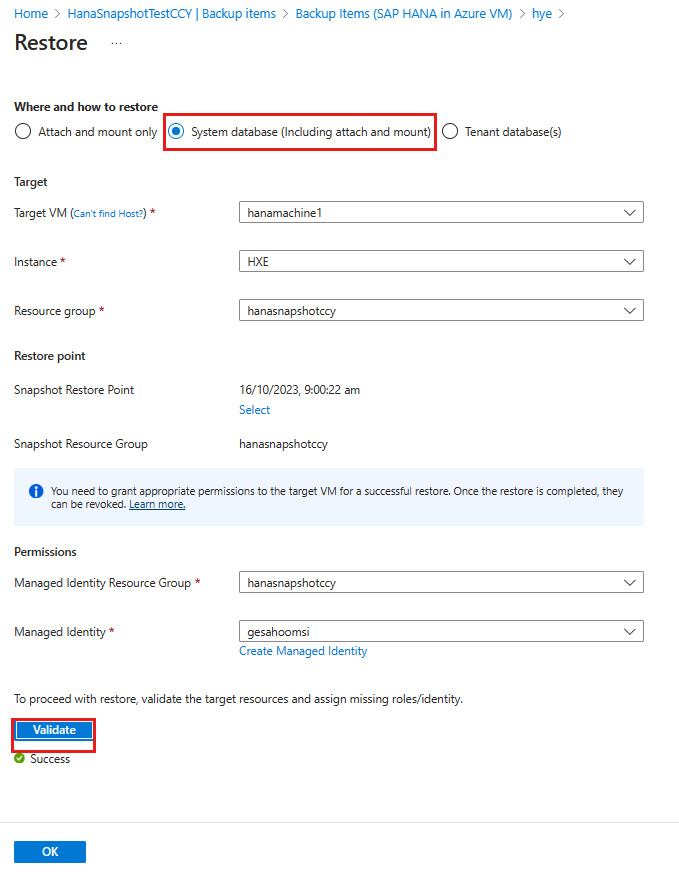
Note
This option creates disks from the selected snapshot restore point and attaches these disks to the specified target VM. It also restores the system database on the target VM.
On VM, select the target VM from the dropdown list.
Under Snapshot Restore Point, click Select and choose the restore point.
Select Validate.
After the validation is complete, select OK to restore.

To recover the system database from the data snapshot by using HANA Studio. For more information, see the SAP documentation.
Note
After you've restored the system database, you need to run the preregistration script on the target VM to update the user credentials.
Restore tenant databases
When the system database is restored, run the preregistration script on the target VM and restore the tenant databases.
To restore the tenant databases using the Azure portal, follow these steps:
Go to the Restore pane, and then select Tenant database(s).
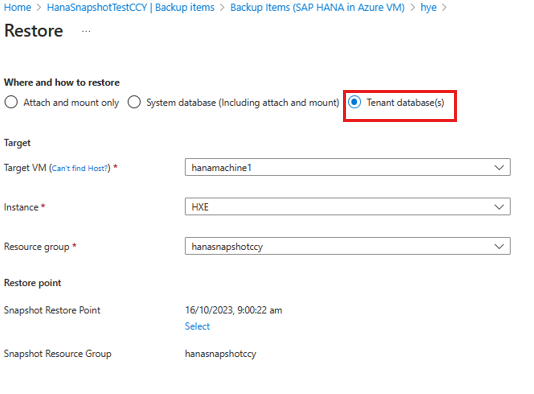
On VM, select the target VM from the dropdown list.
Under Snapshot Restore Point, click Select and choose the restore point.
Select Validate.
After the validation is complete, select OK to restore.
You can also use HANA Studio to recover all tenant databases from a data snapshot. For more information, see the HANA documentation.