Note
Access to this page requires authorization. You can try signing in or changing directories.
Access to this page requires authorization. You can try changing directories.
In this tutorial, you learn how to configure backup and restore for an Azure Kubernetes Service (AKS) cluster that uses Azure Files-based persistent volumes. Azure Backup for AKS now supports backing up applications with Azure File Share (SMB protocol) volumes along with Azure Disk-based volumes and Kubernetes resources.
Azure Files-based volumes are backed up as snapshots stored alongside the file share in the same storage account. This provides fast backup and restore operations for your stateful applications using file shares.
In this tutorial, you learn how to:
- Set up prerequisites for Azure Files backup in AKS
- Configure a new backup instance for AKS with Azure Files volumes
- Create and verify on-demand backups
- Modify an existing backup instance to include Azure Files volumes
- Restore Azure Files volumes to the original or alternate cluster
- Use Resource Modifier ConfigMap for custom storage classes
Prerequisites
Before you configure backup for AKS clusters with Azure Files volumes, ensure the following prerequisites are met:
- An Azure Backup vault in the same region as your AKS cluster.
- An AKS cluster with CSI Driver version 1.32 or higher.
- Azure Files-based persistent volumes provisioned through the Azure Kubernetes CSI Driver (
file.csi.azure.com) using the SMB protocol. - File shares with publicly accessible network endpoints (network endpoint type set to All).
- Persistent volumes configured with the Reclaim Policy set to Retain to ensure snapshots remain available even if the PVC is deleted.
- Backup extension installed in the AKS cluster.
Important
- Azure Files volumes with private network endpoints are not supported.
- Only file shares with 25,000 files or fewer are supported. File shares with more files may experience restore failures.
- Azure Files using the NFS protocol are not currently supported.
- In-tree volumes (provisioner:
kubernetes.io/azure-file) are not supported; only CSI driver-based volumes are supported.
Set the Reclaim Policy to Retain
To ensure that Azure Files snapshots remain available even if the PVC is deleted, set the Reclaim Policy to Retain:
kubectl patch pv <your-pv-name> --patch '{"spec":{"persistentVolumeReclaimPolicy":"Retain"}}'
Replace <your-pv-name> with the name of your persistent volume. You can find it by running:
kubectl get pv
Configure a new backup instance
This section explains how you configure a new backup instance for your AKS cluster with Azure Files volumes.
Install the Backup extension
If you haven't already installed the Backup extension, follow these steps:
In the Azure portal, go to your AKS cluster.
In the resource menu, select Backup under Settings.
Select Install Extension.
Provide a storage account and blob container. This container stores the Kubernetes resource YAMLs and backup logs.
Select Create and wait for the extension installation to complete.
Note
If you already have the Backup extension installed, verify its version v0.0.03004.544 or later. If needed, enable auto-upgrade to update to the latest version.
Configure backup for AKS cluster with Azure Files
In the Azure portal, go to your AKS cluster.
In the resource menu, select Backup, and then select Configure Backup.
Select a Backup vault in the same region as your AKS cluster.
Grant Trusted Access between the Backup vault and AKS cluster by selecting Grant permission. Also, assign the required roles to the Backup vault. Once completed, select Next.
Note
Ensure the Backup vault is in the same region as your AKS cluster.
On the Backup policy tab, create a new backup policy or select an existing one.
Important
- For Azure Files-based volumes, backup retention is limited to 30 days maximum.
- Vault Tier backup is not supported for Azure Files volumes. Ensure your backup policy only includes Operational Tier retention rules.
- If you need to back up both Azure Disk and Azure Files volumes with different backup targets (Vault and Snapshot), create separate backup instances—one for each resource type.
On the Datasources tab, select Add/Edit to define the backup instance configuration.
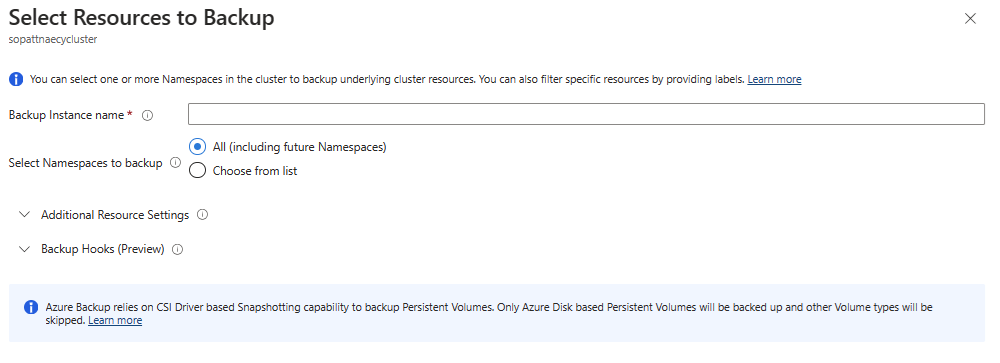
In the Select Resources to Backup pane:
- Backup Configuration: Define which cluster resources to back up.
- Persistent Volumes: Select Azure Files to back up Azure Files-based volumes.
- Secrets: Enable Backup Secrets if you're using Kubernetes secrets to store storage account keys (required for restore operations).
For Snapshot resource group, select the resource group to store Azure Disk snapshots (required even if you're only backing up Azure Files volumes). Then select Validate.
If validation fails due to missing permissions, select Assign missing roles to grant the required access.
When validation succeeds, select Next, and then select Configure backup.

The backup instance is created and will start backing up your AKS cluster according to the configured policy.
Create an on-demand backup
To create an immediate backup:
Open the backup instance you created.
Select Backup Now at the top of the page.
Track the backup progress in Backup Jobs.
Once the backup completes, verify the Azure Files snapshot:
- Go to the storage account containing your file share.
- Navigate to the file share used by your persistent volume.
- Select Snapshots to view the backup snapshot created by Azure Backup.
Verify backup configuration
To verify that your Azure Files volumes are being backed up:
In the Azure portal, go to your Backup vault.
Select Backup instances under Manage.
Find your AKS cluster backup instance and verify its status shows as Backup in progress or Ready.
Select Backup Jobs to view completed and in-progress backup operations.
Modify an existing backup instance
This section explains how you can modify an existing backup instance and start backing up your Azure Files-based persistent volumes.
Modify protection configuration
In the Azure portal, go to your Backup vault.
Select Backup instances under Manage.
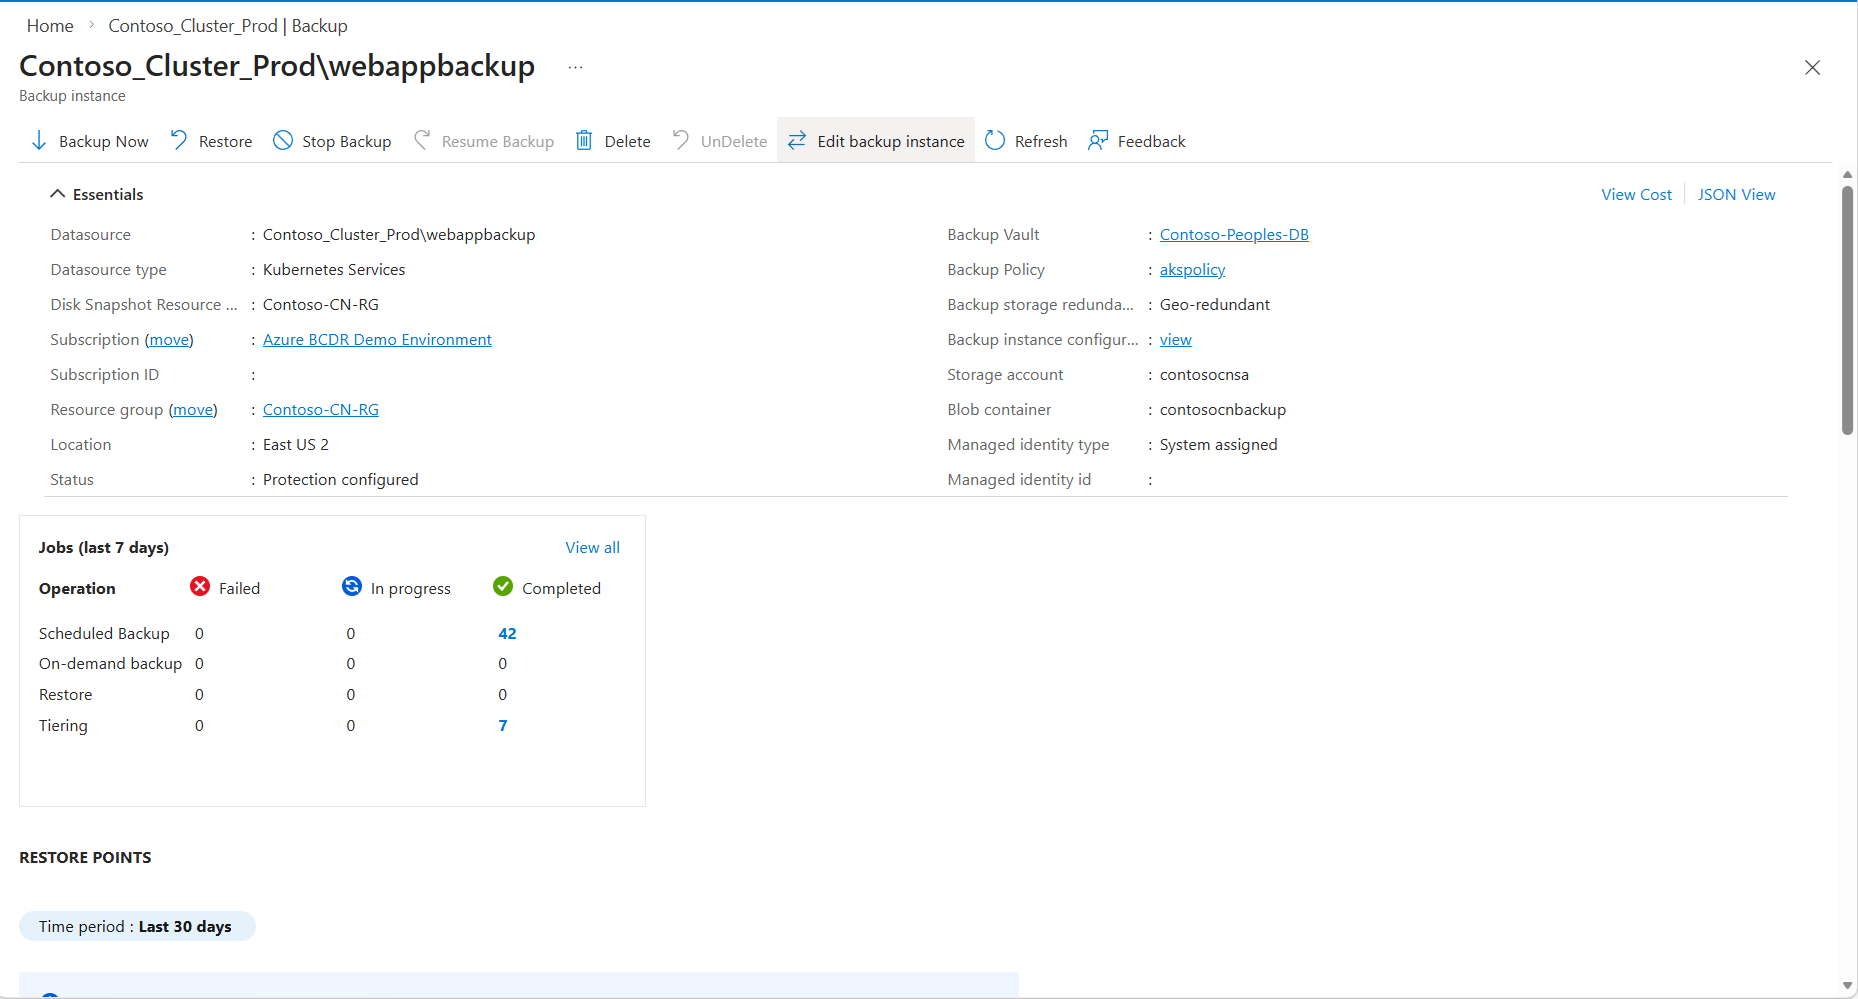
Find your AKS cluster backup instance, open it and click on Edit backup instance on top.
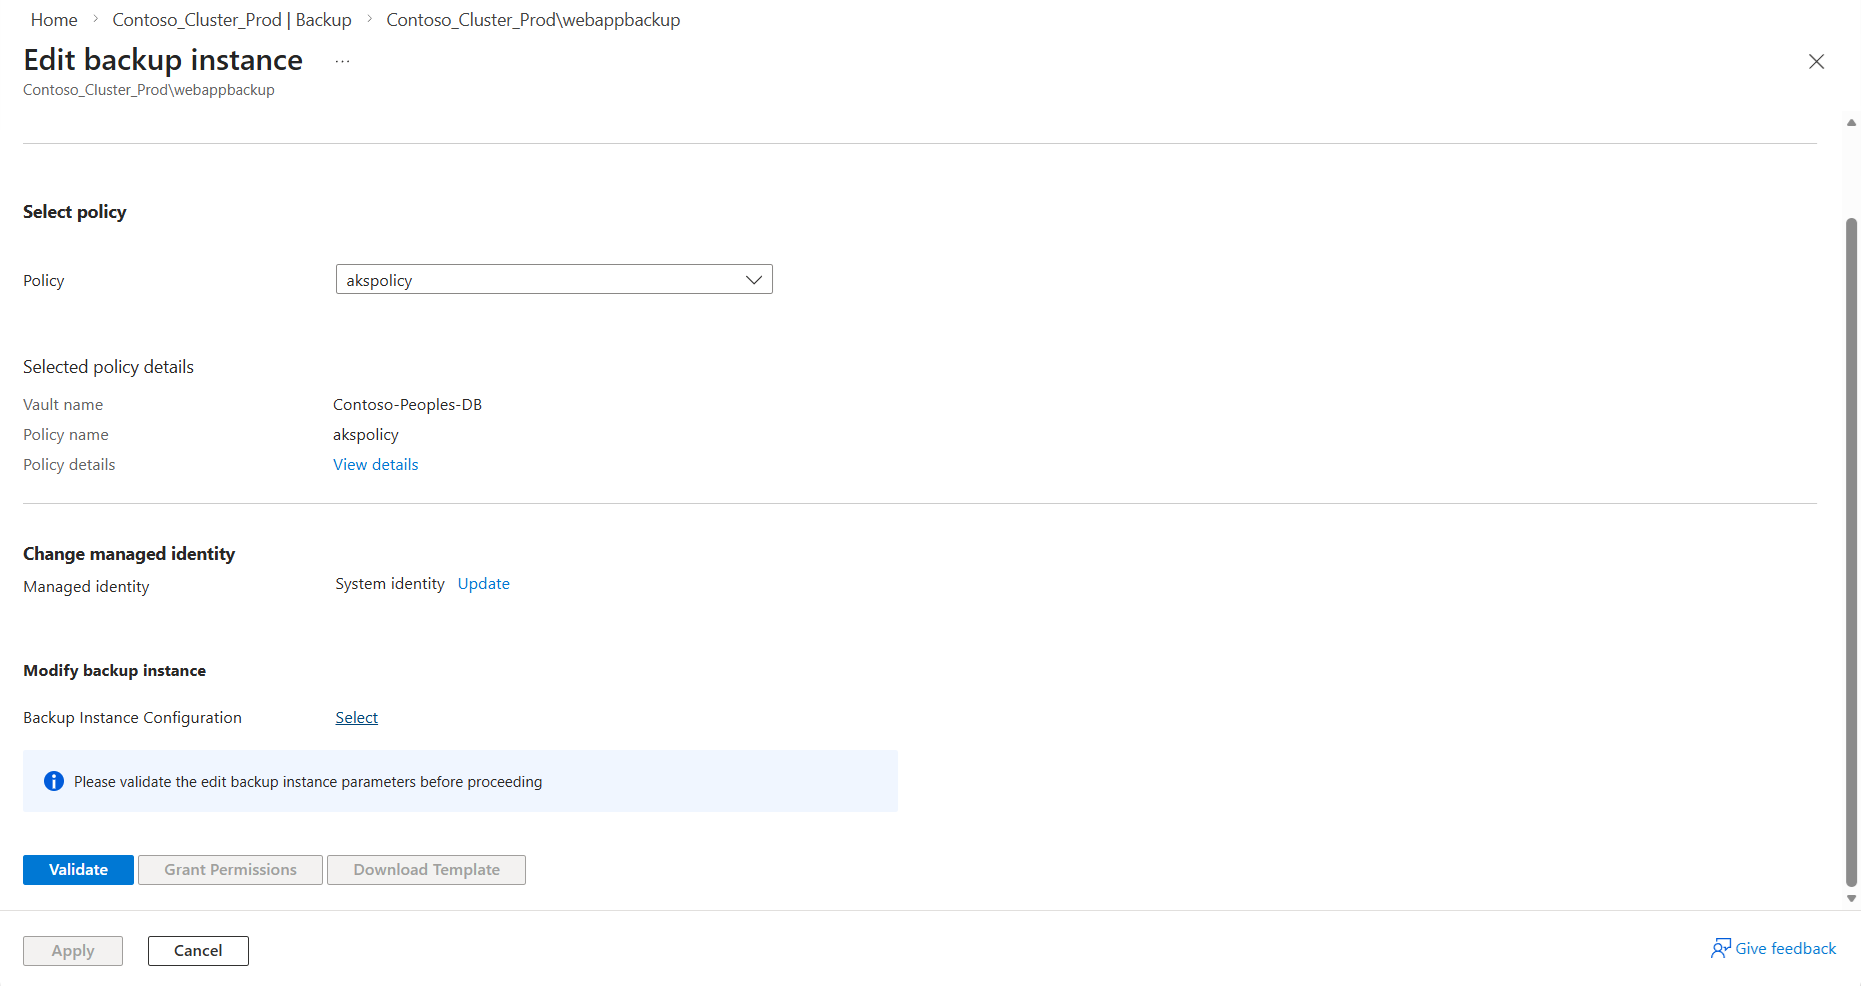
On the new screen, options are available to modify the backup policy, managed identity being used by backup vault and the backup instance configuration. Click on Select in the Modify backup instance section
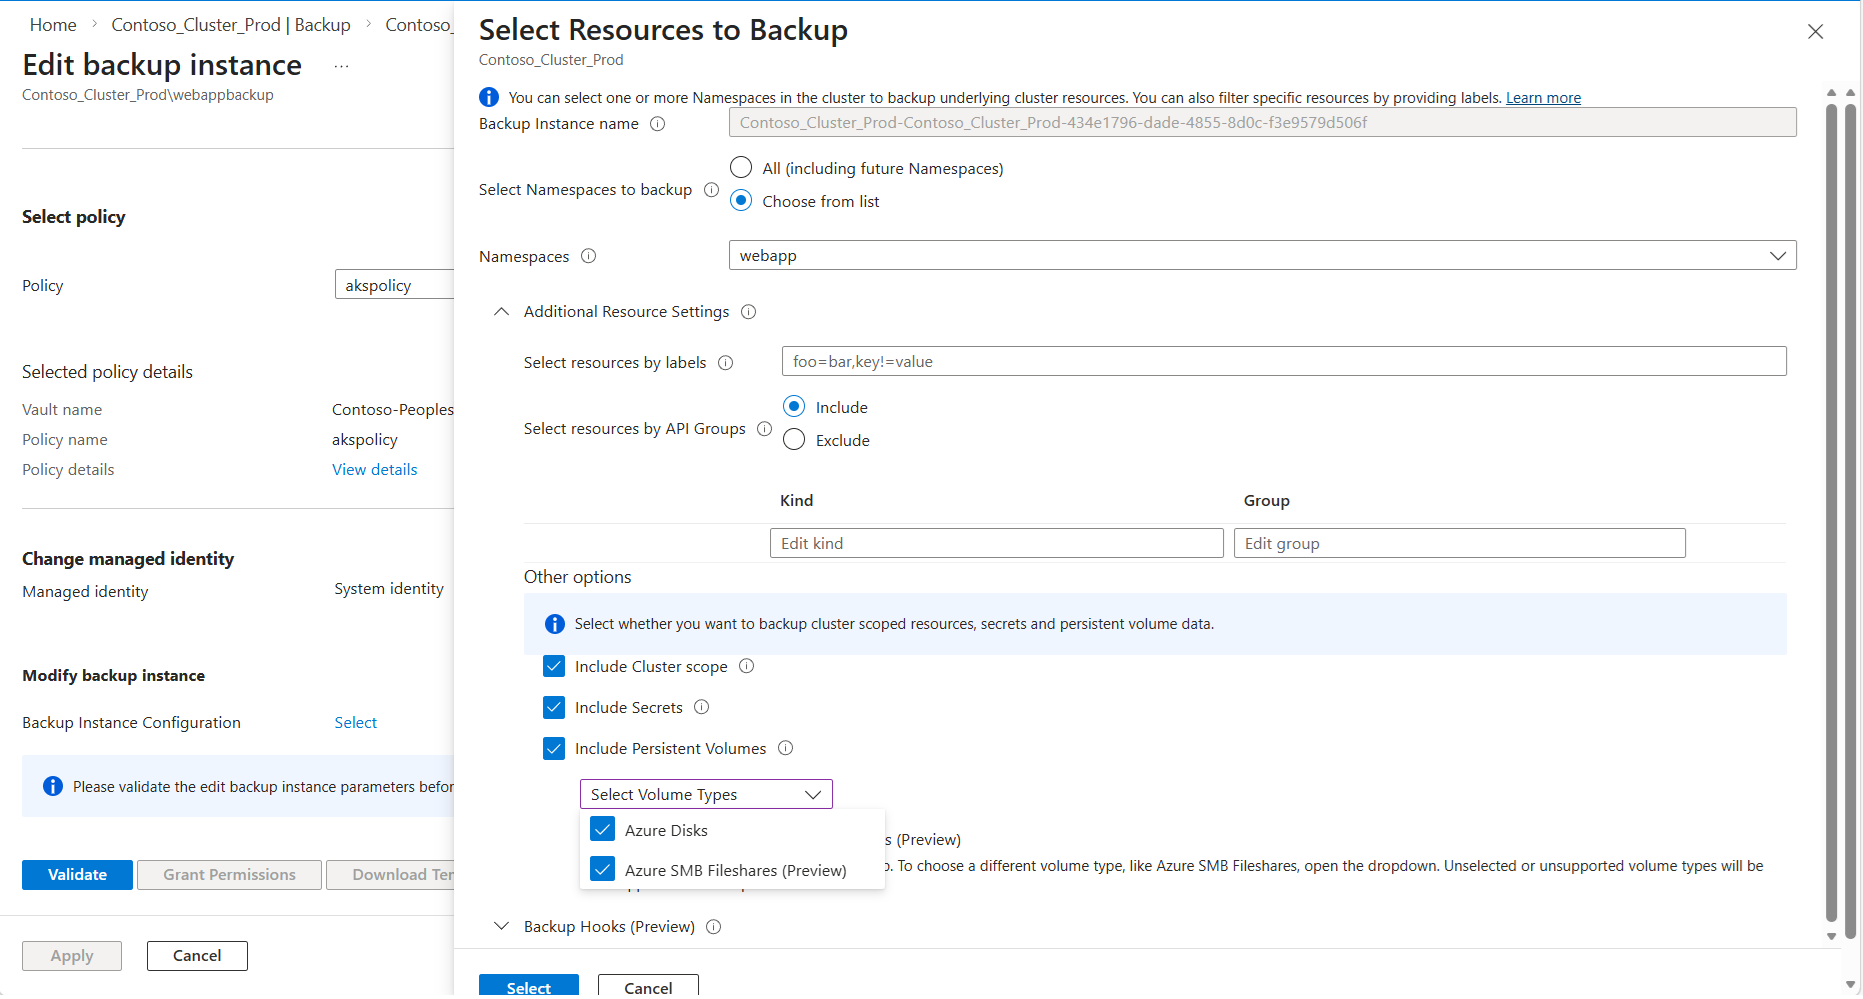
On the right hand side pane, to include Files based volumes to backup, open the dropdown Select Volume Types and select the checkbox for Azure SMB Fileshares. Additionally select the checkbox Include Secrets. You can use this pane, to update any other existing backup configurations including labels. Then click on Select.
After updating the backup configuration, click Validate to ensure all prerequisites for using Azure Files are met. If required roles are missing for the Backup vault identity, a role assignment error will appear. If you have the necessary permissions on the relevant resources, you can resolve this by clicking Grant Permissions.
Click on Apply to finish off the modification of backup instance configuration.


Restore Azure Files volumes
Azure Backup for AKS allows you to restore your Azure Files-based persistent volumes from any recovery point. You can restore to the original cluster or to an alternate cluster within the same subscription and region.
Important
Before performing a restore, ensure that the persistent volumes have the Reclaim Policy set to Retain. This ensures that snapshots remain secure even if the PVC is deleted.
Restore to the original cluster
This scenario is useful when the application namespace, the underlying PVC, or the files within the file share have been deleted, and you need to restore them but the underlying snapshots still exist.
Before starting the restore, if the PVC still exists in the cluster, delete it:
kubectl delete pvc <pvc-name> -n <namespace>In the Azure portal, go to your Backup vault.
Select Backup instances under Manage, and then select your AKS cluster backup instance.
Select Restore at the top of the page.
On the Select recovery point page, choose the recovery point you want to restore from according to the creation time. By default, the latest recovery point is selected. Select Next.
On the Restore parameters page:
- Target cluster: Select the original AKS cluster.
- Restore configuration: Define which resources to restore. You can select specific namespaces or restore all backed-up resources.
- Conflict handling: Choose Skip to skip resources that already exist in the cluster (default option).
Select Validate to check if all required permissions are in place.
If you see a validation error for missing roles, select Assign Missing Roles to grant the required permissions. Once completed, select Revalidate.
Note
The target AKS cluster must have the Storage File Data Privileged Contributor role on the storage account hosting the file shares to perform restore operations.
Once validation succeeds, select Next, and then select Restore.
Track the restore progress in Restore Jobs under the backup instance.
Restore to an alternate cluster
You can restore your backup to a different AKS cluster within the same subscription and region.
Follow the same steps as restoring to the original cluster, but select a different Target cluster on the Restore parameters page.
Ensure that the target cluster:
- Has the Backup extension installed.
- Has Trusted Access enabled with the Backup vault.
- Has the Storage File Data Privileged Contributor role assigned on the storage account (for statically provisioned volumes, this must be assigned manually).
Complete the validation and restore process as described in the previous section.
Restore with custom storage class
If you want to restore to an alternate cluster and change the storage class of the persistent volume claim, you can use a Resource Modifier ConfigMap.
Create a YAML file for the Resource Modifier ConfigMap:
version: v1
resourceModifierRules:
  - conditions:
      groupResource: persistentvolumeclaims
    patches:
      - operation: replace
        path: "/spec/storageClassName"
        value: "azurefile-csi-premium"
Replace
azurefile-csi-premiumwith your desired storage class name.Deploy the ConfigMap to the target cluster:
kubectl create cm <configmap-name> --from-file=<path-to-yaml-file> -n <namespace>For example:
kubectl create cm resource-modifier-configmap --from-file=resource-modifier.yaml -n dataprotection-microsoftDuring the restore process, in the Restore configuration section, reference this ConfigMap under Resource Modifier.
The storage class of the restored PVCs will be replaced with the specified value.
Considerations for statically provisioned volumes
If you're restoring statically provisioned Azure Files volumes (created manually rather than dynamically by the cluster):
Ensure that you have backed up the Kubernetes secrets used to access the file shares. Enable Backup Secrets in your backup configuration.
Manually assign the Storage File Data Privileged Contributor role to the target AKS cluster on the storage account where the file shares are located or will be restored.
Ensure the file share exists in the storage account before attempting restore, or the restore operation will fail.
Verify restore completion
After the restore operation completes:
Verify that the resources have been restored to the target cluster:
kubectl get pods -n <namespace>
kubectl get pvc -n <namespace>
kubectl get pv
Check that the application can access the restored data by connecting to the pod and verifying the mounted file share:
kubectl exec -it <pod-name> -n <namespace> -- ls /mnt/azureVerify the file share snapshot is still available in the storage account for future restores.
Note
The restore process leverages AzCopy to copy data from the snapshot to the target Azure File volume. Since this involves a full data copy operation, it can take some time depending on the volume size and throughput. As a result, the restored volume may become available before the data copy is fully completed, and you may temporarily observe the volume mounted but without the expected data until the AzCopy operation finishes.
Clean up resources
If you created resources for this tutorial that you no longer need, you can clean them up:
- Delete the backup instance from the Backup vault if you no longer need to retain backups.
- Stop protection for the AKS cluster if you're not continuing with regular backups.
- Remove the Backup extension from the AKS cluster if you no longer require backup functionality.
Next steps
Now that you've learned how to configure backup and restore for AKS clusters with Azure Files volumes, explore: