Note
Access to this page requires authorization. You can try signing in or changing directories.
Access to this page requires authorization. You can try changing directories.
This tutorial describes how to review and modify the security level for protected items in Azure Business Continuity Center.
Azure Backup provides security features at the vault level to safeguard the backup data stored in it. These security measures encompass the settings associated with the Azure Backup solution for the vault and apply to the protected data sources contained within the vault.
Azure Business Continuity Center allows you to view the security level for each protected item from the security posture view.
View security level
To view the security level for protected items, follow these steps:
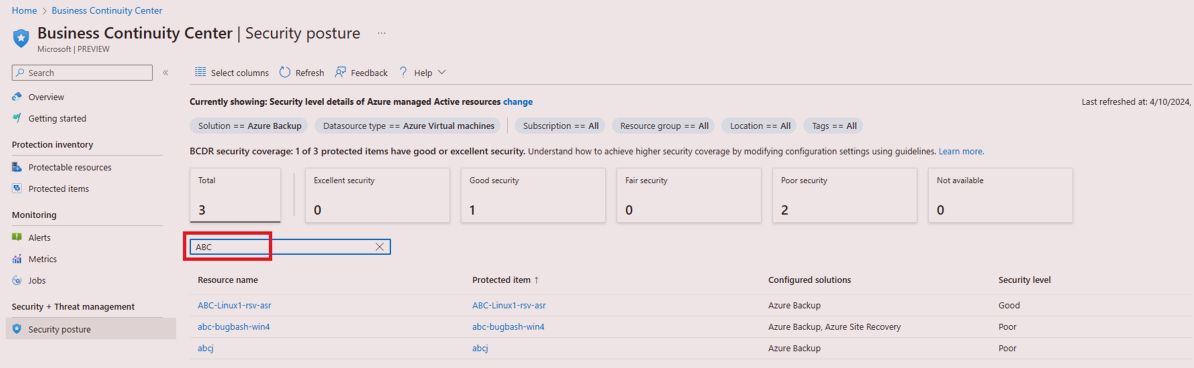
On Business Continuity Center, go to Security + Threat management > Security posture.

On Security posture, you can see a list of all the protected items and their security level across subscription, resource groups, location, type, and so on, along with their properties.
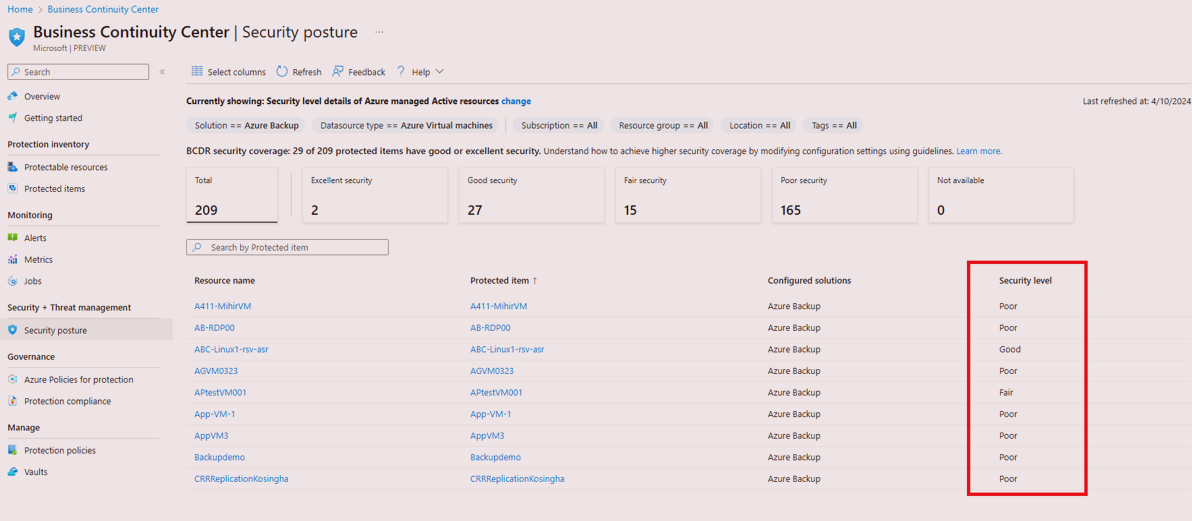
To effectively look for specific items, use the filters, such as subscriptions, resource groups, location, resource type, and so on.
To change the default view in Azure Business Continuity Center using the scope picker from Currently showing: Protection status details of Azure managed Active resources, select Change.
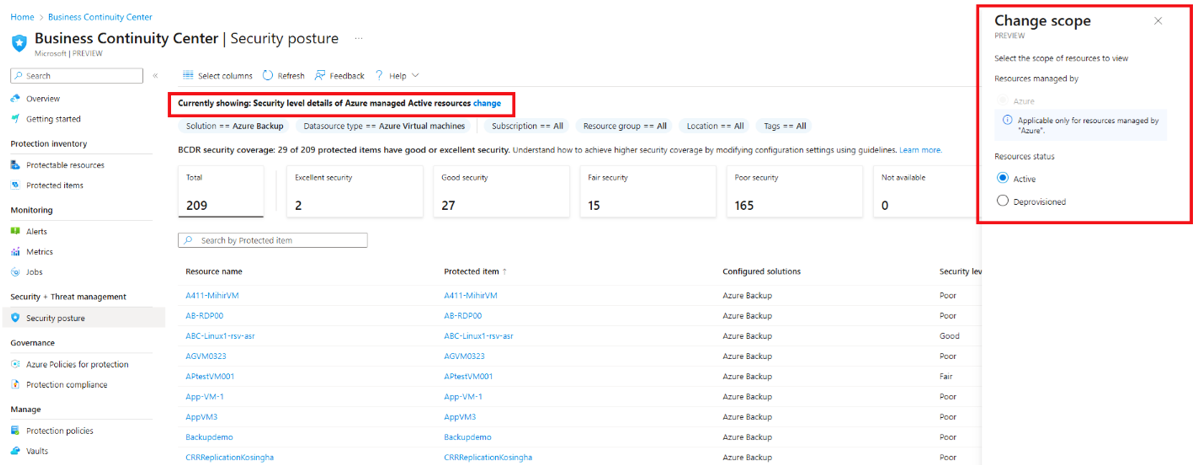
On the Change scope blade, to change the scope for Security posture view from the scope picker, select the following options, and select Update.
- Resource status:
- Active resources - Resources that are currently active, which are not deleted.
- Deprovisioned resources - Describes resources that no longer exist, yet their backup and recovery points are retained.
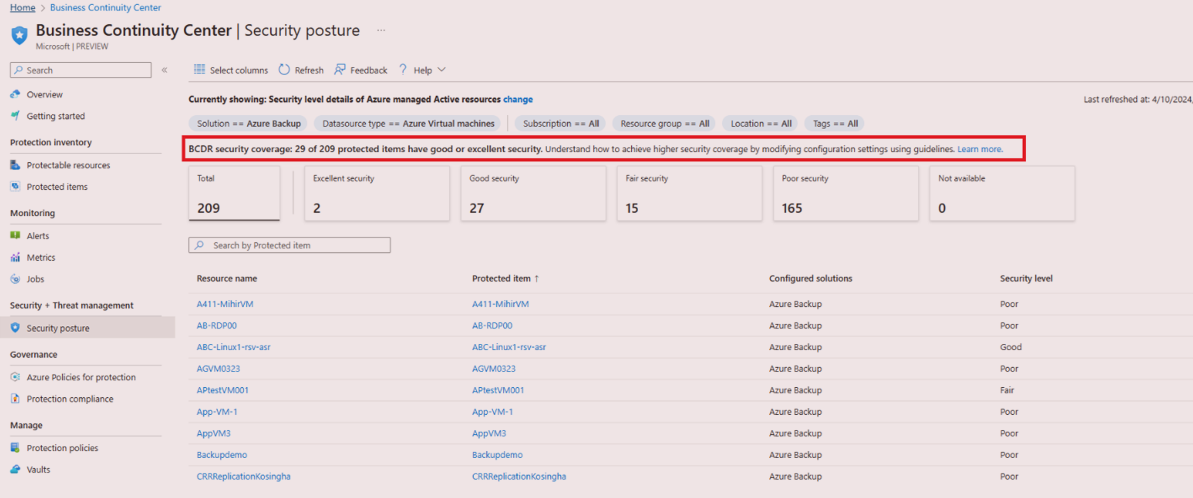
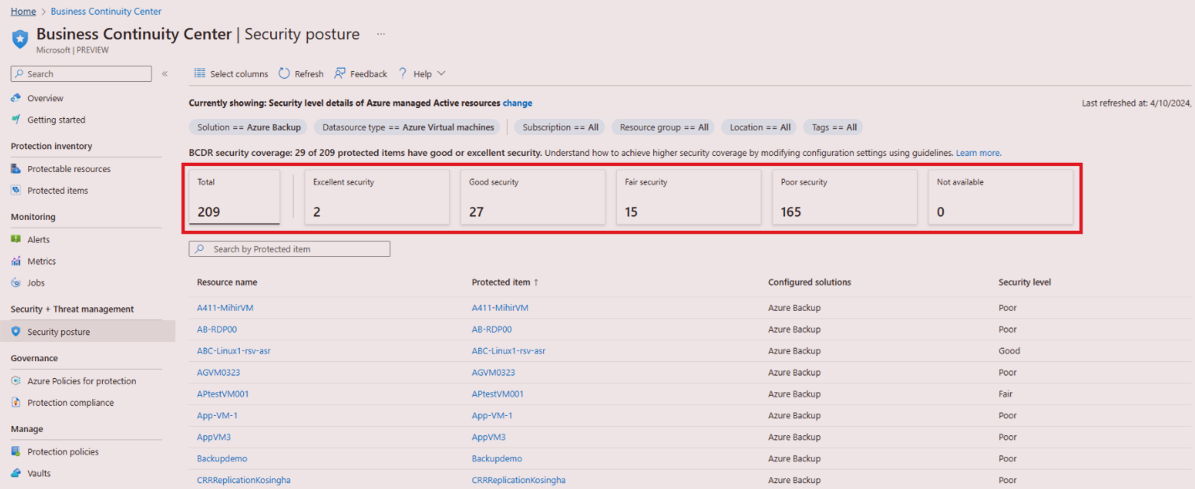
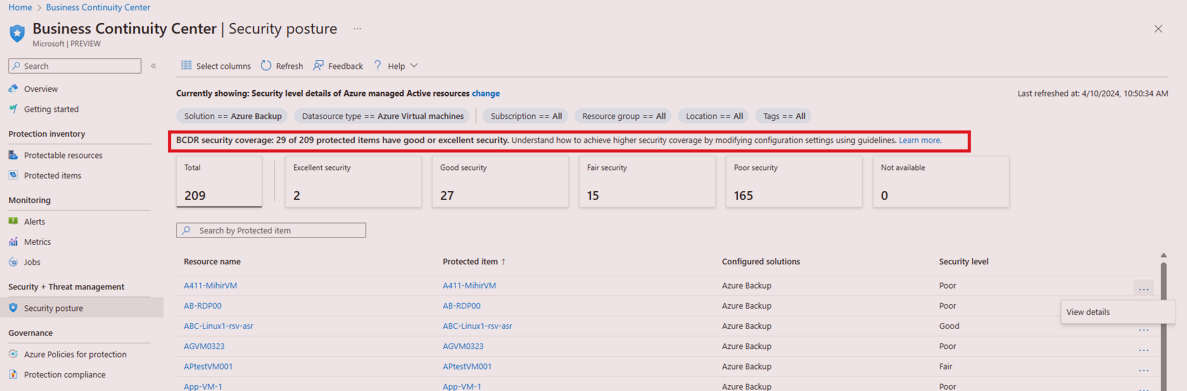
The BCDR Security assessment score shows the percentage and count of the protected items having adequate or maximum security.
- Resource status:
On Security posture, the summary cards display an aggregated count for each security level, considering the applied filters. Select these cards to refine the filtering of the Protected items table.
The security level shows the security settings configured through the implemented solutions for data protection.
To get information for a specific item, search by the item name.
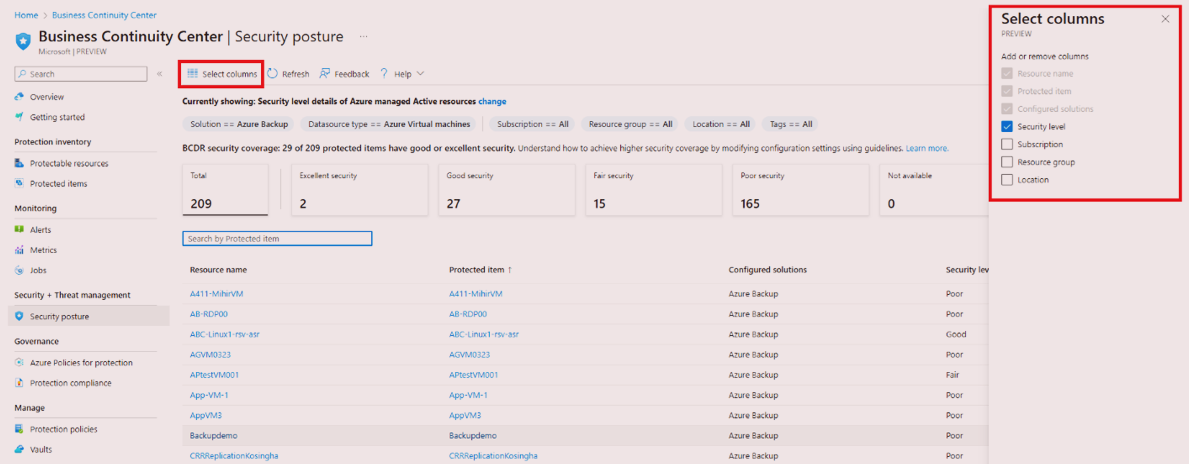
Use Select columns to add or remove columns.
Select the item name or select the more icon … > View details action menu to navigate and view further details for an item.

Azure Business Continuity Center provides in-built help to learn more about these security levels. Select learn more to access it.
On the Security level details blade, the help provides guidance on the various security levels and the settings that are required to meet each level.


Modify security level
In Azure Business Continuity Center, you can change the security level for a protected item.
To modify the security level for an item, follow these steps:
On Business Continuity Center, go to Security + Threat management > Security posture, and then select an item name for a datasource.

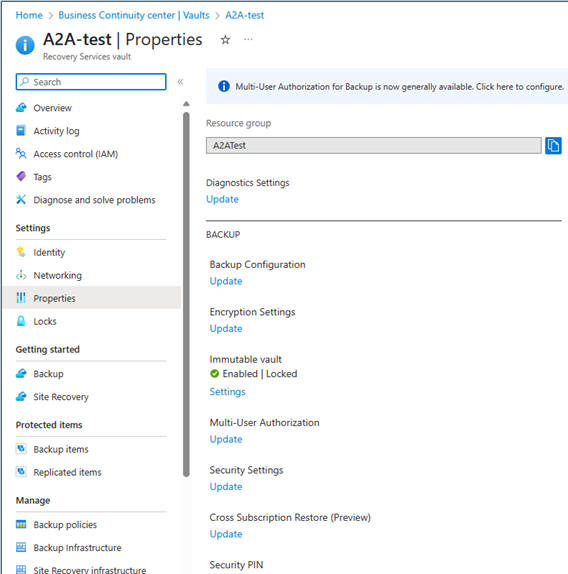
On the item details page, you can view the vault used to protect the item. Select the vault name.
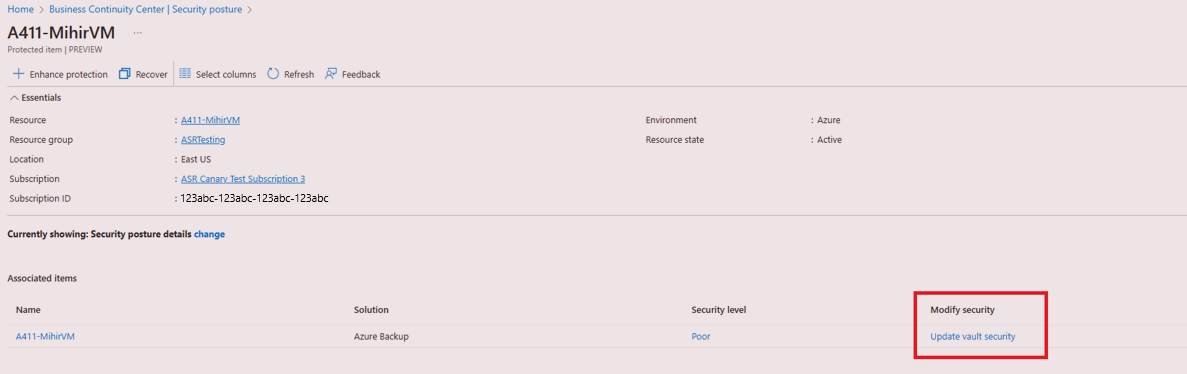
On the vault properties page, modify the security settings as required.
It might take a while to get the security level settings implemented in Azure Business Continuity Center.
When you modify the security setting for a vault, it gets applied to all the protected datasources by Azure Backup in that vault.

