Note
Access to this page requires authorization. You can try signing in or changing directories.
Access to this page requires authorization. You can try changing directories.
This article describes how to use a Microsoft Entra application to create the authentication credentials for using Simple Mail Transfer Protocol (SMTP) to send an email using Azure Communication Services.
Prerequisites
- An Azure account with an active subscription. Create an account for free.
- An Azure Communication Email Resource created and ready with a provisioned domain. Get started with Creating Email Communication Resource
- An active Azure Communication Services Resource connected with Email Domain and a Connection String. Get started by Connecting Email Resource with a Communication Resource
- A Microsoft Entra application with access to the Azure Communication Services Resource. Register an application with Microsoft Entra ID and create a service principal
- A client secret for the Microsoft Entra application with access to the Azure Communication Service Resource. Create a new client secret
Use a Microsoft Entra application for SMTP authentication
Application developers who build apps that send email using the SMTP protocol need to implement secure, modern authentication. Azure Communication Services uses Microsoft Entra application service principals to provide secure authentication. Link a Microsoft Entra application to the Communication Service resource by creating an SMTP Username resource.
The SMTP service uses the Microsoft Entra application information linked to the SMTP username to authenticate with Microsoft Entra on the user's behalf to ensure a secure and seamless email transmission. SMTP username resources are user-defined and can use either email format or freeform. If an SMTP username uses the email format, the domain must be one of the Communication Service resource's linked domains.
Assign a role to the Microsoft Entra application
You also need to give the Microsoft Entra application access to the Communication resource using either a built-in role or a custom role with the required permissions.
Assign the built-in Communication and Email Service Owner role to the Microsoft Entra application
Assign the Communication and Email Service Owner role to a Microsoft Entra application to give it access to a Communication Service resource.
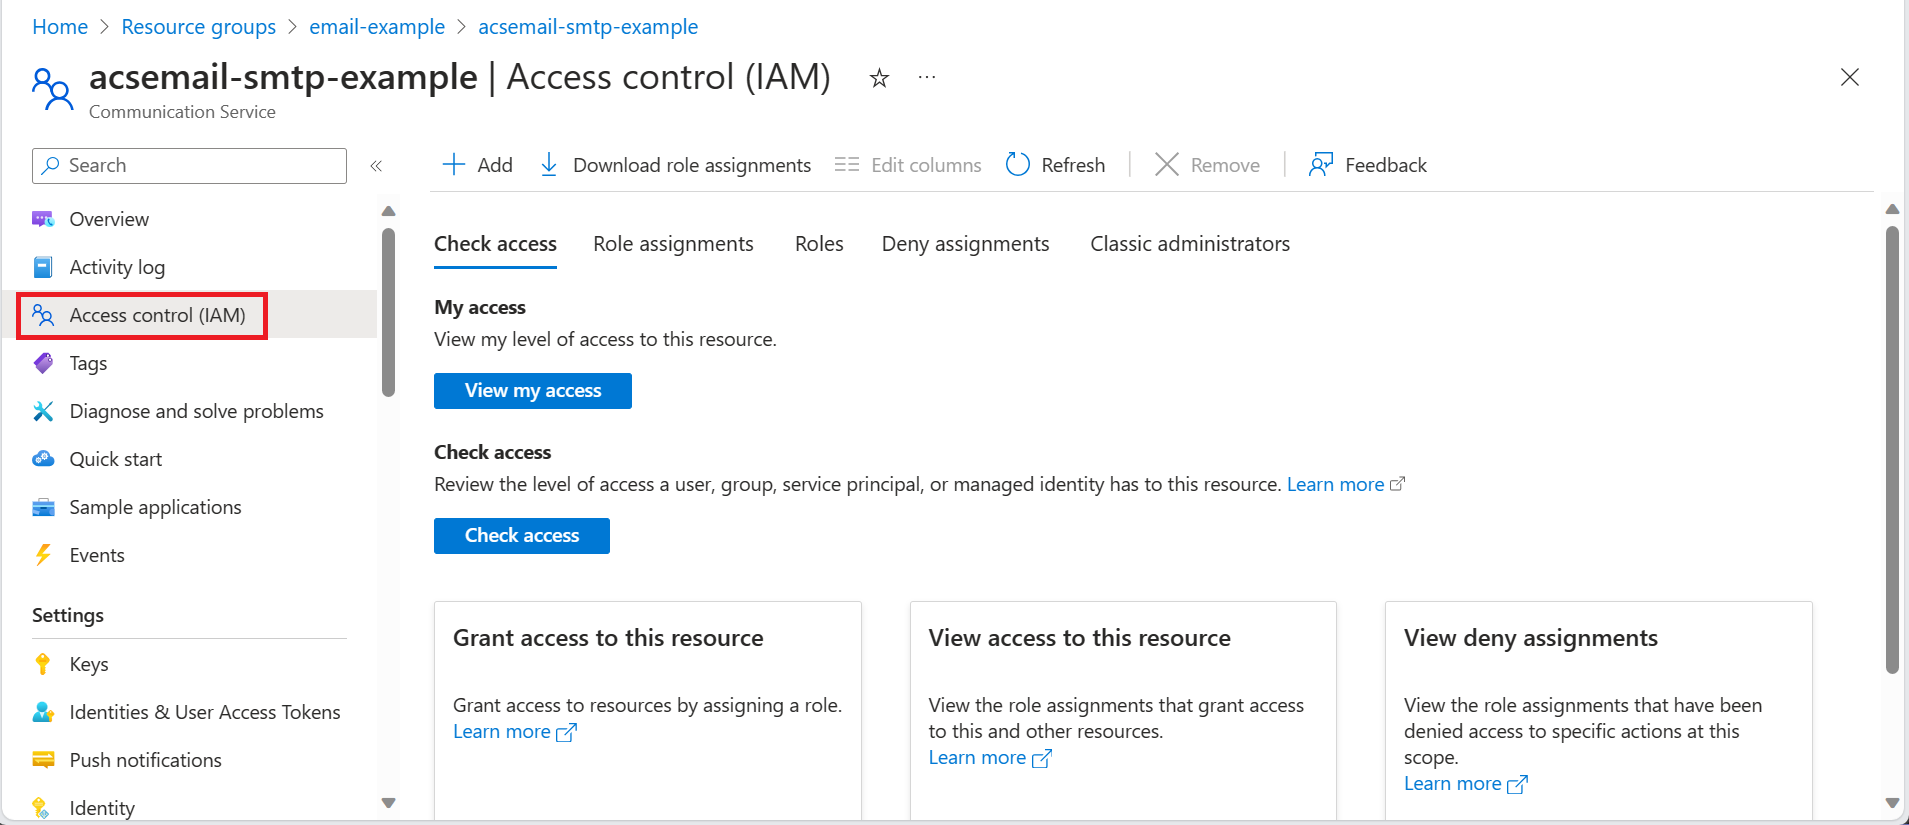
- In the portal, navigate to the Azure Communication Service Resource used to send emails using SMTP and then open Access control (IAM).
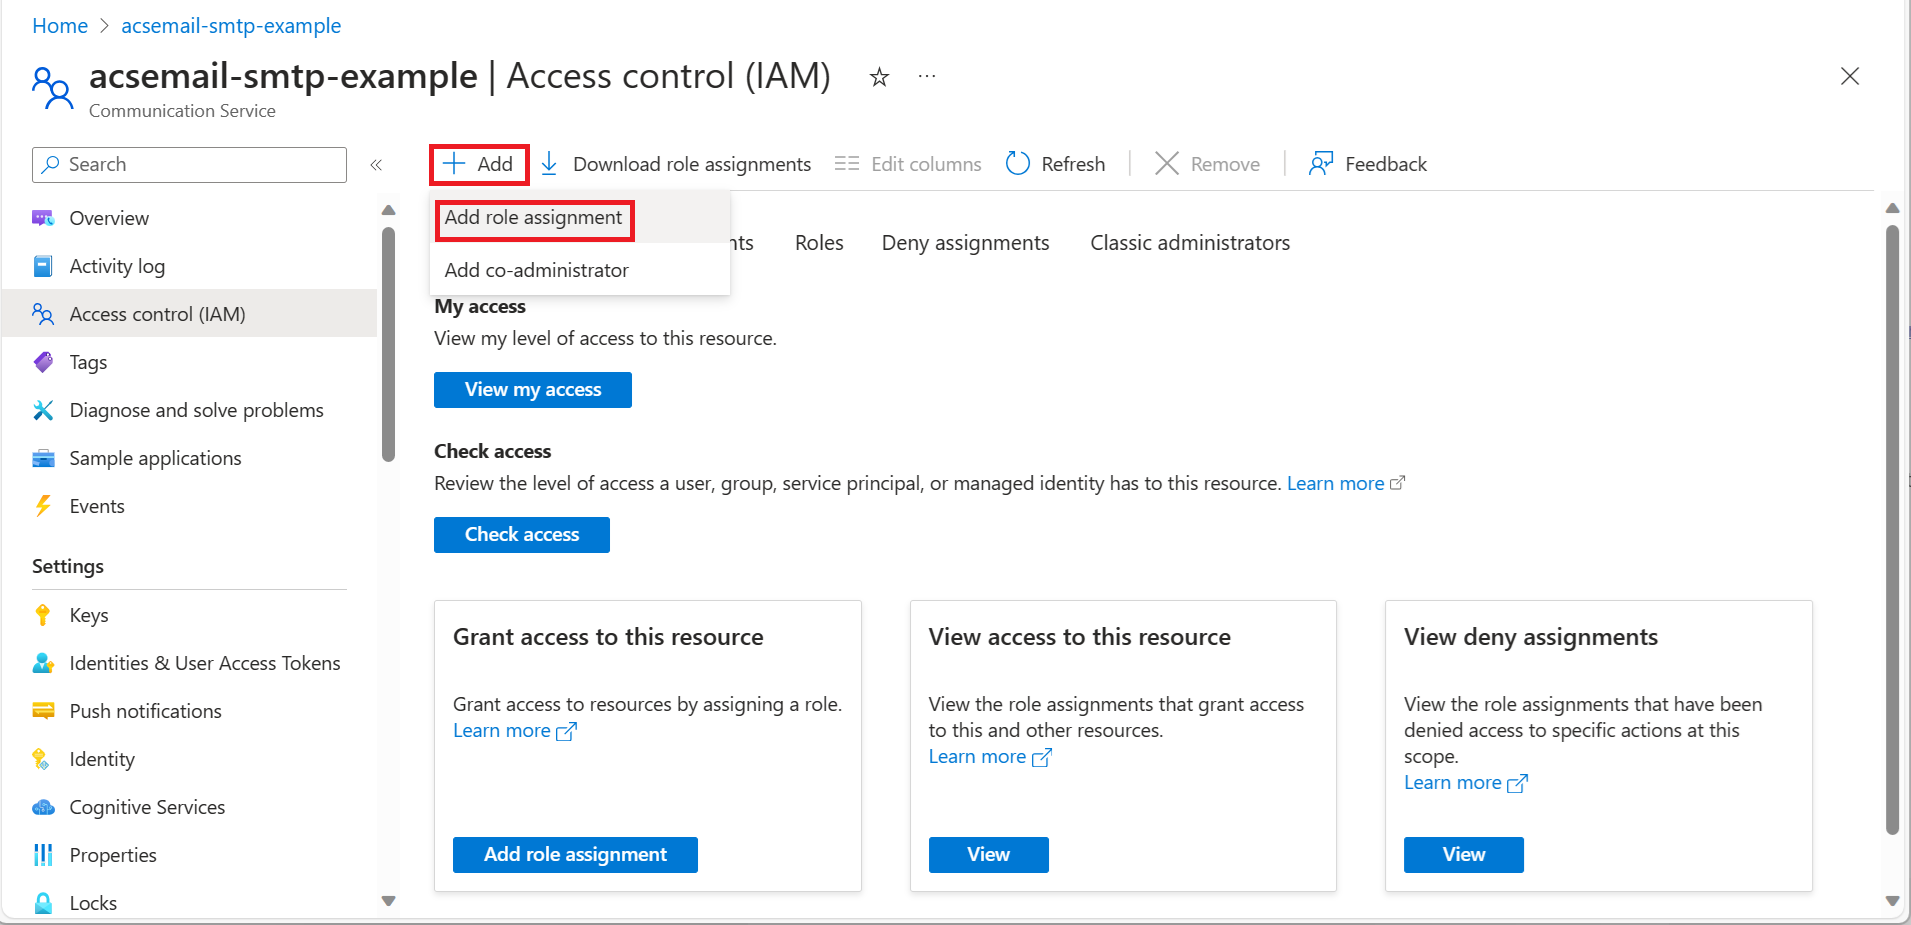
- Click +Add and then select Add role assignment.
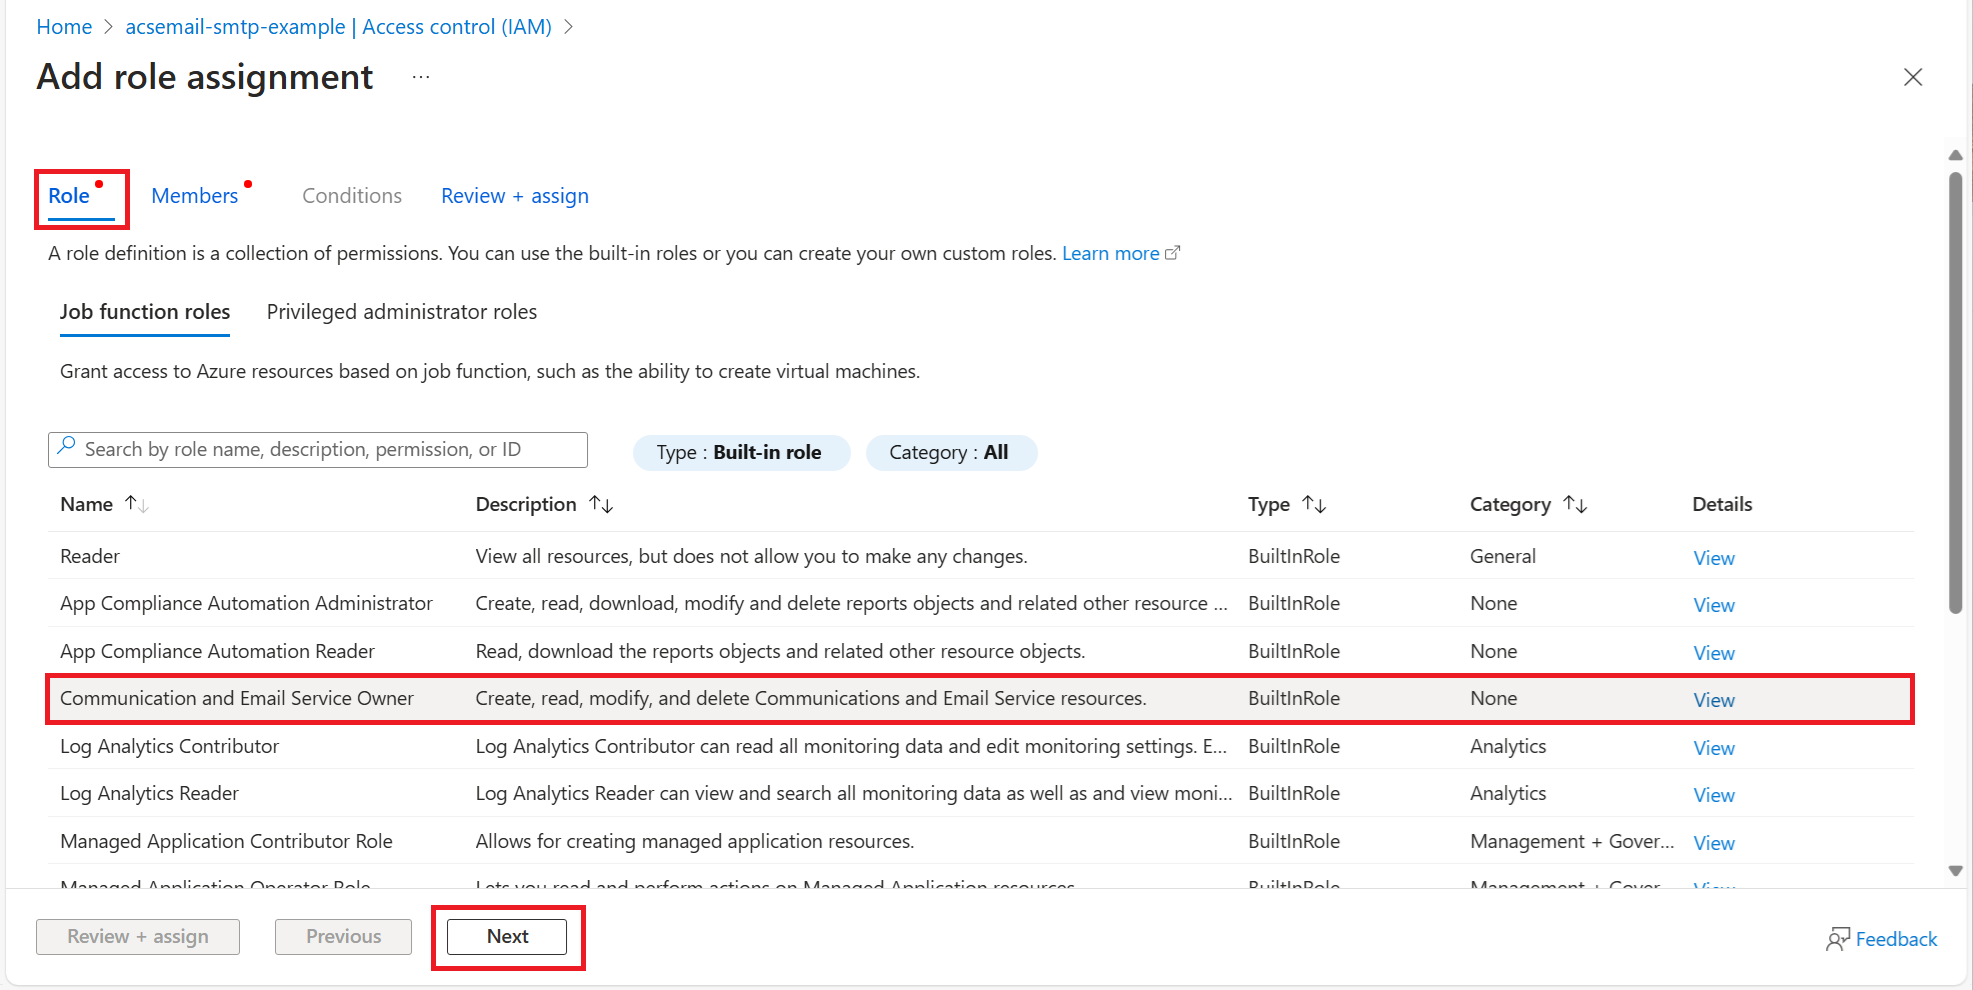
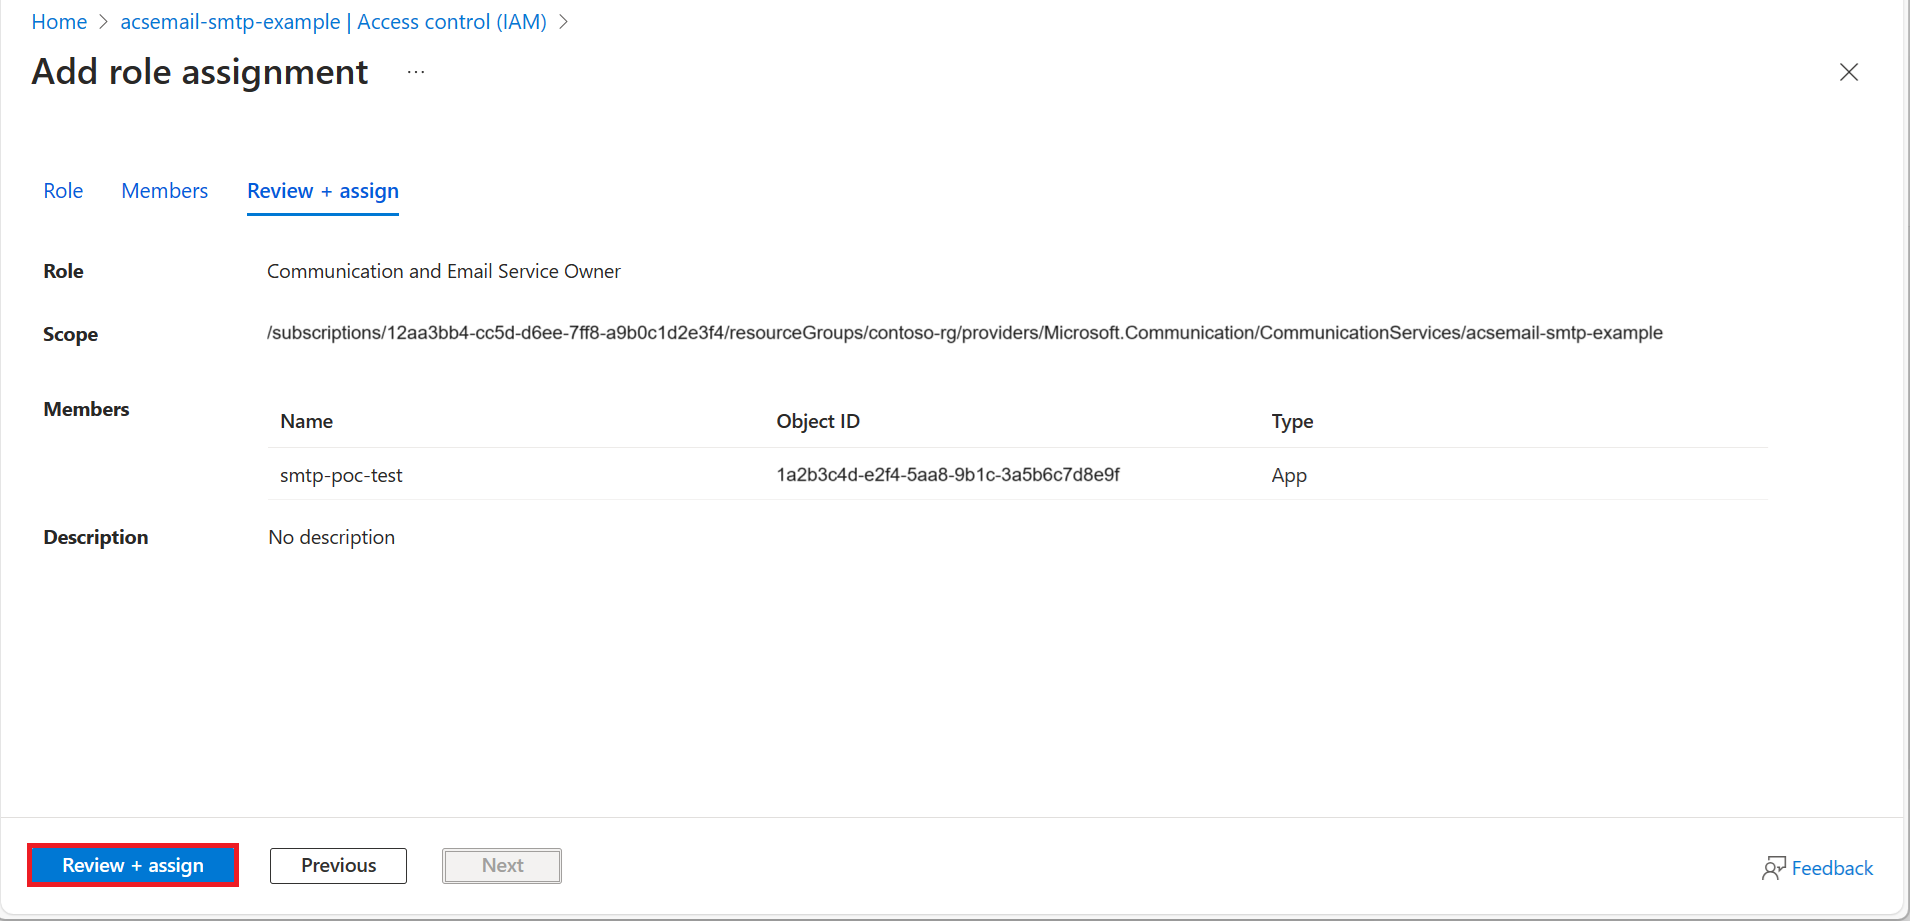
- On the Role tab, select the Communication and Email Service Owner role for sending emails using SMTP and click Next.
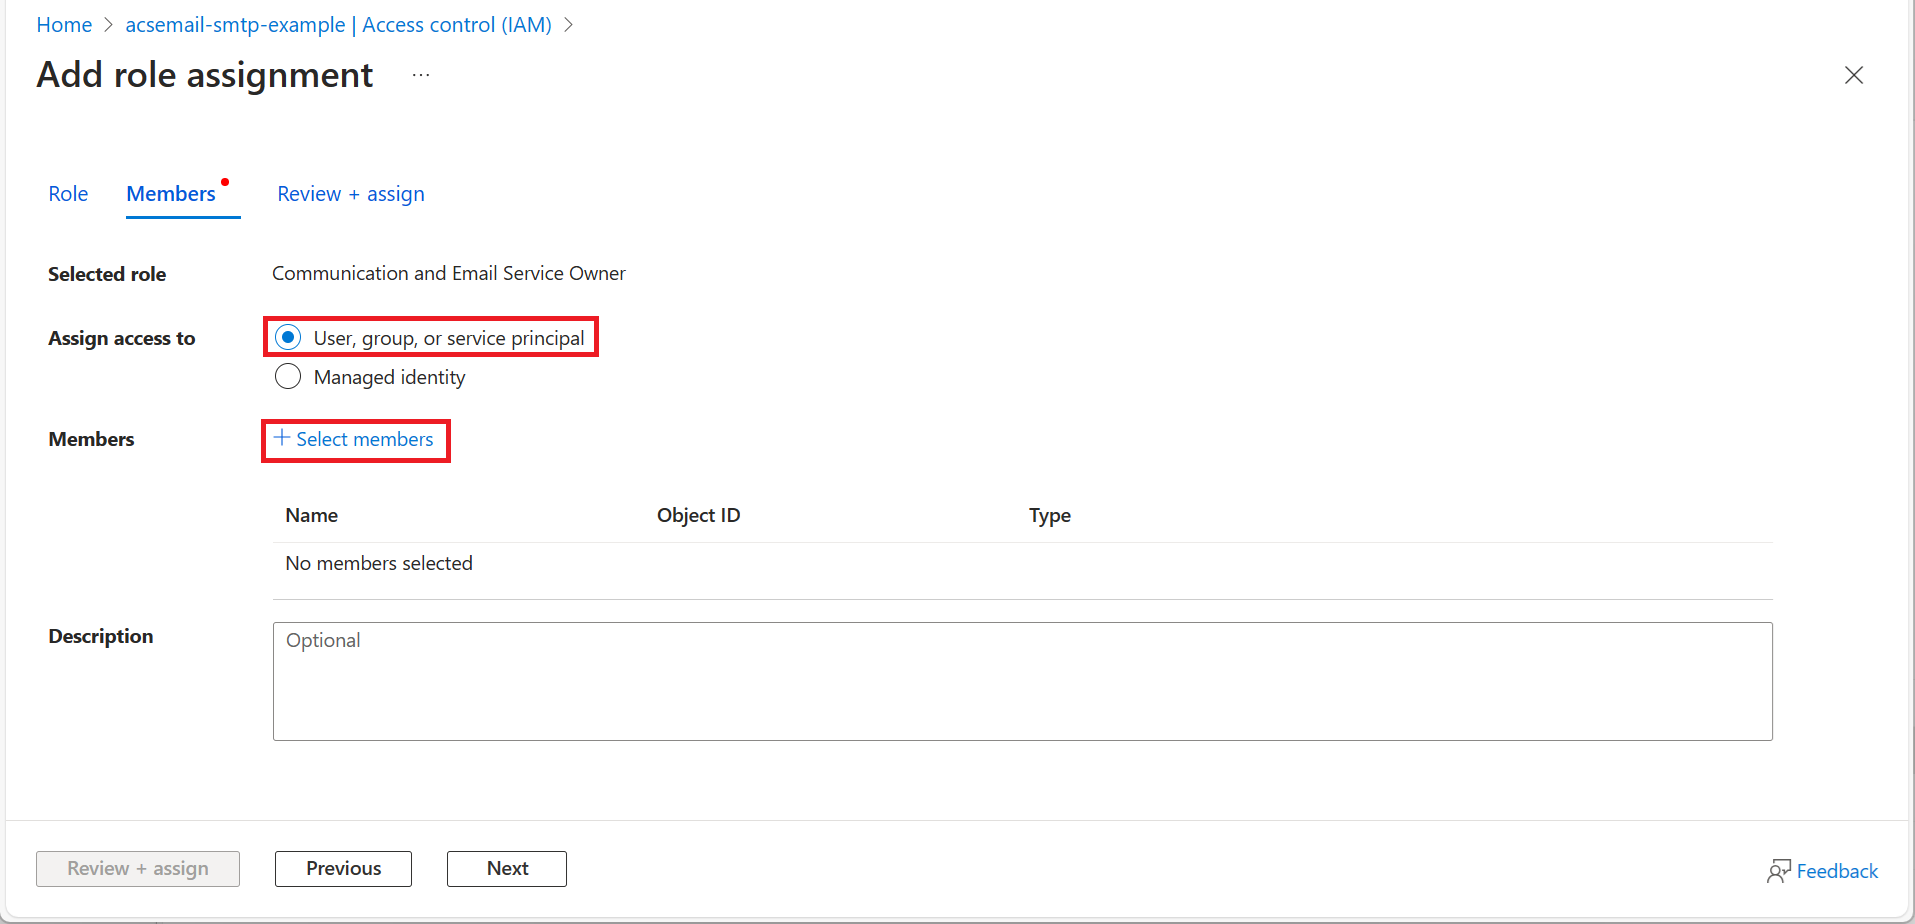
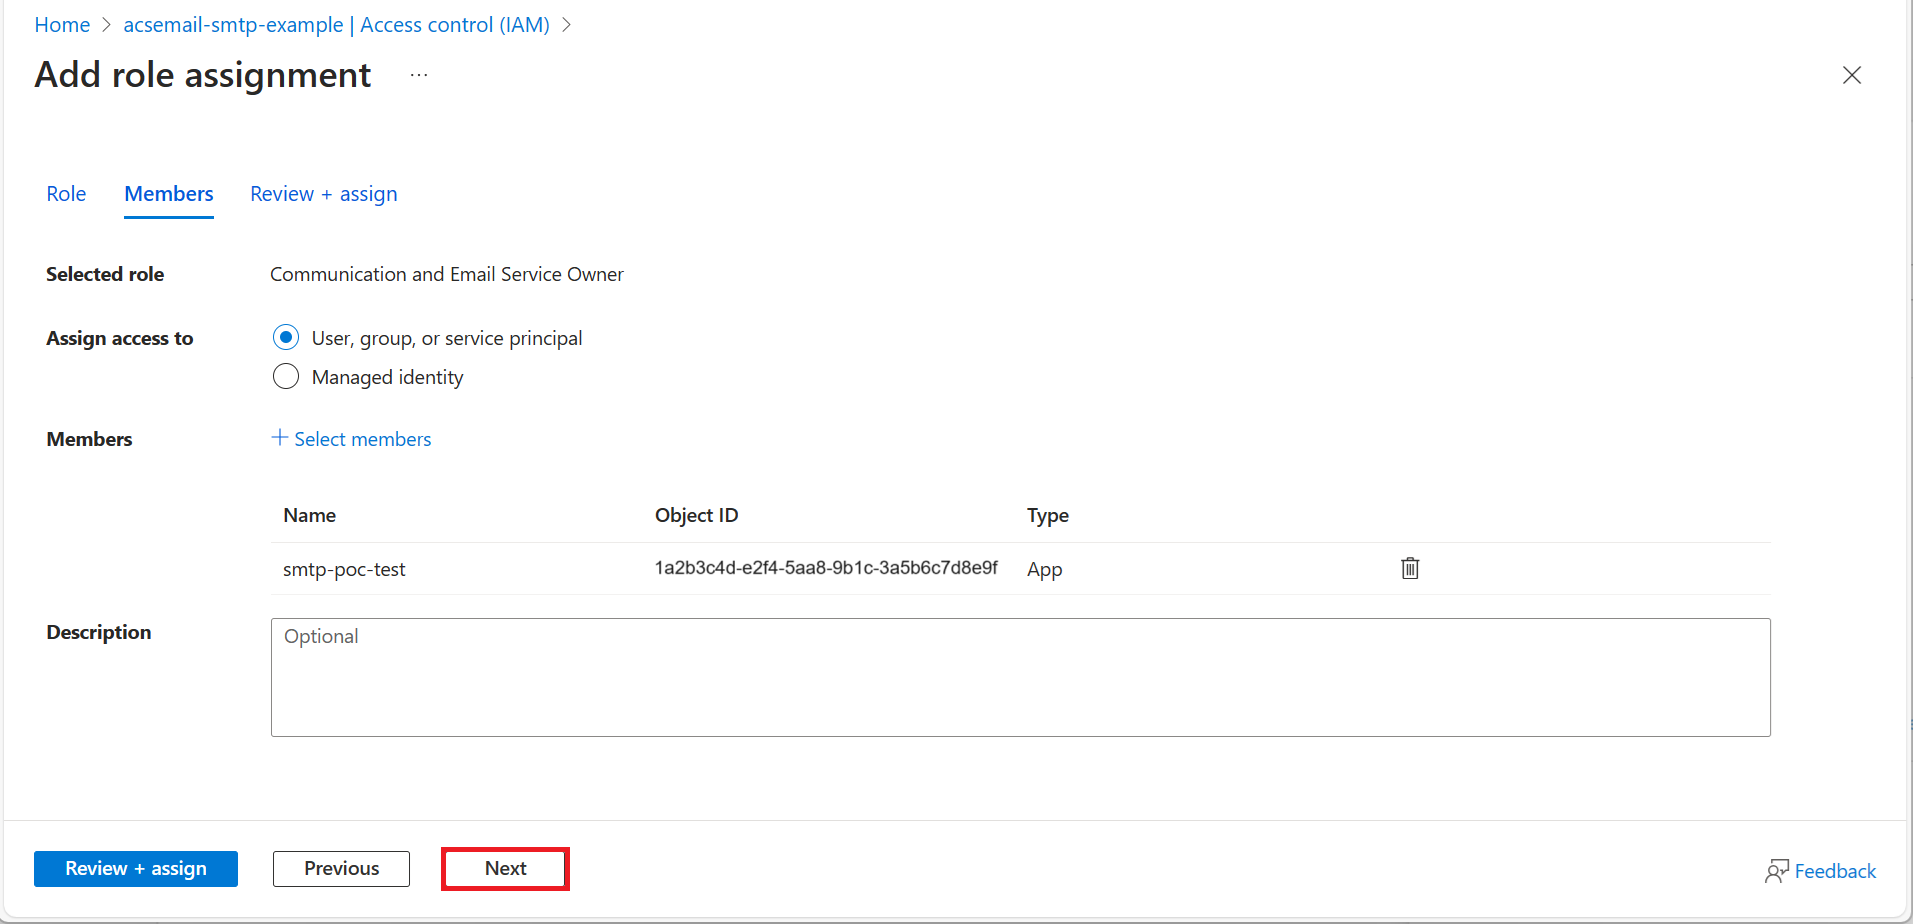
- On the Members tab, choose User, group, or service principal and then click +Select members.
- Use the search box to find the Microsoft Entra application that you use for authentication and select it. Then click Select.
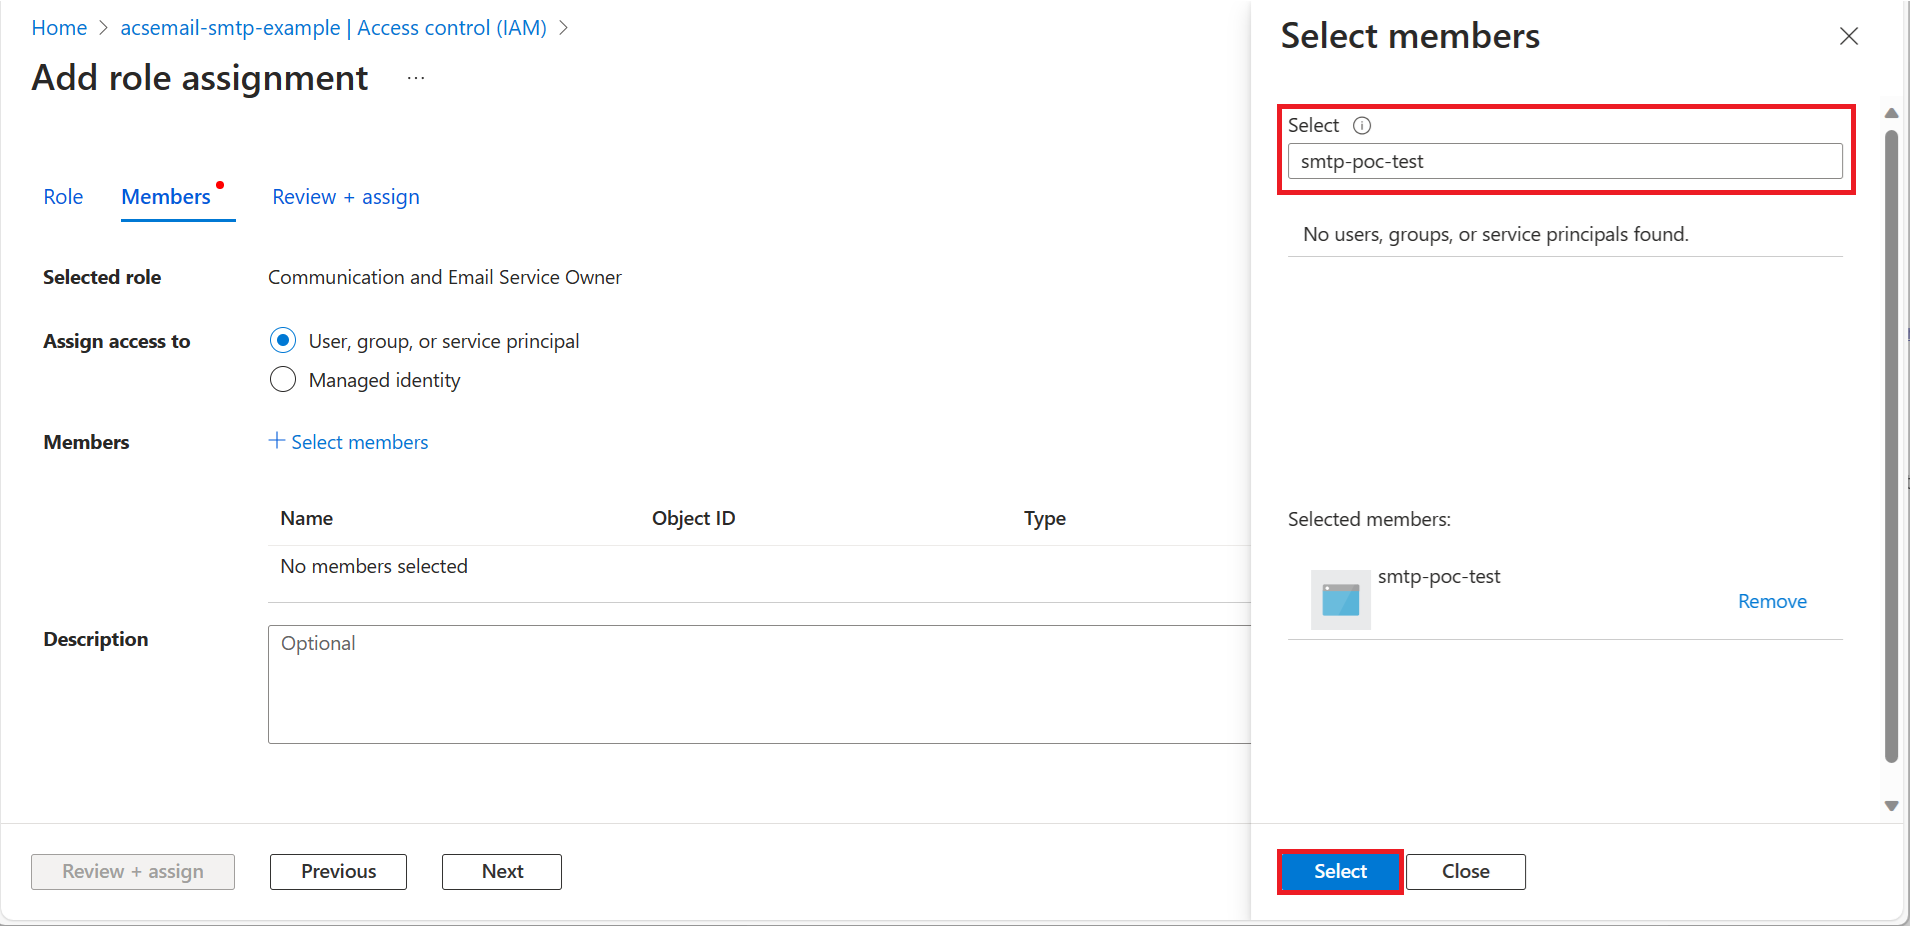
- After confirming the selection, click Next.
- After confirming the scope and members, click Review + assign.


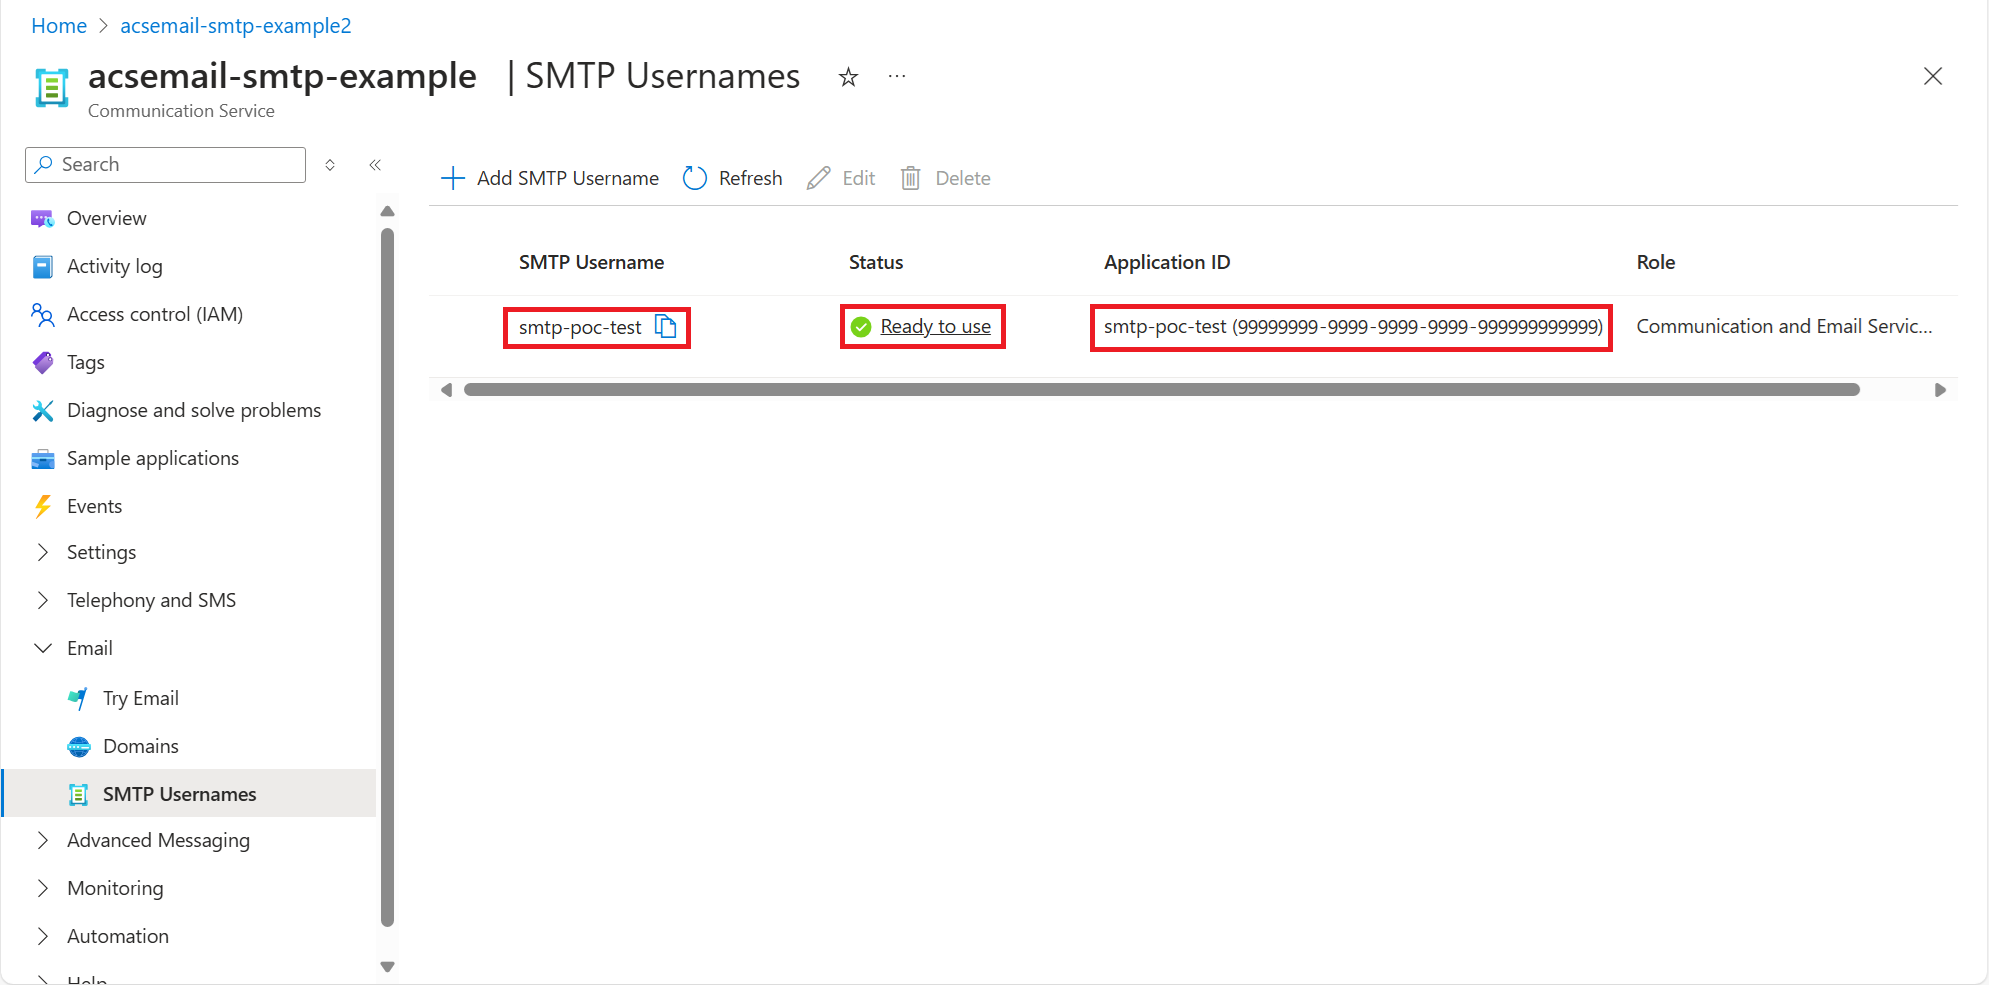
Create an SMTP Username using the Azure portal
- In the portal, navigate to the Azure Communication Service Resource and then open SMTP Usernames.
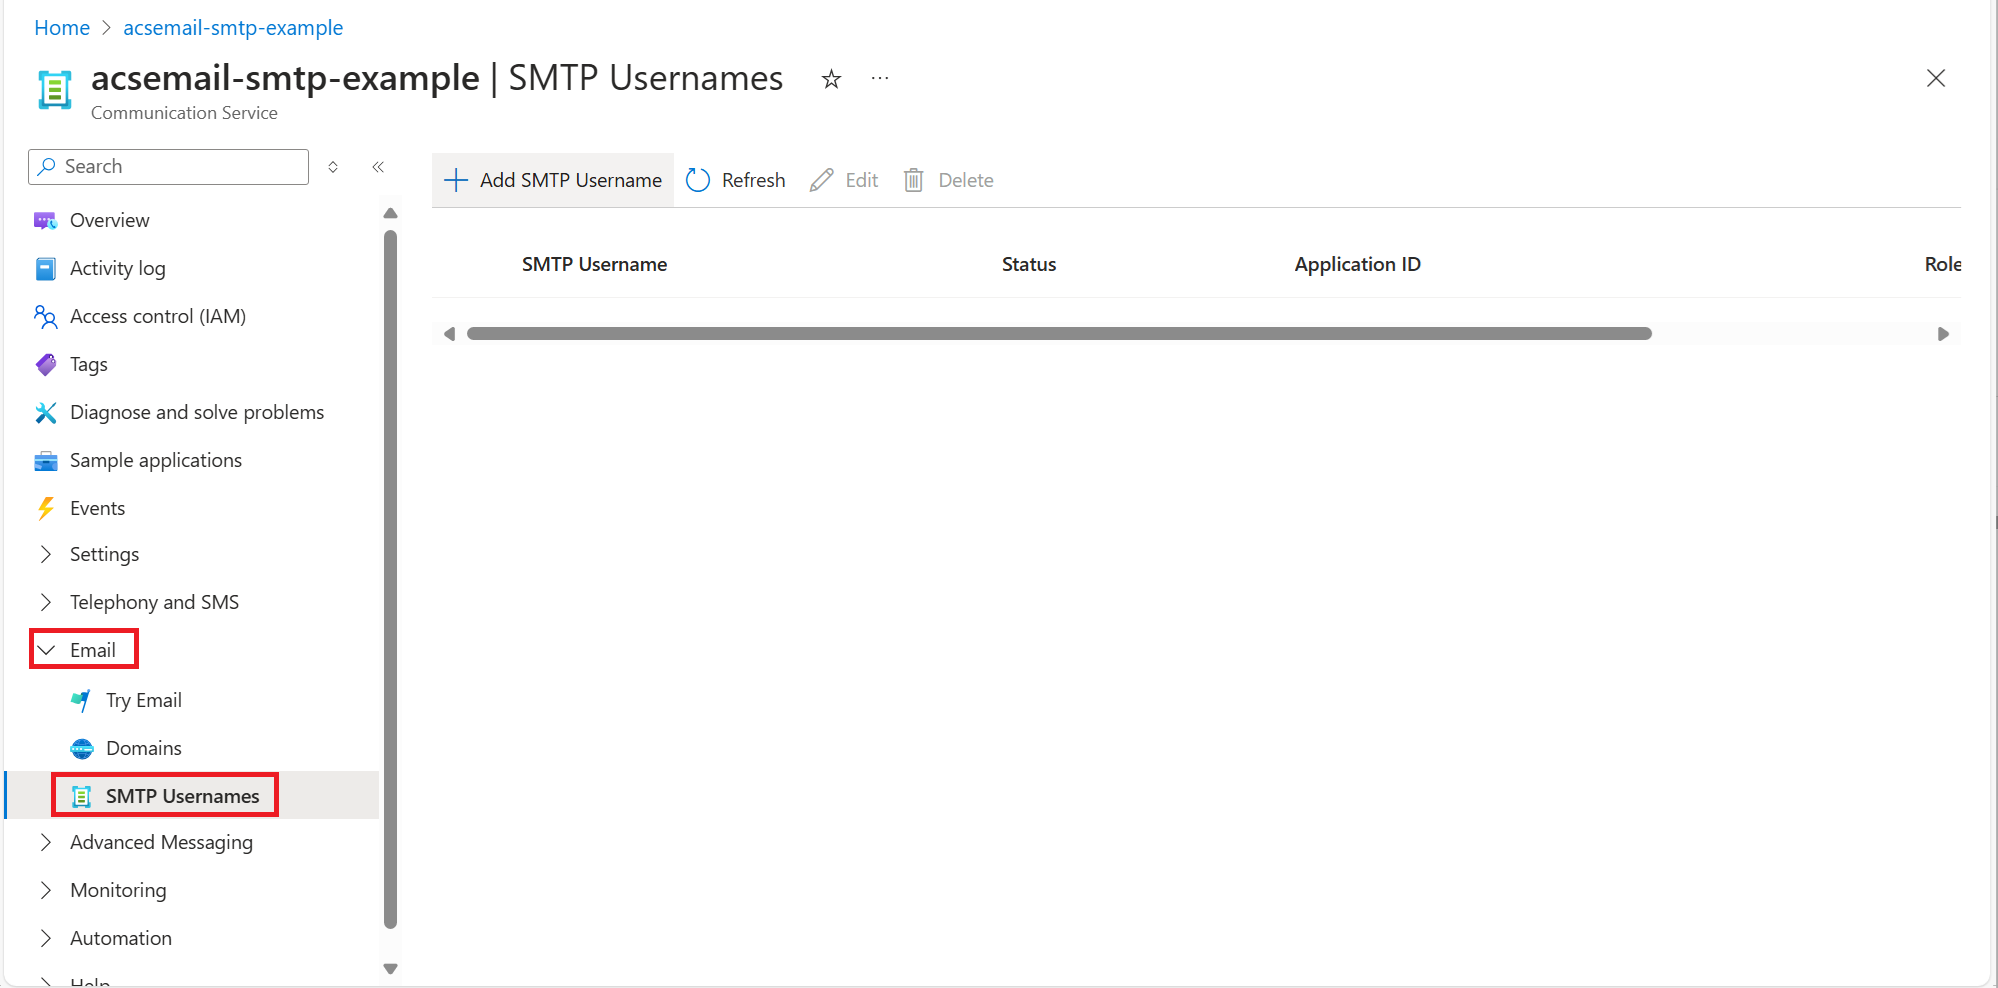
- Click +Add SMTP Username and then select the Microsoft Entra application. If the Microsoft Entra application doesn't appear in the drop-down, see the previous steps to assign a role. The username can be custom text or an email address.
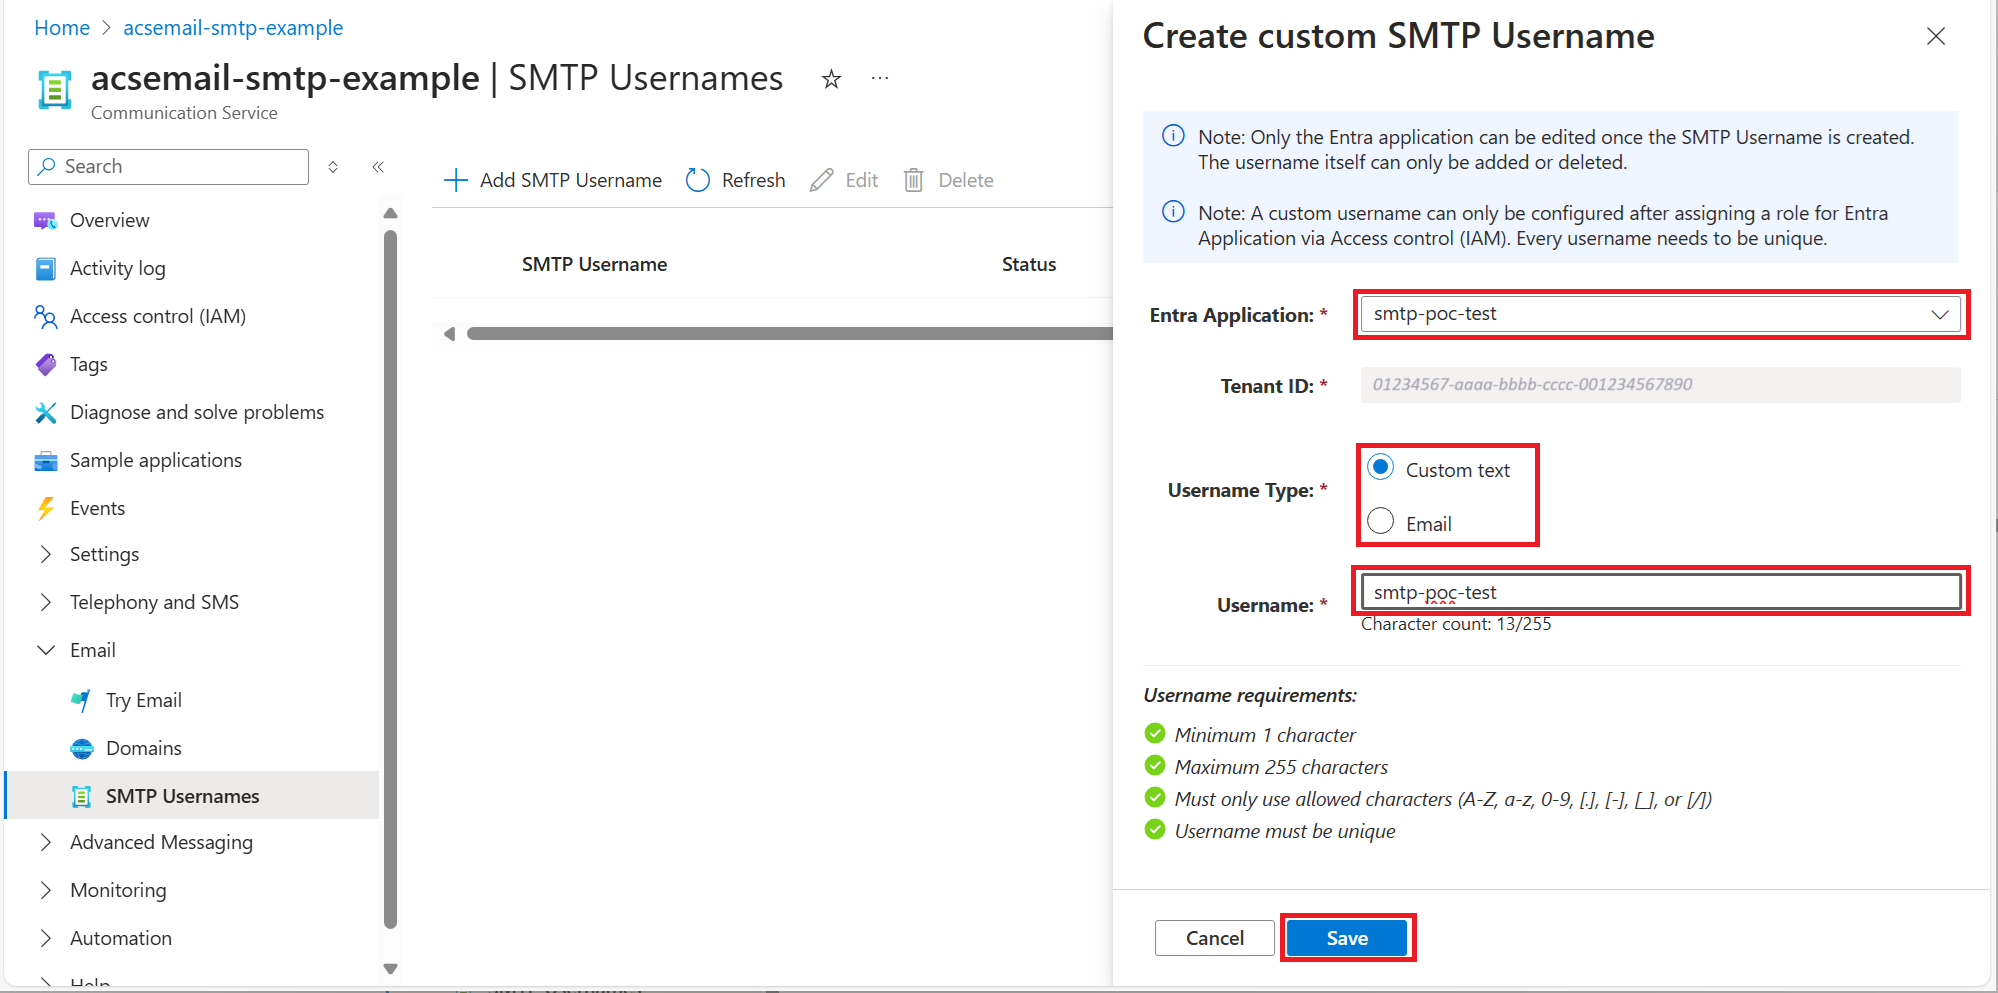
- Verify the SMTP Username is in the list. The status changes to Ready to use once all of the requirements for sending an email using the username and SMTP are met.


SMTP authentication password
The password is one of the Microsoft Entra application's client secrets.

Requirements for SMTP AUTH client submission
- Authentication: Username and password authentication is supported using an SMTP username linked to Microsoft Entra application details. The Azure Communication Services SMTP service uses the Microsoft Entra application user's details to get an access token on behalf of the user and uses that to submit the email.
- Azure Communication Service: An Azure Communication Services Resource with a connected Azure Communication Email Resource and domain is required.
- Transport Layer Security (TLS): Your device must be able to use TLS version 1.2 and above.
- Port: Port 587 (recommended) or port 25 is required and must be unblocked on your network. Some network firewalls or ISPs block ports because that's the port that email servers use to send mail.
- DNS: Use the DNS name smtp.azurecomm.net. Don't use an IP address for the Microsoft 365 or Office 365 server, as IP Addresses aren't supported.
How to set up SMTP AUTH client submission
Enter the following settings directly on your device or in the application as their guide instructs (it might use different terminology than this article). Provided your scenario aligns with the prerequisites for SMTP AUTH client submission, these settings enable you to send emails from your device or application using SMTP Commands.
| Device or Application setting | Value |
|---|---|
| Server / smart host | smtp.azurecomm.net |
| Port | Port 587 (recommended) or port 25 |
| TLS / StartTLS | Enabled |
| Username and password | Enter the SMTP Username and one Microsoft Entra application's client secrets. |