Note
Access to this page requires authorization. You can try signing in or changing directories.
Access to this page requires authorization. You can try changing directories.
You can use Azure Communication Services to add real-time communications to your applications. In this tutorial, you'll learn how to set up a web application that supports Azure Communication Services. This is an introductory tutorial for new developers who want to get started with real-time communications.
By the end of this tutorial, you'll have a baseline web application that's configured with Azure Communication Services SDKs. You can then use that application to begin building your real-time communications solution.
Feel free to visit the Azure Communication Services GitHub page to provide feedback.
In this tutorial, you learn how to:
- Configure your development environment.
- Set up a local web server.
- Add the Azure Communication Services packages to your website.
- Publish your website to Azure static websites.
Prerequisites
- An Azure account with an active subscription. For details, see Create an account for free. The free account gives you $200 in Azure credits to try out any combination of services.
- Visual Studio Code for editing code in your local development environment.
- webpack to bundle and locally host your code.
- Node.js to install and manage dependencies like Azure Communication Services SDKs and webpack.
- nvm and npm to handle version control.
- The Azure Storage extension for Visual Studio Code. You need this extension to publish your application in Azure Storage. Read more about hosting static websites in Azure Storage.
- The Azure App Service extension. The extension allows deploying websites with the option to configure fully managed continuous integration and continuous delivery (CI/CD).
- The Azure Functions extension to build your own serverless applications. For example, you can host your authentication application in Azure Functions.
- An active Communication Services resource and connection string. Learn how to create a Communication Services resource.
- A user access token. For instructions, see the quickstart for creating and managing access tokens or the tutorial for building a trusted authentication service.
Configure your development environment
Your local development environment will be configured like this:
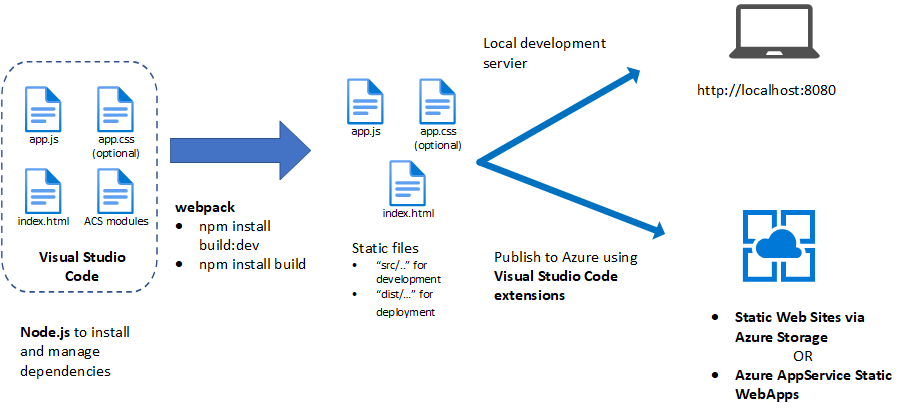
Install Node.js, nvm, and npm
We'll use Node.js to download and install various dependencies that we need for our client-side application. We'll use it to generate static files that we'll then host in Azure, so you don't need to worry about configuring it on your server.
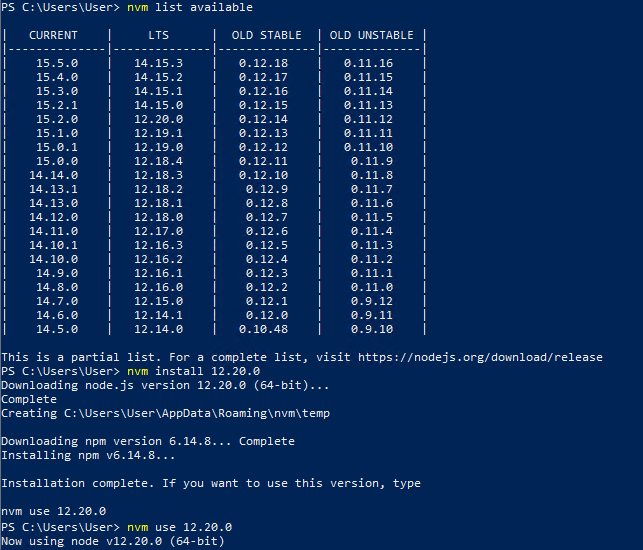
Windows developers can follow this Node.js tutorial to configure Node, nvm, and npm.
This tutorial is based on the LTS 12.20.0 version. After you install nvm, use the following PowerShell command to deploy the version that you want to use:
nvm list available
nvm install 12.20.0
nvm use 12.20.0
Configure Visual Studio Code
You can download Visual Studio Code on one of the supported platforms.
Create a workspace for your Azure Communication Services projects
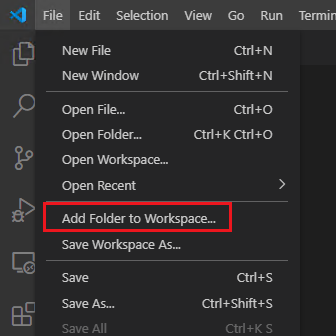
Create a folder to store your project files, like this: C:\Users\Documents\ACS\CallingApp. In Visual Studio Code, select File > Add Folder to Workspace and add the folder to your workspace.
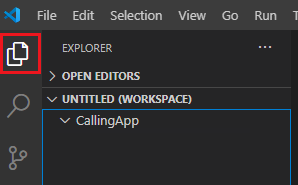
Go to EXPLORER on the left pane, and you'll see your CallingApp folder in the UNTITLED workspace.
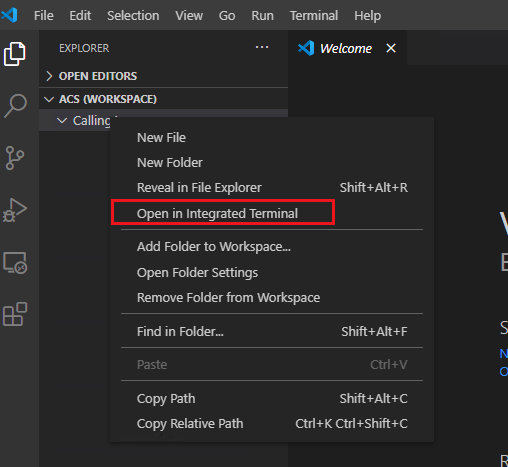
Feel free to update the name of your workspace. You can validate your Node.js version by right-clicking your CallingApp folder and selecting Open in Integrated Terminal.
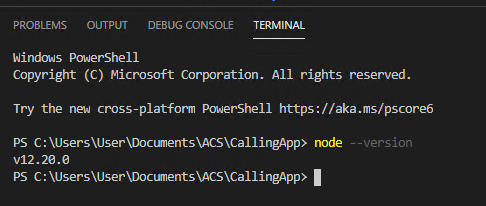
In the terminal, enter the following command to validate the Node.js version installed in the previous step:
node --version
Install Azure extensions for Visual Studio Code
Install the Azure Storage extension either through the Visual Studio marketplace or through Visual Studio Code (View > Extensions > Azure Storage).
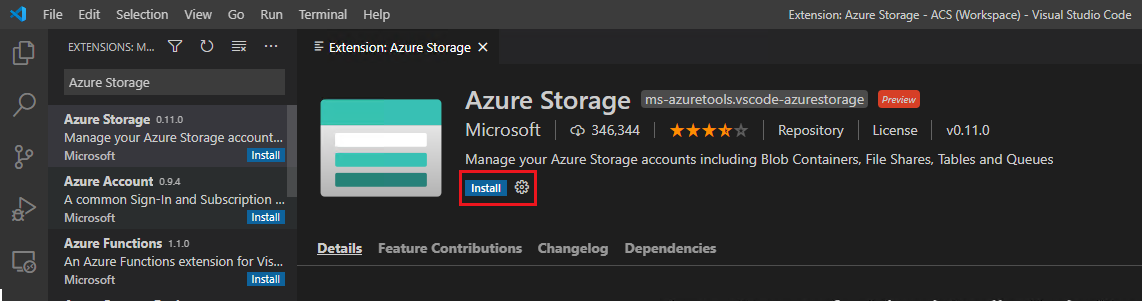
Follow the same steps for the Azure Functions and Azure App Service extensions.
Set up a local web server
Create an npm package
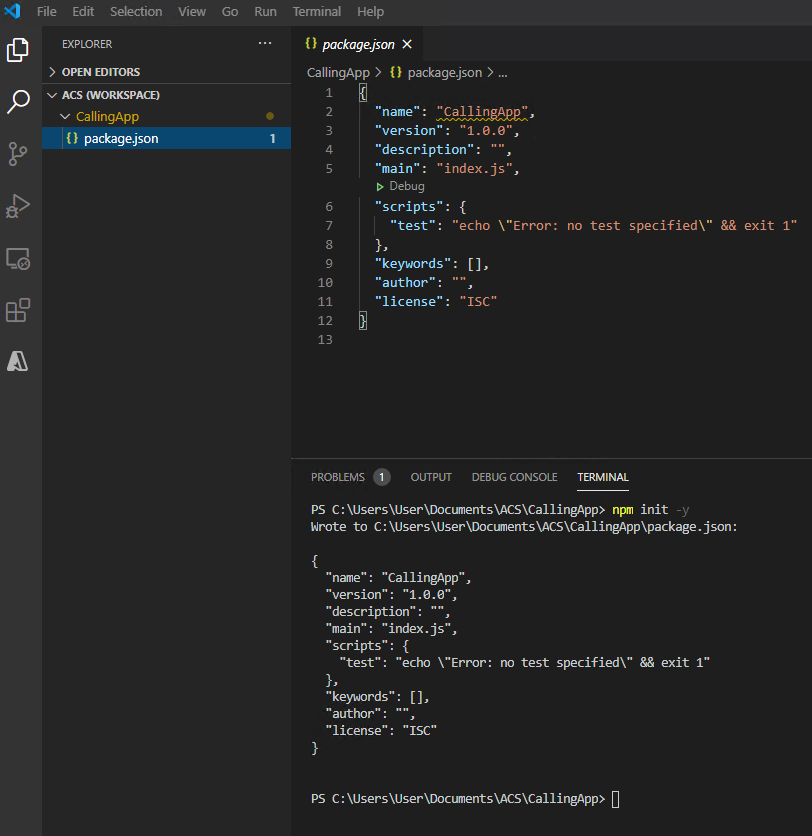
In your terminal, from the path of your workspace folder, enter:
npm init -y
This command initializes a new npm package and adds package.json into the root folder of your project.
For more documentation on the npm init, see the npm Docs page for that command.
Install webpack
You can use webpack to bundle code into static files that you can deploy to Azure. It also has a development server, which you'll configure to use with the calling sample.
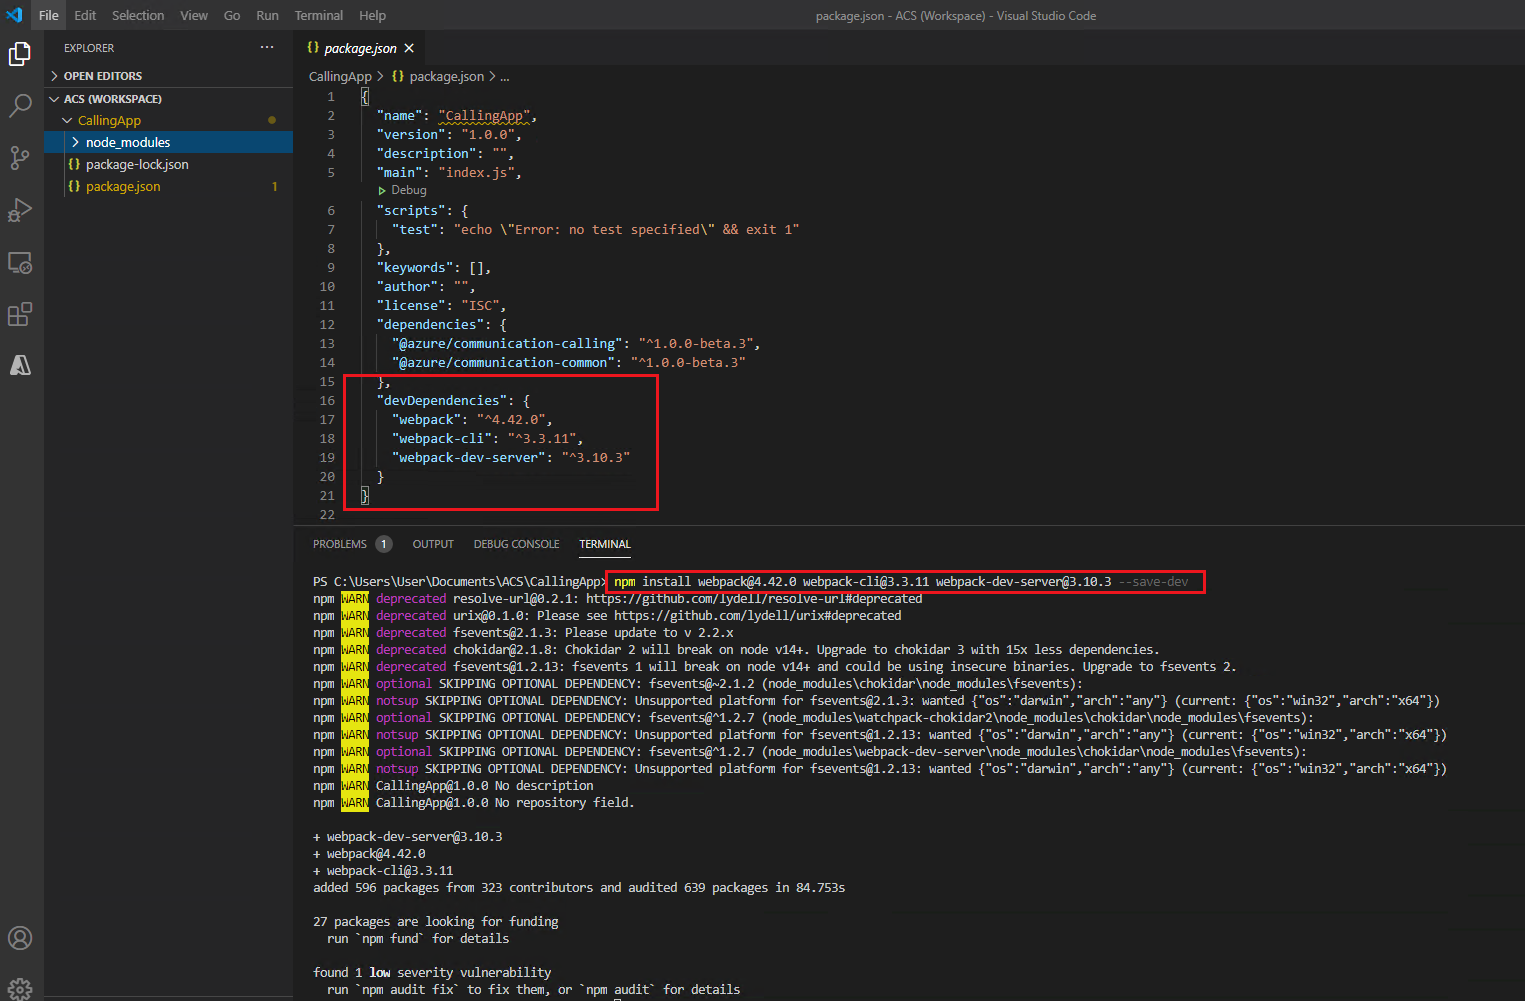
In your terminal, enter the following command to install webpack:
npm install webpack@4.42.0 webpack-cli@3.3.11 webpack-dev-server@3.10.3 --save-dev
This tutorial was tested with the versions specified in the preceding command. Specifying -dev tells the package manager that this dependency is for development purposes and shouldn't be included in the code that you deploy to Azure.
You'll see two new packages added to your package.json file as devDependencies. The packages will be installed in the ./CallingApp/node_modules/ directory.
Configure the development server
Running a static application (like your index.html file) from your browser uses the file:// protocol. For your npm modules to work properly, you'll need the HTTP protocol by using webpack as a local development server.
You'll create two configurations: one for development and the other for production. Files prepared for production will be minified, meaning that you'll remove unused whitespace and characters. This configuration is appropriate for production scenarios where latency should be minimized or where code should be obfuscated.
You'll use the webpack-merge tool to work with different configuration files for webpack.
Let's start with the development environment. First, you need to install webpack merge. In your terminal, run the following command:
npm install --save-dev webpack-merge
In your package.json file, you can see one more dependency added to devDependencies.
Next, create a file called webpack.common.js and add the following code:
const path = require('path');
module.exports ={
    entry: './app.js',
    output: {
        filename:'app.js',
        path: path.resolve(__dirname, 'dist'),
    }
}
Then add two more files, one for each configuration:
webpack.dev.jswebpack.prod.js
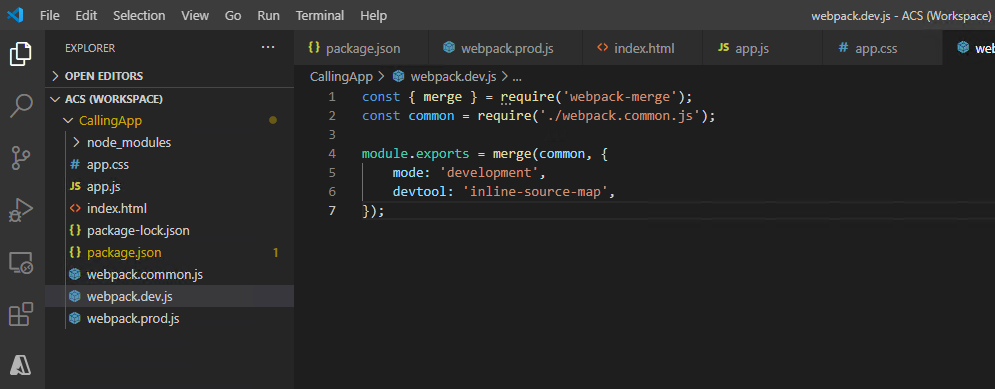
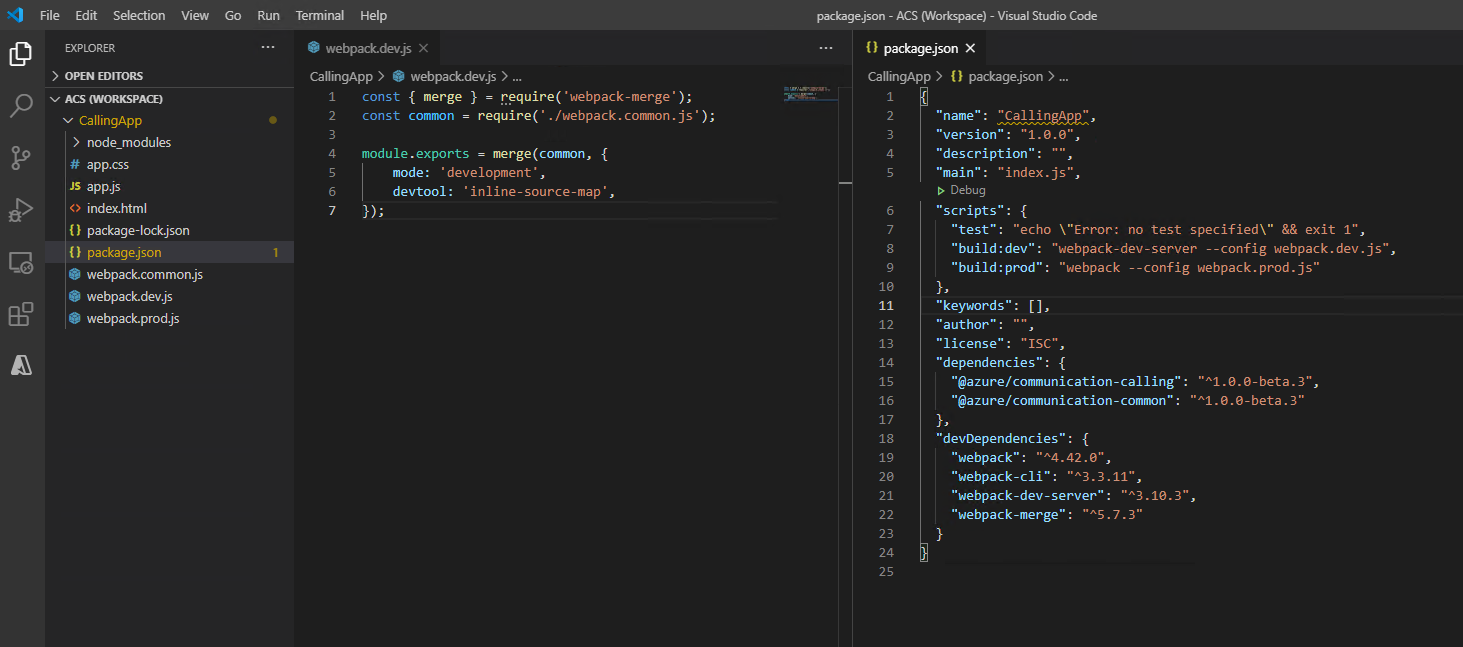
Now modify the webpack.dev.js file by adding the following code to it:
const { merge } = require('webpack-merge');
const common = require('./webpack.common.js');

module.exports = merge(common, {
    mode: 'development',
    devtool: 'inline-source-map',
});
In this configuration, you import common parameters from webpack.common.js, merge the two files, set the mode to development, and configure the source map as inline-source-map.
Development mode tells webpack not to minify the files and not produce optimized production files. You can find detailed documentation on webpack modes on the webpack Mode webpage.
Source map options are listed on the webpack Devtool webpage. Setting the source map makes it easier for you to debug through your browser.
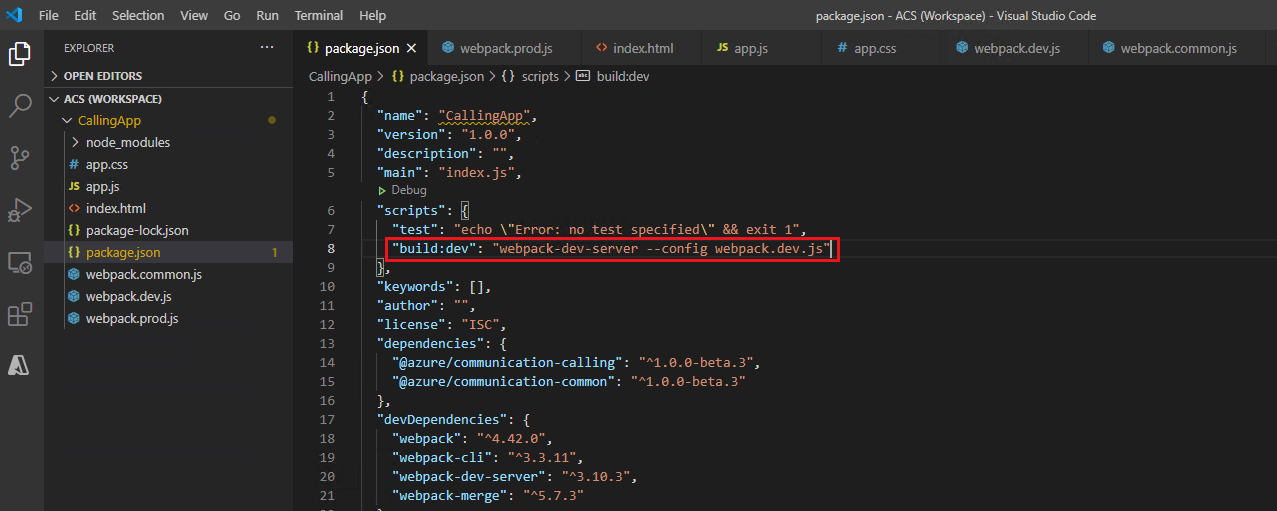
To run the development server, go to package.json and add the following code under scripts:
"build:dev": "webpack-dev-server --config webpack.dev.js"
Your file now should look like this:
{
  "name": "CallingApp",
  "version": "1.0.0",
  "description": "",
  "main": "index.js",
  "scripts": {
    "test": "echo \"Error: no test specified\" && exit 1",
    "build:dev": "webpack-dev-server --config webpack.dev.js"
  },
  "keywords": [],
  "author": "",
  "license": "ISC",
  "devDependencies": {
    "webpack": "^4.42.0",
    "webpack-cli": "^3.3.11",
    "webpack-dev-server": "^3.10.3"
  }
}
You added the command that can be used from npm.
Test the development server
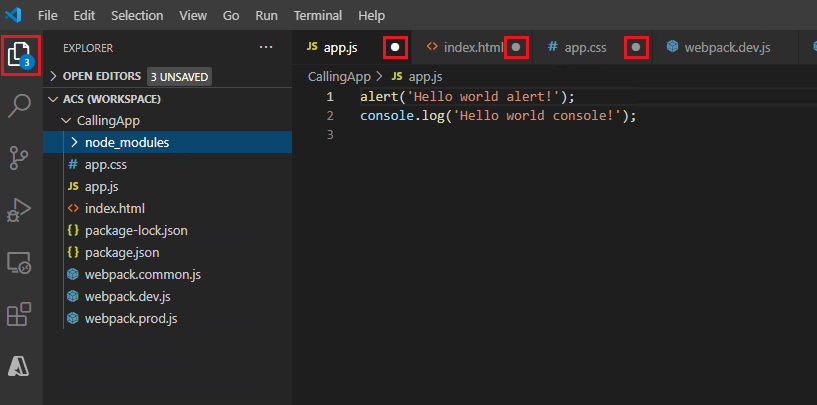
In Visual Studio Code, create three files under your project:
index.htmlapp.jsapp.css(optional, for styling your app)
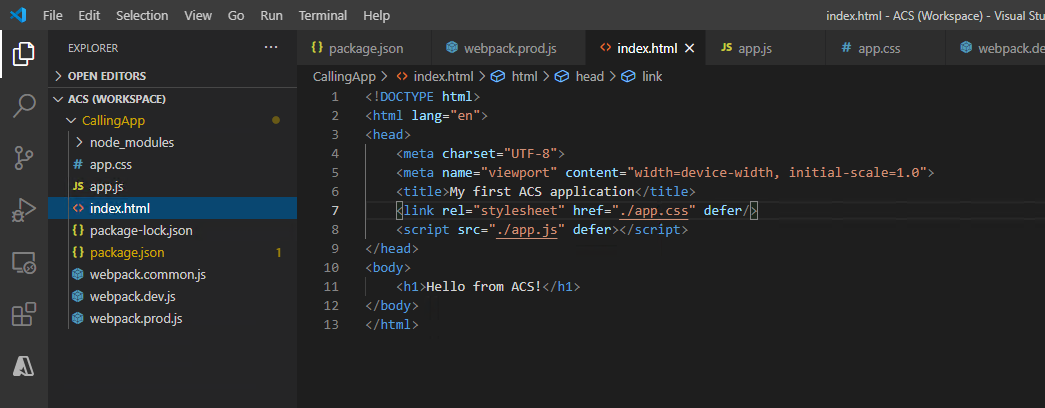
Paste this code into index.html:
<!DOCTYPE html>
<html lang="en">
<head>
    <meta charset="UTF-8">
    <meta name="viewport" content="width=device-width, initial-scale=1.0">
    <title>My first Azure Communication Services application</title>
    <link rel="stylesheet" href="./app.css"/>
    <script src="./app.js" defer></script>
</head>
<body>
    <h1>Hello from Azure Communication Services!</h1>
</body>
</html>
Add the following code to app.js:
alert('Hello world alert!');
console.log('Hello world console!');
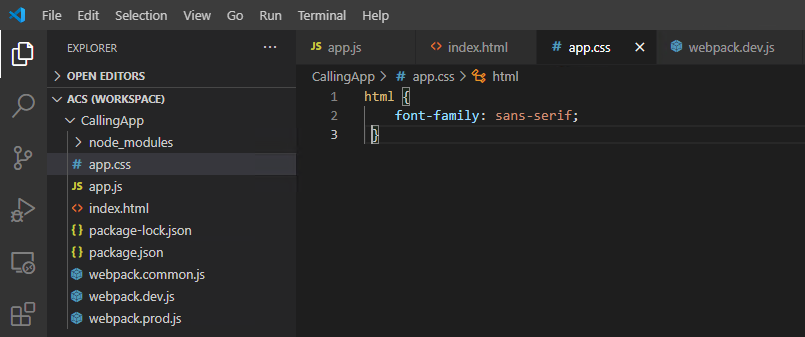
Add the following code to app.css:
html {
    font-family: sans-serif;
  }
Don't forget to save! The unsaved file is indicated by white dots next to file names in the Explorer.
When you open this page, you should see your message displayed with an alert in your browser's console.
Use the following terminal command to test your development configuration:
npm run build:dev
The console shows you where the server is running. By default, it's http://localhost:8080. The build:dev command is the command that you added to package.json earlier.
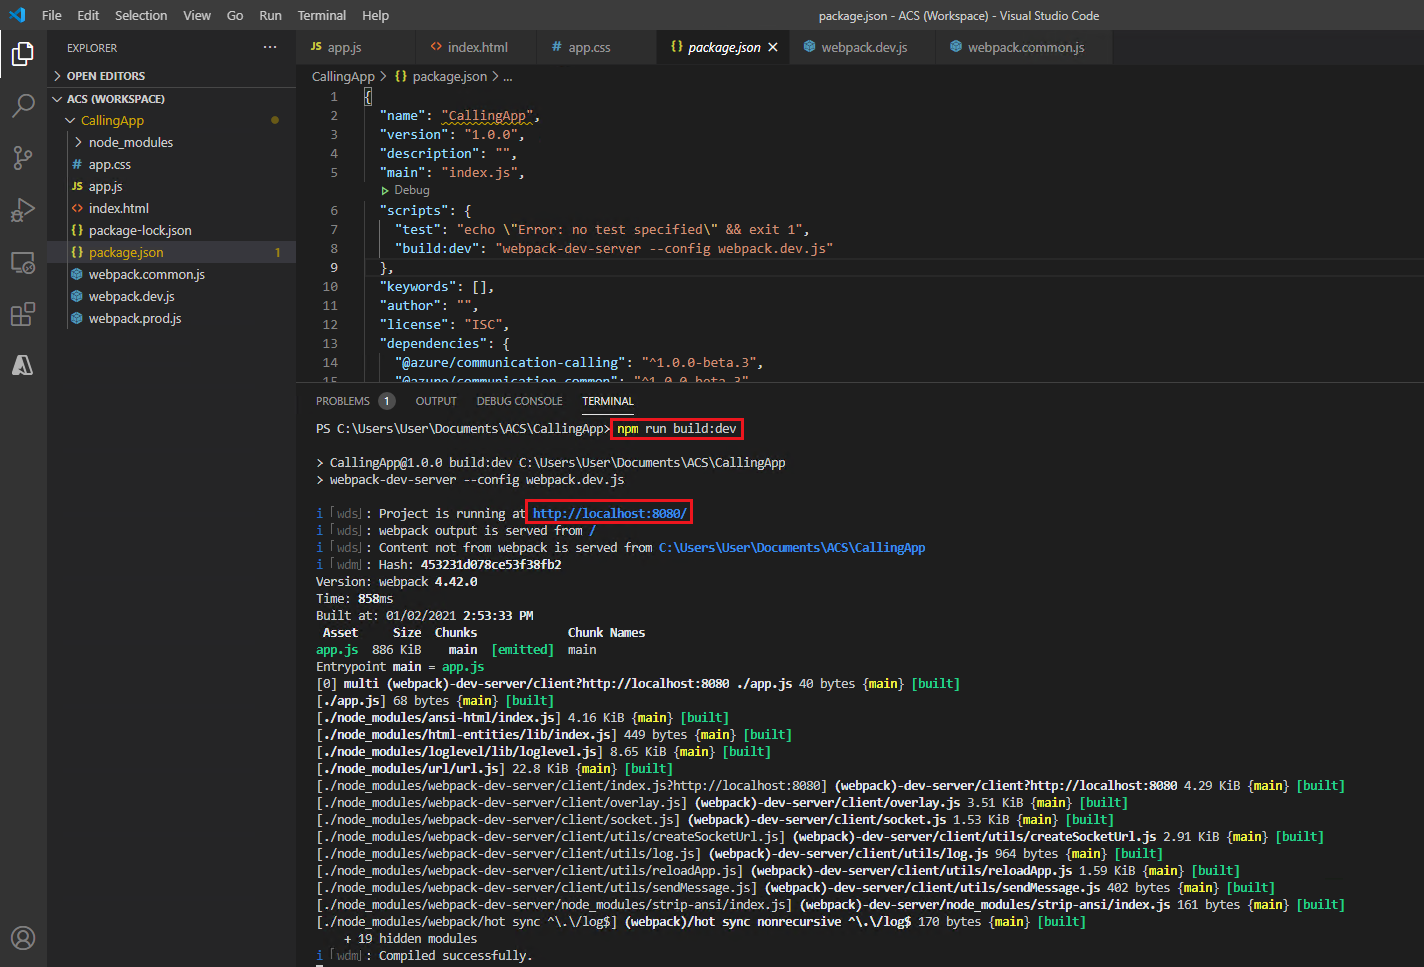
Go to the address in your browser, and you should see the page and alert configured in previous steps.
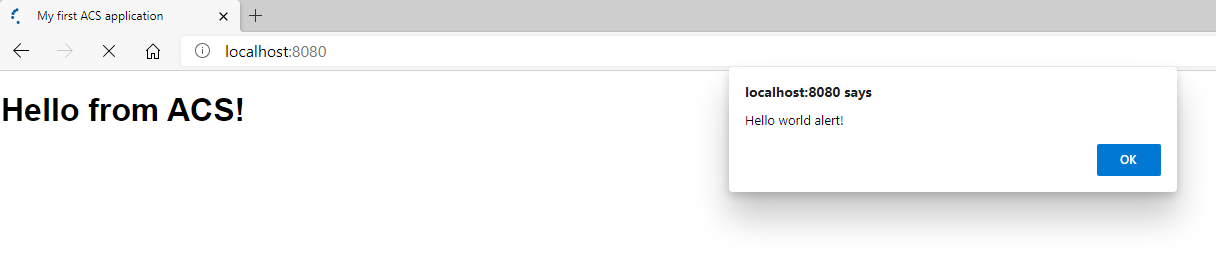
While the server is running, you can change the code and the server. The HTML page will automatically reload.
Next, go to the app.js file in Visual Studio Code and delete alert('Hello world alert!');. Save your file and verify that the alert disappears from your browser.
To stop your server, you can run Ctrl+C in your terminal. To start your server, enter npm run build:dev at any time.
Add the Azure Communication Services packages
Use the npm install command to install the Azure Communication Services Calling SDK for JavaScript.
npm install @azure/communication-common --save
npm install @azure/communication-calling --save
This action adds the Azure Communication Services common and calling packages as dependencies of your package. You'll see two new packages added to the package.json file. You can find more information about npm install on the npm Docs page for that command.
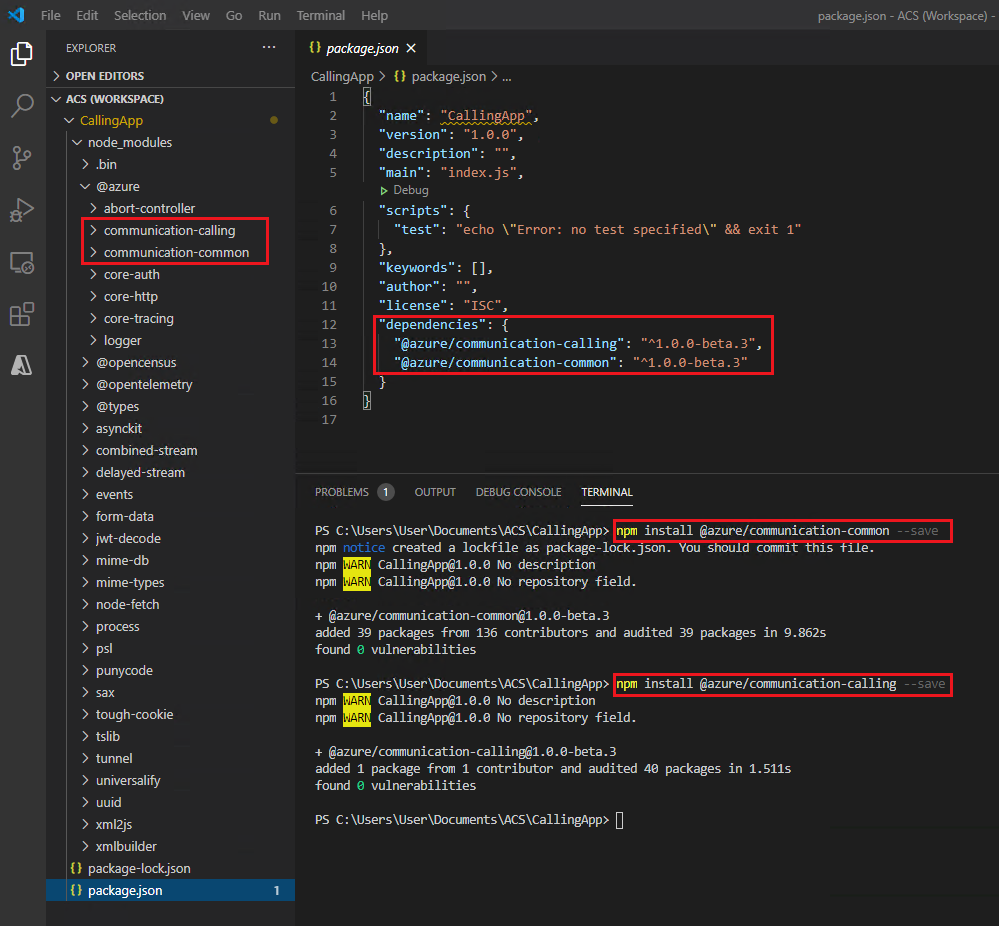
These packages are provided by the Azure Communication Services team and include the authentication and calling libraries. The --save command signals that the application depends on these packages for production use and will be included in devDependencies within the package.json file. When you build the application for production, the packages will be included in your production code.
Publish your website to Azure static websites
Create a configuration for production deployment
Add the following code to webpack.prod.js:
const { merge } = require('webpack-merge');
const common = require('./webpack.common.js');

module.exports = merge(common, {
  mode: 'production',
});
This configuration will be merged with webpack.common.js (where you specified the input file and where to store the results). The configuration will also set the mode to production.
In package.json, add the following code:
"build:prod": "webpack --config webpack.prod.js"
Your file should look like this:
{
  "name": "CallingApp",
  "version": "1.0.0",
  "description": "",
  "main": "index.js",
  "scripts": {
    "test": "echo \"Error: no test specified\" && exit 1",
    "build:dev": "webpack-dev-server --config webpack.dev.js",
    "build:prod": "webpack --config webpack.prod.js"
  },
  "keywords": [],
  "author": "",
  "license": "ISC",
  "dependencies": {
    "@azure/communication-calling": "^1.0.0-beta.6",
    "@azure/communication-common": "^1.0.0"
  },
  "devDependencies": {
    "webpack": "^4.42.0",
    "webpack-cli": "^3.3.11",
    "webpack-dev-server": "^3.10.3",
    "webpack-merge": "^5.7.3"
  }
}
In the terminal, run:
npm run build:prod
The command creates a dist folder and a production-ready app.js static file in it.

Deploy your app to Azure Storage
Copy index.html and app.css to the dist folder.
In the dist folder, create a file and name it 404.html. Copy the following markup into that file:
<!DOCTYPE html>
<html lang="en">
<head>
    <meta charset="UTF-8">
    <meta name="viewport" content="width=device-width, initial-scale=1.0">
    <link rel="stylesheet" href="./app.css"/>
    <title>Document</title>
</head>
<body>
    <h1>The page does not exists.</h1>
</body>
</html>
Save the file (Ctrl+S).
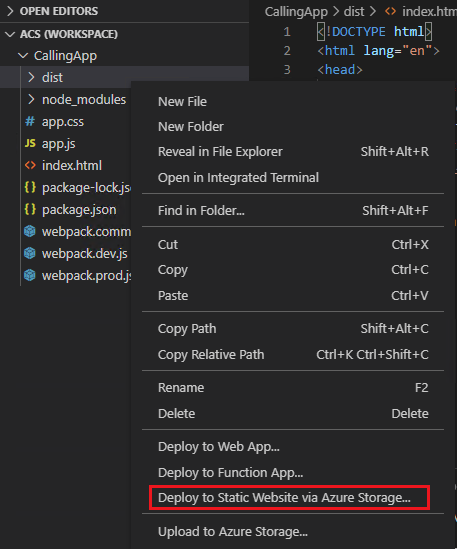
Right-click the dist folder and select Deploy to Static Website via Azure Storage.
Under Select subscription, select Sign in to Azure (or Create a Free Azure Account if you haven't created a subscription before).

Select Create new Storage Account > Advanced.

Provide the name of the storage group.

Create a new resource group if needed.

For Would you like to enable static website hosting?, select Yes.

For Enter the index document name, accept the default file name. You already created the file index.html.
For Enter the 404 error document path, enter 404.html.
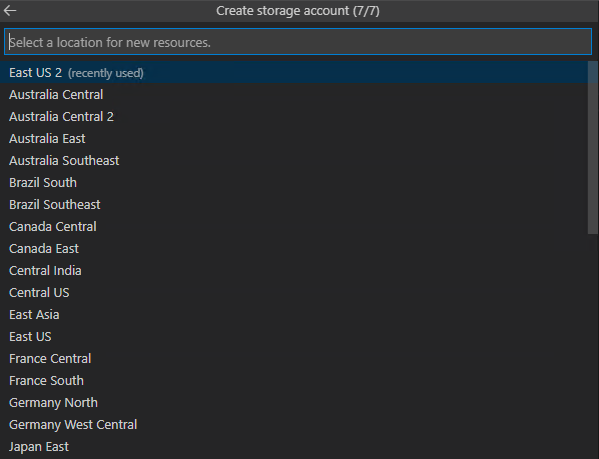
Select the location of the application. The location that you select will define which media processor will be used in your future calling application in group calls.
Azure Communication Services selects the media processor based on the application location.
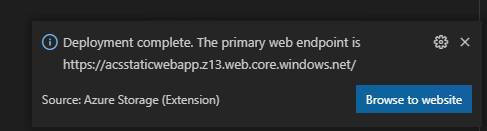
Wait until the resource and your website are created.
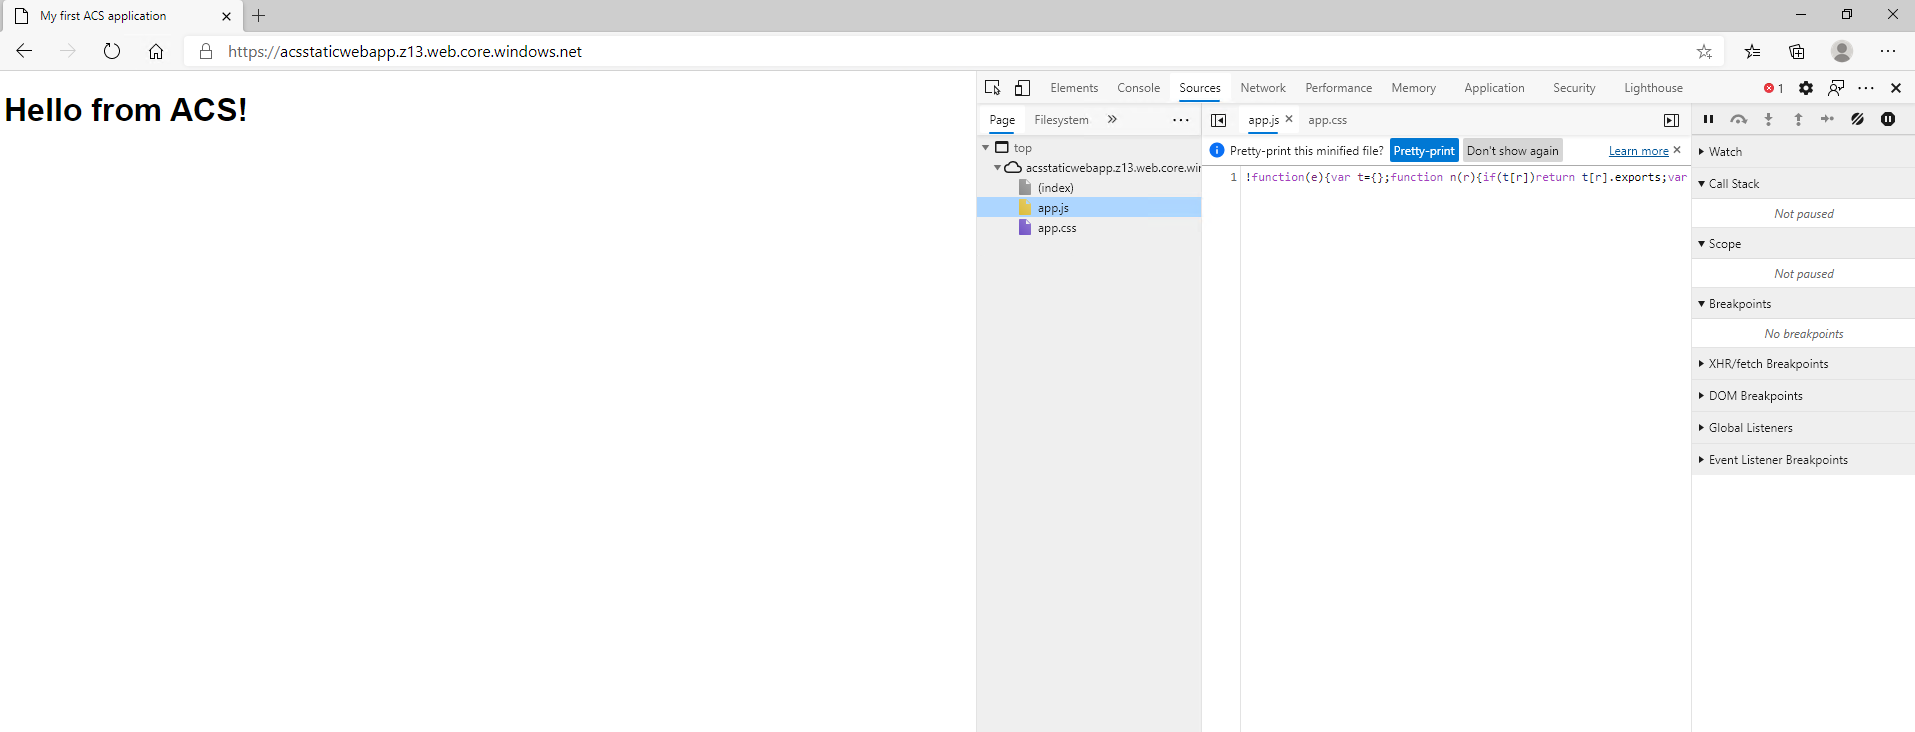
Select Browse to website.
From your browser's development tools, you can inspect the source and see the file that's prepared for production.
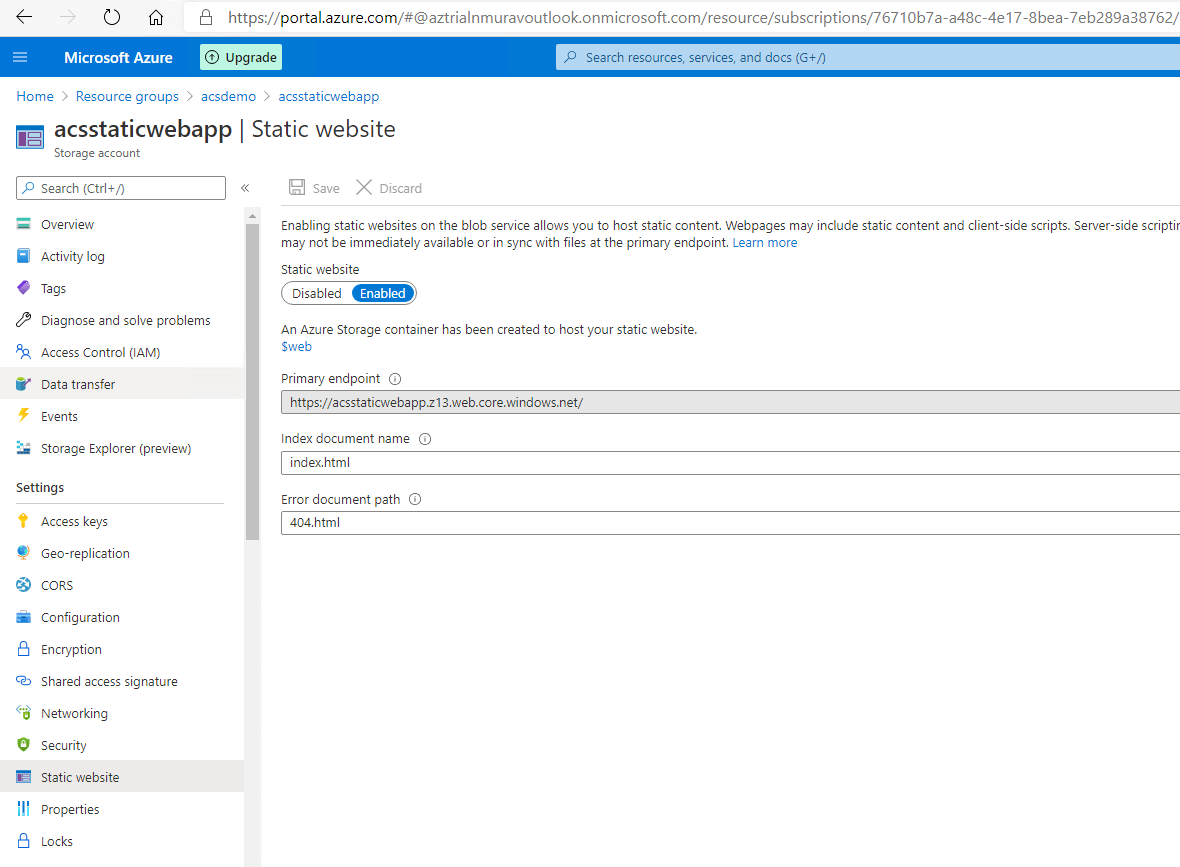
Go to the Azure portal, select your resource group, and select the application that you created. Then select Settings > Static website. You can see that static websites are enabled. Note the primary endpoint, index document name, and error document path.
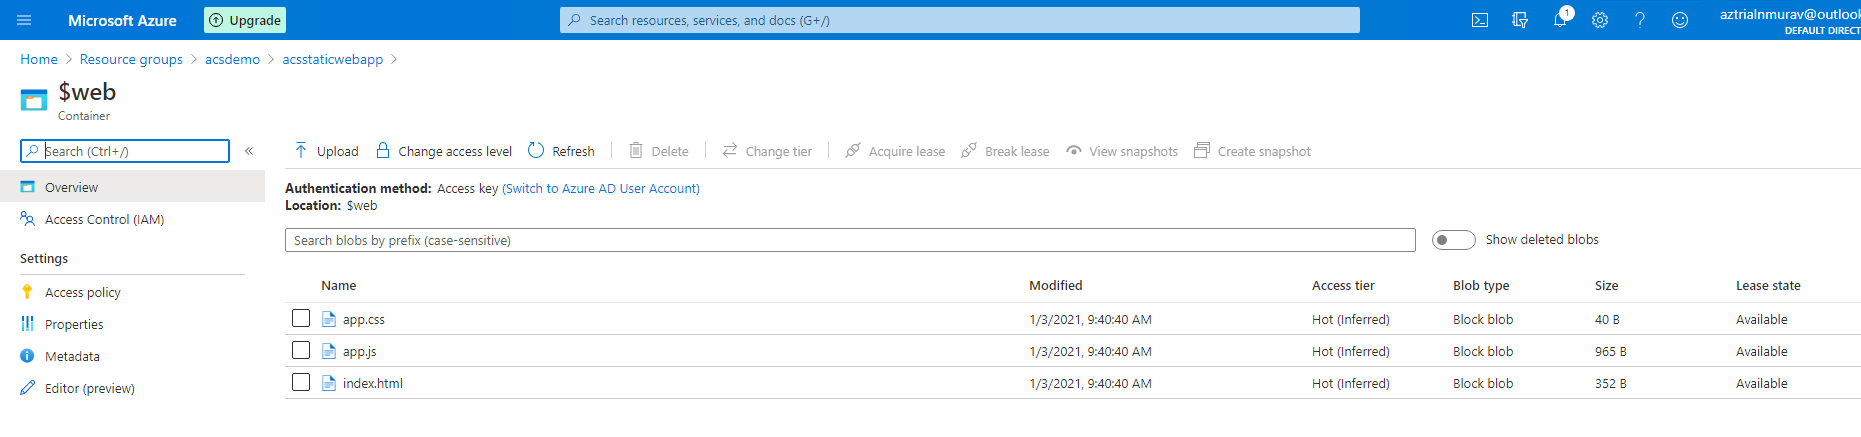
Under Blob service, select Containers. The list shows two containers created, one for logs ($logs) and one for the content of your website ($web).
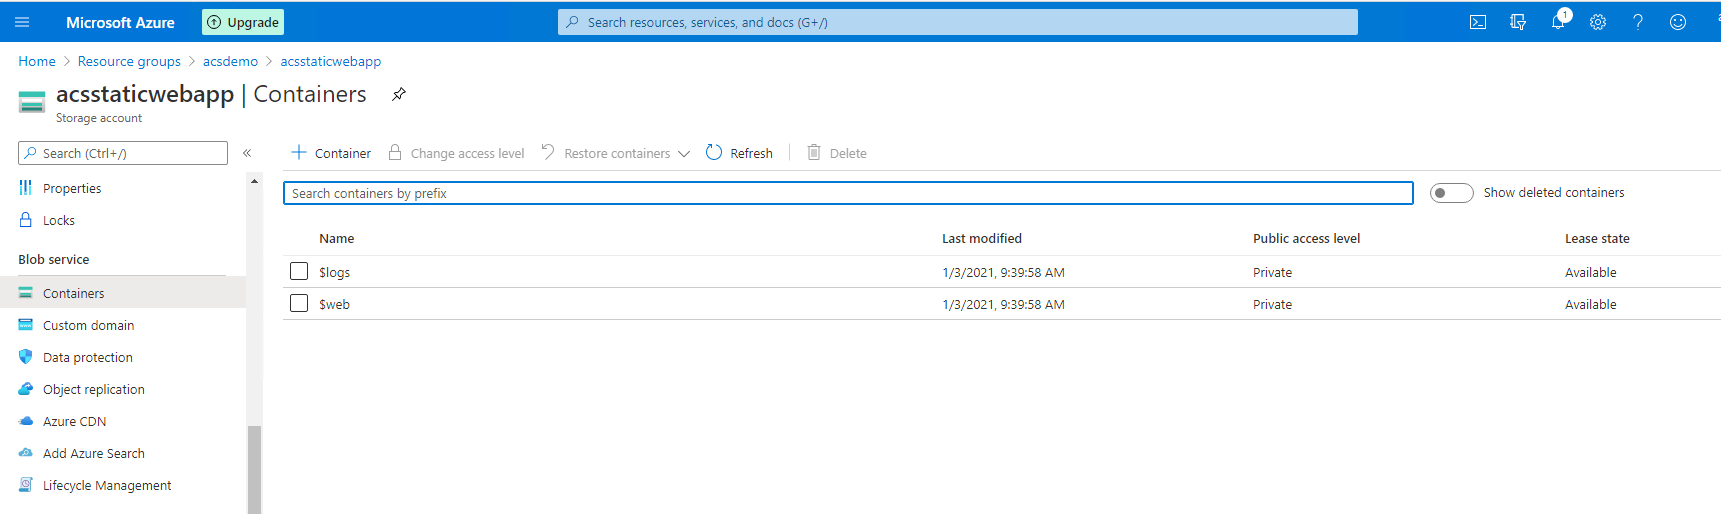
If you open the $web container, you'll see the files that you created in Visual Studio and deployed to Azure.
You can redeploy the application from Visual Studio Code at any time.
You're now ready to build your first Azure Communication Services web application.
Next steps
You might also want to: