Tutorial: Deploy a Dapr application with GitHub Actions for Azure Container Apps
GitHub Actions gives you the flexibility to build an automated software development lifecycle workflow. In this tutorial, you'll see how revision-scope changes to a Container App using Dapr can be deployed using a GitHub Actions workflow.
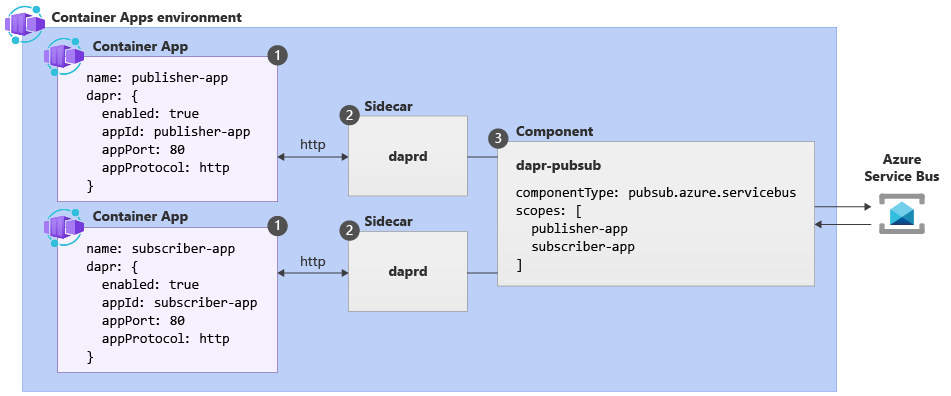
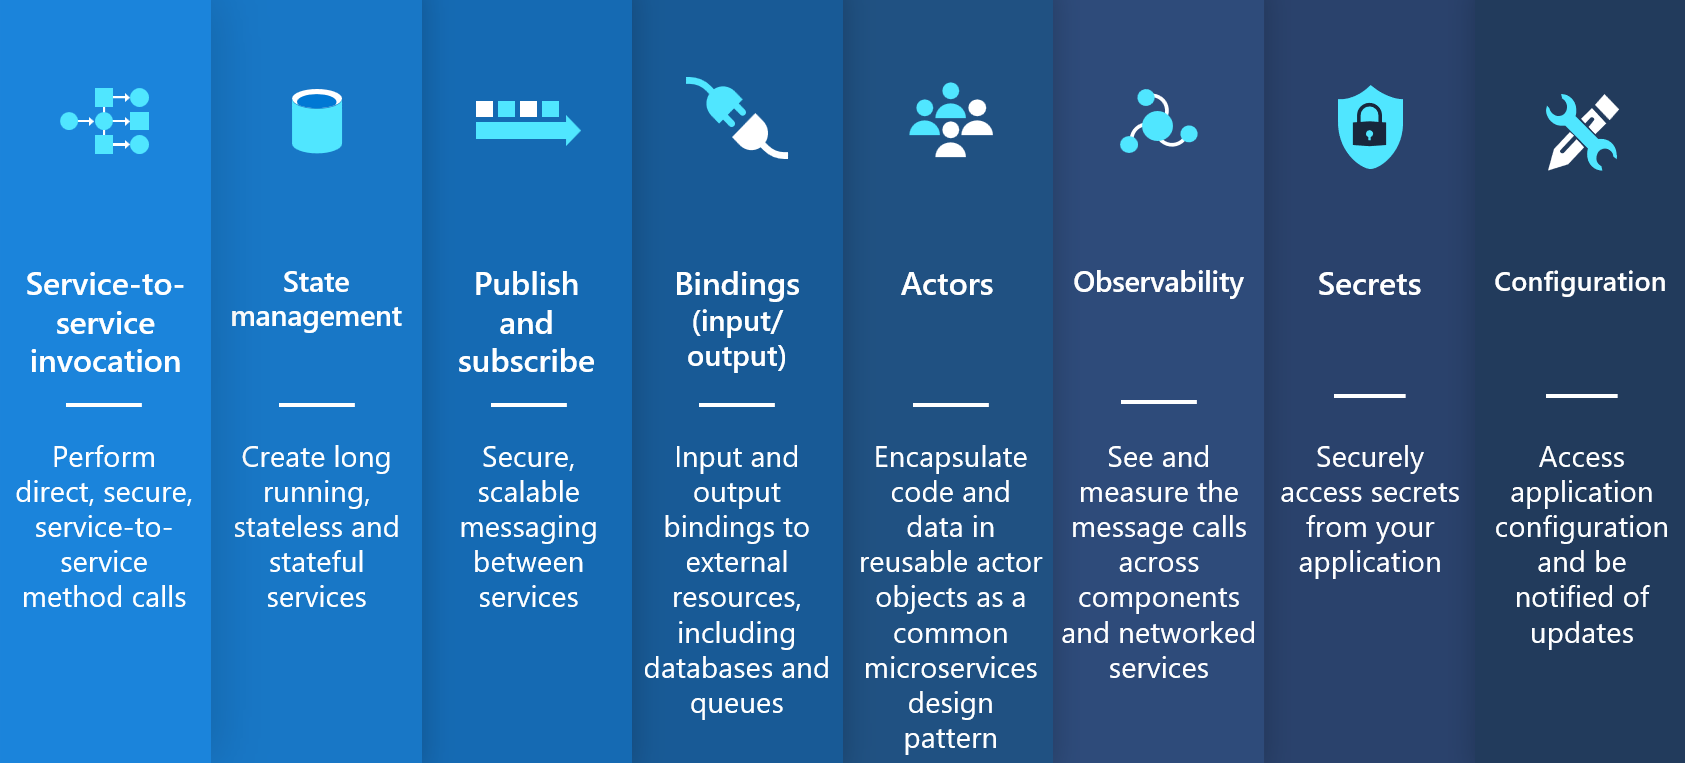
Dapr is an open source project that helps developers with the inherent challenges presented by distributed applications, such as state management and service invocation. Azure Container Apps provides a managed experience of the core Dapr APIs.
In this tutorial, you:
- Configure a GitHub Actions workflow for deploying the end-to-end Dapr solution to Azure Container Apps.
- Modify the source code with a revision-scope change to trigger the Build and Deploy GitHub workflow.
- Learn how revisions are created for container apps in multi-revision mode.
The sample solution:
- Consists of three Dapr-enabled microservices
- Uses Dapr APIs for service-to-service communication and state management
Note
This tutorial focuses on the solution deployment outlined below. If you're interested in building and running the solution on your own, follow the README instructions within the repo.
Prerequisites
- An Azure account with an active subscription..
- Contributor or Owner permissions on the Azure subscription.
- A GitHub account.
- Install Git.
- Install the Azure CLI.
Set up the environment
In the console, set the following environment variables:
Replace <PLACEHOLDERS> with your values.
RESOURCE_GROUP="my-containerapp-store"
LOCATION="canadacentral"
GITHUB_USERNAME="<YOUR_GITHUB_USERNAME>"
SUBSCRIPTION_ID="<YOUR_SUBSCRIPTION_ID>"
Sign in to Azure from the CLI using the following command, and follow the prompts in your browser to complete the authentication process.
az login
Ensure you're running the latest version of the CLI via the upgrade command.
az upgrade
Now that you've validated your Azure CLI setup, bring the application code to your local machine.
Get application code
Navigate to the sample GitHub repo and select Fork in the top-right corner of the page.
Use the following git command with your GitHub username to clone your fork of the repo to your development environment:
git clone https://github.com/$GITHUB_USERNAME/container-apps-store-api-microservice.git
Navigate into the cloned directory.
cd container-apps-store-api-microservice
The repository includes the following resources:
- The source code for each application
- Deployment manifests
- A GitHub Actions workflow file
Deploy Dapr solution using GitHub Actions
The GitHub Actions workflow YAML file in the /.github/workflows/
folder executes the following steps in the background as you work through this tutorial:
Section | Tasks |
---|---|
Authentication | Log in to a private container registry (GitHub Container Registry) |
Build | Build & push the container images for each microservice |
Authentication | Log in to Azure |
Deploy using bicep | 1. Create a resource group 2. Deploy Azure Resources for the solution using bicep |
The following resources are deployed via the bicep template in the /deploy
path of the repository:
- Log Analytics workspace
- Application Insights
- Container apps environment
- Order service container app
- Inventory container app
- Azure Cosmos DB
Create a service principal
The workflow requires a service principal to authenticate to Azure. In the console, run the following command and replace <SERVICE_PRINCIPAL_NAME>
with your own unique value.
az ad sp create-for-rbac \
--name <SERVICE_PRINCIPAL_NAME> \
--role "contributor" \
--scopes /subscriptions/$SUBSCRIPTION_ID \
--sdk-auth
The output is the role assignment credentials that provide access to your resource. The command should output a JSON object similar to:
{
"clientId": "<GUID>",
"clientSecret": "<GUID>",
"subscriptionId": "<GUID>",
"tenantId": "<GUID>"
(...)
}
Copy the JSON object output and save it to a file on your machine. You use this file as you authenticate from GitHub.
Configure GitHub Secrets
While in GitHub, browse to your forked repository for this tutorial.
Select the Settings tab.
Select Secrets > Actions.
On the Actions secrets page, select New repository secret.
Create the following secrets:
Name Value AZURE_CREDENTIALS
The JSON output you saved earlier from the service principal creation RESOURCE_GROUP
Set as my-containerapp-store
Trigger the GitHub Action
To build and deploy the initial solution to Azure Container Apps, run the "Build and deploy" workflow.
Open the Actions tab in your GitHub repository.
In the left side menu, select the Build and Deploy workflow.
Select Run workflow.
In the prompt, leave the Use workflow from value as Branch: main.
Select Run workflow.
Verify the deployment
After the workflow successfully completes, verify the application is running in Azure Container Apps.
Navigate to the Azure portal.
In the search field, enter my-containerapp-store and select the my-containerapp-store resource group.
Navigate to the container app called node-app.
Select the Application Url.
Ensure the application was deployed successfully by creating a new order:
Enter an Id and Item.
Select Create.
If the order is persisted, you're redirected to a page that says "Order created!"
Navigate back to the previous page.
View the item you created via the View Order form:
Enter the item Id.
Select View.
The page is redirected to a new page displaying the order object.
In the Azure portal, navigate to Application > Revision Management in the node-app container.
At this point, only one revision is available for this app.
Modify the source code to trigger a new revision
Container Apps run in single-revision mode by default. In the Container Apps bicep module, the revision mode is explicitly set to "multiple". Multiple revision mode means that once the source code is changed and committed, the GitHub build/deploy workflow builds and pushes a new container image to GitHub Container Registry. Changing the container image is considered a revision-scope change and results in a new container app revision.
Note
Application-scope changes do not create a new revision.
To demonstrate the inner-loop experience for creating revisions via GitHub actions, you'll make a change to the frontend application and commit this change to your repo.
Return to the console, and navigate into the node-service/views directory in the forked repository.
cd node-service/views
Open the index.jade file in your editor of choice.
code index.jade .
At the bottom of the file, uncomment the following code to enable deleting an order from the Dapr state store.
h2= 'Delete Order' br br form(action='/order/delete', method='post') div.input span.label Id input(type='text', name='id', placeholder='foo', required='required') div.actions input(type='submit', value='View')
Stage the changes and push to the
main
branch of your fork using git.git add . git commit -m '<commit message>' git push origin main
View the new revision
In the GitHub UI of your fork, select the Actions tab to verify the GitHub Build and Deploy workflow is running.
Once the workflow is complete, navigate to the my-containerapp-store resource group in the Azure portal.
Select the node-app container app.
In the left side menu, select Application > Revision Management.
Since our container app is in multiple revision mode, Container Apps created a new revision, and automatically sets it to
active
with 100% traffic.Select each revision in the Revision management table to view revision details.
View the new revision in action by refreshing the node-app UI.
Test the application further by deleting the order you created in the container app.
The page is redirected to a page indicating that the order is removed.
Clean up resources
Once you've finished the tutorial, run the following command to delete your resource group, along with all the resources you created in this tutorial.
az group delete \
--resource-group $RESOURCE_GROUP
Next steps
Learn more about how Dapr integrates with Azure Container Apps.
Feedback
Submit and view feedback for